Category Archives: Draft Top Picks

The Most Difficult Spot to Check for CO2 Leaks

hard to find keg co2 leak

If you’ve found this article odds are pretty good you’re having trouble tracking down a pesky leaks.


I recommend changing o-rings when Daylight Savings Time Ends

How Often Should You Replace Keg O-Rings? – A Proposed Schedule for Keeping Kegs in Great Shape


Check for CO2 Leaks

First things first, if you haven’t already used traditional methods to try to track down your leak, check out my resources on the topic.

The Most Difficult Spot to Check for CO2 Leaks…

Continue reading

Keg O-Ring Materials Selection! – EPDM, Silicone and Buna-N?

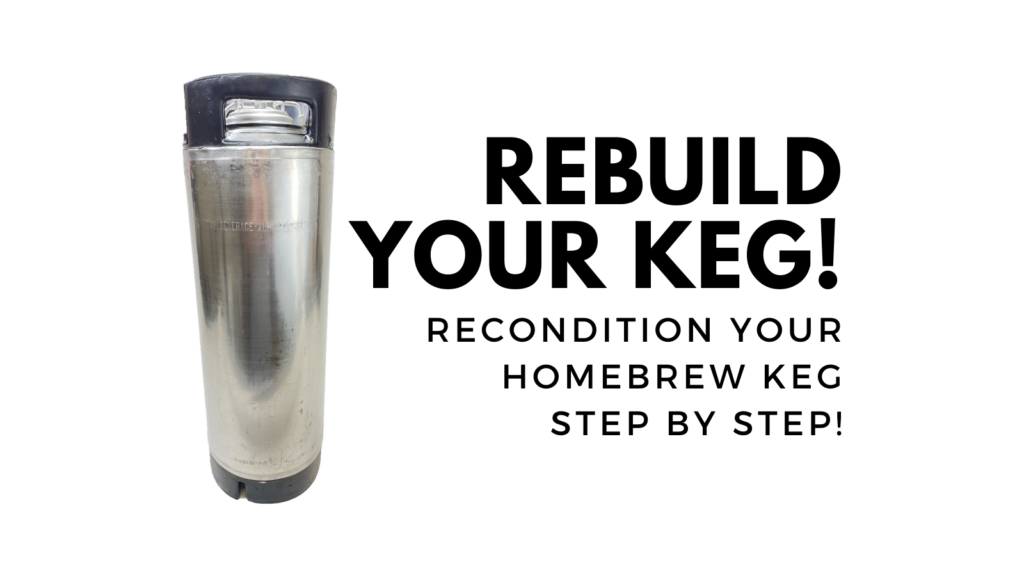
See More About O-Rings in our Keg Rebuild Post – Jump To: Replacing O-Rings

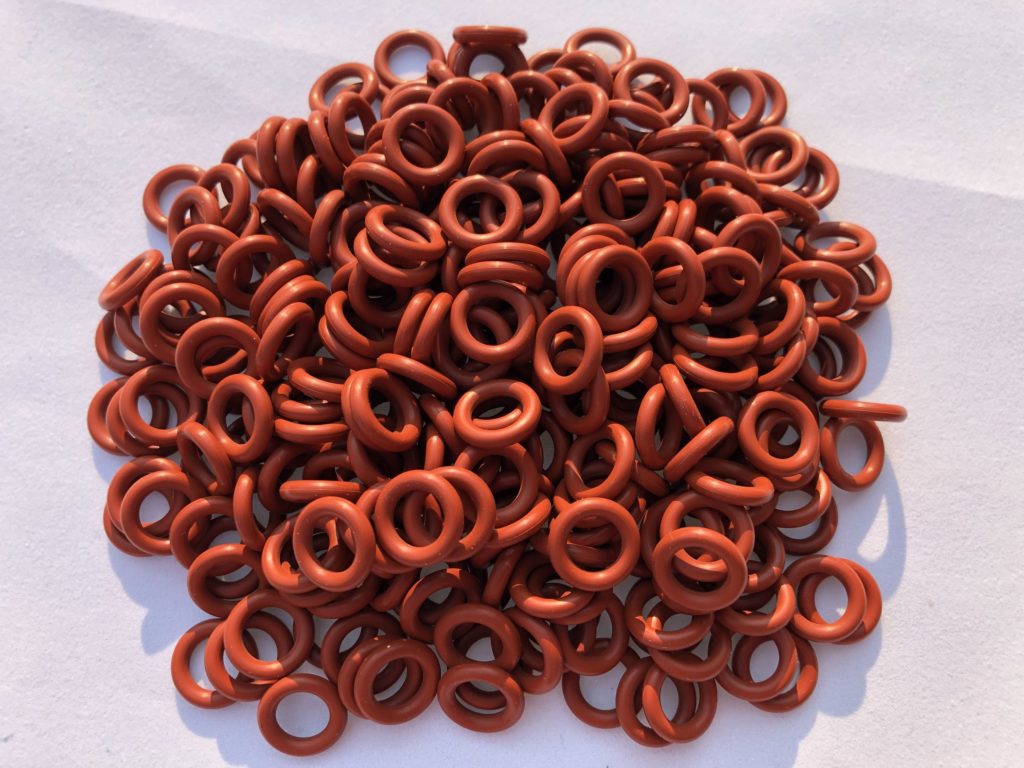
Selecting the Right Material for Keg O-Rings

I would venture a guess that Silicone and Buna-N are the two most commonly used compounds for keg o-rings. EPDM, which has been the choice of professionals for a long time, is probably a distant third, but coming on strong since they’ve become more accessible to homebrewers.

This post is going to take a look at all three, with the goal of helping your choose the right material for your application.

But first things first, let’s talk about food safe materials…

Food Safe Materials for Keg O-Rings?

Most of the o-rings that are marketed to homebrewers do not claim to be food safe.

In my experience, it’s extremely difficult to find offerings that claim to be safe for food contact.  Maybe some of the o-rings that are available are food safe, but very few are actually labeled as such.

But why?  One possible reason… they aren’t food safe.  Beyond that, one industry insider I spoke with said suppliers have a potential problem with fulfillment.  Since many options and materials are available, It’s difficult for some distributors or sellers to guarantee you’re getting a food safe option.

  • Just because an o-ring is marketed for use in a keg doesn’t automatically mean that the materials and production processes used are food safe.
  •  If you think about it from a random supplier or manufacturer’s perspective… they don’t know what you’re putting in your keg, maybe it’s not even food.  The problem that we, as homebrewers, have is is… beer is food and meant for human consumption.
  • You cannot say all o-rings made from [fill in material here] are food safe.  Certain quality standards and processes are required.

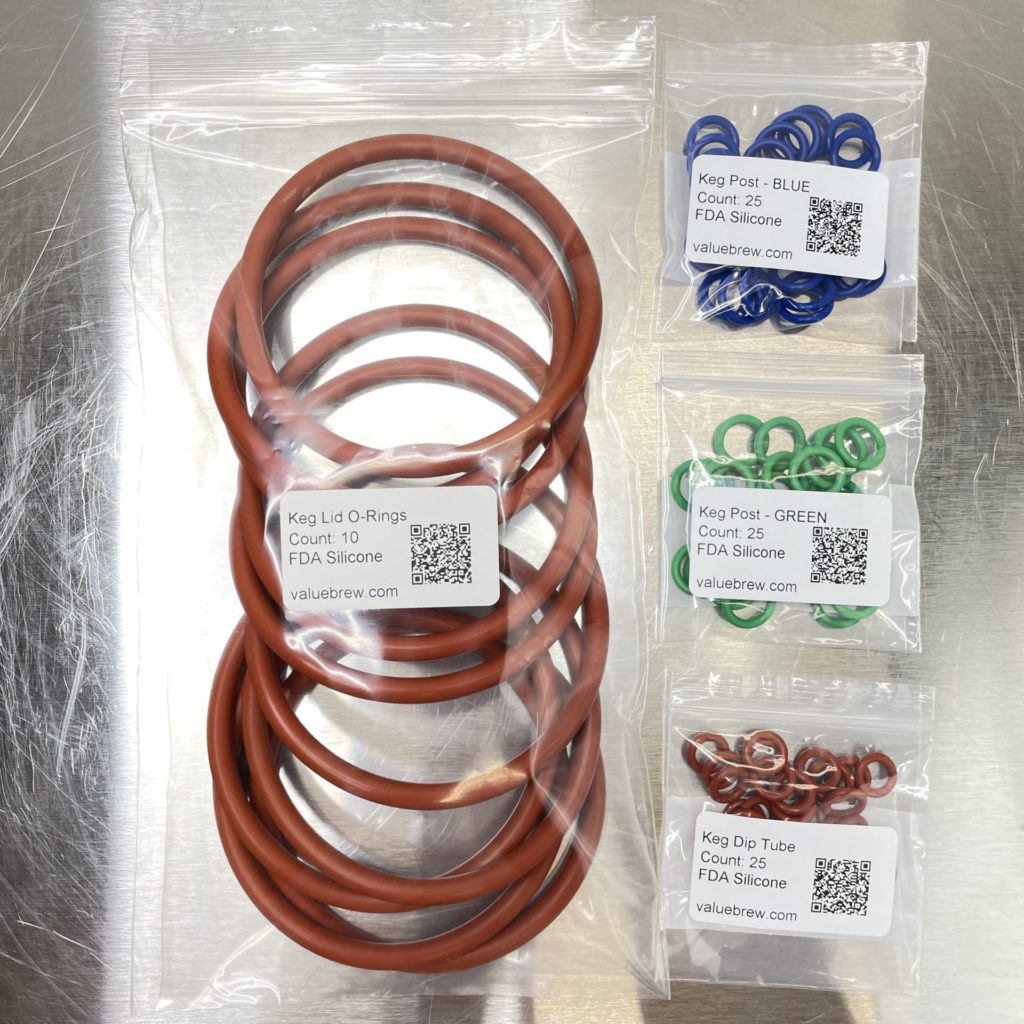
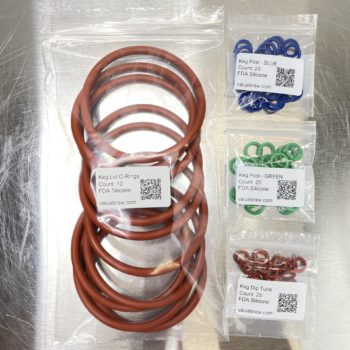
One notable supplier features all food safe o-ring offerings.

Generally speaking, food safe o-rings may cost a little more, but, we’re, generally, only talking a few cents per o-ring.  It’s worth it.

If you’re using your keg for anything food related (beer=food)… My recommendation is to purchase o-rings made out of material safe for food contact.

Compound Selection – Comparing EPDM, Silicone and Buna-N

Terminology

  • Compression Set Resistance – A measurement of the ability of a substance to return to it’s original thickness after long term compression.
  • Compressibility – How well can a material compress to make a quality seal? This is related to hardness, but practically it’s not exactly the same thing. Most keg o-rings are the same hardness, 70A, yet we see Silicone sealing better than Buna-N.
  • Permeability – How well can well can air or oxygen transverse a compound. This is measured in different ways, I’m going to generalize labeling materials excellent or good.
  • Typical Durometer – A measurement of the hardness of a material

Continue reading

Why Do I Have Bubbles in My Beer Line? Diagnosing and Fixing Kegerator Foam Problems

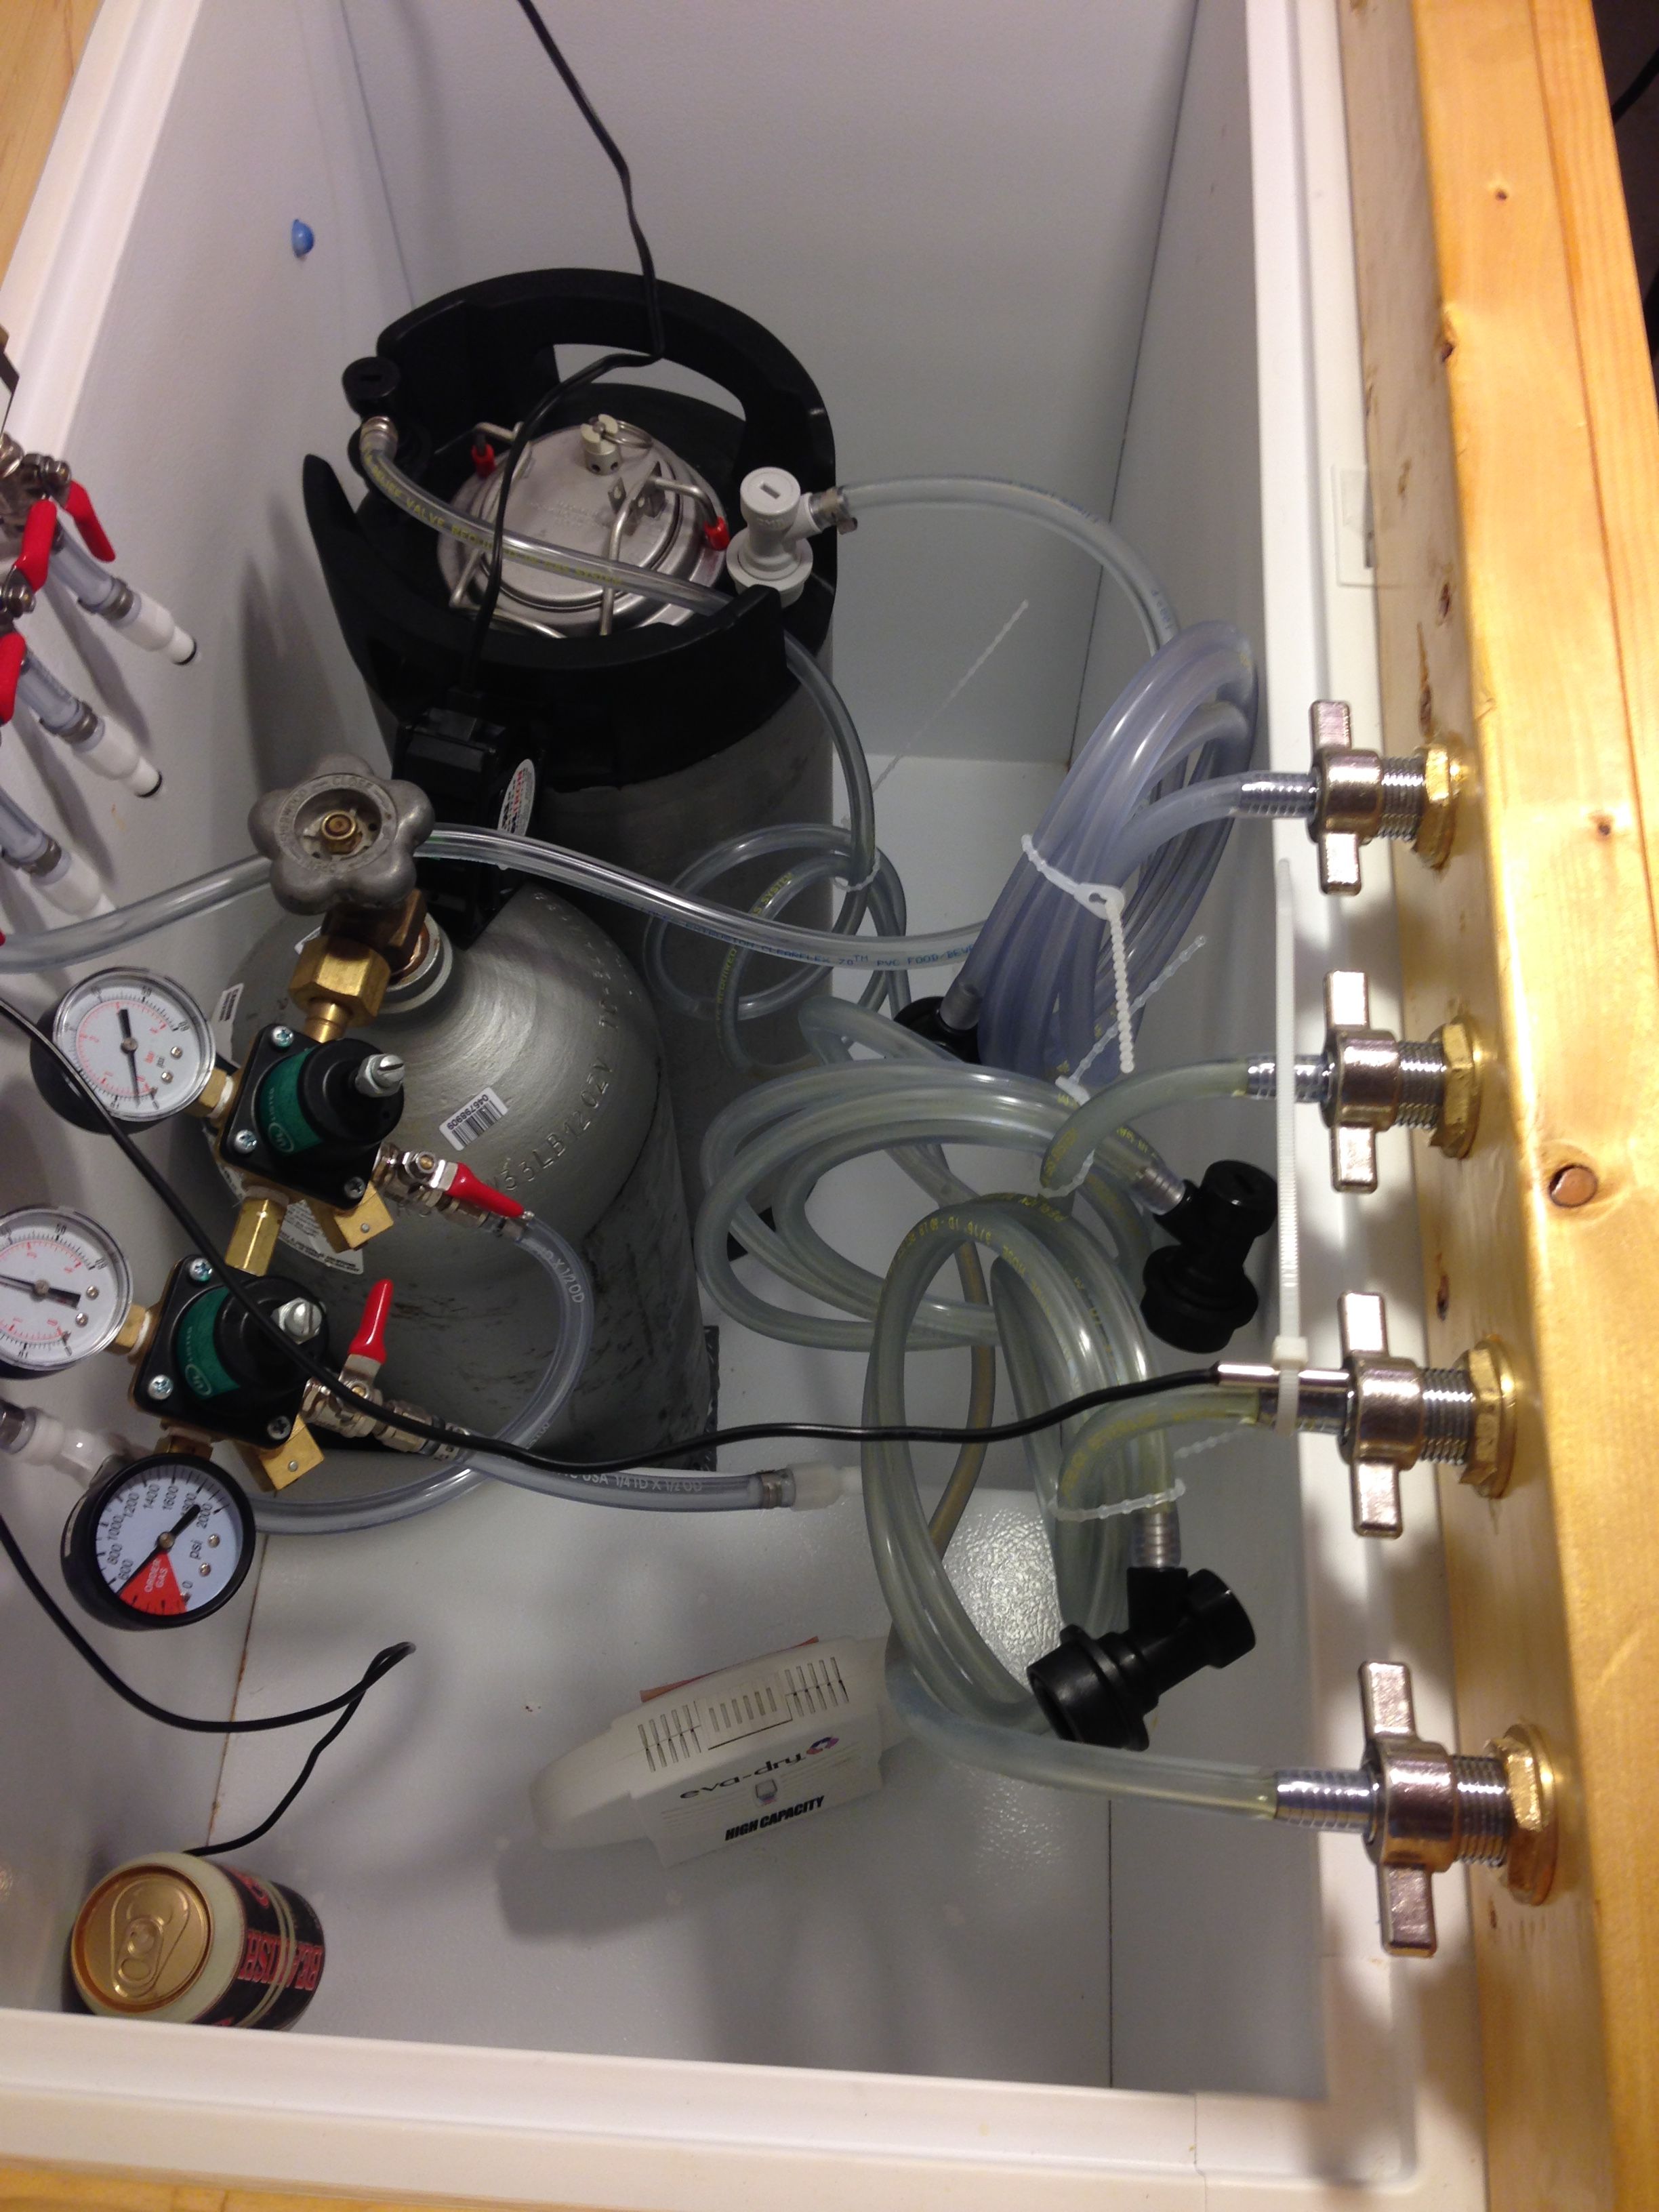
Thanks to u/Procrastinator548 on Reddit for this photo

Got Bubbles?

Bubbles in your beer line can point to a several potential problems. These problems can lead to small bubbles… foam or larger CO2 bubbles breaking out of solution. These issues can occur at different points in your kegerator. The point at which they occur and specific behaviors can help us to track down the problem.

Continue reading

Five Benefits of Using Corny Kegs As Fermenters

The containers we call Ball Lock and Pin Lock Kegs come from the soda industry.  Also called Cornelius Kegs, Corny Kegs and Corney Kegs, they were originally intended to store and distribute soda pre-mix.  The big soda companies decided on different style containers for their pre-mix.  Pepsi landed on the Ball Lock style while Coke uses the Pin Lock style.

Homebrewers have since re-purposed these as homebrew beer kegs. It makes sense. These high quality stainless steel beverages that are meant for years of commercial food use. They’re also tough, can be had for cheap and are easy to move around.

What if someone said there was a pressure capable, heavy duty stainless steel fermenter that could be had for 50 bucks or so?

Great news…. kegs make great fermenters! Same high quality, stainless steel construction, toughness and easy portability, but this time used for fermentation.


Lots More About Kegs


But First, How Do you Convert a Keg to a Fermenter?

One issue needs to be addressed to convert kegs into fermenters… handling CO2 produced by fermentation. Kegs are generally designed to be airtight. Fermentation requires that we allow excess CO2 to escape.  I can think of three options…

  1. A blow-off tube. Remove the gas post or gas post poppet and get use tight fitting tubing to route CO2 to a container of sanitizer.
  2. Use a converted lid to add a stopper and airlock See: Cornelius Keg Fermenter Lid via Adventures in Homebrewing
  3. Use a Spunding Valvesome of the technique and tricks mentioned in this post rely on a Spunding Valve

Keg Fermenter Sizing

A five gallon keg isn’t really suitable for a primary fermenter for a 5 gallon batch.  You could use it as a secondary for a full 5 gallon batch, as a primary fermenter for smaller batches (maybe 3 to 4 gallons max) or you could split 5 gallon batches between two kegs.

There is a 6 gallon keg available that should allow you to ferment a 5 gallon batch.

10 and 15 gallon size ball locks have become readily available at relatively reasonable prices. A 10 gallon keg could easily accommodate a full 5 gallon batch (up to 7 or 8 gallons) while a 15 gallon keg should be able to easily handle a 10 gallon batch (up to 12 or 13 gallons).

Five Unique Benefits to Using Converted Keg Fermenter!

Continue reading

Rebuilding & Reconditioning Homebrew Kegs!

rebuild homebrew kegs

This post will walk you through rebuilding your homebrew keg, step by step.  From de-labeling to cleaning to replacing warn out parts.


What Does Reconditioned/Rebuilt Mean?

The short answer is probably… nothing.  I think reconditioned/rebuilt/refurbished are basically synonyms and there is no standard definition for any of these terms.

Here are the different definitions I’ve seen from different retailers via their offerings:

The short answer is probably… nothing.  I think reconditioned/rebuilt/refurbished are basically synonyms and there is no standard definition for any of these terms.

Here are the different definitions I’ve seen from different retailers via their offerings:

  • The keg is untouched, but is in okay shape and holds pressure.  In this case, reconditioned means… the keg works.
  • The keg has had been tested and had faulty parts replaced.  In this case, reconditioned means, we did the minimum to get the keg working.
  • All o-rings have been replaced and any faulty parts have been replaced.  In this case, reconditioned means… reconditioned.
  • All o-rings have been replaced and any faulty parts have been replaced and the keg has been cleaned.  In this case reconditioned means reconditioned and cleaned.

Examples of Keg Conditions from MoreBeer

The takeaway is that it’s important to read descriptions when it comes to reconditioned/rebuilt/refurbished kegs.  The post walks through a complete rebuild process.


Limited Time Keg Deals!

keg deals

Continue reading

Food Safe Replacement Keg O-Rings in Bulk

Food Safe Replacement Keg O-Rings

Our resource post on o-ring part #s has been a go-to for years.  Grab the a link to that resource below.

The problem: At one point I had an o-ring manufacturer reach out to me that had found this resource while trying to do some market research.  This manufacturer suggested that many of the products that homebrewer’s use are made out of industrial grade materials that should not be in contact with food & beverage products.  These materials could potentially contain materials that are not meant to be ingested.

Okay, that’s a little concerning.  It was at this point that I added a section to that resource that talked about the issue.  I also started adding disclaimers to posts when I was unsure whether or not materials were food grade.

The next problem: For whatever reason, in my experience, it’s extremely difficult to find offerings that claim to be safe for food contact.  Maybe some of the o-rings that are available are food safe, but very few are actually labeled as such.

But why?  One possible reason… they aren’t food safe.  Beyond that, one industry insider I spoke with said suppliers have a potential problem with fulfillment.  Since many options and materials are available, It’s difficult for some distributors or sellers to guarantee you’re getting a food safe option.

  • Just because an o-ring is marketed for use in a keg doesn’t automatically mean that the materials and production processes used are food safe.
  •  If you think about it from a random supplier or manufacturer’s perspective… they don’t know what you’re putting in your keg, maybe it’s not even food.  The problem that we, as homebrewers, have is is… beer is food and meant for human consumption.
  • You cannot say all o-rings made from [fill in material here] are food safe.  Certain quality standards and processes are required.

The fact is we’re putting beer (food) in our kegs.

Finally a food safe option!  Valuebrew has a selection of food grade o-rings.  They also have replacement universal poppet o-rings and internal QD o-rings, also food grade.

Bulk pricing!  As of this posting, all options are available in bulk quantities at a steep discount when compared to buying single o-rings.

Food Safe Silicone Keg O-Rings at Valuebrew

For a closer look take a look at our comprehensive step by step keg rebuilt post…

Rebuilding & Reconditioning Homebrew Kegs – Jump To: O-Ring Section

Also: Kegerator Tips & Gear | Keg Repair Part #s | Recent Keg Finds

Our Top Draft Resources

This post may contain affiliate links. We may make a commission when you use our links. This will never cost you extra. Thank you for supporting Homebrew Finds!

Make sure the components you use are compatible and rated for your intended application.  Contact manufacturer with questions about suitability or a specific application.  Always read and follow manufacturer directions. tag:lnksfxd  pst:vbfsor toppost:fsko tag:tpr

Hands on Review: Kegland DuoTight Fittings & EVABarrier Tubing!

Kegland’s DuoTight Fittings are designed to work with EVABarrier Double Wall Tubing.  They offer quick, reliable connections, easy implementation, a variety of fitting options and feature amazing versatility.  They’re also, generally speaking, very well priced.  DuoTights are push to connect fittings and require no tubing clamps.


In This Review:

  • How to Use DuoTight Fittings – No Tools or Clamps Needed!
  • DuoTight and EVABarrier Sizing
  • A Closer Look at DuoTight Fittings, EVABarrier Tubing and Related Tools
  • DuoTight Compatible Locking Clips
  • More About EVABarrier Double Wall Tubing
  • EVABarrier Tubing Resistance Estimations
  • Beer Line Tidy for EVABarrier Tubing
  • Does EVABarrier Tubing Work with John Guest Fittings?
  • Converting My Kegerator to DuoTights and EVABarrier
  • Tips for skipping ball valves in your DuoTight Setup
  • A Tweak For Super Clean DuoTight Kegerator Installs
  • Build a DuoTight CO2 Gas Manifold
  • Kegland DuoTight Ball Lock QDs
  • Pressure Tests
  • What is the Maximum Pressure for DuoTight Fittings?
  • Nukatap Counter Pressure Bottle Filler
  • DuoTight Inline Secondary Regulators
  • BlowTie Spunding Valves
  • Leaks? Troubleshooting EVABarrier/DuoTight Leaks
  • Conclusions
  • More Interesting and Unique DuoTight Compatible Fittings & Gear

Announcing: DuoTight Conversion for Tapcooler

tapcooler duotight

The Tapcooler can connect directly to your compatible forward sealing faucet (Ultratap, Vent-Matic, Perlick 600 series, Nukatap and Intertap) and allows you to easily counter fill bottles directly from the tap!

Learn More about the Tapcooler!  Hands on Review: Tapcooler Counter Pressure Bottle Filler for Forward Sealing Faucets!

OR Nukatap Counter Pressure Filler

The new fitting for Tapcooler makes a lot of sense of you already own a Tapcooler. If you don’t but are in the market for something similar that includes native DuoTight capabilities consider the Nukatap’s Counter Pressure Bottle Filler


How to Use DuoTight Fittings – No Tools or Clamps Needed!

DuoTights feature a unique double EPDM O-ring design.  Coupling and uncoupling is quick and easy and requires no tools or clamps.

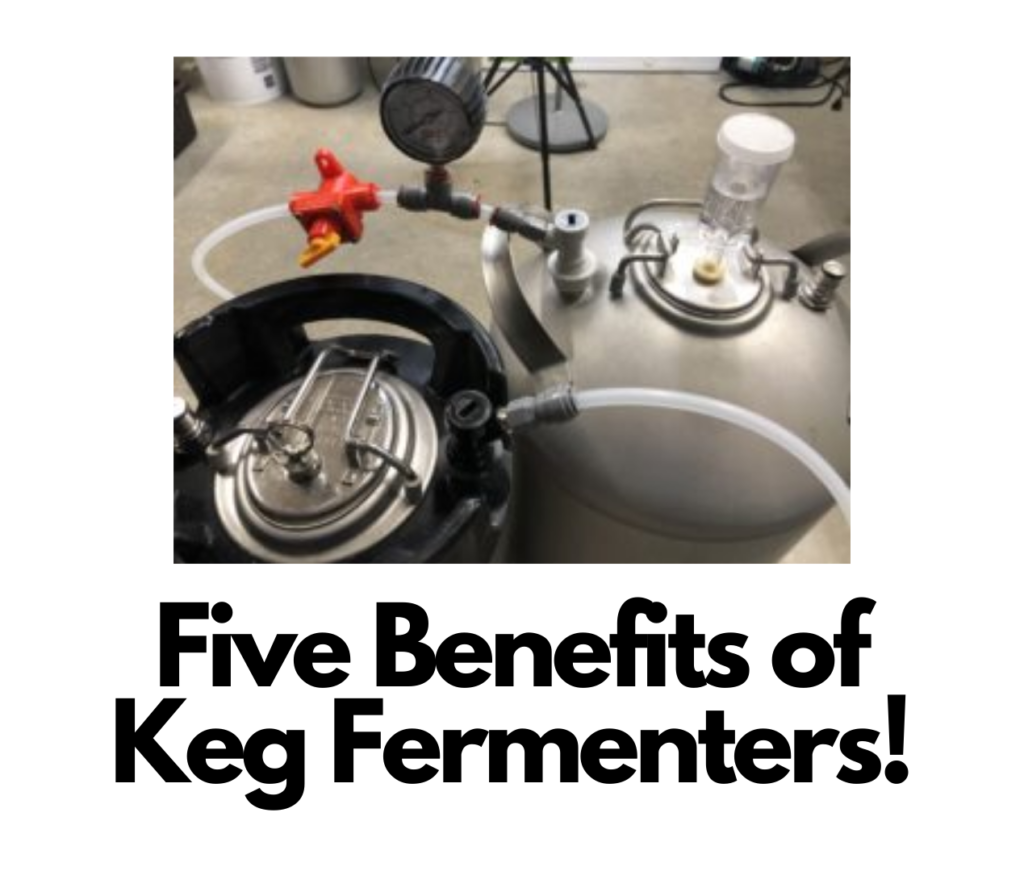
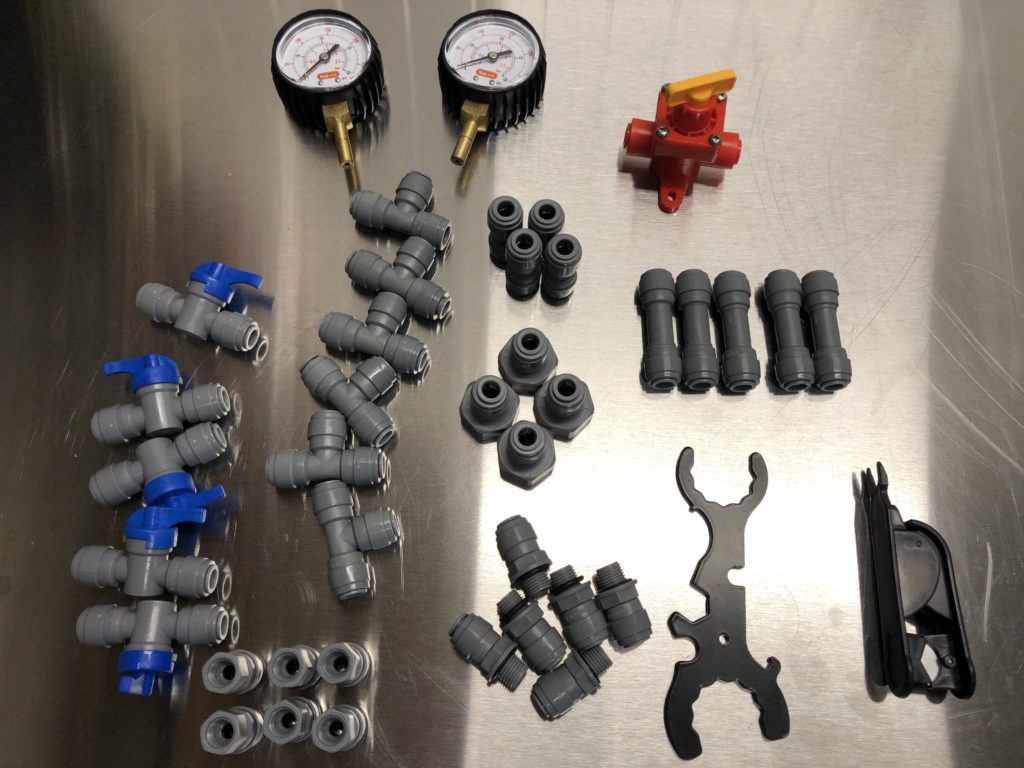
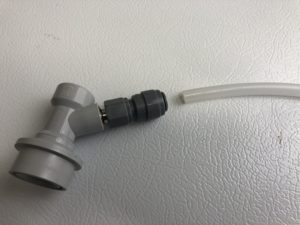
DuoTight Ball Lock QD on Left, Compatible EVABarrier Tubing on RightMaking a pressure capable connection is as easy as pushing the tubing all the way in the fitting and firmly pulling the tubing out.
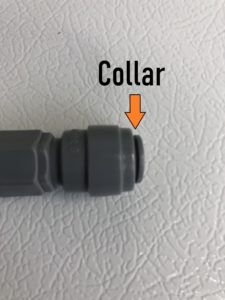
To disengage the connection press the collar toward the fitting body and pull on the tubing.  A couple tools are available to help with this process.  See below for photos and links.


Finding DuoTight Fittings and EVABarrier Tubing, Review Continues Below:

Continue reading

Why Won’t My Homebrew Keg Carbonate? Fixing Draft Beer Carbonation Problems

It’s a tale as old as time, or maybe not quite as old as time, but still old… your beer has finished fermenting, you excitedly transfer it to a keg and wait patiently.  Well, maybe not so patiently.  Every day or two you draw some beer to see where it’s at… it tastes amazing but it’s not carbonating.  You think you’re just being impatient, but then the days continue to pile up.  You’re getting a little carbonation, but not much.  Is this beer broken?  Or, have the basic principles of fluid dynamics just failed?

First Things First…

You’ve probably already done this, but you need to make sure your system is balanced and that both the temperature and pressure levels are set to correctly

See: Step by Step: Balancing Your Kegerator Draft System

Continue reading

What Does a Flow Control Faucet Do?

what does a flow control faucet do

In order to properly serve a pint of beer from your kegerator you need to have a balanced system.  You decide what carbonation level you’d like to serve and what temperature you want your beer to be and set a CO2 pressure based on those two factors.  To pour a proper pint, well carbonated without excessive foam, you need to balance your system.  Balancing offsets your set CO2 pressure with the proper amount of resistance.  Not enough resistance = fast pouring and excessively foamy beers.  Too much resistance = beer pours too slowly or not at all.   Each component along the way provides some resistance.  Typically most of the resistance comes in the form of adding more beer line.  More line = more resistance.  For a full rundown of this see: Step by Step Balancing Your Kegerator Draft System


What do flow control faucets do?

Flow control faucets feature a built in flow compensator that allows you to adjust the resistance your faucet is exerting.  That means less tubing and potentially less foaming and wasted beer. The compensation feature also makes it easier to serve higher carbonation beers as you can set the faucet to provide resistance to offset the increased pressure needed to store and serve these beers at higher pressures.  Instead of replacing your beer line with ever increasing lengths of tubing, you simply turn a knob to increase resistance.

In my opinion Intertap and Perlick are top faucet manufacturers and both have a flow control model.

Continue reading

Upgrade Your Kegerator – 6 Improvements!

kegerator upgrade ideasAfter years of faithful service in it’s current configuration, my beloved kegerator was in need of some upgrades and enhancements.

About My Kegerator:

  • My kegerator based on a 7-ish cubic foot Kenmore chest freezer.
  • I’ve installed a 10″ collar that hosts four faucets.  I’ve also used the collar as a mounting point for my four way CO2 manifold.
  • I have a dual pressure CO2 regulator.  One regulator body maintains what I call a house pressure, 10 PSI.  That body feeds the manifold and the manifold, in turn, feeds each keg.  The second regulator body is for tasks like flushing kegs, force carbonating more quickly or for a keg that I want to serve at a different carbonation level.
  • The gas side of my setup is QD based.  I can swap out or remove lines without turning off the CO2 tank.  The valved disconnects automatically shut off CO2 flow when disconnected.
  • I use a recirculating fan to keep a more uniform temperature.  See: Kegerator Beer Line Temperatures & Reducing Foam with a Recirculating Fan
  • I use an Eva-Dry E-500 to fix condensation – See: Damp Kegerator? Fix Kegerator Condensation

About the Upgrades

  1. I had been using a temperature controller from a now defunct manufacturer for a while. That was replaced by an ITC-308 Digital Dual Stage Temperature ControllerHands on Review
  2. Inkbird Temperature & Humidity Smart Sensor IBS-TH1 – my previous controller, had the ability to log temperatures and I really liked that.  I added this to give me logging capabilities.
  3. Intertap Faucets and Accessories! – time to modernize my setup with these great faucets and accessories.  NukaTap Faucets (Intertap v2!) are also a great choice.
  4. DuoTight Fittings – DuoTight Fittings work in concert with EVABarrier tubing. This system of disconnects offers loads of flexiblity and features.  I’ve used multiple types of disconnect systems in previous versions of my kegerator and DuoTights are, by far, my choice.
  5. EVABarrier Tubing – This is an update to… this update. This post originally featured Ultra Barrier coiled tubing. That tubing was very expensive and has since become difficult to find. EVABarrier tubing is high-quality double walled tubing that offers protection against oxidation, CO2 loss and microbial growth. It’s BPA and PVC free.  EVABarrier is also very reasonably priced.
  6. San Jamar VM5280 Versa-Mat Interlocking Bar Mat, 12″ Length x 12″ – also available in different colors and quantities – search san jamar interlocking bar bat on Amazon – for the bottom of the kegerator.  I had already used a single square of this to set the CO2 tank on.  This upgrade including lining the entire bottom with this great mat. Related: Not Just for Bars Anymore… Using Interlocking Bar Mats Around Your Home Brewery!

Bonus Upgrade!  Rebuild Your Kegs!


Installing the Upgrades

Continue reading

Serve Homebrew on Any Kegerator & Convert Commercial Kegerator to Homebrew

convert sanke to homebrew

Homebrew and Commercial Kegerators do the same thing.  They chill beer and allow you to serve it.  Each has lines for gas (typically CO2) and beer.  The only difficult thing about switching back and forth are the fittings and taps.

Commercial kegs use commercial keg couplers or taps.  These taps vary based on the brewery.  A typical style for US kegs is Sanke type D.  Commercial taps typically handle liquid and gas in single unit while homebrew couplers separate these out into gas and liquid quick disconnects.

Continue reading

What’s the Difference Between Ball Lock Kegs and Pin Lock Kegs?

Ball Lock Kegs vs Pin Lock Kegs – What’s the Difference?

The containers we call Ball Lock and Pin Lock Kegs come from the soda industry.  Also called Cornelius Kegs, Corny Kegs and Corney Kegs, they were originally intended to store and distribute soda pre-mix.  The big soda companies decided on different style containers for their pre-mix.  Pepsi landed on the Ball Lock style while Coke uses the Pin Lock style.

Homebrewers have since re-purposed these as homebrew beer kegs.


Announcing: NEW Pin Lock Kegs Now Available!

new pin lock kegsThe availability of of used kegs has recently become an issue. See: Are Used Kegs Running Out?

This has been especially true of pin lock kegs, because new pin locks have not been coming on the market. To my knowledge no new pin lock offering was generally available to homebrewers. This has caused the price and availability of pin locks to be a serious issue. For example, MoreBeer’s Pin Lock offering has sky-rocketed to $85 per keg.

Well, today is a happy day… Announcing NEW Pin Lock Kegs from cornyieg.com


First, It’s important to understand both do the same thing with slightly different and dimensions and features.  Note: All measurements in this post should be considered approximate.  There are different models and manufacturers of kegs.  Their sizes are generally about the same, but some kegs and manufacturers vary slightly.  There are several sizes of kegs available including 2.5, 3, 5, 10 and 15 gallons.  This post focuses on the commonly used 5 gallon size.

cln_img_3151The first thing you’ll notice is dimensions – Pin Lock Kegs wider than Ball Lock kegs.  Ball Lock on Left, Pin Lock on Right.cln_img_3150Left [Brand New 5 Gallon Ball Lock from AIHReview] | Right [Used 5 Gallon Pin Lock] – Pin Locks are also shorter than Ball Lock Kegs.  Ball Lock on Left, Pin Lock on Right.  Both of these kegs have a ~5 gallon capacity.


Limited Time Keg Deals, Article Continues Below:

keg deals

Continue reading

Checking for Draft System CO2 Leaks – Using The Pressure Gauge Method

check for co2 leaks

For the most part, checking for keg liquid and CO2 leaks is pretty straightforward.  Is beer leaking?  Then you’ve got a liquid leak.  Is there six inches of beer in your kegerator?  That one’s really easy to spot.  If beer is shooting out like a geyser, you’ve got a… fast leak. 🙂

For kegerator CO2 leaks, it’s a generally a little more work, but still pretty easy… spray everything with Star San solution (diluted of course) and look for bubbles.

Related: Step by Step: Finding and Fixing Keg CO2 Leaks

A Problem Spot…

Continue reading

Tip: Consider Oetiker Stepless Clamps for Kegerator Gas and Beer Lines

Pictured: Oetiker 16700010 Stepless Ear Clamp via Amazon

Part of Our Homebrew Tips and Tricks Series.  Check out the complete list – Homebrewing Tips, Tricks & Shortcuts! This is a Top Post! See: All Top Posts


  • I use stainless steel Oetiker-style stepless clamps for most gas and beer applications.  I like the fact that they are, generally… stainless steel, stepless and the fact that they stay tight and will not loosen over time.
  • These clamps are designed so that there are no steps (gaps) on the inside.  That reduces the possibility that tubing will be torn or damaged.
  • These are single use clamps.  The upside of that is… Oetiker-style stepless clamps will not loosen over time.  When they’re tight, they’re tight.  I really like that for kegerator applications because… A: I don’t like to empty CO2 tanks for no good reason and B: I don’t like standing beer in my kegerator.
  • A sizing note – Oetiker-style Stepless clamp sizes generally refer to the largest diameter in mm.  So a size 13.3 means that the Oetiker Stepless clamp is 13.3 millimeters (about .52″) in diameter uncrimped.
  • Search Amazon for “Stepless Hose Clamps” to shop around and see what’s available
  • Related Top Post: Tips: Cleaning, Drying & Storing Tubing
  • Resource Page: Tips and Gear for your Kegerator
  • Related Categories: DraftTubing

Some specific sizes to consider…

I use a pair of nail nippers (meant for cutting heads off nails) but there are also purpose made tools for clamping Oetiker-style stepless clamps…

Also: Kegerator Tips & Gear | Keg Repair Part #s | Recent Keg Finds

Our Top Draft Resources

This post may contain affiliate links. We may make a commission when you use our links. This will never cost you extra. Thank you for supporting Homebrew Finds!

Make sure the components you use are compatible and rated for your intended application.  Contact manufacturer with questions about suitability or a specific application.  Always read and follow manufacturer directions.

toppost:oetiker rp:tips#34 tag:tpr

Hands On Review: Inkbird ITC-308 Dual Stage Temperature Controller +WiFi Version

Inkbird’s ITC-308 Digital Dual Stage Temperature Controller is a dual stage, pre-wired Digital Temperature Controller

The ITC-308 comes in the original version as well as an updated Wi-Fi enabled model.  This review covers both editions of this controller.


Why a Temp Controller?

Temperature controllers, sometimes referred to as over-riding thermostats, can control devices like refrigerators, freezers and fermentation heating devices to provide a consistent temperature for your kegerator, fermentation chamber or brew system. They do this by monitoring the temperature and cycling on and off the device in question. Generally, you will set the device to full cooling or heating power and the temperature controller takes over from there.


Check Prices, Current Specs & Availability, Review Continues Below:

Alternate Listings:

Different listings or combos for the ITC-308 may be available – search Amazon for “Inkbird Digital Temperature Controller”  – to see what variations may be available

Canada:

At MoreBeer:


Our ITC-308 Deal Pages:

These pages show our most recent deals for these great controllers

Inkbird ITC-308 Digital Dual Stage Temp Controller [Kegerator or Fermentation] – $28 w/20% Off Coupon

Inkbird ITC-308 WiFi Digital Dual Stage Temp Controller


Dual vs Single Stage

Dual stage means that the ITC-308 can control both a heating and cooling device.  Alternatively, it can control a heating or a cooling device.  This controller displays in Fahrenheit and Centigrade.  Dual Display shows both measured and set temperature.

Hands on Review Inkbird’s ITC-308 Temp Controller

Continue reading

Universal Poppets Tips and Tricks!

I use universal style poppets exclusively when rebuilding kegs. Finding the right OEM specific replacement poppets can be a chore. Beyond finding the right part number, these can be prohibitively expensive. Paying $10 to $14, or more, for an OEM poppet isn’t fun. In fact, if you really had to pay that, it may not even make sense to keep the keg.

Enter universal poppets.  These can be picked up at a reasonable cost, regularly under $2 each, and fit the vast majority of kegs.

Tip: Immediately Replace Universal Poppet O-Rings

I remove and discard the o-rings that come with universal poppets.  That may sound a little odd, but there are a couple issues. First, I have no idea what these are made of. They are probably okay, but I’m not sure. This is one spot that has a lot of contact with beer. I want to make sure these are food grade.  Second, when it comes time to replace these o-rings I want replacements that won’t change fit.  I’m aware of a single source for bulk food grade o-ring replacements for universal poppets. Size may vary slightly compared to OEM, so I replace these before adjusting for fit so that the replacements won’t change the way these fit. The stainless parts of universal poppets should last a long, long time, having a reliable source for replacements that you know aren’t going to change anything is a big benefit. Beyond that, being sure you’re using food grade materials at this point is worth a few cents.

OR… Universal Poppets – 304 Stainless + Food Grade Silicone! & Reliable O-Ring Replacements

universal poppetsSince this guide was published, Valuebrew has released a 304 Stainless Steel + Food Grade Silicone Universal Poppet option!

I’m excited that there’s finally there’s an option that comes with quality o-rings made from the right materials out of the box!  Beyond that, Valuebrew has pledged to always carry replacement o-rings, so you’ll always have a source when the time comes for replacements.

Universal Poppets – via Valuebrew – These are made of 304 SS and come with food grade silicone o-rings. Valuebrew has committed to always carrying replacements.

Continue reading

Convert Your Mark II Keg & Carboy Washer to a Recirculating Draft Line Cleaning Pump!

Mark’s Keg and Carboy is Awesome

The Mark II Keg and Carboy Washer can clean a lot of your homebrewing gear.  Kegs, Carboys, Speidel Fermenters, Tubing, Small Parts & Pieces, Buckets, Keggles and lots more.

Hands On Review: Mark’s Keg and Carboy Washer

Mark’s Keg & Carboy Washer can be found at…


This article contains affiliate links. We may make a small percentage if you use our links to make a purchase. You won’t pay more and you’ll be supporting Homebrew Finds and more content like this. Thank you for your support!


An Easy Upgrade Converts it to a Line Cleaner

A small hardware purchase can convert your Keg and Carboy Washer over to an efficient ball lock draft line cleaning pump.

Continue reading

Kegerator Beer Line Temperatures & Reducing Foam with a Recirculating Fan

Back in 2014, I had what I would call a reasonably well put together and balanced kegerator.  In spite of that, for years, I had dealt with the dreaded first foamy pint of beer.  After that pint of beer, beer would pour great.  That is until a significant delay between pours – overnight or a few hours.


Related Resources – Foam Control & Kegerator Balancing


Diagnose Other Issues


A Closer Look at Kegerator Beer Line Temps

cln_img_5476The setup.  I have two temperature probes in my kegerator.  One is zip-tied to the top of a beverage line.  The other is zip-tied to a can of beer.  That’s how I have kept the probe in my kegerator for a long time with the thinking that the mass of the can of beer will help to stabilize temperature readings and give overall stable and accurate readings.  That can is sitting on the compressor hump of my Kenmore Deep Freeze (8.8 Cu ft Model 16932, out of production).  That puts it about mid keg.

Beer Line Temps – No Recirculation Fan

The cause of the problem is pretty clear.  Heat rises.  That means the top of your kegerator is going to be warmer than the bottom of your kegerator.  That warmer beer foams when it comes out.  The faucet and shank are also warmer.  That warmth adds to the problem.

How much is the temperature variance?  Of course, this will vary from setup to setup and climate to climate.  I was relatively shocked by the temperature difference in my own kegerator.

img_temps

The top reading about mid keg and the bottom reading is the top the top of my beer lines.  These are about 22″ apart.  This graph shows a point in time variance between the two of 14.9 degrees F.   My beer is about the temperature I want it, but the top of my serving line is much warmer.  That difference in temperature causes the first pint to have too much foam.  Pours that happen soon after the first are fine.  The tubing, shank and beer are relatively cool.

Adding a Recirculating Fan to Reduce Beer Foam

Continue reading