
Build a Recirculating Draft Line Cleaning Pump
Clean kegerator lines are a key part of serving delicious beer. Bacteria and mineral build in lines can cause off flavors, quick loss of head, under-carbonated beer due to rapid co2 loss and lack of legs forming on the inside of your beer glass.
Limited Time Deal:
Helps you clean multiple lines at the same time…
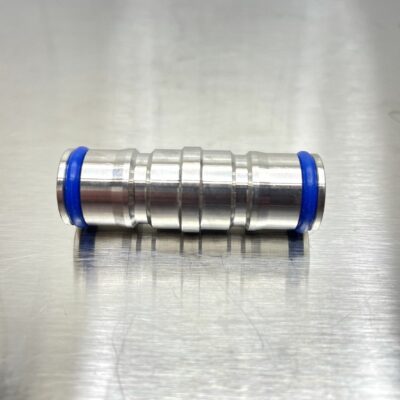
Valuebrew is offering a pack of two jumpers and 25 replacement o-rings for $32.97. Coupon code JUMP discounts the combo by a whopping 32%.
Double Jumper Special! < note that you must use this link along with coupon code JUMP to get the deal, the standard product will not get you the discount
Valuebrew’s jumper is unique because of the custom color, food grade o-rings and because … it works with both liquid and ball lock jumpers.
The directions on most line cleaners call for recirculating the cleaner for some period of time. Most affordable cleaning setups that are out there include a hand pump. Operating one of those for 15 to 30 minutes, for each faucet, doesn’t sound fun.
This article contains affiliate links. We may make a small percentage if you use our links to make a purchase. You won’t pay more and you’ll be supporting Homebrew Finds and more content like this. Thank you for your support!
To really clean your draft lines, you need to keep solution flowing for a length of time, not just fill and wait. Initially I tried to clean my system by pushing line cleaner out of a keg. This was a waste of CO2. I also found it tough to keep solution running slowly enough to get the required amount of contact time. It’s easy to quickly push a cleaning or sanitizing solution through your system under CO2 pressure, but I found it to be a pain to try to do so slowly. This also requires quite a bit of cleaning solution versus a recirculating pump.
I decided to put together a recirculating draft line cleaning pump setup.
Building a Recirculating Draft Line Cleaning Pump
Note: This is an update to a build I put together in 2012. The purpose of this re-design was to reduce overall costs and, in response to comments received, increase the flow rate of the setup. A link v1 can be found toward the end of this post. About Comments: This updated v2 build was completed in July of 2015. Comments on this article that are dated before that time apply to the lower flow rate v1 build.
The Pump. I have a utility pump that I use for various tasks around brewery. I decided that that pump was too powerful. I didn’t want to deal with foaming issues that I thought may be caused by the high flow this pump would produce. I wanted something with less power that could slowly circulate liquid through draft lines. Version 1 of this build used the EcoPlus-132 Submersible Pump. That pump moved a steady stream that I was happy with. Still, the top critical feedback I received back about that setup were complaints about flow rate. For this build, I went to the EcoPlus-264 Submersible Pump. That provides more than double the stated flow rate (290 GPH vs 132 GPH) compared to the original pump.
The Pump I Used:
EcoPlus 290 GPH (1098 LPH, 17W) Submersible Water Pump w/ 6 ft Power Cord | Aquarium, Fish Tank, Fountain, Pond, Hydroponics – affiliate link, note that multiple variations of this product may be available, as such a different version may appear at this link
What are Other’s Saying? Search this product’s Amazon reviews for “beer” – affiliate link, note that multiple variations of this product may be available, as such a different version may appear at this link
You can, of course, adapt other pumps to this task. Search Amazon for Submersible Utility Pump to Shop Around
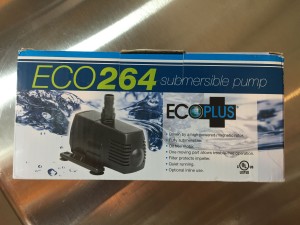 Here’s a look at the box for the EcoPlus 264
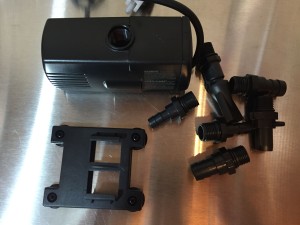 Here’s what you get. The pump, a removable suction cup base and an assortment of connection options.
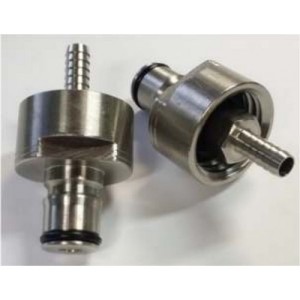 For v2, I wanted to employ a stainless steel carbonation cap with dip tube (see below for links). Using this eliminates a good number of fittings compared to v1, some complexity and a good bit of cost. This carbonator cap has a couple unique features… First, it has a 5/16″ ID barb on the inside. Second, it’s designed in such a way as to work with either liquid or gas ball lock QDs. Typically carbonator caps would just work with gas QDs. The fact that this also works well with liquid QDs makes it perfect for this application.
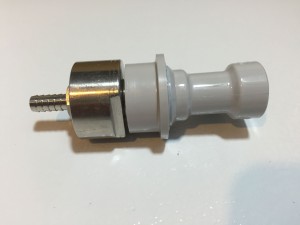 A carbonator cap would typically work with a gas QD and this does.
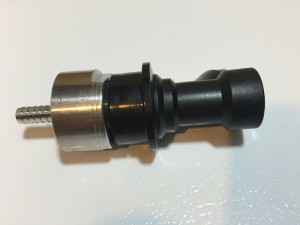 However, it also works (easily) with a liquid QD. This is an important feature for this build.
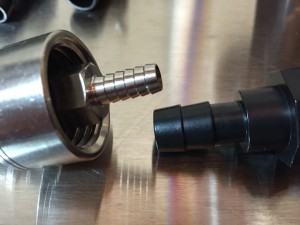 The problem with this plan is the 5/16″ barb on the SS carb cap isn’t easily compatible with the smallest barb option that comes with the pump. Sure, I could get a reducing fitting of some sort, but the reason I wanted to use the carb cap was to reduce cost and complexity. I ended up solving this with a couple short pieces of tubing. As with most problems… randoms bits of tubing are the solution. 🙂
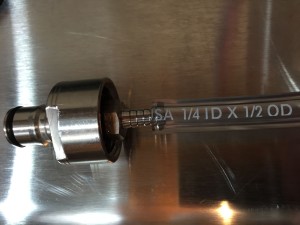 1/4″ ID x 1/2″ OD tubing fits perfectly on the barb.
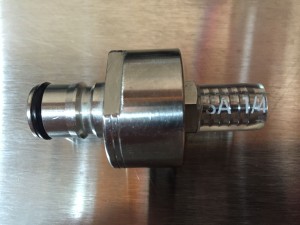 A small length of tubing on the barb
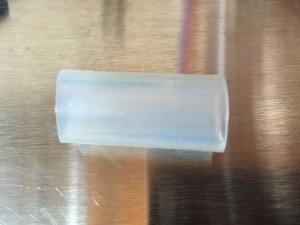 A small length of 1/2″ ID tubing
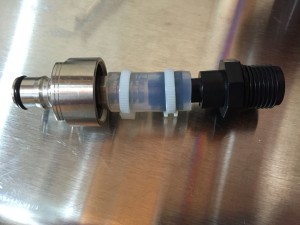 The 1/2″ ID silicone tubing fits well both on the outside of the 1/2″ OD tubing and on the smallest available barb that came with the pump. I secured each end with trimmed zip ties. This resulted in a reasonably firm connection although you may want to use tubing clamps. See: Liner Clamp for Silicone Tubing – Choose Large Size
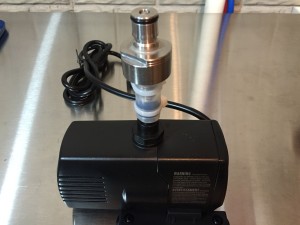 The finished assembly… whammo
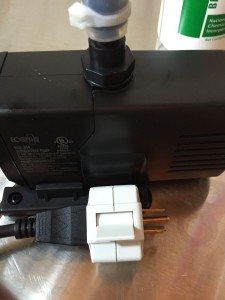 I also used a switch [Similar: GE Handy Switch] to turn this on and off easily. Now is a good time to remind you to read and follow the manufacturer’s directions for this pump. The directions I received said to make sure and use a GFCI Outlet. Search Amazon: GFCI Adapter
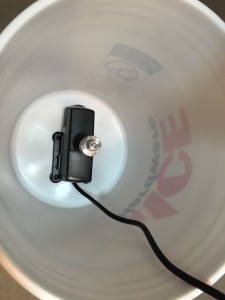 The pump assembly in the bottom of a 5 gallon bucket. This bucket acts as a reservoir for BLC, Water and Star San.
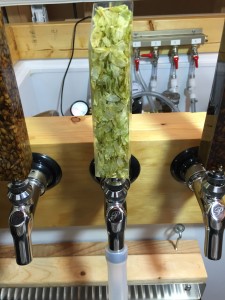 The only thing that’s left is routing the faucet discharge back to the recirculation bucket. I’ve found 1/2″ ID Silicone tubing works great for this. The silicone is stretchy enough to easily fit on my Perlick faucets. You really only need 2 or 3 feet, just enough to get from the faucet down to the reservoir bucket. Of course, you can use any size ID/length of tubing that works well for your setup.
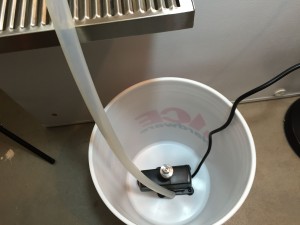 Here is the tubing returning to the bucket
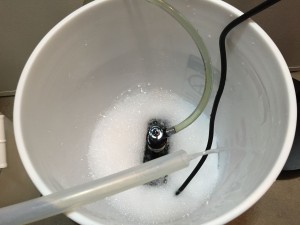 This is an initial test of the tubing/ss carb cap assembly. The pump is powered on with the faucet closed. That puts pressure on the assembly. Mine did not leak. I’m using zip ties. Tubing clamps will make this setup even more solid.
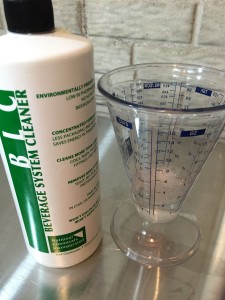 Measuring BLC with my Perfect Beaker
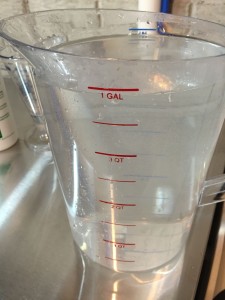 Of course I used my trusty Rubbermaid 1 Gallon Pitcher [Review] to measure the water for the BLC solution
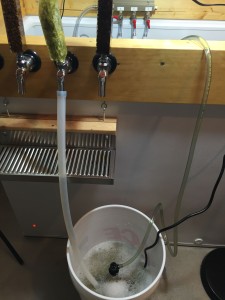 The entire setup in operation. The bucket contains BLC solution. My ball lock beer line and QD connect to the SS carb cap assembly. The pump moves solution through the ball lock QD, beer line, shank and faucet. Solution is returned to the bucket via the silicone tubing.
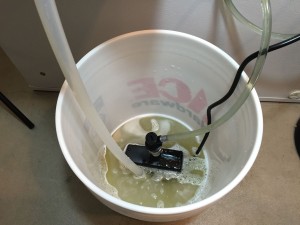 A closer look at the bucket. I generally recirculate for 15 to 20 minutes per faucet.
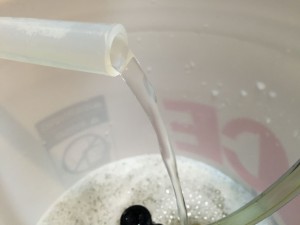 Here’s a picture to give you an idea about flow rate. This is going to vary based on how much tubing you’re using, how much solution you have in your bucket, where you’ve placed your bucket and pump and more. With my setup, this pump produces a nice steady flow of solution.
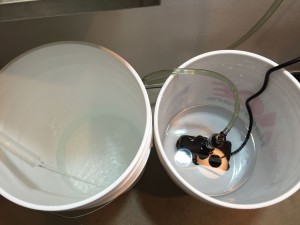 Here’s the rinsing step. For rinsing, I just use another bucket. I no longer see a need to recirculate water. Just run a good bit of water through each line to flush the BLC solution.
 Final step… recirculating Star San
This design cleans your whole draft system. This design cleans the faucet, the shank, the quick disconnect and the tubing. Some designs that I’ve seen have you removing the beer nut and placing the hand pump apparatus directly on the shank. That’s some work disassembling and reassembling and it also skips a lot of your setup including the beer line and quick disconnect.
Alternative for Pin Lock and Sankey Systems. The setup outlined here is for ball lock systems. I know of no similar Pin Lock carbonator caps or fittings. You could replace the SS Carbonator Cap with this 1/4″ Male Flare to 1/4″ Barb Fitting. Remove your FFL based Pin Lock QDs or Sankey Taps and attach to this fitting and in turn the pump. This should work for any setup that employs 1/4″ flare, (FFL) swivel connectors on beverage lines.
Components – excluding carbonator cap
- EcoPlus 290 GPH (1098 LPH, 17W) Submersible Water Pump w/ 6 ft Power Cord | Aquarium, Fish Tank, Fountain, Pond, Hydroponics – affiliate link, note that multiple variations of this product may be available, as such a different version may appear at this link
- What are Other’s Saying? Search this product’s Amazon reviews for “beer” – affiliate link, note that multiple variations of this product may be available, as such a different version may appear at this link
- You can, of course, adapt other pumps to this task. Search Amazon for Submersible Utility Pump to Shop Around
- Small Piece of compatible tubing. I used a scrap of 1/2″ ID silicone I had around.
Carbonator Cap
I purchased the carbonator cap pictured in this build, from AliExpress. As you can see for the photos, it works with both gas and liquid QDs. That’s important for this build. Since publishing, I have received word back that the AliExpress offering no longer works with both gas and liquid QDs.
Consider these alternatives, Specifications Can Change: Check product descriptions for current description and specifications to make sure these are designed to work with both liquid and gas QDs.
- Ferroday Stainless Carbonation Cap Counter Pressure Bottle Filling With 5/16″ Barb – I’ve used this one and I can confirm the one I received worked with both liquid and gas QDs – Hands on Review
- Stainless Carbonation Cap with 5/16″ Barb Ball Lock Type, Fit Most Soft Drink PET Bottles
- UP100 Line Cleaning Cap Stainless Carbonation Cap Counter Pressure Bottle Filling,w/ 5/16″ Barb
New offerings regularly pop up. Search Amazon for “stainless steel carbonation cap” to see what’s out there. Again, check descriptions to make sure these work for both gas/grey and liquid/black QDs.
The Pump I Used:
EcoPlus 290 GPH (1098 LPH, 17W) Submersible Water Pump w/ 6 ft Power Cord | Aquarium, Fish Tank, Fountain, Pond, Hydroponics – affiliate link, note that multiple variations of this product may be available, as such a different version may appear at this link
What are Other’s Saying? Search this product’s Amazon reviews for “beer” – affiliate link, note that multiple variations of this product may be available, as such a different version may appear at this link
Cleaning Multiple Lines at the Same Time!
 Here’s the key piece of hardware to clean two ball lock lines at the same time. It’s a ball lock jumper from Valuebrew. There are only a couple similar offerings out there, to my knowledge. This one is unique because it uses their custom color, food grade post o-rings AND… it works with both liquid and ball lock jumpers.
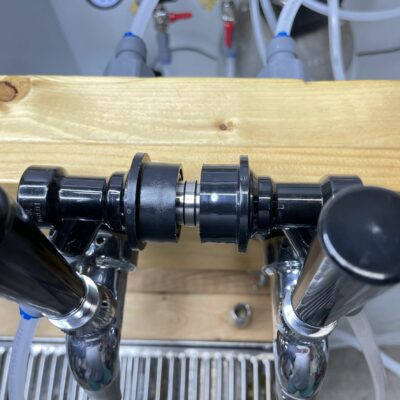 Here it is installed. This is connecting two 10′ EVABarrier tubing runs.
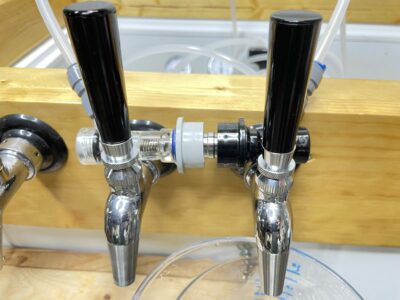 This jumper allows you to connect liquid AND gas lines. That means you can flush lines with CO2 to push out an remaining cleaner or sanitzer. Cleaned > Rinsed > Sanitized and… Dried lines! Make sure to use a low pressure that’s compatible with all components in your system if you do this.
Draft Line Cleaning Solutions and Sanitizers
- National Chemical Keg Beer Line Cleaner for Kegerators 32 oz Bottle
- Search Amazon for “BLC Line Cleaner”
- Tank and Line Cleaner (30) – 30 pre-measured packs
- 32oz. BLC Liquid Line Cleaner – via Keg Connection
- LLC – Liquid Line Cleaner via MoreBeer
- TLC Tank & Line Cleaner – 1 lb. CL38 – via MoreBeer
- Search Amazon for “Star San”
- Search Amazon for “PBW”
All Our Builds & Related Resources
- Hands on Review: Kegland Ball Lock Cleaning Kit
- Build A Recirculating Draft Line Cleaning Pump
- Mark II Keg & Carboy Cleaner… As a Recirculating Draft Line Cleaning Pump
- Building a Simple Draft Line Flushing Setup
- Recirculating Draft Line Cleaning Build v1
- Kegerator Tips & Gear | Keg Repair Part #s | Recent Keg Finds
Build a Simple Draft Line Flushing Setup
Keg Deals!
kegdealsRebuild Your Kegs!
Upgrade to EPDM
More Homebrew Finds!
- Last 50 Finds!
- Top Deals – a curated list of the best deals
- Homebrew Reviews – one of the largest libraries of homebrew reviews in existence!
- Our Top Posts – tips, how-tos, resources posts and more
- Let’s be Friends!
Recent Deals!
10 Most Recent Homebrew Resource Posts & How-To’s!
We are Homebrew Review HQ! Our 10 Most Recent Reviews
Also: Kegerator Tips & Gear | Keg Repair Part #s | Recent Keg Finds
Our Top Draft Resources
- The Most Difficult Spot to Check for CO2 Leaks
- Keg O-Ring Materials Selection! – EPDM, Silicone and Buna-N?
- Why Do I Have Bubbles in My Beer Line? Diagnosing and Fixing Kegerator Foam Problems
- Five Benefits of Using Corny Kegs As Fermenters
- Rebuilding & Reconditioning Homebrew Kegs!
- Food Safe Replacement Keg O-Rings in Bulk
- Hands on Review: Kegland DuoTight Fittings & EVABarrier Tubing!
- Why Won’t My Homebrew Keg Carbonate? Fixing Draft Beer Carbonation Problems
- What Does a Flow Control Faucet Do?
- Upgrade Your Kegerator – 6 Improvements!
- Serve Homebrew on Any Kegerator & Convert Commercial Kegerator to Homebrew
- Tips and Gear for Growler Filling
- What’s the Difference Between Ball Lock Kegs and Pin Lock Kegs?
- Checking for Draft System CO2 Leaks – Using The Pressure Gauge Method
- Tip: Consider Oetiker Stepless Clamps for Kegerator Gas and Beer Lines
- Hands On Review: Inkbird ITC-308 Dual Stage Temperature Controller +WiFi Version
- Universal Poppets Tips and Tricks!
- Convert Your Mark II Keg & Carboy Washer to a Recirculating Draft Line Cleaning Pump!
- Step by Step: Finding and Fixing Keg CO2 Leaks
- Kegerator Beer Line Temperatures & Reducing Foam with a Recirculating Fan
- Kegging CO2 Use Estimations and Calculations
- Step by Step: Balancing Your Kegerator Draft System
- Building a Simple Ball Lock Draft Line Flushing Setup
- Build a Recirculating Draft Line Cleaning Pump
- Home Brew Keg Roundup – New & Used, 5 and 2.5 Gallon & More!
- Damp Kegerator? Fix Kegerator Condensation
- Portable Draft Beer Serving Options!
- Homebrew Temp Controller Roundup! – Kegerator and Fermentation – concepts, applications and models
- Bulk Keg Orings and Keg Repair Part Numbers
standarddraft pinned
This post may contain affiliate links. We may make a commission when you use our links. This will never cost you extra. Thank you for supporting Homebrew Finds!
greatdealsMake sure the components you use are compatible and rated for your intended application. Contact manufacturer with questions about suitability or a specific application. Always read and follow manufacturer directions. tag:lnksfxd toppost:draftrecirpump rs:7 tag:tpr



It’s a nice build, and I duplicated it myself. I ran into similar issues mounting the stainless steel QD on mine.
I tried your zip tie solution, but have been finding that the backpressure of the size conversion tends to push the steel QD out of the tubing. I can push it back on, but considering the very slow flow I’m getting, I’m wondering if there’s also a liquid leak due to the zip ties.
FWIW, I’m planning to change over to some metal hose clamps the next time I use this. Hopefully this will improve pressure and keep the QD seated!
Has anyone tried daisy chaining multiple faucets together and running this set up?
I only ask becase I have seen professional set ups where they do it that way.
I guess you would need to install jumper lines between the different beer disconnects for this to work.
You can do that, but it will slow flow down, I don’t think that’s a big deal, but it will happen if you daisy chain multiple faucets together.
I use a similar pump and setup and found it’s MUCH easier to just push the cleaner/water/sanitizer up into the faucet and out the beverage tubing than to worry about hooking it up the other way around.
I have a length of tubing I press over one of the plastic barbs that come with the pump, then push over the outside of my Perlick faucets. I remove the pin lock connectors from the swivel nut, put that end of the beverage tubing in the bucket, open the faucet and kick the pump on. Works like a champ.
For the folks talking about using a chugger pump how are you feeding it? Are you using a pot filled with the blc as a vessel for the cleaner? I just can’t quite envision the setup. However I like the idea of daisy chaining together and cleaning them all at once. I’ve got 4 x 20’ lines so I need a good pump solution.
Noob to kegging and I know I need a system for this. I use PL kegs and am wondering why couldn’t I just use a BL like this to a PL on my keg? Am I missing something? If so , please explain
tia,
g
If you’re talking about using the stainless steel carbonation cap with a pin lock QD, that won’t work. The caps are designed to work with ball lock connectors.
Nice Update!
It’s actually 1/2inch not 3/4 reducer.
I bought all the stuff to make this about six months ago and finally got around to using it. This thing makes life so easy. Hook it up, set a timer, walk away. Time goes off, switch taps, and repeat. Then just go through and do the same with water and santizer. Makes cleaning draft lines a sinch. Thank you for the guide, very well put together.
has anyone with 10 foot lines got a successful pump going? just noticing some people have not from the comments – i’d like to know before i attempt this
I bought the recommended stainless carbonation cap, but my liquid QD doesn’t fully fit over it or snap the collar closed. Am I doing something wrong?
Hmmm…. Did you get the one from Aliexpress? Do you know what brand of liquid QD you’re using? Is it CM Becker?
I did pick up the one you linked to from Aliexpress, and the QD says CMB – GERMANY on it, so I take it that it is CM Becker.
Well… the product description on that continues to say that it will fit both gas and ball lock QDs I would try another QD. If that doesn’t work… I would get with the seller and request a replacement.
I went with the 396GPH version of the pump, and it’s unfortunately just about worthless with my setup. I have 10ft liquid lines, and using this pump with a bucket yields only a tiny trickle of water flowing through the tubing, not even enough to fill the 3/8″ line.
Am I doing something wrong here, or is it really just not strong enough to move water that distance?
Is the beer line filled? What kind of distance is there between the pump and the top of your shanks? Decreasing that distance should help flow rate?
I too got the 394gph unit and my beer lines are 5 feet long. The flow is awful. I am not too impressed.
Have you tried reducing the distance between the pump and the top of your shanks? My current build uses the 290 GPH version and I get good flow.
I tried using the 132 gph version of this pump and the flow rate is pretty anemic if the beer line is elevated more than about a foot. I think it’ll work if I lift the bucket to be higher and closer to the faucets, but that’s not super convenient.
Does the stainless steel ball lock fitting come apart like the ones on a corny keg? Can the poppet be replaced?
The 5/16″ barb fitting does come off and that reveals the inner workings of the QD, but it only exposes it, I don’t see where i can actually disassemble it.