Adding a Tri-clamp Fitting to a Homebrew Keg Lid!

This article is by Homebrew Finds Reader Kris G. Thank you Kris for your creativity and hard work!
Editors Note: This is an advanced project that requires additional tools, skill and materials. This post outlines the process that Kris took to modify his keg lid with a weldless tri-clamp bulkhead. Product specifications can change over time, double check to make sure that current specifications match your needs.
Adding a Tri-clamp Fitting to a Homebrew Keg Lid
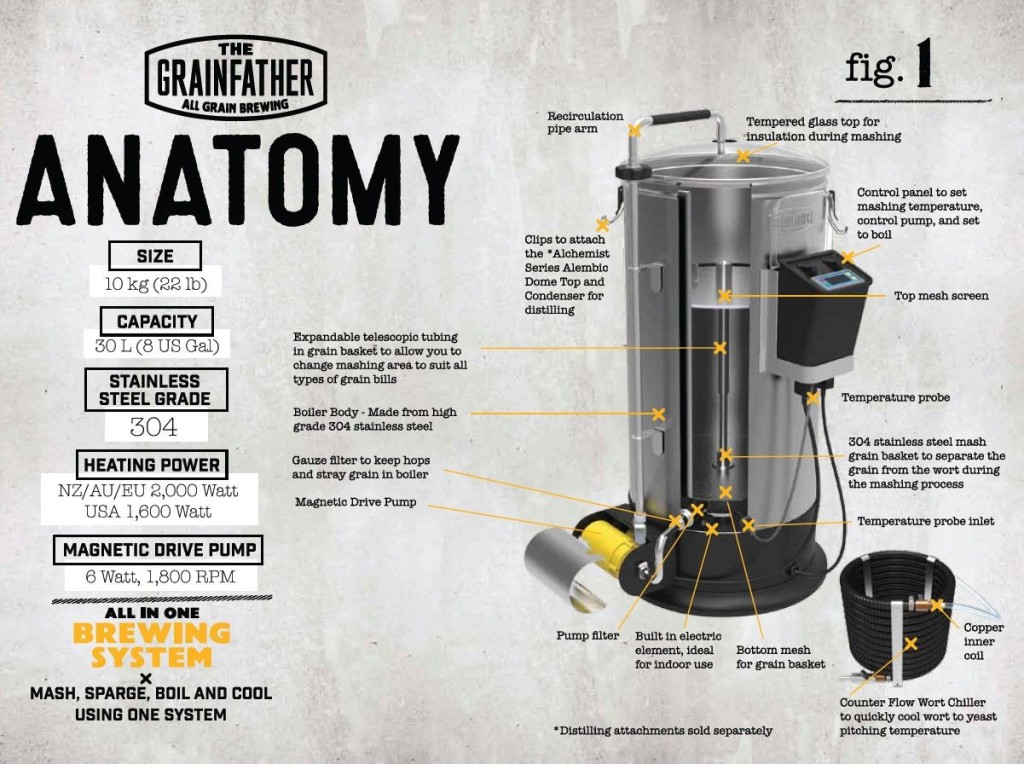
Carboys, conicals, buckets, kegs, etc. There is an ever-growing number of options for fermentation vessels. I recently moved away from carboys to experiment with pressurized fermentation. I didn’t feel like buying anything new, so why not repurpose a corny keg for fermentation? This past year I “right-sized” my batches down to 2.5-3 gallons making a corny the perfect size for fermenting. With a couple modifications (shortened dip tube, hop screen, etc), I had an old 5 gallon corny now as a dedicated fermenter. An added bonus was that it fit perfectly in my temp-controlled chest freezer.
 Fermenting in a Keg Using TC Equipped Lid
Related: Fermenting Under Pressure
Commercial Option Now Available, Build Continues Below:
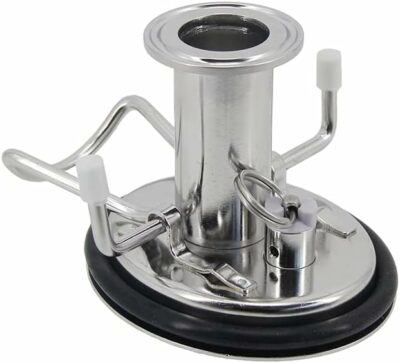
304 stainless steel Cornelius Keg Lid with 1.5″ Tri-clamp Ferrule,NEW Corny Beer Keg Lid 60PSI PRV Food Grade Dry Hopper – affiliate link, note that multiple variations of this product may be available, as such a different version may appear at this link
This article contains affiliate links. We may make a small percentage if you use our links to make a purchase. You won’t pay more and you’ll be supporting Homebrew Finds and more content like this. Thank you for your support!
I started seeing some other homebrew fermenters with tri-clamp connections on top. Blogs all around showed them used with blowoff tubes, thermowells, carbonation stones, CIP spray balls, etc. It seemed like a great universal connection with a ton of uses. Most importantly to me, I wanted the tri-clamp connection to build an oxygen-free dry hop dropper (that build is an article for another day).
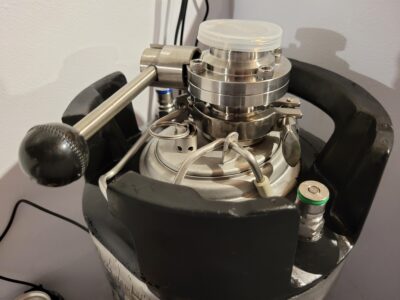 TC Equipped Lid with Butterfly Valve – Also: Color Coded Keg O-Rings
Read on to see my trials and tribulations while adding a TC bulkhead to my corny lid.
Build note: This is a weldless build. If you’ve got the ability/skill/tools to weld stainless, go for it!
Safety Note: Ensure that you are using all tools properly and wearing all the proper PPE. You will be drilling/cutting metal which is both sharp and hot.
PLEASE BE CAREFUL WHEN FOLLOWING THESE INSTRUCTIONS.
HBF is not responsible for your irresponsibility. At time of this writing, I am fully up to date with my tetanus shot. That may or may not be related…
Supplies
- Cornelius keg lid with wideset bail (the lids that have the narrow straight bails don’t leave enough room)
- Weldless tri-clamp bulkhead
- 1-5/8” (41mm) Tungsten Carbide Hole Saw (or step bit)
Editors Note: Note that multiple variations of these products may be available, as such a different version may appear at these links. Double check sizes and features.
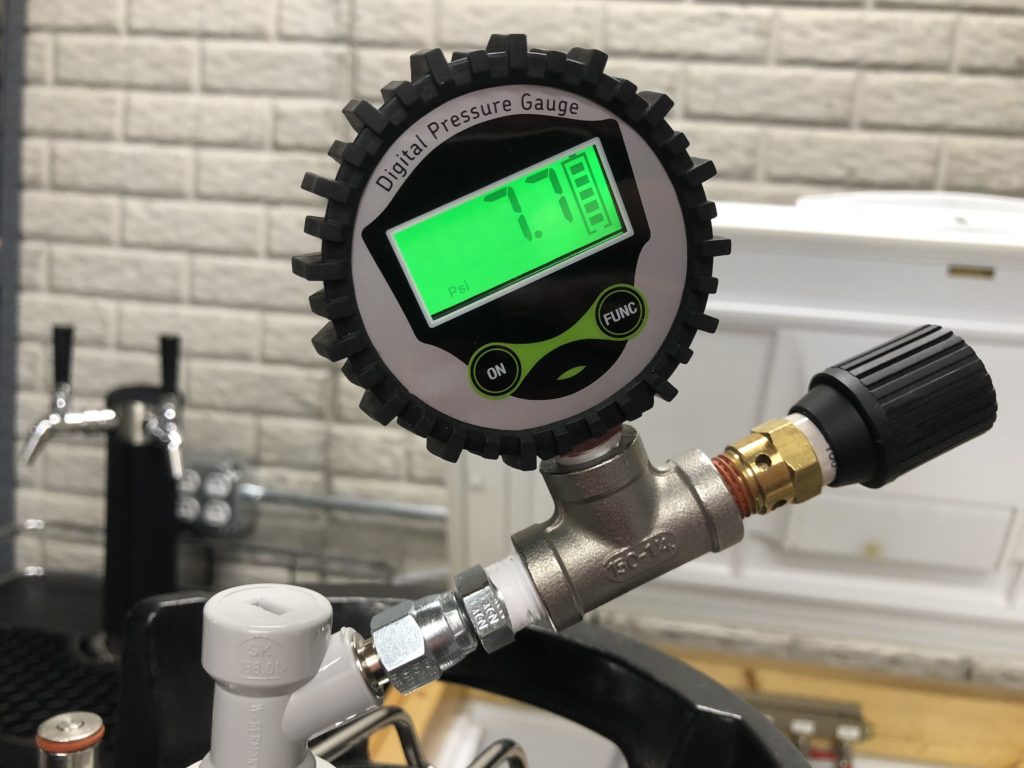
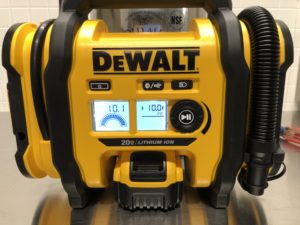 The left screen shows current pressure the right screen shows set pressure. The dial allows you to set pressure and start and stop the inflator.
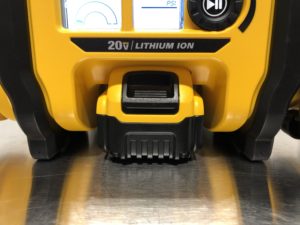 A closeup of an installed 20V MAX Lithium Ion Battery. Helping trim weeds one day and check kegs for leaks the next!
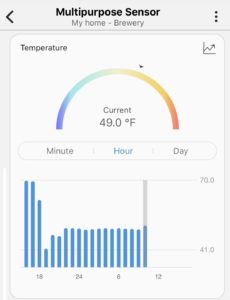
 The Multipurpose Sensor can do several things including monitor temperature
 The other piece to the puzzle was a smart plug to tum the kegerator/freezer/fridge off and on as needed. I used a
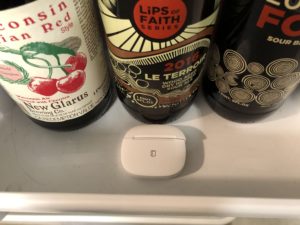

 Initially I had planned to use the open/close sensing feature of this sensor for this project. However, the space between the body of my beer fridge and the door itself was too large. Fortunately, this sensor also detects vibration. That means my setup was as easy as placing this in the door. Depending on your refrigerator, you may be able to use the open/close sensor.
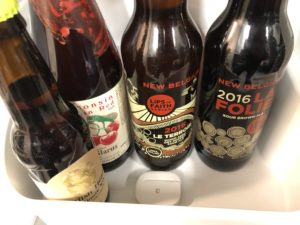
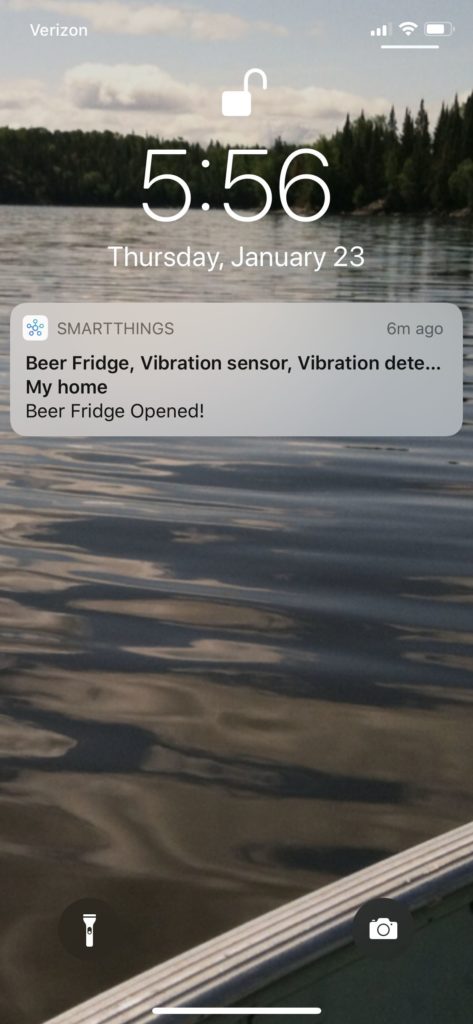 Here you can see an alert that my beer fridge was opened. Setting that up is as easy as setting up an Automation task in SmartThings to send an alert when vibration is detected. I found this to be a fairly reliable system although I did get some false positives. Example, I periodically received notice when the freezer door was opened. Playing with the sensor location and orientation could help with that.
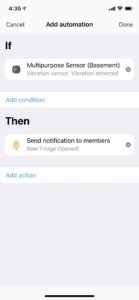 Programming this alert is straightforward. I Just added an automation that is activated when vibration is detected. I chose to “send notification to members” which sends a notification to users of the app. Text message notifications are also an option.
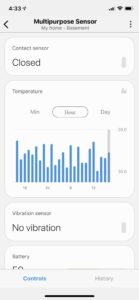 The Multipurpose Sensor also monitors temperatures. Super handy to make sure your kegerator or keezer is doing it’s job.
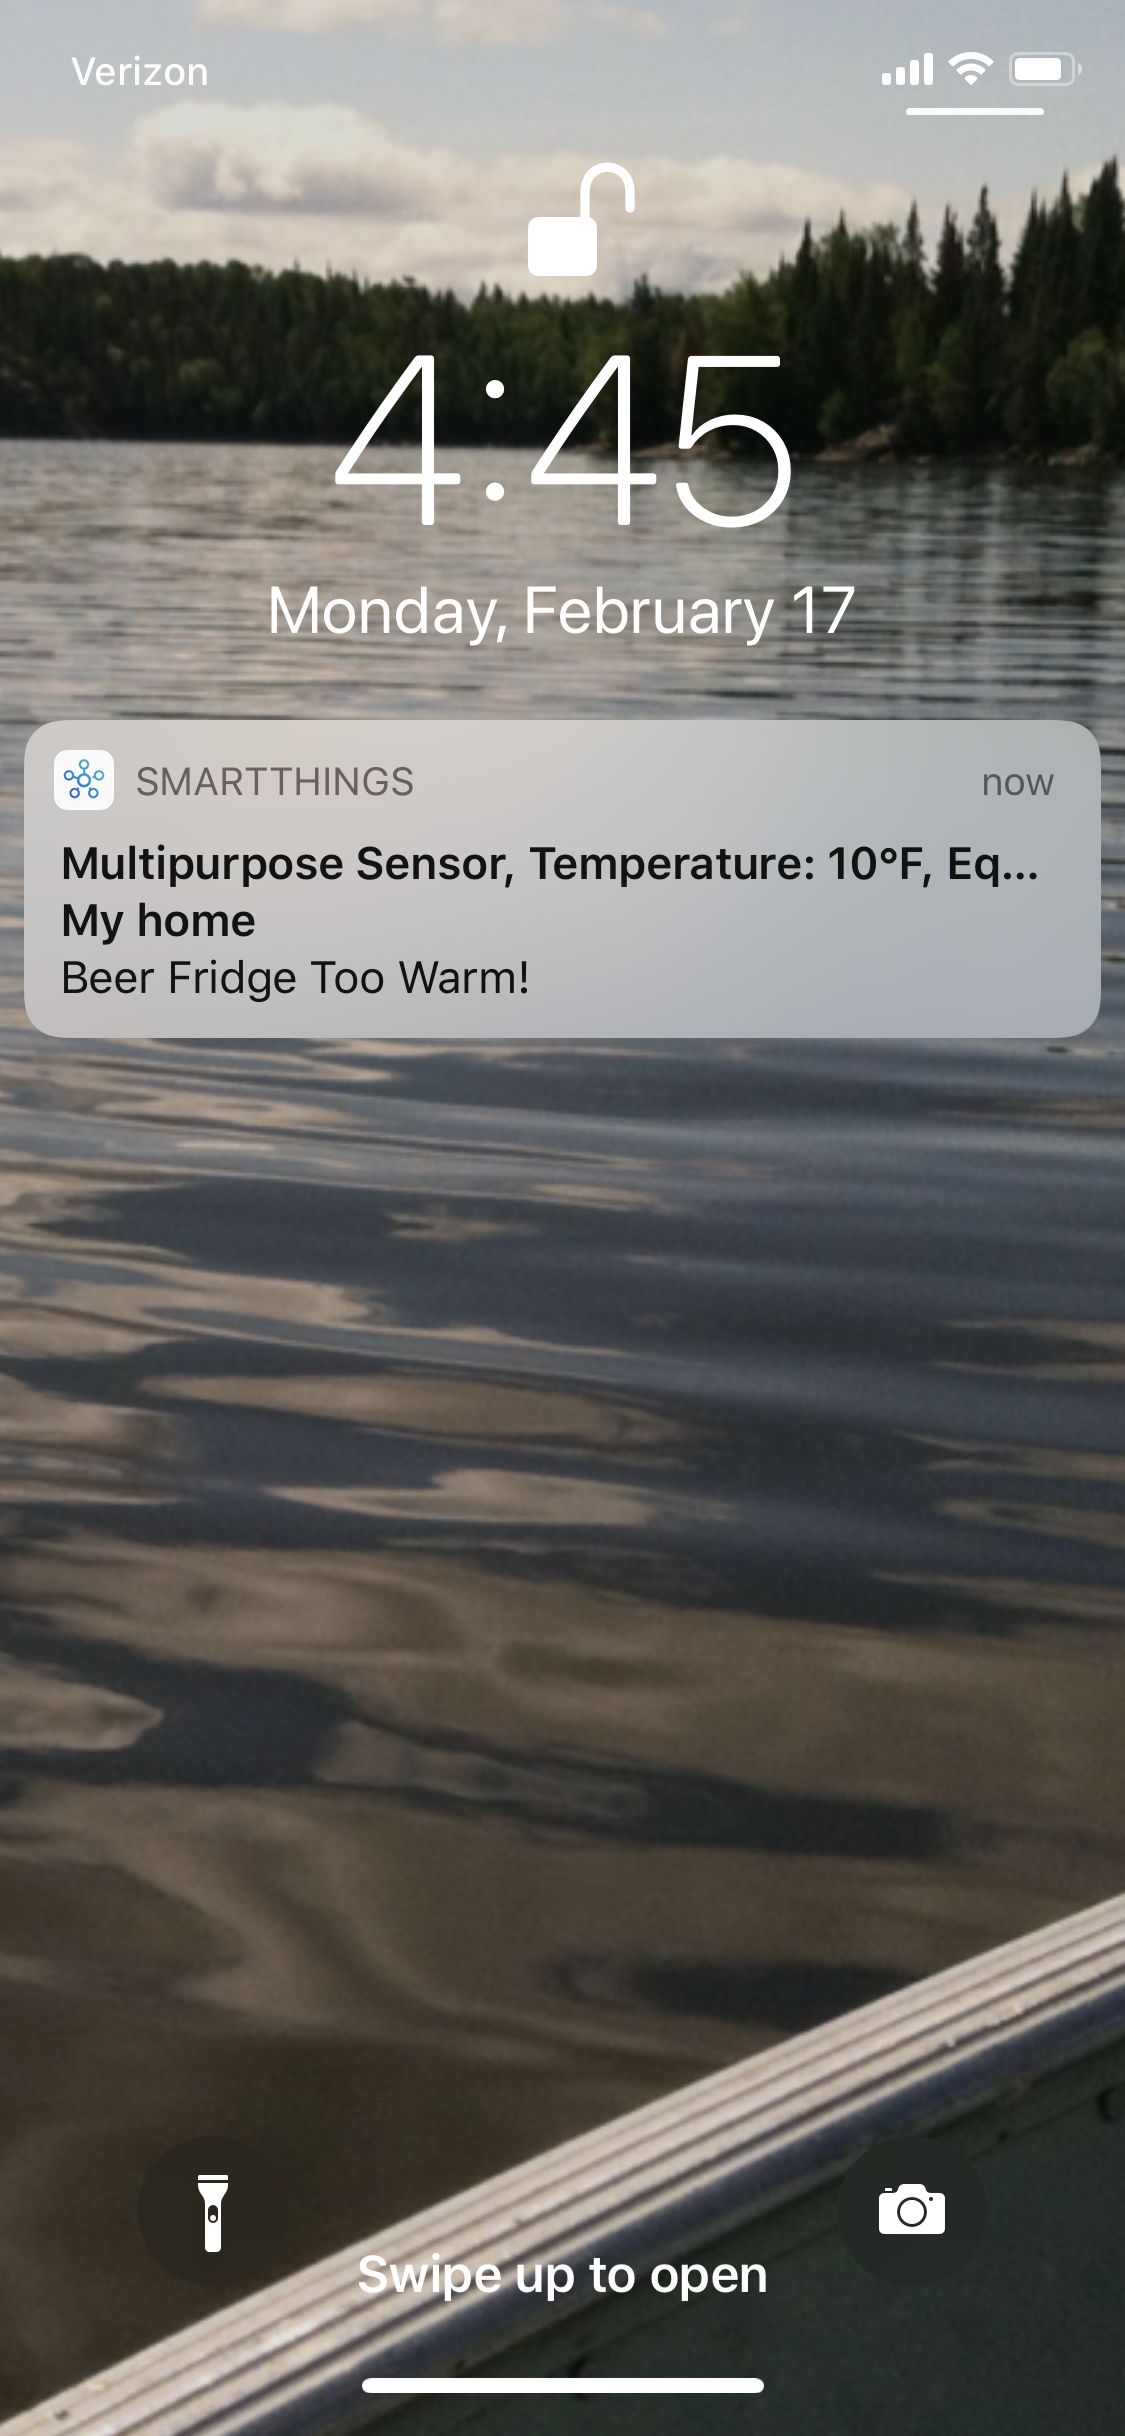 You can also take action based on temperature. This screenshot shows an alert I received telling me my beer fridge was too warm. I set the threshold temp to 10 to trigger this alert as you can see from the notification. That’s just so I could get a screenshot, of course, you’d want to choose a reasonable temp.
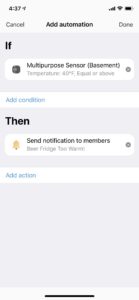 Programming this alert is straightforward. I Just added an automation that is activated when the Multipurpose Sensor goes above a certain set point. In this case, 40 degrees. You could just as easy write another automation to let you know if it gets too cold. I chose to “send notification to members” which sends a notification to users of the app. Text message notifications are also an option.


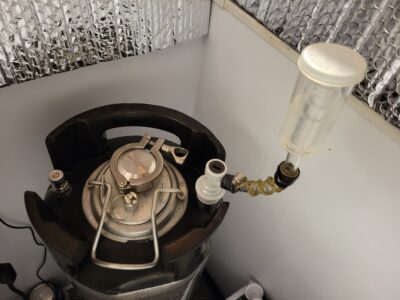
 Here’s Rob Spunding Setup. It’s a Style 3 [See:
 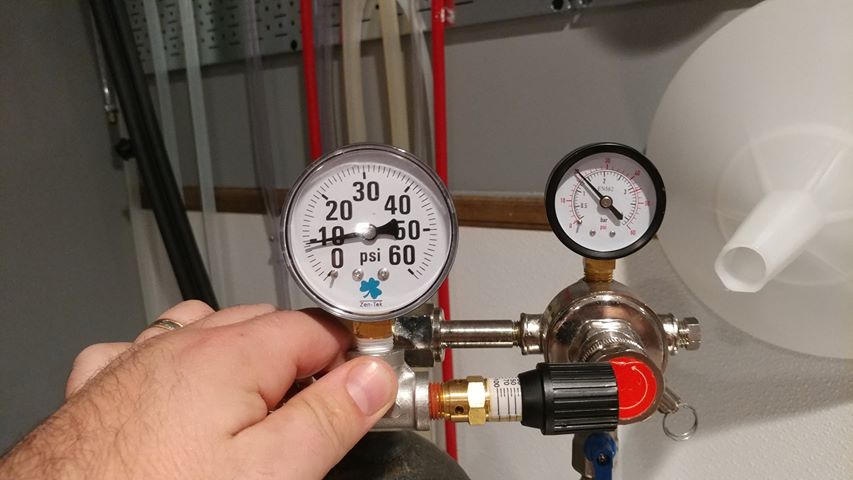 This is a photo of the inline regulator set to about 10 PSI, you can see the primary’s low pressure gauge is set to a higher pressure, 20 PSI.
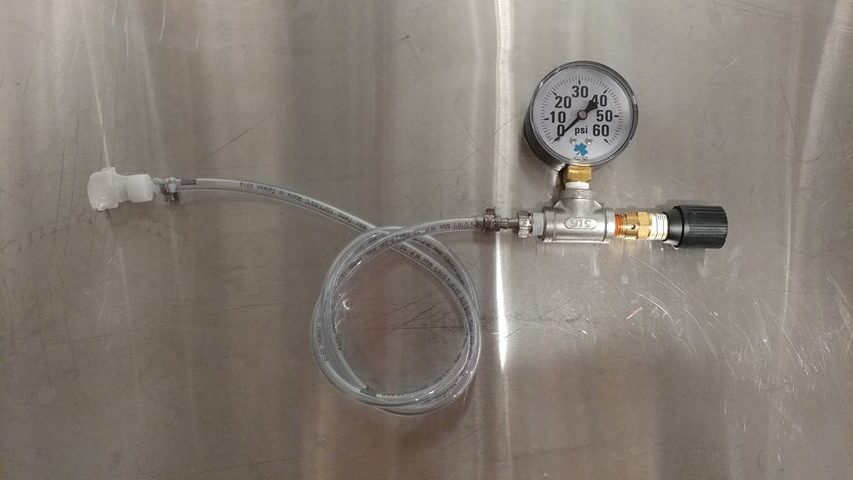
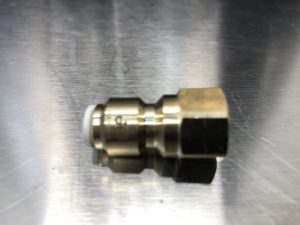 This fitting is a John Guest Female Flare to 1/4″ Tube model # MI4508F4SLF
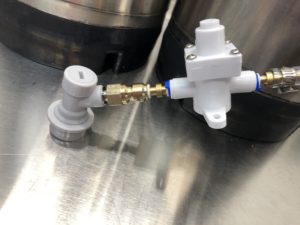 Here’s the fitting on an inline secondary regulator –
 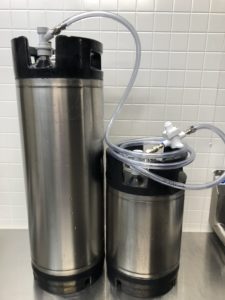 Here’s a setup using this fitting