Setting Economy Inline Regulators with a Spunding Valve

These inline secondary regulators have been on the scene for a little while now. At the price I’ve seen them at, sub $10, they are a bargain. They also add a lot of flexibility to your draft setup, allowing you to easily and cheaply vend using multiple pressures and carbonation levels.
Grab One! via William’s Brewing | via MoreBeer
Note that these are inline secondary regulators. You still need a primary regulator attached to your CO2 tank. The idea is, you set the primary to the highest pressure you will use (without exceeding specifications of any component of your system) and then use these regulators inline (one per line) to fine tune pressure and carbonation [See: Balancing Your Draft System]. As an example, you could set your primary to 25 PSI for faster force carbonation and set each line to a different pressure based on desired carbonation level.
Since this does not have a gauge, you need some sort of a gauge to use for tuning in the pressure. The gauge doesn’t have to stay connected, just while you’re setting the regulator. This is a perfect application of a Spunding Valve [See: Build a Spunding Valve! – How and Why]
Thanks to Facebook Friend Rob [8 Ways to Connect with HBF] for his process for setting the Inline Secondary using a Spunding Valve and for the photo walk through!
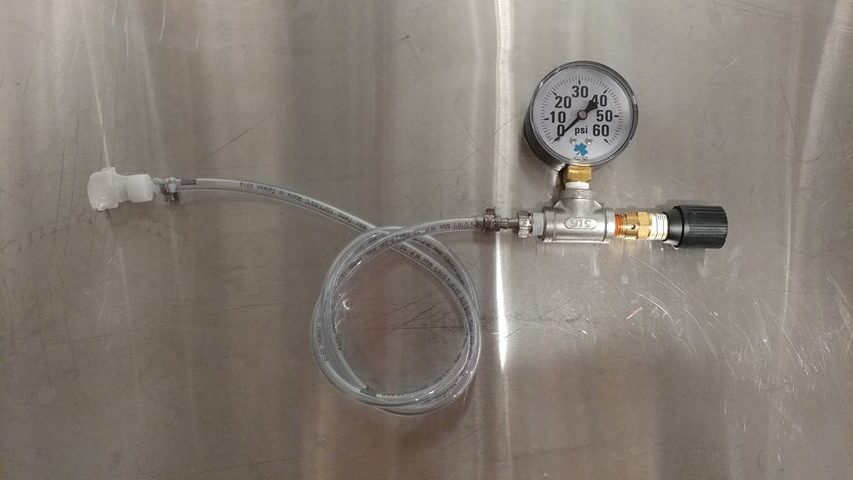
 Here’s Rob Spunding Setup. It’s a Style 3 [See: Build a Spunding Valve! – How and Why] that features a barb, tubing and a valved QD from MoreBeer
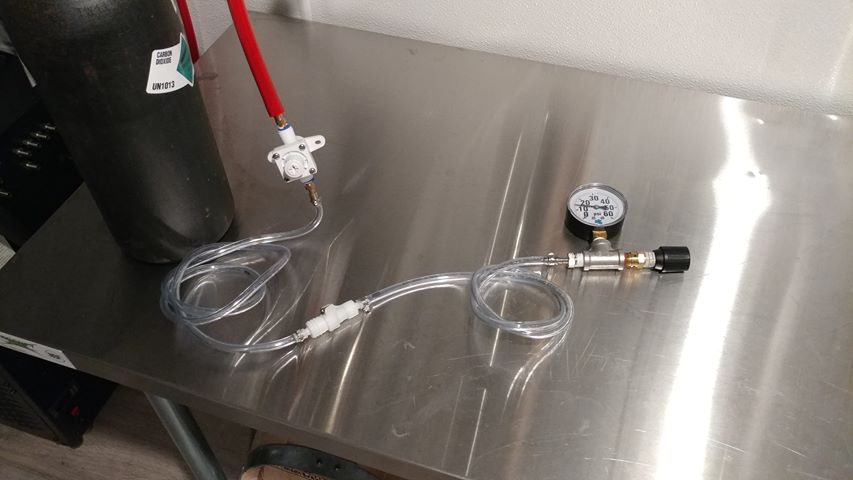
 This is the assembly hooked up to the low pressure side of his CO2 regulator. Rob starts with the Spunding Valve set to it’s highest pressure to prevent CO2 from venting.
With everything hooked up, you have two options:
- Start with the inline regulator fully closed and very slowly work your way up until the Spunding Valve gauge shows reads your desired pressure.
- Start with the inline regulator wide open and slowly work your way down, venting the Spunding Valve as needed until you work your way back down to your desired pressure.
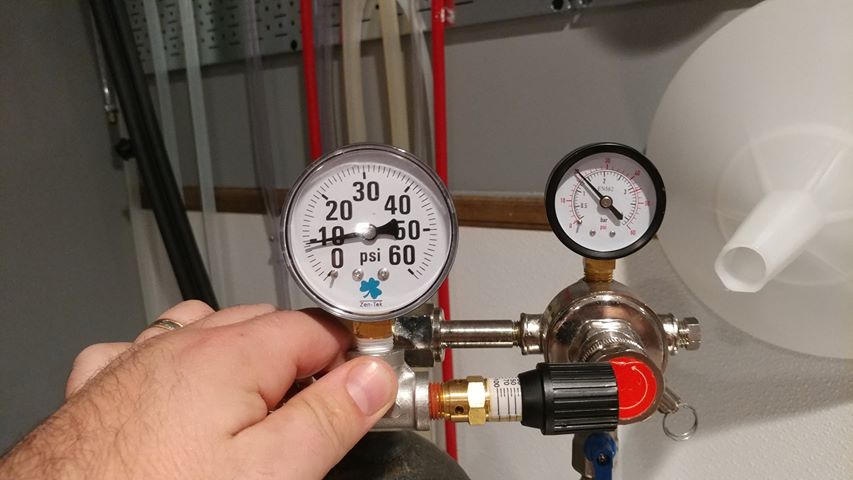
 This is a photo of the inline regulator set to about 10 PSI, you can see the primary’s low pressure gauge is set to a higher pressure, 20 PSI.
This technique has some great benefits. First, many homebrewers already have a Spunding Valve. This process requires little to no extra gear for Spunding Valve owners. Second, this process should use very little CO2. I’ve been adjusting this using a keg. I’ve used an entire empty 2.5 gallon ball lock and also the head space of a keg. Either way, that amounts to more CO2 compared with Rob’s procedure.
Grab The Gear:
- Inline Secondary via William’s Brewing
- Inline Secondary via MoreBeer | Beer & Gas Quick Connect – In-Line Set (With Shut-Off)
Related Posts:
- Build a Spunding Valve! – How and Why
- Hands on Review: William’s Brewing Inline CO2 Regulator
- Balancing Your Draft System
Also: Kegerator Tips & Gear | Keg Repair Part #s | Recent Keg Finds
Our Top Draft Resources This post may contain affiliate links. We may make a commission when you use our links. This will never cost you extra. Thank you for supporting Homebrew Finds! Make sure the components you use are compatible and rated for your intended application. Contact manufacturer with questions about suitability or a specific application. Always read and follow manufacturer directions. hack:setinlinereg
Very cool! Thanks for posting. However, I got lost with this part: “Second, this process should use very little CO2. I’ve been adjusting this using a keg. I’ve used an entire empty 2.5 gallon ball lock and also the head space of a keg. Either way, that amounts to more CO2 compared with Rob’s procedure.” Can you clarify?