
Rebuilding & Reconditioning Homebrew Kegs!
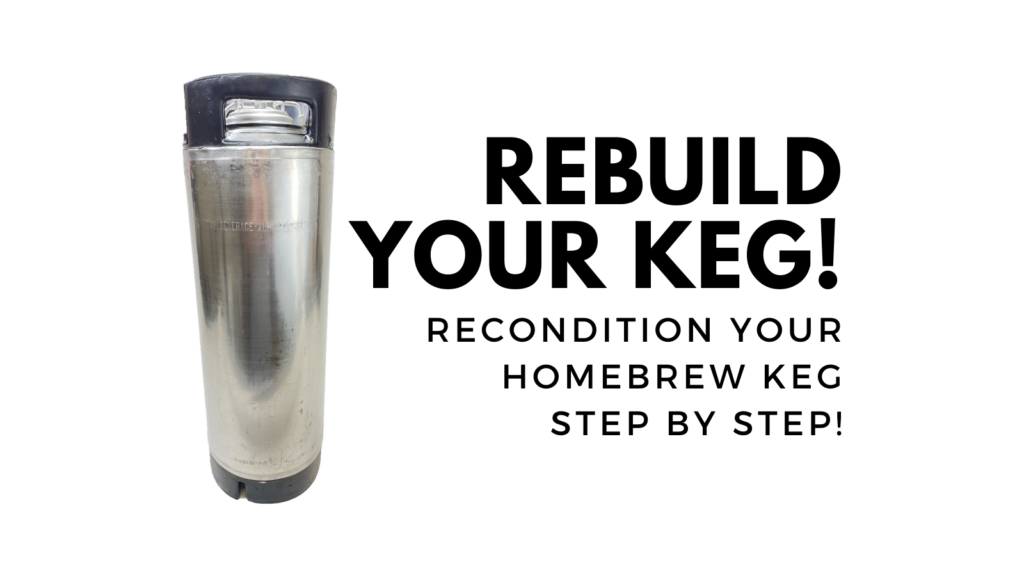
This post will walk you through rebuilding your homebrew keg, step by step. From de-labeling to cleaning to replacing warn out parts.
Limited Time Deal on Keg Parts

For a short time, Valuebrew is discounting bulk food grade o-rings (including custom colors),
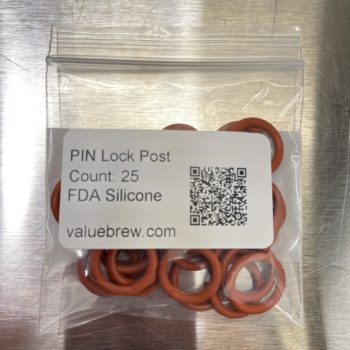
Valuebrew offers a lineup of food grade keg replacement o-rings in bulk quantities. Most offerings are silicone or EPDM with one Buna-N option. Everything they carry is food grade, more info below. They have some unique offerings like bulk pin lock size post o-rings, replacement universal poppet o-rings, bulk internal QD o-rings and color coded Blue and Green post o-rings
Some of these offerings are detailed in our Keg Rebuild How-To
Save an EXTRA 15% when you spend $30 or more on select items at Valuebrew. This stacks on top of existing discounts. Includes…
- Bulk Food Grade O-rings
- Custom Color Post O-Rings
- FDA Rated EPDM O-Rings!
- Universal Poppets
- Ball Lock Jumpers
- DuoTight Compatible Gear
Use coupon code vbdeal with an order of $30 or more to get the deal
What Does Reconditioned/Rebuilt Mean?
The short answer is probably… nothing. I think reconditioned/rebuilt/refurbished are basically synonyms and there is no standard definition for any of these terms.
Here are the different definitions I’ve seen from different retailers via their offerings:
The short answer is probably… nothing. I think reconditioned/rebuilt/refurbished are basically synonyms and there is no standard definition for any of these terms.
Here are the different definitions I’ve seen from different retailers via their offerings:
- The keg is untouched, but is in okay shape and holds pressure. In this case, reconditioned means… the keg works.
- The keg has had been tested and had faulty parts replaced. In this case, reconditioned means, we did the minimum to get the keg working.
- All o-rings have been replaced and any faulty parts have been replaced. In this case, reconditioned means… reconditioned.
- All o-rings have been replaced and any faulty parts have been replaced and the keg has been cleaned. In this case reconditioned means reconditioned and cleaned.
Examples of Keg Conditions from MoreBeer
- Used Cornelius Keg – Ball Lock 5 gal. KEG430 – these are raw kegs – no cleaning, no rebuild, sold “as is” < This is the keg offering that’s rebuilt in this post
- Rebuilt Used Corny Keg – Ball Lock 5 gal. KEG420 – cleaned and checked in house. Gaskets are replaced as needed. Pressure checked and guaranteed to hold pressure.
- Used Corny Keg Ball Lock 5 gal. – Pressure Tested KEG423 – these are cleaned, sanitized, de-labeled and refurbished by a third party service. Pressure checked and guaranteed to hold pressure.
The takeaway is that it’s important to read descriptions when it comes to reconditioned/rebuilt/refurbished kegs. The post walks through a complete rebuild process.
Limited Time Keg Deals!
A Look at the Un-rebuilt, Raw Keg
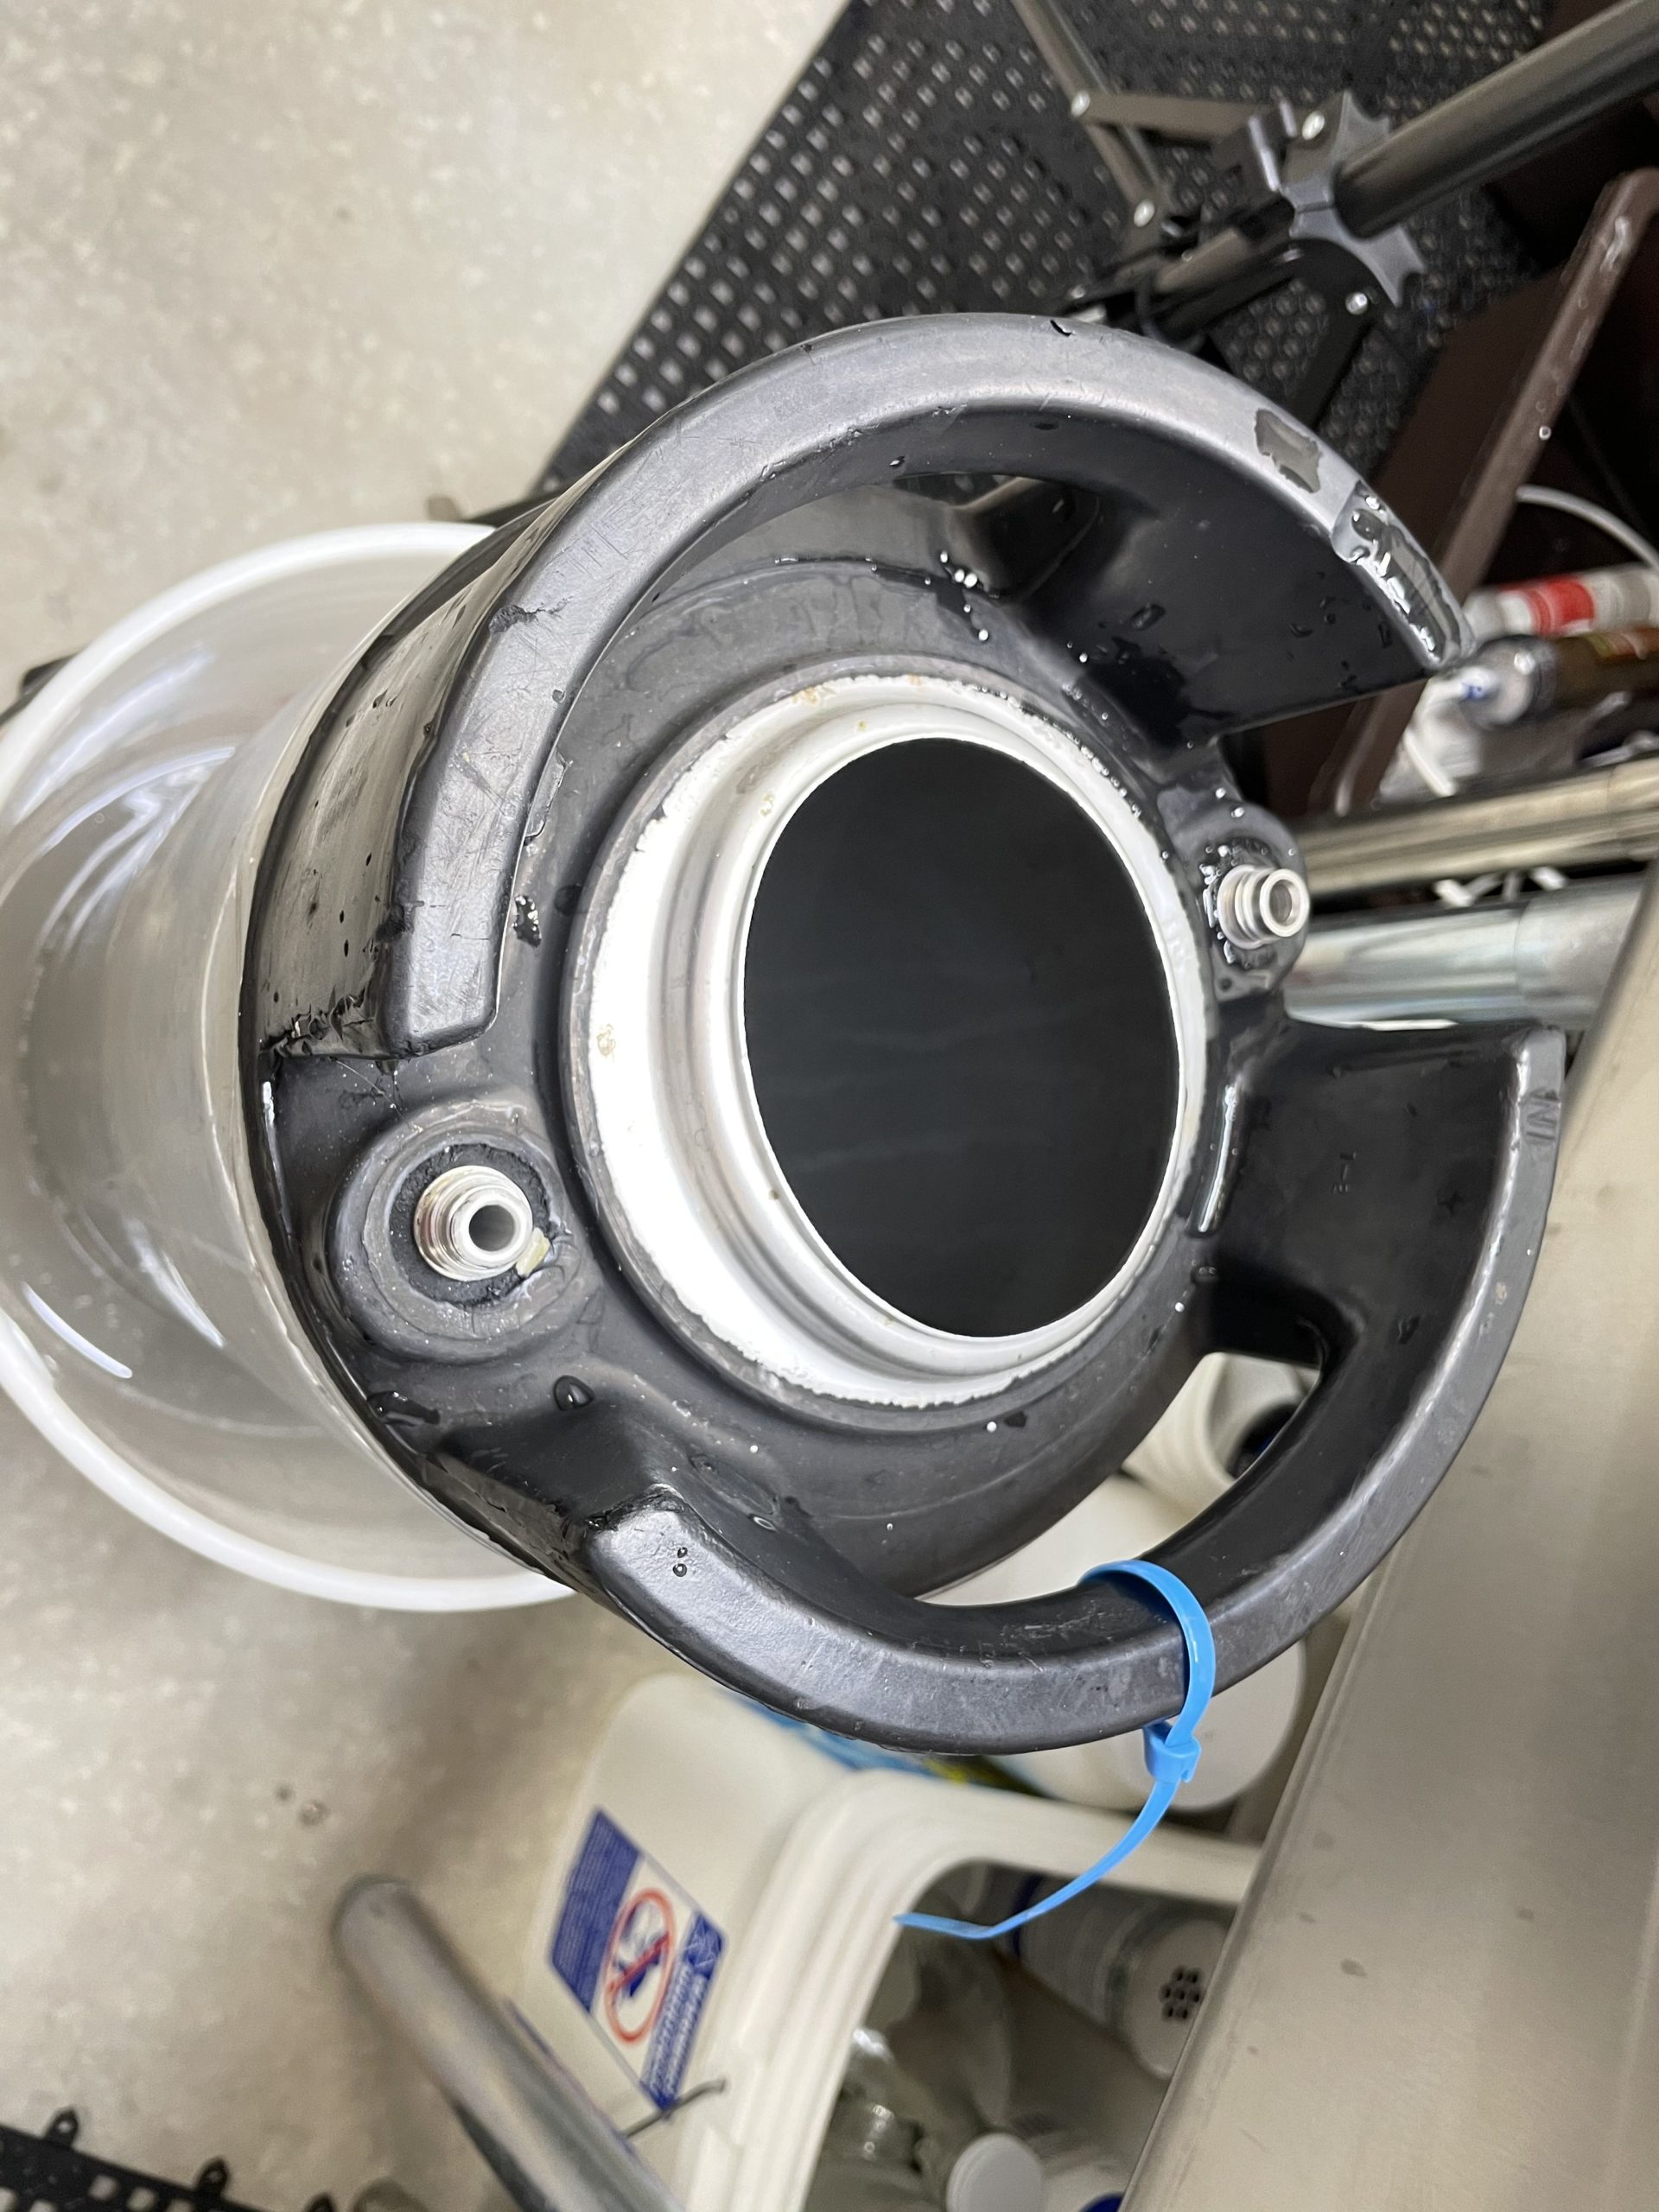
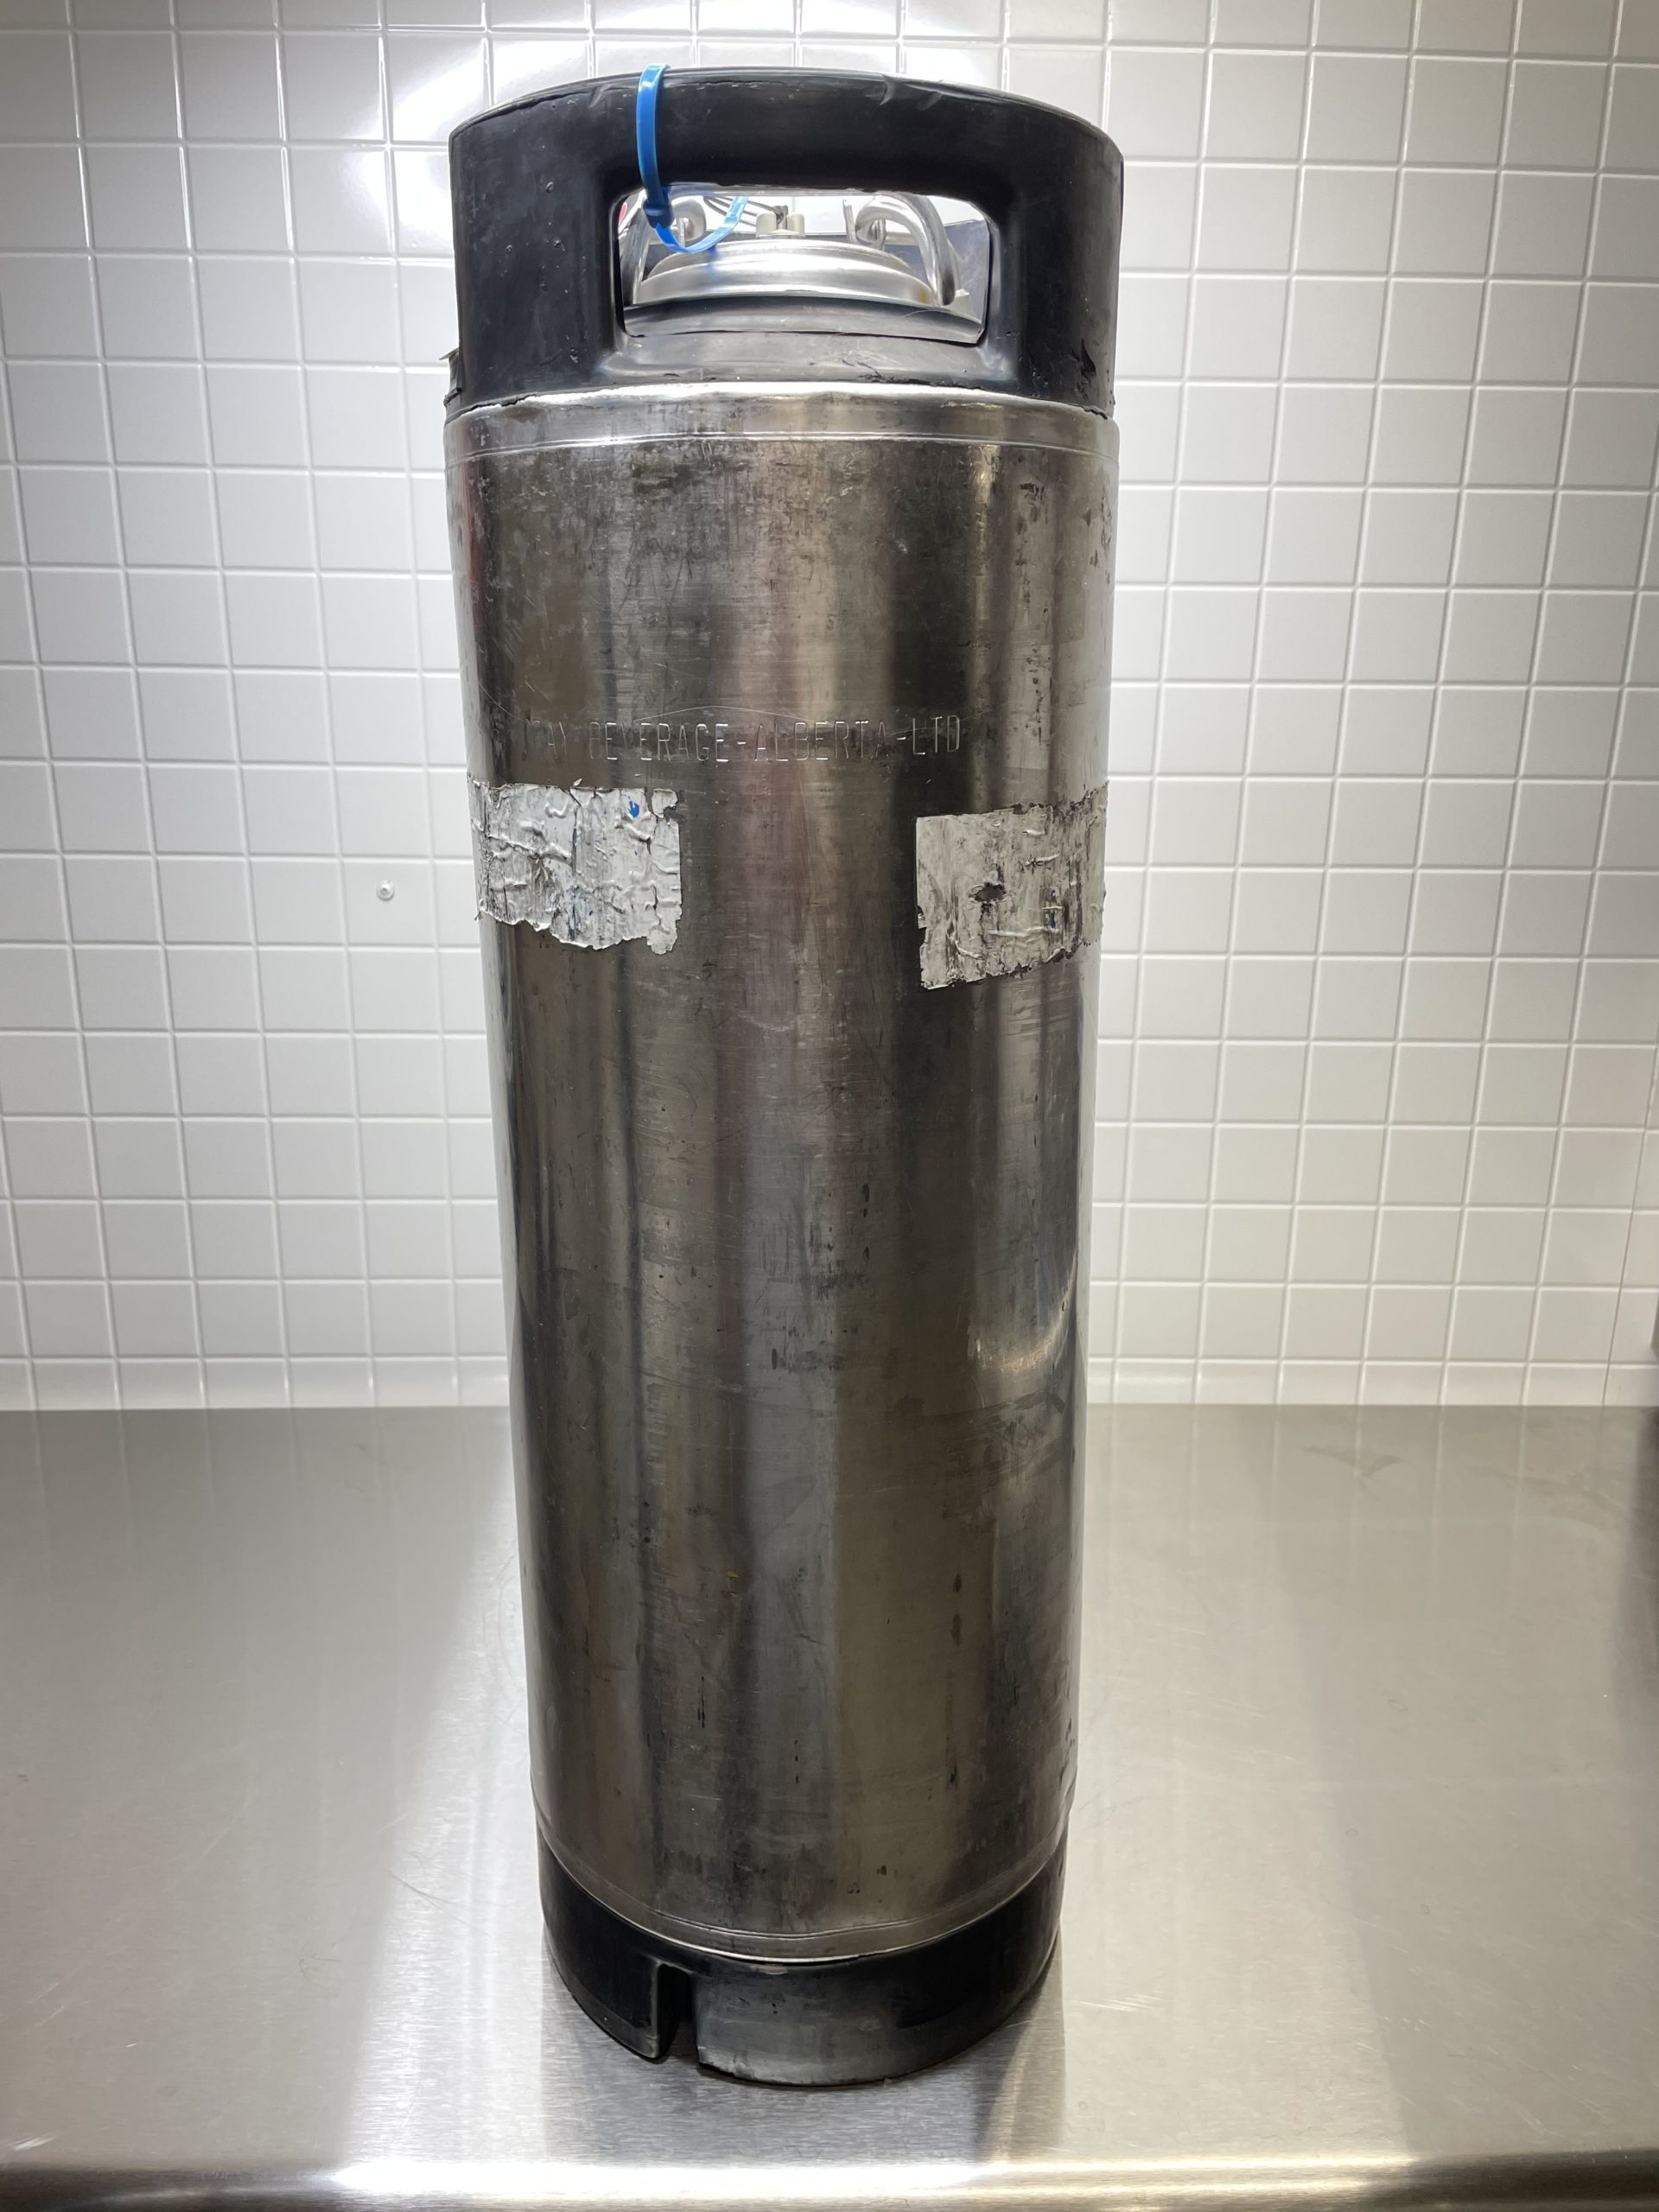 The keg is in good shape, but quite dirty and in need of some TLC
 Looking at the top of the lid o-ring, you can see that it’s really grimy. No surprise, this is a raw keg.
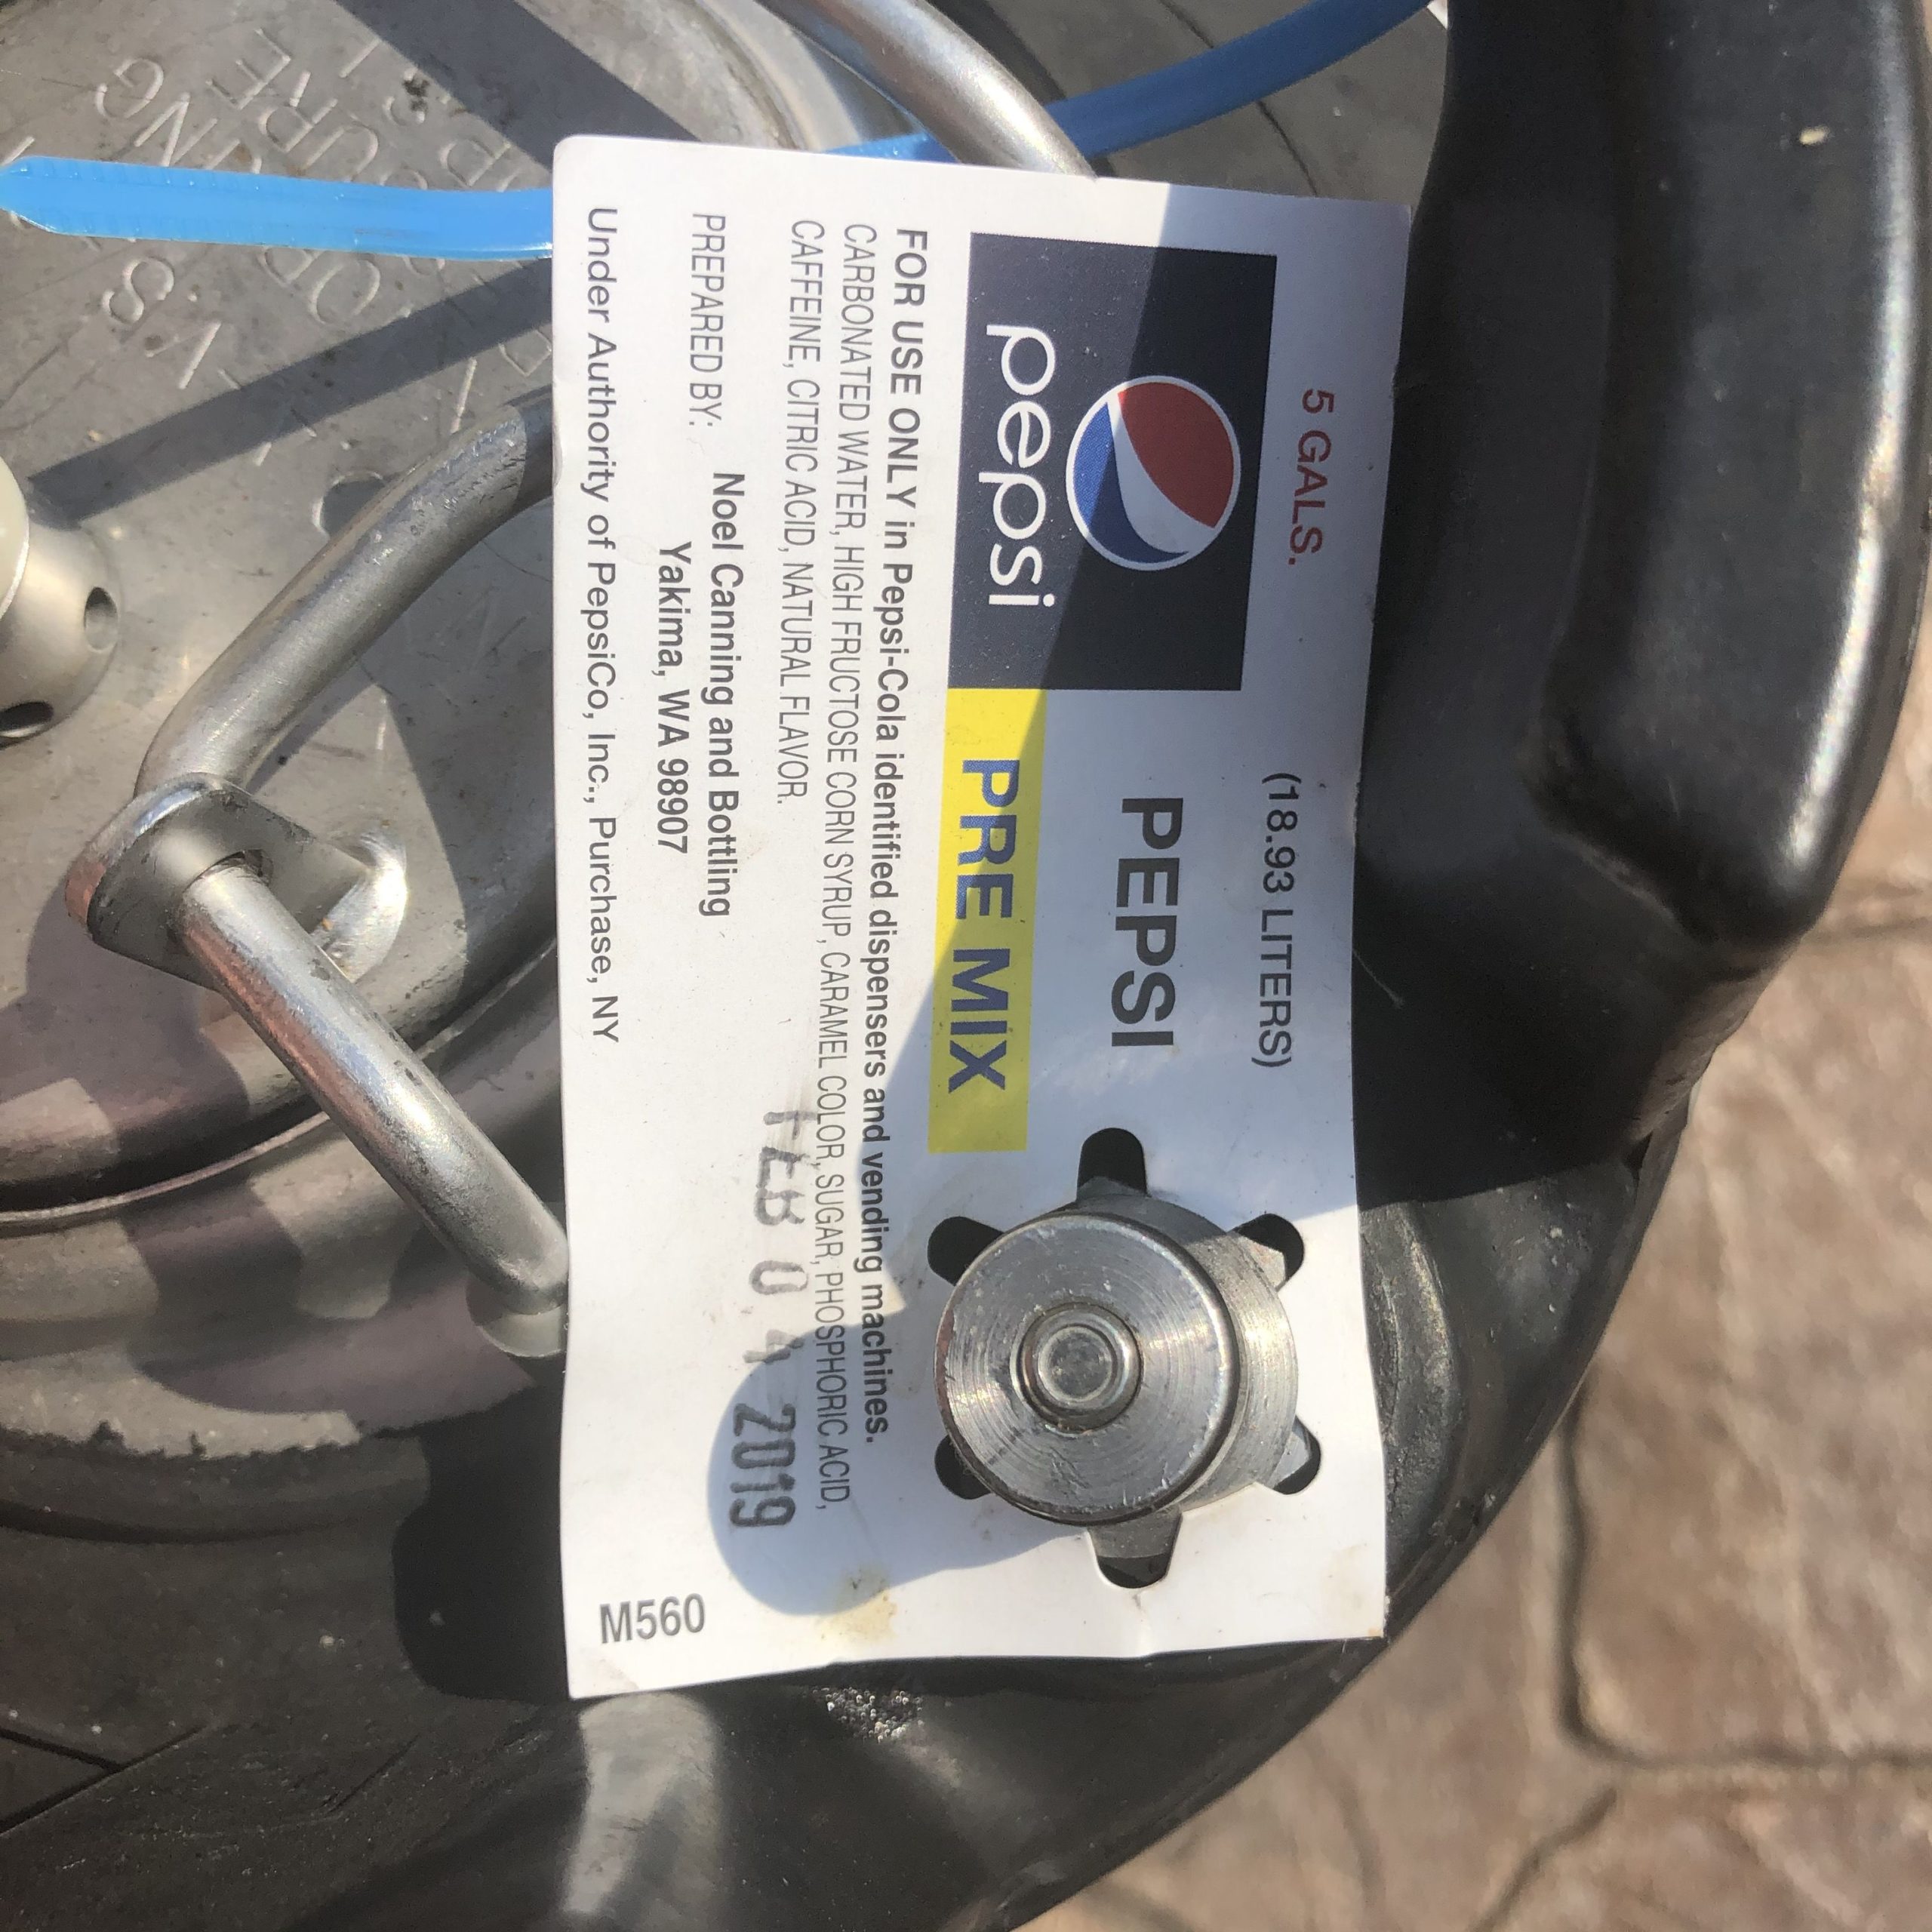 Commercial ball lock kegs are usually used by Pepsi distributors. Hey, look what we have here. This holds Pepsi pre-mix. Side note… Pin lock kegs are usually used by Coke Distributors. See: Ball Lock vs Pin Lock
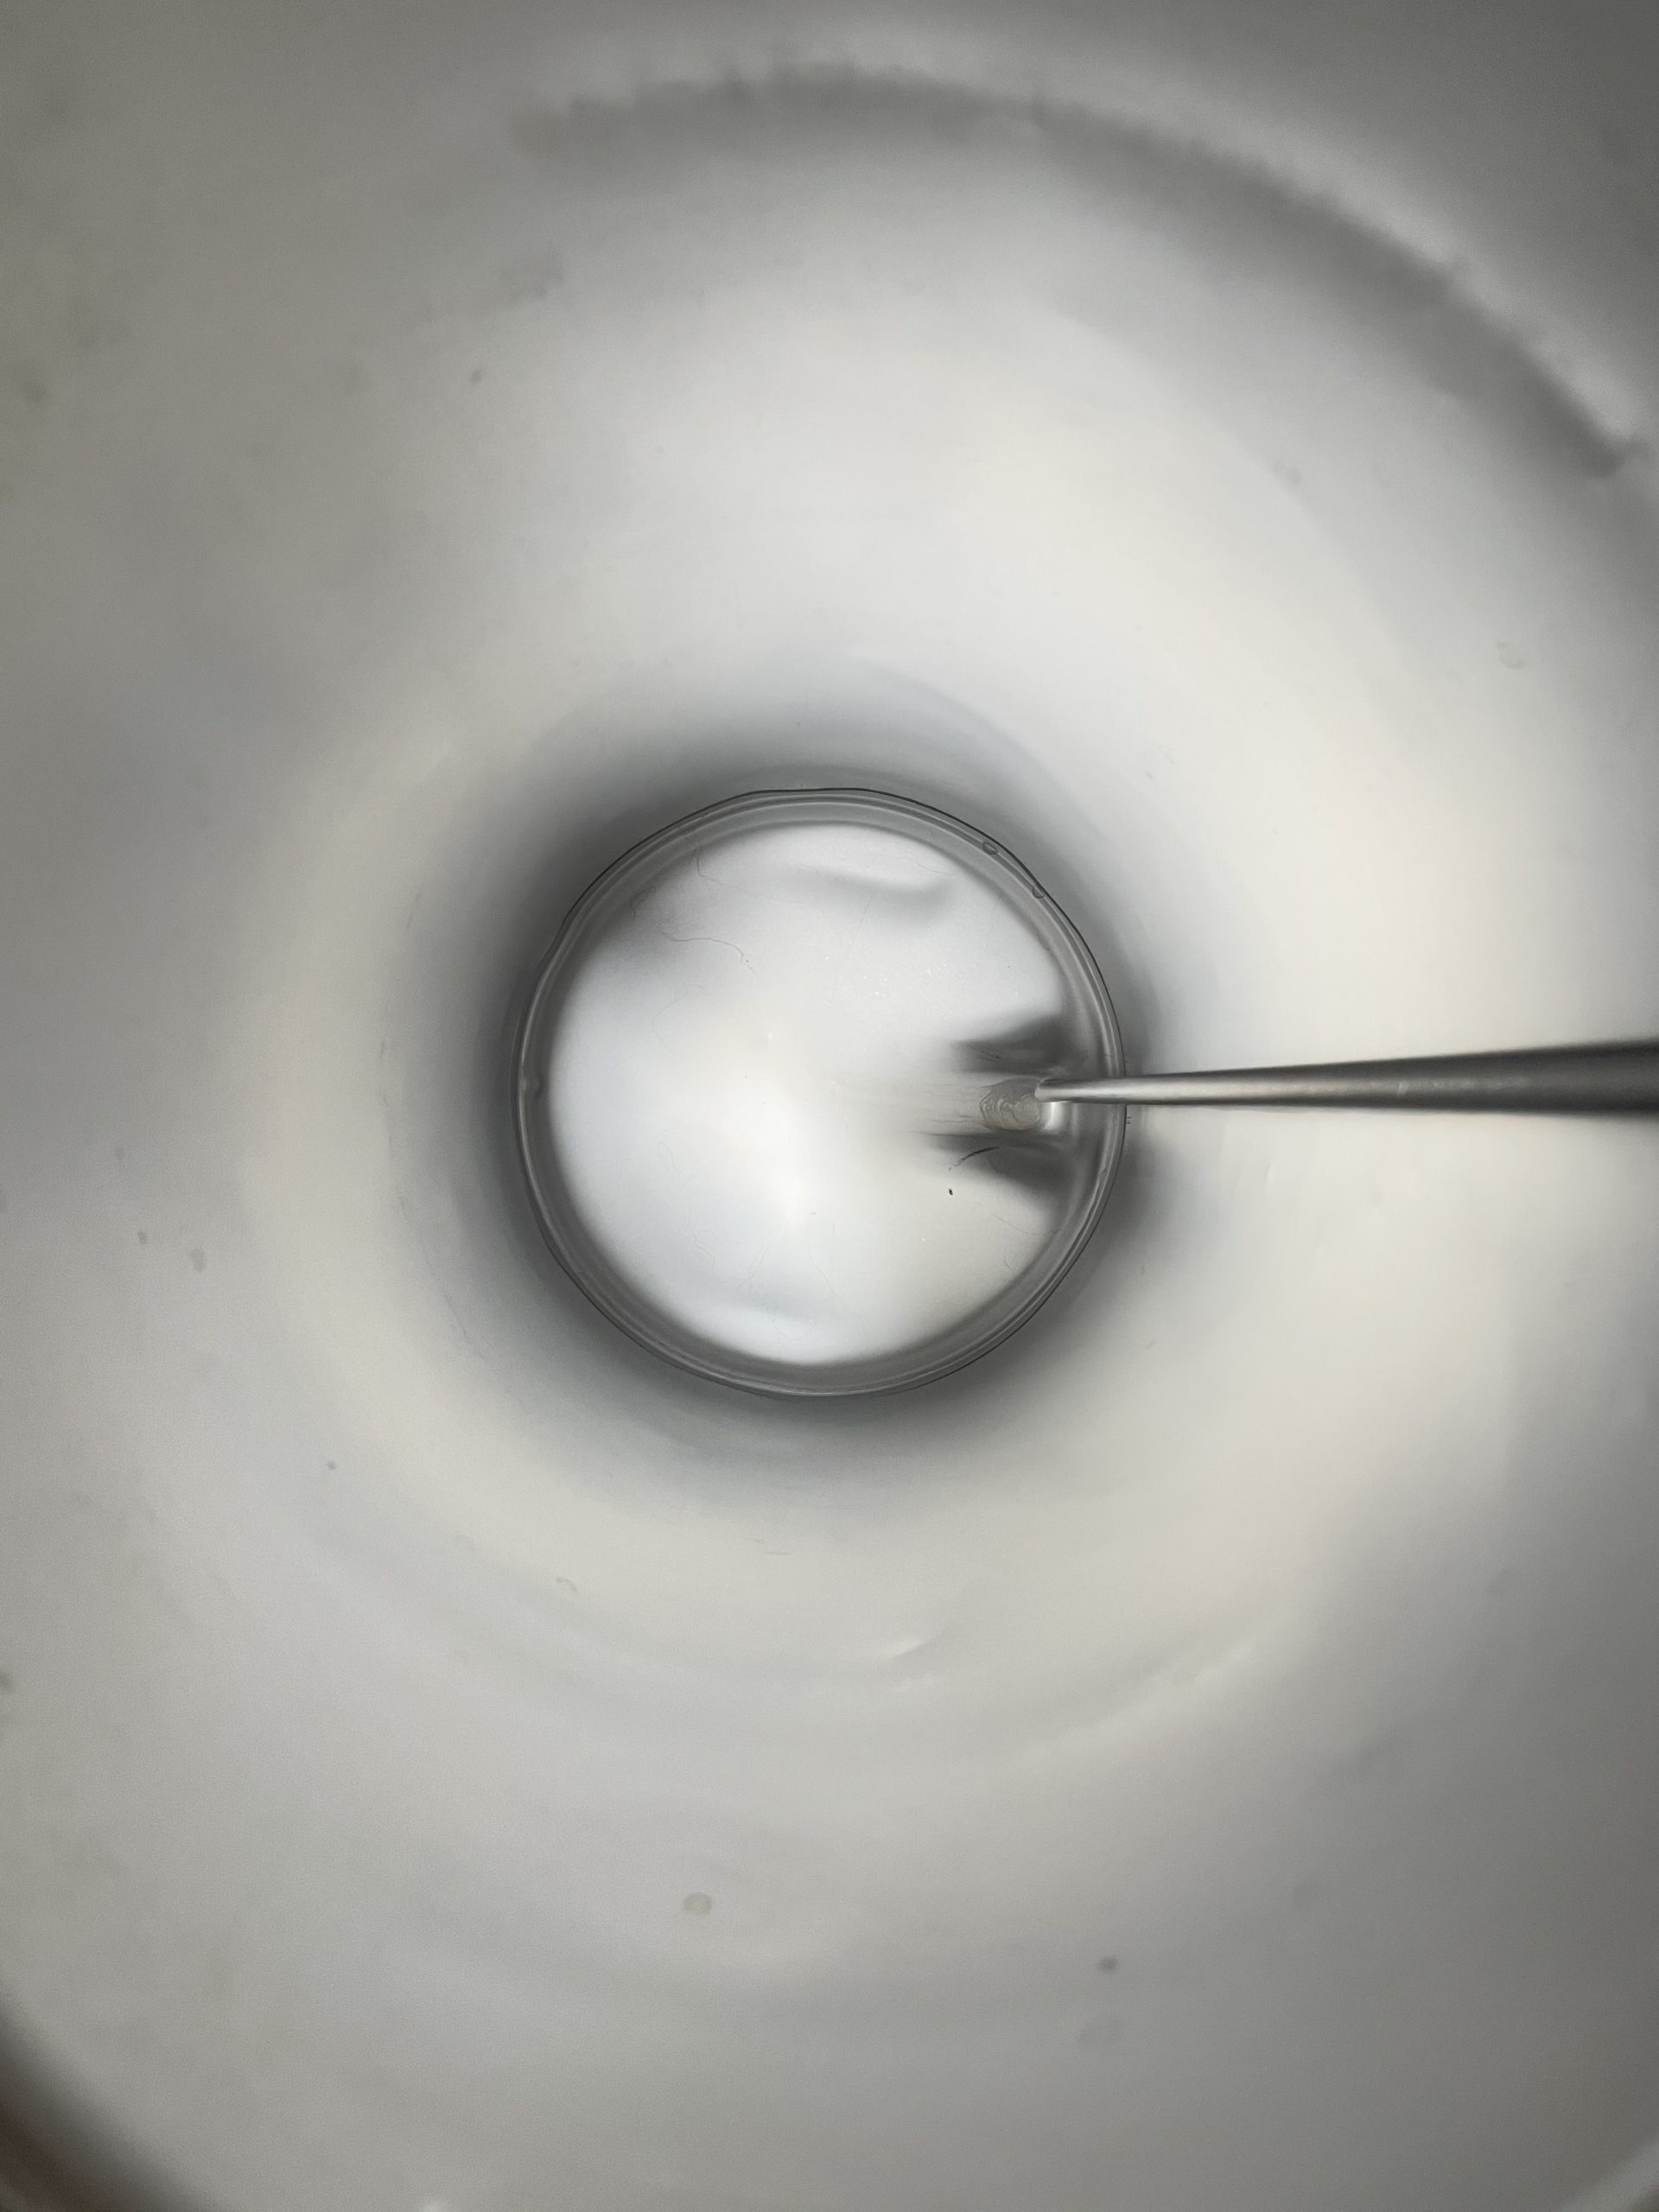
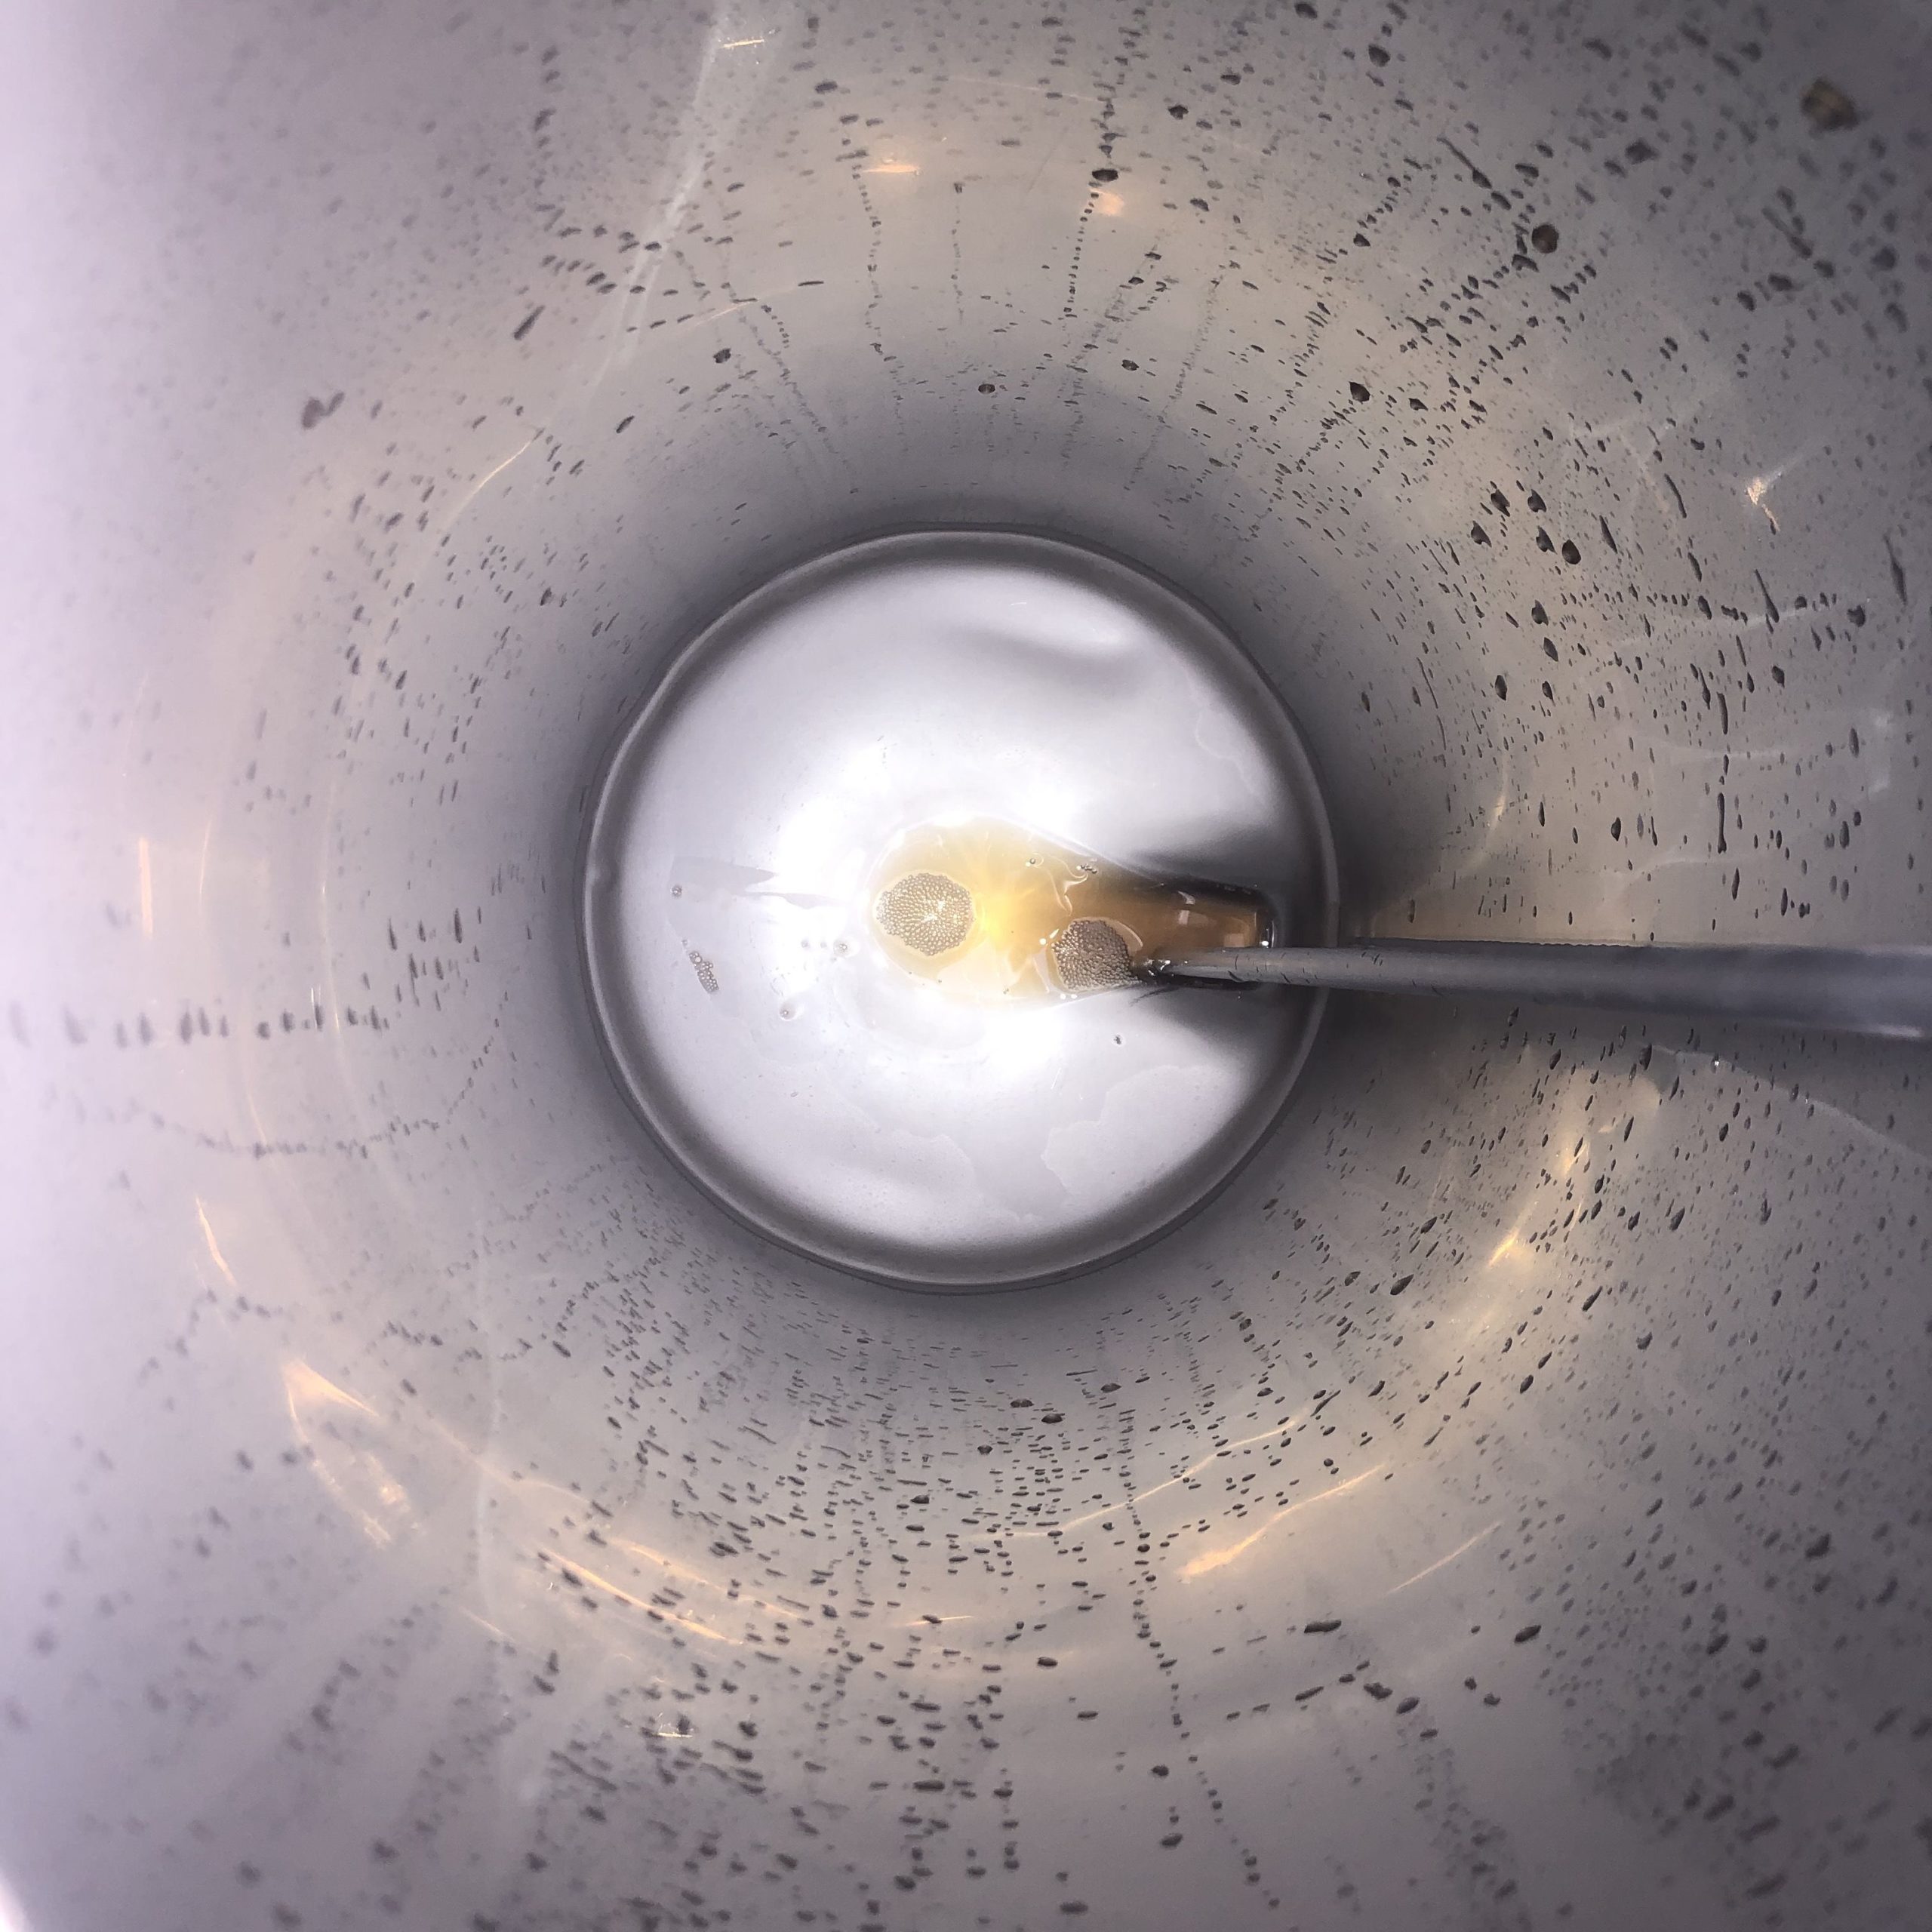 A look inside the keg. Hey… it’s Pepsi! Like a lot of non-rebuilt kegs, this has soda in it.
Removing Keg Labels… A Trick That Makes it Easy!
 As you can see from this photo, this keg had one sticker on it. It mostly goes around the keg. Trying to peel this sticker off yielded… 0 positive progress. It was stuck on the keg, presumably for years. The actual printing itself is completely warn away. I was only able to get very small bits of this sticker off.
 I wrapped my Fermwrap heater around the keg and let it warm up for several minutes. The idea here is to warm up the sticker and the old adhesive to make sticker removal easier.
 After just a few minutes of warming the sticker came up very easily.
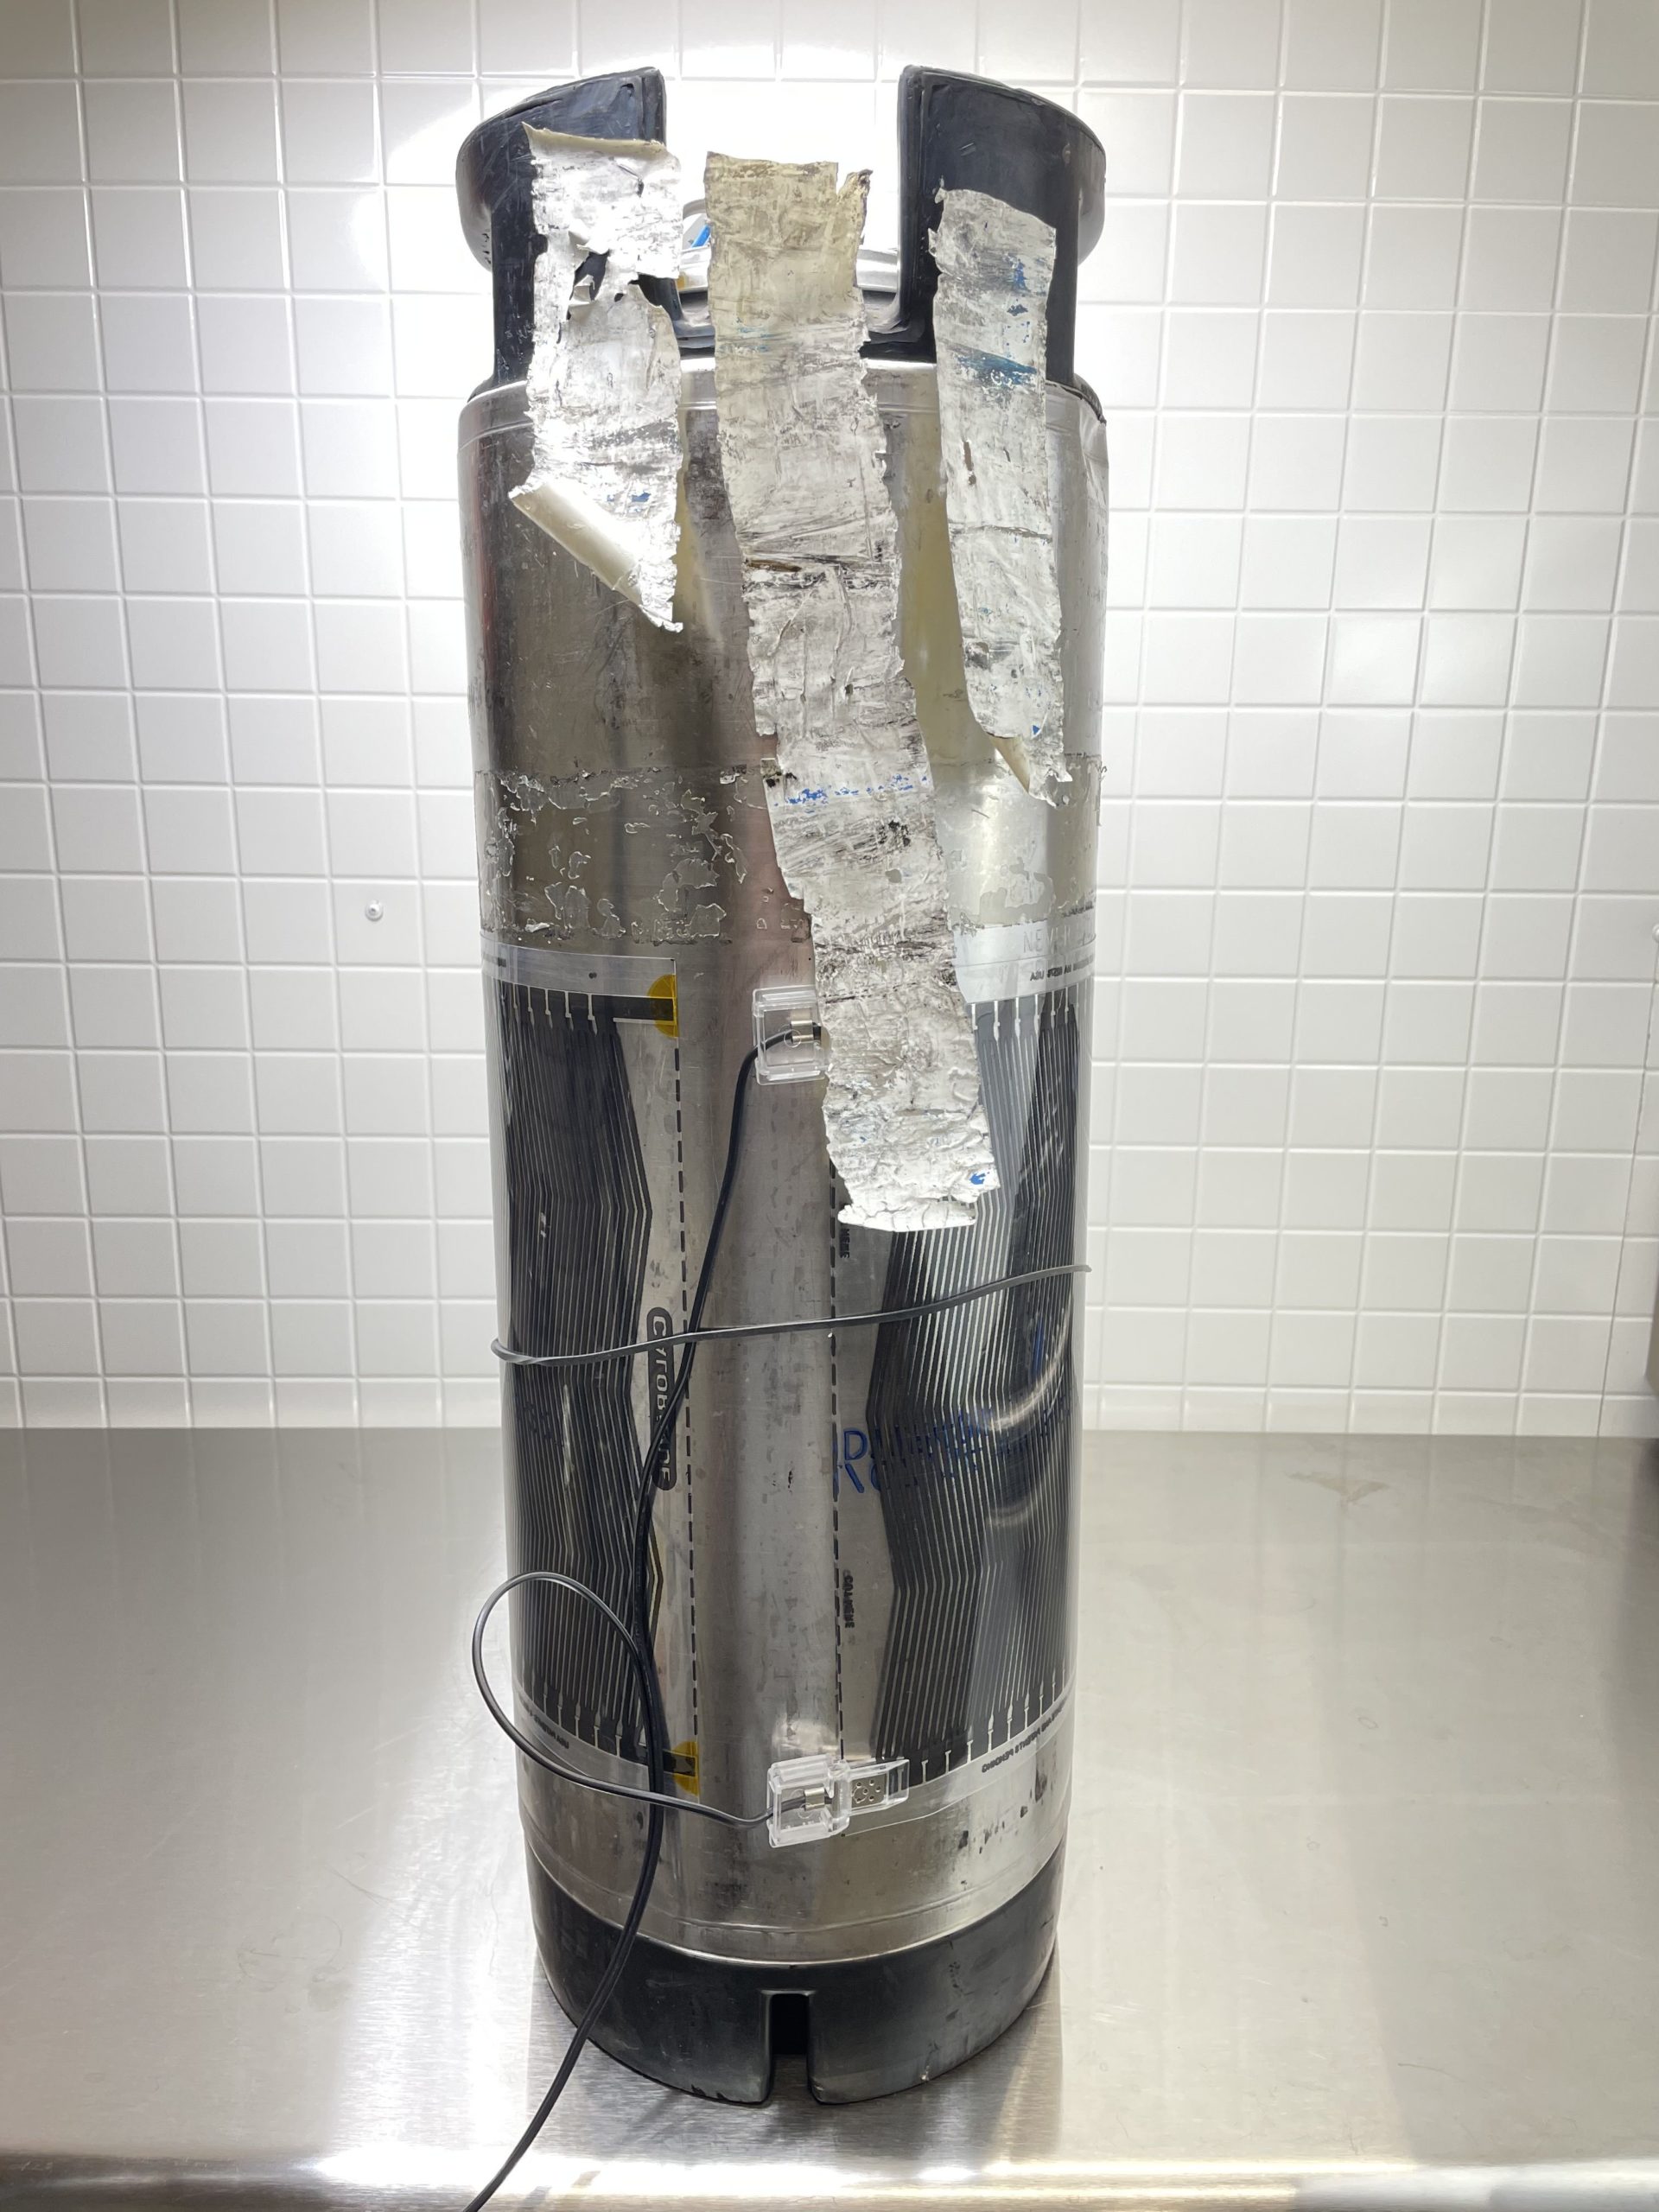 A minute later, I had the entire sticker removed in three chunks.
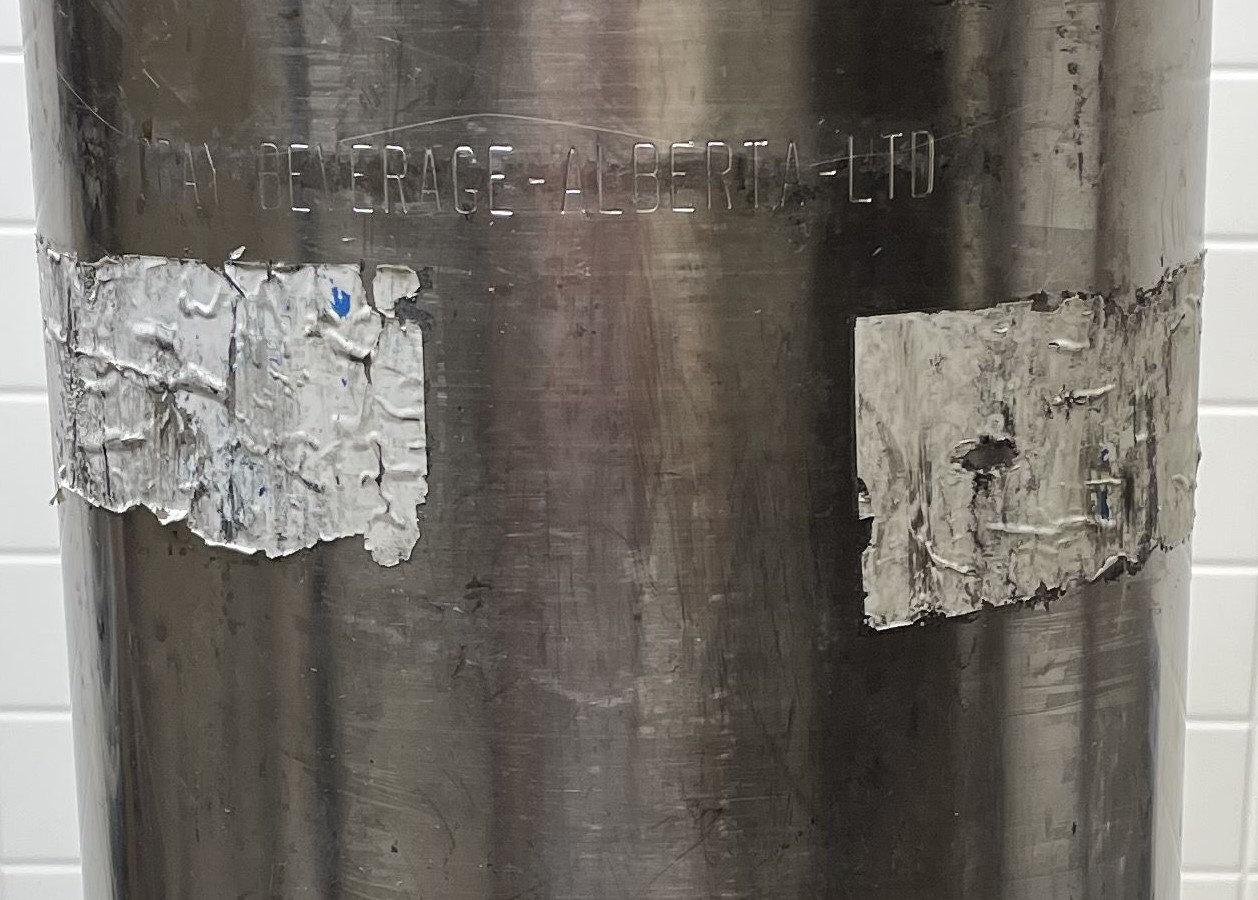
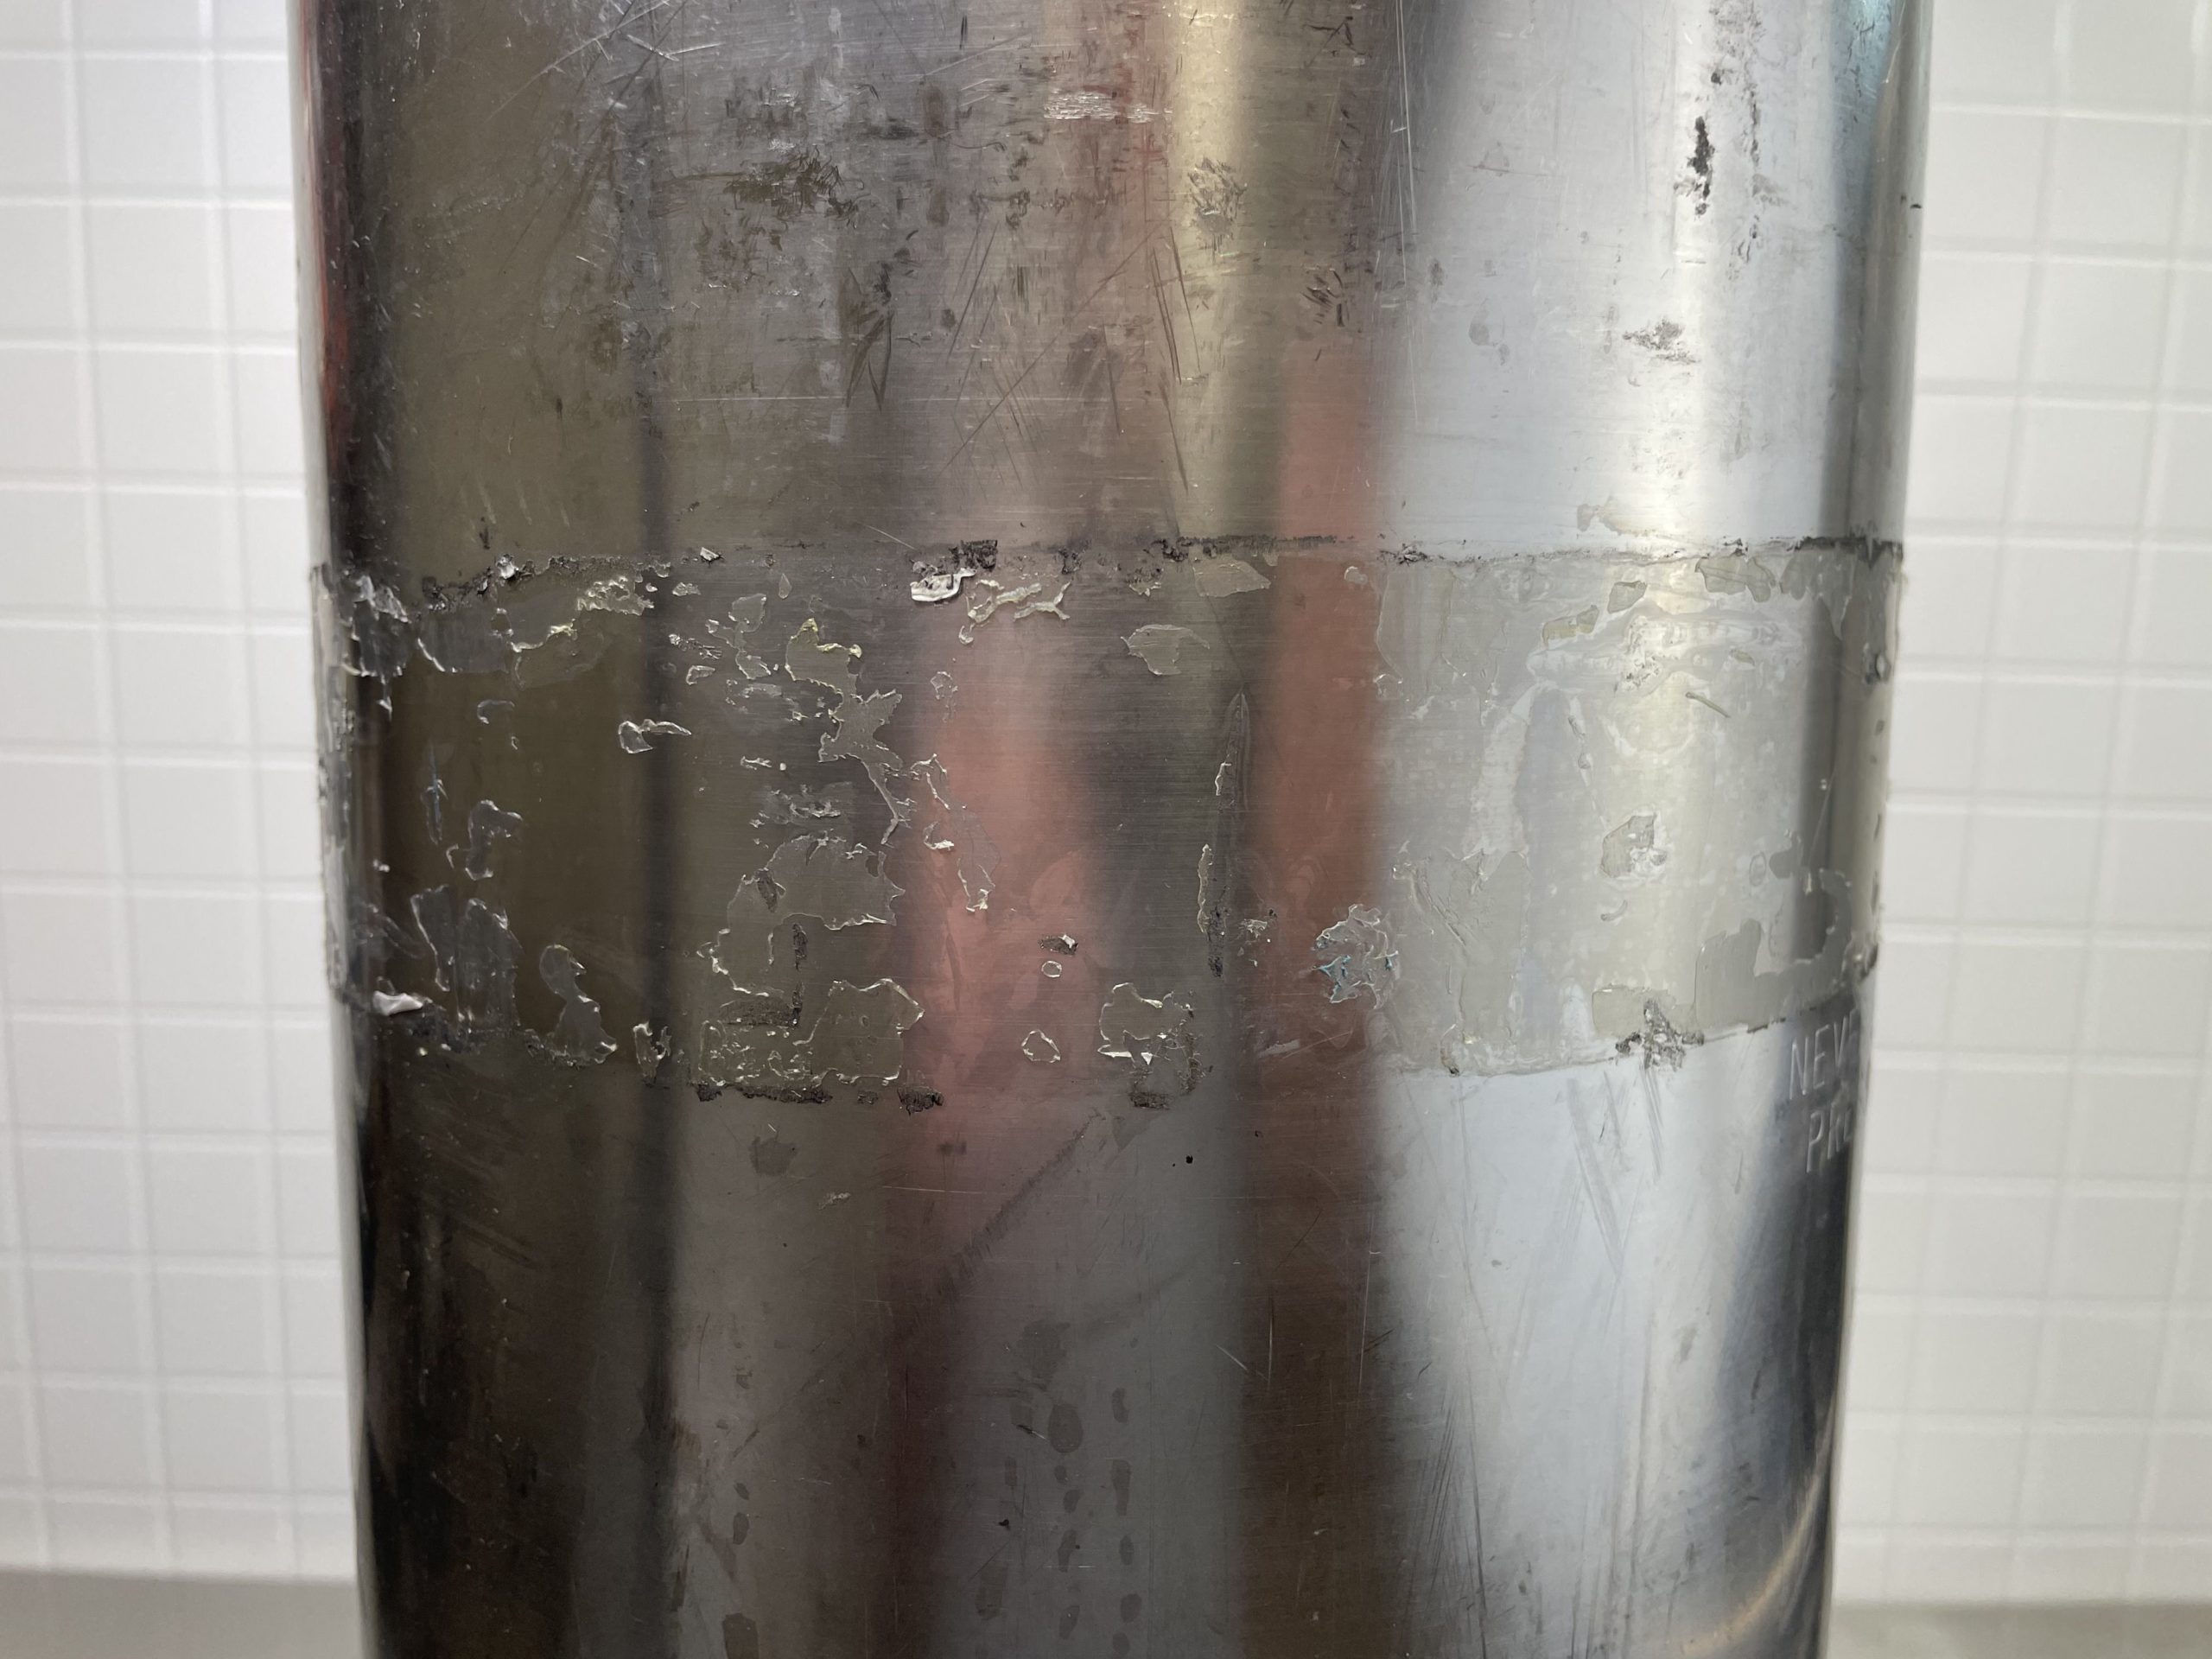 The only thing that remains of the sticker is residual adhesive
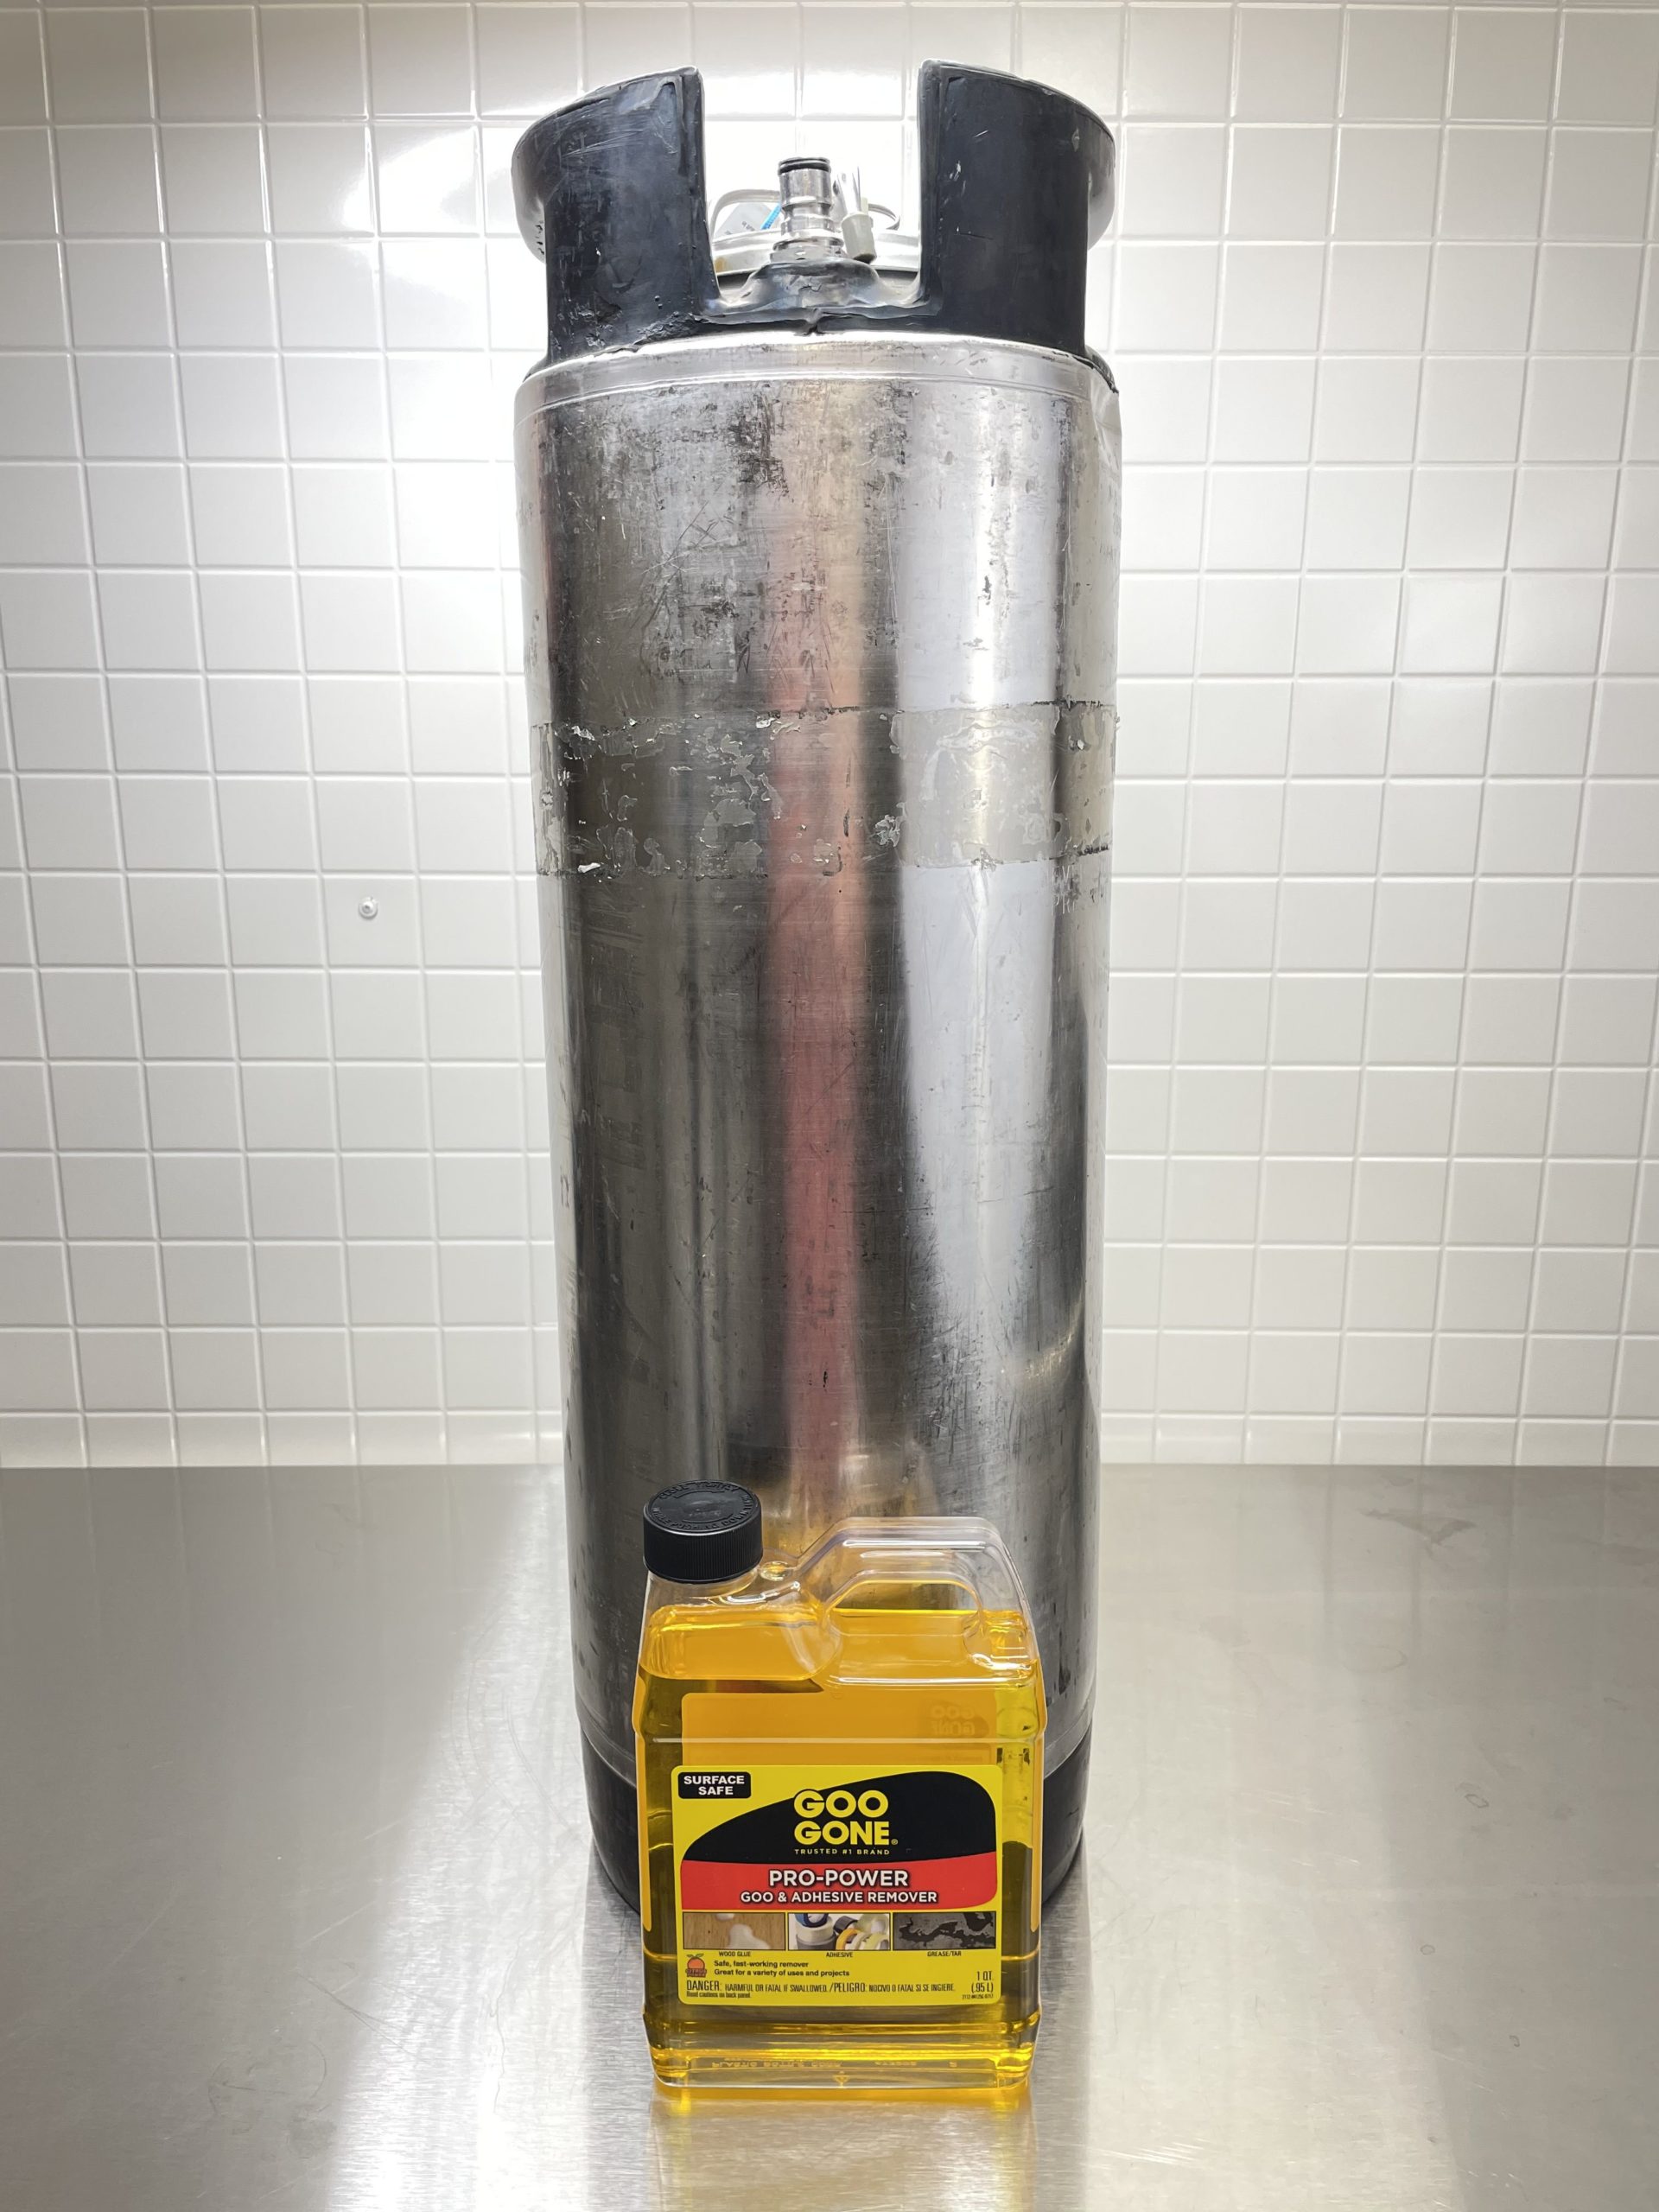 Goo Gone to the rescue. In this case it’s Goo Gone Pro-Power, but the regular stuff should work too.
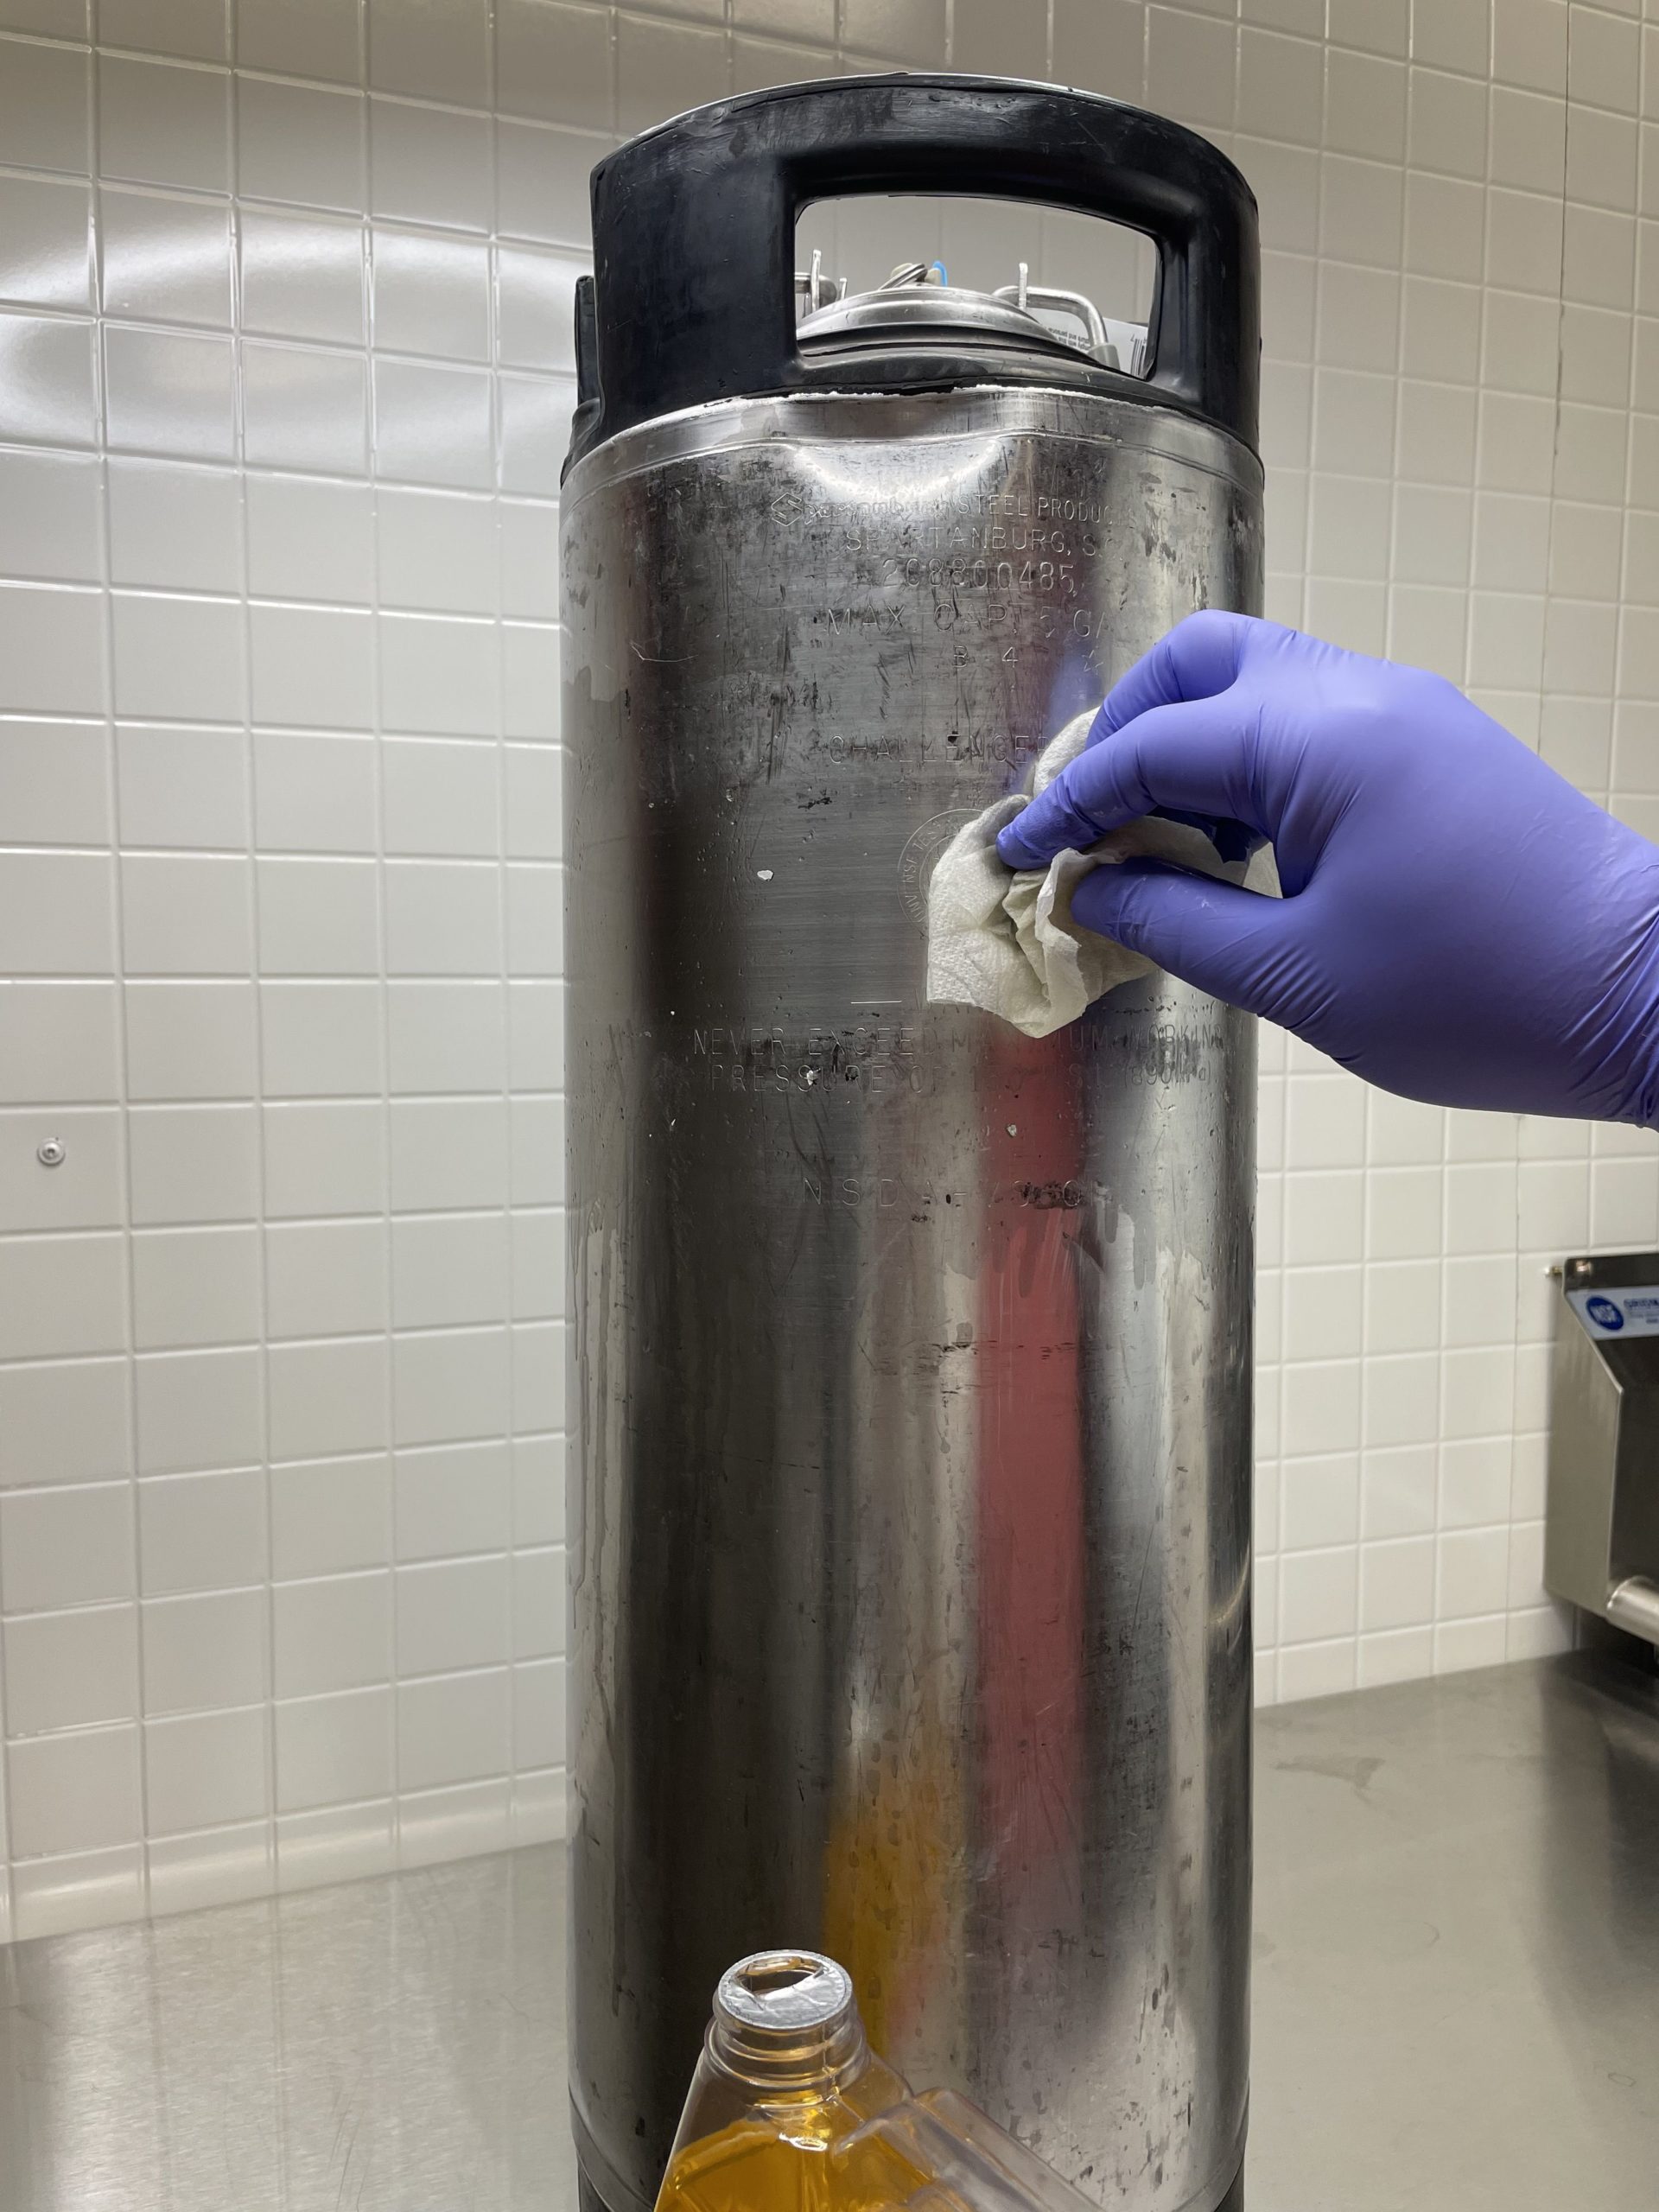 In my experience, Goo Gone is harsh on my skin so I’m using nitrile gloves. Glove are… handy. Did you see what I did there? 🙂 I just work my way around the keg a few times. That gives the Goo Gone a chance to chemically break down the adhesive while I provide some periodic agitation. In this case the adhesive dissolved pretty quickly and the small pieces of sticker that were left came right off. TIP: I recommend using Goo Gone sparingly. You really don’t need that much and you certainly WOULD NOT want to use enough that it gets on the handle or base of your keg. Goo Gone acts as a solvent for many adhesives. It could potentially loosen up rubber handles or bases. Then you’d need to use our Fixing Loose Handles Tip. So, just put a little on a paper towel or rag and add a little more if you need to.
 A look at the used paper towel with dirt, adhesive residue and small bits of stickers on it. Whammo!
Cleaning the Outside of the Keg – PBW Scrub
 Similar to my bottle label removal tip, I like to use some full strength PBW right on a sponge to clean the outside of a keg when I’m reconditioning it. That has two advantages. Some grittiness and since it’s full strength, additional cleaning power.
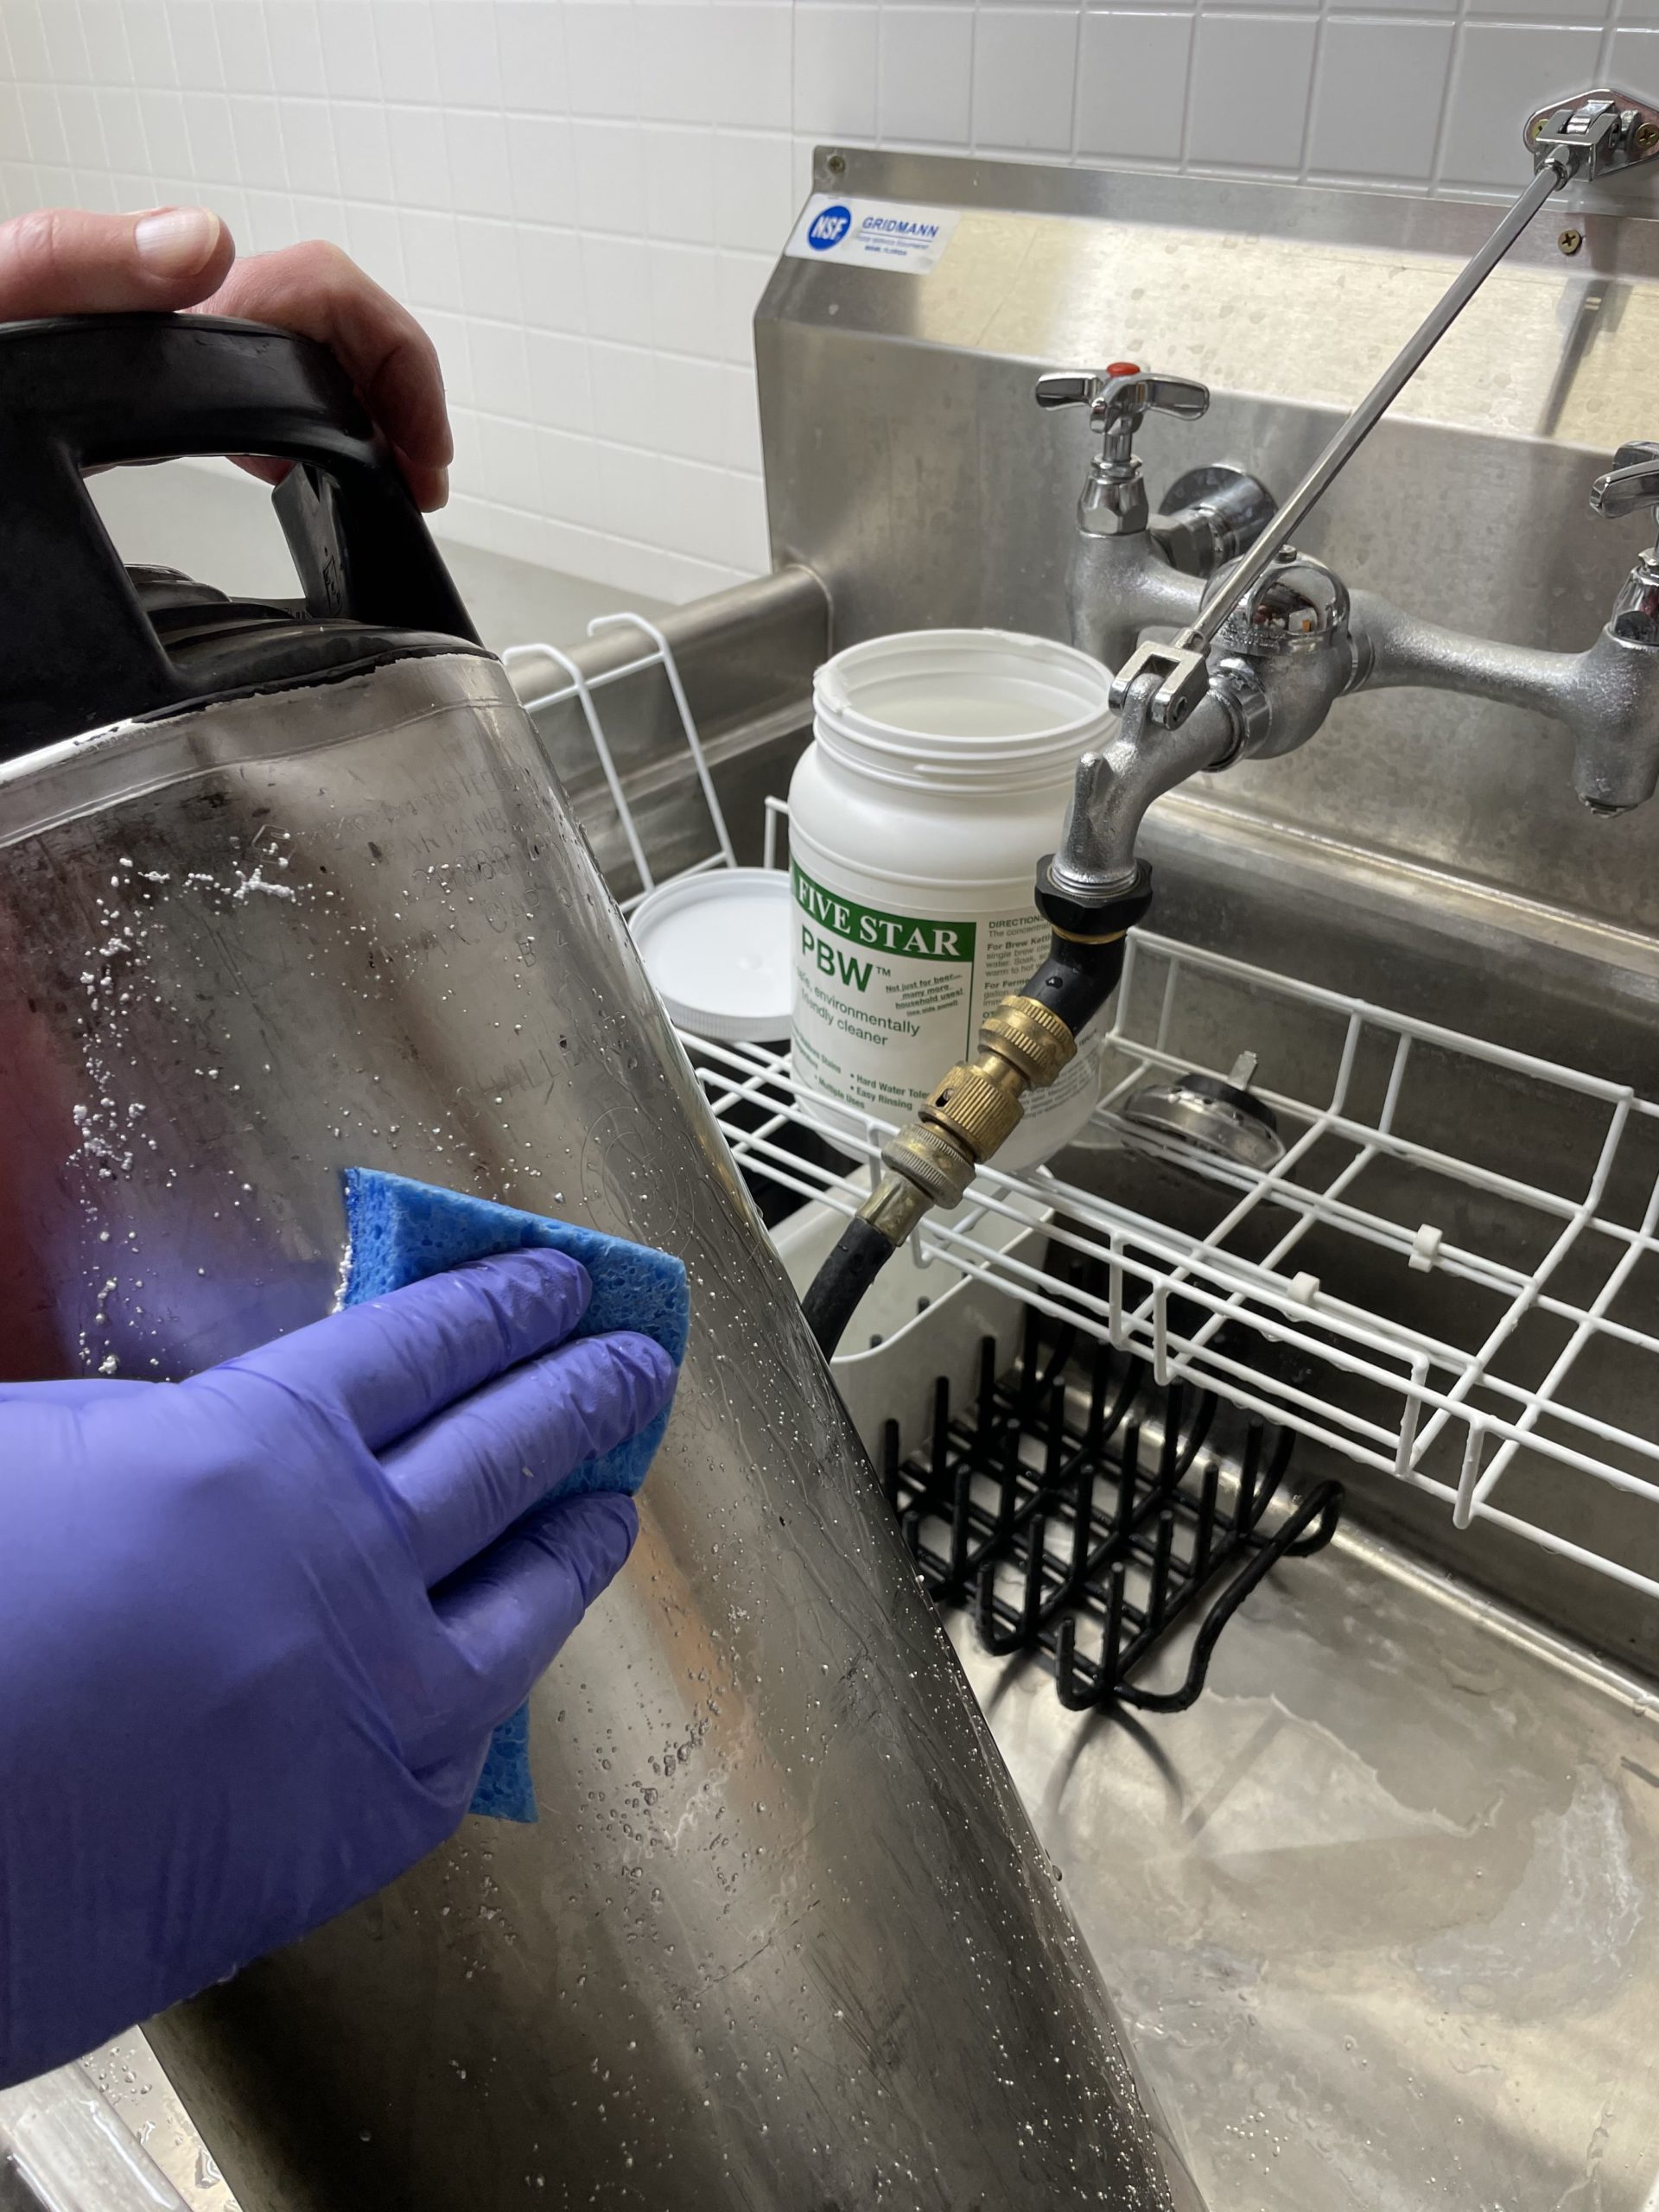 Cleaning the outside of the keg using PBW in my brewing area sink.
Disassembling The Keg
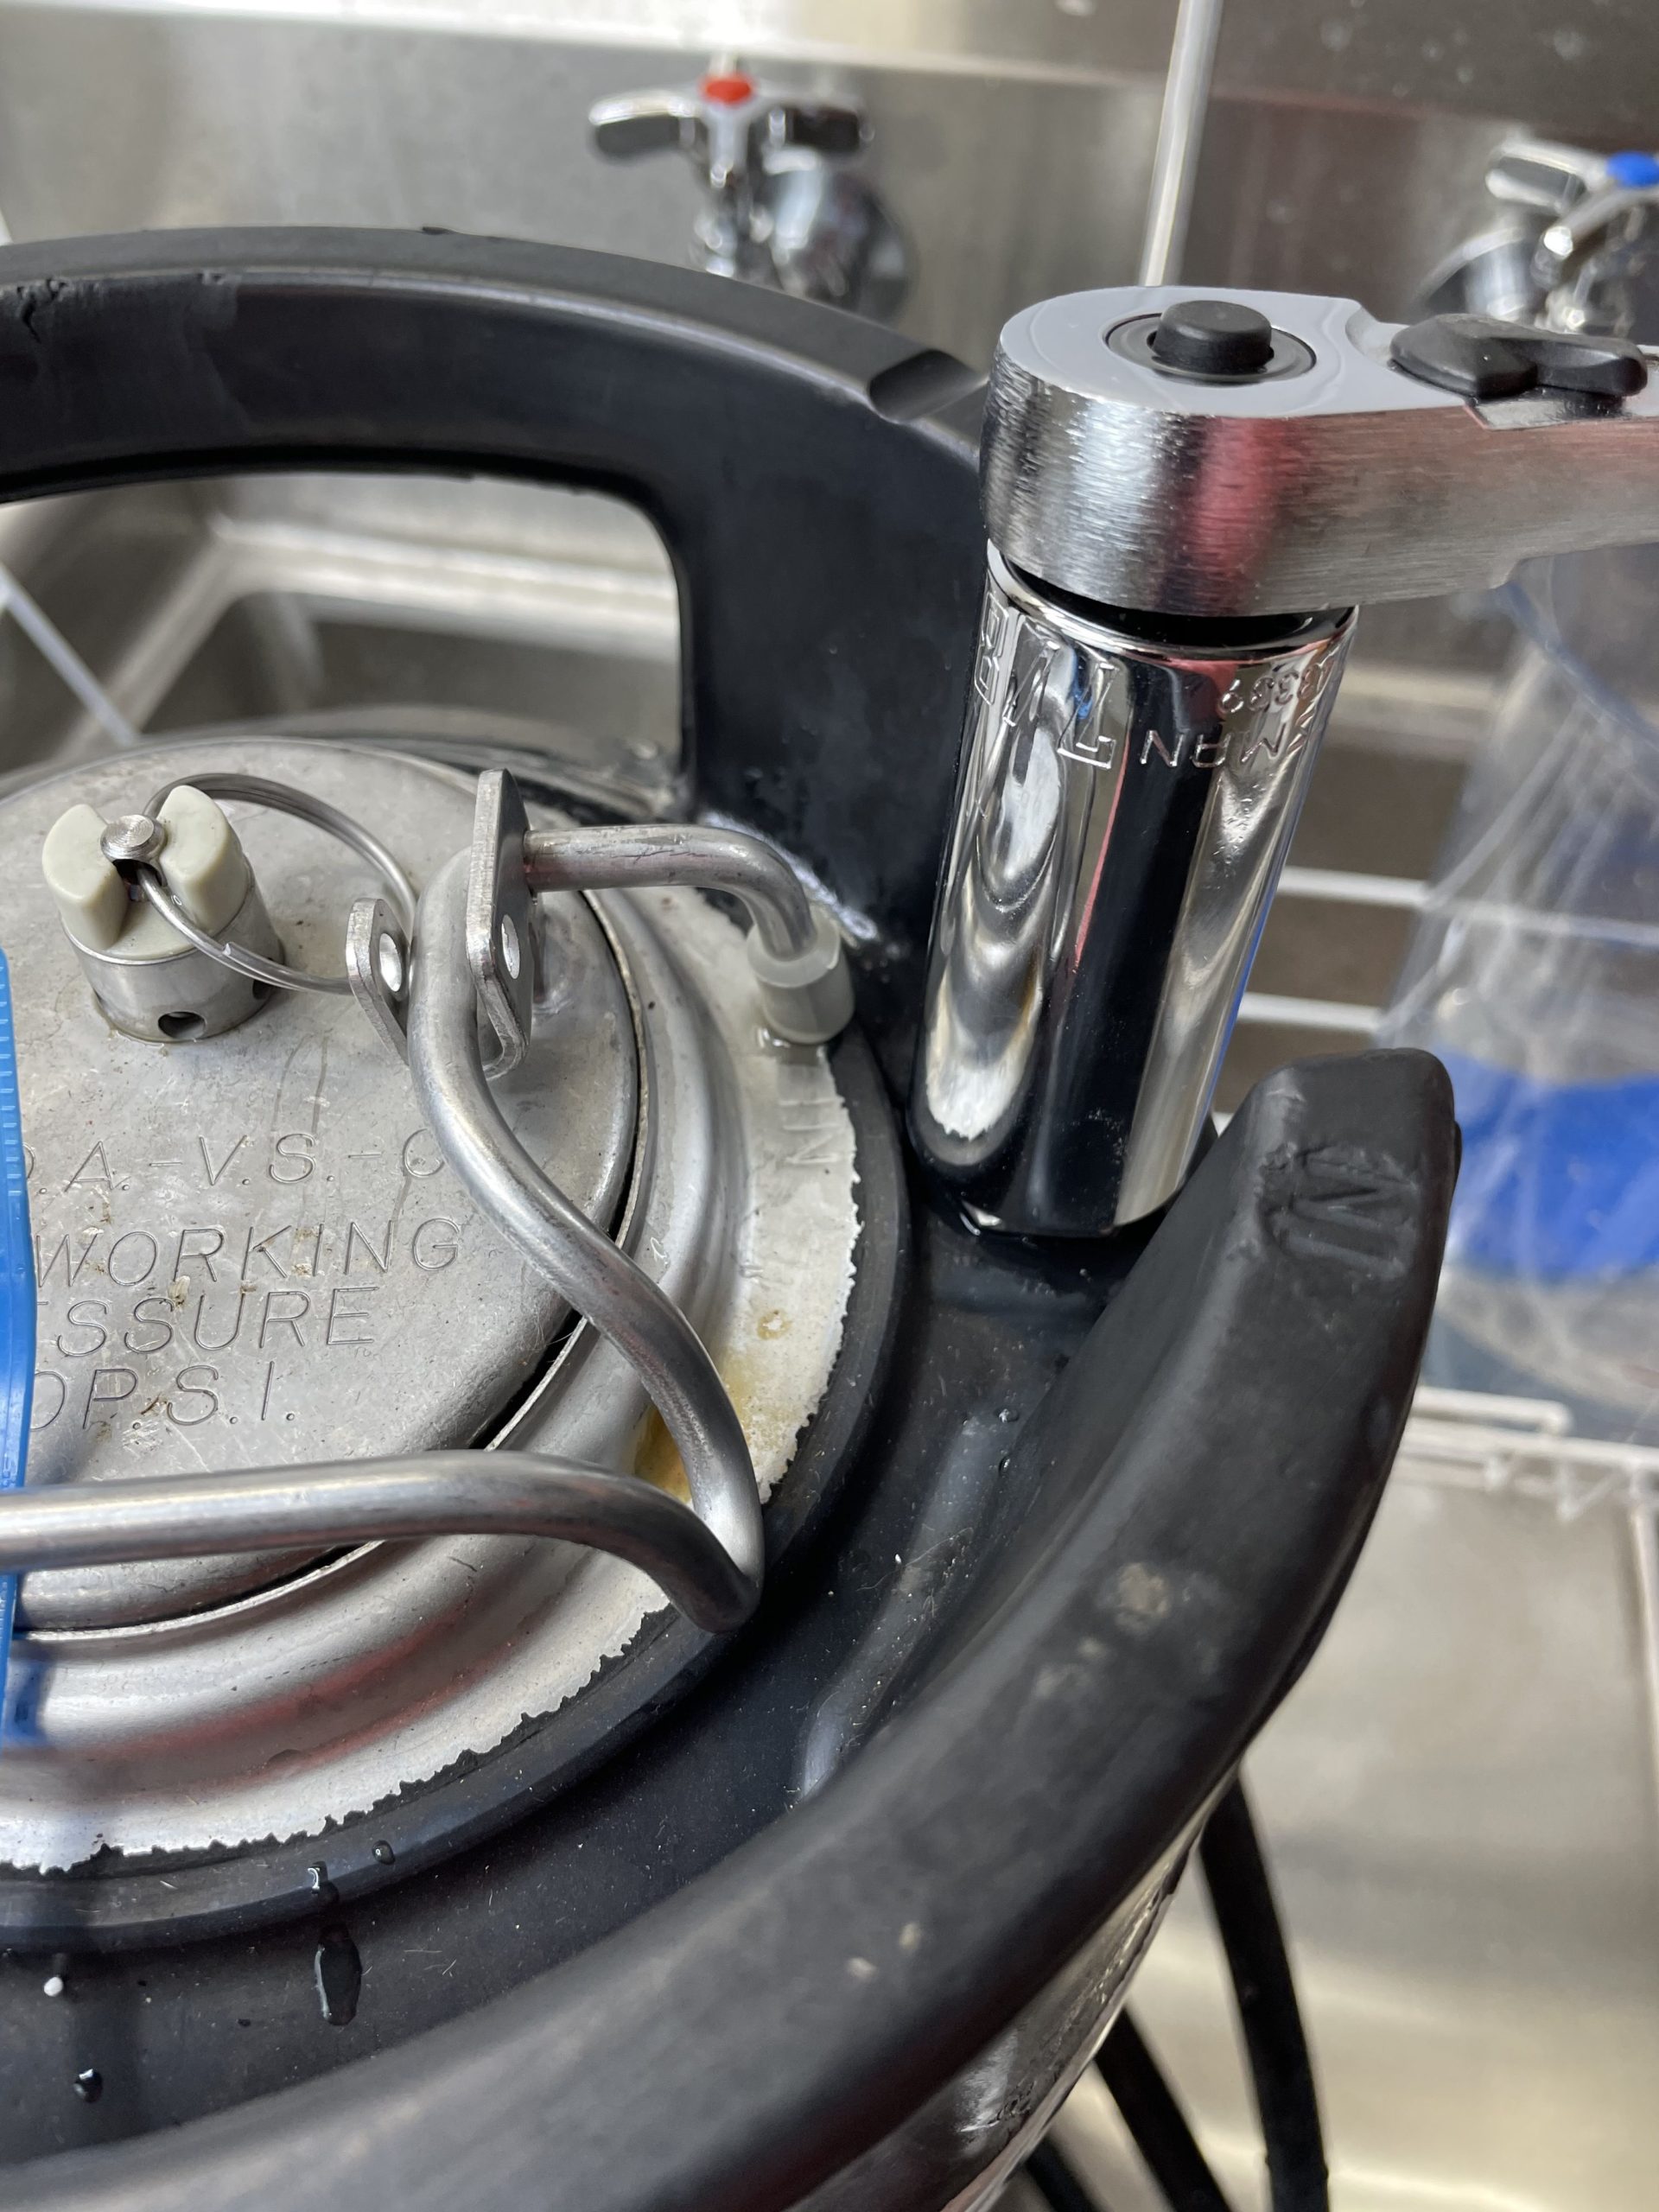 This particular keg has 6 pt 7/8″ posts. I’m using my Craftsman 7/8″ Deep Well Socket to remove the keg post. Related: Hands on Review: Craftsman Deep Well Sockets for Ball Lock Keg Posts
Related: Tools for Removing Keg Posts
- Hands on Review: Craftsman Deep Well Sockets for Ball Lock Keg Posts
- Hands on Review: “Ball Lock Keg Wrench” – 11/16″+7/8″ Ratcheting Wrench – via Apollo Tools Wrench Set
- Keg Sockets – Choose Your Sockets – via Keg Connection – choose from ball lock and pin lock compatible sockets
- Search Amazon for “Pin Lock Socket”
- 11/16″ 6 point: CRAFTSMAN Deep Socket, SAE, 3/8-Inch Drive, 11/16-Inch, 6-Point (CMMT43336) – affiliate link, note that multiple variations of this product may be available, as such a different version may appear at this link
- 11/16″ 12 point: CRAFTSMAN Deep Socket, SAE, 1/2-Inch Drive, 11/16-Inch, 12-Point (CMMT47524) – affiliate link, note that multiple variations of this product may be available, as such a different version may appear at this link
- 7/8″ 12 point: CRAFTSMAN Deep Socket, SAE, 1/2-Inch Drive, 7/8-Inch, 12-Point (CMMT47528) – affiliate link, note that multiple variations of this product may be available, as such a different version may appear at this link
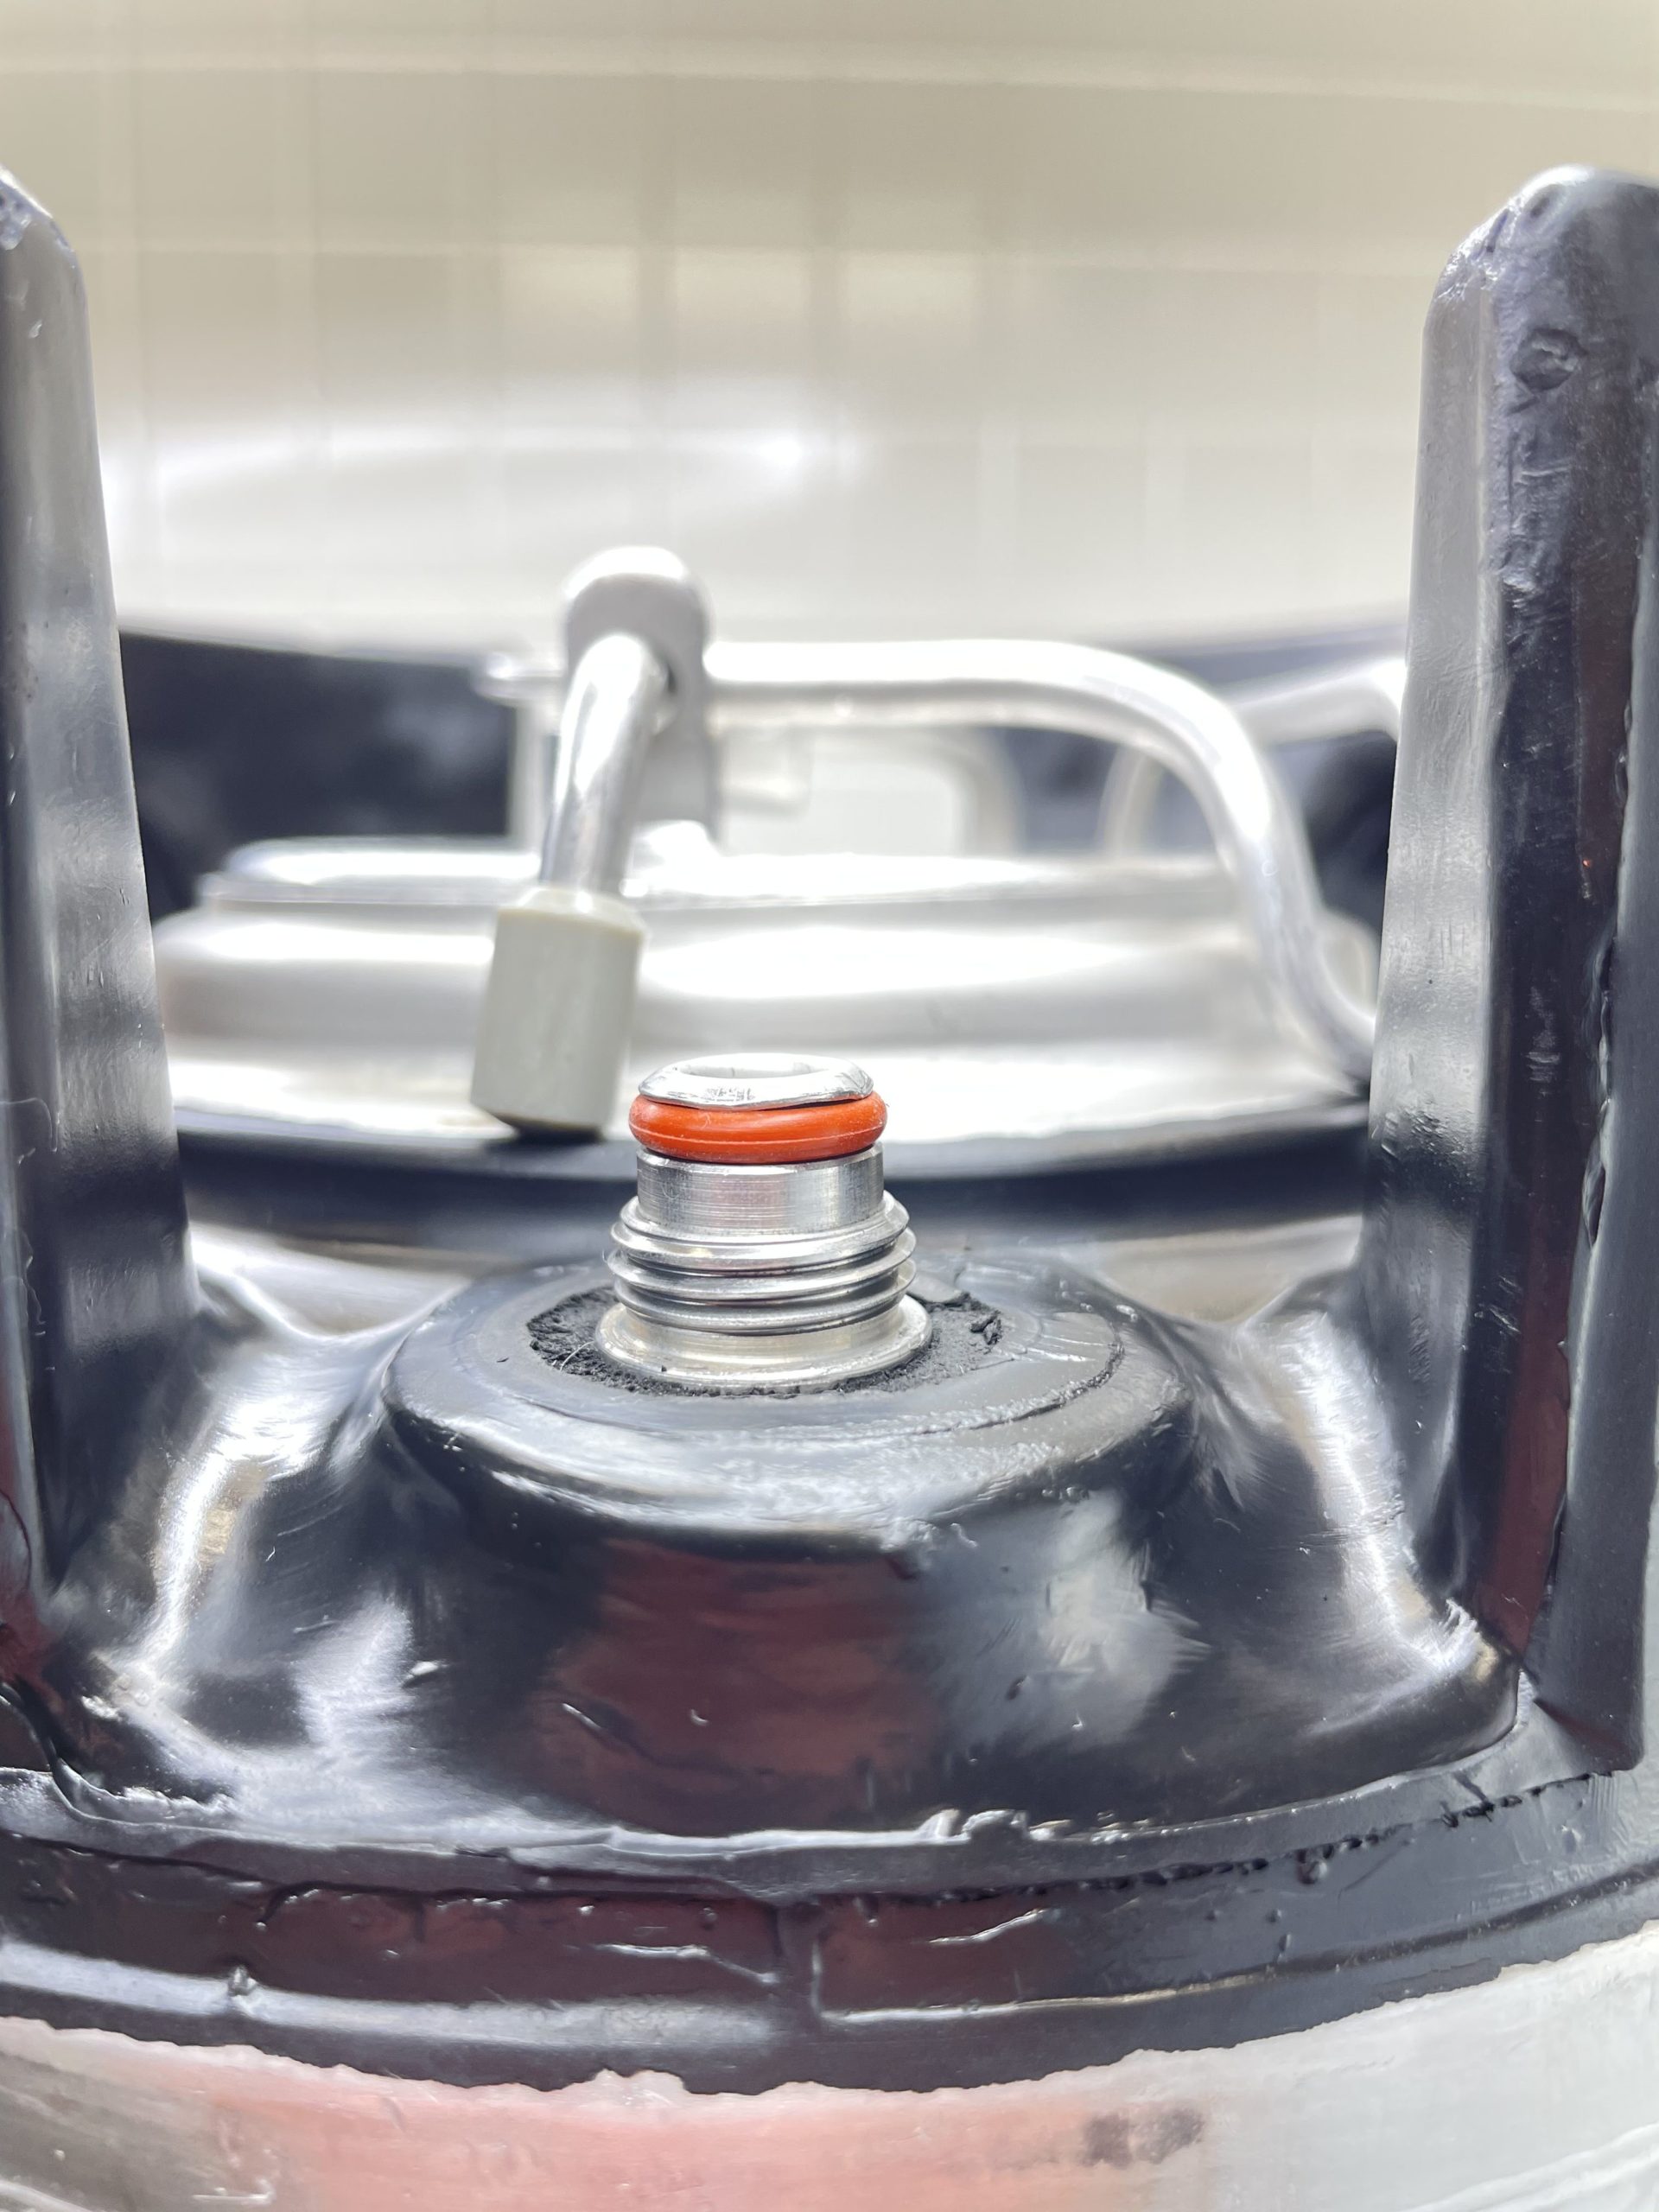
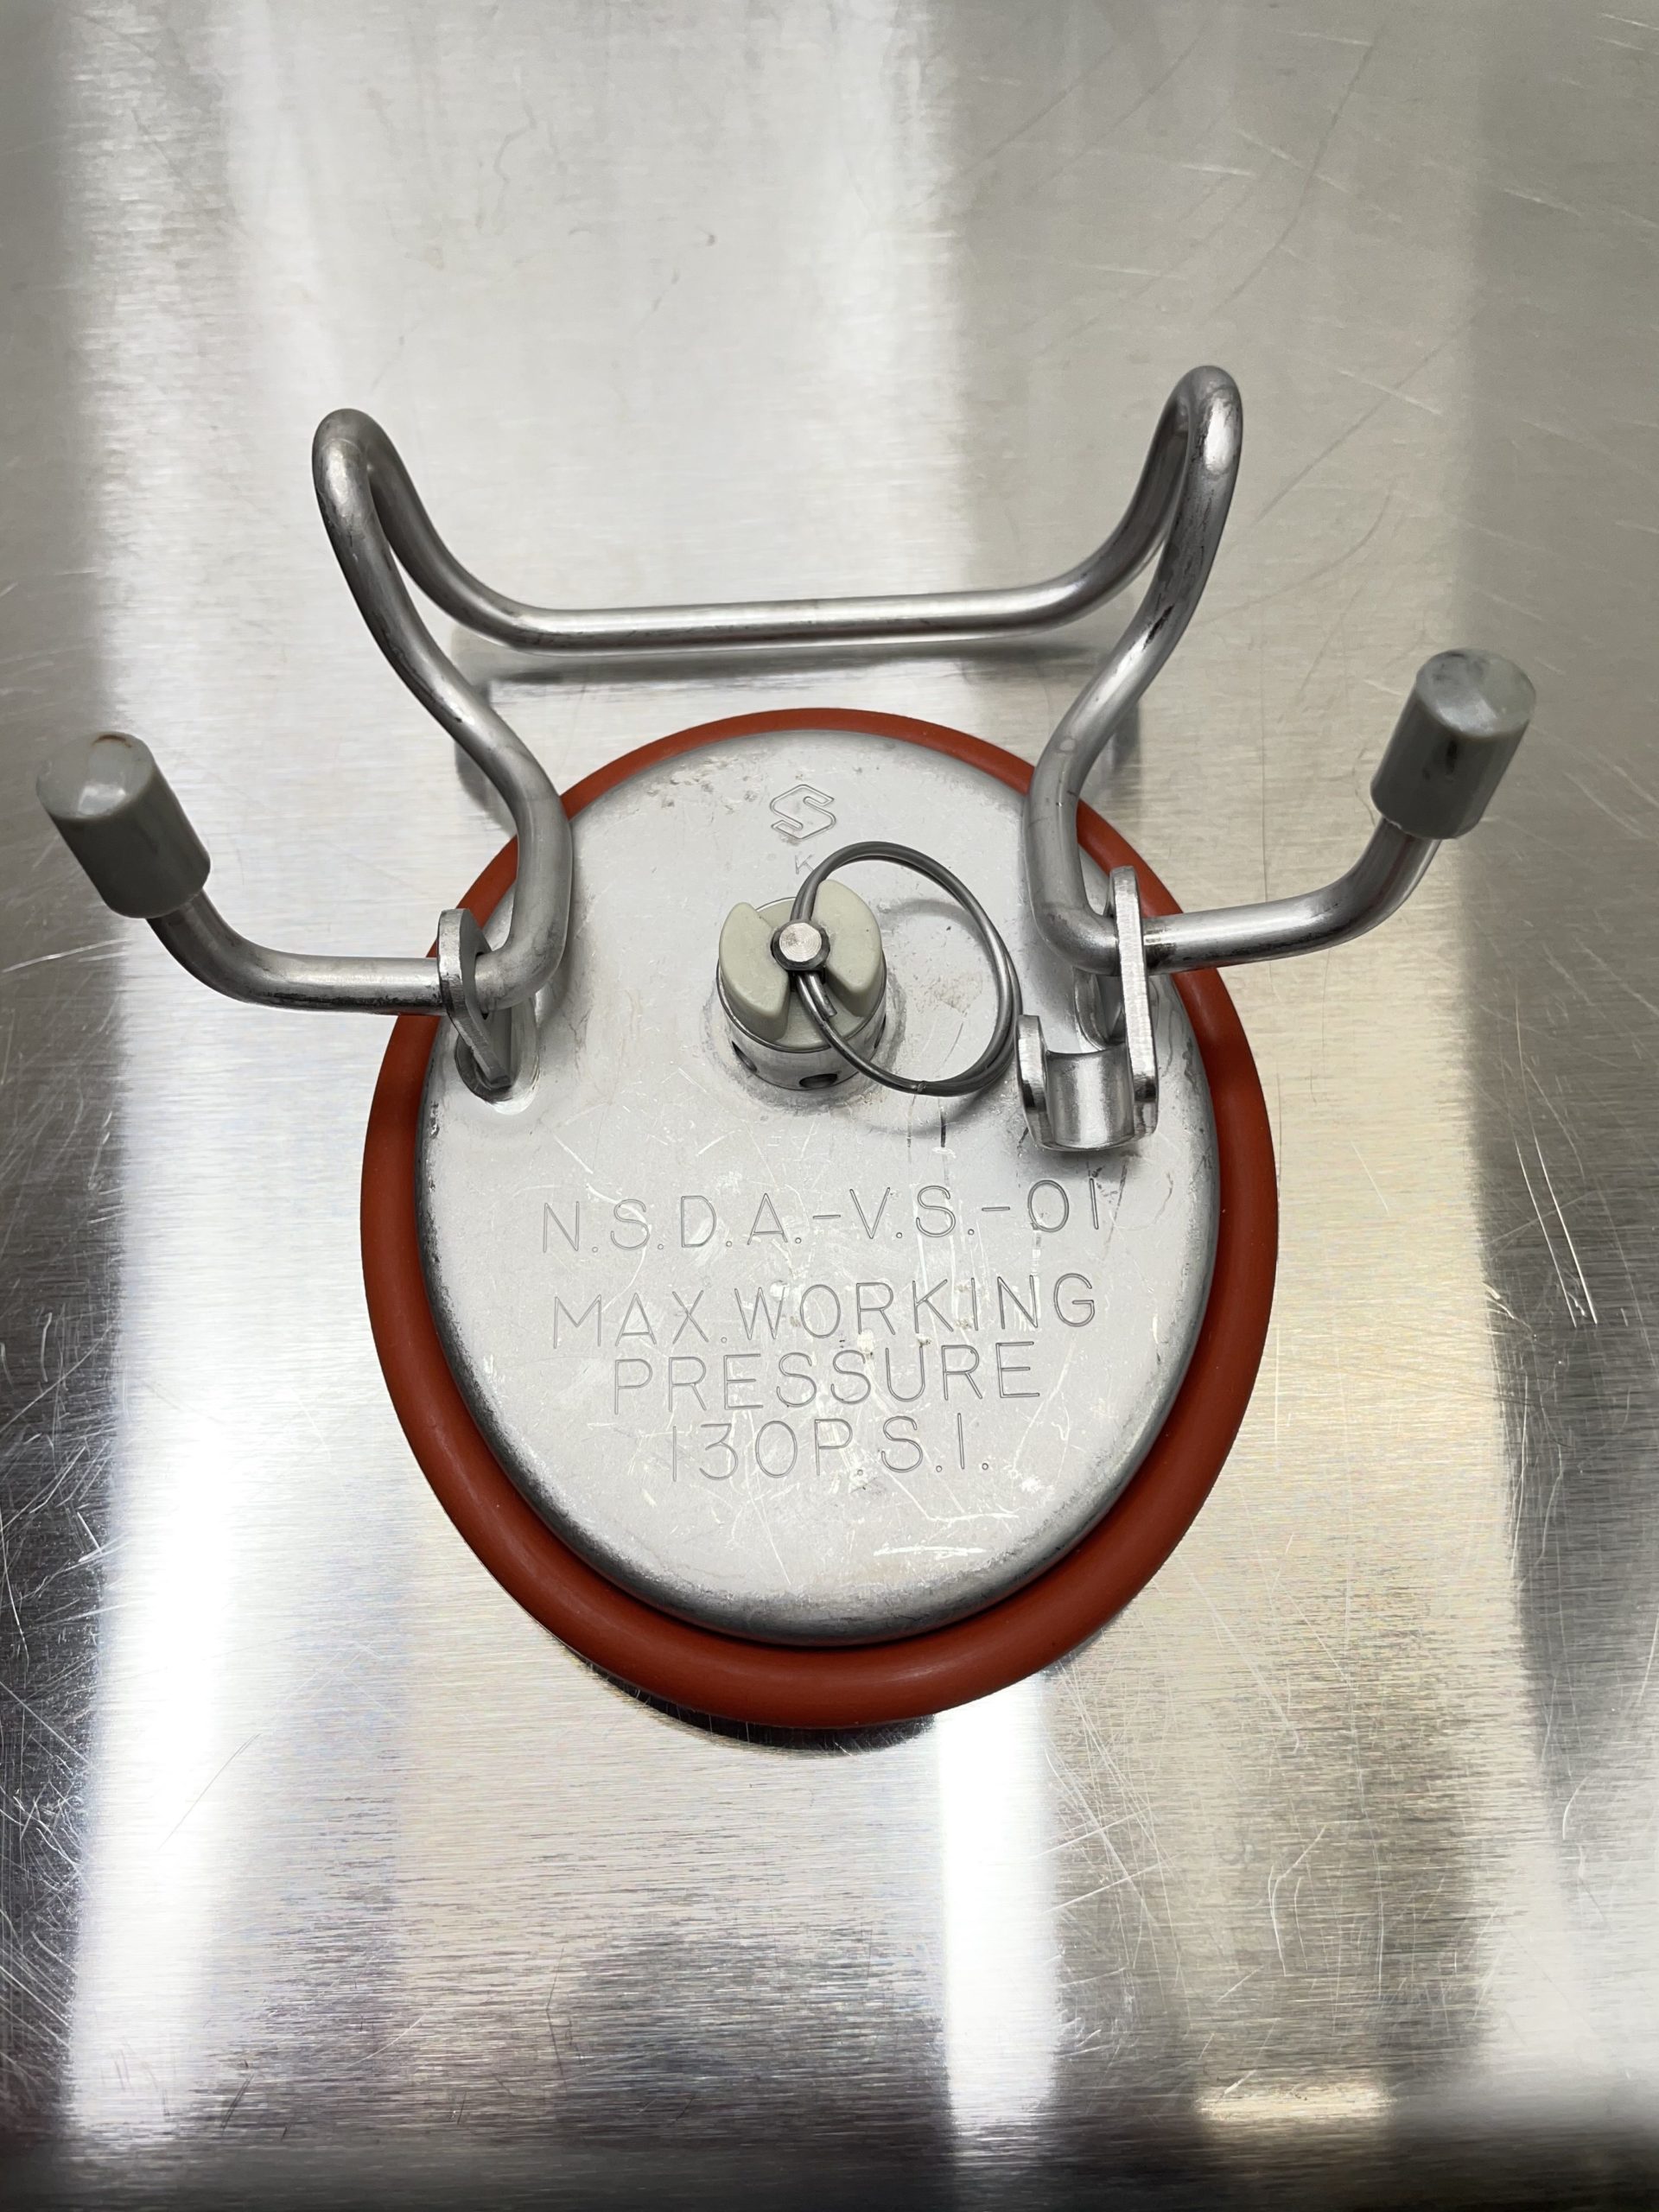
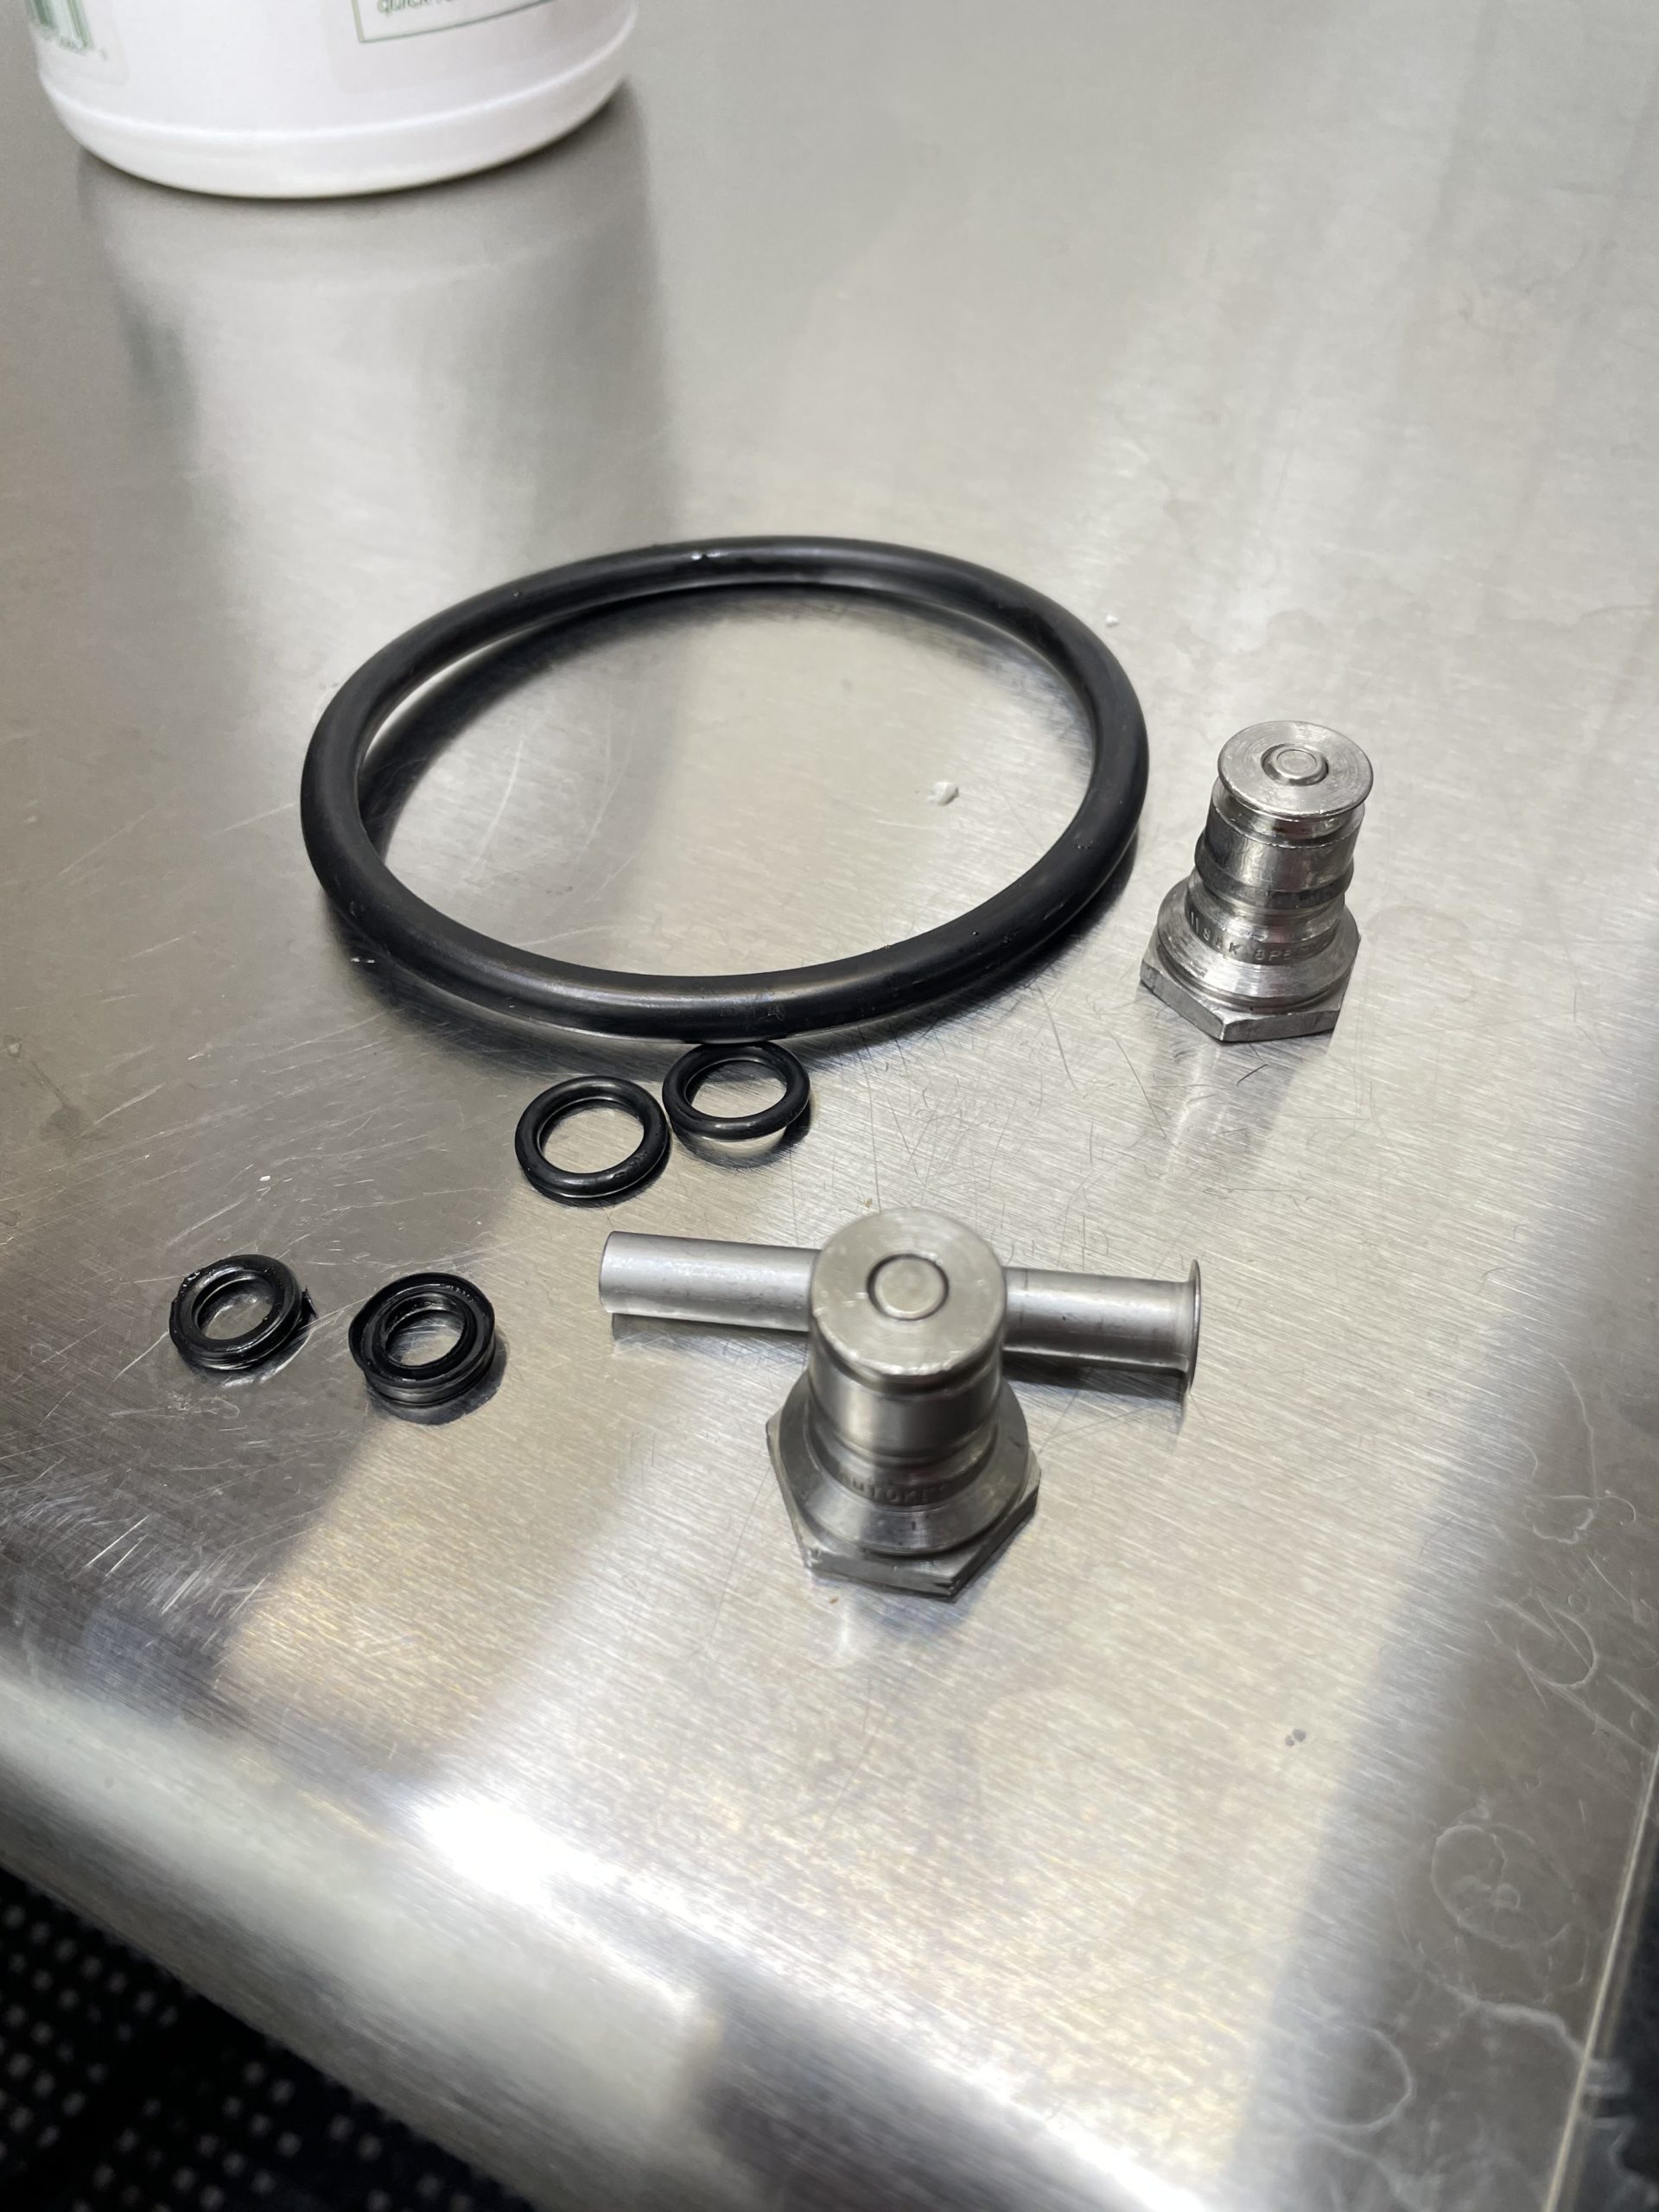 Here you can see the keg o-rings, gas dip tube and posts. I’ll give you some commentary on this mess after a tip on removing poppets.
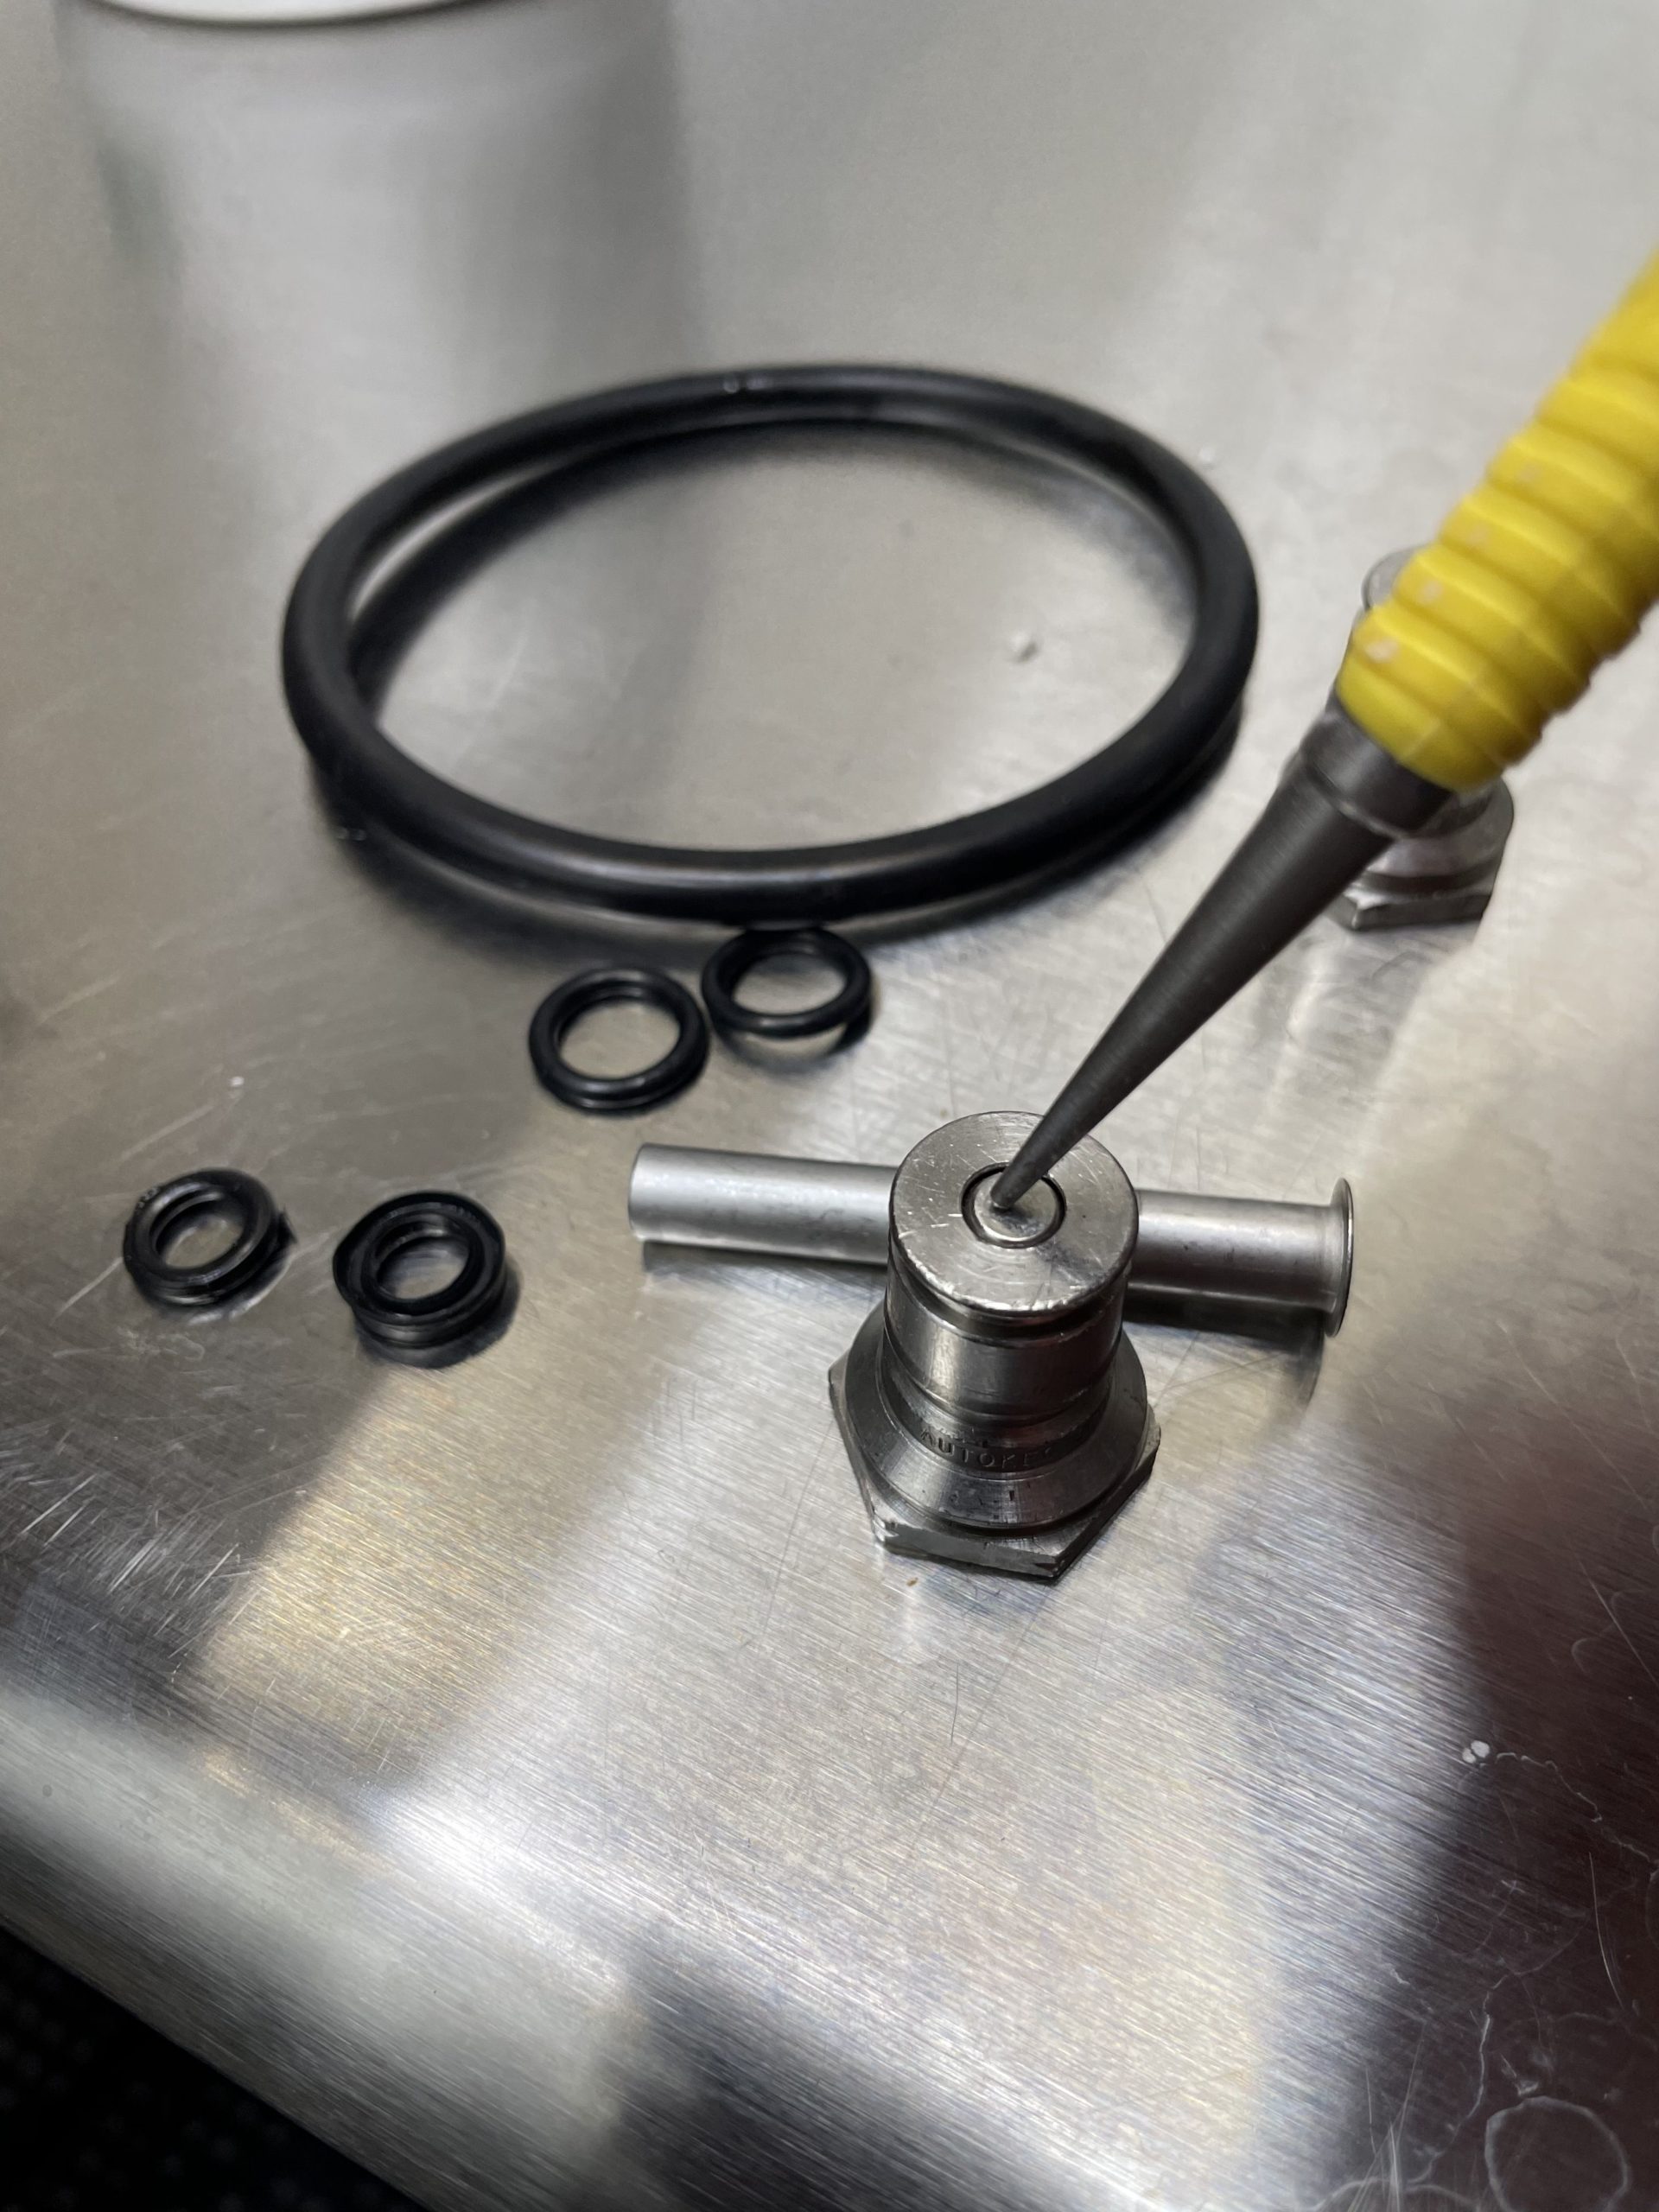 Some poppets seem to be almost installed permanently in keg posts. I think this is by design and that the reason they seem to be is because they… are. I don’t like those because they’re more difficult, potentially impossible, to clean and sanitize.
When I run into poppets like this I use a punch to dislodge the old poppet. It usually doesn’t take a whole lot of force.
It’s noting that it’s possible that you could damage the poppet doing this. To me, that doesn’t matter a whole bunch to me since I’m going to replace them with Universal Poppets.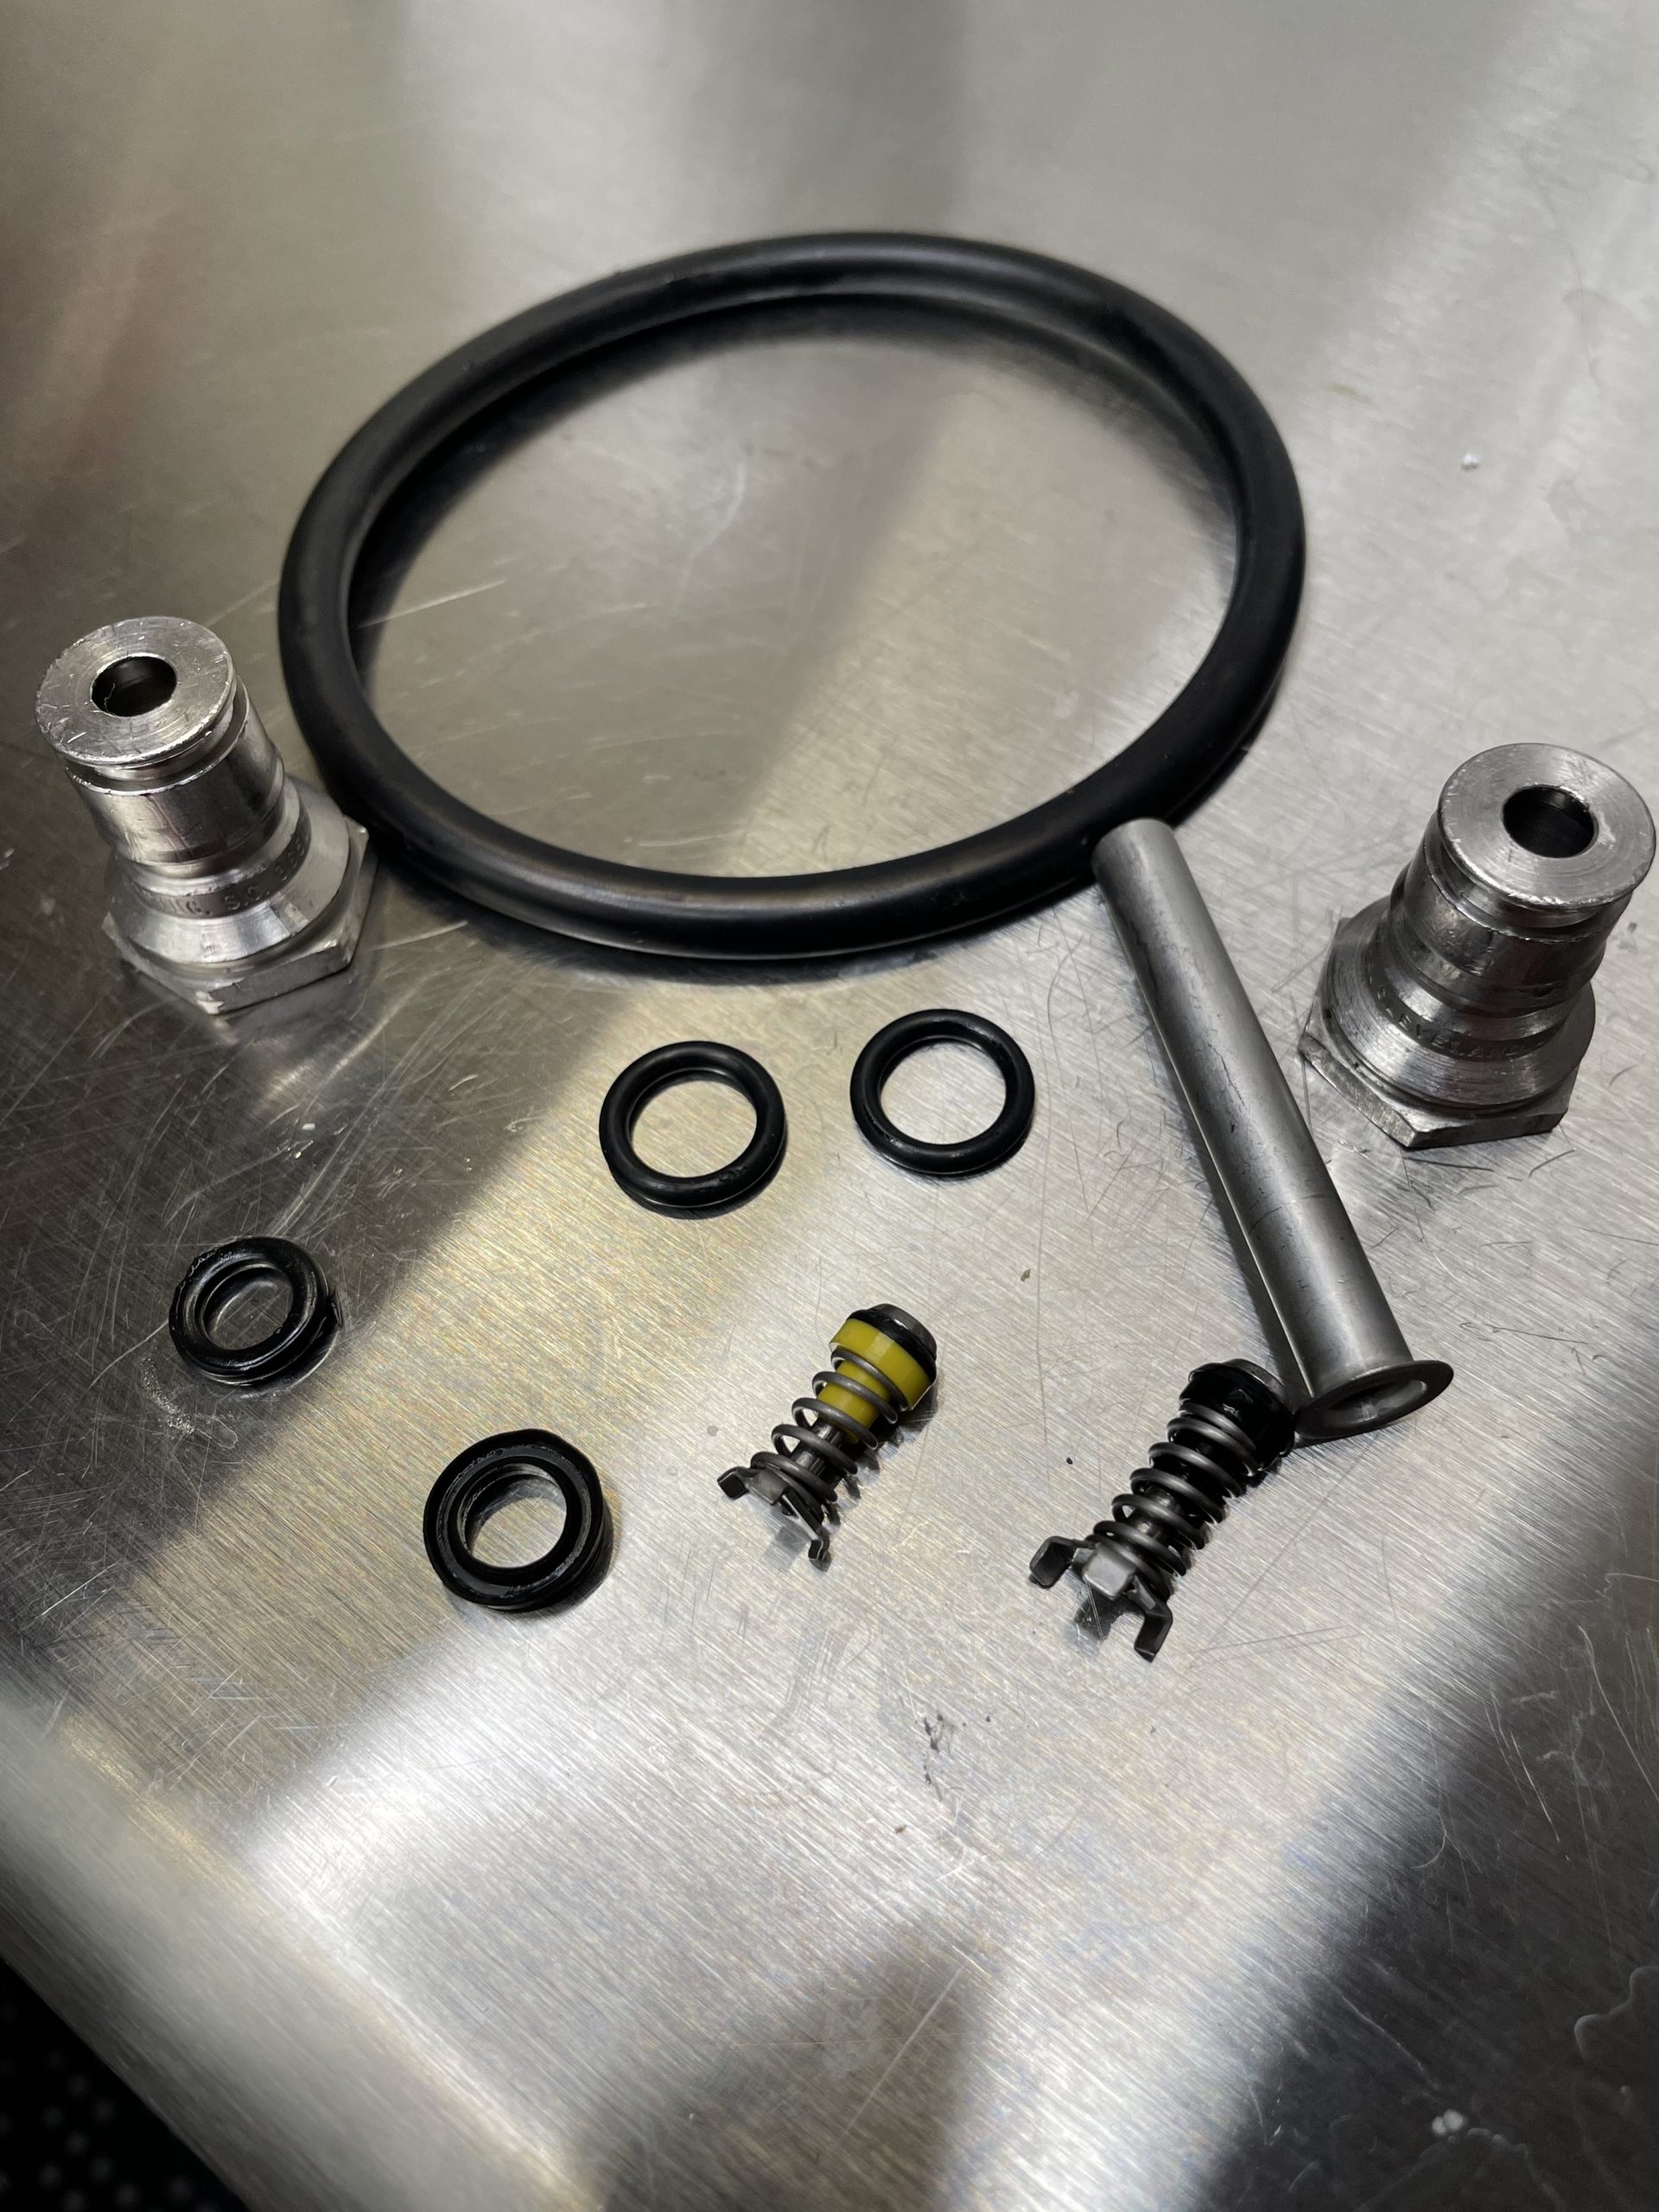 Now we have a full picture of the what’s going on with this keg. This hardware is a mish mash of stuff. The poppets are different, the dip tube o-rings are different, the lid o-ring was literally covered in crud and the whole lot smelled intensely of soda. The post o-rings actually looked to be in pretty good shape, but there’s no sense in keeping them since they smell of soda and I have bigger plans for this and all my kegs. I’ll discard the o-rings and poppets. Dip tubes, posts and lid are all in good shape.
 Using one of my 1 gallon pitchers – Review – to soak lid, posts and gas dip tube in hot PBW solution.
Cleaning the Keg
 I have a Mark II Keg & Carboy Cleaner – Review – and I love it. However… when I’m reconditioning a keg, I opt to go old school bucket. Primary because I want to clean both the inside and the outside of the keg. Here’s the keg in a bucket of hot PBW solution. The keg itself is about half full of hot PBW solution. Fill the keg first and then fill the bucket, this will stop the keg from floating up out of the bucket. Note: Before I got to this step, I gave the inside of the keg a thorough rinse to get rid of the soda pre-mix residue.
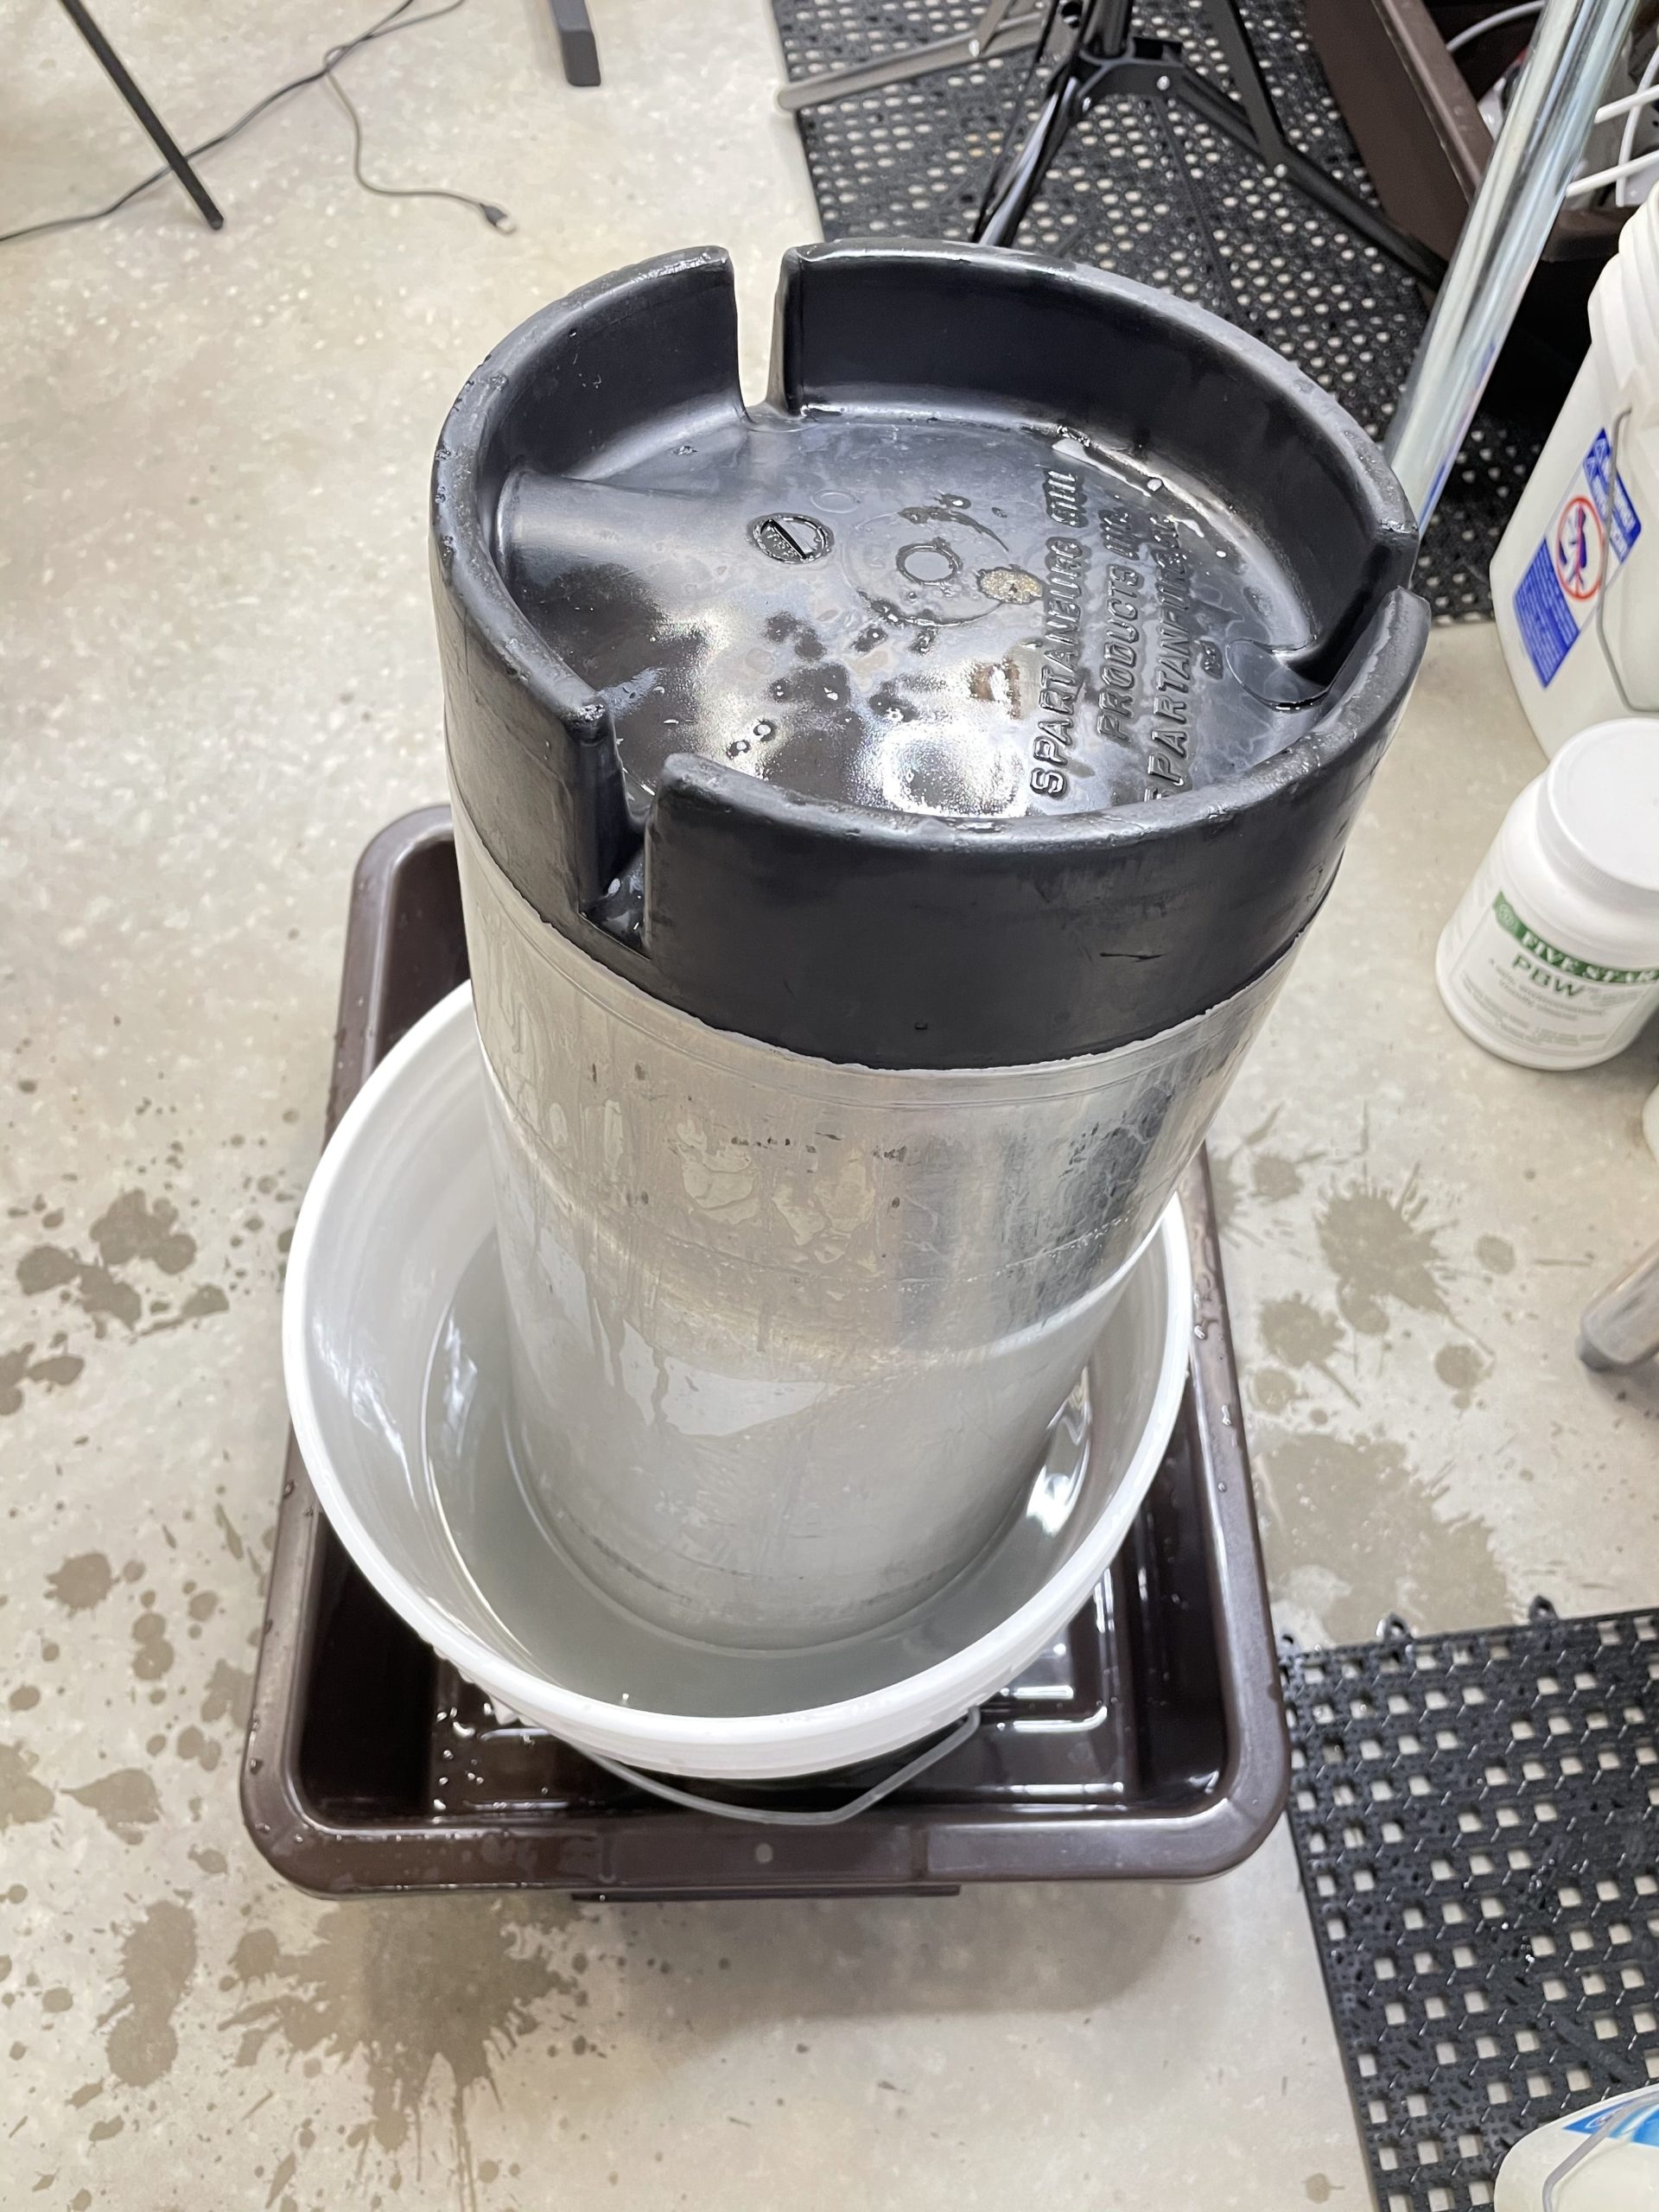 After 15 minutes or so, I flipped the keg. This precarious flip is one big advantage to using the Mark II Keg and Carboy Washer. Again, I’m trying to clean both the inside and the outside of the keg including the base and handles. My handy bus tubs – More Info – caught most, but not all, of the mess. Recognize that bump on the bottom? If not, more about that later.
 Next is a thorough scrub with Bar Keepers Friend. Bar Keepers friend works wonders with stainless steel and you’re going to see that in the finished product.
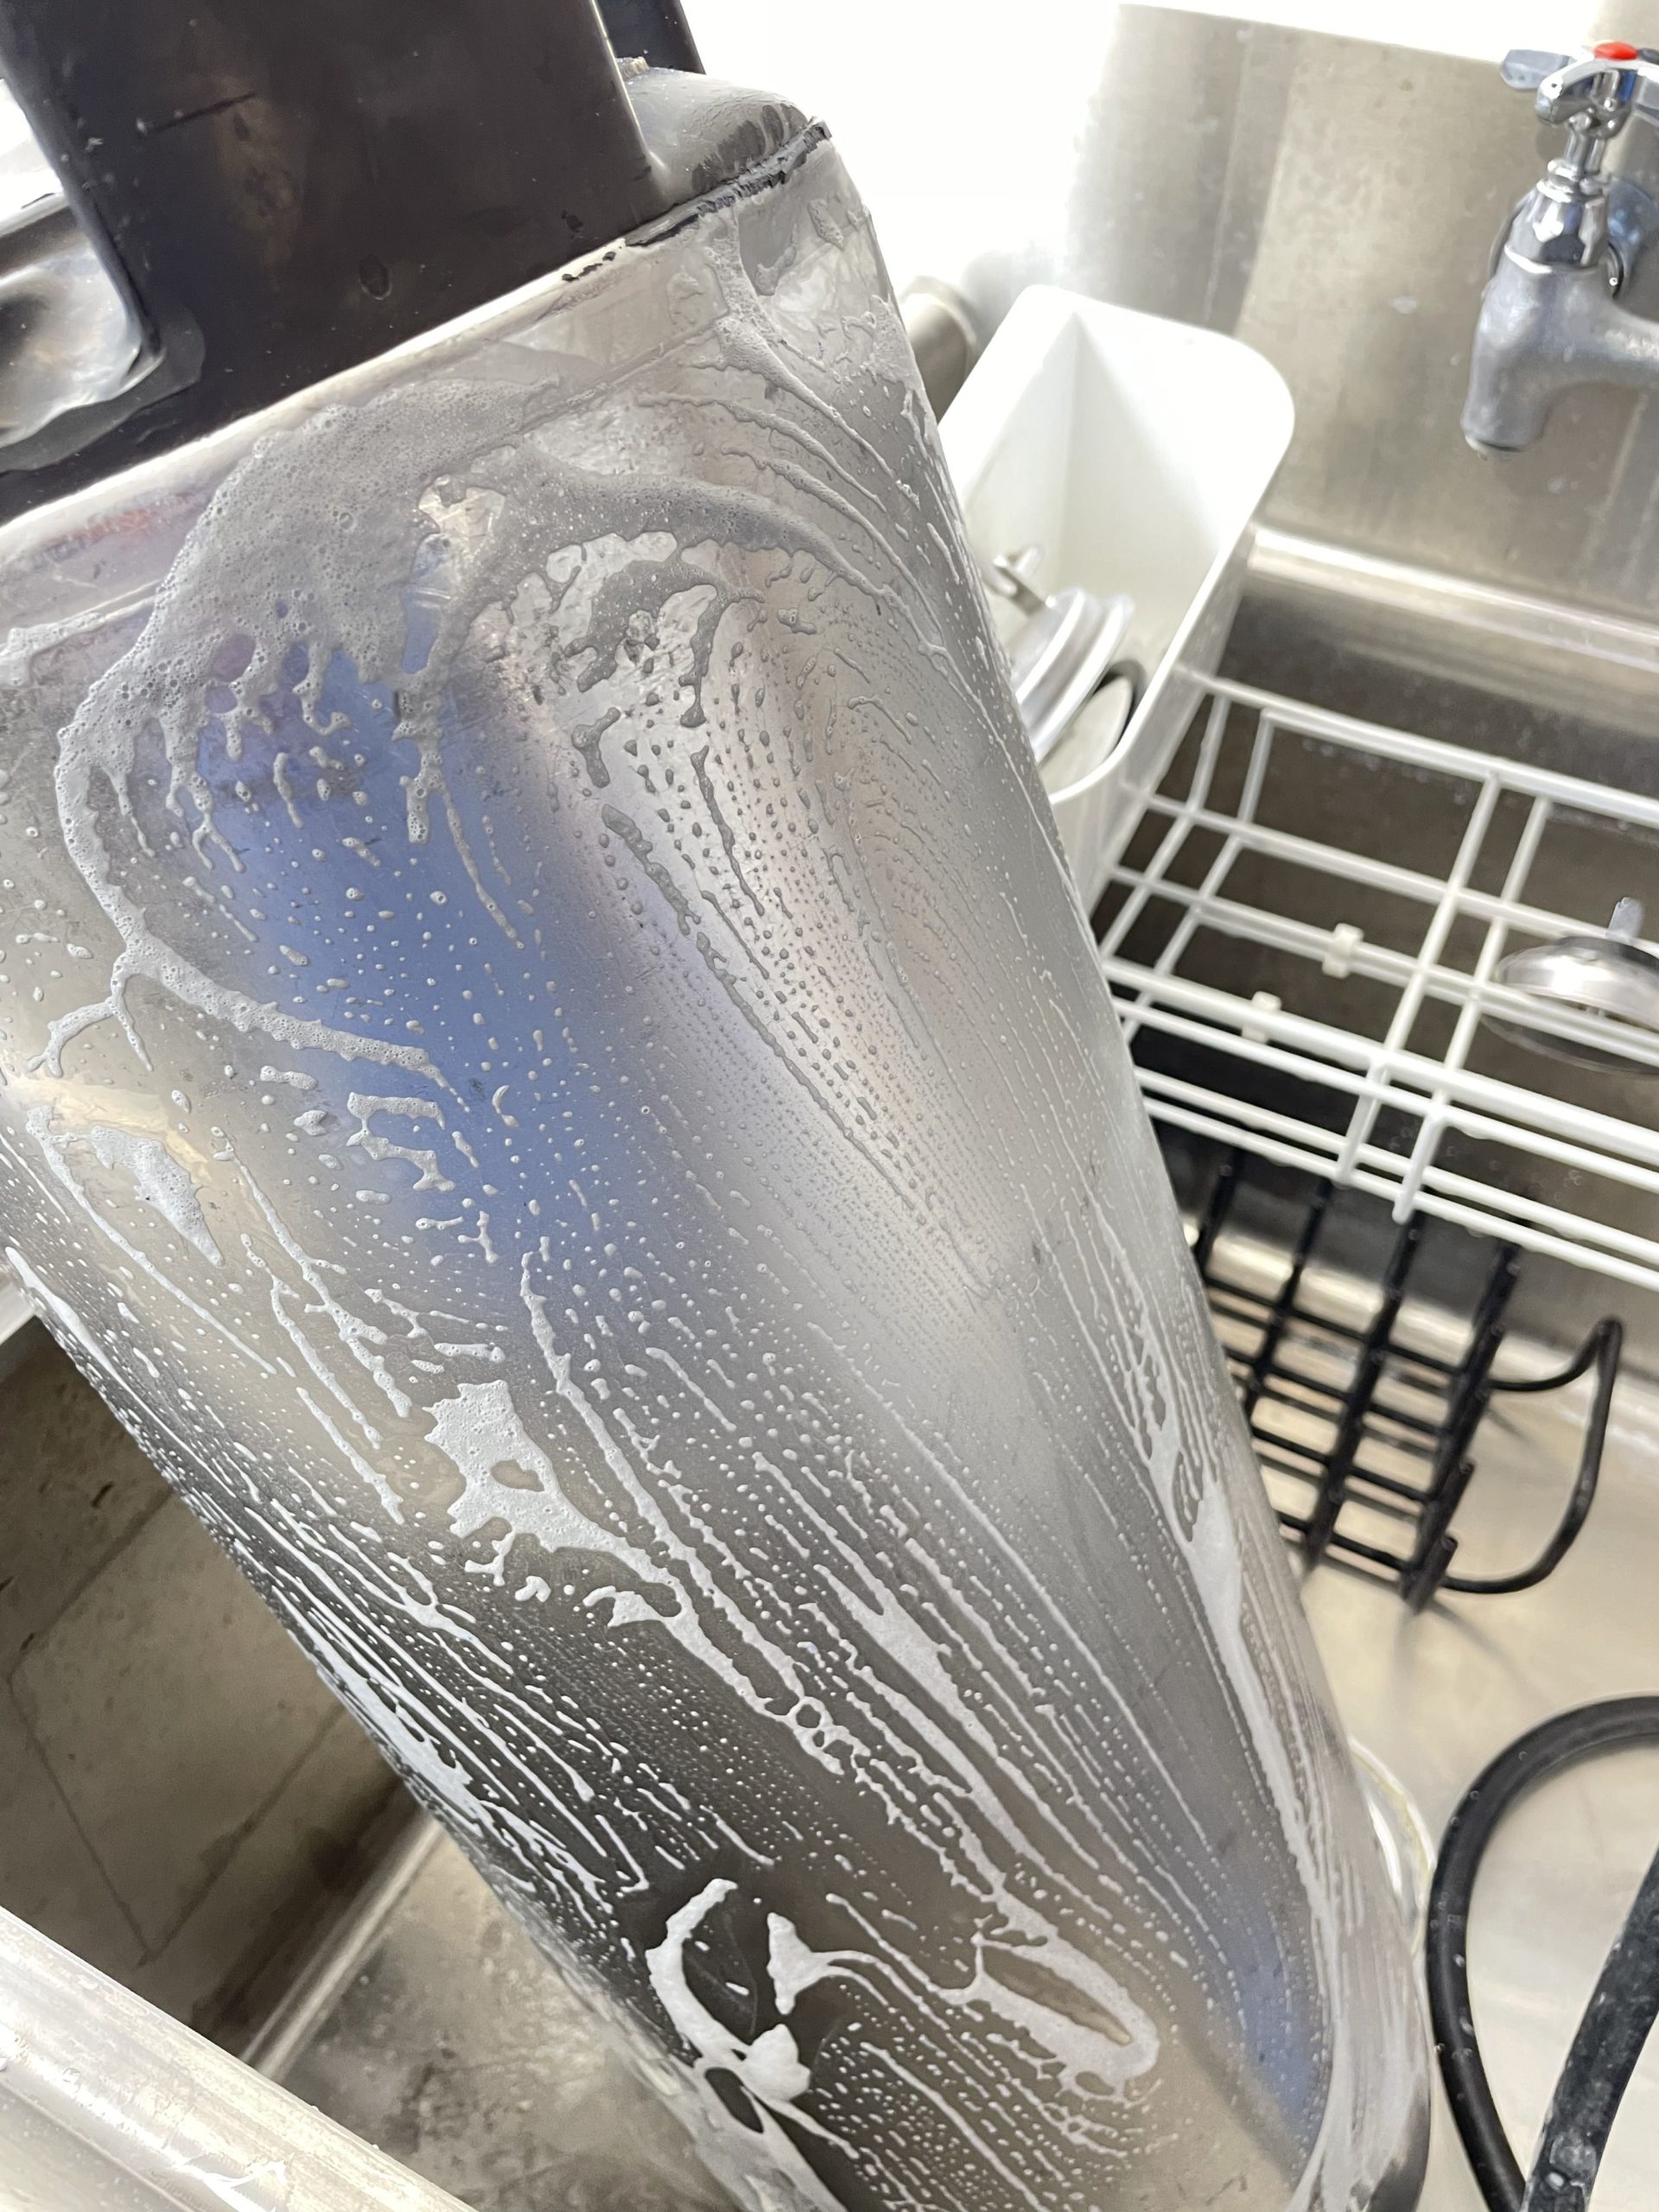 Scrubbing with Bar Keepers Friend. This keg is starting to look great.
Reconditioning Keg Handles and Base
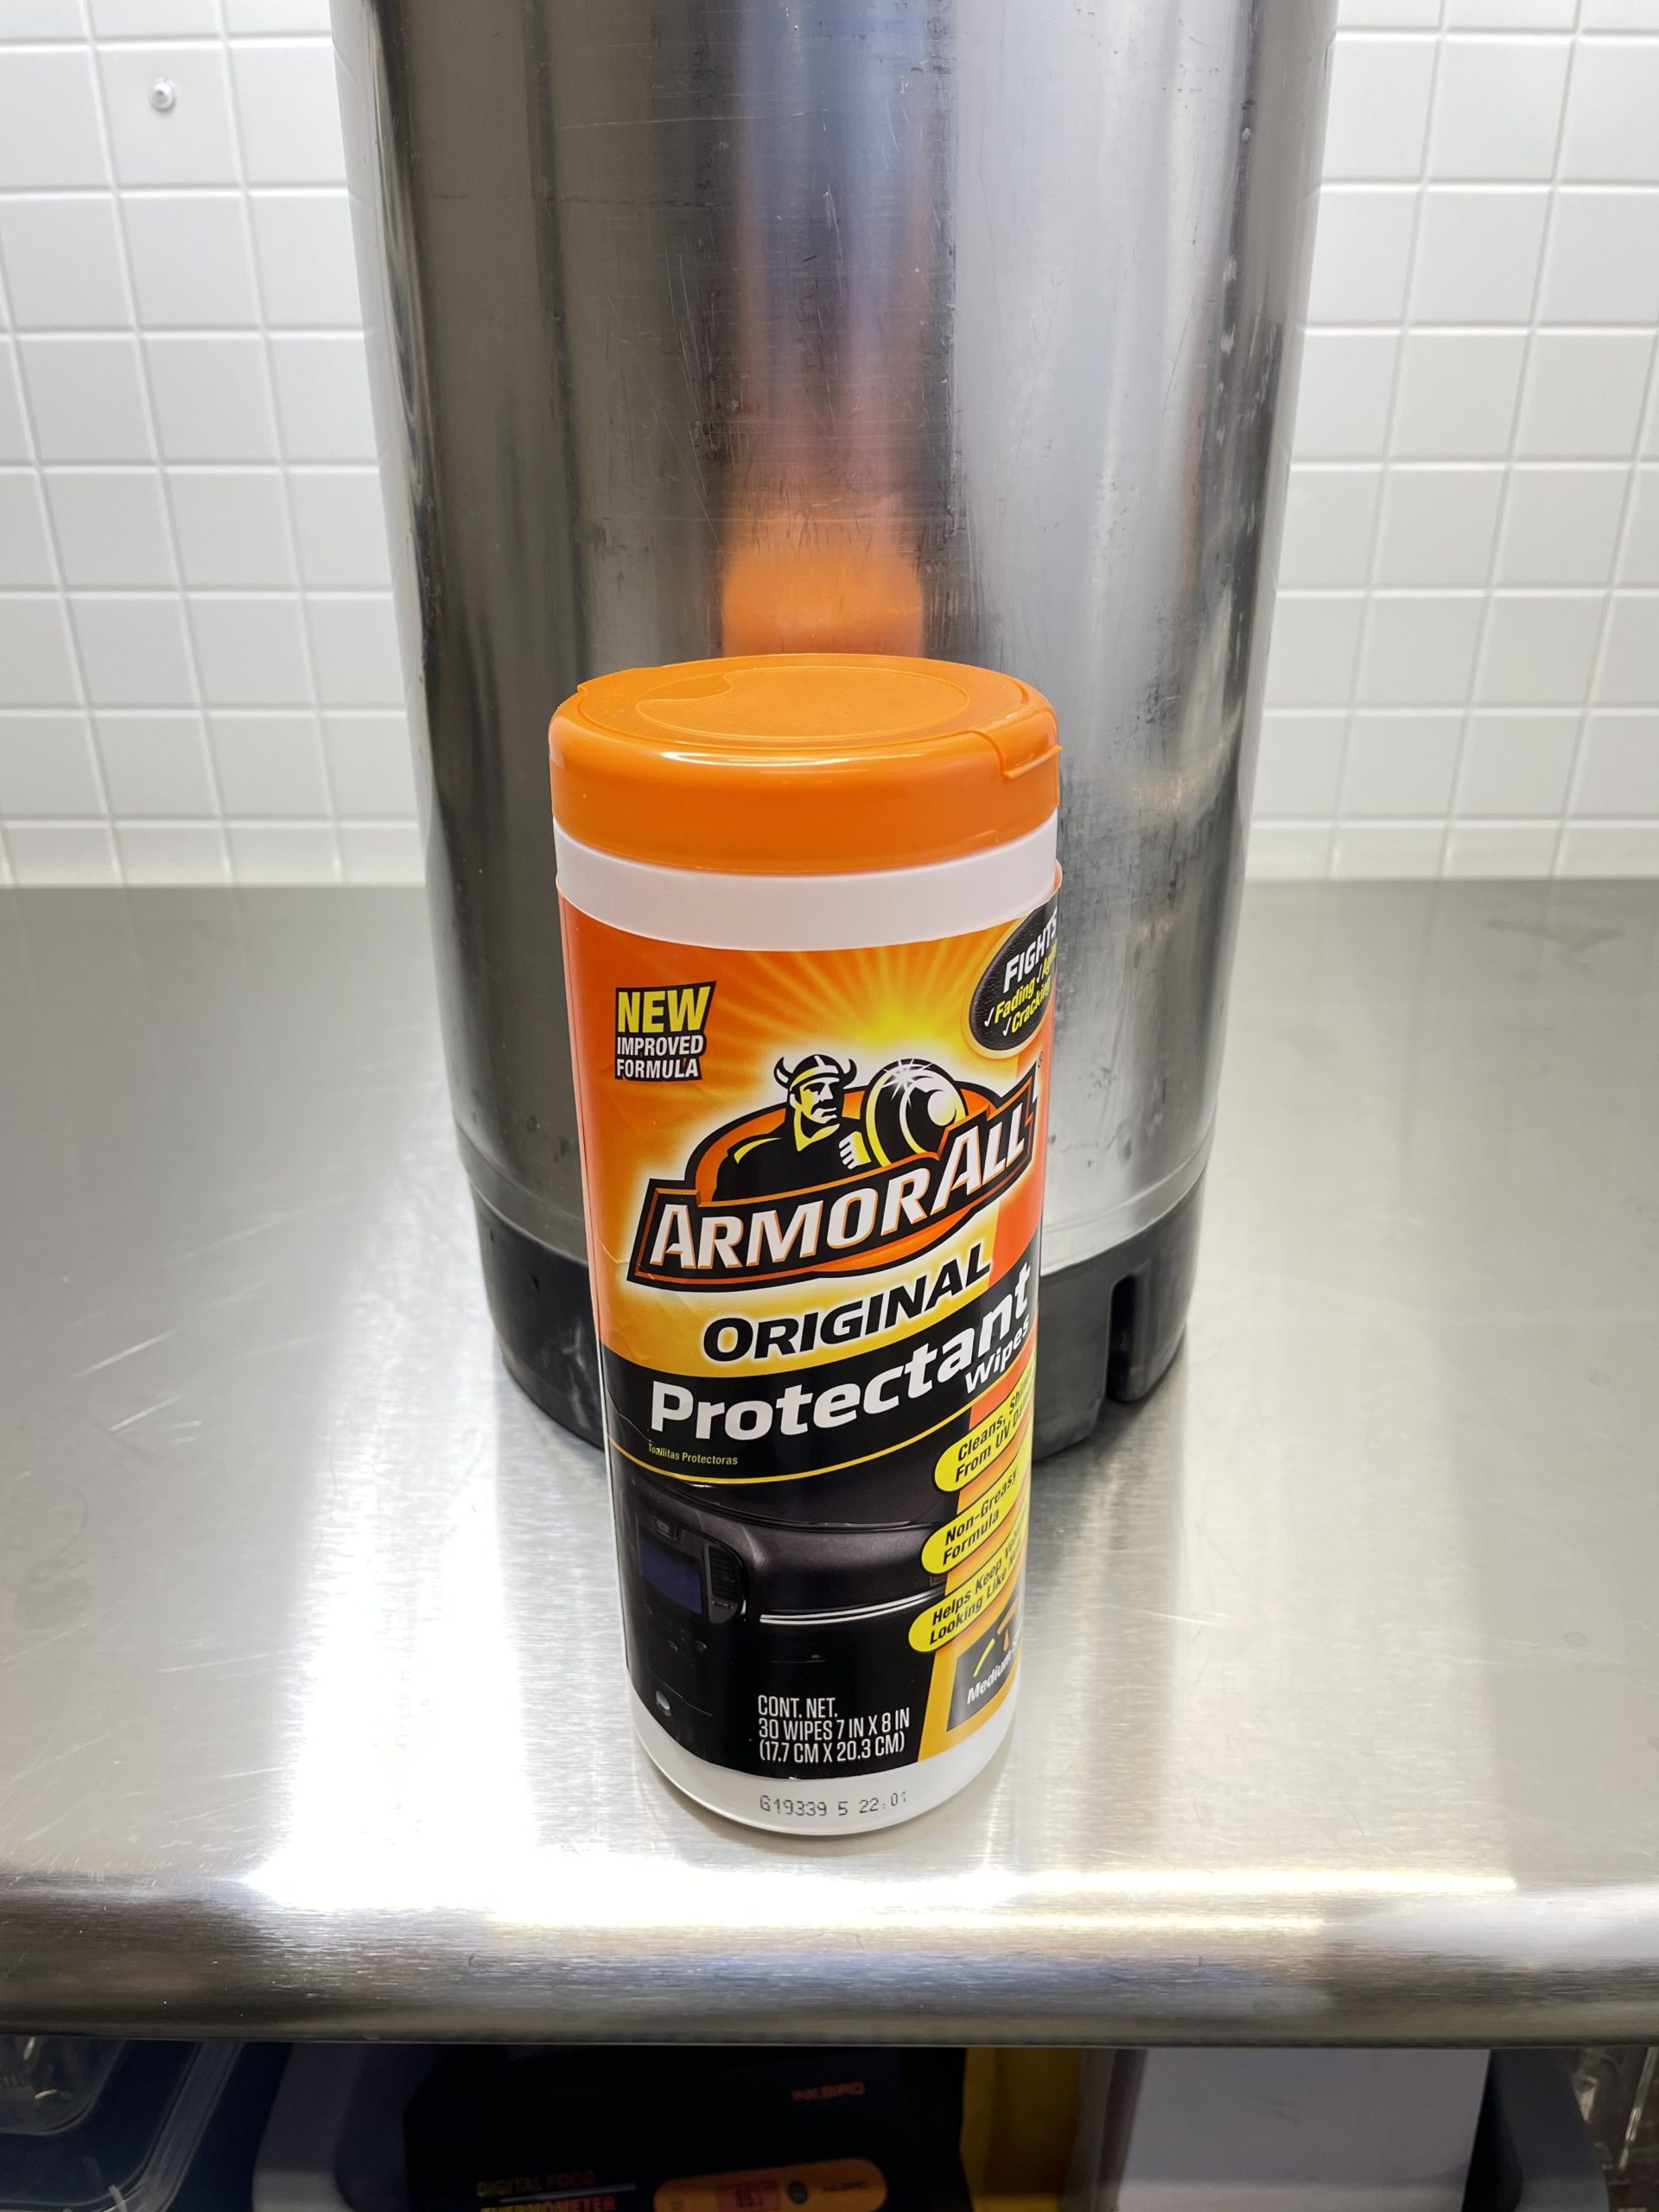 Rubber Handles get dried out and can start to crack. Kegs in this state also tend to leave rubber marks on everything and dirty up your hands quickly. Armor All Protectant works great to reinvigorate rubber handles and bases.
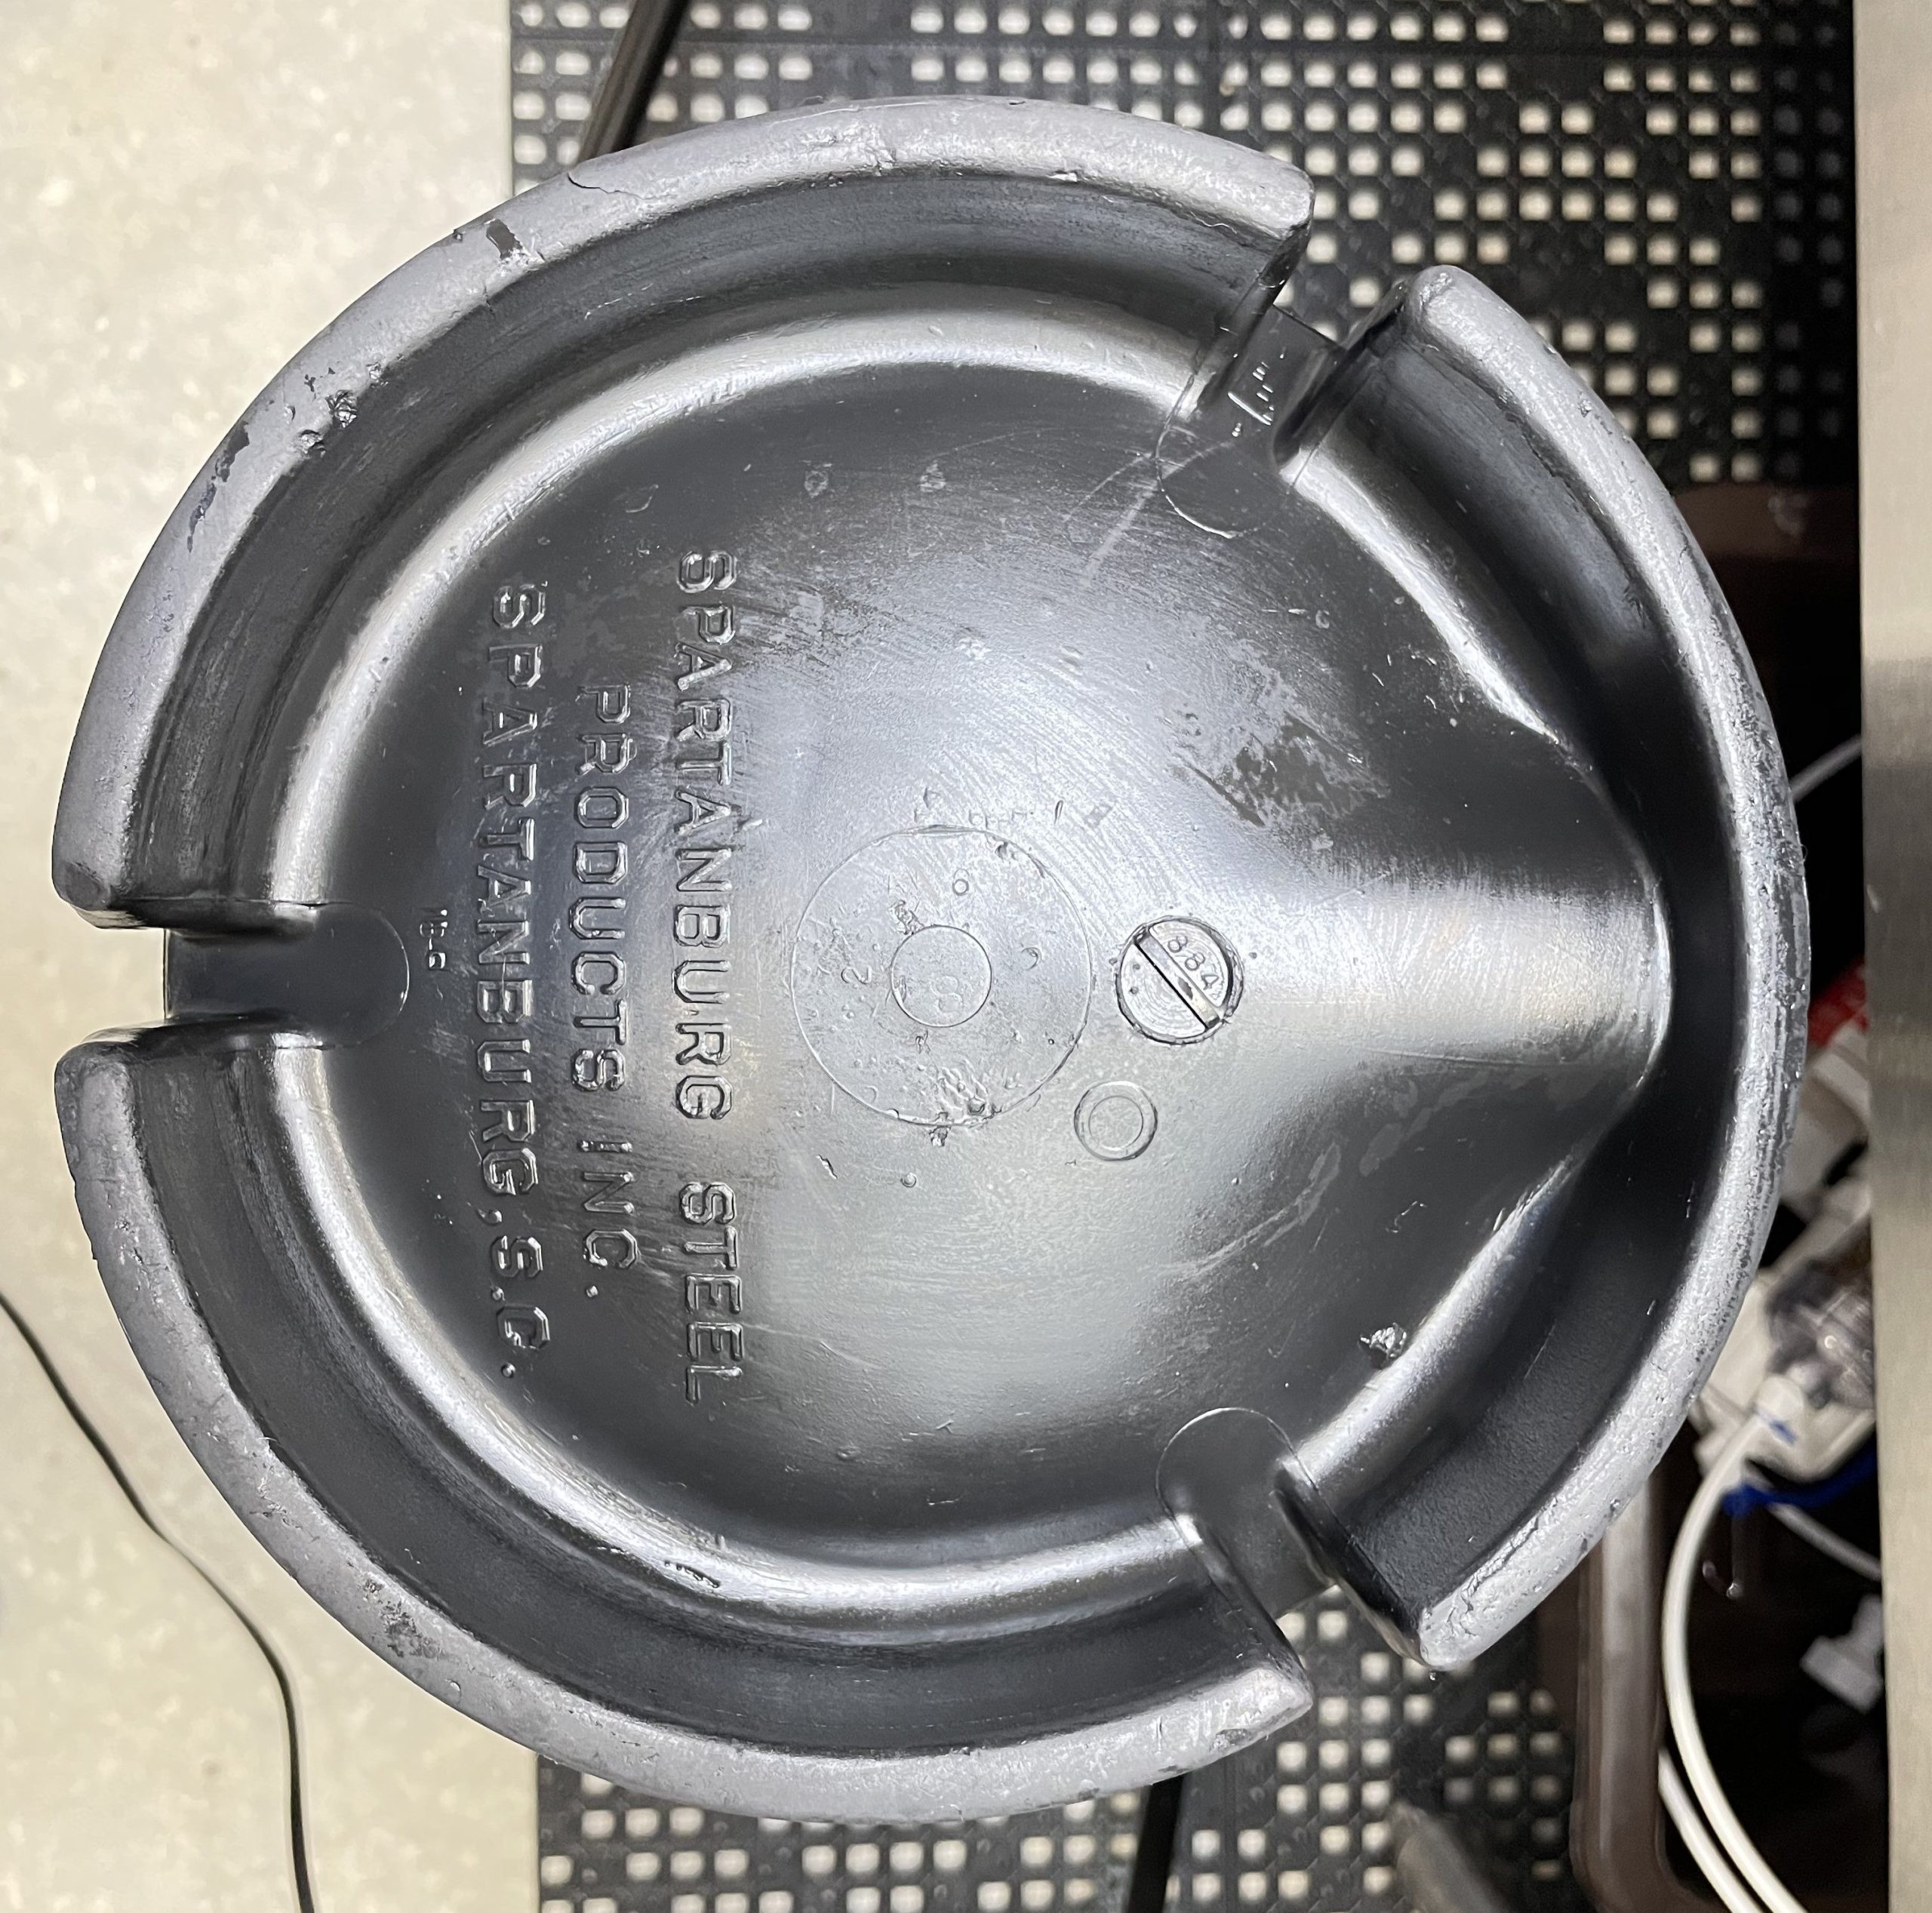 A look at the clean and Armor All Treated Based. Looking nice and shiny.
Side Note: What about the Bump?
In the previous photo you can see a bump. At first look it may seem the keg base is loose or damaged. It is not.
If you look at the inside of the keg (now bright and shiny because of the rebuild/cleaning process) You can see that this bump is by design. The liquid out dip tube is straight and fits right in that notch. From what I’ve seen this design is more rare as most of my kegs do not have this bump. The doesn’t matter, both designs function the same.
 Close up of the reconditioned rubber handle.
Replacing O-Rings
Why replace o-rings even if they’re holding pressure?
In my opinion, you’re going to want to replace all the o-rings in your keg. Generally speaking they are going to be worn out and even if they aren’t they’ll smell of soda pre-mix. Beyond that, who knows what they’re made from. Start with a clean slate. As you saw earlier, the o-rings in this keg were a grubby mismatch of soda drenched o-rings.
How Often Should You Replace Keg O-Rings?
As stated previously, I think you should replace all keg o-rings when you refurbish or obtain a used keg.
What about after that? Of course, you could just keep using them until they break, they smell or look horrible or… until you lose a tank of CO2 due to an o-ring related leak. On the other end of the spectrum some people change o-rings every time they keg.
Depending on material, keg o-rings have a shelf life. At some point, materials may become brittle. Beyond shelf life, o-rings wear out from use – compression and abrasion. The other potential issue is materials compatibility. Do your o-rings break down from the chemicals you subject them to? Even compatible materials will break down given excessive exposure to acids like Star San. See: Star San Tips & Tricks for more on that.
Keg manufacturer AEB says to replace o-rings yearly. AEB produces some of the best kegs on the market and I agree with the one year in most cases. Because of their very low cost, I suggest changing high contact, high risk leak o-rings more often.
High Risk:
- Post o-rings: Especially gas. Leaks originating from gas post very difficult to detect.
- Gas dip tube o-rings: Leaks here are easier to detect, but I also classify these as high risk. A leak at either the gas post or gas dip tube is invisible and has frustrating consequences… heading to your CO2 source to swap or fill a tank. Better safe than sorry.
High Contact: Internal QD and Universal Poppet O-Rings. These touch every ounce of beer that’s poured.
I suggest using Daylight Savings dates as a reminder. Something like this…
- Daylight Savings Begins (Spring): Replace high leak risk and high contact o-rings – Post O-Rings (especially gas), Gas Dip Tube, Internal QD O-Rings and Universal Poppet O-Rings.
- Daylight Savings Time Ends (Fall): Replace all keg, poppet and QD o-rings.
Most of these o-rings are pennies each when bought in reasonable bulk quantities. Regularly replacing, costs very little and helps stave off unwanted off flavors, leaks and lost CO2. This schedule should keep your kegs working great from a gasket perspective.

Use Food Safe Keg O-Rings
For whatever reason it’s difficult to find replacement keg o-rings. Valuebrew’s lineup features replacements made out of food grade materials. Mostly FDA rated silicone, with one FDA rated Buna-N option. They also have some exclusive, unique offerings.
More About Food Safe MaterialsOur resource post on o-ring part #s has been a go-to for years.
The problem: At one point I had an o-ring manufacturer reach out to me that had found this resource while trying to do some market research. This manufacturer suggested that many of the products that homebrewer’s use are made out of industrial grade materials that should not be in contact with food & beverage products. These materials could potentially contain materials that are not meant to be ingested.
Okay, that’s a little concerning. It was at this point that I added a section to that resource that talked about the issue. I also started adding disclaimers to posts when I was unsure whether or not materials were food grade.
The next problem: For whatever reason, in my experience, it’s extremely difficult to find offerings that claim to be safe for food contact. Maybe some of the o-rings that are available are food safe, but very few are actually labeled as such.
But why? One possible reason… they aren’t food safe. Beyond that, one industry insider I spoke with said suppliers have a potential problem with fulfillment. Since many options and materials are available, It’s difficult for some distributors or sellers to guarantee you’re getting a food safe option.
- Just because an o-ring is marketed for use in a keg doesn’t automatically mean that the materials and production processes used are food safe.
- If you think about it from a random supplier or manufacturer’s perspective… they don’t know what you’re putting in your keg, maybe it’s not even food. The problem that we, as homebrewers, have is is… beer is food and meant for human consumption.
- You cannot say all o-rings made from [fill in material here] are food safe. Certain quality standards and processes are required.
The fact is we’re putting beer (food) in our kegs.
Valuebrew has a selection of food grade o-rings. They also have replacement universal poppet o-rings and internal QD o-rings, also food grade.
Bulk pricing! As of this posting, all options are available in bulk quantities at a steep discount when compared to buying single o-rings.
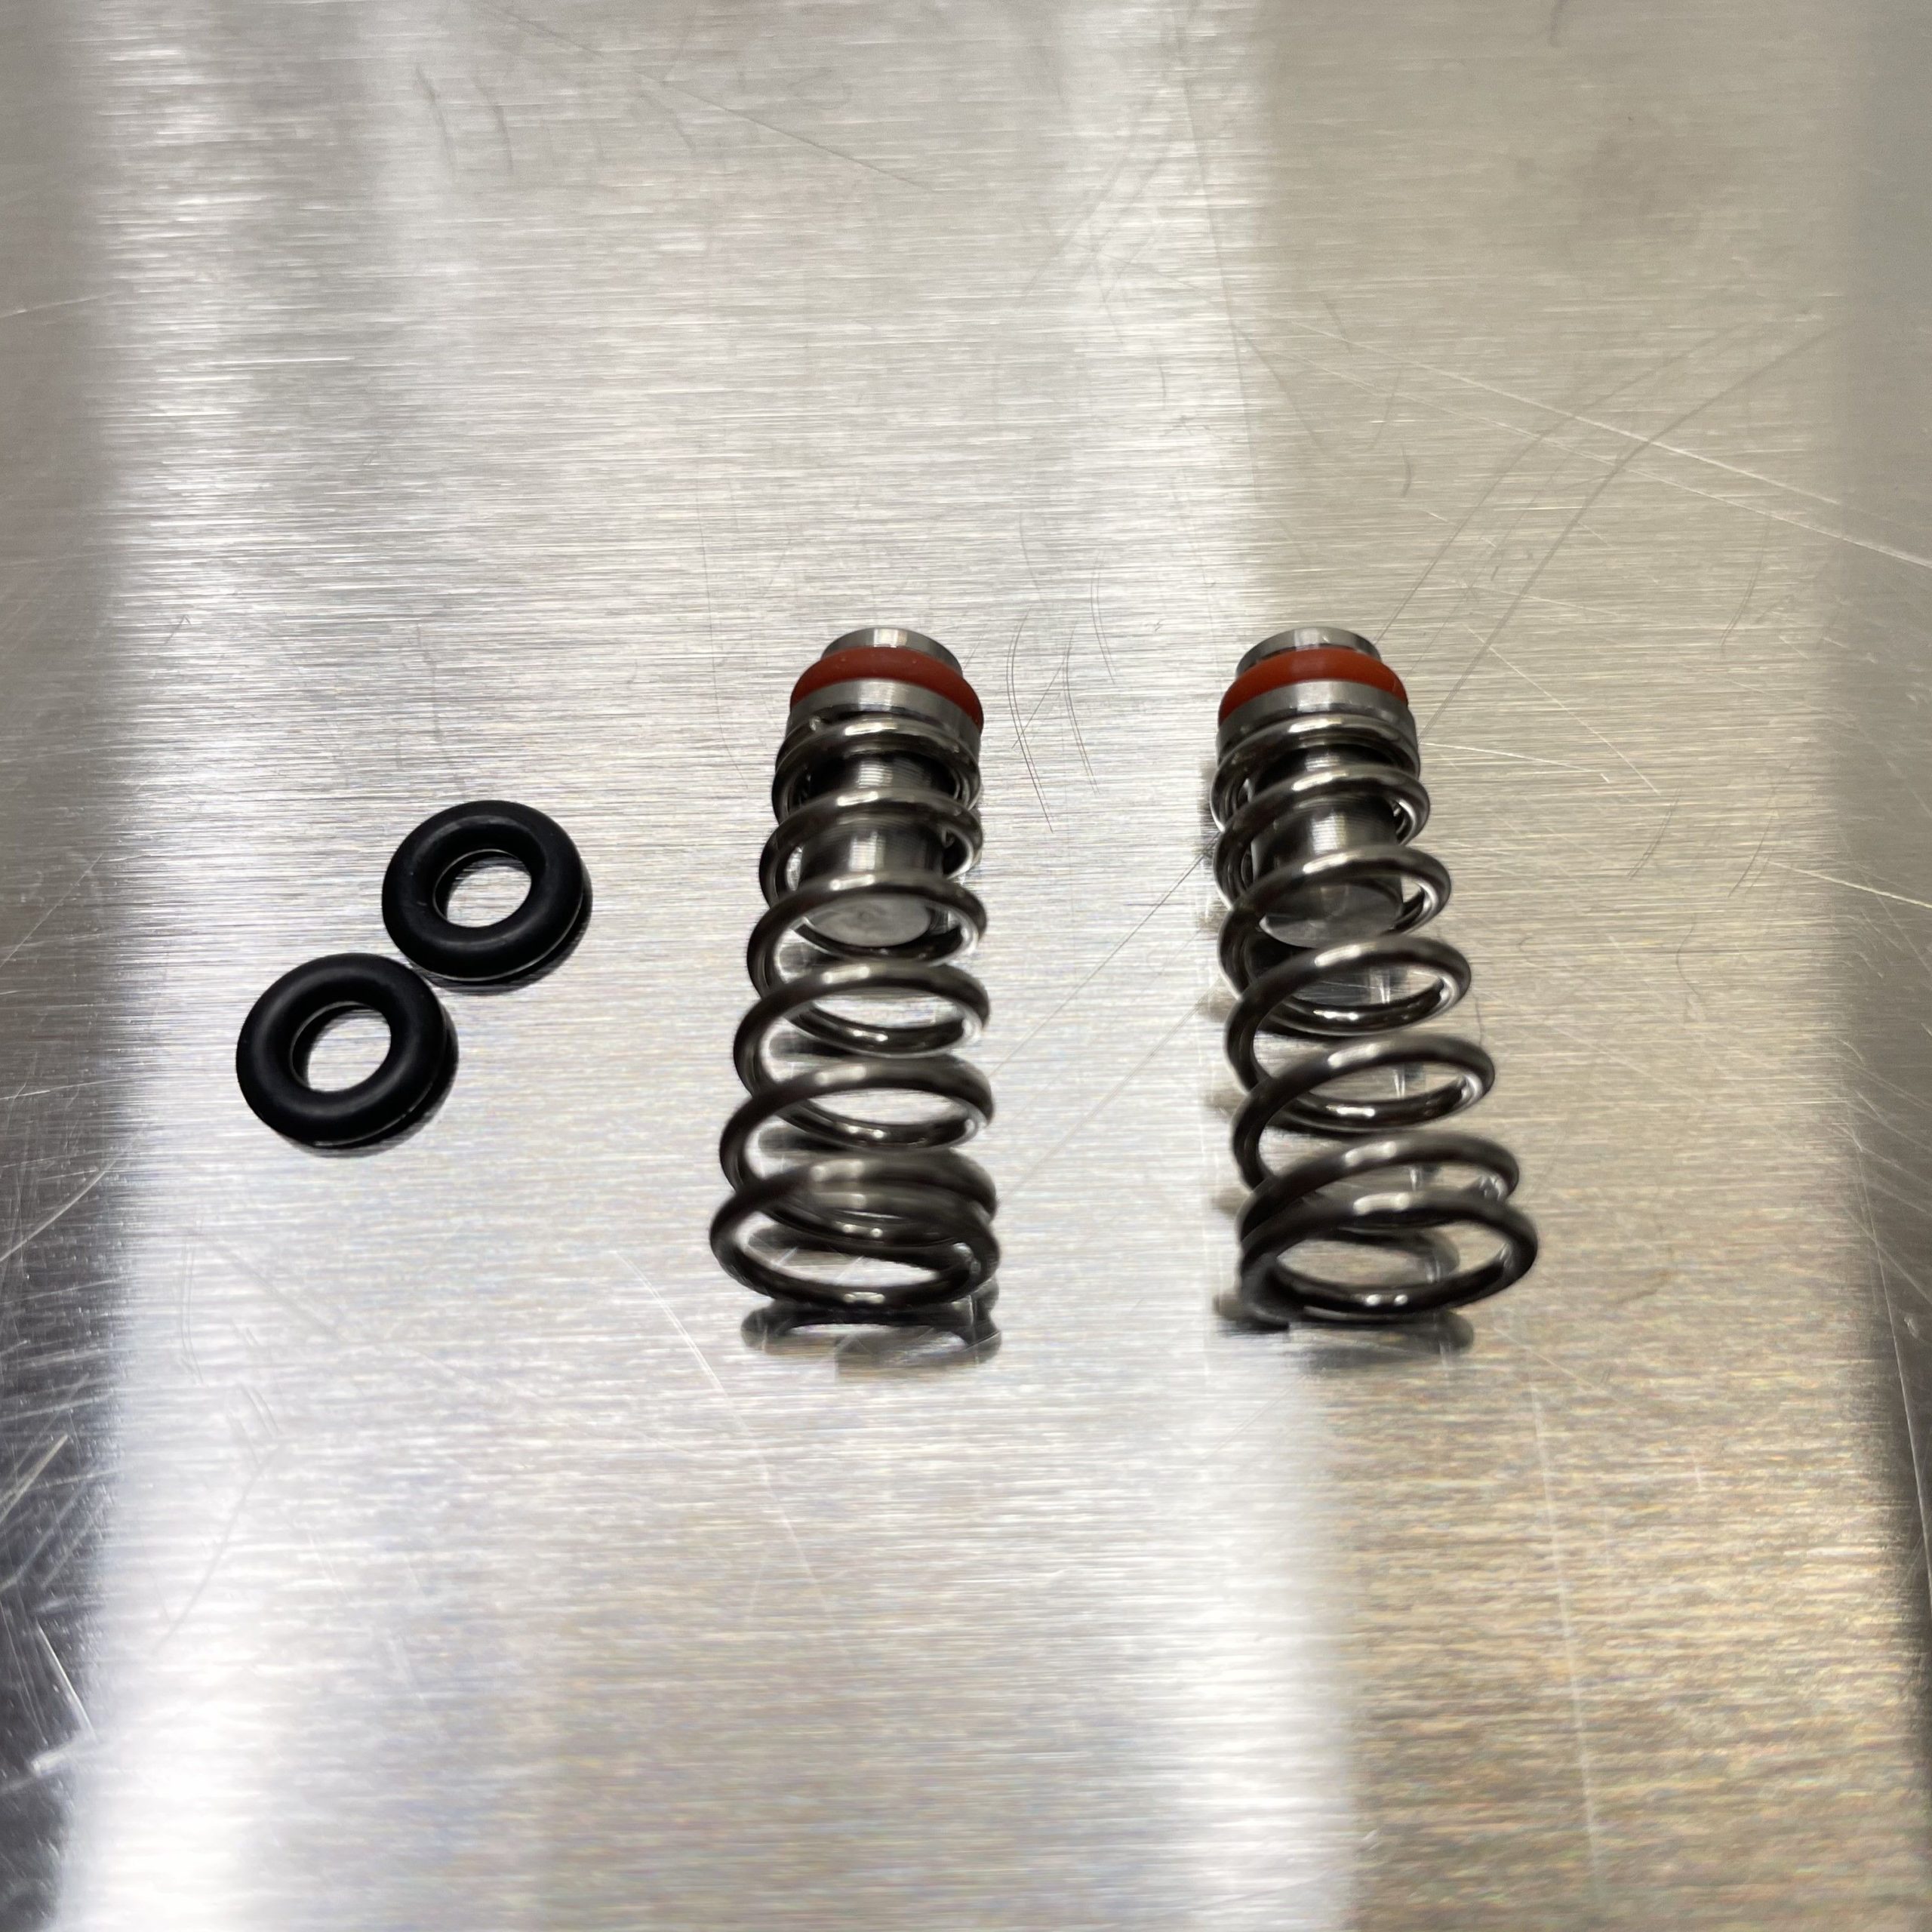
 Replaced lid o-ring. This is silicone. Valuebrew also offers a food grade Buna-N option
 Profile view of new lid o-ringNext up are fresh dip tube o-rings
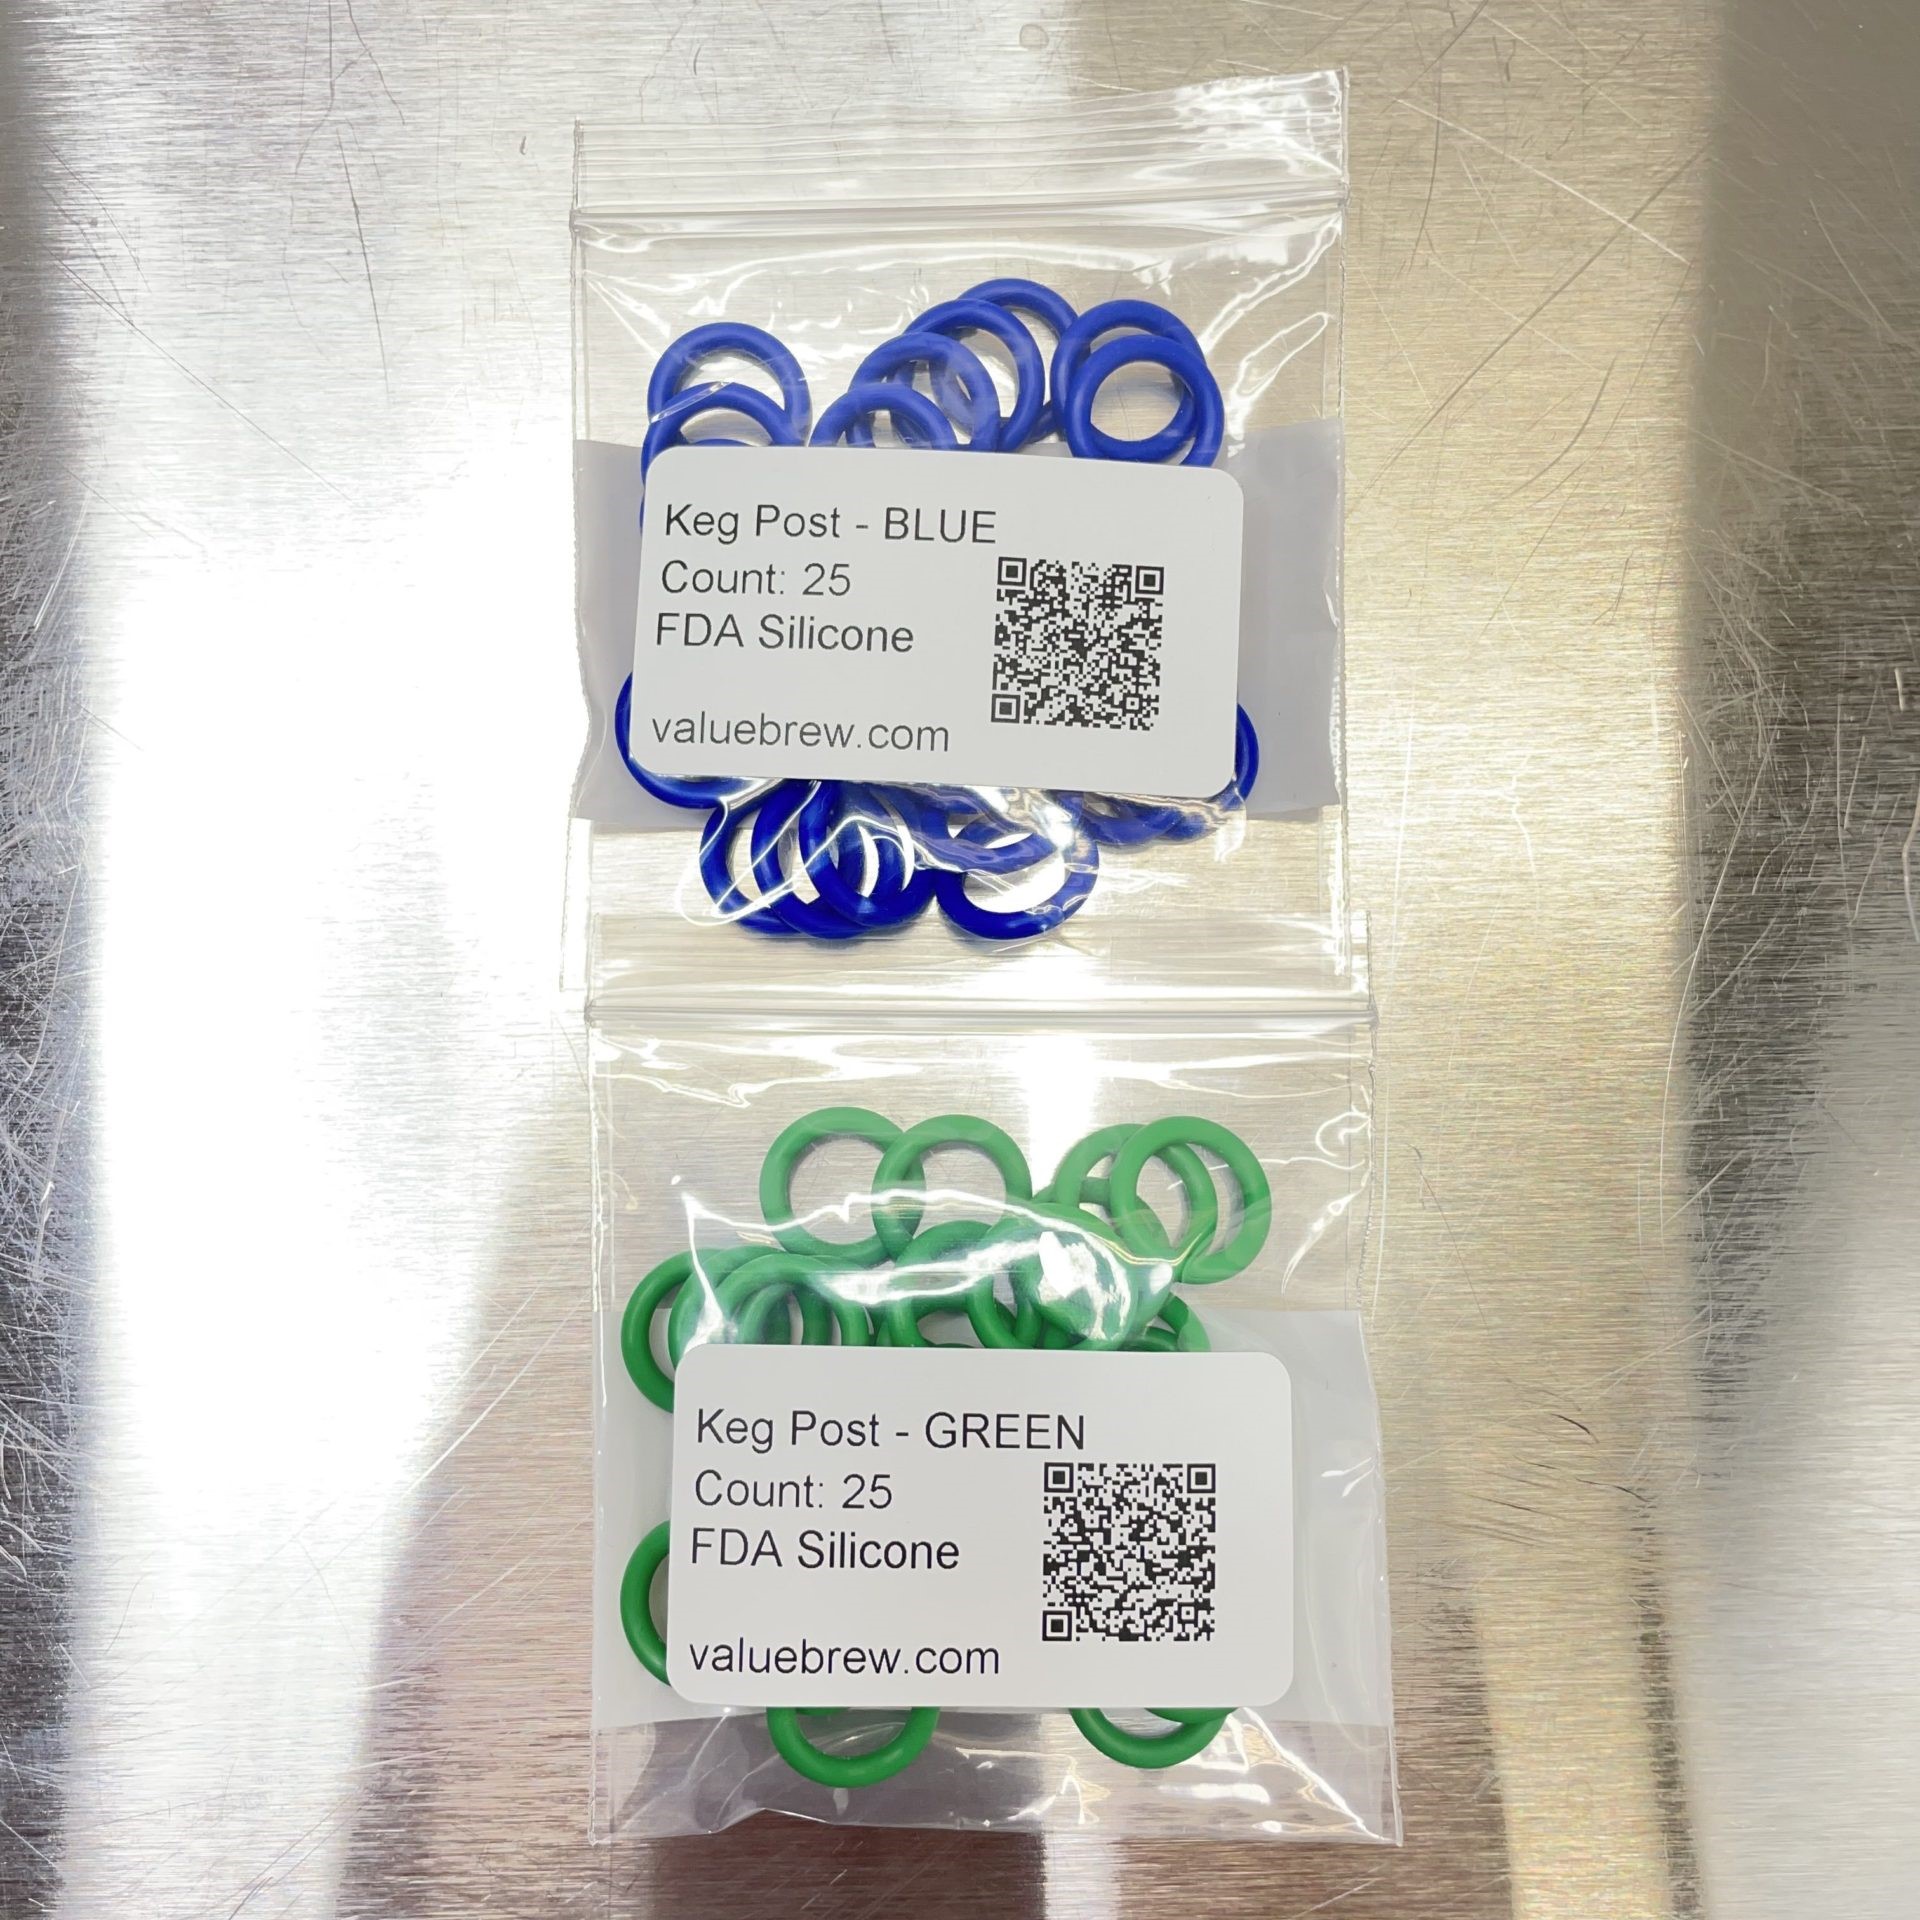 For the keg post o-rings, Valuebrew has an exclusive color coded option. Blue and Green. These are sized for ball lock kegs (although there is a workaround for pin lock kegs, see pin lock section below). You can use these however you’d like, but the idea is to color code you keg posts for easy identification. They recommend Blue for Beer and Green for Gas. I’m quite excited about these.
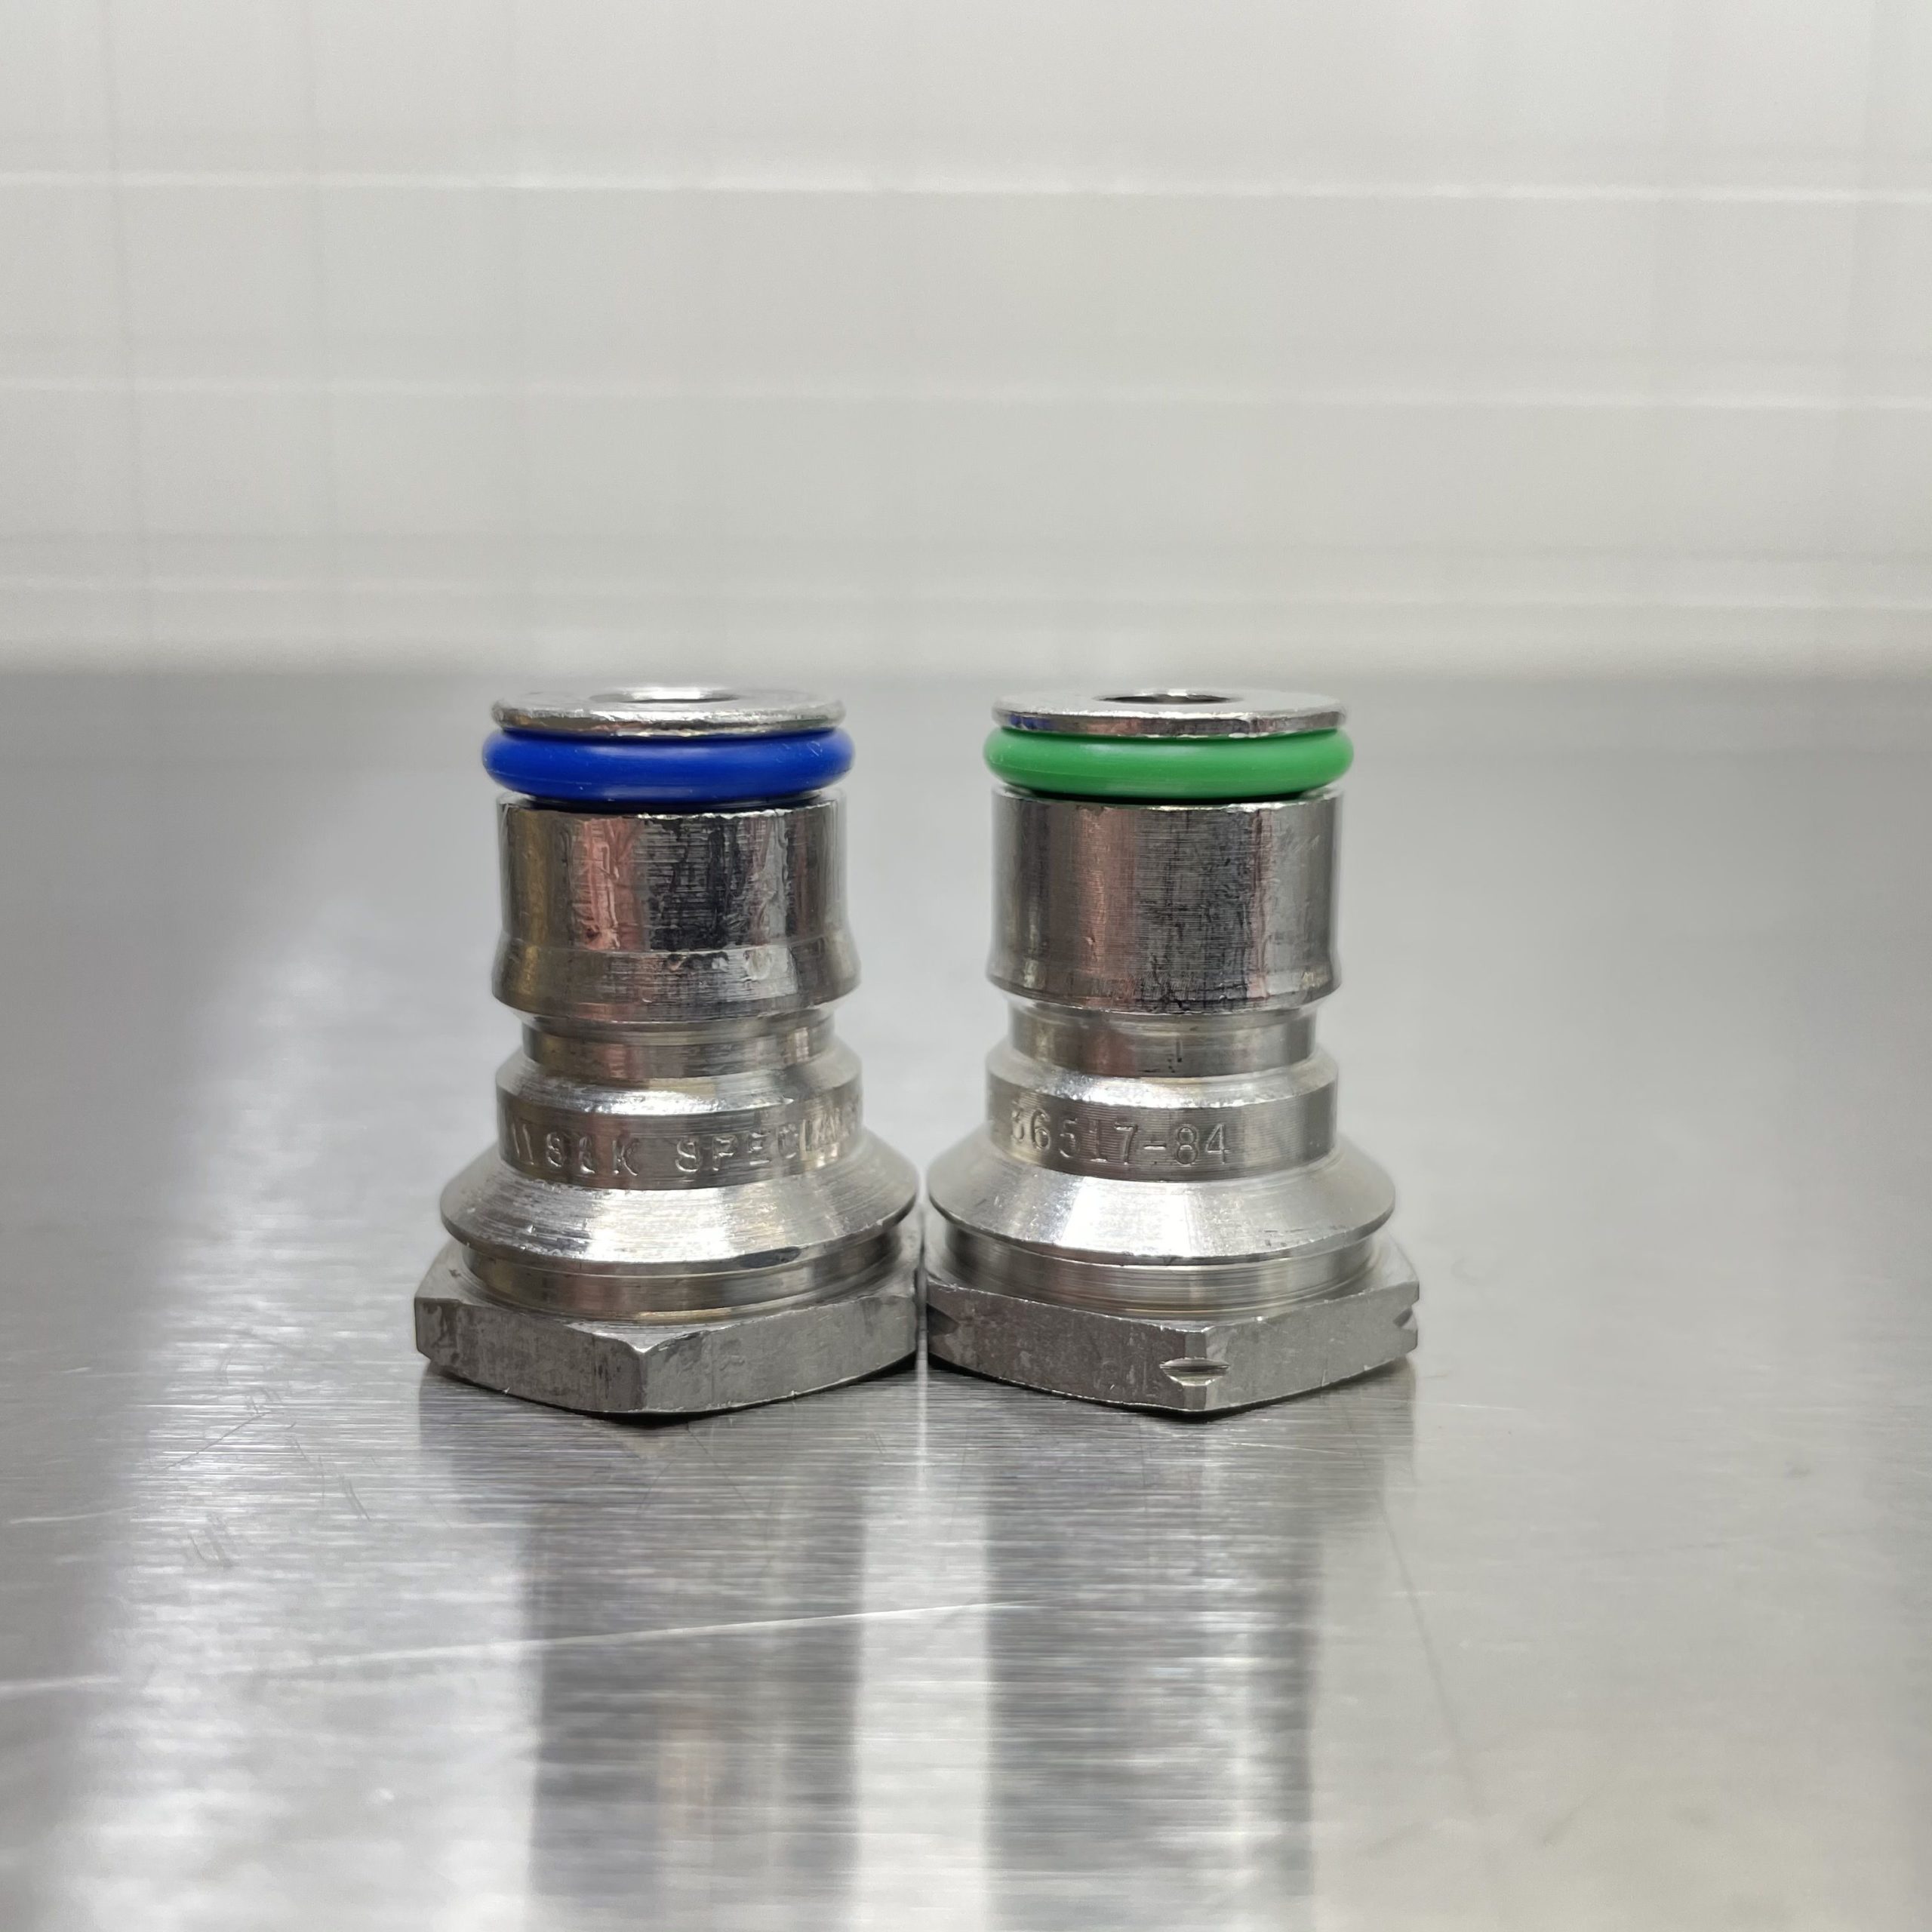 Installed on the keg posts
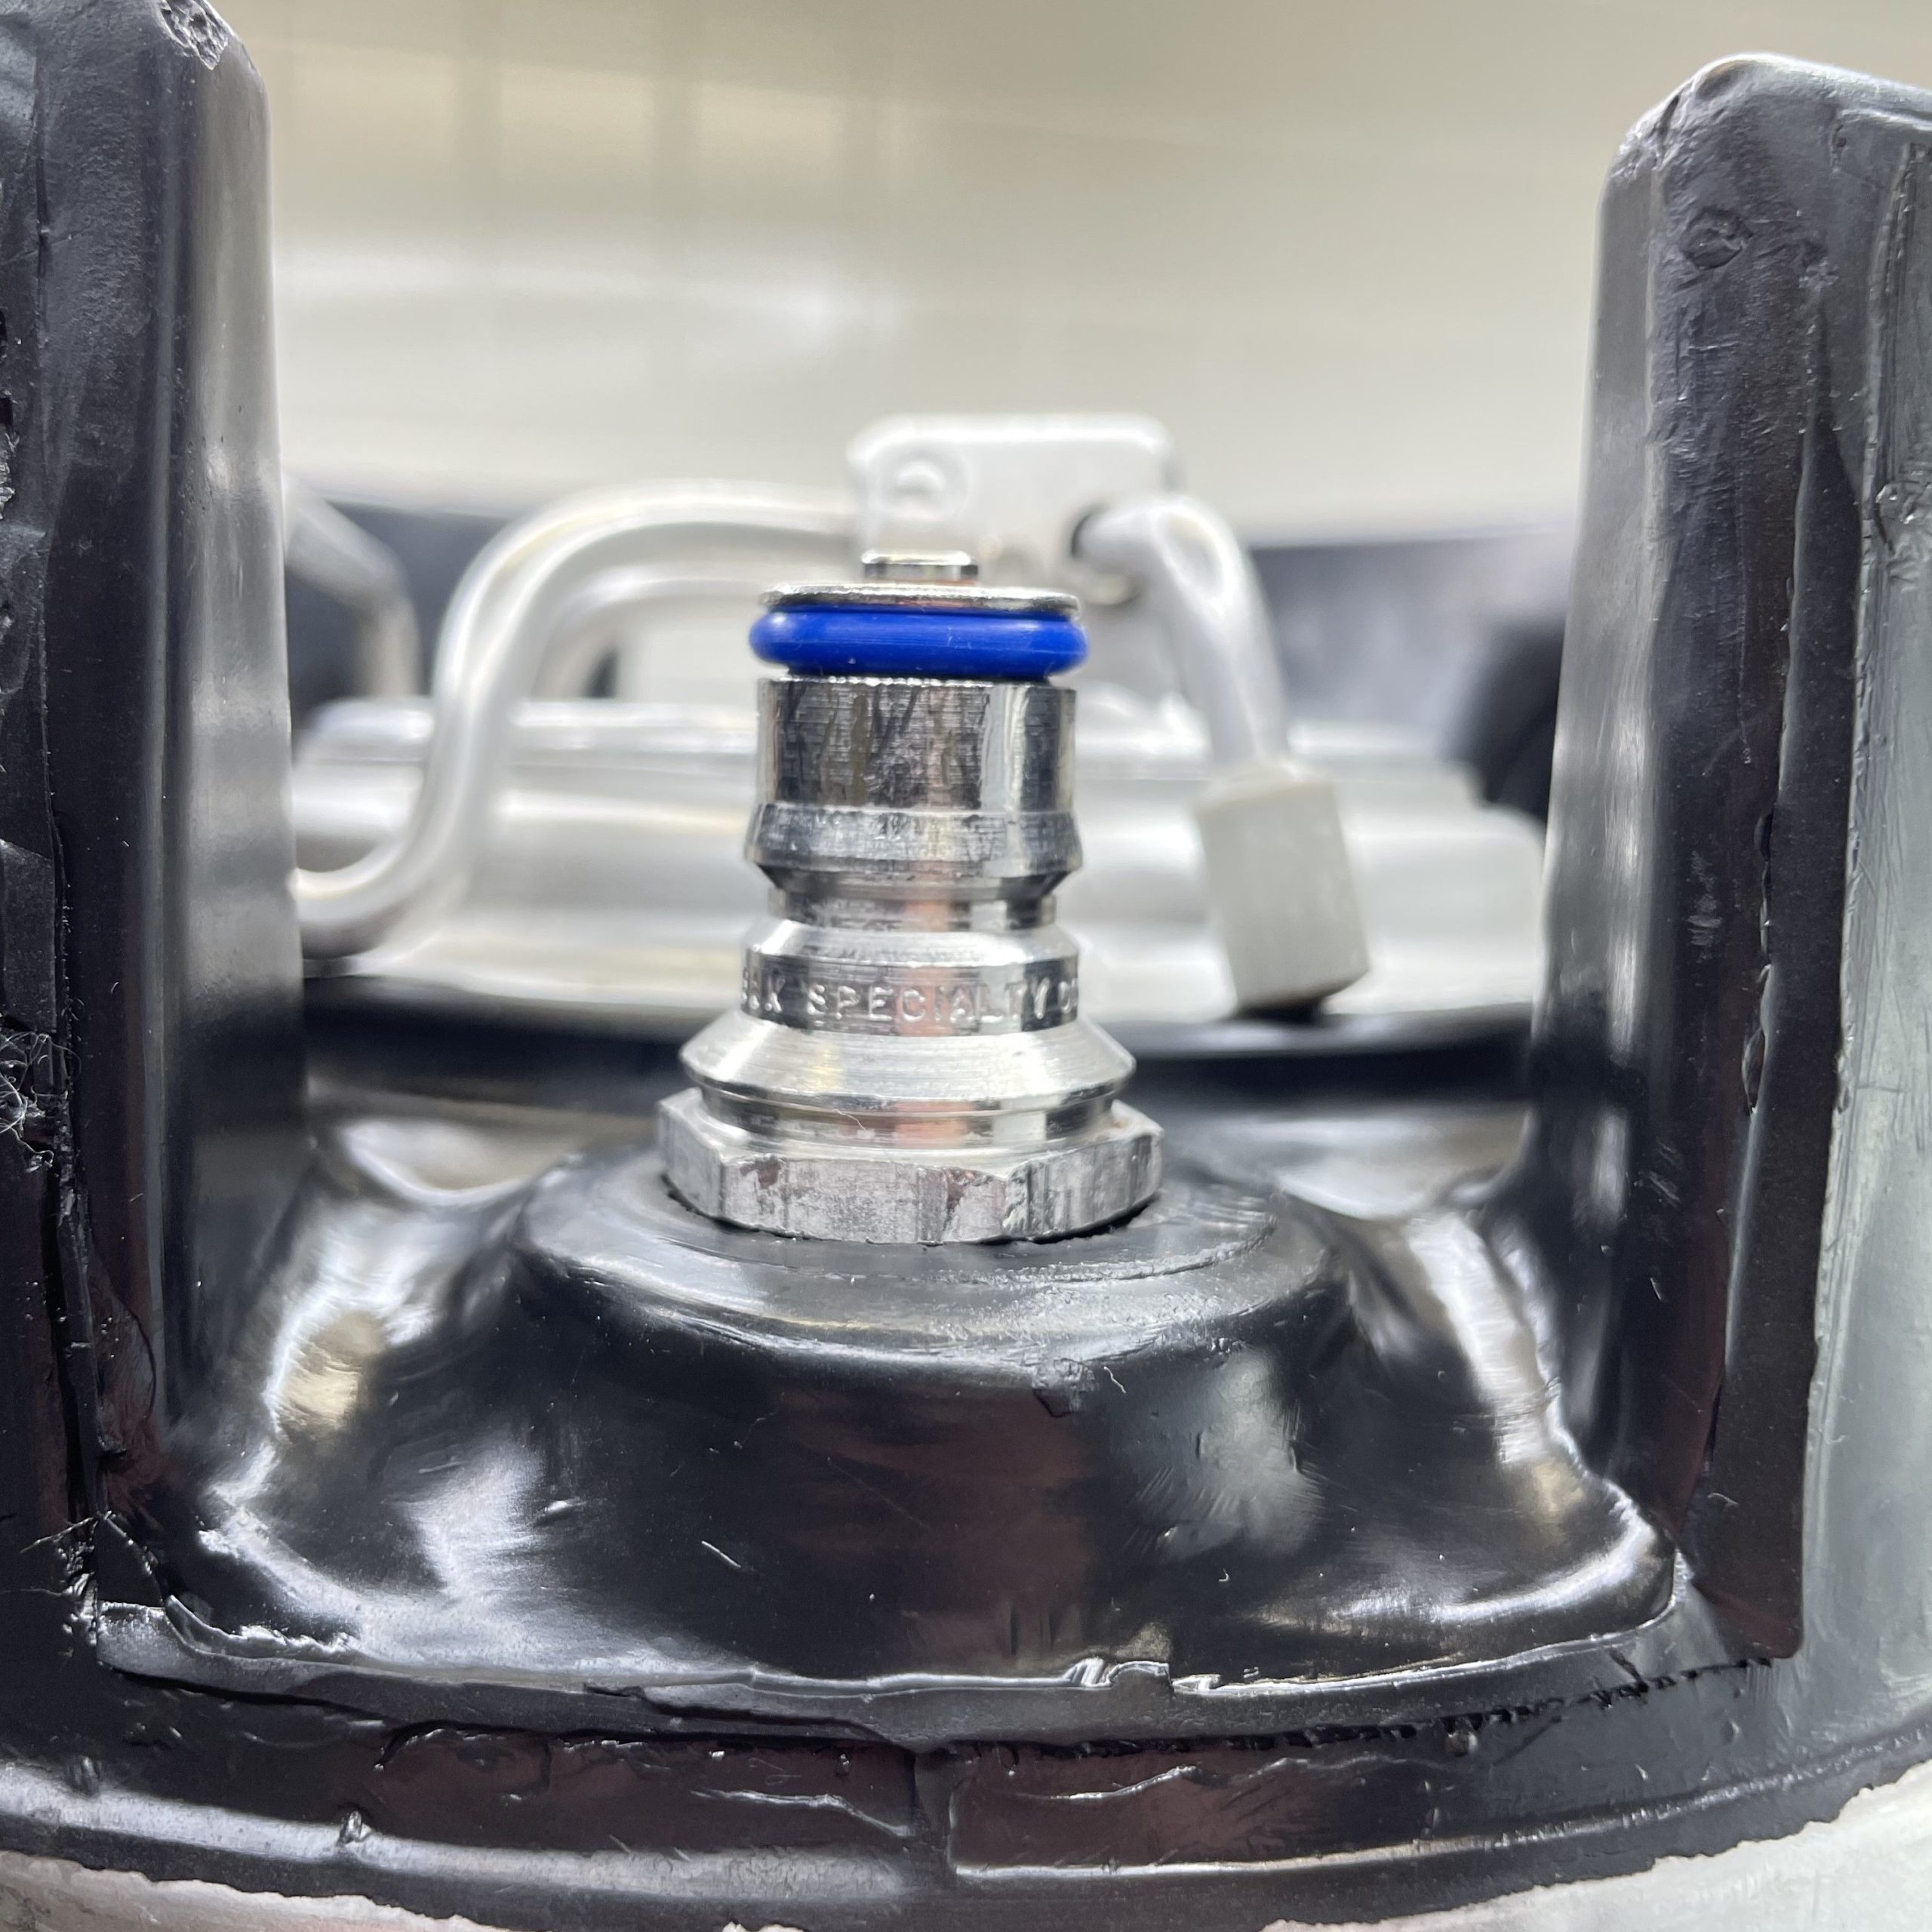 Blue for Beer/Liquid Out Installed
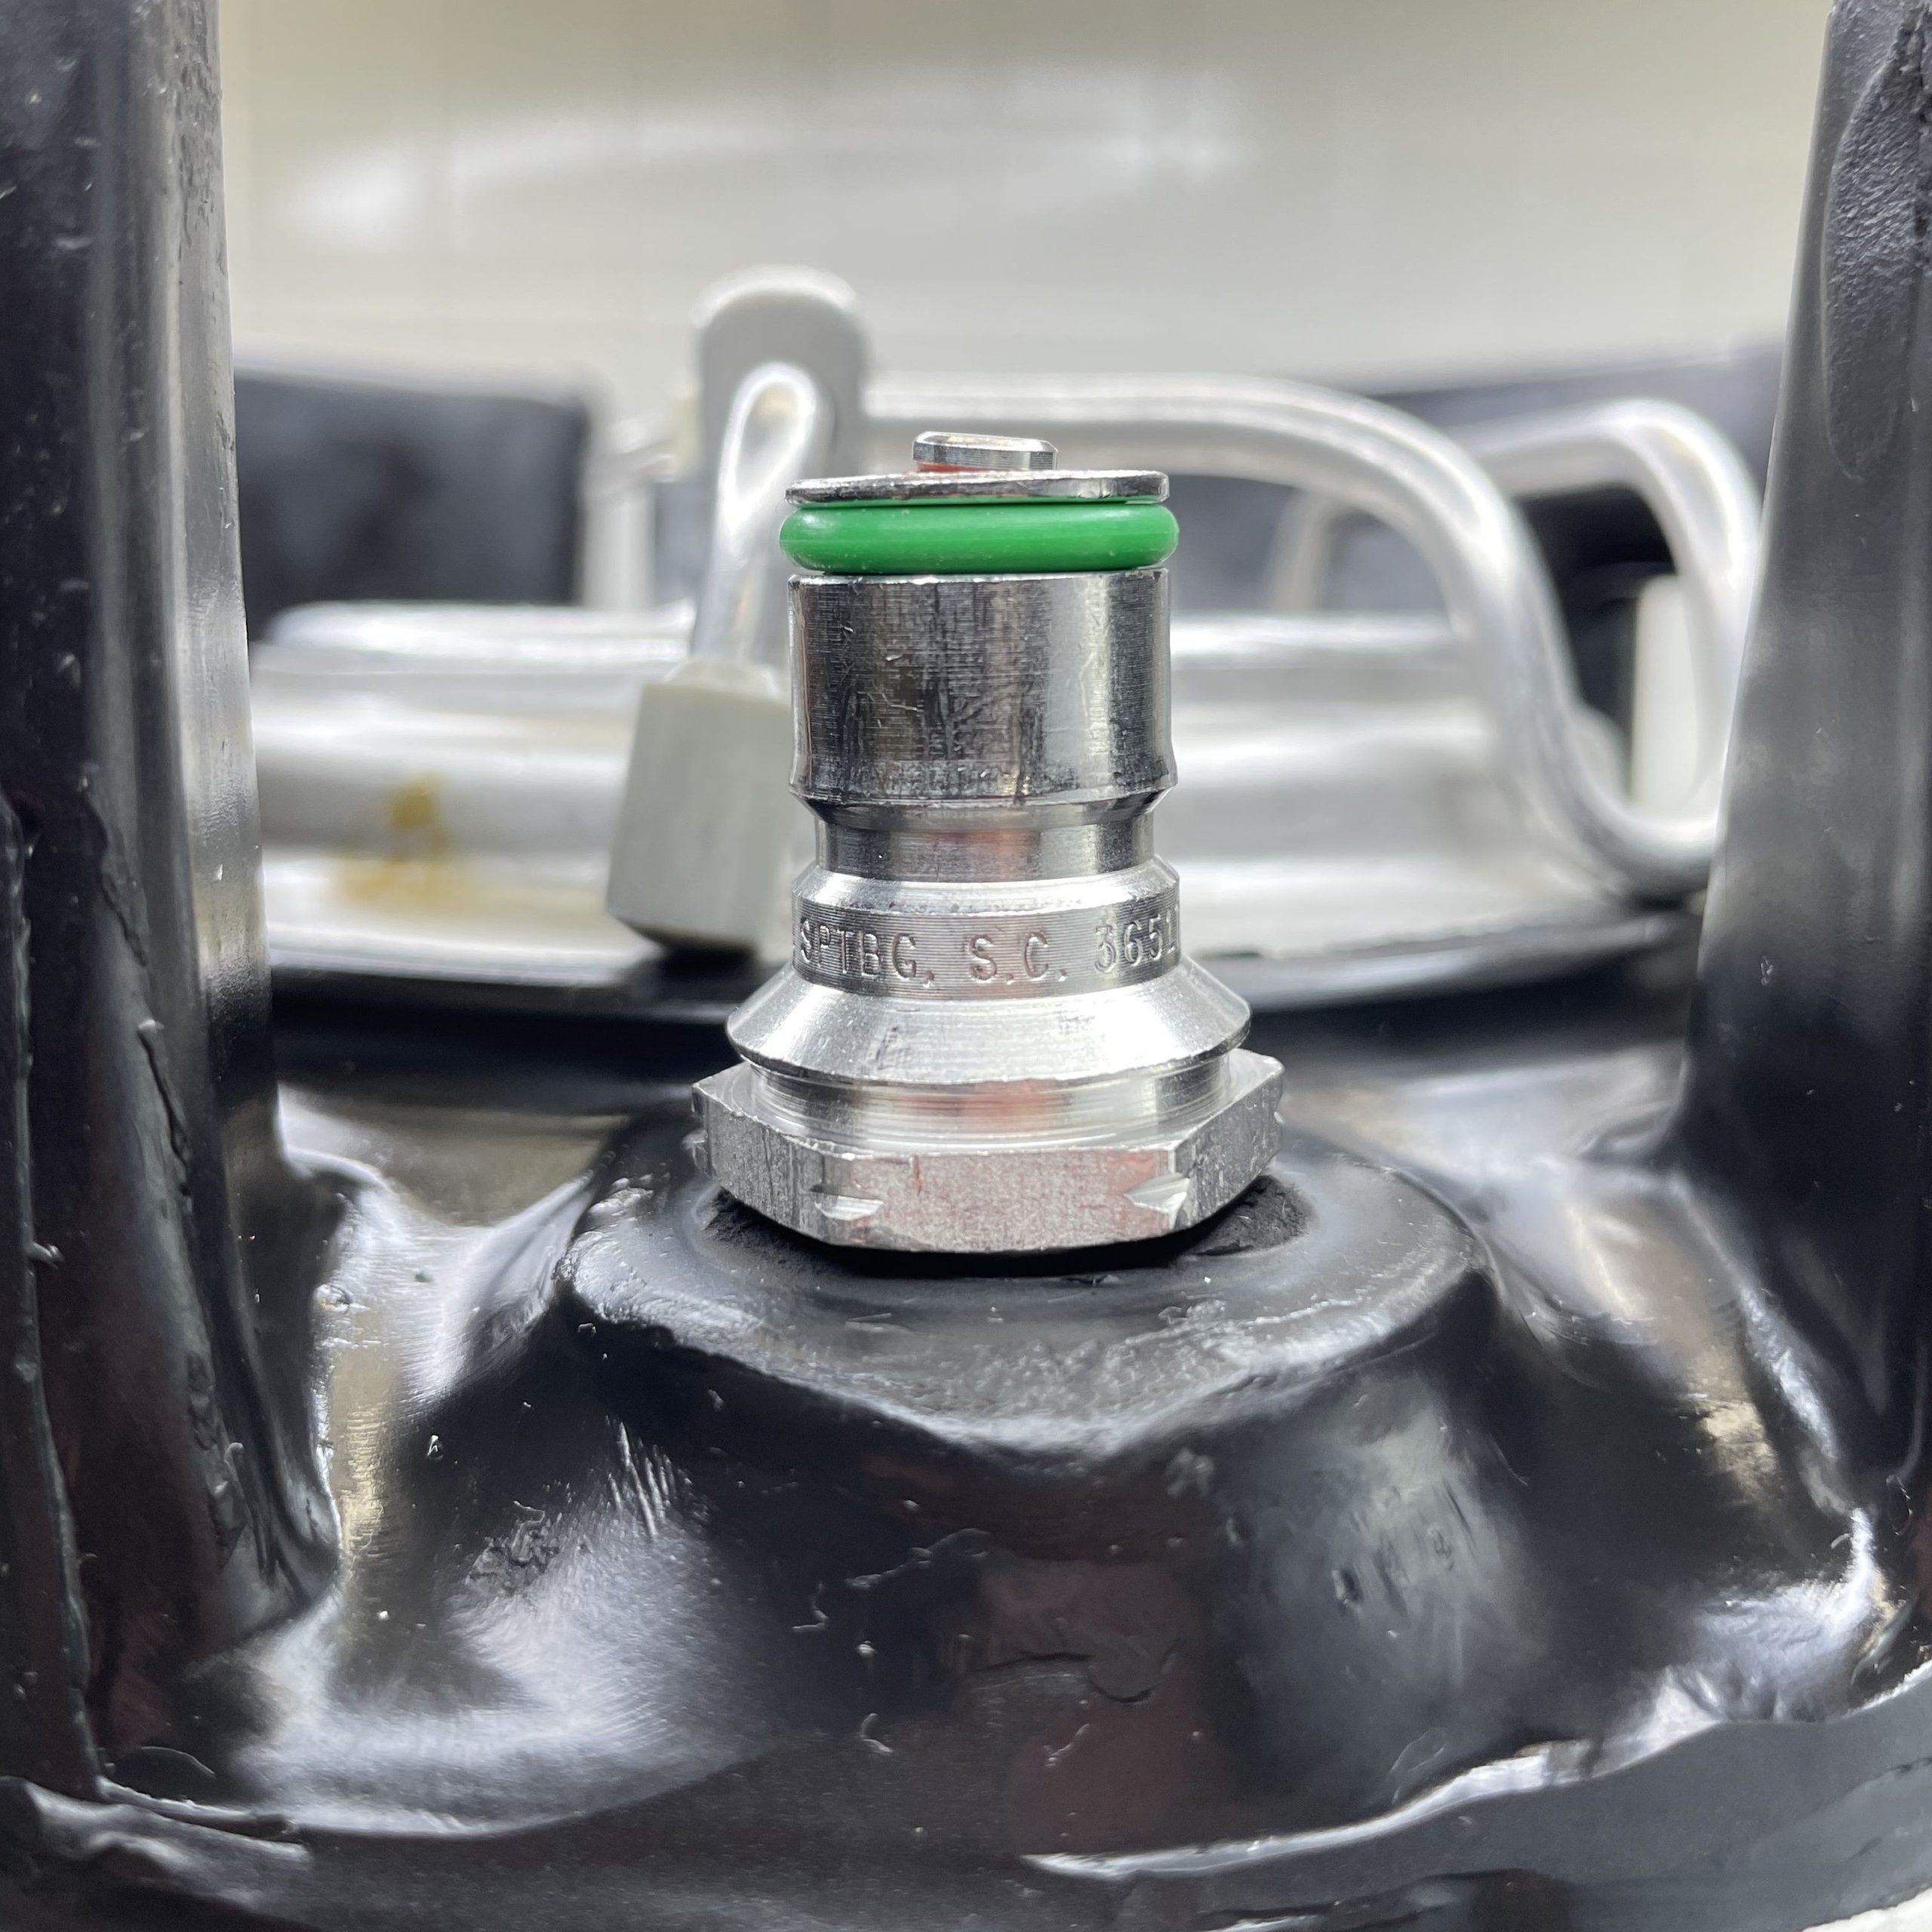 Green for Gas In Installed. A Note on Gas O-rings I am quick to replace gas o-rings. A leak at the post is particularly difficult to test for. I have lost multiple tanks of CO2 before learning this lesson. In bulk, these are cheap, replace them liberally. My suggestion is every other keg.
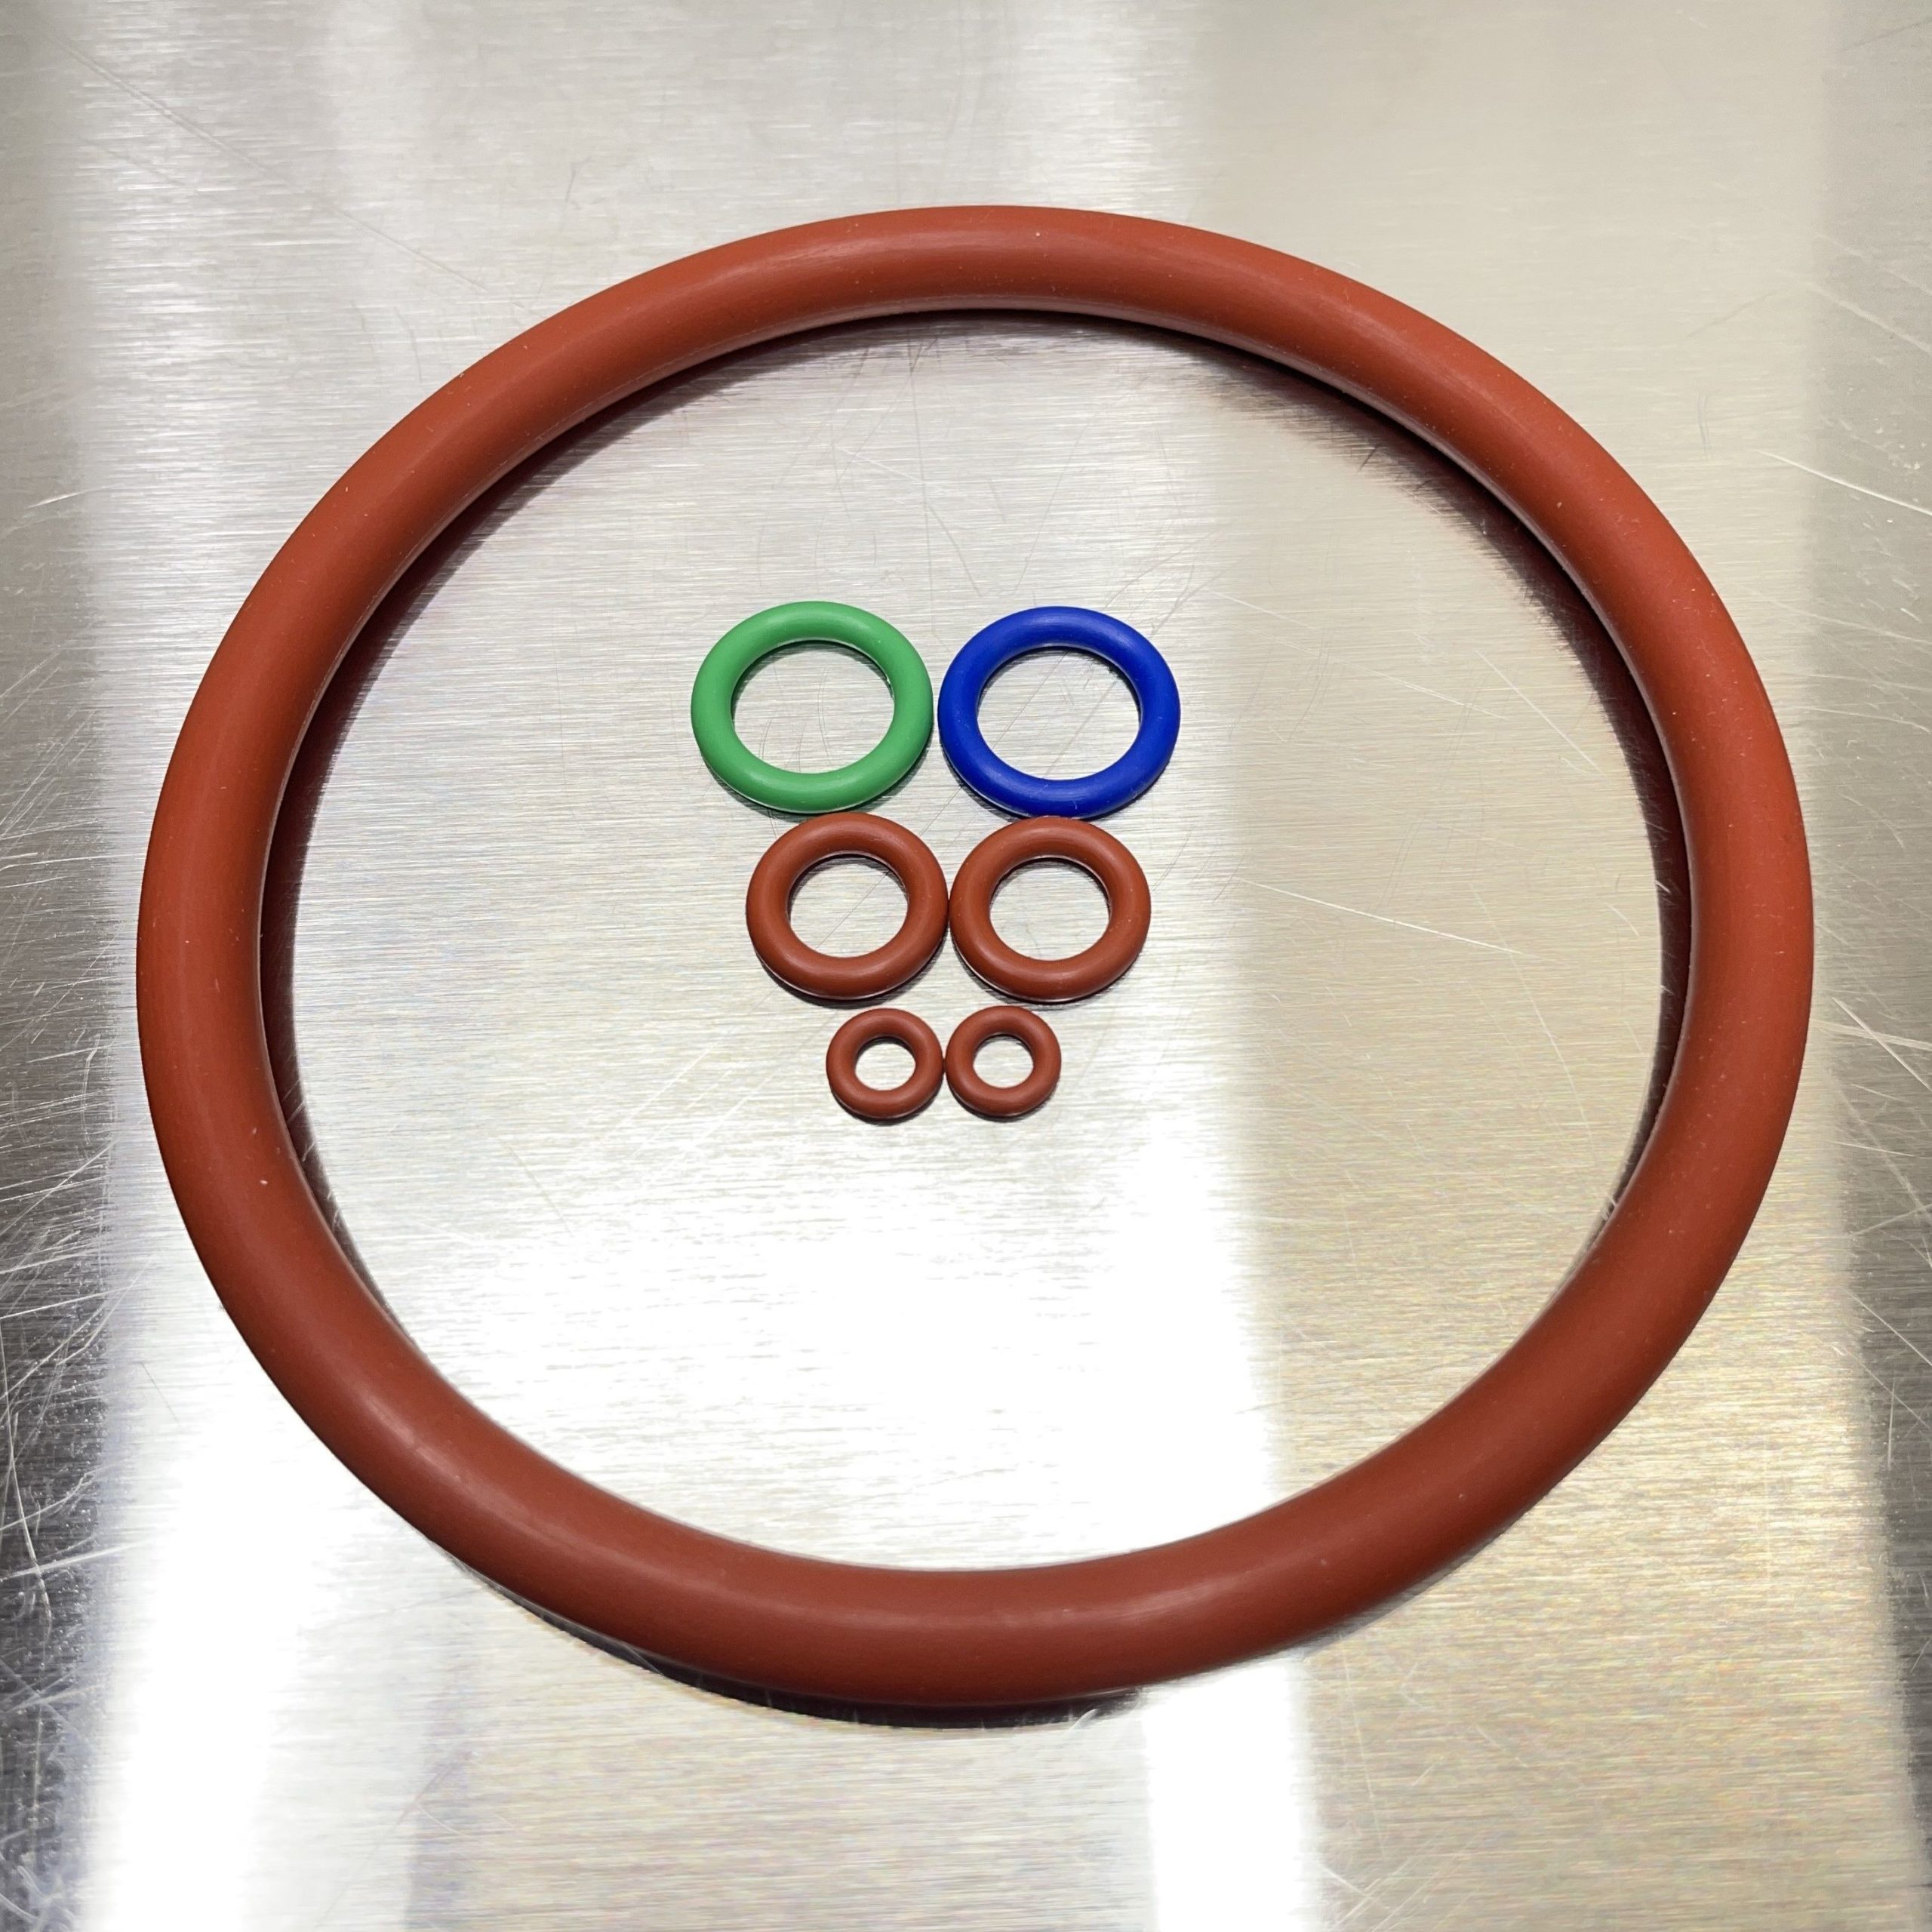 The full set of o-rings I used to rebuild this keg. Lid, Custom Posts, Dip Tube and Universal Poppets. See: Food Safe Keg O-Rings in Bulk via Valuebrew
 There is one adjustment for Pin Locks, see Pin Lock section below.
Update: New Color Code Option – Gray and Black!
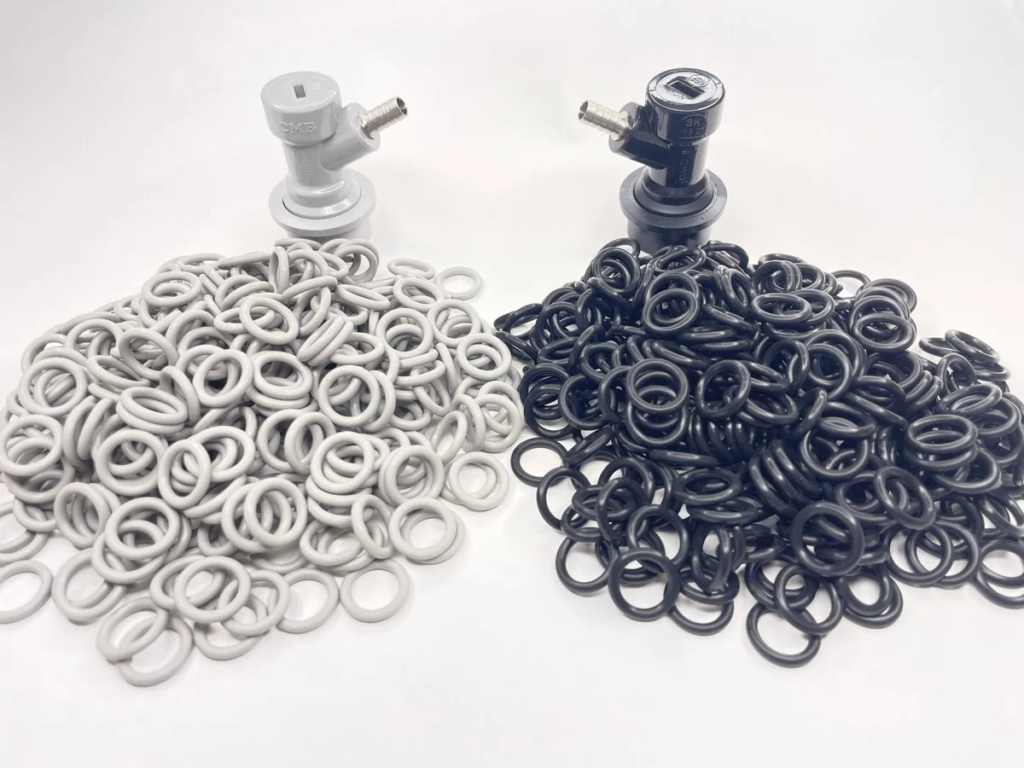 Valuebrew has introduced Gray and Black o-rings. As the picture indicates these are designed to match standard gray and black keg QDs. These have become standard colors on ball lock, pin lock (usually the bottom portion of the QD) and even recently released Kegland QDs (center portion).
The gray and black are also made from food grade silicone and also available in bulk quantities.
Gray & Black Post O-Rings at Valuebrew!
Installing and Adjusting Universal Poppets
I use universal style poppets exclusively when rebuilding kegs. These have fit every single keg I’ve rebuilt. Sometimes they require some adjustment. That is process is detailed here.
 I remove and discard the o-rings that came the universal poppets. That may sound a little odd, but there are a couple issues. First, I have no idea what these are made of. They are probably okay, but I’m not sure. This is one spot that has a lot of contact with beer. I want to make sure these are food grade. Second, when it comes time to replace these o-rings I want replacements that won’t change fit. I’m aware of a single bulk o-ring replacement for universal poppets. Size may vary slightly compared to OEM, so I replace these before adjusting for fit so that the replacements won’t change the way these fit. The stainless parts of universal poppets should last a long, long time, having a reliable source for replacements that you know aren’t going to change anything is a big benefit. Beyond that, being sure you’re using food grade materials at this point is worth a few cents.
This article contains affiliate links. We may make a small percentage if you use our links to make a purchase. You won’t pay more and you’ll be supporting Homebrew Finds and more content like this. Thank you for your support!
Update… Universal Poppets – 304 Stainless + Food Grade Silicone! & Reliable O-Ring Replacements
 Since this guide was published, Valuebrew has released a 304 Stainless Steel + Food Grade Silicone Universal Poppet option!
I’m excited that there’s finally there’s an option that comes with quality o-rings made from the right materials out of the box! Beyond that, Valuebrew has pledged to always carry replacement o-rings, so you’ll always have a source when the time comes for replacements. Universal Poppets – via Valuebrew
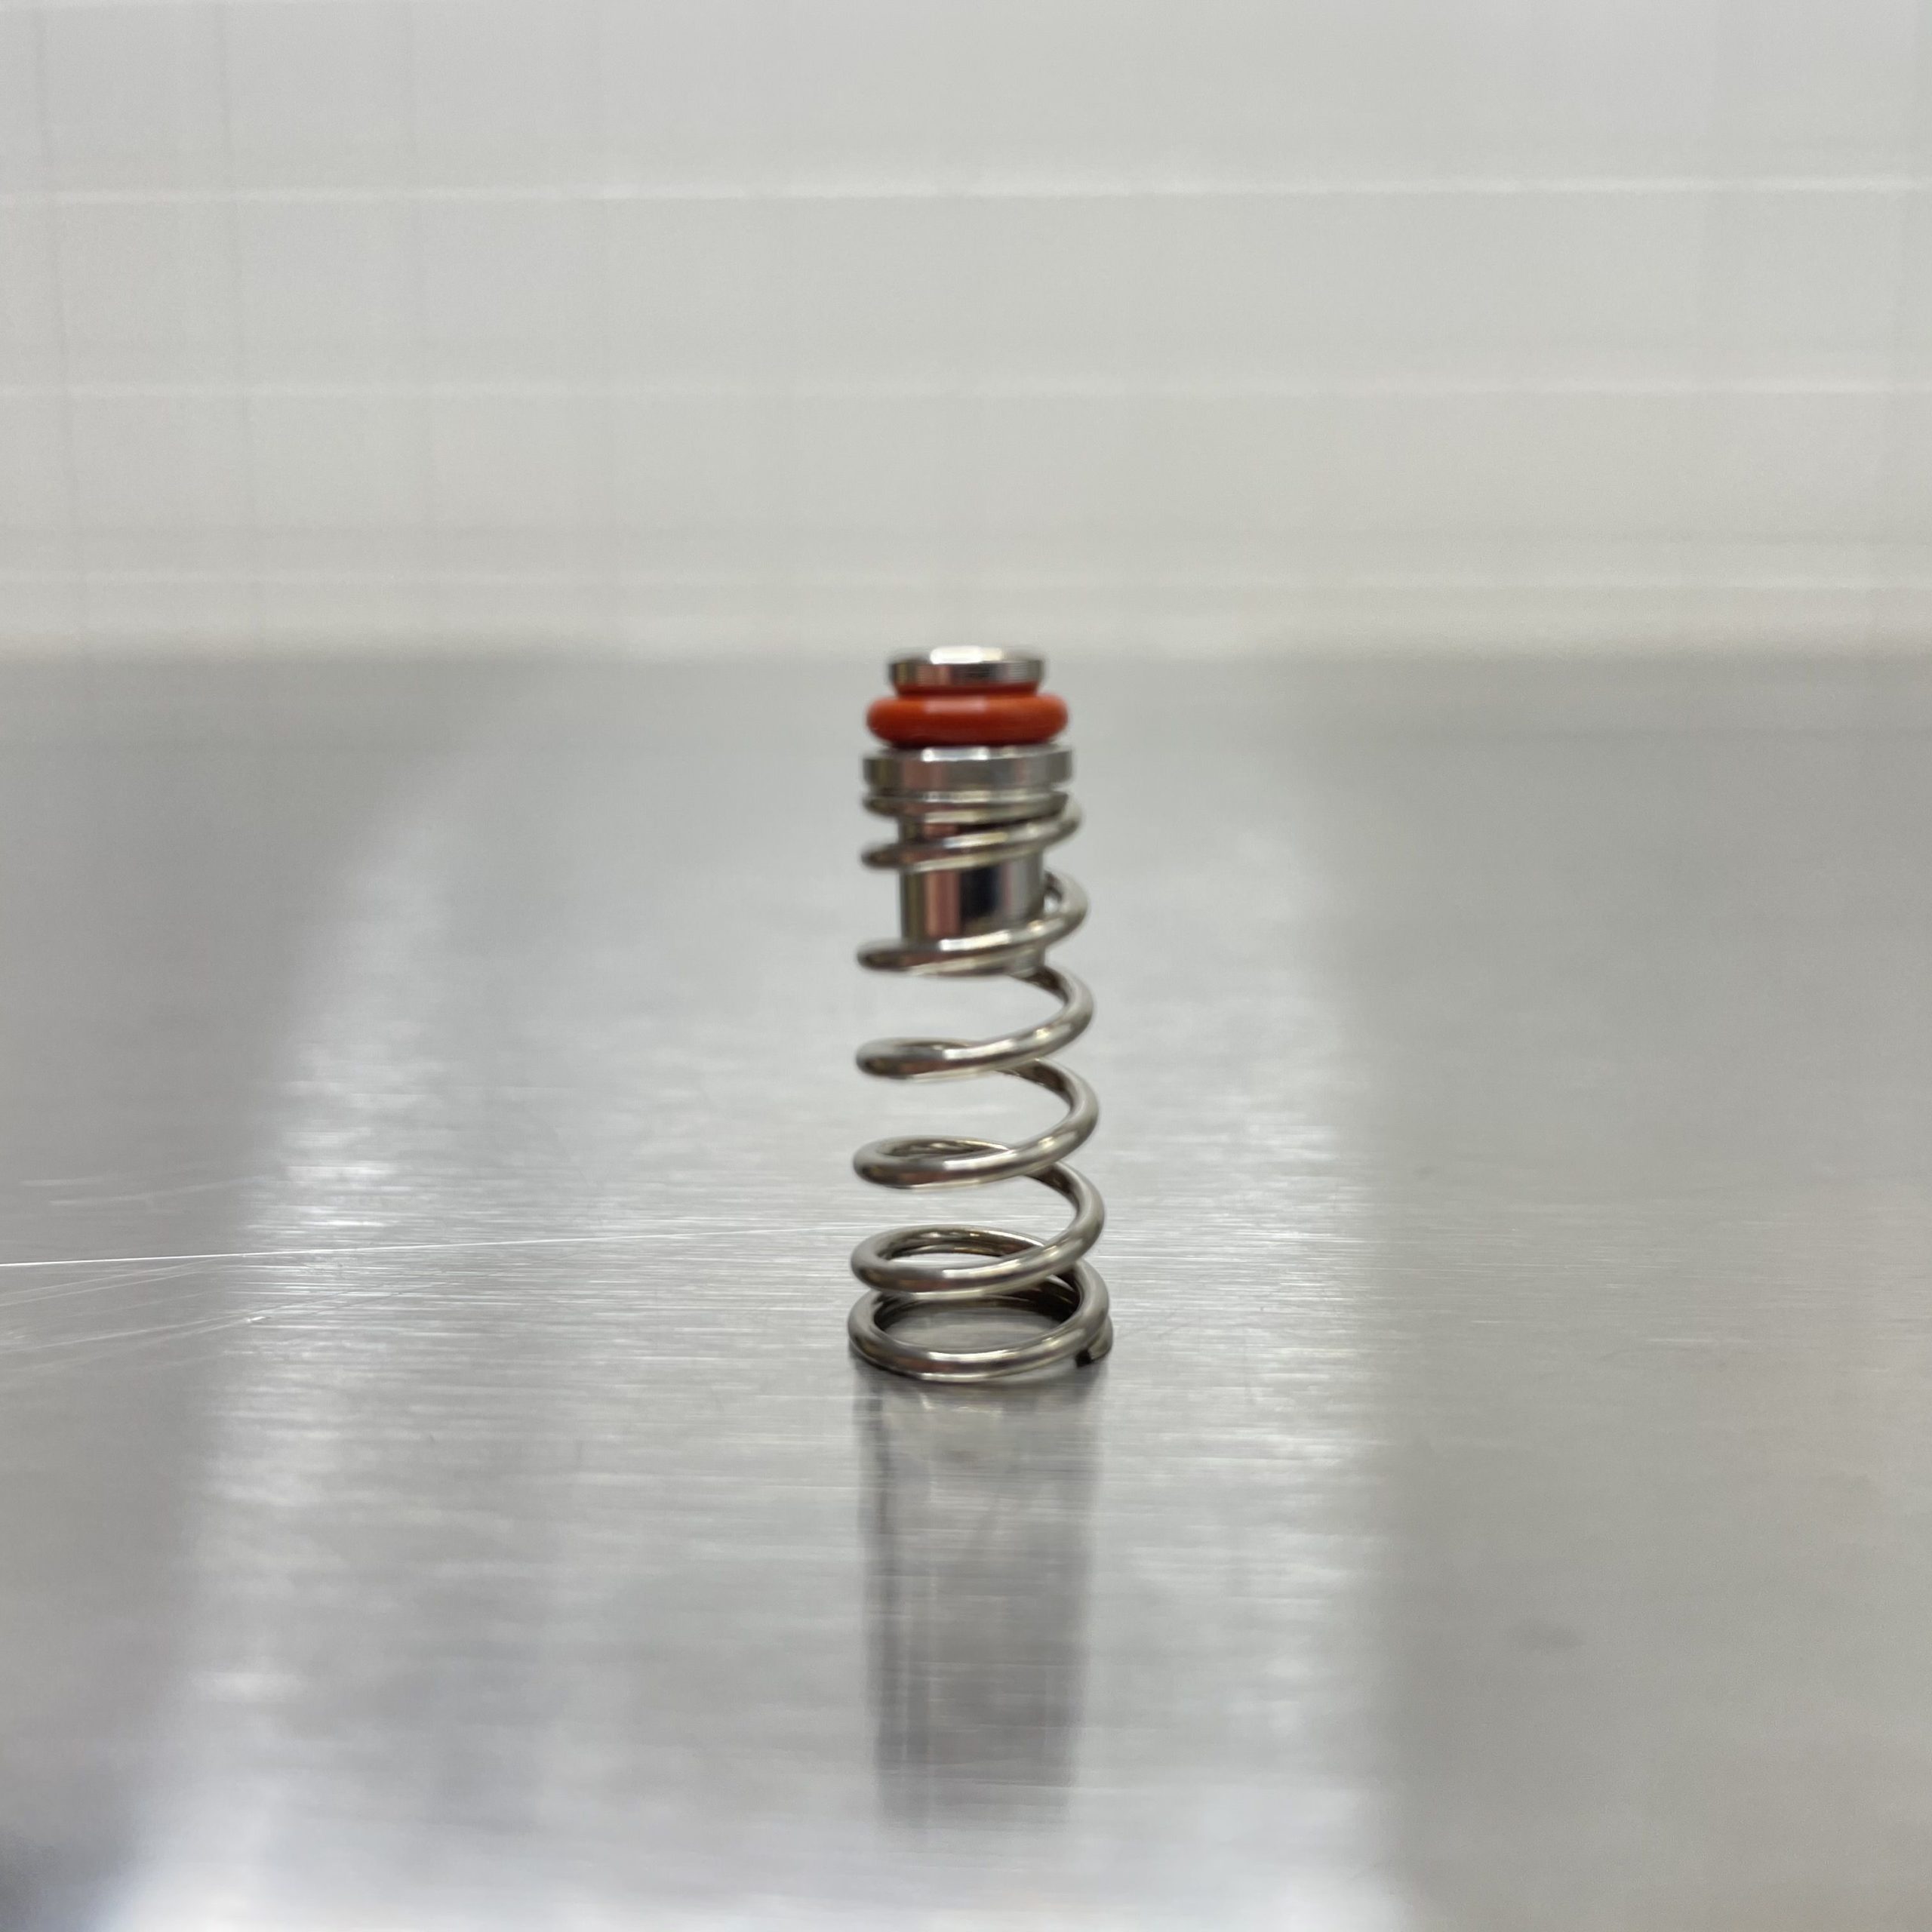 The universal poppet with food grade silicone o-ring.
 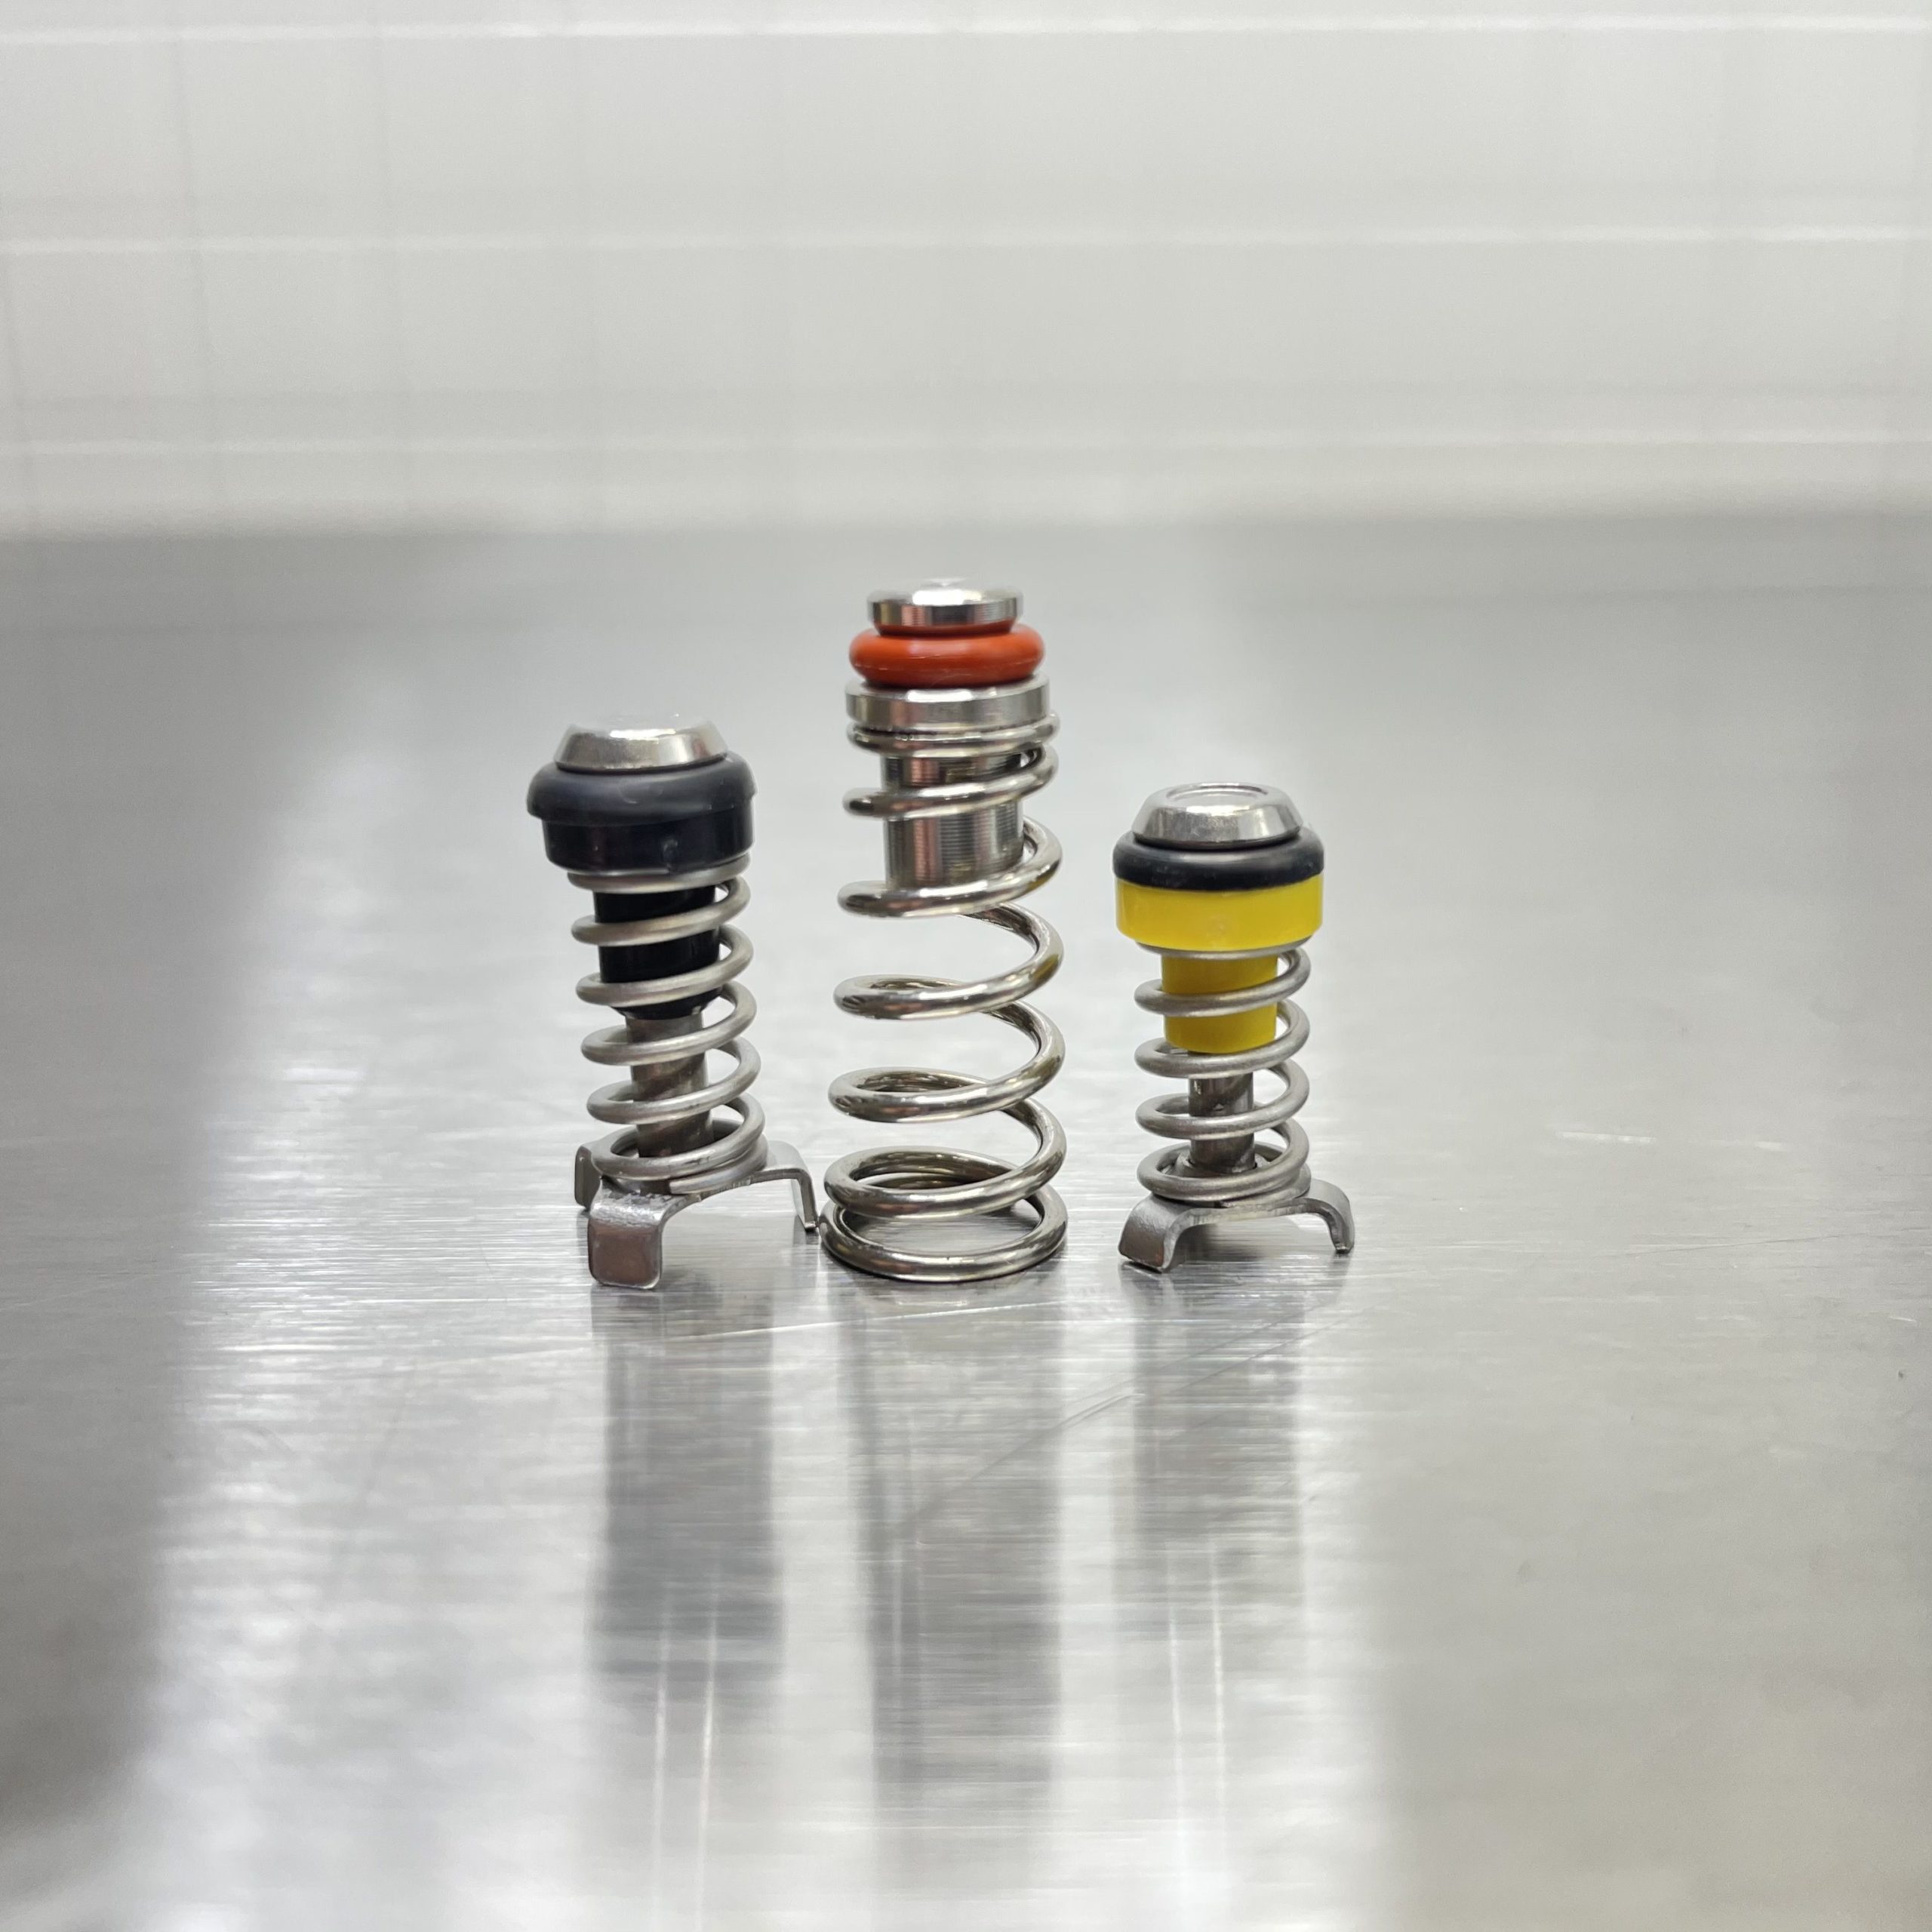 Compared to the poppets that came with this keg. Mmkay… the poppets that came with these kegs are a mish mash. The second thing worth observing is the universal o-ring is probably going to be a bit tight. On to fitting.
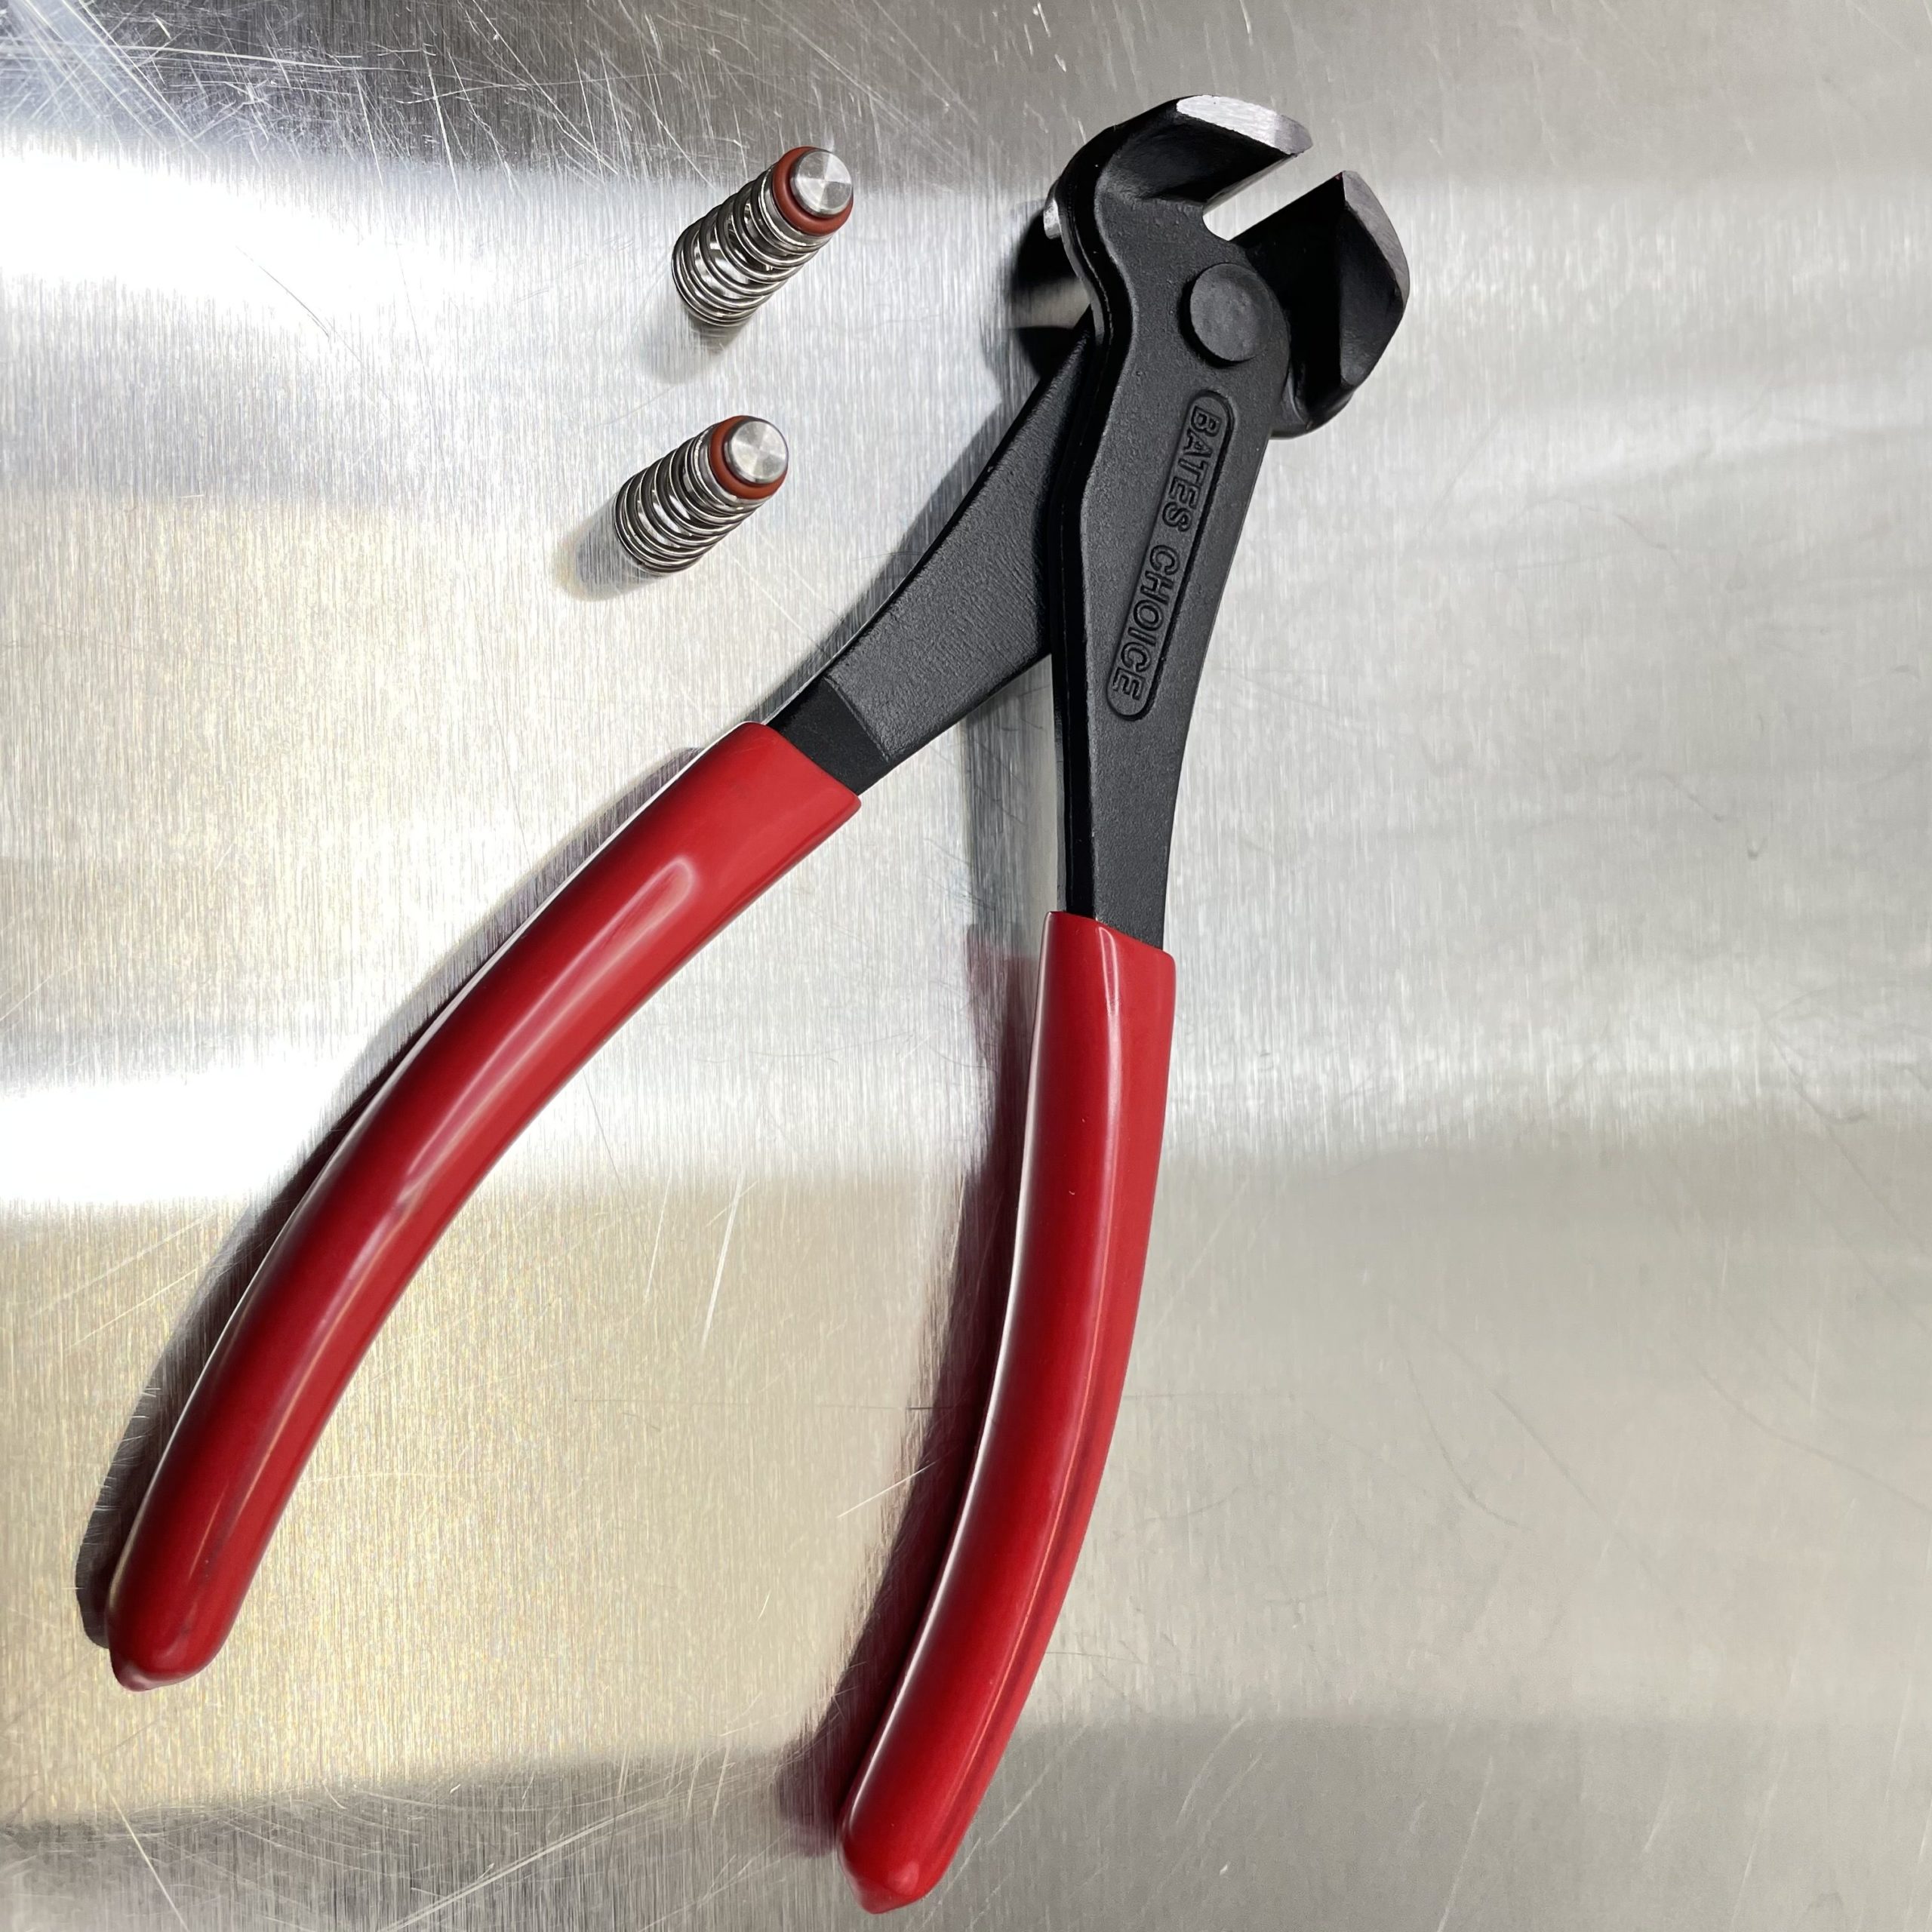 Use a pair of Nipper Pliers to trim the universal poppet to fit properly. This is what’s pictured. Also, search Amazon for “nipper pliers”. Look for a tool that’s designed to cut nail heads.
 Trimming a coil
 Important: I suggest trimming a half coil or less and testing. You want the QD to slide on easily and for it to reliably hold pressure when the QD is off. Taking off a half of a coil and testing helps make sure you don’t end up making the poppet too loose. In this case… you can clearly see that I’ve broken my own rule. Based on the size of the universal poppet, I was confident I could take a full coil off and in fact this worked perfectly.
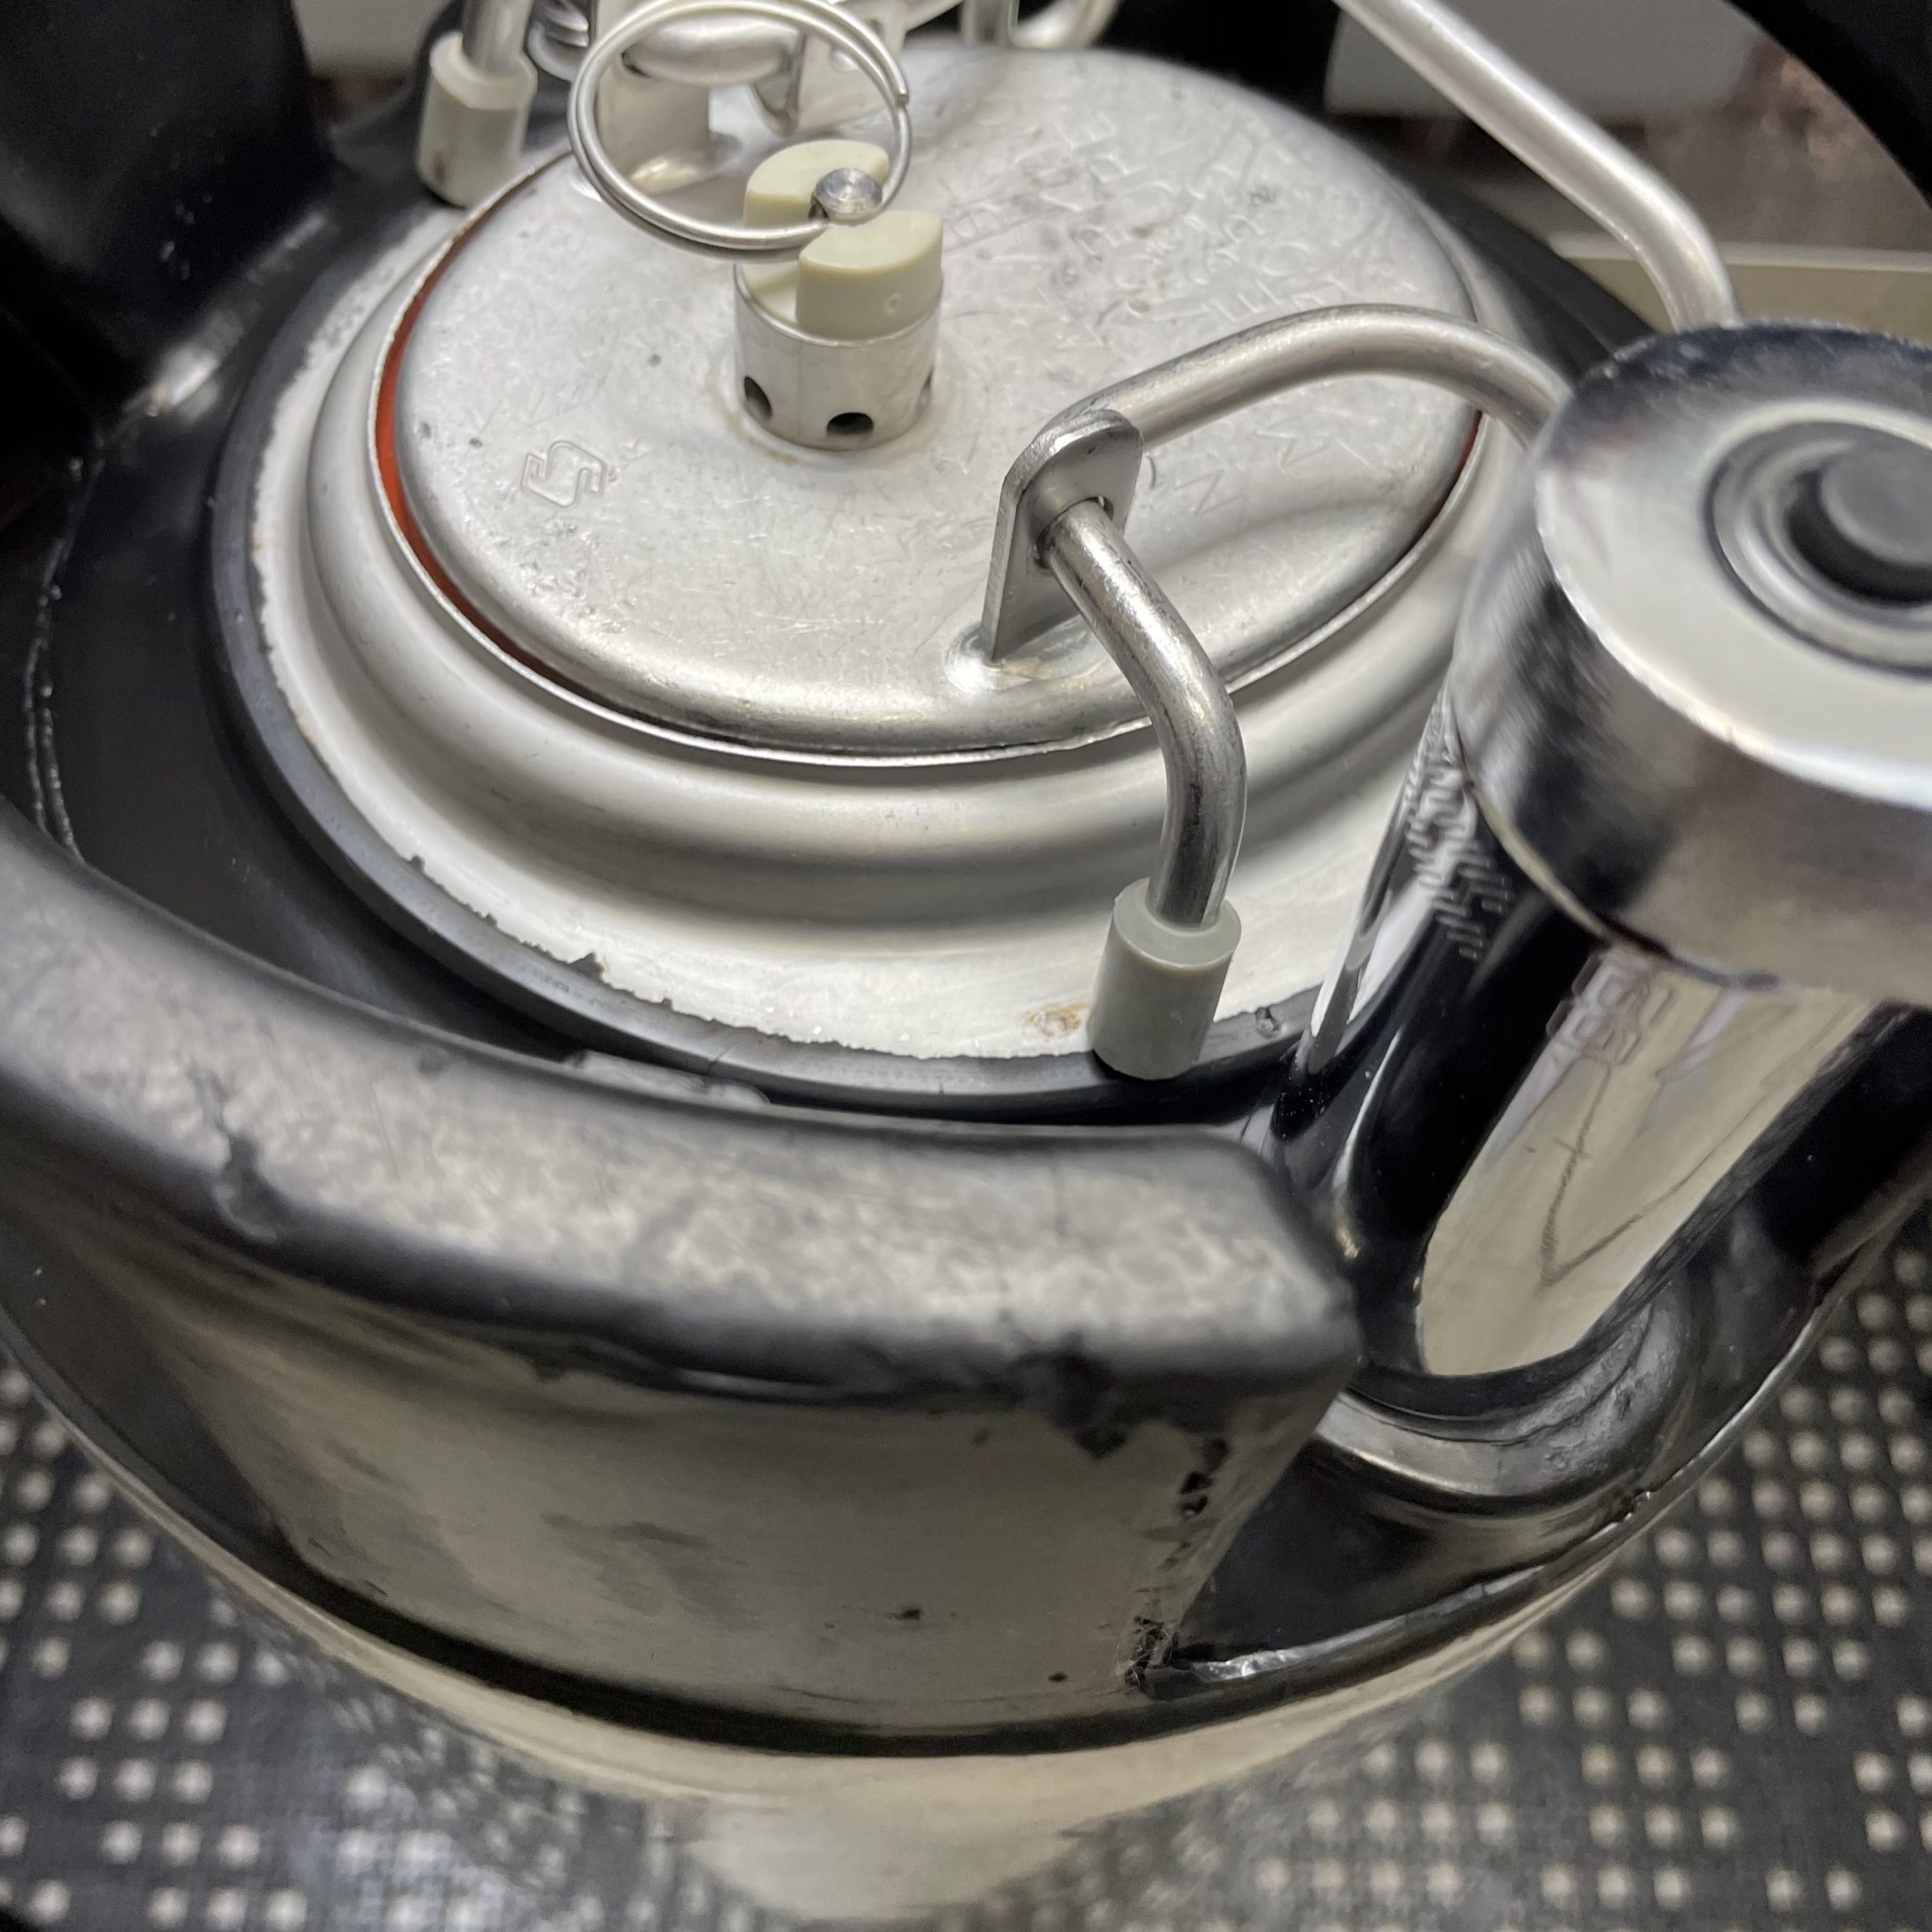 Tightening Posts
 Checking Fit. You want QDs to slide on without excessive force. It’s important the poppets are not too loose because you want them to reliable hold pressure when QDs are removed.
Keeping Parts Together
After adjustment has been complete, these poppets now belong with this keg. I won’t use them on other kegs. That’s true for most of the rest of the parts too. Dip tubes and posts. All these parts stay with this keg. Keg lids are completely interchangeable, so I don’t spend a whole lot of time keeping a certain lid with a certain keg.
Another Advantage To Easily Replaceable Universal Poppet O-Rings
Sour beers. Hard surfaces can be cleaned and sanitized. That includes glass and stainless steel. That’s not true for soft items, like tubing and o-rings. If you use the process outlined here, this is a simple fix. Grab spares in bulk and replace as needed.
What About Pin Lock Kegs?
The process is nearly identical with the exception of post o-rings. Pin lock o-rings are close, but not identical to ball lock post o-rings. Valuebrew offers these in bulk.
If you want to use one of the custom color o-rings mentioned above. Those are sized for ball lock kegs. For pin lock keg owners, Valuebrew suggests using your choice of color on the liquid post and pin lock size o-rings on your gas post. The logic behind this is beer is less likely to leak and if it does… you’ll see it. Where gas would be invisible and is more likely to leak.
Finished Product!
A look inside the keg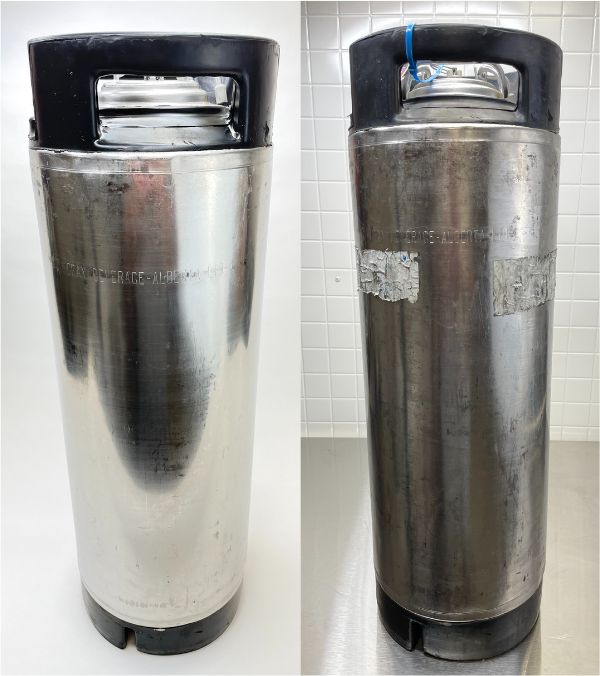 Before, Right, After, Left. The photo may not be exactly fair because of lighting, but you get the idea. The finished product looks amazing.
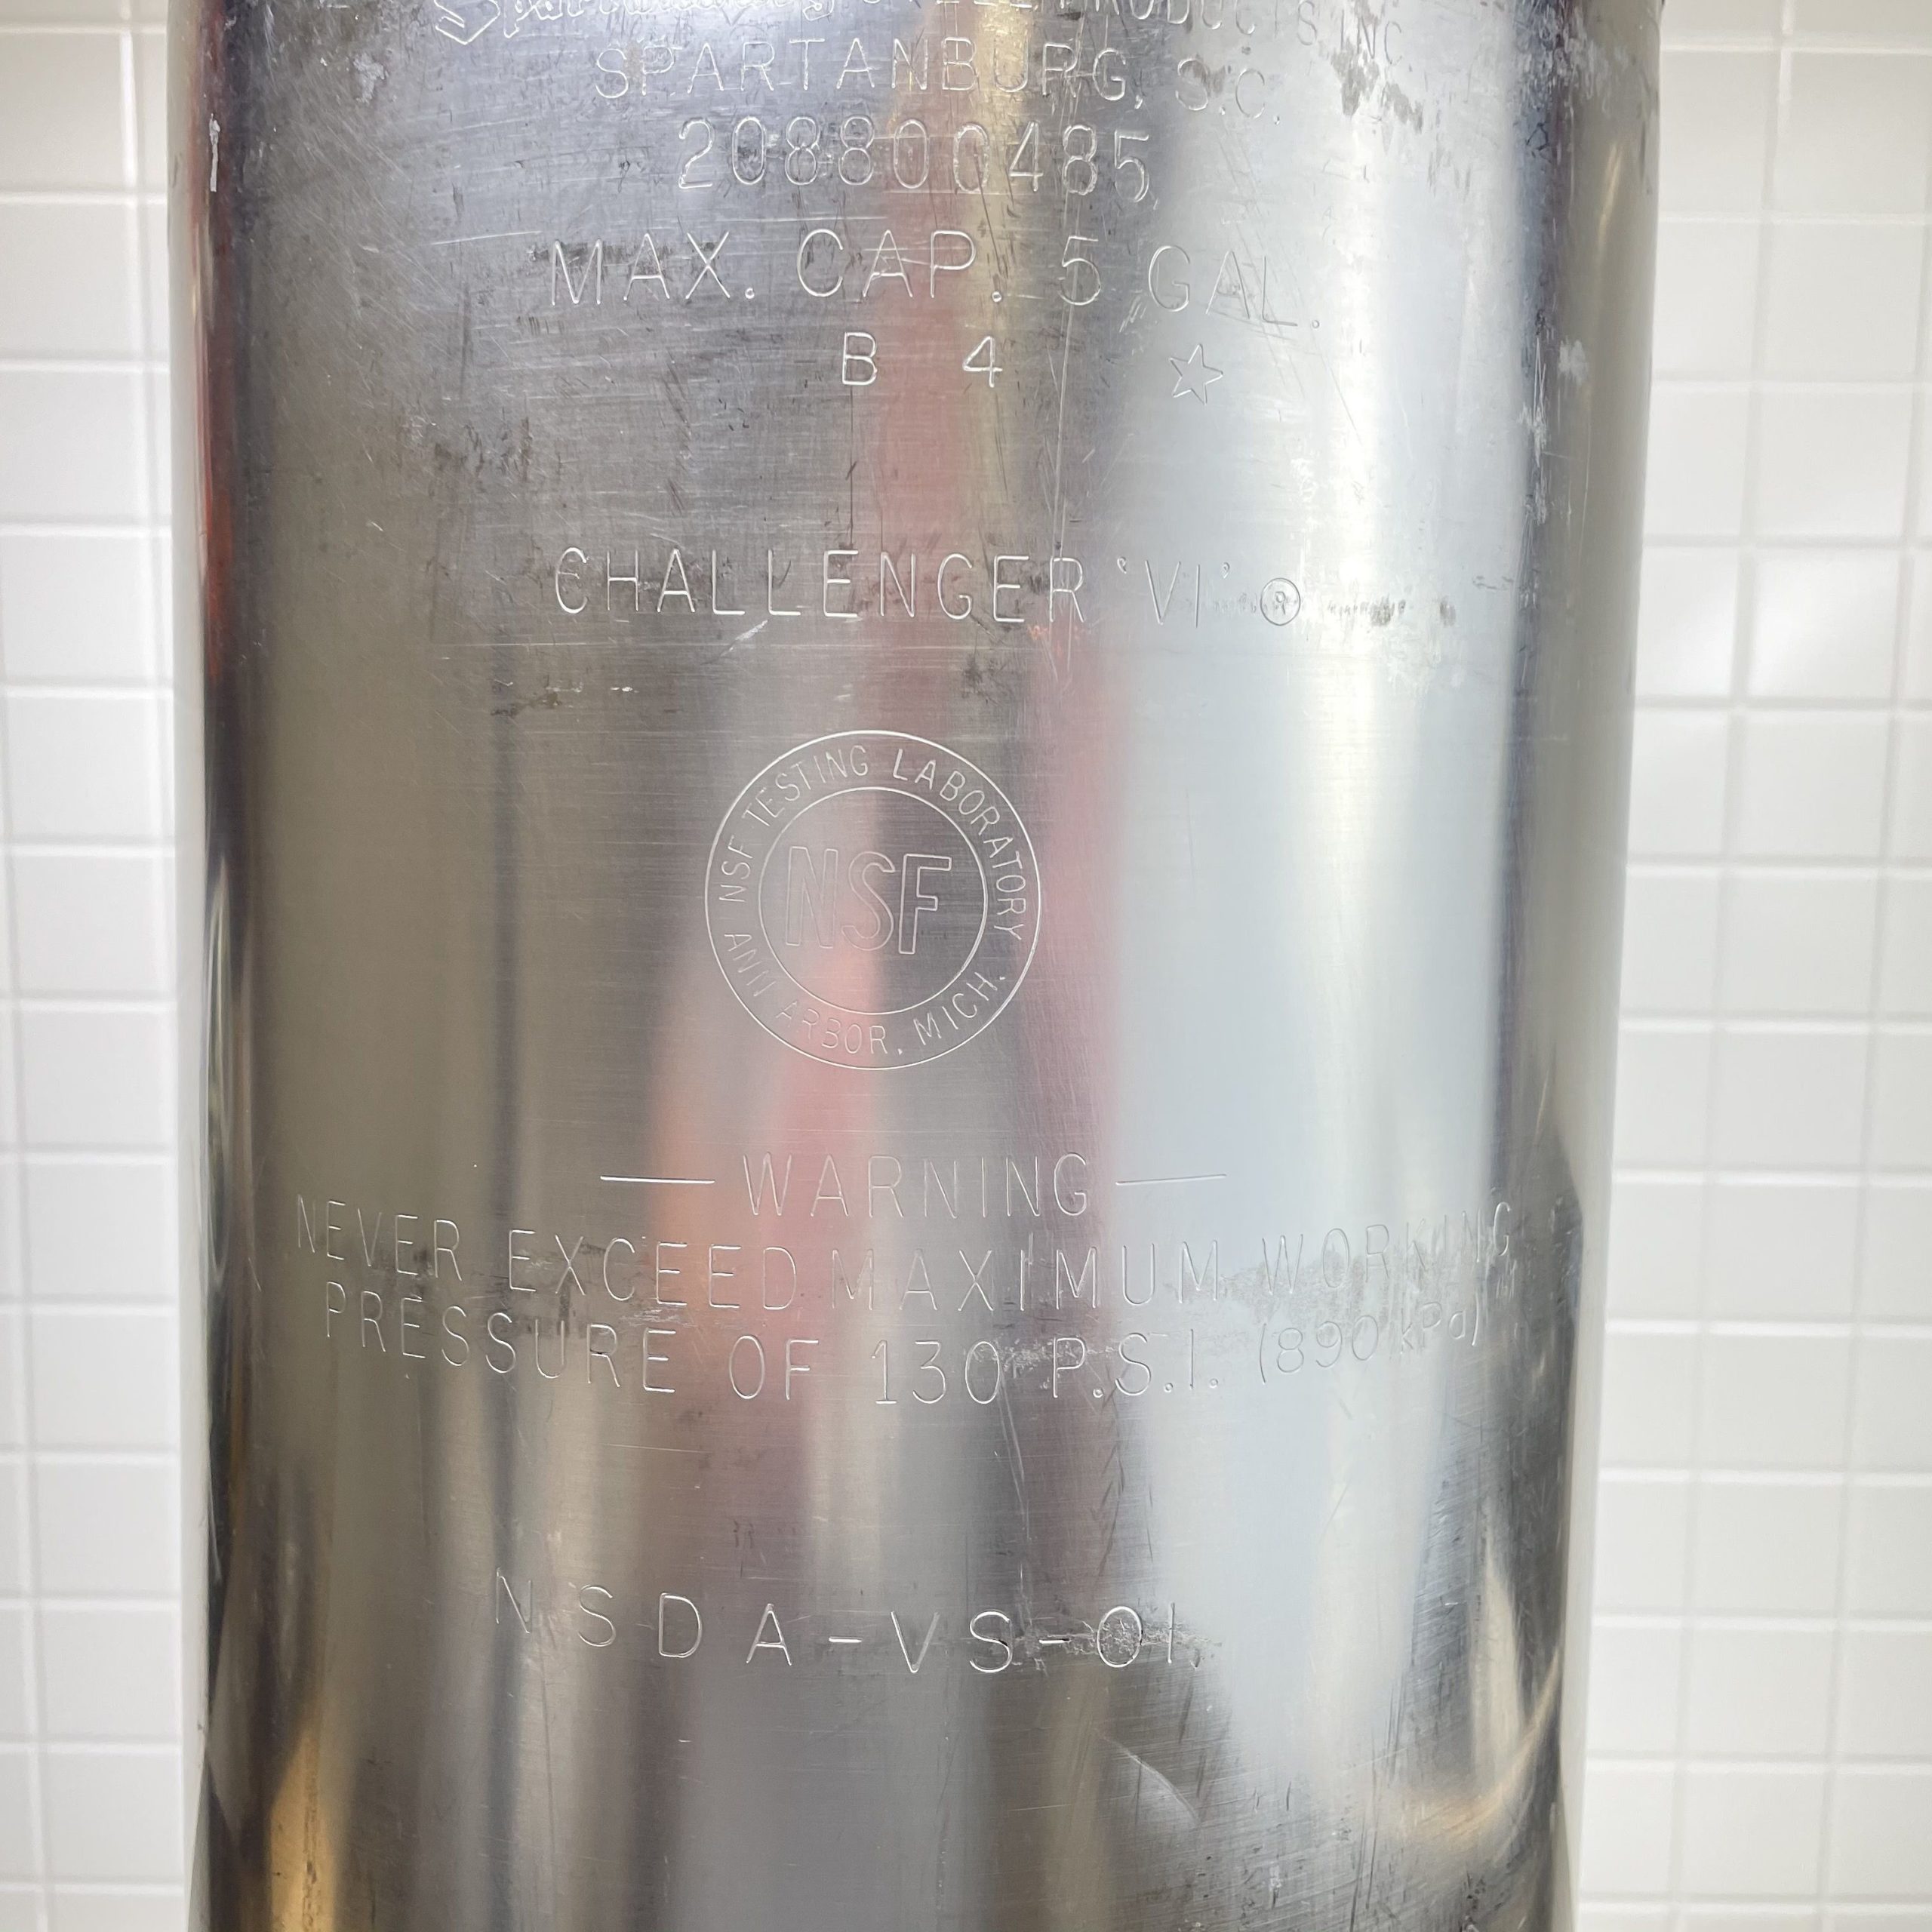
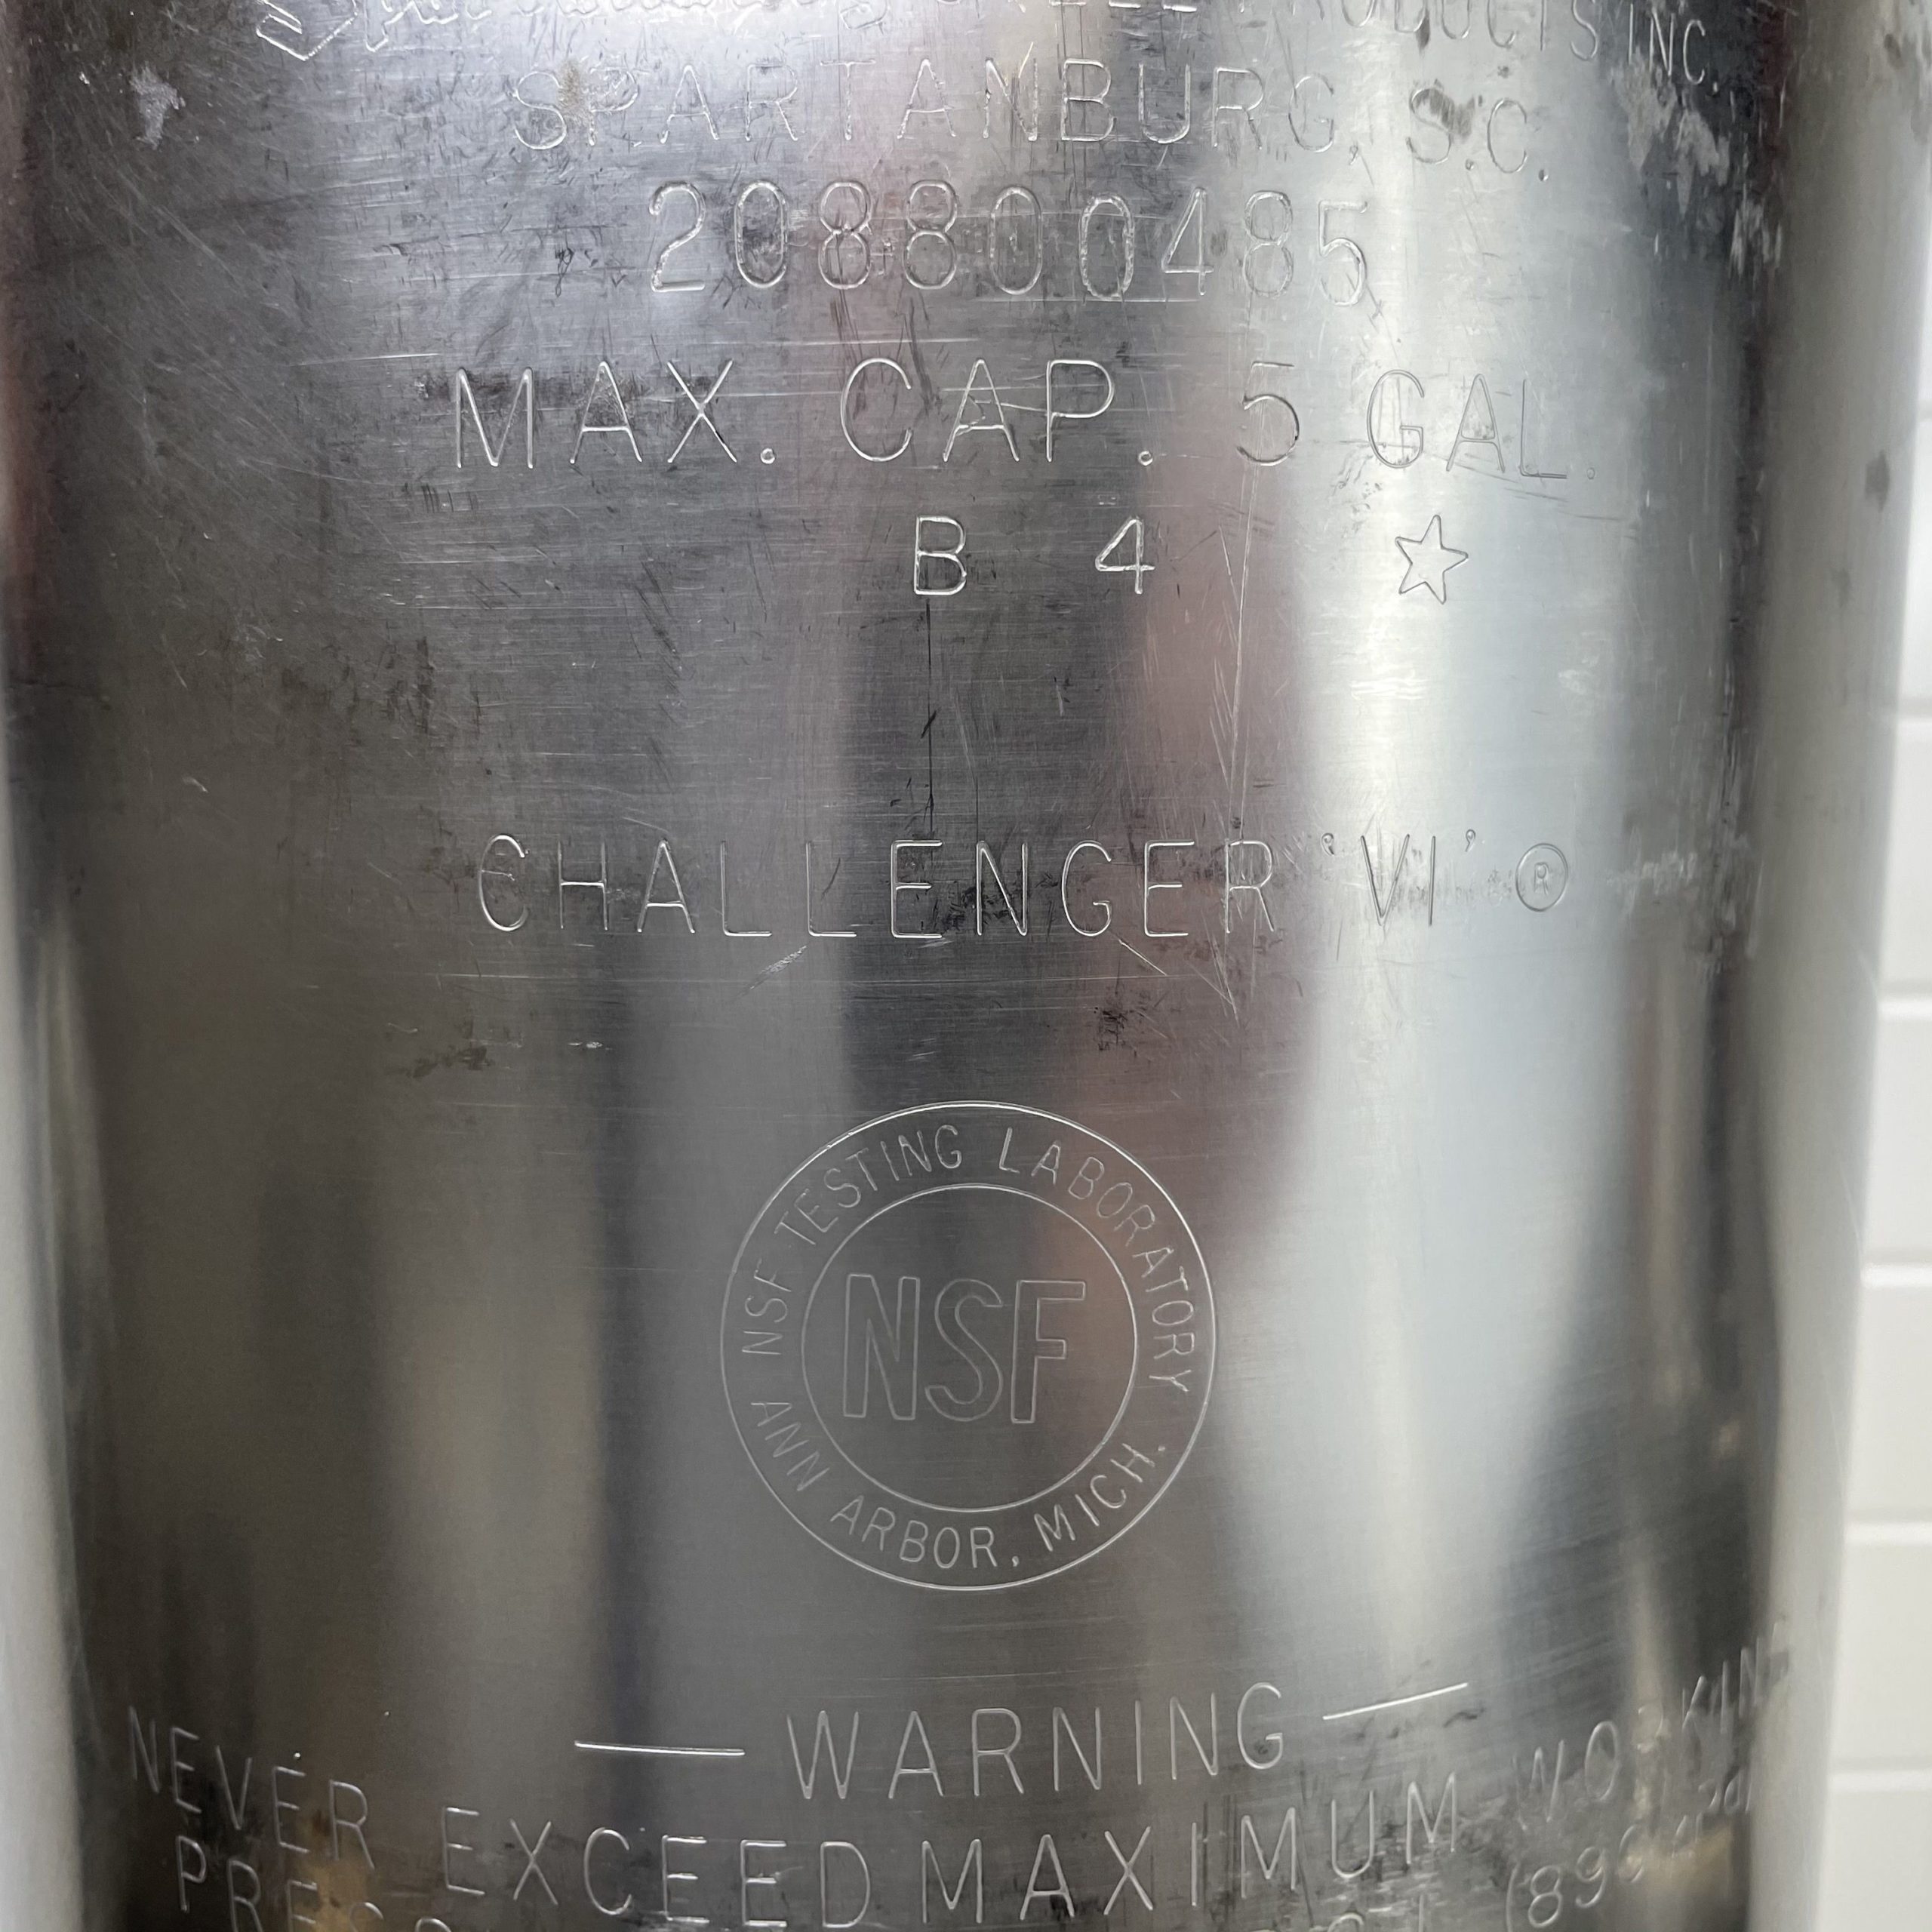 The visual appearance is evident when you look at the4keg imprint. It was tough to read before and looks nearly new now.
How Do You Find Your Kegs Model? If you look on the outside of your keg. It should have an imprint with both the manufacturer and model. in the case of the keg pictured above, it is a Spartanburg Challenger VI.
 Shiny
Shiny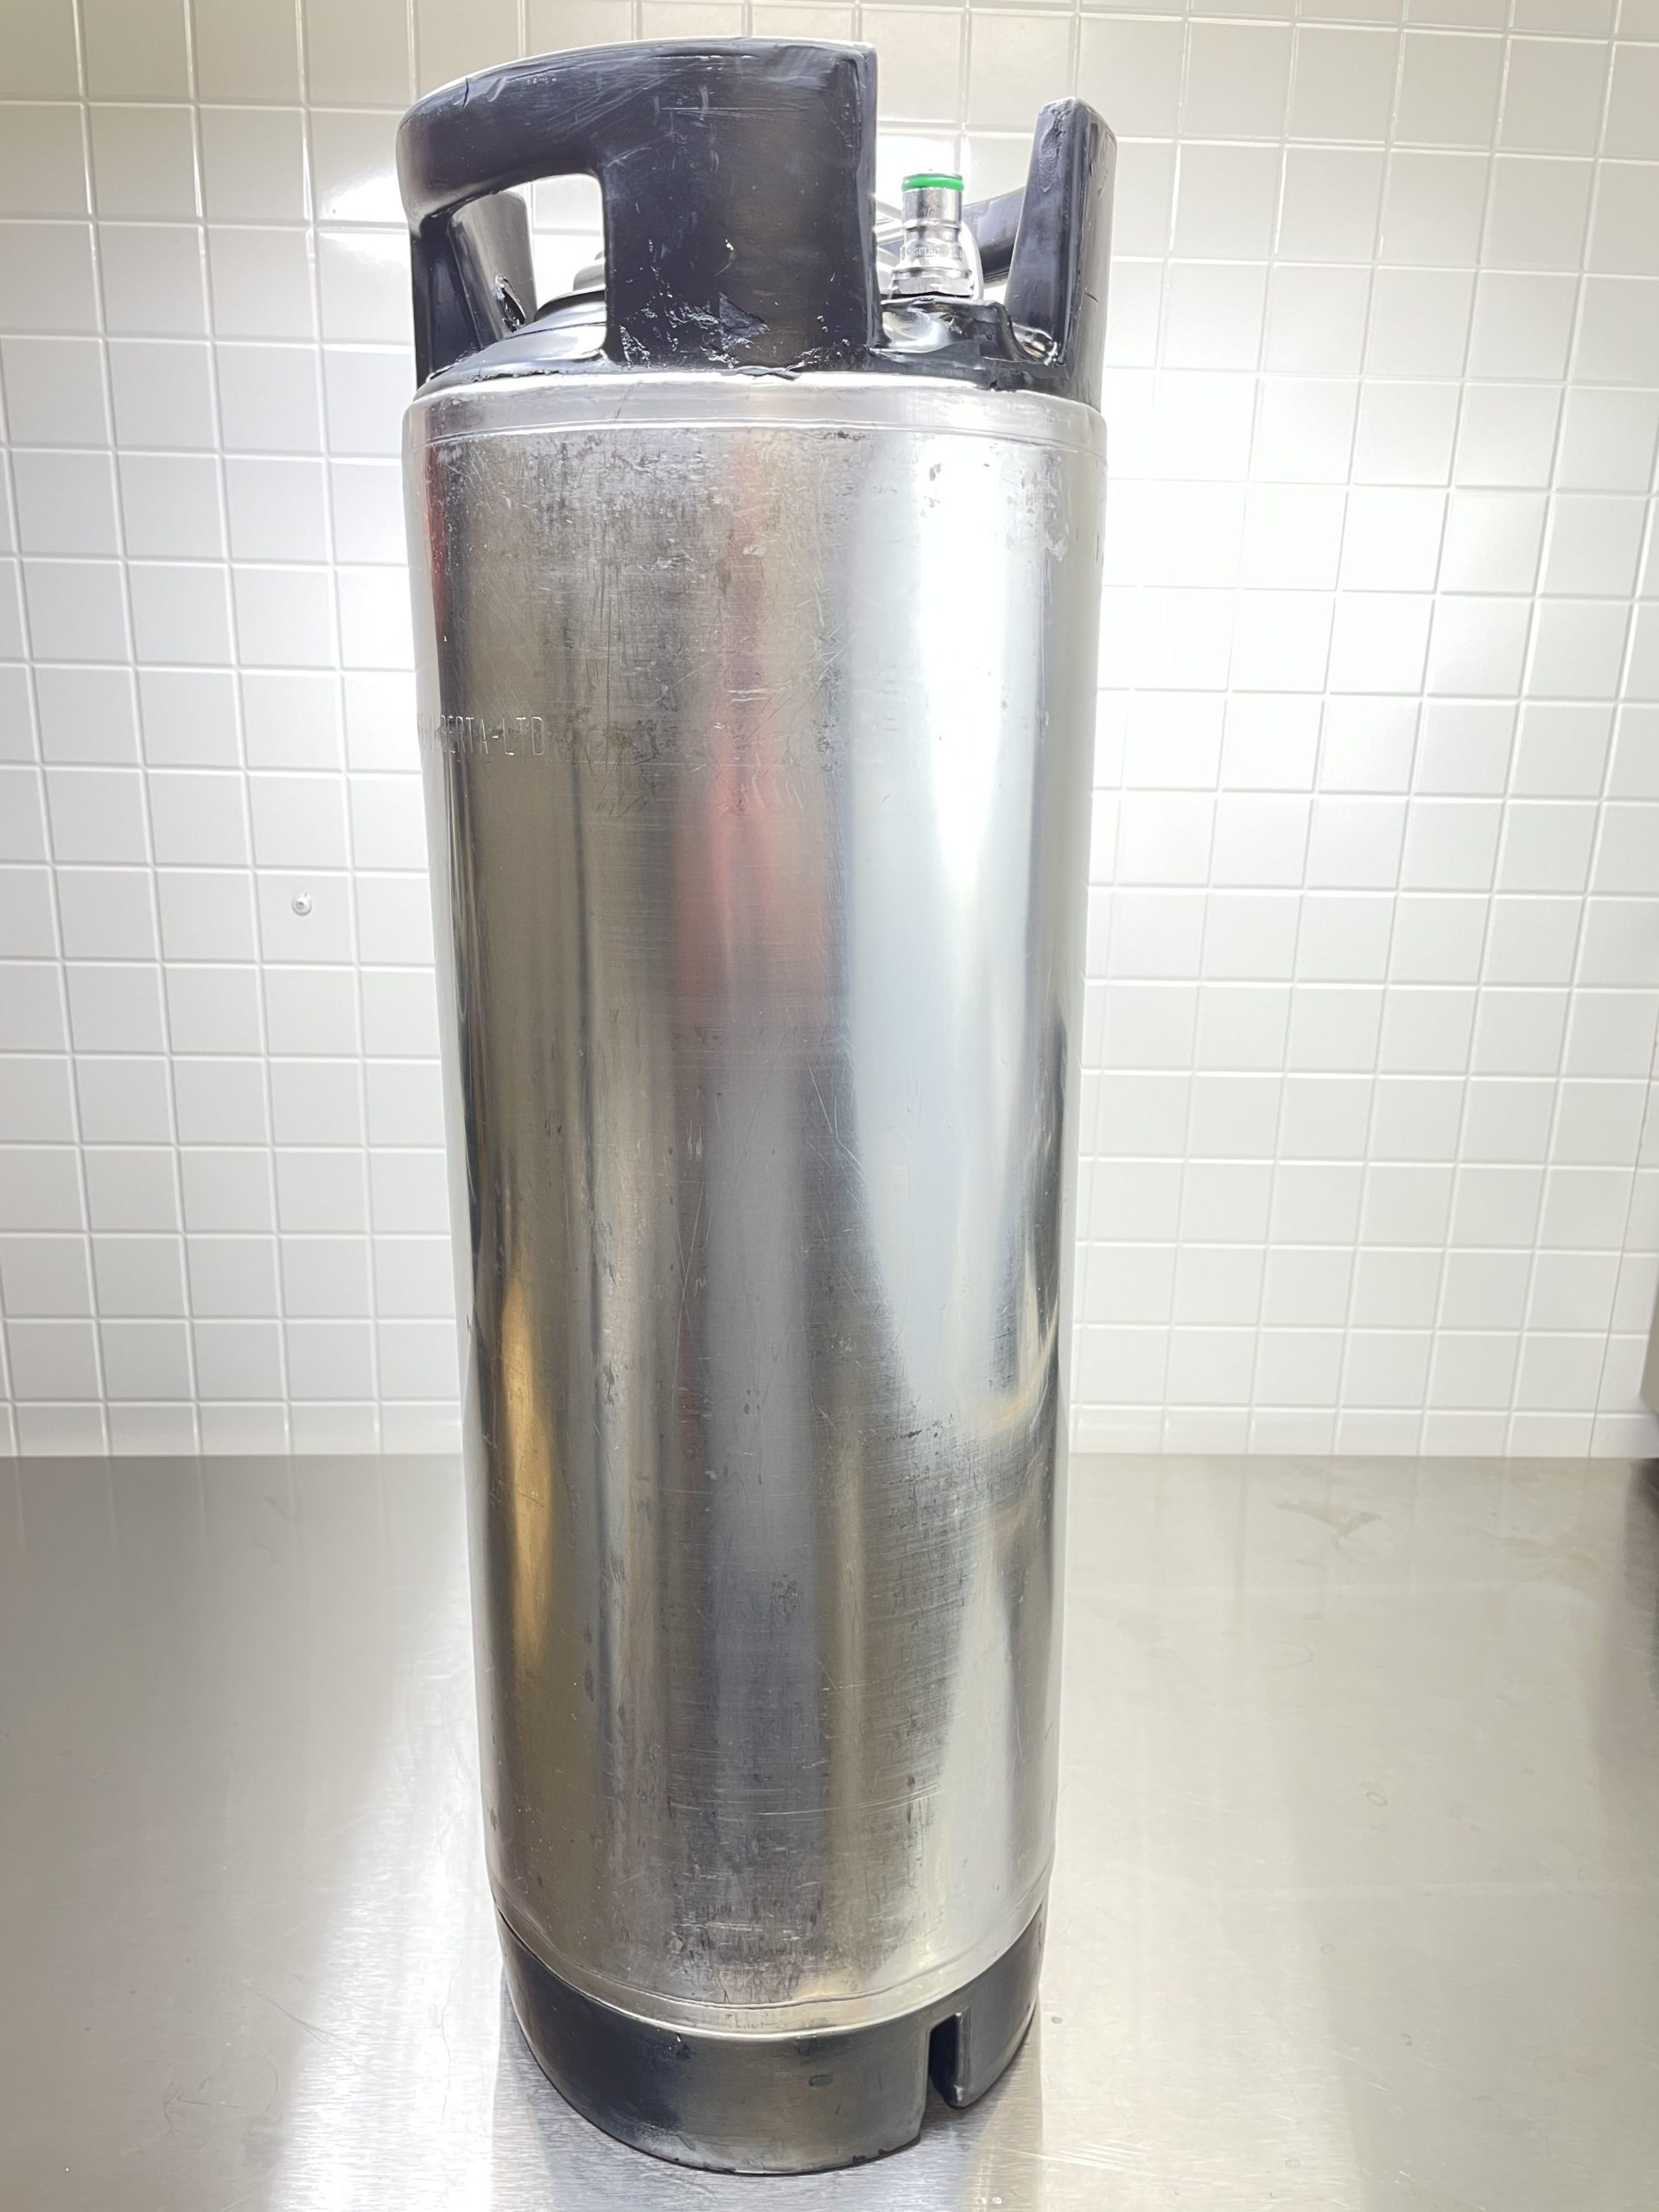 Reconditioned Keg
Conclusions
Rebuilding and reconditioning a keg is easy. It doesn’t take a lot of time, vastly improves the keg, saves you money and makes it easy to appreciate a job well done. Beyond initial cost savings, replacing poppets and o-rings can save you time, money and frustration.
For this project
- Food Safe Keg O-Rings in Bulk – includes exclusive color coded options and bulk pin lock post o-rings
- Search Amazon for Universal Poppets
- Search Amazon for Goo Gone
- Search Amazon for Bar Keepers Friend
- Search Amazon for Armor All Protectant
- Search Amazon for Nitrile Gloves
- Search Amazon for Nipper Pliers
- Search Amazon for Punch
- Hands on Review: Craftsman Deep Well Sockets for Ball Lock Keg Posts
- Used Cornelius Keg – Ball Lock 5 gal. KEG430 < This is the keg offering that’s rebuilt in this post
Four Places to Find Great Deals on Used Kegs
- MoreBeer – most options work with MoreBeer’s Free Shipping
- Adventures in Homebrewing – can have some amazing deals!
- Keg Connection
- Homebrew Keg Deals Roundup! – A curated list of the best keg deals
Posts, Lids and Broken Handles
Posts
Posts are very sturdy but sometimes need replaced. The most common damage I’ve seen is when the upper lip of the post is bent. That can causing sealing problems. When they do need replaced, it’s important to get the right size. Look at the keg for a manufacturer and model stamp and look up the correct thread size.
Two Spots to Look for Posts:
- Our Keg Posts Tag
- Keg Repair and Replacement Parts – big lineup of parts
- Search Amazon for Replacement Keg Posts
Lids
Lids may become bent or damaged over time.
An upgrade upgrade for Pin Lock Kegs:
In most cases, Pin lock and ball lock cornelius style keg lids are interchangeable from a size perspective. That means you can, generally speaking, put a pepsi/ball lock style (manual prv) lid on a coke/pin lock style (no manual prv) keg. In my book, that’s a solid upgrade. See: What’s the Difference Between Ball Lock Kegs and Pin Lock Kegs?
- Our Keg Lids Tag
- New Cornelius Keg Lid with New pressure relief valve – via Adventures in Homebrewing
- New Italian Lid for Cornelius or Firestone Kegs – via Keg Connection
Loose Handles or Bases
- Fix It! Repairing Loose Cornelius Keg Handles and Bases
- Loose handle and/or base kegs can be some of the best deals out there. Search Adventures in Homebrewing, Search Austin Homebrew Supply
Should I buy a New Keg or a Used Keg?
 The Keg that I Reconditioned in This Post (Left) next to a Brand New, Italian Made AEB Keg. They’re not entirely the same, but… they’re not entirely different either.
Used kegs are generally sourced from soda bottlers. They are built with commercial use in mind and designed to last for many years of rough duty service.
Brand new ball locks may not be made to the same standards. However… We also don’t generally put our kegs through the same abuse that a soda distributor would.
Not withstanding price. I think both options are valid. If you’re up for a little elbow grease and replacing a few parts, used may be the way to go, if you’re more interested in convenience brand new is a good choice. Practically, at least as of this posting, I think price will cause many to go the used route.
Looking for a Keg Rebuild Kit?
“Keg Rebuild Kits” are a one size fits all approach. I recommend treating each keg invidually, replacing parts as needed. One size fits all keg kits typically have too much, or too little. You’ll also generally save money by buying o-rings in bulk and the remainder of the parts as needed.
Keg Deals!
Also: Kegerator Tips & Gear | Keg Repair Part #s | Recent Keg Finds
Our Top Draft Resources!
- The Most Difficult Spot to Check for CO2 Leaks
- Keg O-Ring Materials Selection! – EPDM, Silicone and Buna-N?
- Why Do I Have Bubbles in My Beer Line? Diagnosing and Fixing Kegerator Foam Problems
- Five Benefits of Using Corny Kegs As Fermenters
- Rebuilding & Reconditioning Homebrew Kegs!
- Food Safe Replacement Keg O-Rings in Bulk
- Hands on Review: Kegland DuoTight Fittings & EVABarrier Tubing!
- Why Won’t My Homebrew Keg Carbonate? Fixing Draft Beer Carbonation Problems
- What Does a Flow Control Faucet Do?
- Upgrade Your Kegerator – 6 Improvements!
- Serve Homebrew on Any Kegerator & Convert Commercial Kegerator to Homebrew
- Tips and Gear for Growler Filling
- What’s the Difference Between Ball Lock Kegs and Pin Lock Kegs?
- Checking for Draft System CO2 Leaks – Using The Pressure Gauge Method
- Tip: Consider Oetiker Stepless Clamps for Kegerator Gas and Beer Lines
- Hands On Review: Inkbird ITC-308 Dual Stage Temperature Controller +WiFi Version
- Universal Poppets Tips and Tricks!
- Convert Your Mark II Keg & Carboy Washer to a Recirculating Draft Line Cleaning Pump!
- Step by Step: Finding and Fixing Keg CO2 Leaks
- Kegerator Beer Line Temperatures & Reducing Foam with a Recirculating Fan
- Kegging CO2 Use Estimations and Calculations
- Step by Step: Balancing Your Kegerator Draft System
- Building a Simple Ball Lock Draft Line Flushing Setup
- Build a Recirculating Draft Line Cleaning Pump
- Home Brew Keg Roundup – New & Used, 5 and 2.5 Gallon & More!
- Damp Kegerator? Fix Kegerator Condensation
- Portable Draft Beer Serving Options!
- Homebrew Temp Controller Roundup! – Kegerator and Fermentation – concepts, applications and models
- Bulk Keg Orings and Keg Repair Part Numbers
This post may contain affiliate links. We may make a commission when you use our links. This will never cost you extra. Thank you for supporting Homebrew Finds!
Price, promotions and availability can change quickly. Check the product page for current price, description and availability.
Make sure the components you use are compatible and rated for your intended application. Contact manufacturer with questions about suitability or a specific application. Always read and follow manufacturer directions. tag:lnksfxd top:rebuildkeg rs:7 #tag:tpr
Thanks for this excellent round-up of kegging information!
I have a keg for which I bought a replacement liquid dip tube. I noticed that when I tighten the post down, the liquid tube does not stay centered and starts pushing up against the bottom curved area. Normally this wouldn’t bother me, but it seems that it starts getting jammed up against the bottom to the point where I’m sure I’ll bend the dip tube completely out of wack. Is this fixable? My guess is the threading is the issue — I’ve tried 2 different posts and the result is the same. Time to ditch this keg?
thanks!
Are the old o rings not safe to use anymore?
Hey John! I can’t comment on whether they’re safe or not. Maybe they are, maybe they’re not. On this particular keg the were in okay to poor condition with some reeking of soda premix. In my opinion, it’s best to start with a clean slate. Brand new gaskets made of appropriate materials. They don’t cost a lot and better safe than sorry, both from a materials perspective and from a leak perspective.