
Homebrewing Tips, Tricks & Shortcuts!

Check out our collection of homebrew tips, tricks, money saving ideas, shortcuts and more. Got something to add to the list? Let us know! Submit your tip for consideration. If your tip makes it, we’ll always give you the credit!
Tip 1: Using Polypropylene Lab Bottles to Rehydrate Yeast
 I use the pictured bottles – Bel-Art Precisionware Wide-Mouth 500ml (16oz) Autoclavable Polypropylene Bottles; Polypropylene Cap, 53mm Closure affiliate link, note that multiple variations of this product may be available, as such a different version may appear at this link
- Note: This tip involves handling hot items. Always use extreme caution when handling hot items to avoid being scalded.
- In my opinion, Polypropylene is a good material for this. It is commonly used in lab bottles and has a higher heat resistance when compared to HDPE and LDPE.
- The pictured bottle is what I personally use. There are lots of options out there.
- Consult your yeast manufacturer for specific amounts, temperatures and timing recommendations.
Rehydrating Yeast Step by Step
- Place the appropriate amount of water in the bottle. Some manufacturers recommend 10 grams of water per 1 gram of yeast. Most packets are 11 grams. That’s 110 grams.
- Use an accurate gram scale to weigh the water. For a common measurement like 110 grams, I mark my bottle with a Sharpie so I can easily measure out rehydration water without needing to weigh every time.
- Place the lid on top of the bottle. Important: Do not thread or tighten the lid! It will burst if you do that. You just want the lid setting loosely on top so that it can be sanitized by the steam.
- Microwave until the water comes to a full boil.
- Cooling to Temp, Slow Option: Let the bottle sit with cap loosened until it reaches proper hydration temperature.
- Cooling to Temp, Quick Option: Very carefully tighten the cap down. Run cool water over the bottle to reach proper rehydration temp. This is going to be hot, be very careful! I use heat resistant gloves for this. The cooling will most likely cause the container to collapse on itself and could slightly misform it.
- I use an Infrared thermometer to check temp as cooling commences. Note that I do not open the bottle to check temp. Just aim the IR thermometer at the mass of water inside the bottle. I’m usually aiming for around 95 deg F.
- Sprinkle the dry yeast in the container and place the lid on back on the bottle. Let this sit for 10 to 15 minutes.
- Gently swirl bottle to ensure the yeast is thoroughly mixed.
- Pitch when you’re ready.
- This method ensures a sanitary process. The initial container and water are sanitized and there is no touching of the water with thermometers or stirring devices.
- You could use a similar method to produce yeast washing water.
- Search Amazon for “Polypropylene Lab Bottles” – Some things to look for – proper temp ratings, use of food safe materials and microwaveable.
- Search Amazon for “digital gram scale”
- Search Amazon for “infrared thermometer”
- Search Amazon for “heat resistant kitchen gloves”
- Review: Hands On: American Weigh 100g x 0.01g Digital Scale
- Related Categories: Yeast, Scales, Infrared Thermometers
Tip 2: Use Two Scales if You’re an All Grain Brewer
- As all grain brewers we are generally weighing things in two categories. Moderately large amounts of things – like grain – and smaller amounts of things – like hops and water salts.
- Although weighing both types of things involve a scale, they are really wildly different activities.
But Why?
- I’ll take the Ultraship Ultra-55 [Hands On Review] as an example. That has been my go-to grain scale for years and years. It has a large 55 lb capacity, the tare feature and the face removes so that you can weigh large items (like buckets of grain) and still easily read the display.
- The Ultraship Ultra-55 has a resolution of 2 grams when weighing up to 1 kg (about 2.2 lbs). From 2 lbs to 50 lbs it has a resolution of .5 oz. If we’re weighing 20 lbs of 2 row, this works great. If you’re 2 grams or a half an ounce off either way, it really doesn’t matter. How about hops? A 2 gram resolution would work in a pinch, but I don’t think most brewers would be happy with that. Weighing water salts are completely of the question with this sort of precision/resolution. But.. it’s a great grain scale.
- Second example… American Weigh 100g x 0.01g Digital Scale [Hands on Review]. That scale has an outstanding 1/100th gram resolution. That’s great for weighing hops accurately AND weighing water salts. How about for your all grain grist bill? It should be awesome right? No. 100 grams equates to about .22 lbs.
The right tool for the job: As scale capacity goes up, resolution, precision and accuracy generally go down. Very accurate scales with higher capacities do exist, but they’re very expensive. If you’re looking for something like this or just want to see prices, try this search on Amazon. It searches “high capacity lab scale” in the Industrial & Scientific category sorting from high to low price.
- Recommendation: Use one larger capacity scale for measuring grain. Important features to consider: Tare (allows you to subtract the weight of the container that’s being used), Pounds/Kilograms Display, Digital Readout, Either Auto Hold or a Removable Face (this allows you to weigh large objects like a bucket of grain. An AC Adapter is also nice to have. This Ultraship scale is what I use. I’ve used it for years and have been very happy with it. It features a removable face to easily weigh larger objects.
- Recommendation: Use one smaller, more accurate scale for weighing hops, spices and water salts. Tare, Pounds/Kilograms and Digital Readout are important for this one. You’ll want something that measures to an accuracy of 1/10th of a gram. You’ll be using grams for water salts and you should consider using grams for hops. Consider the AWS-100
What about Extract Brewers?
If you’re an extract brewer or you can only keep one scale because of budget or space, look for something in the middle, something with an 11 to 15 lb capacity and a 1 gram resolution – something like this. You can use that to weigh out grain bills – you may need to split your grain bill up into a couple batches to get under the capacity and 1 gram will work for hops.
- Related: See Tip 16 – Use Metric
- Search Amazon – for “digital gram scale” AND “digital postal scale for packages” for some ideas
- Reviews: Hands On: American Weigh 100g x 0.01g Digital Scale | Hands On: Ultraship 55 lb Digital Scale [Grain] With Removable Face
- Related Categories: Scales
Tip 3: Homebrew CO2 Tank Tips – New or Used & Tank Size
- Don’t buy a new CO2 tank unless you’re certain that you have a good local source that will refill tanks. It doesn’t make any sense to buy a shiny new tank and then swap it out for an old, janky tank right away. You’ve paid for a new tank and possibly paid for shipping it, only to swap it for a used one. Save your money and just go to the supplier where you’re going to be swapping it out and buy a good, used tank.
- Get a big CO2 tank. At my supplier, it costs around $20 to swap out an empty 5 lb tank. It costs around $25 to swap out an empty 20 lb tank. It’s more than 3 times the cost to refill the smaller tank! This will pay for itself quickly both in time and money.
- Search Amazon for “CO2 Tank”
- Learn More… Top Post: CO2 Tank Tips – New or Used & Tank Size
- Related Categories: Draft, CO2 Hardware, Tanks
Tip 4: Get your Propane Tank Refilled Instead of Swapping It
- Most (maybe all?) propane tank swap services under fill. The tank holds 20 lbs, refill places commonly fill to 15 lbs. You’re only getting a 3/4 filled tank!
- For me, refilling a tank to 20 lbs is actually less expensive than swapping it out. For the purpose of comparison, let’s say that refilling and swapping are the same… $20 to swap and $20 to refill. The fill costs you $1/lb. If you’re refilling with a vendor that fills to 15 lbs, you’re paying $1.33/lb or 33% more.
- When you refill your tank – You’re, generally, saving money, You’re supporting a local business and saving yourself time because you don’t have to get propane as often.
- Find a local provider that fills your tank all the way up. This is usually about the same price, supports local businesses and saves you time.
- Bonus Tip: Extra tanks! I suggest having an extra tank (or two) of propane on hand. Running out of propane mid brew is a bummer. It is inconvenient and you can end up with a different beer than you intended because of the delay. This can also be a money saving thing too if you refiller charges by the tank. Since you don’t want to run out of propane on brew day, you may be more likely to swap or refill a tank that still have propane left in it.
- Search Amazon for “Propane Tank”
- Learn More… Top Post: Propane Tips – Refill vs Swaps and Extra Tanks
Tip 5: Use an Infrared Thermometer for Select Homebrewing Tasks
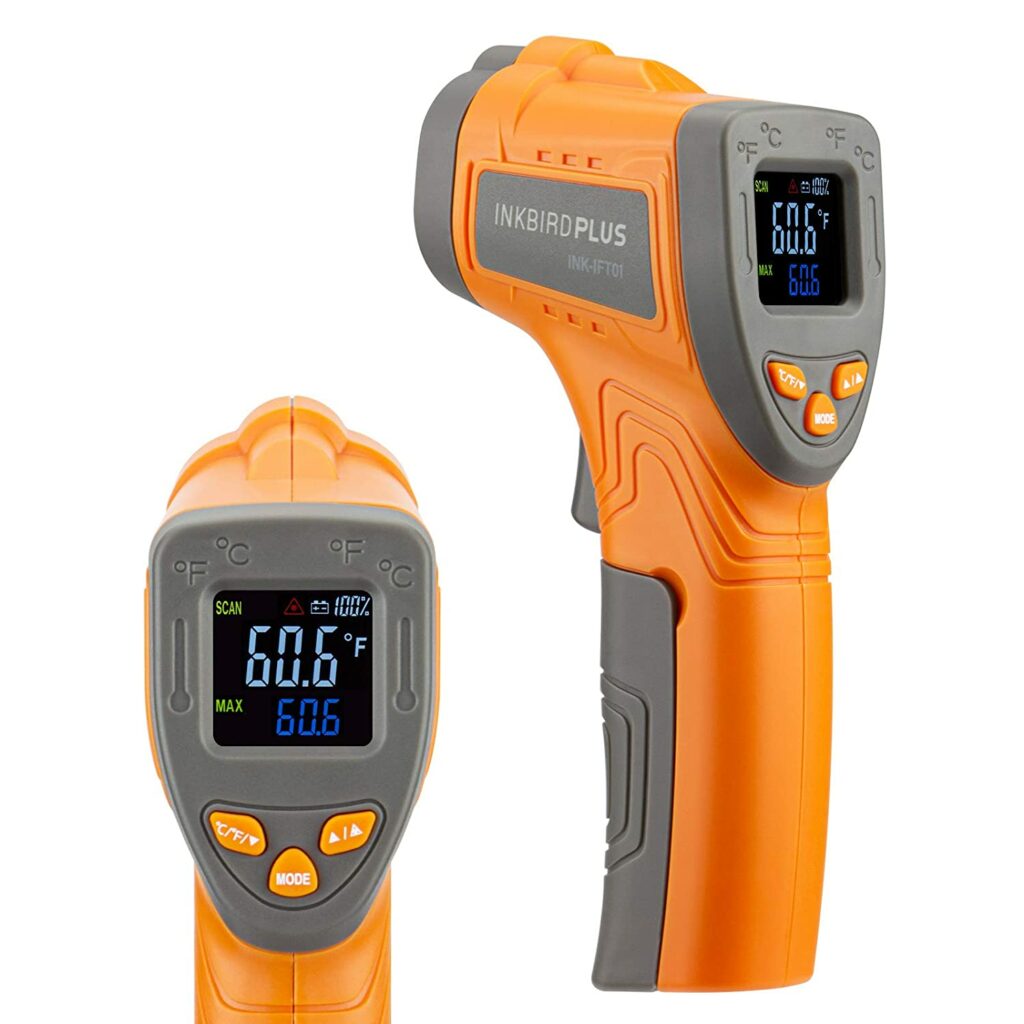 Pictured: Inkbird Infrared Thermometer for Cooking Temperature Gun, Laser Thermometer Gun Digital for Pizza Oven and Reptiles, -58℉~1022℉ (INK-IFT01) – affiliate link, note that multiple variations of this product may be available, as such a different version may appear at this link
- These (can be) inexpensive and give you a no-touch way to measure the temperature of something.
- Since these are no touch, you can check the temp of yeast washing and yeast rehydration water and your starter wort without the risk of infection. I find mine particularly useful for rehydrating yeast (See Tip 1).
- In my opinion, Infrared thermometers should not be considered a direct replacement for your standard thermometer. A quality IR thermometer will give you a close approximation of surface temperatures. In my experience steam seems to throw off readings.
- Potential Uses Include: Contained yeast rehydration water, chilled wort or starter temperature, kegerator, fermenter or fermenation area and beer tasting samples.
- Our INK-IFT01 Deal Page
- Shop Around, Search Amazon for “Infrared Thermometer”
- Related Categories: Thermometers, Infrared Thermometers
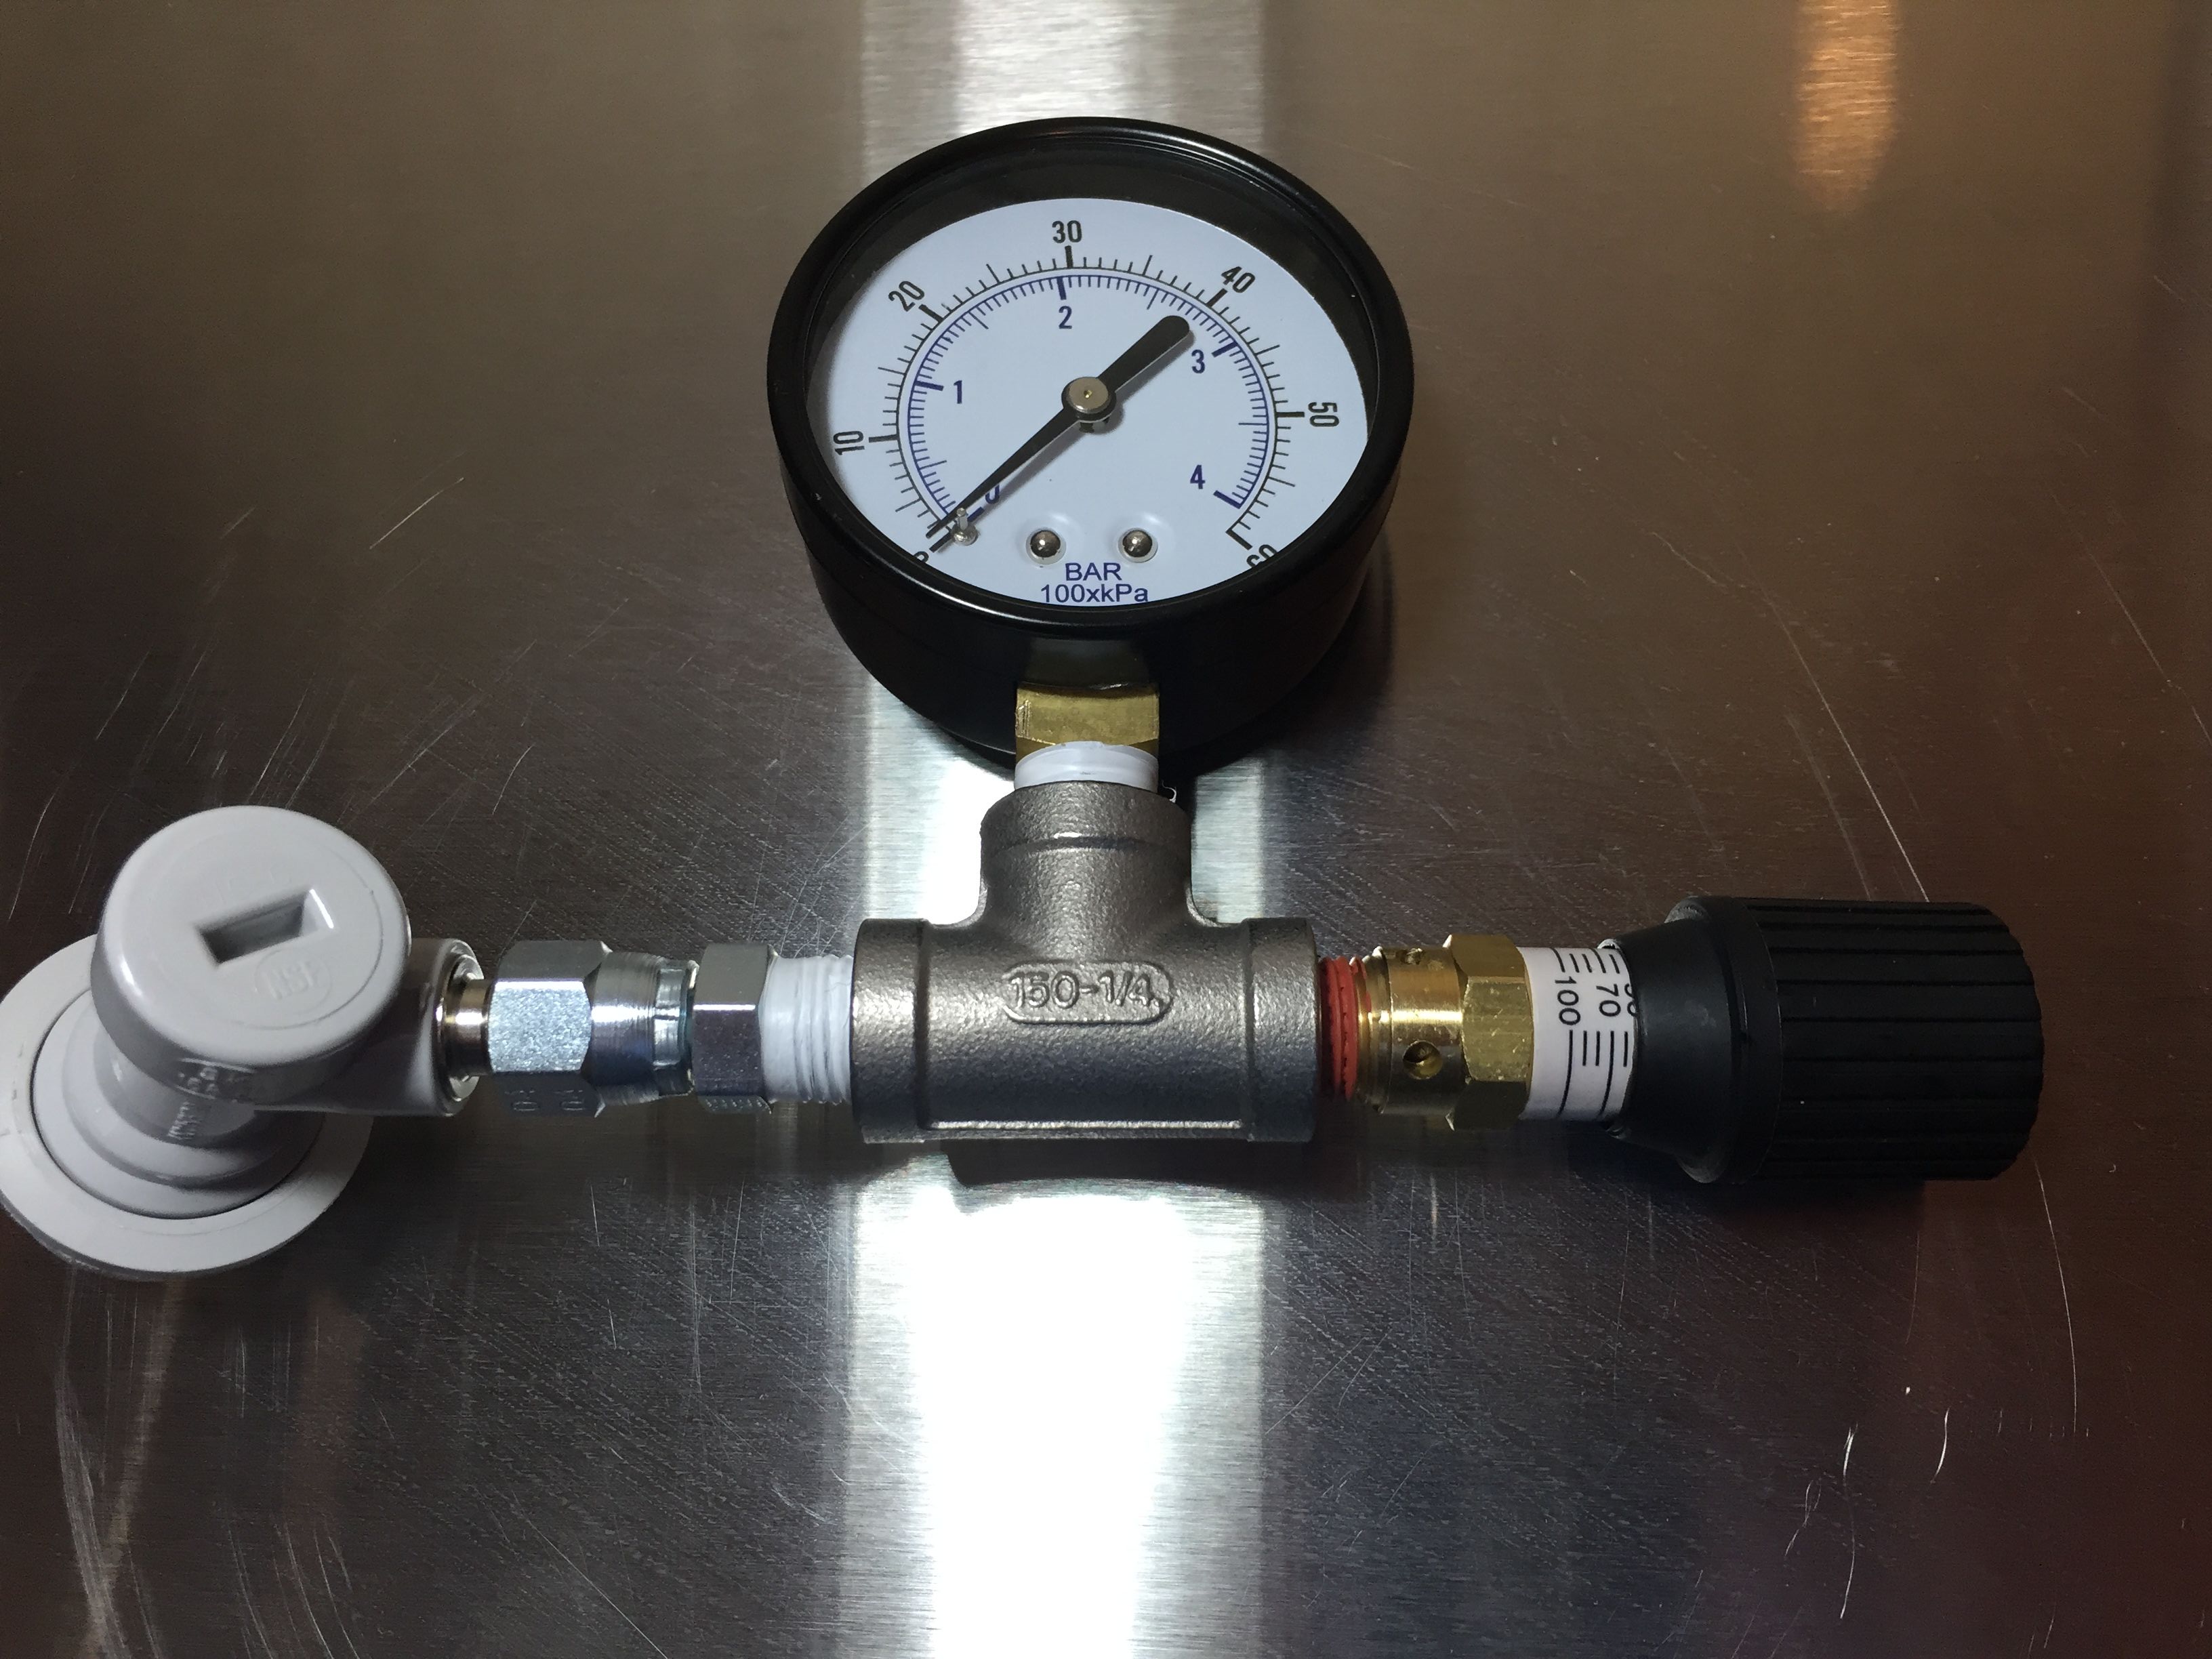
Tip 6: Checking for Draft System CO2 Leaks – the Pressure Gauge Method
This tip is a supplement to the standard “spray everything with Star San and look for bubbles technique”
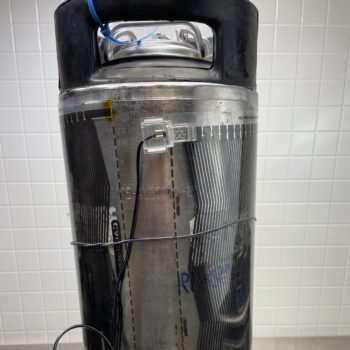
- Charge your keg with CO2 as usual. Use your usual serving pressure. Over-pressurizing can mask leaks that may otherwise show themselves.
- Remove the CO2 line and replace with a pressure gauge or Spunding Valve – with the adjustable PRV set to a very high pressure so that not gas escapes.
- After the pressure has stabilized. I mark the current pressure with a wax pencil, or you can just remember what it reads
- Wait for a couple hours to overnight to see if the gauge drops.
- If it drops quickly, there is a leak someplace in the system. Note: If your keg has beer in it that is uncarbonated the pressure will drop some overnight (it is equalizing and carbonating the beer). What you don’t want is a quick drop in pressure.
- This technique tests the entire keg including the gas post, o-ring, QD and any tubing that’s connected.
- In my experience, over long periods of time there will be some slow gauge movement. I don’t know if these are micro leaks or temperature related, but I’m not really concerned with that, I am looking for a relatively quick drop in pressure. Something that shows up within a couple hours.
- Search Amazon for “Chemical Resistant Spray Bottle”
- Learn More… Top Post: Checking for Draft System CO2 Leaks – the Pressure Gauge Method
- Related: Finding and Fixing Keg CO2 Leaks
- Related Categories: Draft, CO2 Hardware
Tip 7: Use High Quality Pitchers on Brew Day and Beyond
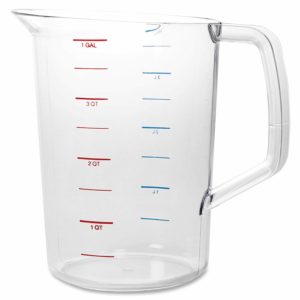 Pictured: Rubbermaid Commercial Products Bouncer Measuring Cup, 4-Quart, Clear, FG321800CLR via Amazon – Hands On Review
- I recommend keeping a couple high quality pitchers around to use for measuring, mash recirculation, utensil storage, water and wort transfer, help cleaning and sanitizing smaller items and more.
- Why having quality pitchers is great… There are several equipment purchases that I look back on and say… I’m really glad I got that, it’s made a big difference. This pitcher, is one of those. I went from a mish-mash of too small plastic pitchers, found around the house, that bent under the weight of wort, dripped and leached who knows what into my beer to two of these babies! What a difference.
- The FG321800CLR is designed for food service, food safe, high temp capable – up to 212 deg F, has volume markers, has an easy to use handle and is sturdy.
- Shop Around, Search Amazon for “4 quart measuring pitcher” – look for food safe materials and temperature ratings within your required range. Aluminum pitchers can work too, although a word of warning that Star San and aluminium do not place well together. Not a deal breaker, just something to keep in mind as you use your new pitcher.
- Review: Hands On: Rubbermaid Commercial Product 1 Gallon Bouncer Pitcher
- Related Categories: All Grain, Brew Day, Pitchers
Tip 8: Buy Keg O-Rings In Bulk
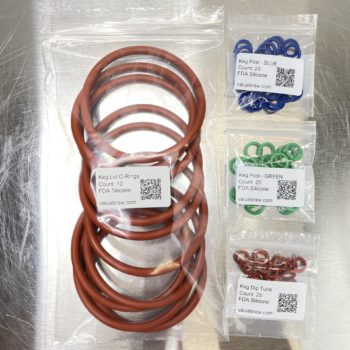
- You can save a bundle buying Homebrew Keg O-Rings in bulk
- Valuebrew has a lineup of FOOD Grade keg o-rings available in bulk. The lineup includes some unique offerings like color coded post o-rings, pin lock specific post o-rings and more.
- Replacing O-Rings – a section of our keg rebuild how-to
- More about food safe materials
- Related Top Post: Ball Lock Keg O-Rings vs Pin Lock Keg O-Rings – are they the same?
- Related Top Post: Bulk Keg Orings and Keg Repair Part Numbers
- Related Categories: Draft, Kegs, Keg Parts, Keg O-Rings
Tip 9: Get a Refractometer!
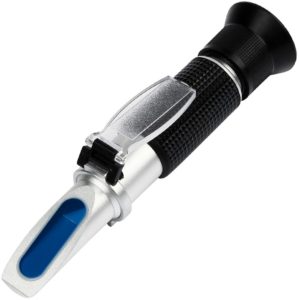 Pictured: Anpro Brix Refractometer for Homebrew, Beer Wort Refractometer Dual Scale Specific Gravity 1.000-1.120 and Automatic Temperature Compensation 0-32% via Amazon
- If you haven’t realized it yet… hydrometers are made out of breakable glass that can… break. They also require a healthy sample size.
- With a refractometer you need a sample size of just a couple drops. That’s a lot of saved beer compared to a hydrometer. So much so that a refractometer may very well pay for itself over time.
- For me, getting a refractometer was one of those small, inexpensive upgrades that made a huge difference.
- An quick estimation of unfermented wort gravity is easy to calculate. OG is around 4 times the Brix reading obtained from your refractometer. That becomes more and more inaccurate as gravities increase.
- Refractometers can also be used to measure gravity throughout the fermentation process. Just plug your numbers into a calculator for correction after fermentation begins. See: Sean Terrill’s Refractometer Calculator
- If you have a refractometer AND a hydrometer you can estimate ABV without a starting gravity. See Tip 10 for more information on that.
- Some shopping tips… Look for a dual scale (Brix and Gravity) model. ATC/Automatic Temperature Correction is another important feature. That automatically accounts for changes due to temperature within a certain range.
- There are many offerings and they can change quickly. Shop Around, Search Amazon for “dual scale refractometer” to compare prices and see what models are currently available.
- If you have a higher budget, consider a digital model. Generally speaking, those are not available with dual scale capabilities, but you get a digital readout of gravity readings. That’s a nice feature. Shop Around, Search Amazon for “digital brix refractometer” to compare prices and see what models are currently available.
- Related Categories: Fermentation, Refractometers
Tip 10: Estimate ABV Without a Starting Original Gravity
- Forgot to take an original gravity and still want an estimate of ABV? No problem. You’ll need a refractometer and a hydrometer.
- Take careful measurements with each. Thoroughly de-gas the sample to get a more accurate reading.
- Run those numbers through this equation. SG is the gravity reading obtained from the hydrometer, Brix is the reading obtained from the refractometer. ABV = [277.8851 – 277.4(SG) + 0.9956(Brix) + 0.00523(Brix2) + 0.000013(Brix3)] x (SG/0.79).
- This is a great reason to get a refractometer. There are many offerings and they can change quickly. Shop Around, Search Amazon for “dual scale refractometer” to compare prices and see what models are currently available.
- More reasons to get a refractometer! See Tip 9.
- Thanks to BYO for this formula. Not a subscriber? Subscribe to BYO
- Related Categories: Fermentation, Refractometers
Tip 11: Easiest Way to Seal Mylar Bags using a FoodSaver-type Vacuum Sealers
Why Mylar?
Mylar bags block oxygen and are a great way to store hops and other oxygen sensitive materials. As a testament to this, many hop distributors and sellers distribute hops in Mylar type bags. Sometimes those are vacuum sealed and sometimes they are nitrogen flushed.
Mylar bags are not generally expensive, so that’s great! The problem is vacuum sealers that can seal Mylar bags ARE expensive. Sometimes very expensive. That’s not great!
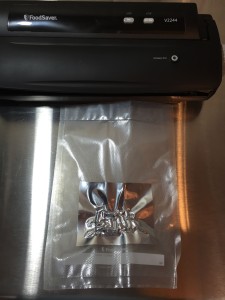 The “nested” method in action via Hands on Review: FoodSaver V2244 Vacuum Sealer
The “Nested” Method for Sealing Mylar Bags
- Insert a filled Mylar bag into a standard vacuum sealer bag.
- Vacuum seal the standard vacuum sealer bag.
- The only entry path for oxygen is now the very top of the Mylar bag. That very small opening is protected by the outer bag.
- To access contents, trim a small amount off the outer bag and re-use as many times as possible.
- See Tip 12 for another method
- In my opinion, this is the quickest and easiest way to seal a Mylar Bag using a traditional type vacuum sealer.
- Shop Around, Search Amazon for “mylar bags for food storage”
- Shop Around, Search Amazon for “vacuum sealer bags”
- Review: Hands on Review: FoodSaver V2244 Vacuum Sealer
- Top Post: Vacuum Sealing Mylar Bags Using Traditional Vacuum Sealers
- Related Categories: FoodSaver, Vacuum Sealing, Hops
Tip 12: Second Easiest Way to Seal Mylar Bags using a FoodSaver-type Vacuum Sealers
The “Snorkel” Method for Sealing Mylar Bags
- Cut a 1″ strip off the top of a vacuum bag.
- Fill the Mylar bag with hops or whatever you’re going to store.
- Insert the 1″ strip into the filled bag so that the strip sticks out of the Mylar bag.
- Trim the end of this strip so that about 1/2″ is sticking out of the Mylar bag.
- Insert the top of the Mylar bag into the vacuum sealer bag, ensuring that the 1″ strip of vacuum bag is sticking slightly out of the top of the Mylar bag. This acts as a channel.
- Vacuum and Seal.
- Because Mylar bags can be thicker that standard vacuum sealer bags, you may need to double seal the top with your vacuum sealer’s heat strip.
- Trim the excess vacuum bag strip.
- Trick Required: There is a trick here. Notice I didn’t say FoodSaver bag. I, initially, tried this with a FoodSaver bag and it wouldn’t seal correctly. FoodSaver bags are a bit thicker than most others on the market. Look for a thinner style bag to try with this technique.
- See Tip 11 for another method
- In my opinion, this is the second easiest way to seal a Mylar Bag using a traditional type vacuum sealer.
- Shop Around, Search Amazon for “mylar bags for food storage”
- Shop Around, Search Amazon for “vacuum sealer bags”
- Review: Hands on Review: FoodSaver V2244 Vacuum Sealer
- Top Post: Vacuum Sealing Mylar Bags Using Traditional Vacuum Sealers
- Related Categories: FoodSaver, Vacuum Sealing, Hops
Tip 13: Make a CO2 “Utility” Line
- This easy project adds a lot of flexibility to your draft system with minimal cost
- Top Post: Making a Utility CO2 Line Using Luer Lock Disconnects
- Related Categories: Draft, Disconnects
Tip 14: Use The “Spray Bottle Method” to Apply Star San
- That fact of the matter is… there’s no need to submerge your equipment in gallons and gallons of this stuff. The open space in the middle of your carboy does not need to be sanitized. Just the surfaces do.
- The key benefit of the Spray Bottle method is using what you need. This technique allows you to use very little Star San per batch. See our Star San Tips and Tricks post, linked below, for some cost savings estimations
- Add 6 CCs of Star San to one gallon of distilled water. You can use a syringe to properly measure this.
- Store the solution in a glass gallon jug as Star San can dissolve plastic over time.
- Fill a spray bottle with the Star San solution.
- Spray items in need of sanitizing instead of soaking them in gallons and gallons of Star San.
- Top Post: Star San Tips, Tricks and Guidelines – Using Star San In a Spray Bottle – thoroughly explains the Spray Bottle Method + lots of guidelines, tips and tricks
- Star San at Amazon
- Star San at MoreBeer
- Search Amazon for “10 ml syringe”
- Search Amazon for “chemical resistant spray bottle”
- Search Amazon for “1 gallon glass jug”
- Related: What’s the Shelf Life of Star San? – Testing Star San’s Effectiveness
- Related: My Favorite Size of Star San & Why
- Related Category: Sanitation
Tip 15: Dissolving DME More Easily – Cool or Hot Water?
- It may seem counter-intuitive, but Dry Malt Extract (DME) dissolves more easily, with minimal clumping, in cool water.
- DME at MoreBeer
- DME at Adventures in Homebrewing
- Search “Dry Malt Extract” at Amazon
- Credit for this technique goes to John Palmer. Learn more about John via his Author Page at Amazon
- Related Categories: Malt Extract, Extract Brewing, Yeast Starters
Tip 16: Use Metric for Hops, Water Salts and Yeast Starters
- Grams are much easier and more accurate for measuring hops and water salts.
- Of course, grams aren’t technically more accurate, a weight is a weight. What I’m saying is they are practically more accurate. For example 14 grams is .493835 ounces. If you have 6 digit precision when using ounces on your scale, whammo, it doesn’t matter much, but a gram scale with 1 digit precision (Example 14.1 grams) is a lot easier to come by and gets you really close with fewer digits to concern yourself with.
- A starter is also easier in metric. Water to DME ratio is always 10 to 1. 1,000 mL (1 L) to 100 grams of DME. Example – Need to make a 1.5 L Starter? You need 150 grams of DME.
- Search Amazon for “Digital Gram Scale”
- Resource Post: Yeast Starters & Fermentation
- Related Categories: Hops, Yeast, Yeast Starters, Fermentation
Tip 17: Cut pH Strips in Half and Save 50%

- Cut pH Strips in half length-wise.
- They are generally still easy enough to read and you’ve just saved 50% by effectively doubling your pH strips
- ColorpHast pH Strips – 4.0 to 7.0 (100 Strips) via MoreBeer
- COLORPHAST PH STRIPS 4-7 – 100 PACK via Brew Hardware
- pH Strips – ColorpHast – 4.0-7.0 via Amazon
- Search Amazon for “ph strips for beer”
- Review: Hands on Review: Milwaukee MW102 and PH55 pH Meters
- Related Categories: All Grain, pH
Tip 18: Saving Dry Yeast With a Vacuum Sealer!
- Of course you can vacuum seal hops, smaller amounts of grain and other brewing ingredients using your vacuum sealer. Using this technique you can also save partial packets of unused dry yeast!
- Determine the proper amount of yeast using a pitching rate calculator. If you don’t have a pitching rate calculator, sign up for a free non-expiring Brewfather trial account.
- Prepare the proper amount of re-hydration water. Generally, you’ll prepare 10 grams of water for every one gram of yeast needed, but consult manufacturer’s directions.
- Put the prepared rehydration water on an accurate gram scale – I use the AWS-100 from American Weigh [Hands on Review]. Make sure the scale has a “tare” feature or otherwise account for the weight of the container and water.
- Zero the scale out using the tare feature.
- Cut the yeast packet open and slowly pour the yeast into the rehydration water. Careful, there’s no going back if you pour too much. 🙂
- When I get the amount of yeast I’m looking for, I immediately seal the yeast packet (if it’s a mylar type material) using the heat strip sealer on my vacuum sealer.
- I write the amount of remaining yeast on the packet using a Sharpie and then seal that in vacuum bag for additional protection.
- This is quick and easy, reduces waste and saves money.
Gear, Supplies and Related Resources
- Search Amazon for “digital gram scale”
- Amazon Best Sellers in Vacuum Sealers
- Safale US-05 via MoreBeer
- Safale S-04 (3 ct.11.5 g Packs) via Amazon
- Safale US-05 (3 ct.11.5 g Packs) via Amazon
- Dry Yeast at William’s Brewing – William’s carries a variety of manufacturers and strains including (as of this update) Safale, Lallemand, and Mangrove Jacks
- Label Peelers, generally, has free shipping on dry yeast, no minimum order amount, to addresses in the contiguous US. Fermentis Yeast – Lallemand Yeast – Check Label Peelers for current availability
- Dry Yeast at William’s Brewing – William’s carries a variety of manufacturers and strains including (as of this update) Safale, Lallemand, and Mangrove Jacks
- Review: Hands On Review: American Weigh AWS-100 – 100g x 0.01g Digital Scale
- Review: Hands on Review: Brewfather App
- Review: Hands on Review: FoodSaver V2244 Vacuum Sealer
- Top Post: Saving Dry Yeast With a Vacuum Sealer!
- Related Categories: Yeast, FoodSaver, Vacuum Sealing
Tip 19: Repair Cornelius Keg Handles and Bases.
Thank you to Facebook Friend Jason for this technique!
- Use automotive brake cleaner to clean the metal and rubber.
- Scuff both the metal and rubber with an emery cloth.
- Get an appropriate adhesive that works with rubber and metal. Consider: 3M 08008 Black Super Weatherstrip Adhesive via Amazon. HBF Reader Scott says Gorilla Glue also works great for this: “Gorilla Glue works great for reattaching rubber keg parts. It’s an expanding polyurethane so it really gets in there and grabs.” Thanks Scott!
- Reattach the handle using the adhesive. Follow the product specific instructions for application and curing.
- Search Amazon for Gorilla Glue
- Loose handle and/or base kegs can be some of the best deals out there. Search Adventures in Homebrewing, Search Austin Homebrew Supply
- Top Post: Fix It! Repairing Loose Cornelius Keg Handles and Bases
- Top Post: Bulk Keg Orings and Keg Repair Part Numbers
- Related Categories: Draft, Kegs, Keg Parts
Tip 20: Filling a quick bottle or growler from your kegerator faucet
- If you need a quick bottle or two or a growler filled from your kegerator, there’s no need to hook up your Beer Gun or Counter Pressure Bottle Filler. Just slip a piece of tubing over your faucet and pour.
- 3/8″ ID Tubing fits snugly over most picnic/cobra faucets.
- 1/2″ ID Tubing fits snugly over most Perlick type faucets.
- If you’re an Intertap faucet user, consider the Growler Filing Attachment
- If you use forward sealing faucets counter pressure option are now available that allows you to easily counter pressure fill bottles without a lot of tubing and cleanup. See: Tapcooler – Nukatap Counter Pressure Bottle Filler
- Make sure your length of tubing goes all the way to the bottom of the container you’re filling
- Sanitize the tubing and the receiving bottle.
- Reduce your regulator PSI down to 2 or 3 PSI, vent your keg to release excess pressure and fill your bottle or growler slowly from the bottom.
- Cap on foam and you’re good to go.
- If you have a compatible forward sealing faucet, The Tapcooler is worth a hard look. This is a counter-pressure filler that attaches directly to your faucet. Since it attaches directly to your faucet, you don’t have all the tubing to deal with.
- Search Amazon for “Growler Filler”
- Top Post: Tips and Gear for Growler Filling
- Related Categories: Draft, Portable Serving, Bottling
Tip 21: Tubing Tips
- Cleaning: My process general process is rinse > PBW soak > rinse
- Reducing Water Spots: If you have a problem with water spots on your tubing, make your last step a rinse in a diluted mixture of Star San. Not only will you get some sanitizing benefits, the Star San acts as a surfactant that helps fight water spots.
- Drying: I let wet tubing dry by hanging it with ends facing down until water has dripped off. After it’s mostly dry (generally speaking, overnight), I will coil the tubing up and hang it with the ends facing up. Facing the ends of the tubing upwards give moisture a place to escape as the tubing finishes completely drying. Note: this is for any residual moisture that may be in the tubing, not large drops. You can skip this step if you leave it drying U-shaped for long enough. After the tubing is completely dry, I rotate it so that the ends are face down to minimize dust in the tubing.
- Storage: I store my most commonly used piece of tubing on my Bulldog Hardware Peg-A-System Pegboard – note these aren’t always in stock, search Amazon for “plastic pegboard” to look for other options. One of the reasons I chose that pegboard is because it’s plastic and can handle a little moisture without issue. That means I can do my drying on the pegboard. For lesser used tubing and bulk rolls I’ll coil up each individual piece of tubing and use a reusable/adjustable cable tie – similar to these – to keep each coil together to keep things from tangling together. I keep those in a large tote, but a 5 gallon bucket would also work pretty well. Tip: Make sure your tubing is completely dry before stowing. Residual dampness in an enclosed space will harbor bacteria. Depending on your circumstances, you may want to keep the lid off of your tote or bucket. I also keep a smaller tote with odds and ends tubing (6″ or under) to keep on hand for projects and miscellaneous uses.
- Food Safe Materials: Look for tubing made from food safe materials that is rated for the temperature and pressure for your application.
- Also See: Tip 28 – Re-shaping Vinyl Tubing
- Search Amazon for “PBW Cleaner”
- Search Amazon for “Star San”
- Search Amazon for “reusable cable ties”
- Search Amazon for “plastic pegboard”
- Gardner Bender Reusable & Adjustable Cable Ties – note that multiple variations of this product may be available
- VELCRO Brand One Wrap Thin Ties, Black, 8 x 1/2-Inch, 100 Count – Thanks to HBF Reader John for this tip. He uses these for keeping tubing rolls neat.
- The Bulldog Hardware 131588 Peg-A-System Ultimate Kit
- Top Post: Tips: Cleaning, Drying & Storing Tubing
- Top Post: Oetiker Stepless Clamps for Kegerator Gas and Beer Lines
- Related Categories: Cleaning, Sanitation, Tubing
Tip 22: US Nickel as a Calibration Weight
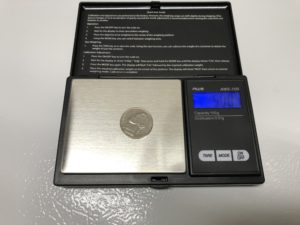 Weighing a US Nickel Using an AWS-100 Digital Gram Scale – Hands on Review
- According to the United States Mint a Nickel weighs 5 grams.
- That makes a cheap and easy calibration weight to calibrate or check the honesty of your gram scale – Details
- Note: for scales that can be calibrated, you may need a specific weight. If it’s a smaller amount, you can use multiple US Nickels. “Checking the honesty” of your scale can be done with any scale. A US Nickel should weigh 5 grams on your gram scale.
- Search Amazon for “digital gram scale”
- Search Amazon for “calibration weight set”
- Related Tip: Use Two Scales if You’re an All Grain Brewer
- Review: Hands On Review: American Weigh AWS-100 – 100g x 0.01g Digital Scale
- Related Resource Page: Homebrew Scale Deals, Discounts and Coupons & Reviews
- Related Categories: Scales
Tip 23: Tips for Fighting Homebrew Boil-Overs!
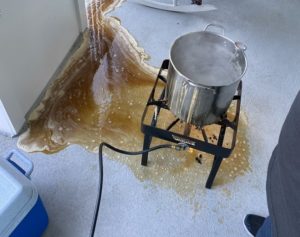 Thanks to HBF Reader Case for this photo! [8 Ways to Connect with HBF]
- Start with a well-sized kettle. Having some margin, gives you a better chance to fight the dreaded boil-over.
- Be alert! When your wort hits hot-break temperatures, boil-overs can happen quickly.
- Adding hops is another potential boil-over inducing event that should be ready for.
- Stir the Foam! If you’re fighting a boil-over… stir the foam. No need to stir the entire batch, just stir the very top to break up the foam more quickly.
- A spray bottle of water (set to a moderate mist) works well to combat foam
- A wooden spoon placed over the top of your brew kettle can help break up foam. Personally I would not use this as primary defense.
- FermCap-S Foam Control – This is designed to control foam. It settles out during fermentation and actually helps increase head retention.
- Search Amazon for “food safe spray bottle”
- Search Amazon for “24 stainless whisk”
- Related Review: Hands On: 24″ Stainless Steel Whisk – Extract, All Grain and Whirlpooling
- Related Categories: Stirring, Mash Paddles, Propane Burners, Kettles
Tip 24: Beer Bottle Label Removal Tip – Using Undiluted PBW to Help with Bottle Label Removal
- Soaking your bottles in hot PBW is not a new technique. It works well and I would venture a guess that a lot of homebrewers do this.
- Here’s the tip… If you have a label or bits of adhesive that are being stubborn, Put a little bit of PBW right on a label or adhesive that’s giving you problems and scrub. The grittiness of the PBW combined with it’s full strength application generally dissolves the label and adhesive in short order.
- PBW can be rough on your hands when diluted. That’s even more true when it’s undiluted. I recommend using protective gloves when dealing with PBW.
- Search Amazon for “elbow length cleaning gloves”
- Search Amazon for “PBW Cleaner”
- Search Amazon for “scrub pads”
- Search MoreBeer for “PBW”
- Related Categories: Bottling, Cleaning
Tip 25: Grain Storage Capacity Rule of Thumb
- My rule of thumb for unmiled malt storage is… 5 lbs per gallon or 1.25 lbs per quart.
- That’s a rough estimate, actual storage capacity will vary.
- Search Amazon for “airtight pet food storage” – look containers made from food safe materials
- Top Post: Storage Options – Base Grain, Specialty Grain and DME
- Related Review: Hands On Review: Ultraship 55 lb Digital Scale
- Related Resource Post: All Grain Tips & Gear
- Related Categories: Storage, Containers, Grain Storage
Tip 26: Use a Full Size Sheet Pan to Make Bottling Easier
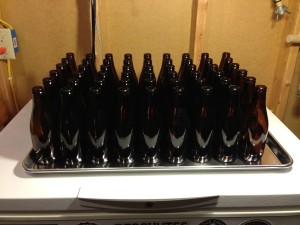
- How about tray that has a 54 bottle (or so) capacity to making bottling day easier?
- The pictured tray – Thunder Group ALSP1826 – is actually a full size sheet pan that’s about 18″ x 26″. As you can see it easily hold 54 bottles. Those are Anchor Steam bottles which are a little wider than standard beer bottles. You can probably get a few more long neck style bottles on a full size sheet pan. This is large enough to hold enough bottles for a full 5 gallon batch. If you leave 1/2 gallon of trub behind, you would use right around 48 (12) ounce bottles. These are estimates.
- This tray catches those in-between bottle drips, helps keep your bottling area clean and generally speeds up bottling and cleanup.’
- +BBQ…. When you’re done you have one tray to rinse off. This also pulls double duty for me come time to BBQ. I use this tray for preparing and transporting ribs. Note that this is actually too large to fit in my standard size oven. I like that because it means it stays out of the oven and I don’t have to worry about odds and ends getting baked on to it.
- Pictured: Thunder Group ALSP1826 19 Gauge Sheet Pan, Full Size 18″ x 26″ via Amazon
- Search Amazon for “full size sheet pan”
- Top Post: Using a Full Size Sheet Pan to Make Bottling Easier – Catch Drips on Bottling Day
- Related Categories: Bottling
Tip 27: Use a “Brew Day Box”
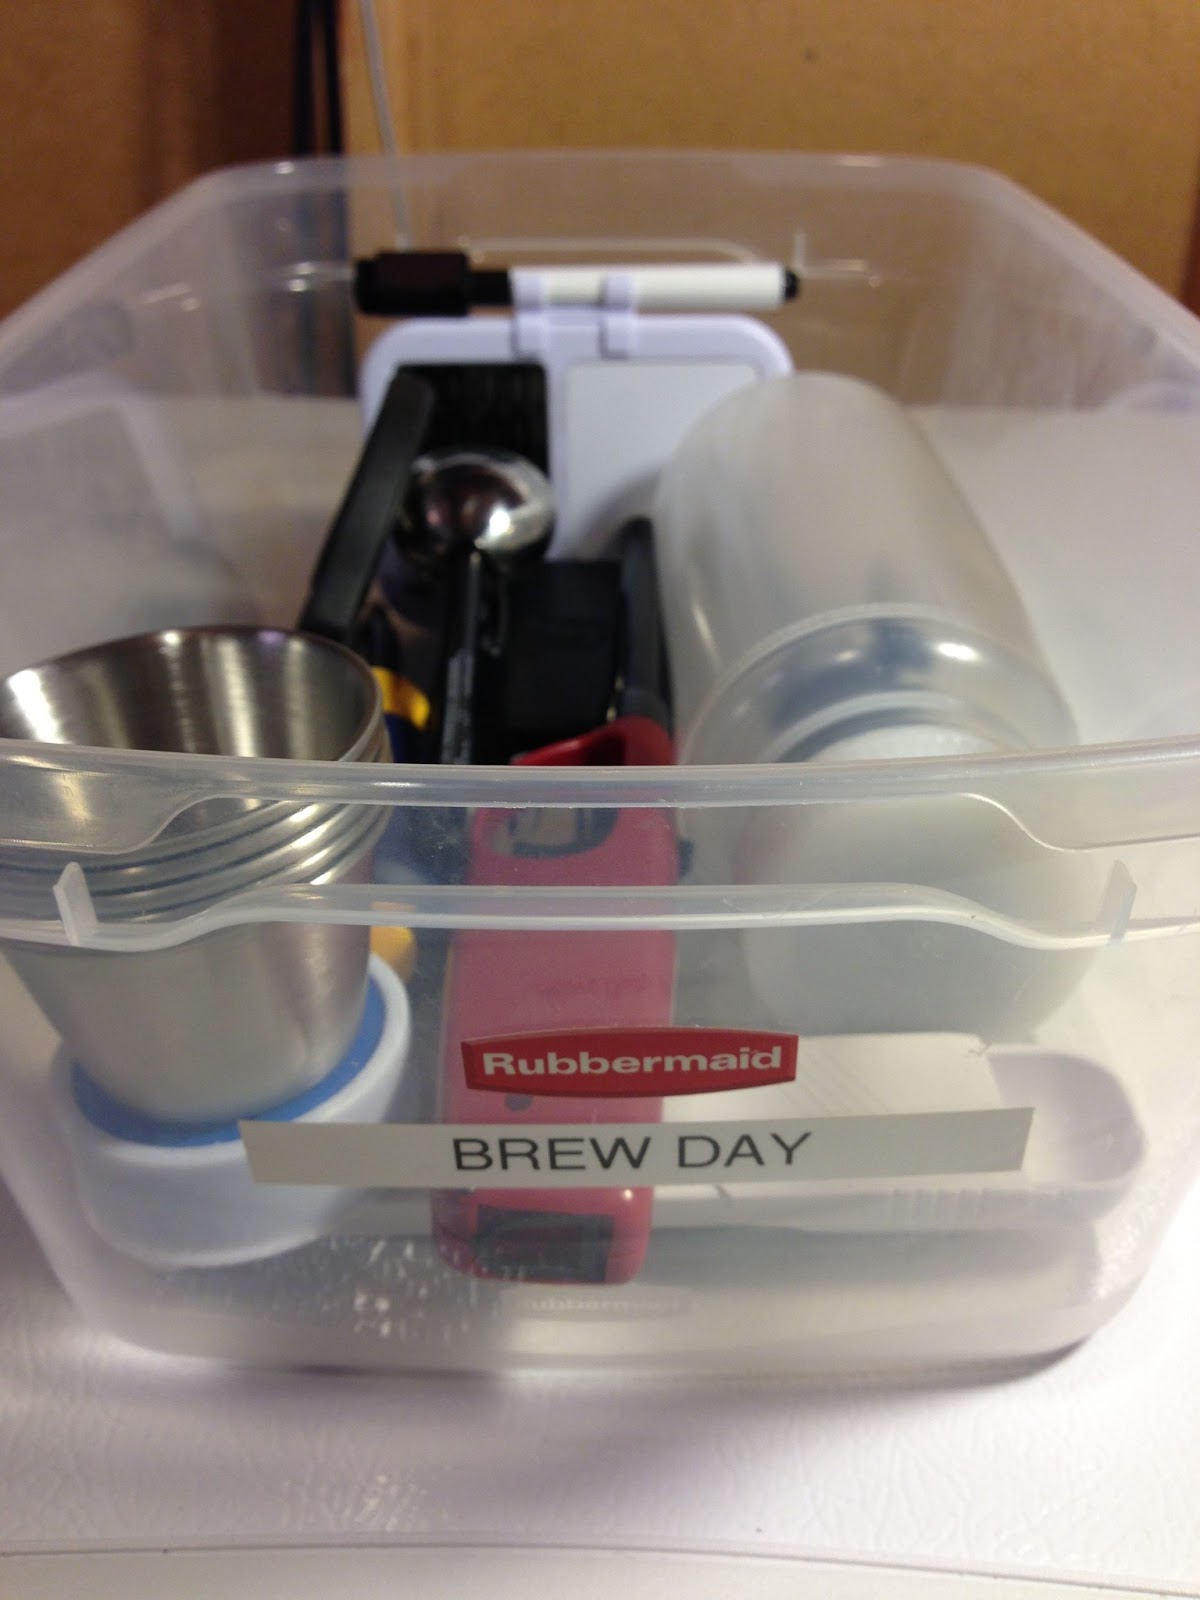
- Develop a “Brew Day Box” with all your brew day needs conveniently stored in the same spot.
- I suggest getting dedicated gear for this box. Example… this box should have it’s own thermometer. Otherwise, you’ll end up having to gather everything to put back in the box on brew day. That defeats the purpose of the Brew Day Box.
- Top Post: Putting Together a “Brew Day Box”
- Related Top Post: Short On Time? Time Saving Homebrew Tips!
- Related Top Post: Bus Tubs for Brew Day – Save Time and Effort
- Related Categories: Storage, Containers, Brew Day, Making Brew Day Easier
Tip 28: Buy PBW in Bulk to Save Money
- Depending on vendor and size the cost of PBW on a per pound basis can vary wildly.
- Buy the bigger sizes (4 lb+). If you’re an avid homebrewer and like PBW, it’s something you’re going to use. Generally speaking, the larger size you purchase, the less PBW will cost per lb. Buy the largest size your budget allows for.
- Amazon: Five Star PBW, 4 lbs
- Amazon: PBW by Five Star- 8 lbs
- Amazon: PBW by Five Star- 50 lbs
- Search Amazon for “PBW” – new offerings pop up regularly
- Top Post: Compare Prices: Five Star PBW Homebrew Cleanser + Tips & Buying Guidance!
- Related Top Post: Star San Tips, Tricks and Guidelines – Using Star San In a Spray Bottle
- Related Categories: Cleaning, Sanitation
Tip 29: Straighten Homebrew Tubing
- If you have a length of tubing that is difficult to roll up correctly or otherwise sits incorrectly, try soaking it it warm or hot water (be very careful!) and then bend the tubing how you want it and let it cool.
- Don’t exceed the maximum temp rating for your tubing
- Search Amazon for “food safe tubing”
- Top Post: Tips: Cleaning, Drying & Storing Tubing
- Related Categories: Tubing
Tip 30: Fix it, Instead of Replacing It
- Many things we use around our home breweries can be repaired. If possible, fix something rather than replacing it. The challenge can be fun and you can save money.
- When possible, rehab kegs instead of replacing them. Most kegs are designed for commercial service, they should have long lives and most parts are replaceable.
- See Resource Post Bulk Keg Orings and Keg Repair Part Numbers for a slew of replacement keg replacement parts.
- Keg Connection has a number of diagrams and parts lists to help you repair draft related items. These are neat because not only do they show you how things go together, they offer an easy way to get what you need. As of this posting, they have parts pages for pony pumps, stout faucets, keg disconnects, Perlick 600 series faucets, Perlick 525, standard faucets and shanks. Searching “parts” at Keg Connection should get you headed in the right direction to find their current resources
- If you’re having trouble figuring out how to fix something or source repair parts, join our Facebook group and ask your fellow homebrewers.
- For general repairs and projects I like to keep an assortment of hardware on hand at the ready to help fix and build things around the brewery – some Amazon searches – “screw assortment”, “clamp assortment”, “electrical nut assortment”, “heat shrink assortment”, “hardware assortment kit”
- Related Top Post: Repairing Loose Cornelius Keg Handles and Bases
- Related Categories: Draft, Kegs, Keg Parts
Tip 31: Use Heat Resistant Gloves for Minding Yeast Starters & On Brew Day
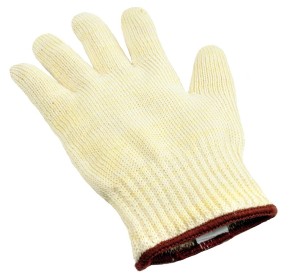 Pictured: G & F Heat Resistant Oven Glove via Amazon
- I use a heat resistant oven glove when I’m making yeast starters in an Erlenmeyer Flask. It’s really handy (pun intended) to swirl around the flask or to quickly remove to keep the flask from boiling over.
- These are also handy on brew day for handling hot, (but not wet) ball valves and such.
- A lot of these types of gloves, including the pictured model and the ones I use are not waterproof. As such, they should not be used with hot liquids.
- Some silicone models are available that may offer some water resistance. Generally speaking silicone gloves are going to be less flexible. That may make it harder to pick things up. You’re trading off some water resistance for grip.
- Safety Note: Always use caution when handling hot items or ingredients and always read and follow manufacturer directions.
- StirStarter Stir Plate – Hands on Review
- Hands on Review: Propper Starter Canned Starter Wort
- Search Amazon for “heat resistant oven glove”
- Search Amazon for “heat resistant waterproof silicone gloves”
- Ove Glove HH501-18 Hot Surface Handler Oven Mitt Glove affiliate link, note that multiple variations of this product may be available, as such a different version may appear at this link
- G & F Heat Resistant Oven Glove via Amazon
- Top Post: Use Heat Resistant Gloves for Minding Yeast Starters & On Brew Day
Tip 32: Use a Wallpaper Prep Tray for Cleaning, Sanitizing and Storage of Longer Brewing Items
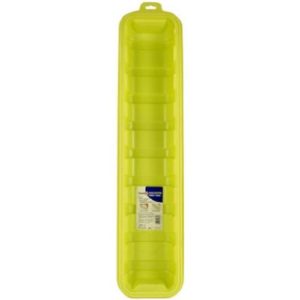 Pictured: Zinsser 98030 30-Inch Wallpaper Prep Tray – affiliate link, note that multiple variations of this product may be available, as such a different version may appear at this link
- I use a wallpaper try to clean and sanitize longer items like racking canes, auto-siphons, spoons, tubing and beverage out dip tubes. It works great.
- These also work well for storing longer items. If you’re going to store things in these, I would recommend stacking a couple together to give them some extra strength.
- Another similar option are planter boxes. They are generally sturdier than wallpaper prep trays and they’re about the same length. Since you can get away with one your total cost may end up being less.
- Zinsser 98030 30-Inch Wallpaper Prep Tray – affiliate link, note that multiple variations of this product may be available, as such a different version may appear at this link
- Search Amazon for “wallpaper prep tray”
- Bloem 20-52430 Fiskars TerraBox Planter, Thyme Green, 30″ affiliate link, note that multiple variations of this product may be available, as such a different version may appear at this link
- Search Amazon for “planter box” – consider total length when deciding
- Top Post: Use a Wallpaper Prep Tray for Cleaning, Sanitizing and Storage of Longer Brewing Items
- Related Top Post: Star San Tips, Tricks and Guidelines – Using Star San In a Spray Bottle
- Related Top Post: Bus Tubs for Brew Day – Save Time and Effort
- Related Categories: Cleaning, Sanitation, Storage
Five Star recommends limited contact time with ALL plastics. See: Star San Tips – Materials Compatibility + Do Not Soak
Tip 33: Build a Spunding Valve
- A Spunding Valve allows you to maintain a set pressure. If pressure in the pressure vessel exceeds the set point, it is expelled.
- Some applications – Pressurized fermentation, Dry hop under pressure, Naturally and accurately carbonate beer right in the keg, An airlock replacement, Fix over-carbonated beers, Test for keg leaks, As an airlock for long term aging of beers and… more
- Homebrew Finds is Spunding Central! – Must Read… Top Post: Build a Spunding Valve
- Spunding Valve Build: “Cheapest Option”
- Spunding Valve Build: Using Primefit CR1401G Replacement Air Regulator
- Hands on Review: Kegland BlowTie Diaphragm Spunding Valve!
- Using a Keg as a CO2 Source for Portable Serving!
- Related Categories: Fermentation, Carbonation
Tip 34: Consider Oetiker Stepless Clamps for Kegerator Gas and Beer Lines
 Pictured: Oetiker 16700010 Stepless Ear Clamp via Amazon
- I use stainless steel Oetiker-style stepless clamps for most gas and beer applications. I like the fact that they are, generally… stainless steel, stepless and the fact that they stay tight and will not loosen over time.
- These clamps are designed so that there are no steps (gaps) on the inside. That reduces the possibility that tubing will be torn or damaged.
- These are single use clamps. The upside of that is… Oetiker-style stepless clamps will not loosen over time. When they’re tight, they’re tight. I really like that for kegerator applications because… A: I don’t like to empty CO2 tanks for no good reason and B: I don’t like standing beer in my kegerator.
- A sizing note – Oetiker-style Stepless clamp sizes generally refer to the largest diameter in mm. So a size 13.3 means that the Oetiker Stepless clamp is 13.3 millimeters (about .52″) in diameter uncrimped.
- Search Amazon for “Stepless Hose Clamps” to shop around and see what’s available
- Top Posts: Oetiker Stepless Clamps for Kegerator Gas and Beer Lines
- Related Top Post: Tips: Cleaning, Drying & Storing Tubing
- Resource Page: Tips and Gear for your Kegerator
- Related Categories: Draft, Tubing
Some specific sizes to consider…
- Oetiker 16700010 Stepless Ear Clamp, One Ear, 7 mm Band Width, Clamp ID Range 10.8 mm (Closed) – 13.3 mm (Open) (Pack of 25) – affiliate link, note that multiple variations of this product may be available, as such a different version may appear at this link
- Oetiker 16700012 Stepless Ear Clamp, One Ear, Clamp ID Range 11.5 mm (Closed) – 14 mm (Open) (Pack of 25) – affiliate link, note that multiple variations of this product may be available, as such a different version may appear at this link
- Oetiker 16702498 Stepless Ear Clamp, One Ear, 7 mm Band Width, Clamp ID Range 16.6 mm (Closed) – 19.8 mm (Open) (Pack of 25) – affiliate link, note that multiple variations of this product may be available, as such a different version may appear at this link
I use a pair of nail nippers (meant for cutting heads off nails) but there are also purpose made tools for clamping Oetiker-style stepless clamps…
- Oetiker 14100446 Single Action Side Jaw Pincers affiliate link, note that multiple variations of this product may be available, as such a different version may appear at this link
- Oetiker Clamp Tool – via Keg Connection
- Search Amazon for “Stepless Clamp Tool” to shop around and see what’s available
Tip 35: Use Deli Containers To Store Your Yeast Cake
 Pictured: Deli Food Storage Containers with Lids, 16 Ounce affiliate link, note that multiple variations of this product may be available, as such a different version may appear at this link
- Note: This tip involves handling hot items. Always use extreme caution when handling hot items to avoid being scalded.
- These containers are generally food safe and microwave safe.
- They also, generally, have tight lids. Lids are either not quite airtight – That’s perfect for storing a yeast cake for your next batch as, the yeast may need to off-gas – Or airtight – That’s okay too as popping a lid off one of these isn’t usually a huge deal.
- You can sanitize these by microwaving some water in them. Place the lid loosely on top so that it can get sanitized by steam. Be very careful around boiling water and steam, you can get hurt. Or, sanitize with your favorite food grade homebrew sanitizer.
- These type of containers are also handy for general storage, rehydrating yeast, sample collection and lots more. Non-brewing related bonus… these are great for giving food-stuffs away as they are economical enough that you don’t need to worry about getting your container back.
- There are many offerings for these types of containers and they can change quickly. Search Amazon for “pint deli containers” to see what’s out there. Some things to look for – food safe materials, microwave safe and tight fitting lids.
- Credit for this tip goes to Denny Conn!
- Related Categories: Fermentation, Yeast
Tip 36: Save Time, Clean As You Go
- Clean as you go – This is one of the most frequent user contributed time-saving tips we’ve received. Cleaning during down times – mashing, boiling, chilling means you don’t have to do it afterwards. Clean your mash tun during the boil, sanitize your fermenter while you’re chilling, etc.
- Top Post: Time Saving Homebrew Tips
- Related Resource Page: Homebrew Tips and Tricks Series
- Related Categories: Making Brew Day Easier, Brew Day
Tip 37: Save Time, Shorten Your Boil
- 15 Minute Boil: If you’re an extract brewer, boil for 15 minutes. Extract has already been boiled. The only reason we boil it further is to sanitize the wort and utilize hops. Use recipe software to refigure hops and make sure to adjust your pre-boil volume to account for a very short boil. The finished beer will not exactly match your recipe. It may be better, but it will certainly be different. You’ll be spending more money on hops, but cashing in on 45 minutes in time savings.
- All Grain Brewers: Shorten your boil. Depending on your grain bill you may be able to shorten your boil. Adjust pre-boil volumes to compensate. Again, this is grain bill dependent as some malts really need to be boiled longer to drive off DMS precursors.
- Need brewing software to re-figure recipes? Get a FREE Non-Expiring Brewfather App Trial
- Top Post: Time Saving Homebrew Tips
- Related Categories: Making Brew Day Easier, Brew Day, All Grain, Extract Brewing
Tip 38: Save Time, Go Big, or Go Small
- Go Big: Brew back to back batches. Setting up, tearing down and cleaning take a good bit of time. Brewing back to back batches will take you more time on brew day, but your time commitment per batch is significantly reduced.
- Go Big: Get the gear to brew double batches. Want some more variety? Split the double batch in half and do separate fermentations, yeast and dry hops. Check out our Large Batch post tag for gear and techniques for batches sizes of 10 gallons and up.
- Go Small: Smaller batches make things easier and quicker. Getting to a boil is quicker, chilling is quicker, cleaning is quicker. I’ve done 2 to 3 gallon all grain small batches on my stop top with great success – See: Small Batch, All Grain Stove Top Brewing + Water Calculation Spreadsheet – and you could do the same thing with extract. Combine small batches with the previous 15 minute boil tip and you’ve saved some serious time.
- Related Top Post: Small Batch, All Grain Stove Top Brewing + Water Calculation Spreadsheet
- Top Post: Time Saving Homebrew Tips
- Related Categories: Making Brew Day Easier, Brew Day
Tip 39: Save Time with UniVessel Equipment
- UniVessels are vessels that serve two purposes. Kettles that also work as fermenters and fermenters that also work as kegs. Using a single vessel for two things means less cleaning and saved time.
- Ferment in Your Kettle! Anvil kettles offer a FIAK (ferment in a kettle) add on that allows you to ferment directly in your kettle. This lets you entirely skip cleaning and sanitizing a separate fermenter. Combine this with the BIAB style of brewing and you have a single vessel mash tun, brew kettle and fermenter! Chapman’s Stainless Steel Fermenters – Search Amazon for “Chapman Fermenter” – Adventures in Homebrew – Austin Homebrew Supply – also function as a univessel brew kettle/fermenter.
- Serve in Your Fermenter! Kegmenter vessels act as both fermenter and serving keg. That means one vessel to clean instead of two – at MoreBeer, at William’s Brewing
- Top Post: Time Saving Homebrew Tips
- Related Categories: Making Brew Day Easier, Brew Day, Fermentation, Kettles
Tip 40: Lodge Pan Scrapers for Cleaning Fermenters
 Pictured: Lodge Pan Scrapers. Handheld Polycarbonate Cast Iron Pan Cleaners. (2-Pack. Red/Black) – affiliate link, note that multiple variations of this product may be available, as such a different version may appear at this link
- Credit for this idea goes to Drew Beechum. Drew is the author of Experimental Brewing, Homebrew All Stars and lots more. Check out his Author Page at Amazon to learn more about Drew
- Drew Says… “An absolutely underrated tool – particularly for getting stubborn Krausen off of stainless without scratching!”
- Lodge Pan Scrapers. Handheld Polycarbonate Cast Iron Pan Cleaners. (2-Pack. Red/Black) – affiliate link, note that multiple variations of this product may be available, as such a different version may appear at this link
- Search Amazon “for cast iron pan scraper”
- Related Categories: Cleaning
Tip 41: Easily Remove Old Keg Labels
I use a fermentation heat wrap to help remove stubborn keg labels. The gentle heat helps loosen old adhesive.
Removing Keg Labels… A Trick That Makes it Easy! – a section of our keg rebuild how-to
Tip 42: Trouble Cleaning Your Keezer With a Collar? Use a Mop
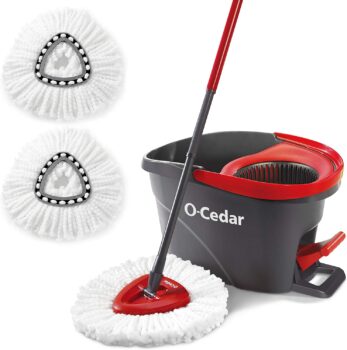 Pictured: O-Cedar EasyWring Microfiber Spin Mop & Bucket Floor Cleaning System + 2 Extra Refills affiliate link, note that multiple variations of this product may be available, as such a different version may appear at this link
Adding a collar to my chest freezer based kegerator/keezer was a huge upgrade. It allowed me to switch from messy/drippy picnic taps to forward sealing faucets and a drip tray. It looks great and it works great. Beyond that, I don’t have to deal with sticky tubing and cobra style taps.
The downside of doing this is… I can no longer easily reach the bottom of the chest freezer. I just cannot get down there. Short of actually trying to get inside (which would not be pretty) or removing the collar, this is a spot that’s hard to clean.
Mops to the rescue! I use a mop to periodically clean and sanitizer the floor of my collar-equipped keezer. It makes quick work of the job. I did purchase a new mop to dedicated to this use.
- Search Amazon for “microfiber mop” to shop around
- Related Top Post: Build a Recirculating Draft Line Cleaning Pump
- Related Categories: Draft, Cleaning
Got a great tip? Submit your tip for consideration. If your tip makes it, we’ll always give you the credit!
This post may contain affiliate links. We may make a commission when you use our links. This will never cost you extra. Thank you for supporting Homebrew Finds!
Make sure the components you use are compatible and rated for your intended application. Contact manufacturer with questions about suitability or a specific application. Always read and follow manufacturer directions.
Safety Note: Always use caution when handling hot items or ingredients and always read and follow manufacturer directions.
page:tips tag:itsapage