
Hands on Review: Propper Starter Canned Starter Wort!
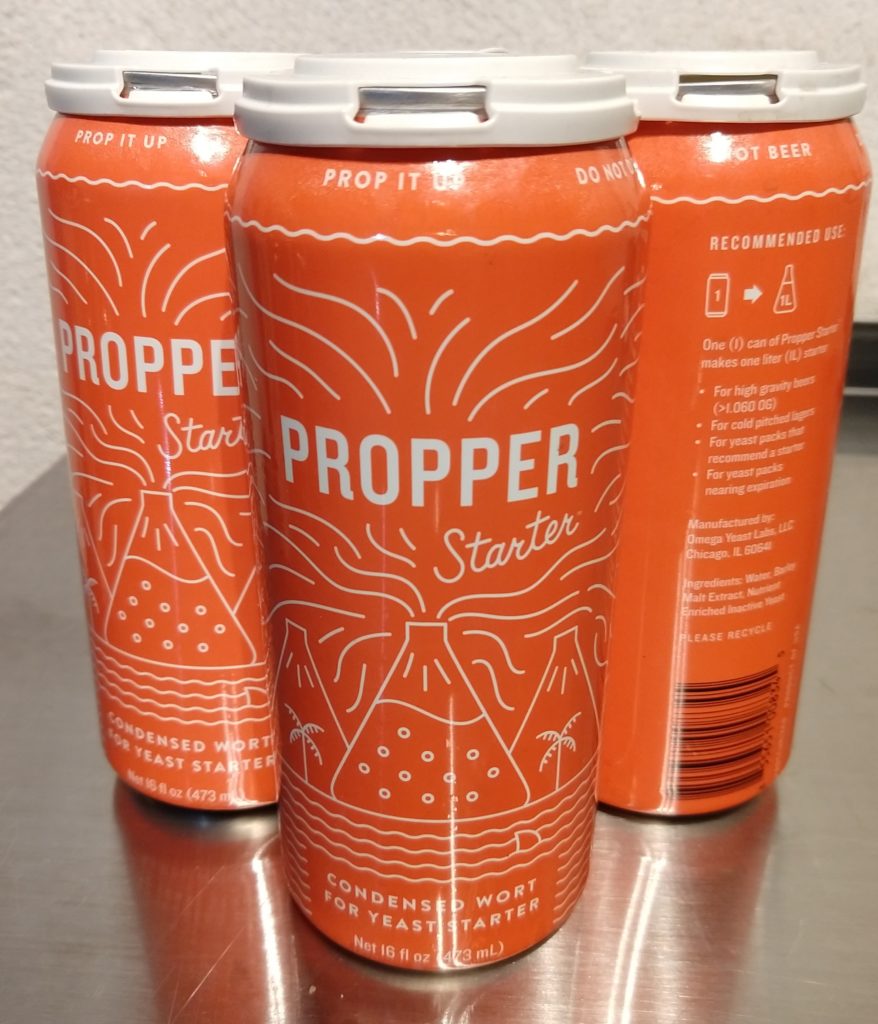 Propper Starter Canned Wort by Omega Labs
This review is by Homebrew Finds Contributor Brad Probert. Brad is an engineer, expert homebrewer and experienced reviewer. Grab a link to Brad’s website at the end of this review.
Propper Starter Canned Starter Wort
I never used to be a fan of starters. I willfully ignored stories people would tell about their starters because I didn’t want starters to matter. Extra work strung out to a few days before brew day was something I just couldn’t get excited about. But then I did some experiments splitting a batch and fermenting one with a starter and one without. I then saw firsthand how the starter saved a couple of challenging lager fermentations. I could no longer be a denier.
I set about trying to make the process as easy as possible with a flask, stir plate, and even a small electric coffee kettle to allow me to keep the process contained to my basement brewing area. It was manageable, but I still couldn’t overcome the dislike of having to buy DME (and running short when I needed it), and the whole cooling process after I boiled the wort starter. Then I stumbled upon the Propper Starter canned starter wort in my LHBS. Could this be my savior?
Compare Prices Propper Starter Canned Wort, Review Continues Below
- Propper Starter Canned Wort via MoreBeer
- Search “Propper Starter Canned Wort” on Amazon – offerings vary
- Propper Starter Canned Wort via Adventures in Homebrewing
- Propper Starter Canned Wort via Austin Homebrew Supply
- Propper Starter Canned Wort via Label Peelers
- Propper Starter Canned Wort via Great Fermentations
- Propper Starter via Delta Brewing – bonus for all grain brewers… their free shipping promo includes full sacks of grain with a qualifying order
Propper canned starter wort is made by Omega Yeast Labs. Omega yeast labs opened in mid-2013, which makes it a newer kid on the block of homebrewing yeast suppliers. Based in St. Louis and Chicago, you will mostly find their yeast in the Midwest and East Coast areas. A yeast producer making a yeast starter seems like a natural/logical fit.
The can of Propper Starter contains concentrated wort and yeast nutrient. It’s made to be diluted to the proper concentration. One 16 oz. can of concentrated wort poured into your flask, then you fill up the empty 16 oz. can with water again and you’ve got 1 Liter of 1.040 gravity starter wort.
Hands on Review
The process of making this starter is incredibly simple. The water you choose to use is where you can really rack up the time savings. You can use Reverse Osmosis, Distilled, or tap water (if you boil it first and then cool it down). The key here is making sure the water is microbe free. Boiling and chilling tap water to kill any microbes requires a lot of time and a lot of babysitting. I went and bought a gallon of Distilled water from the store so I could skip both the boiling and chilling steps. That gallon jug is good for 16 x 1L starters. The beauty here is that the jug of distilled water is already at room temperature, so it’s as simple as just pouring these together in the flask, dumping the yeast and putting it on the stir plate.
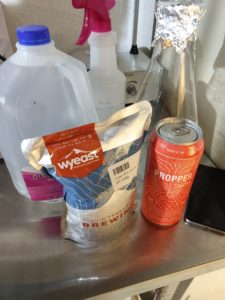 Starter Gear Lined up for Time Trial
To quantify exactly how fast it is, I timed the process. First step involved my bottle of Star San spraying down the Propper Starter Can top, my Erlenmeyer flask, and the outside of my yeast pouch. I swirled the Star San around in my flask to ensure it got on every surface, then let the extra drain out. Poured it all together and put it on the stir plate, then stopped the timer. Five minutes and 26 seconds from start to finish. Doing it with DME and boiling/chilling water would consume about an hour of my time (depending on how hands-on I wanted to be on the chilling portion to make that go faster).
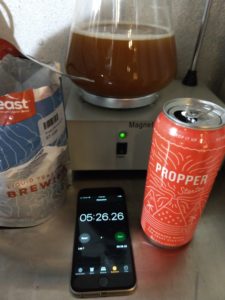 Time Trail Complete – 5 minutes and 26 seconds
I ran some numbers on the price. A 4-pack of Propper Starter cans sells for $12.99 at multiple different homebrew shops, so about $3.25 per 1 L of starter. My distilled water sells for $1.00/gallon at the grocery store. So a 2L starter will cost you $6.50 for the Propper Starter plus $0.25 of distilled water. Making a 2L starter with DME requires 7.5 oz. of DME to get 1.040 gravity. At a price of $5.50/lb for Golden Light Briess DME, that works out to $2.58 per 2L starter (assuming using “free” tap water).
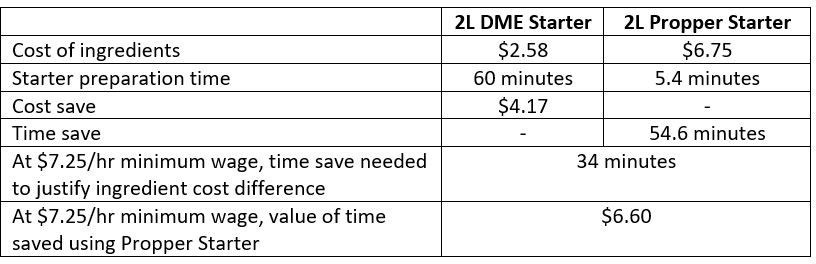
So depending on what value you place on your time (or if you were theoretically paying a minimum wage high school student to make your starters) the Propper Starter works out to be worth the extra money spent for the time save.
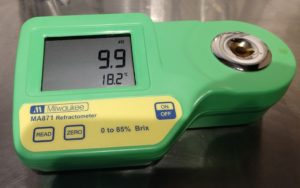 Gravity reading of diluted starter wort – 9.9 Brix or about 1.040 SG on my MA871 Digital Refractometer – Hands on Review
The starter wort is a darker color than a Light DME starter. So if you’re brewing a very pale colored beer, you may want to cold crash and decant before pitching into your fermentor. Or the effect may be minimal based on volume ratio of starter to your beer volume. To test the gravity, I made two different 1L starter batches to evaluate. Both of them were spot on 1.040 gravity. I made the starter a few days before brew day and cold crashed and decanted. When pitched into my chilled wort at 50F, I saw gravity start to drop on my Tilt hydrometer 5 hours after pitching it. So it definitely made a very healthy starter.
Conclusions
Overall, the Propper Starter definitely delivers with a healthy pitch of yeast going into your fermentor. And if your objective is to cut time out of this process step, it definitely delivers. Aside from the actual measured time save of the prep process, it fundamentally changes it from something you need to carve out time to do, to something you can just run downstairs and take care of. And that can be transformational from making it a process you don’t do, to a process you do.
Check Prices & Availability
- Propper Starter Canned Wort via MoreBeer
- Search “Propper Starter Canned Wort” on Amazon – offerings vary
- Propper Starter Canned Wort via Adventures in Homebrewing
- Propper Starter Canned Wort via Austin Homebrew Supply
- Propper Starter Canned Wort via Label Peelers
- Propper Starter Canned Wort via Great Fermentations
- Propper Starter via Delta Brewing – bonus for all grain brewers… their free shipping promo includes full sacks of grain with a qualifying order
More Photos
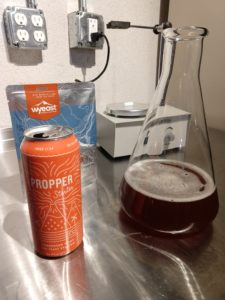 Proper Starter Mixed Before Adding Yeast – in the background – Fermentap Stir Plate – Hands on Review
Get a Stir Plate!

More Homebrew Finds!
- Last 50 Finds!
- Top Deals – a curated list of the best deals
- Homebrew Reviews – one of the largest libraries of homebrew reviews in existence!
- Our Top Posts – tips, how-tos, resources posts and more
More Fermentation Related!
- Our Fermentation Related Reviews – Fermenters and More
- Yeast Starters and Fermentation Resource Page
- Yeast: The Practical Guide to Beer Fermentation
- Compare Prices: StirStarter Stir Plate
This post may contain affiliate links. We may make a commission when you use our links. This will never cost you extra. Thank you for supporting Homebrew Finds!
Special Thanks to Omega Labs for providing the Propper Starter Canned Wort used for evaluation in this review.
By Brad Probert. Check out Brad’s website – beersnobby.com
review:propperstartercannedwort tag:tpr