A while back I became aware of a Stainless CIP Spray Ball (1/2″ size) via a reader tip. Thanks to HBF Reader Sam for the original heads up on these and HBF Reader Chris for the idea to use in conjunction with the Mark II Keg and Carboy Cleaner! [8 Ways to Connect with HBF].
Find a CIP Spray Ball!
Note: The Spray Ball I used in this post has since changed specifications.
CIP (Clean in Place) Spray Balls are generally used for vessels that are too large to move. Since they’re too large to move you… clean them in place. If you have a larger setup, you could incorporate these into your system or routine to help clean your vessels more easily.
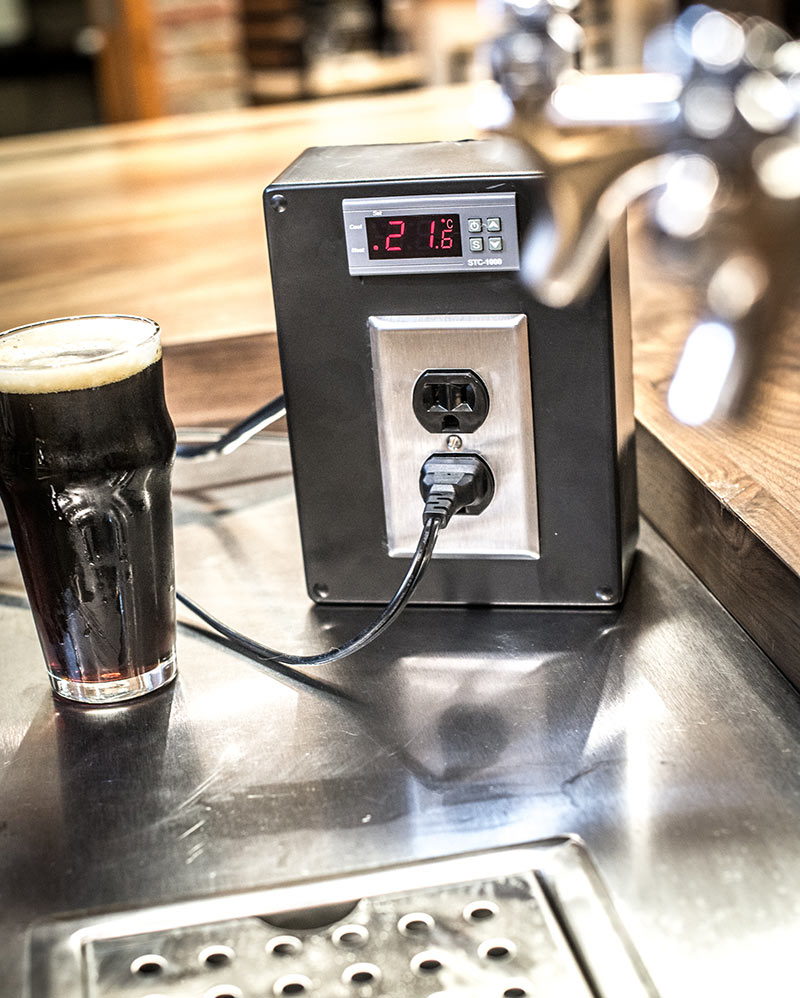
The STC-1000 is versatile digital temperature controller. It’s manufactured by a number of manufacturers
Specifications can very but you can generally speaking these are dual stage temperature controllers that you can use to help control temperature of your kegerator, fermentation chamber or as part of your brew system. Dual Stage means this can control a heating and cooling device. Alternatively, it can control a heating or a cooling device. Note that these are unwired controllers and will require some work to implement in your project.
STC-1000 vs ITC-1000
The STC-1000 is a great controller, arguably the best value in temperature controllers, especially if you’re on the handy side. The ITC-1000 from Inkbird is what I would call and upgrade to the STC-1000. The big upgrade is that the ITC-1000 display ins deg F and deg C, where most versions of the STC-1000 were deg C display only. Beyond there, it’s my understanding that there are some usability improvements in the ITC-1000.
If you’re looking for a pre-wired temp controller, consider – ITC-308 – Review
Some things to consider when buying an STC/ITC 1000 controller
Input voltage. These can be powered by DC and AC 120 to 240
Readout capabilities. Many STC-1000 controllers read in Celsius only. Some have the ability to read in Celsius or Fahrenheit.
The American Homebrewers Association has a great write up on a step by step build out of an STC-1000/ITC-1000 Temperature Controller Build. It includes a parts list, pictures and diagrams along with a step by step how to for getting this going.
How to Build a Temperature Controller for the AHA
by Duncan Bryant
This dual-stage temperature controller is perfect for managing temperatures of your kegerator, fermentation chamber or keezer. It allows for a hot and a cool trigger to be individually controlled, so you could have your fermentation refrigerator hooked up to the cold trigger and a heat source to the hot trigger. If the temperature falls below the target value, the heating device will be turned on, and vice versa.
Note: this project deals with electrical current and DIY’ers should pursue the build at their own discretion. Read through the directions entirely to have a full understanding of the build before diving in. If you are unsure of your abilities, consult with someone well versed in electrical wiring.
Make sure the components you use are compatible and rated for your intended application. Contact manufacturer with questions about suitability or a specific application. Always read and follow manufacturer directions.
The Build
Materials
Shop around for the best deals. I managed to get everything listed below for under $45. For this project, you’ll need to following materials:
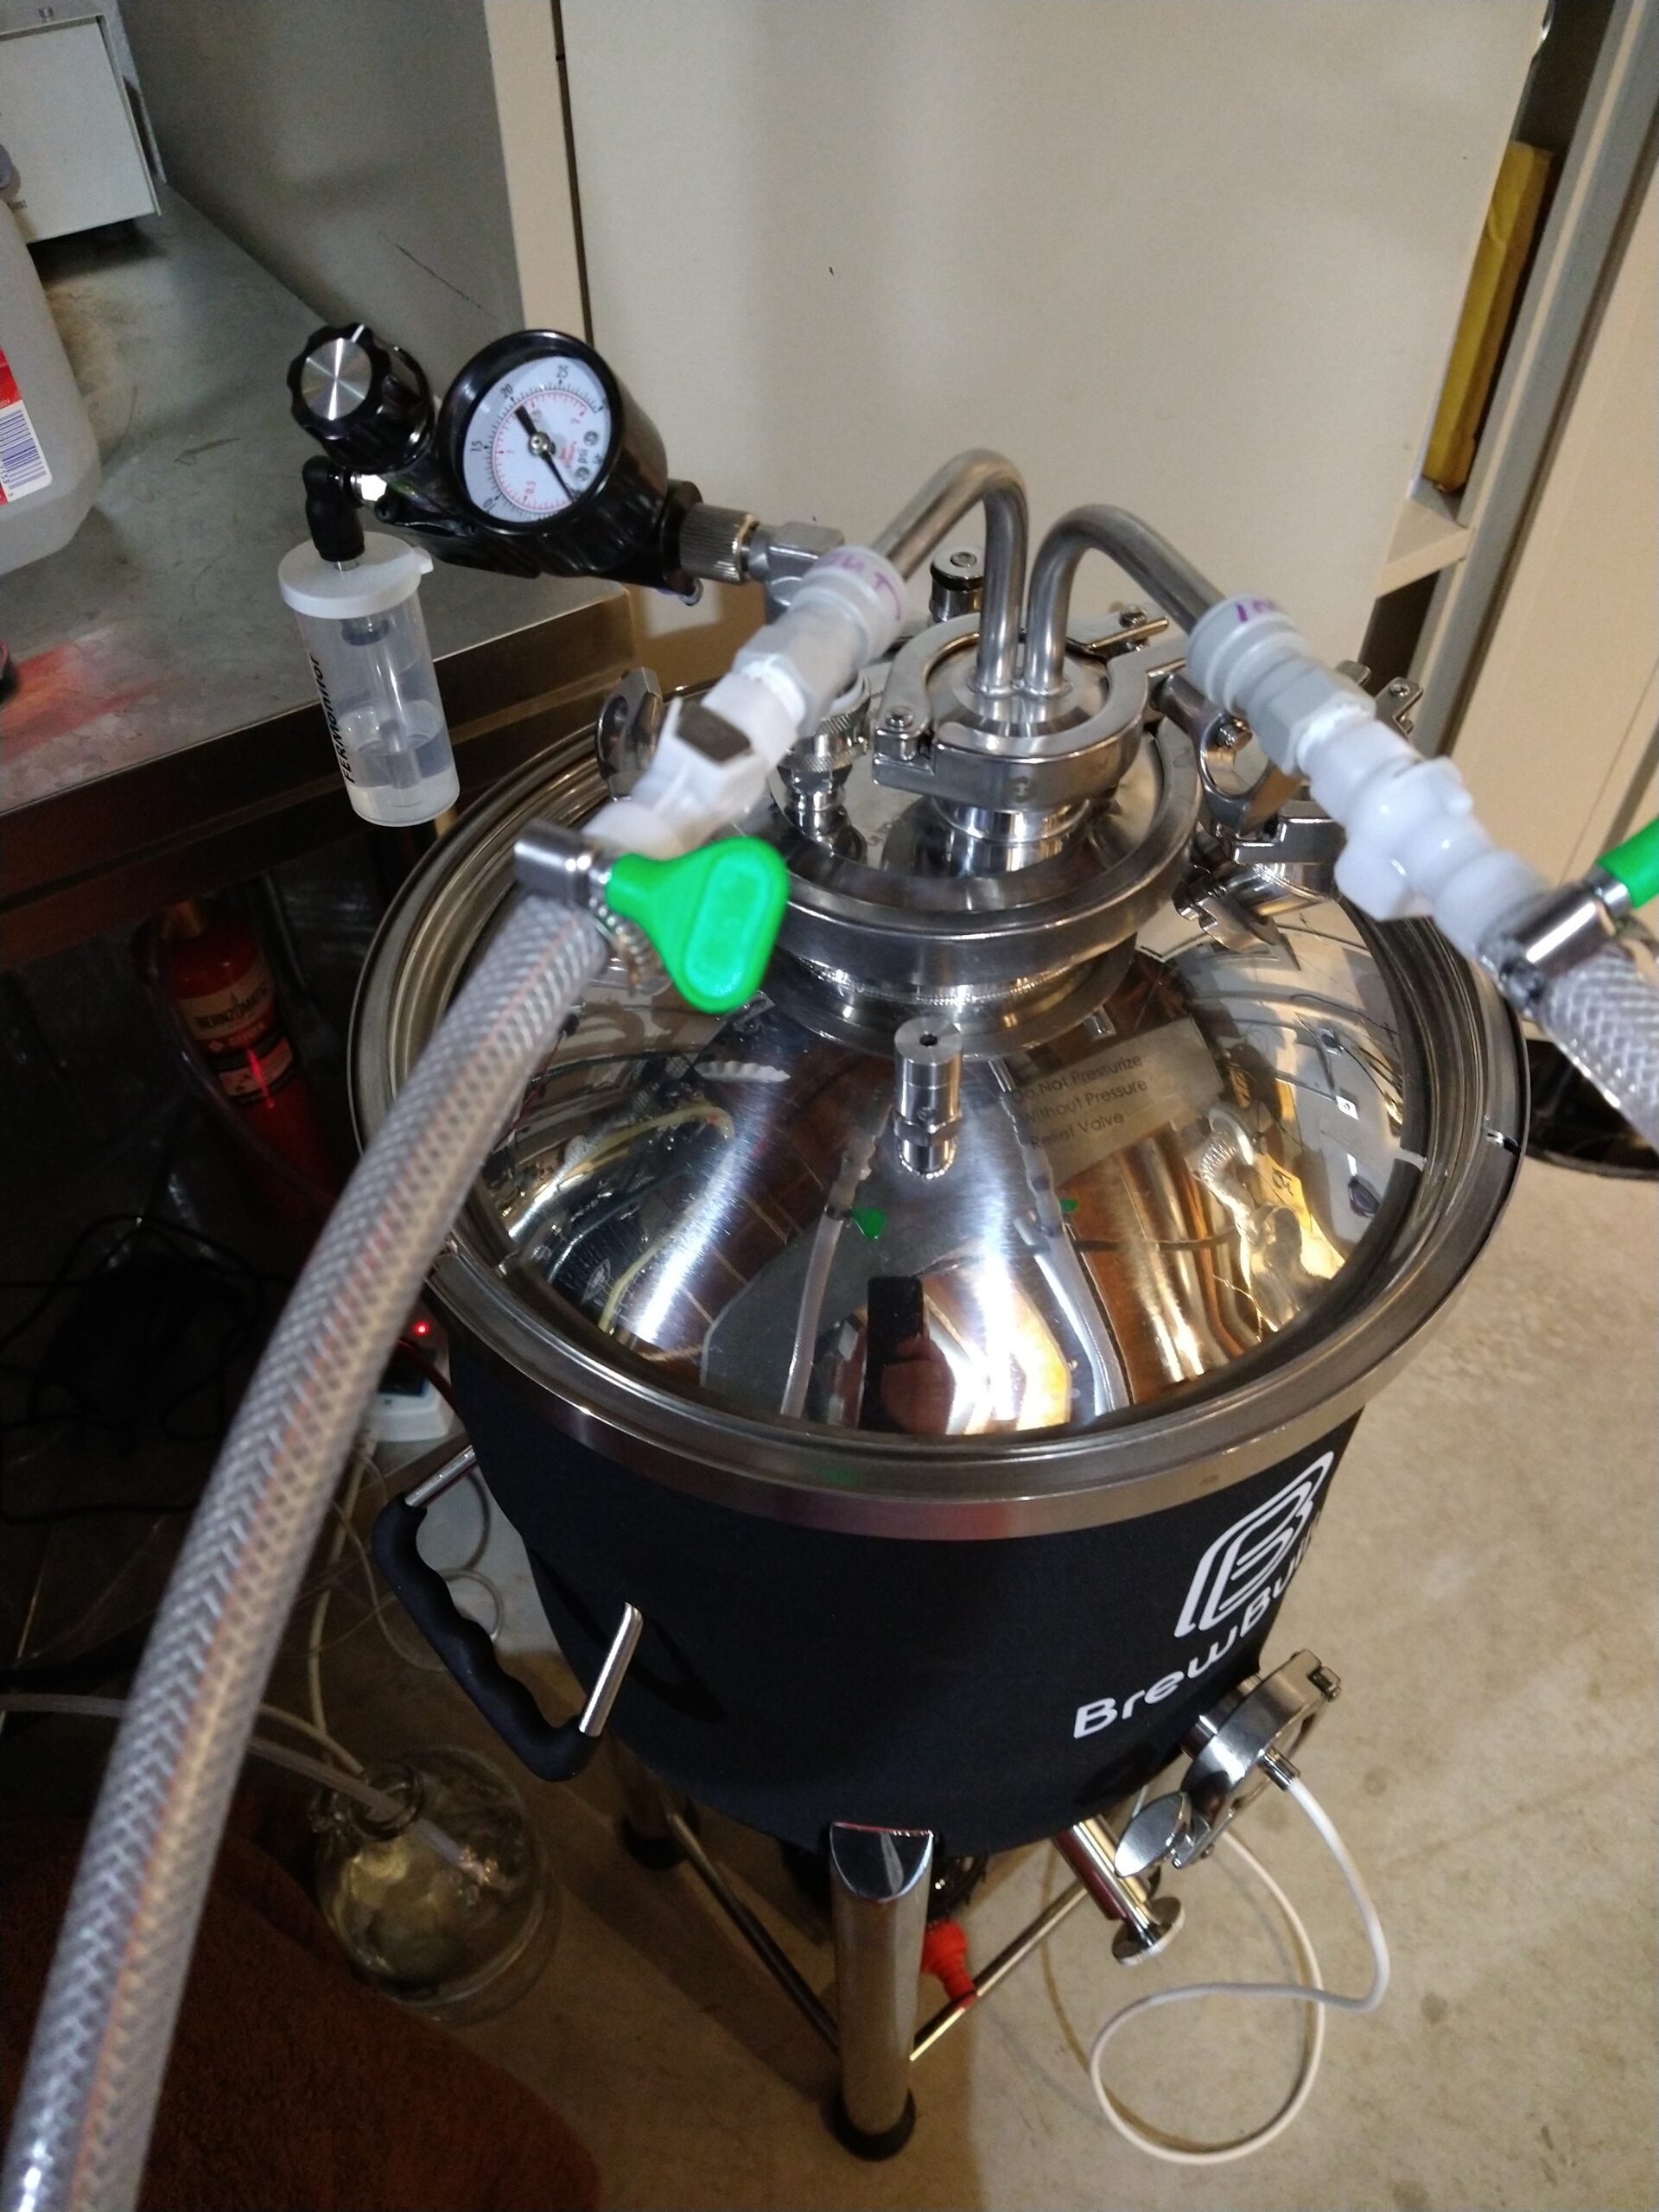
Pressurized fermentations are becoming increasingly popular, and for a good reason. Some of the benefits that you gain from fermenting beer under pressure are: Lower ester production, being able to ferment at higher temperatures without producing off-flavors, and having your beer carbonated by the end of fermentation. Pressure fermenters are also called uni-tanks because you can use them for both fermentation and carbonating. You can serve beer directly from uni-tanks, counter pressure fill bottles or easily transfer beer into kegs using pressure.
Related: Benefits of Using Kegs for Fermentation
Fermenting lagers under pressure is a huge benefit of uni-tank. When yeast ferment under pressure, the production of fruity esters is greatly reduced. This can allow you to brew a lager at 70F an obtain traditional lager flavor. – via MoreBeer
Since off-gassing is reduced added hop flavor and aromas are also potential benefits of fermenting under pressure.
This article is by Homebrew Finds Contributor Brad Probert. Brad is an engineer, expert homebrewer and experienced reviewer. Grab a link to Brad’s website at the end of this review.
What is Fermenting Under Pressure?
I’ll start first by defining “normal fermentation” as fermenting with an airlock or blow-off tube on your fermentor. In the chemical process of your yeast converting wort sugars to alcohol, CO2 gets naturally produced. In a normal fermentation, this CO2 pushes out of the liquid wort/beer into the headspace above your liquid level. As more and more CO2 gets produced, it starts to get crowded up there, so pressure builds up and then pushes a glug of air/CO2 through your airlock. As fermentation progresses, more CO2 is created, creates pressure in the headspace, and then vents through your blow-off tube or airlock.
Fermenting under pressure follows the chemical process, but instead of an airlock or blow-off tube, which has a very low pressure threshold before it relieves the pressure, you have a spunding valve attached. The spunding valve is typically set to open and release headspace pressure until a much higher level, and therefore keeps everything at a higher pressure in your fermentor (headspace and beer). This increased pressure on your yeast during fermentation changes how they behave. The two main important things that happens with yeast under pressure are: 1) It slows down fermentation rate, and 2) It suppresses production of esters and fusel alcohols.
Spunding Valves for Fermenting Under Pressure
There are multiple makers of spunding valves, with different looks and features/limitations. They can be grouped into two major types- 1) Spring & Poppet, and 2) Diaphragm. Both operate with the same basic principles. Pressure from your fermentor pushes up against the pressure regulating mechanism inside. In the Spring & Poppet, the “mechanism” is a small poppet like what you have inside the gas or liquid posts on your keg. The Diaphragm design uses a large flexible rubber/silicone disc as its “mechanism”. Resisting this pressure, on the other side of the mechanism is a spring. By turning an adjustment knob on the spunding, you can compress the spring more, which in turn pushes harder on the mechanism. Then it’s just a force balance between the pressure in your fermentor and the compression of the spring. Once the pressure overcomes the spring force, it creates a path for the compressed CO2 to escape and it bleeds off. This then regulates your pressure.
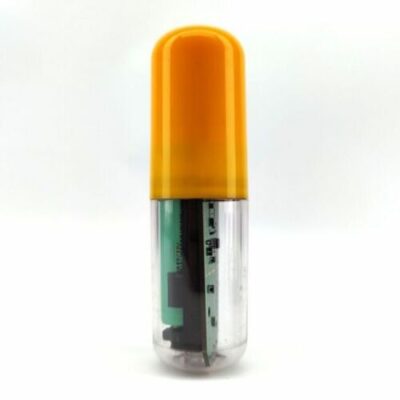
The RAPT Pill allows accurate and precise, true real-time specific gravity and temperature logging and control via wifi/bluetooth integration with the RAPT fermentation chamber (KL15813), RAPT mobile app or RAPT IOT.
The RAPT Pill acts as both a real-time gravity testing hydrometer and thermometer allowing instant gravity and temperature measurements and also logging from inside your fermenter during fermentation.
The RAPT Pill boasts many advantages over other wireless hydrometers and thermometers including tough design, better ergonomics, sanitary design and less susceptible to error as a result of hops, krausen or CO2 bubbles generated from fermentation.
The iSpindel is a DIY Wi-Fi enabled hydrometer. The project originated in Germany, but an English translation is available.
This integrates directly with RAPT fermentation Chamber and can also work independently via RAPT mobile app or RAPT IOT.
Finding RAPT Pill:
Availability of RAPT Pill in the US has been scant. eBay has been the only place I’ve been able to find them.
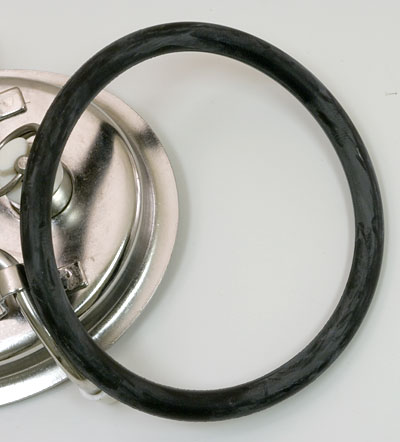
About, from William’s: “Unlike standard lid O rings which have a .280″ cross section, our exclusive Oversize O Ring has a slightly larger (.310″) diameter, and is molded from softer rubber, for a more positive seal at low dispensing pressures. An ideal fix for an older keg with a leaky lid, or for any keg that needs to be pressurized before filling to achieve an airtight seal. Fits all brands of kegs, pin-lock or ball-lock, with a 3 by 3.5” clamp down oval lid. ”
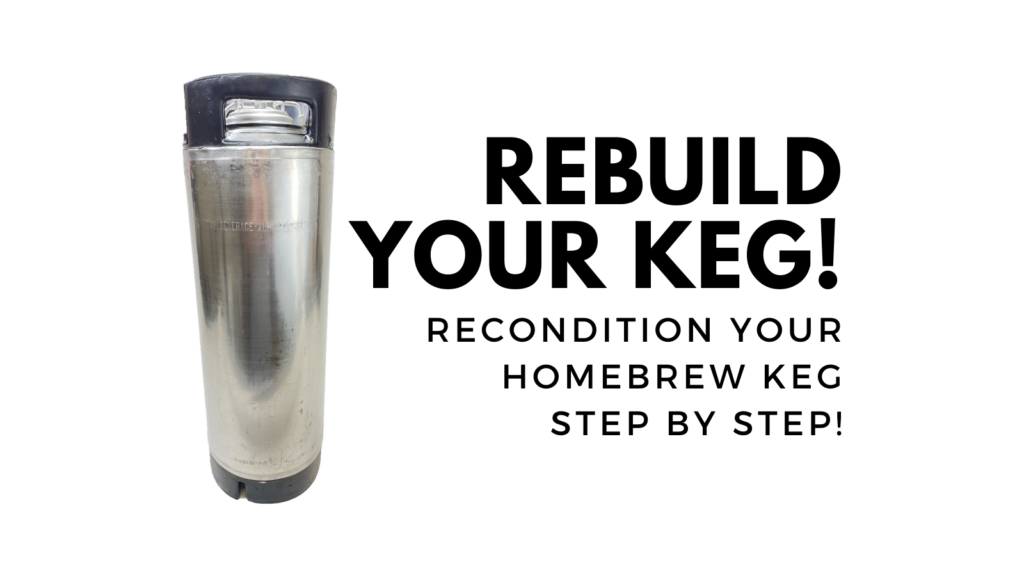
This post will walk you through rebuilding your homebrew keg, step by step. From de-labeling to cleaning to replacing warn out parts.
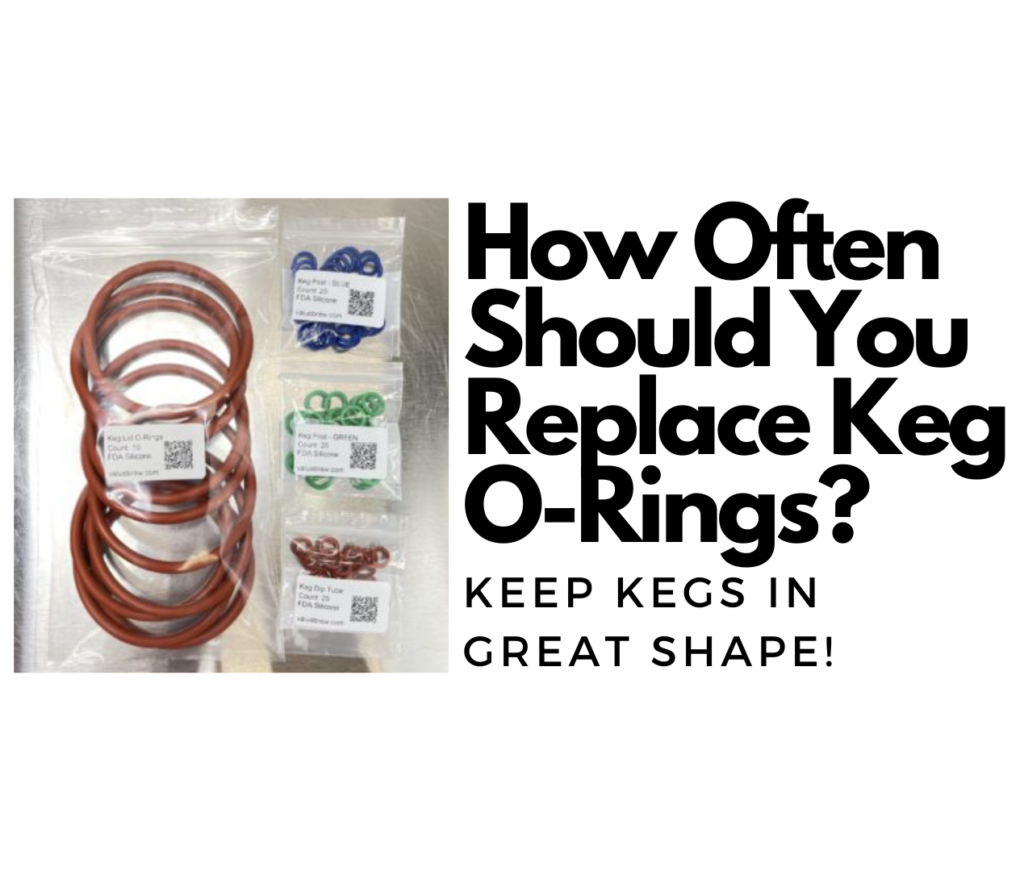
Daylight Savings Time Starts Soon – I Recommend Changing O-Rings Now:
Limited Time Deal on Keg Parts
For a short time, Valuebrew is discounting bulk food grade o-rings (including custom colors),
Valuebrew offers a lineup of food grade keg replacement o-rings in bulk quantities. Most offerings are silicone or EPDM with one Buna-N option. Everything they carry is food grade, more info below. They have some unique offerings like bulk pin lock size post o-rings, replacement universal poppet o-rings, bulk internal QD o-rings and color coded Blue and Green post o-rings
Use coupon code vbdeal with an order of $30 or more to get the deal
What Does Reconditioned/Rebuilt Mean?
The short answer is probably… nothing. I think reconditioned/rebuilt/refurbished are basically synonyms and there is no standard definition for any of these terms.
Here are the different definitions I’ve seen from different retailers via their offerings:
The short answer is probably… nothing. I think reconditioned/rebuilt/refurbished are basically synonyms and there is no standard definition for any of these terms.
Here are the different definitions I’ve seen from different retailers via their offerings:
The keg is untouched, but is in okay shape and holds pressure. In this case, reconditioned means… the keg works.
The keg has had been tested and had faulty parts replaced. In this case, reconditioned means, we did the minimum to get the keg working.
All o-rings have been replaced and any faulty parts have been replaced. In this case, reconditioned means… reconditioned.
All o-rings have been replaced and any faulty parts have been replaced and the keg has been cleaned. In this case reconditioned means reconditioned and cleaned.
The takeaway is that it’s important to read descriptions when it comes to reconditioned/rebuilt/refurbished kegs. The post walks through a complete rebuild process.
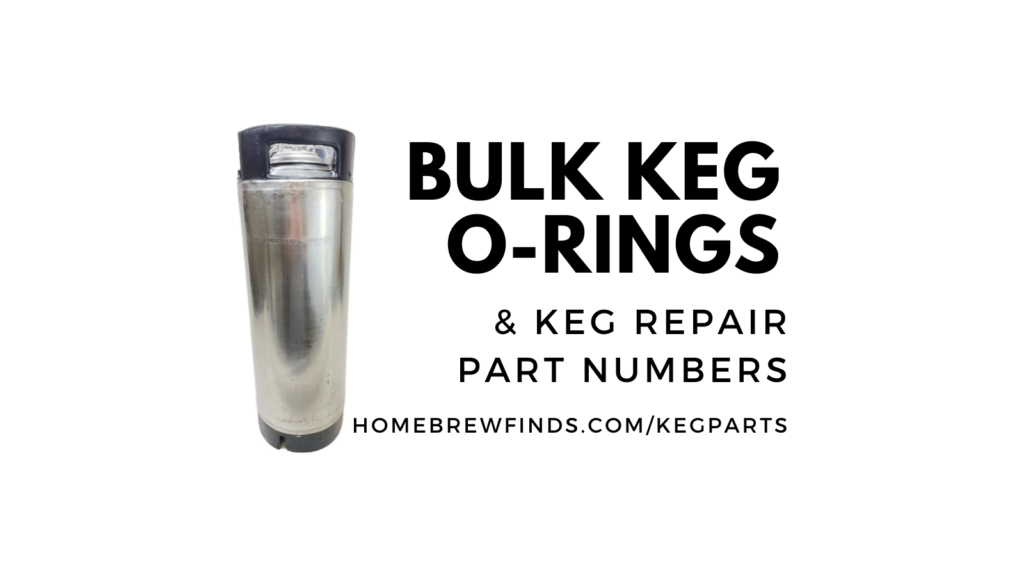
You can save a bunch by buying homebrew keg o-rings in bulk. Here are some part numbers, background and tips on keg gaskets along with part numbers and sources for everything related to your homebrew kegs.
This is a extensive resource post. Here’s what’s covered…
Replacement Keg O-Rings
Keg O-Ring Materials Selection – EPDM, Silicone and Buna-N
Keg Dip Tube O-rings
Keg Post O-Rings
Keg Lid O-Rings
Internal Ball Lock Quick Disconnect O-Rings
Ball Lock Keg O-Rings vs Pin Lock Keg O-Rings – are they the same?
Thank you to HBF Contributor Aaron Nord for this hands on review! Aaron is an advanced award winning brewer, a long time reader and a serial tipster!
Making Wine as a Homebrewer
Background
I can remember when I first considered delving into brewing all grain beer. After gaining experience from doing boxed recipe kits, to then slightly modifying a boxed kit or two followed soon by making my own recipes with partial mash batches, I figured it was time to step up to all grain. The amount of time and research I poured into the endeavor before pulling the trigger was considerable. I was concerned that I would miss a step or need to make a brew-time adjustment without being prepared and be left with gallons of potentially ruined wort. It all ended up working out. Sure, there were some missteps along the way and the inevitable audibles during brew day, but each time I was rewarded with a drinkable beverage that trended upward in the flavor and quality departments with each experience.
When I considered throwing my hat in the ring for making wine, I had the same feelings I had when I made the move to all grain brewing from kits and partial mashes. I was apprehensive. What if I forget something in the process? What if I don’t have the requisite knowledge to be able to make prime time adjustments? What if the wine just doesn’t turn out? While I was overthinking the endeavor, I had another thought that brought be back into reality.
As a kid I remember getting the occasional taste of an adult beverage when we would visit my great grandma at her farmhouse in rural southern Iowa. She was a crafty and capable maker of all the things one needs on a farm and even some that might not be considered a necessity, like wine.
I use a recirculating draft line pump for cleaning my draft lines. That’s worked well for me (and many others) for years. See: Recirculating Draft Line Cleaning Pump
The issue I ran into was the desire to periodically do a quick flush to rinse, clean or sanitize lines.
When a keg kicks, there’s residual beer in the line. The beer at the end of a keg is also more likely to contain gunk – hop and yeast trub. Rather than leave that sitting in the line, shank and faucet, I like to flush is out. Also, when putting on a new beer I wanted to be able to easily sanitize.
Of course, I could get out my complete keg line cleaning pump, but setting that up and cleaning afterwards is a bit of work. What I wanted was an easy solution for a quick rinse or flush.
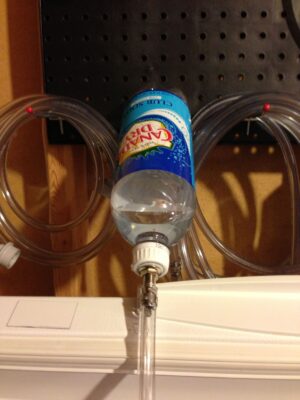
v1 of this build dates back to 2013. A little about that, for comedic and nostalgia reasons, at the end of this post. This write-up walks through a much improved v2.
This build is super easy, works great and can be made from a few items you probably already have around or can easily obtain.
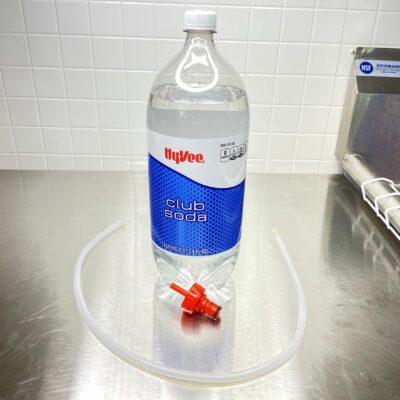
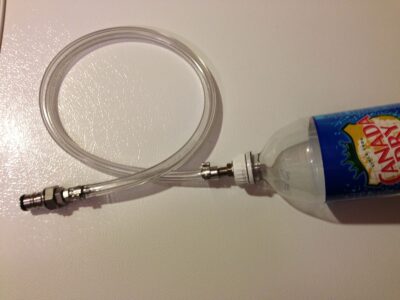
The components – a 2 Liter PET bottle, a carbonation cap and a short length of tubing. My build uses a Kegland DuoTight Compatible Cap and EVABarrier tubing. DuoTights and EVABarrier are outstanding [Hands on Review], but I want to stress that these exact components are not required. Any suitable carbonator cap and a length of compatible tubing should do the trick.
Step 1 – take off the label. Or… leave it on. 🙂 Whatever you want.Step 2 – attach tubing to carbonator cap. I like the idea of using EVABarrier because it’s stiff and I thought it would work well.Step 3 – Trim the tubing to fit. That’s it… you’re ready to change the world by quickly and easily flushing ball lock lines!
Flushing Lines
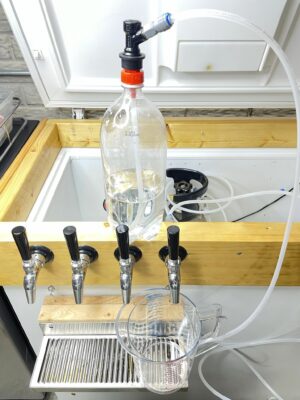
This photo shows pretty much all the players. The left side is the gas line that I use for charging the cleaner assembly. The right line is liquid line with ball lock QD. You can also see the other side of the liquid line terminating in the right-most shank. My setup is all DuoTight/EVABarrier and you’ll see DuoTight Compatible Locking Clips used throughout. If you are a DuoTight user, the locking clips are something I recommend as they provide a more secure connection.
This is powered by CO2 pressure. It’s important to underfill the bottle to leave some head space for CO2 pressure. I found that about half full, or 1 liter works well. I used about 30 PSI of pressure. Make sure to choose a pressure that’s compatible with all components in your setup.
In Action!
This works really well. 1 liter (half full) along with a 30 PSI initial charge would be enough to briefly flush all four of my tap lines. Alternatively, less than 1 liter could be used to minimize chemical use. A “quick clean” could also be accomplished by filling lines with PBW and letting them sit, followed by a round of water and finally Star San.
The pitcher I’m using for collection is a 2 Quart Rubbermaid Commercial Pitcher. This is a smaller version of the one gallon pitcher I’ve used and recommended for years. Although I got this half gallon size for the kitchen, it’s worked it’s way to my brewing area and is the perfect size for this task.
But Will it Flush Two Lines??
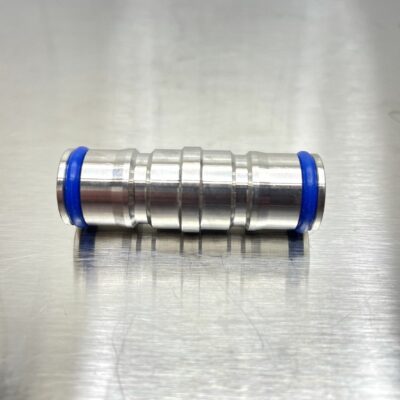
Here’s the key piece of hardware to clean two ball lock lines at the same time. It’s a ball lock jumper from Valuebrew. There are only a couple similar offerings out there, to my knowledge. This one is unique because it uses their custom color, food grade post o-rings AND… it works with both liquid and ball lock jumpers.Here it is installed. This is connecting two 10′ EVABarrier tubing runs.If you look on the right you’ll see my Intertap faucet is equipped with a ball lock nozzle. This would work the exact same way with a NukaTap faucet. If you have another brand, you’d just make a jumper that fits over the spout of your faucet.Complete Setup for Two Line Test
The plumbing for my test is as follows
Flushing Assembly – 2 L bottle/carbonation cap/dip tube (on left) >
Ball Lock Line Jumper – 2 ball lock QDs with a short length of EVABarrier tubing >
I was actually quite surprised at how well this worked. It’s over 20′ of tubing, four QDs and a jumper. All being driven by the head pressure in half of a 2L bottle.
The setup outlined here is for ball lock systems. I know of no similar Pin Lock carbonator caps or fittings. You could build as outlined and make a small jumper to go from Lock to Pin Lock
This setup also uses a PET bottle to store solution, but gets more complicated and… harder to use from there.The cap was modified by installing a Shrader valveInside of the converted capFrom there, I put together a bunch of relatively expensive parts to form the ball lock connector
To make it harder to use… there’s no dip tube. The bottle had to be oriented so the top faces down.
This post may contain affiliate links. We may make a commission when you use our links. This will never cost you extra. Thank you for supporting Homebrew Finds!
Make sure the components you use are compatible and rated for your intended application. Contact manufacturer with questions about suitability or a specific application. Always read and follow manufacturer directions. tag:lnksfxd toppost:lineflush tag:tpru
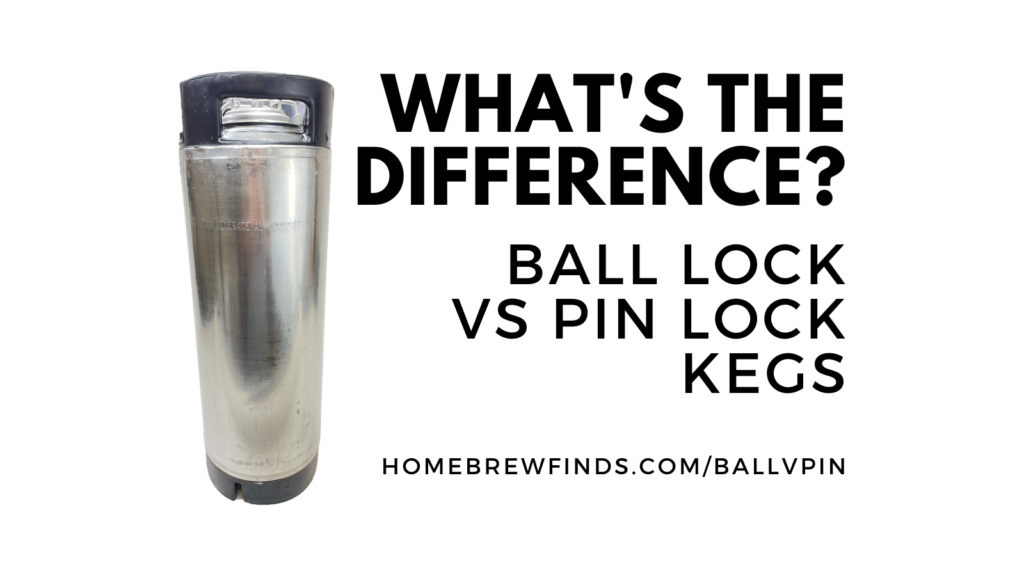
Ball Lock Kegs vs Pin Lock Kegs – What’s the Difference?
The containers we call Ball Lock and Pin Lock Kegs come from the soda industry. Also called Cornelius Kegs, Corny Kegs and Corney Kegs, they were originally intended to store and distribute soda pre-mix. The big soda companies decided on different style containers for their pre-mix. Pepsi landed on the Ball Lock style while Coke uses the Pin Lock style.
Homebrewers have since re-purposed these as homebrew beer kegs.
This has been especially true of pin lock kegs, because new pin locks have not been coming on the market. To my knowledge no new pin lock offering was generally available to homebrewers. This has caused the price and availability of pin locks to be a serious issue. For example, MoreBeer’s Pin Lock offering has sky-rocketed to $85 per keg.
Well, today is a happy day… Announcing NEW Pin Lock Kegs from cornyieg.com
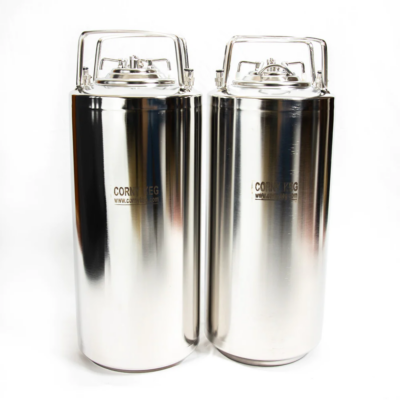
First, It’s important to understand both do the same thing with slightly different and dimensions and features. Note: All measurements in this post should be considered approximate. There are different models and manufacturers of kegs. Their sizes are generally about the same, but some kegs and manufacturers vary slightly. There are several sizes of kegs available including 2.5, 3, 5, 10 and 15 gallons. This post focuses on the commonly used 5 gallon size.
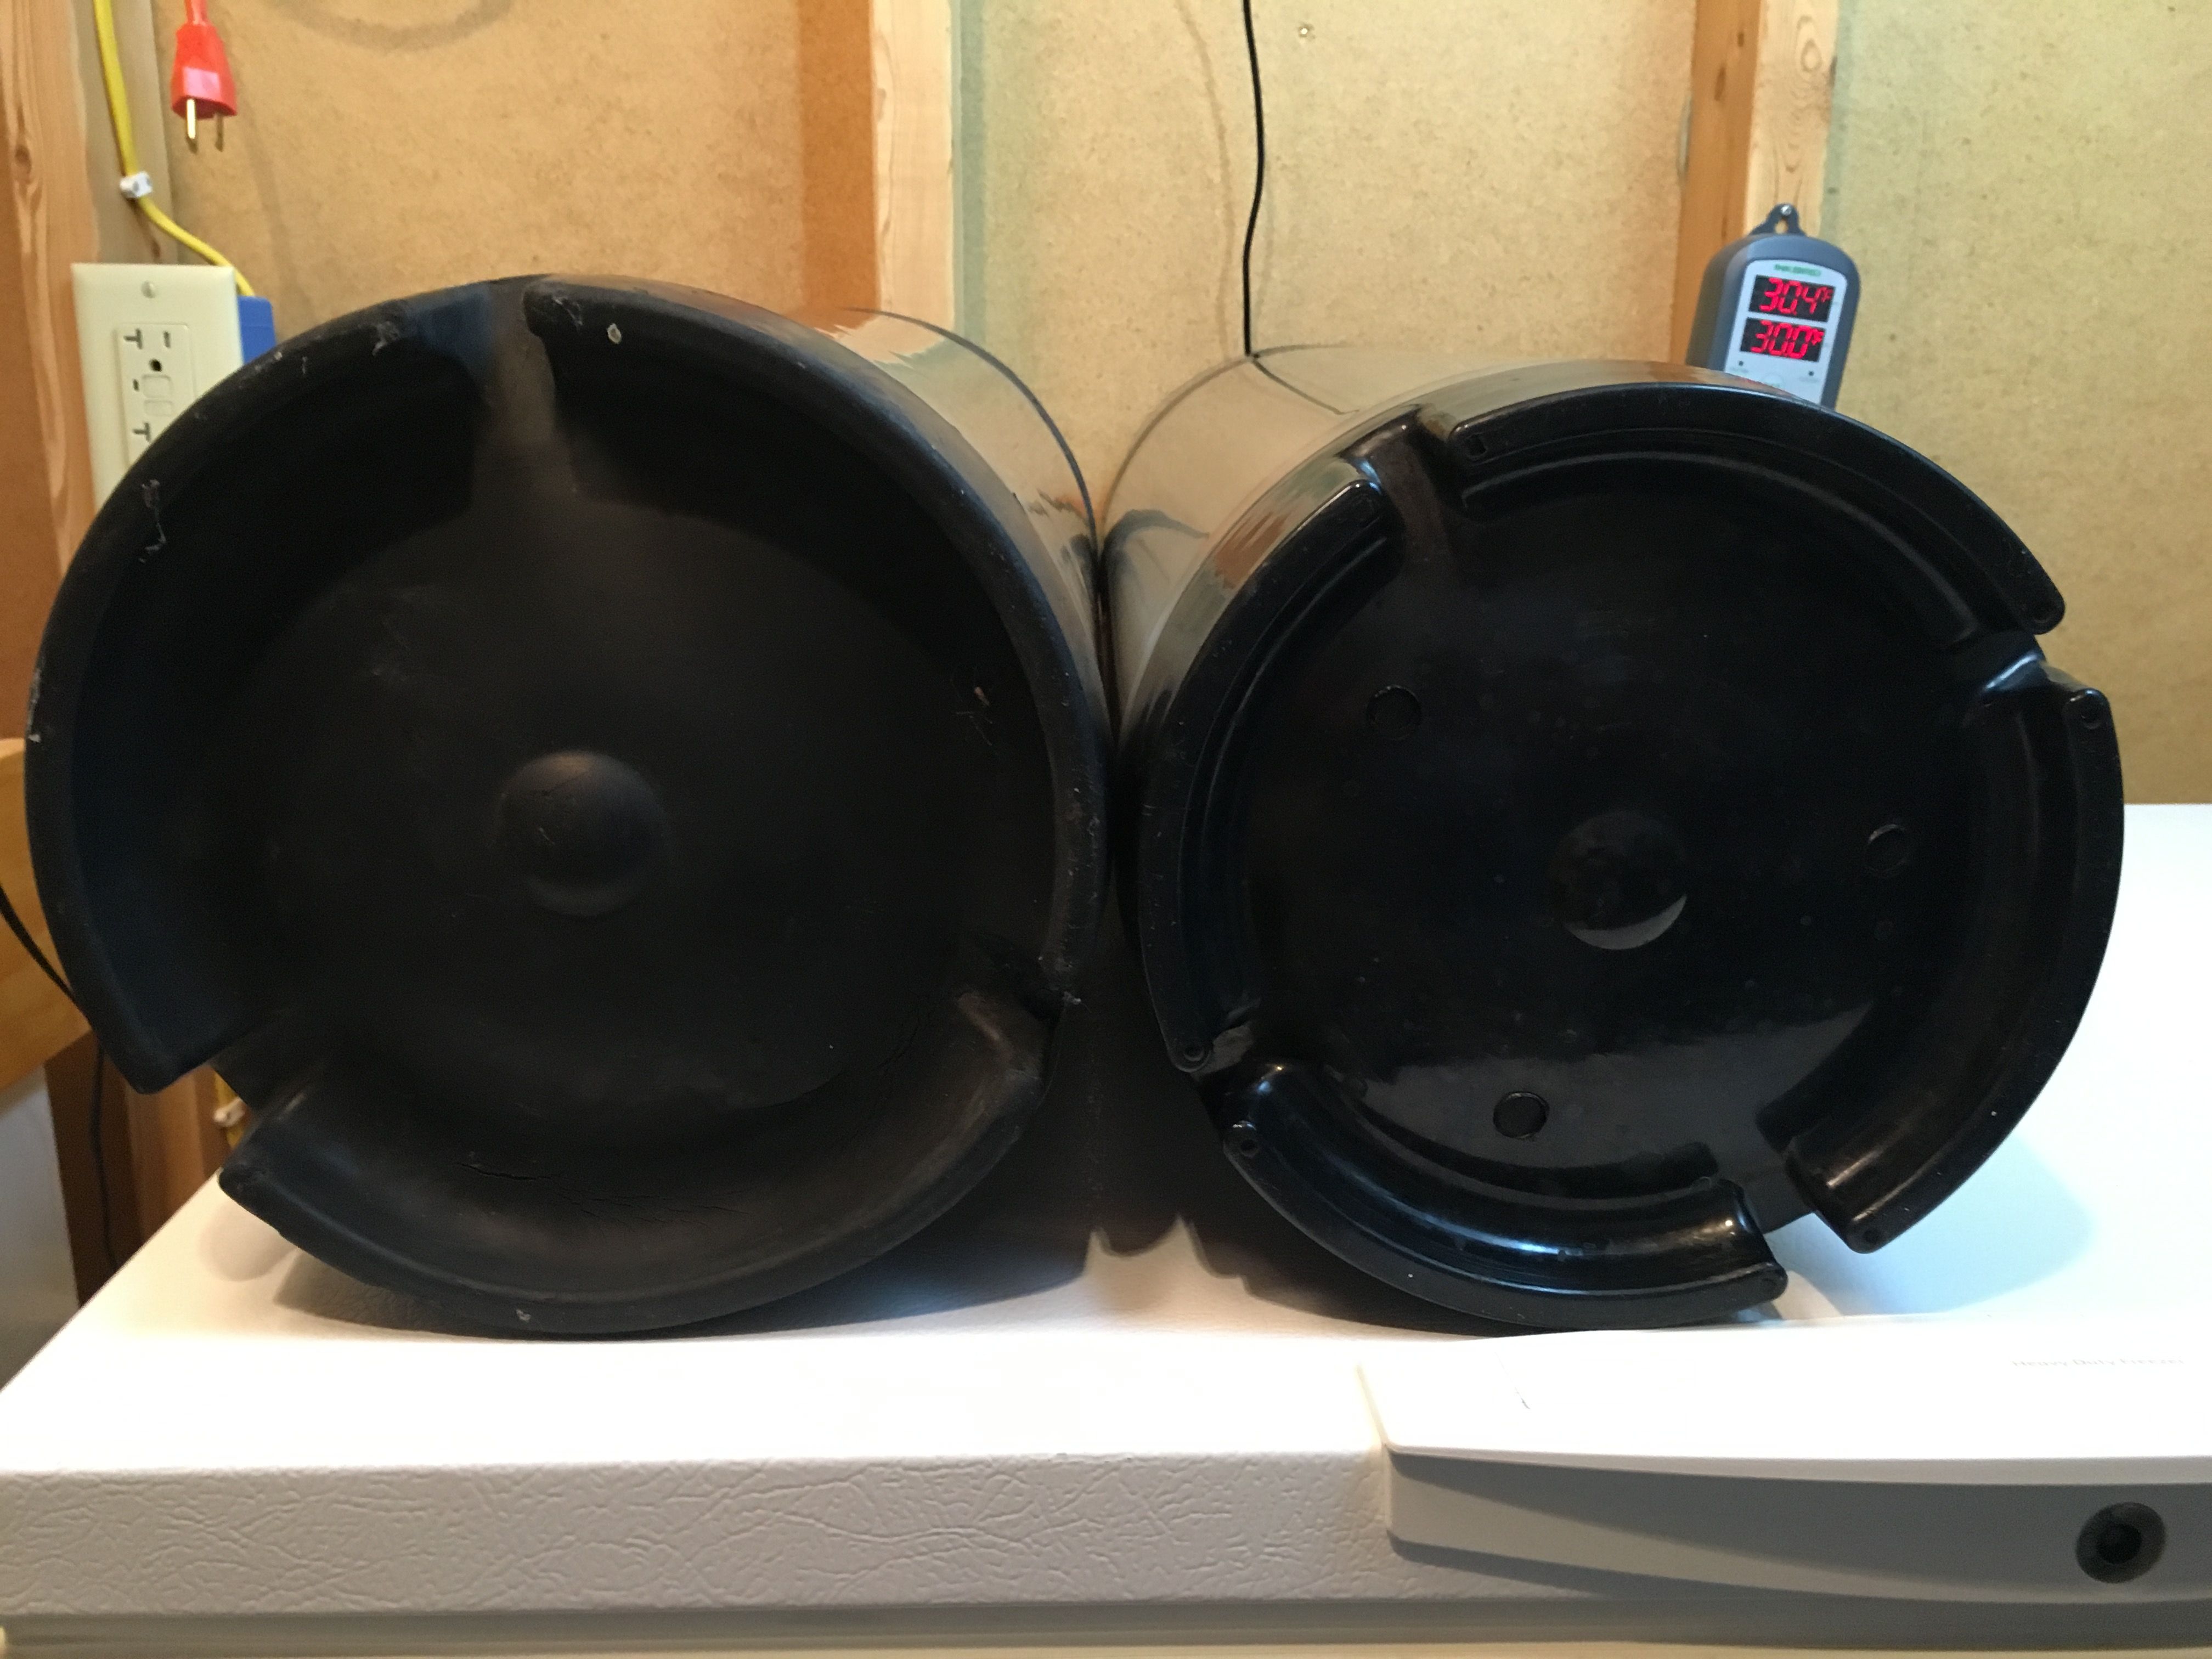
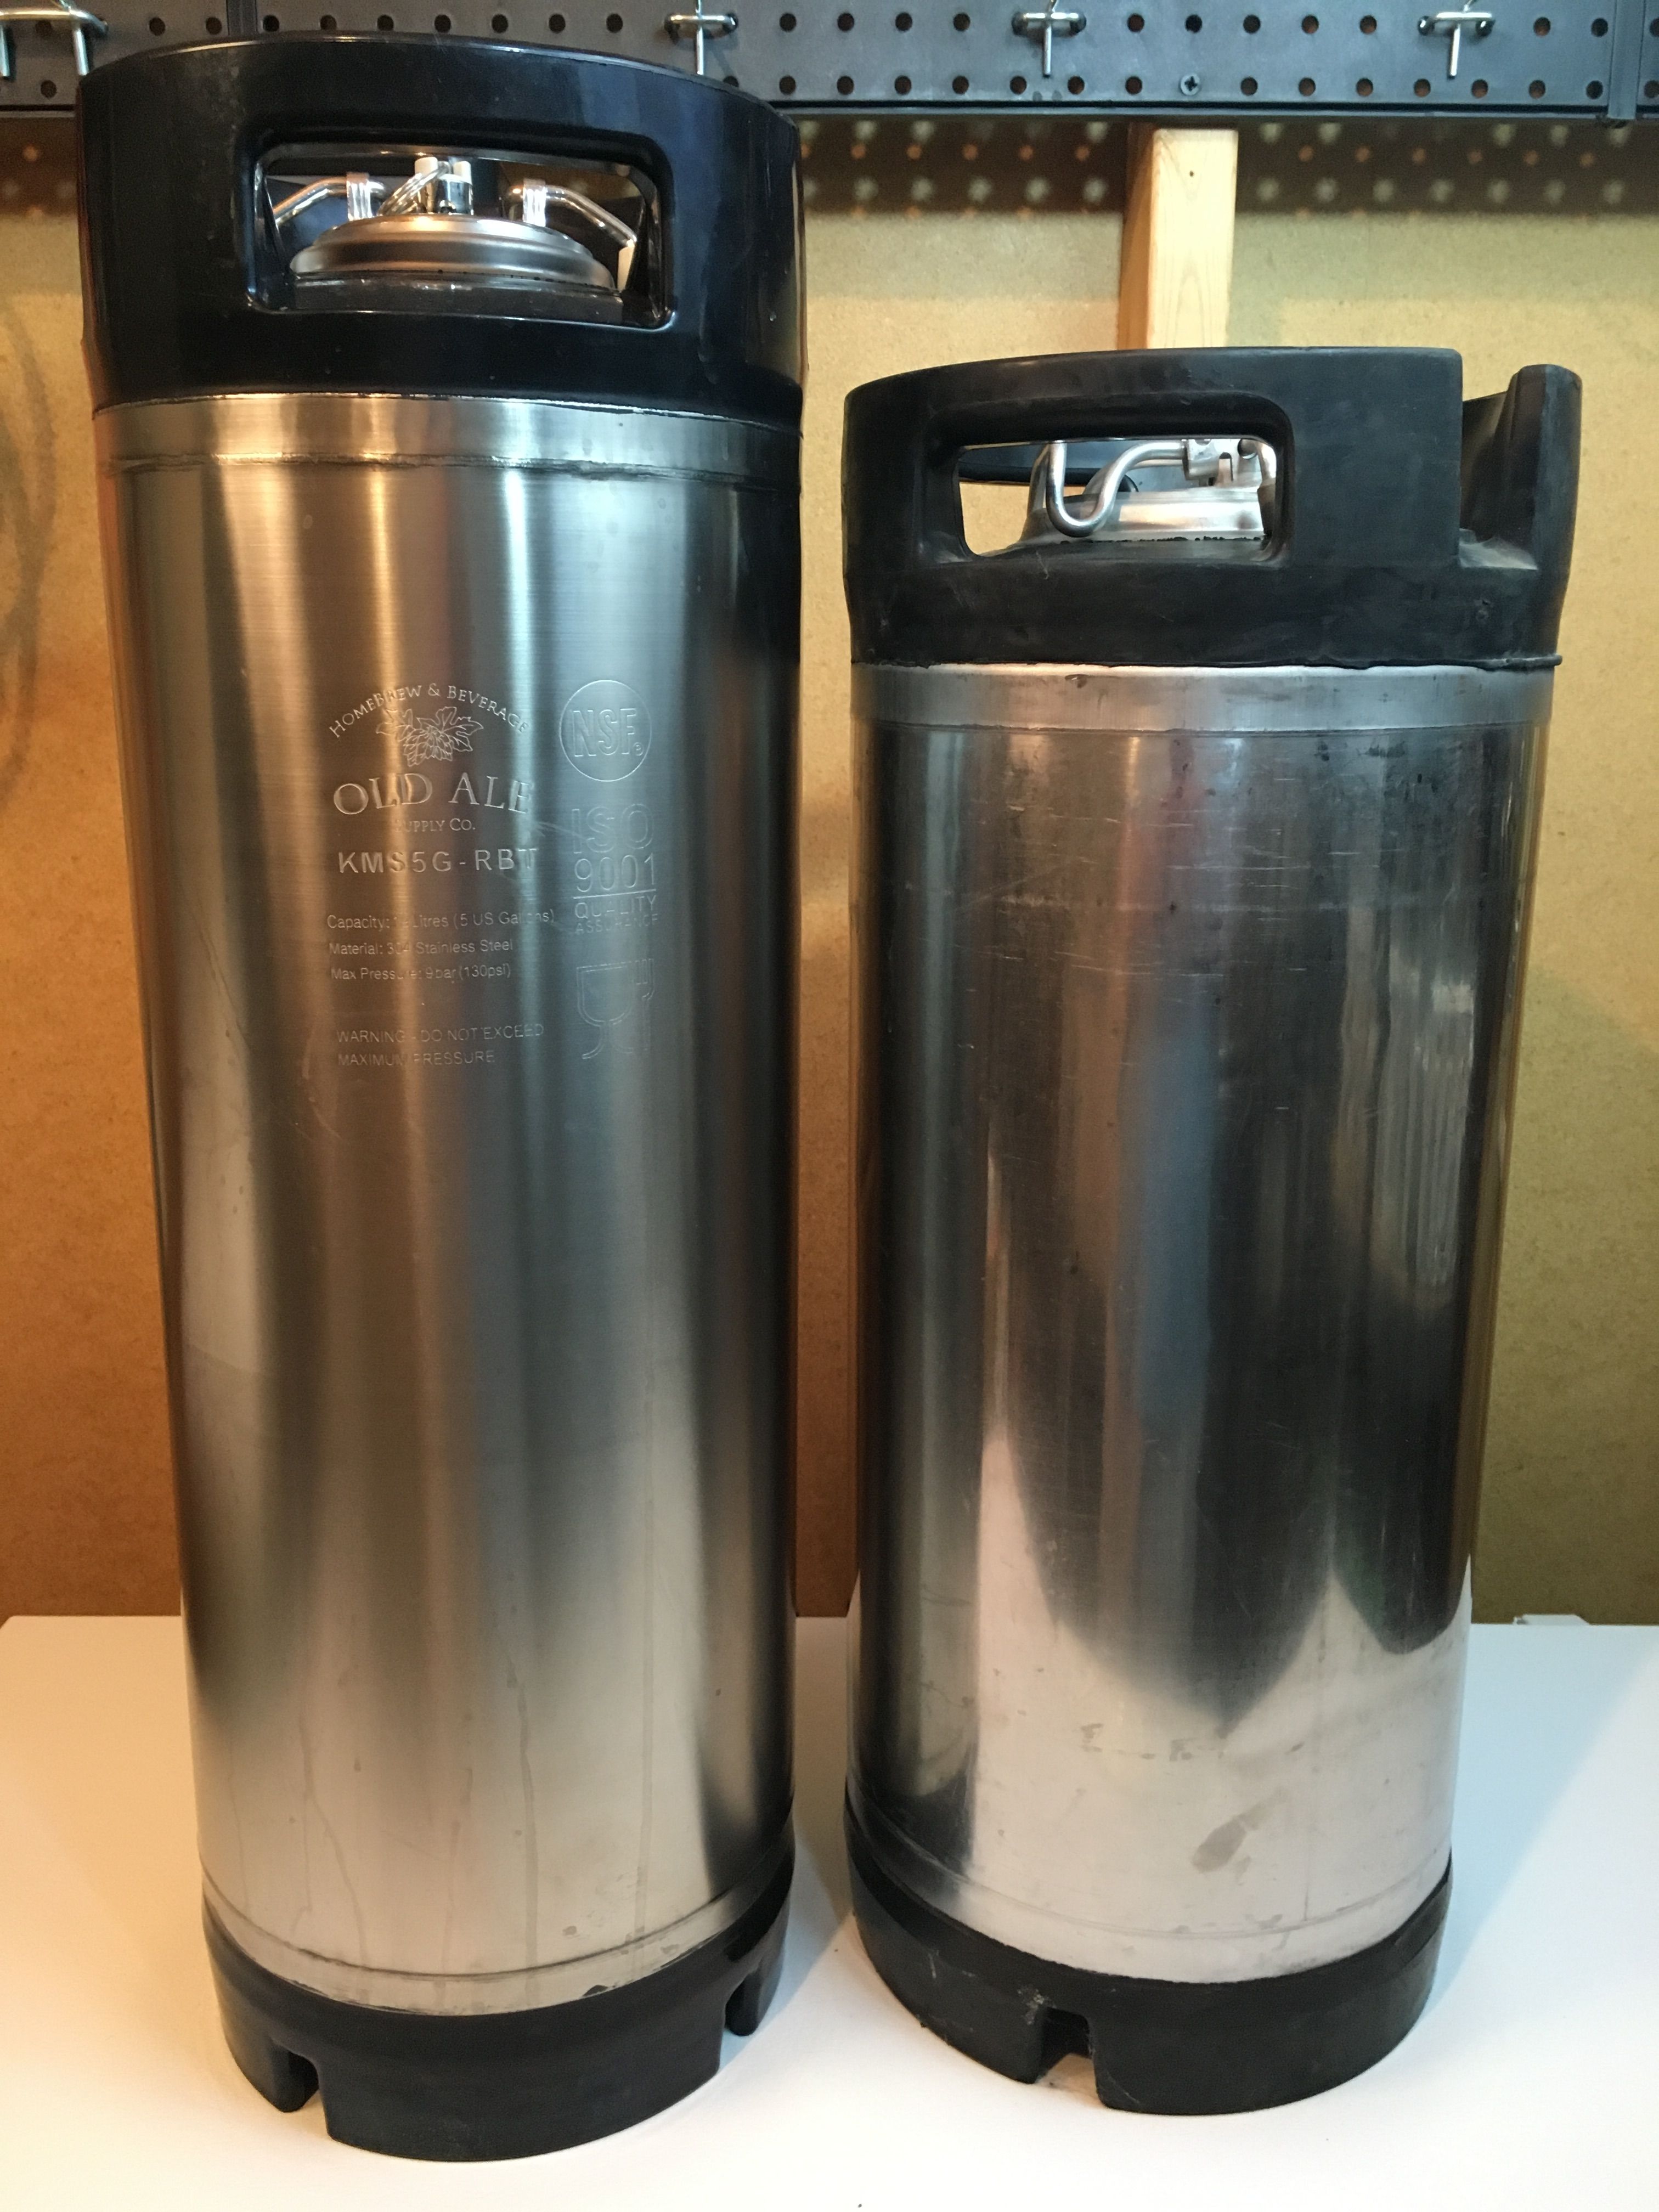
The first thing you’ll notice is dimensions – Pin Lock Kegs wider than Ball Lock kegs. Ball Lock on Left, Pin Lock on Right.Left [Brand New 5 Gallon Ball Lock from AIH – Review] | Right [Used 5 Gallon Pin Lock] – Pin Locks are also shorter than Ball Lock Kegs. Ball Lock on Left, Pin Lock on Right. Both of these kegs have a ~5 gallon capacity.
Kegland’s DuoTight Fittings are designed to work with EVABarrier Double Wall Tubing. They offer quick, reliable connections, easy implementation, a variety of fitting options and feature amazing versatility. They’re also, generally speaking, very well priced. DuoTights are push to connect fittings and require no tubing clamps.
The containers we call Ball Lock and Pin Lock Kegs come from the soda industry. Also called Cornelius Kegs, Corny Kegs and Corney Kegs, they were originally intended to store and distribute soda pre-mix. The big soda companies decided on different style containers for their pre-mix. Pepsi landed on the Ball Lock style while Coke uses the Pin Lock style.
Homebrewers have since re-purposed these as homebrew beer kegs. It makes sense. These high quality stainless steel beverages that are meant for years of commercial food use. They’re also tough, can be had for cheap and are easy to move around. Related: Five Benefits of Using Corny Kegs As Fermenters
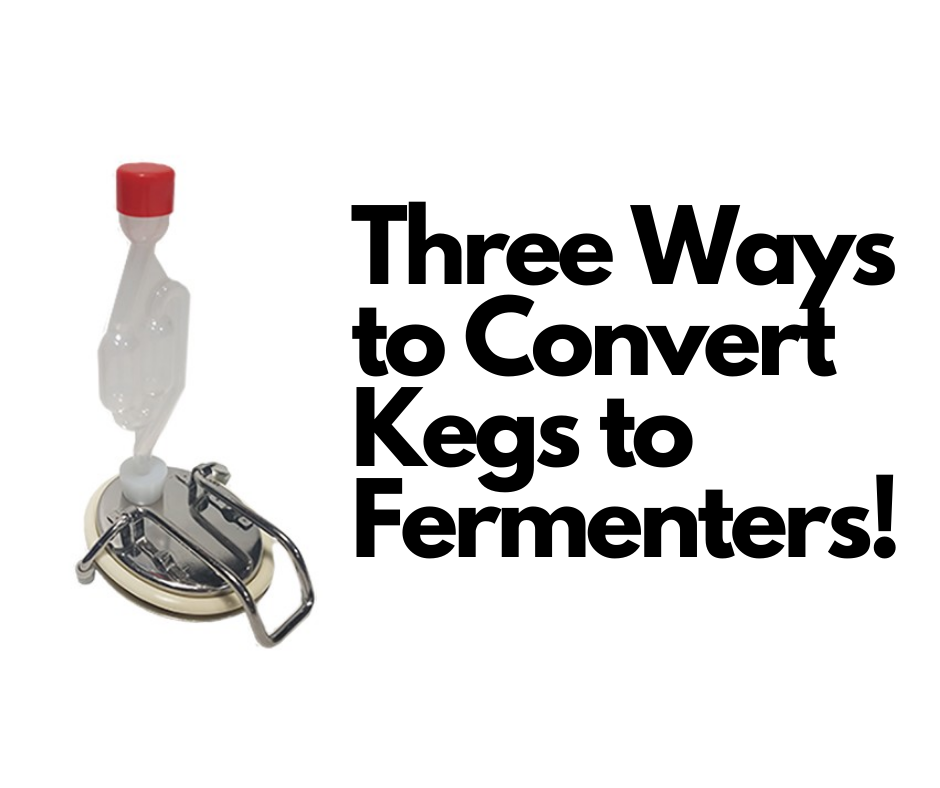
What if someone said there was a pressure capable, heavy duty stainless steel fermenter that could be had for 50 bucks or so?
Great news…. kegs make great fermenters! Same high quality, stainless steel construction, toughness and easy portability, but this time used for fermentation.
Converting Kegs Into Fermenters, 3 Options
One issue needs to be addressed to convert kegs into fermenters… handling CO2 produced by fermentation. Kegs are generally designed to be airtight. Fermentation requires that we allow excess CO2 to escape. I can think of three options…
A blow-off tube. Remove the gas post or gas post poppet and get use tight fitting tubing to route CO2 to a container of sanitizer.
Filling a growler or small draft dispenser from your draft setup is an easy and straightforward process. Here are some tips and tools for making this as easy and efficient as possible.
I use universal style poppets exclusively when rebuilding kegs. Finding the right OEM specific replacement poppets can be a chore. Beyond finding the right part number, these can be prohibitively expensive. Paying $10 to $14, or more, for an OEM poppet isn’t fun. In fact, if you really had to pay that, it may not even make sense to keep the keg.
Enter universal poppets. These can be picked up at a reasonable cost, regularly under $2 each, and fit the vast majority of kegs.
Tip: Immediately Replace Universal Poppet O-Rings
I remove and discard the o-rings that come with universal poppets. That may sound a little odd, but there are a couple issues. First, I have no idea what these are made of. They are probably okay, but I’m not sure. This is one spot that has a lot of contact with beer. I want to make sure these are food grade. Second, when it comes time to replace these o-rings I want replacements that won’t change fit. I’m aware of a single source for bulk food grade o-ring replacements for universal poppets. Size may vary slightly compared to OEM, so I replace these before adjusting for fit so that the replacements won’t change the way these fit. The stainless parts of universal poppets should last a long, long time, having a reliable source for replacements that you know aren’t going to change anything is a big benefit. Beyond that, being sure you’re using food grade materials at this point is worth a few cents.
Since this guide was published, Valuebrew has released a 304 Stainless Steel + Food Grade Silicone Universal Poppet option!
I’m excited that there’s finally there’s an option that comes with quality o-rings made from the right materials out of the box! Beyond that, Valuebrew has pledged to always carry replacement o-rings, so you’ll always have a source when the time comes for replacements.
Universal Poppets – via Valuebrew – These are made of 304 SS and come with food grade silicone o-rings. Valuebrew has committed to always carrying replacements.
I have resource posts on Star San and PBW that have loads of information, tips & tricks.
Star San and PBW Tips and Tricks
About Star San
Star San is my homebrew sanitizer of choice. When mixed properly, it’s food safe and no rinse. Required contact time is five minutes. It has worked very well for me for quite some time and I’m convinced that it’s one of the most economical solutions available if you’re using the “Spray Bottle Method” outlined here.
Five Star Chemicals PBW – Powder Brewery Wash – is my go-to brewery cleaner. It is a non-hazardous buffered alkaline brewery cleaner and it… works great.
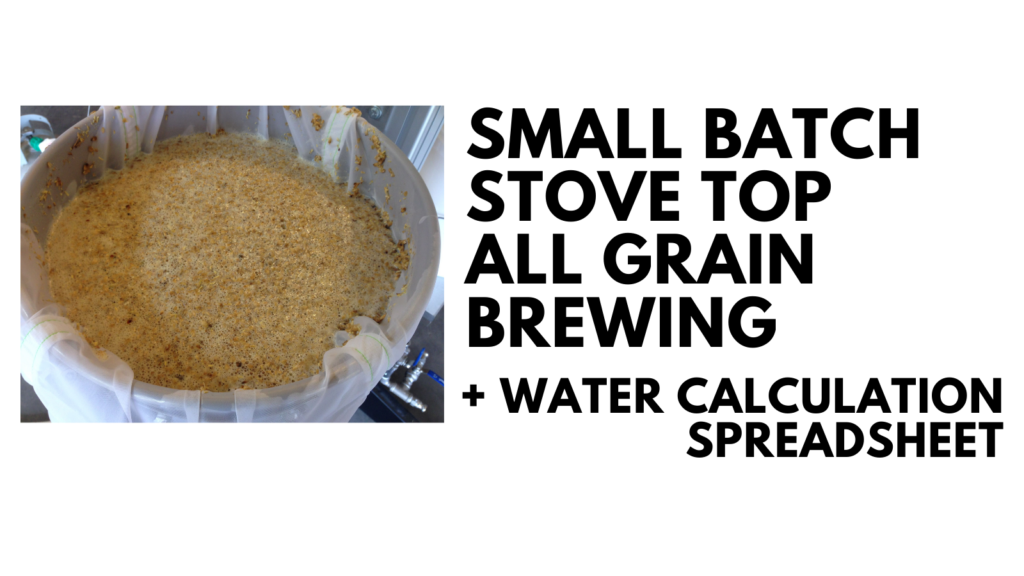
I periodically brew small (1-3) gallon all grain batches of beer on my stove top. Some reasons I do that… 1. The weather – it’s too cold, too hot or too something else, 2. Time or 3. I want to test something. It’s a fun, simple, quick and economical way to brew all grain with minimal investment.
For the extract brewer, what kind of gear is needed to accomplish this amazing feat? A comprehensive list follows…
Thank you to HBF Contributor Aaron Nord for this hands on review! Aaron is an advanced award winning brewer, a long time reader and a serial tipster!
Making Wine as a Homebrewer
Background
I can remember when I first considered delving into brewing all grain beer. After gaining experience from doing boxed recipe kits, to then slightly modifying a boxed kit or two followed soon by making my own recipes with partial mash batches, I figured it was time to step up to all grain. The amount of time and research I poured into the endeavor before pulling the trigger was considerable. I was concerned that I would miss a step or need to make a brew-time adjustment without being prepared and be left with gallons of potentially ruined wort. It all ended up working out. Sure, there were some missteps along the way and the inevitable audibles during brew day, but each time I was rewarded with a drinkable beverage that trended upward in the flavor and quality departments with each experience.
When I considered throwing my hat in the ring for making wine, I had the same feelings I had when I made the move to all grain brewing from kits and partial mashes. I was apprehensive. What if I forget something in the process? What if I don’t have the requisite knowledge to be able to make prime time adjustments? What if the wine just doesn’t turn out? While I was overthinking the endeavor, I had another thought that brought be back into reality.
As a kid I remember getting the occasional taste of an adult beverage when we would visit my great grandma at her farmhouse in rural southern Iowa. She was a crafty and capable maker of all the things one needs on a farm and even some that might not be considered a necessity, like wine.
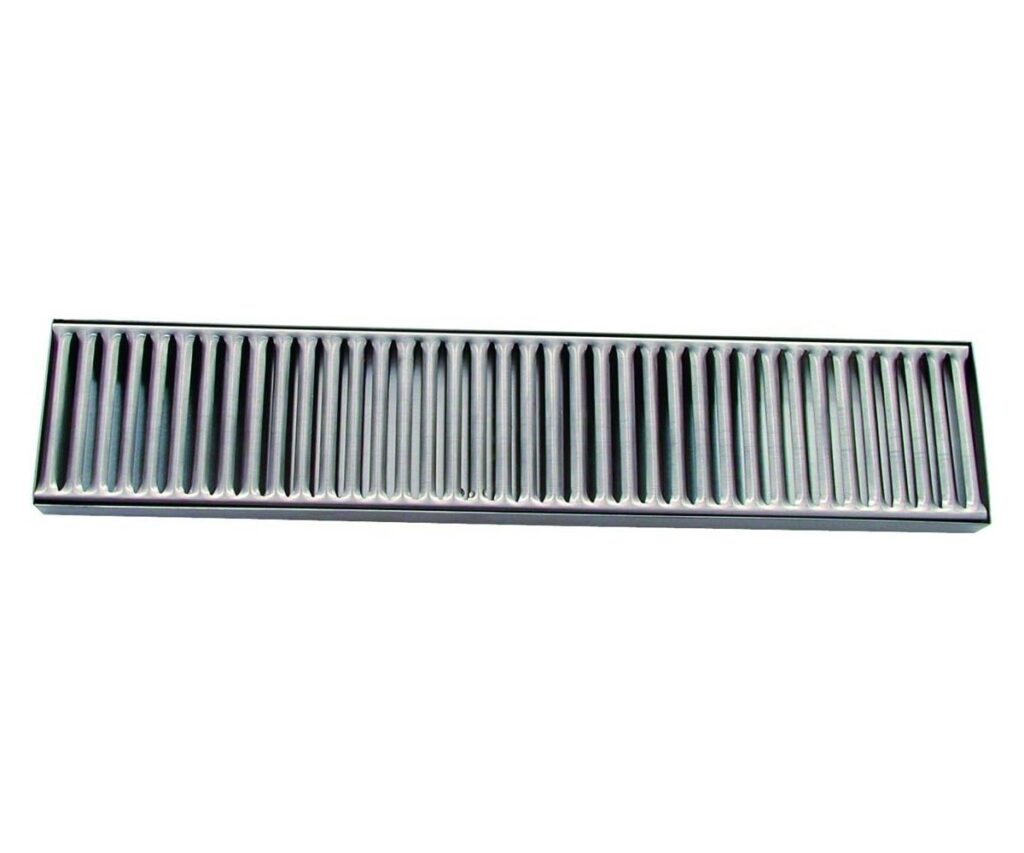
Step by Step instructions for making a magnetic drip try for your Kegerator or Keezer.
This is a project that requires materials and tools. Operate power tools carefully. Make sure the components you use are compatible and rated for your intended application. Contact manufacturer with questions about suitability or a specific application. Always read and follow manufacturer directions.
1’4″ of 6×1 Poplar Wood (actual width is 5.5″) Note: A thicker wood will suffice for this…remember the longer the wood extends down from the joint, the less likely the magnetic bond will break from the leverage applied to the edge of the drip tray.)
4-5ft of Decorative Trim of your choice (Sold in lengths of 8′)
MUST BE 1.25-1.5 inch trim. I used 1.5 which I highly recommend.
3/4″ mounting screws (for magnets) or Epoxy/Gorilla Glue
1″ wood screws
Brad/Finishing Nails
1 large old school hard drive magnets (Bigger with Mounting Holes than newer drives) (Alternative: rare earth neodymium magnets that are .5″ thick (Approximately 8); these can be stacked if you can only find .25″ magnets)
Wood Glue
Wood Putty (Optional)
Wood Stain (Optional)
Tennis Racket Grip Tap (Or an old yellow rubber glove). Anything rubbery and tacky to increase friction against the fridge.
Vacuum sealing with a FoodSaver, Seal-a-Meal or similar is a great way store food, hops, grains, spices and more. Vacuum bags work to seal out oxygen, prevent freezer burn and more.
What Are the Advantages Mylar Bags?
Generally speaking Mylar bags consist of three layers. Two Mylar layers that laminate a center aluminum foil layer. This combination provides strength, flexibility and durability along with an extremely low Oxygen Transmission Rate (OTR). These bags also block potentially damaging light. Combine this with vacuum sealing and you’ve got an outstanding way to store food & more.
For homebrewer’s… Vacuum sealed Mylar bags are an excellent way to store hops and other oxygen sensitive materials. As a testament to this, many hop distributors distribute hops in Mylar bags. Sometimes those are vacuum sealed and sometimes they are nitrogen flushed.
Do Mylar Bags Work with FoodSaver Vacuum Sealers?
A FoodSaver (or similar) is a standard home suction type vacuum sealer that relies on special bags. We generally call them… vacuum sealer bags. These bags are embossed or textured to create channels on the inside of the bag. Those channels allow a FoodSaver to draw out air and create a vacuum all while the machine is clamped down. When this process is done a heat strip seals the bag locking in the vacuum state.
Mylar bags have smooth walls. Since they don’t have the required special channels they will not work with FoodSaver machines.
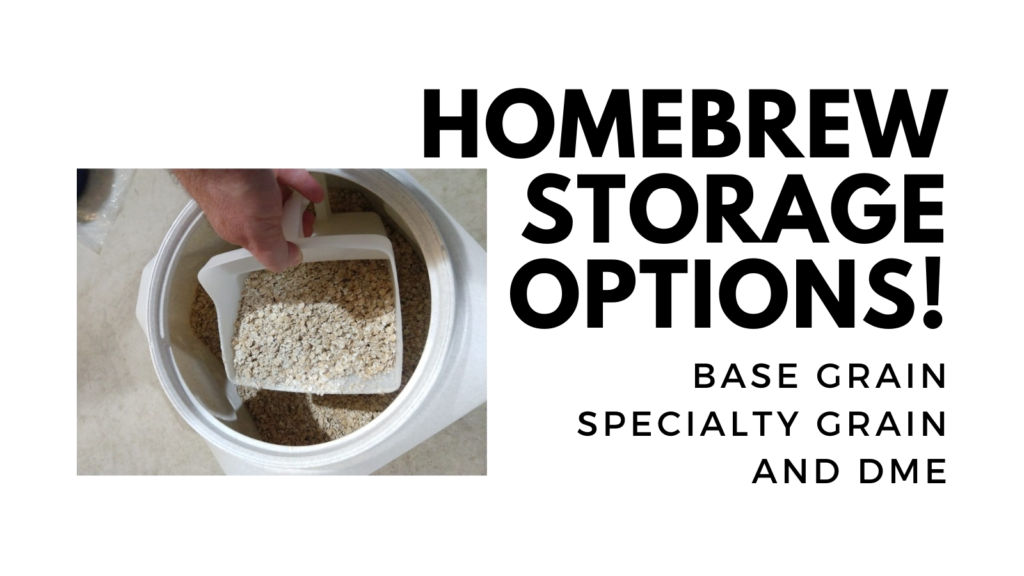
When it comes to storing grain and DME, we’re concerned about keeping ingredients fresh minimizing oxygen and moisture exposure. We’re also interest in keeping Grain and DME away from possible pests. Beyond that convenient access and efficient use of space are issues to consider. This post also includes some tips and general sizing guidelines.
Buckets are one of the most basic and popular options out there and for good reason. They are generally easy to source, well made and cheap. Food safe options are also easy to find.
My rule of thumb for grain storage capacity is about 5 lbs per gallon for unmilled malt storage. That’s a rough estimate, actual storage capacity will vary. A 5 gallon bucket holds about 25 lbs Two buckets = a 50 lb bag. Two 6 gallon buckets would comfortably hold a 55 lb bag.


 The components – a 2 Liter PET bottle, a carbonation cap and a short length of tubing. My build uses a
  Step 1 – take off the label. Or… leave it on. 🙂 Whatever you want.
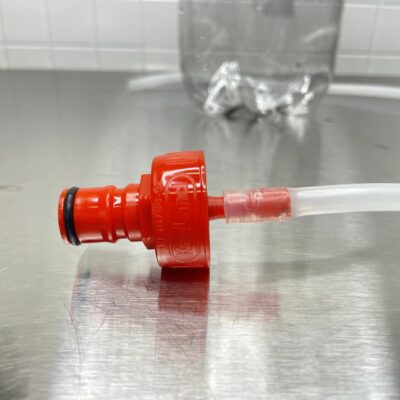 Step 2 – attach tubing to carbonator cap. I like the idea of using EVABarrier because it’s stiff and I thought it would work well.
 Step 3 – Trim the tubing to fit. That’s it… you’re ready to change the world by quickly and easily flushing ball lock lines!
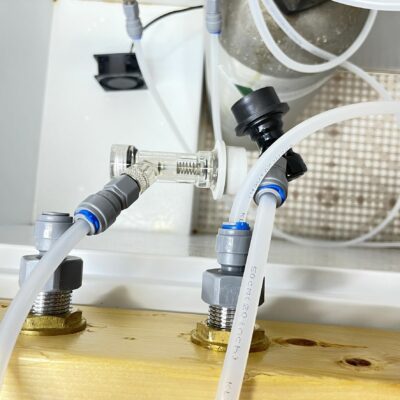
 Here’s the key piece of hardware to clean two ball lock lines at the same time. It’s a
 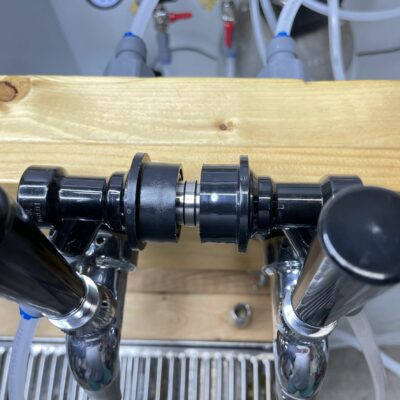 Here it is installed. This is connecting two 10′ EVABarrier tubing runs.
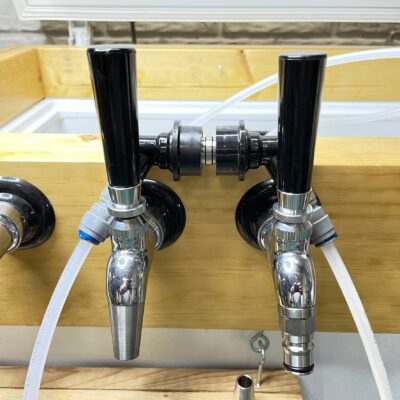 If you look on the right you’ll see my
 Kegland makes a
 This setup also uses a PET bottle to store solution, but gets more complicated and… harder to use from there.
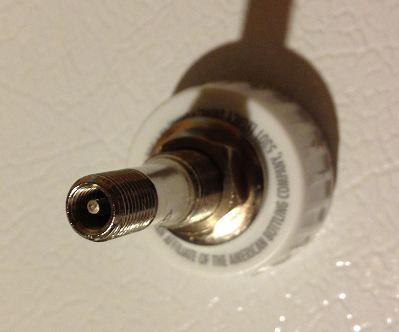 The cap was modified by installing a Shrader valve
 Inside of the converted cap
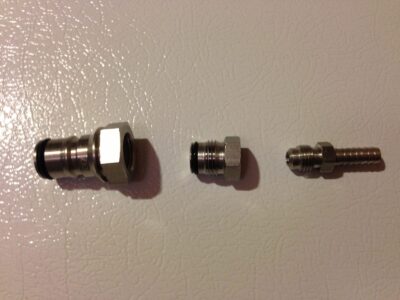


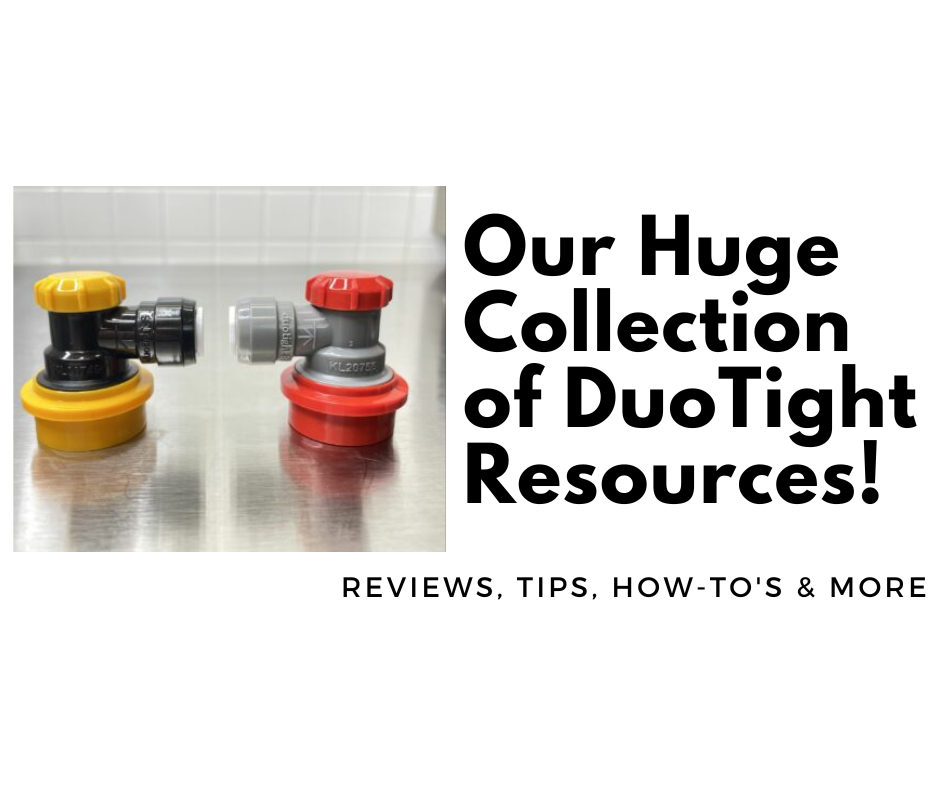 Kegland’s DuoTight Fittings are designed to work with EVABarrier Double Wall Tubing. They offer quick, reliable connections, easy implementation, a variety of fitting options and feature amazing versatility. They’re also, generally speaking, very well priced. DuoTights are push to connect fittings and require no tubing clamps.