
Making Wine as a Homebrewer!
Thank you to HBF Contributor Aaron Nord for this hands on review! Aaron is an advanced award winning brewer, a long time reader and a serial tipster!
Making Wine as a Homebrewer
Background
I can remember when I first considered delving into brewing all grain beer. After gaining experience from doing boxed recipe kits, to then slightly modifying a boxed kit or two followed soon by making my own recipes with partial mash batches, I figured it was time to step up to all grain. The amount of time and research I poured into the endeavor before pulling the trigger was considerable. I was concerned that I would miss a step or need to make a brew-time adjustment without being prepared and be left with gallons of potentially ruined wort. It all ended up working out. Sure, there were some missteps along the way and the inevitable audibles during brew day, but each time I was rewarded with a drinkable beverage that trended upward in the flavor and quality departments with each experience.
When I considered throwing my hat in the ring for making wine, I had the same feelings I had when I made the move to all grain brewing from kits and partial mashes. I was apprehensive. What if I forget something in the process? What if I don’t have the requisite knowledge to be able to make prime time adjustments? What if the wine just doesn’t turn out? While I was overthinking the endeavor, I had another thought that brought be back into reality.
As a kid I remember getting the occasional taste of an adult beverage when we would visit my great grandma at her farmhouse in rural southern Iowa. She was a crafty and capable maker of all the things one needs on a farm and even some that might not be considered a necessity, like wine.
Make Your Own Wine!
- VineCo Wine Making Kits
- Winexpert Wine Making Kits
- On The House Wine Making Kits
- Wine Making Equipment Kits
- Winemaking Equipment Kit for VineCo Concentrate Kits W150 – Hands on Review
- Winemaking Equipment Kit (For Brewers) W105
- Winemaking Supplies
- Wine Bottles

Two Ways to Save on VineCo Kits – Selection Changes Regularly


Aaron’s Wine Making Series!
- Making Wine as a Homebrewer!
- Hands on Review: VineCo Winemaking Equipment Kit from MoreBeer!
- Hands on Review: VineCo Wine Kit Review!
This article contains affiliate links. We may make a small percentage if you use our links to make a purchase. You won’t pay more and you’ll be supporting Homebrew Finds and more content like this. Thank you for your support!
I was probably around ten years old when I first had the opportunity to try some of my great grandma’s wine which she made from common ingredients she had on hand – items easily accessible in a small, rural town’s grocery store. I can still remember the homemade wine, many decades later, as being a tasty beverage. Being around ten years old I was certainly no wine connoisseur and, with many years having passed since then, maybe my memory isn’t the sharpest on this topic. Despite those sentiments, this homemade wine memory helped me decide to take the plunge into the hobby myself. If my great grandma could make tasty wine from Welch’s Grape Juice, bread yeast, a bottle, and a balloon then why shouldn’t I take the leap?
Another factor that helped me enter the hobby was that I enjoy drinking wine. I live in the Midwest where the local wineries typically sell two types of wine: those made with their own grapes or otherwise locally sourced and those made with juice transported in from the more notable grape growing regions of the US. The former wines are known for being quite sweet and are great for dessert wine (or table wine if one’s predilection is towards sweeter drinks) and the latter result in a finished product much like the off the shelf wines in grocery and liquor stores that originate from the same areas of the more notable wine producing regions in the US. Given that as a hobbyist wine maker I could obtain a kit that includes juice (or “must” for those who prefer the true winemaking vernacular) that is presumably sourced from that same region, how is that much different from what local wineries are doing?
With two great reasons to support the idea that winemaking is something I should take on, I decided to do it and I began by researching what the process would entail, all the while viewing it through the lens of a homebrewer. My first thought was “Wow, this looks simple!”. My current homebrewing setup uses a single electric vessel brew in the bag, but before that I had a three-vessel system. Both systems involve hoses and pumps, temperature control, mashing and boiling wort, etc. As most readers of this are likely aware, making beer can be a laborious process, especially with the all-grain approach. Contrasting this with what I envisioned the wine-making process to be I figured the latter would be a breeze! While the first part of winemaking really did seem simple compared to brewing beer, the latter parts were much more comparable in terms of complication and complexity.
Fermentation was the part of the process that gave me the most pause. I have integrated into my beer brewing process a number of measures to prevent (or at least limit to the highest degree possible) the introduction of oxygen once fermentation has begun. From everything I have studied and experienced, oxygen is the enemy of a finished beer and can lead to staling and undesirable off flavors and aromas. I therefore make every effort possible to mitigate oxygenation past the initial stage of fermentation. These mitigation efforts include using fermenters that are designed for this purpose, transferring the finished beer using CO2 to kegs that have been purged with CO2, and never opening the lids of those kegs until all the last pint has been served from it. My current process is a long way from my early days of using buckets for primary fermentation, a carboy for secondary, transferring without much care for oxygen pickup, and bottling with a similar ignorance of oxygen introduction. Getting to the point I am now required an upgrade to equipment and process, as well as a high degree of neurosis that keeps oxygenation top of mind.
The equipment setup I used to make my first wine did not easily lend itself to carry forward my oxygenation mitigation strategies from beer brewing into winemaking. First off, I was back to using buckets and carboys to ferment and condition the wine. Additionally, the transfer mechanism I would use was the same auto-siphon I had used in my early days of homebrewing. Not only did this equipment make it tricky or impossible to use CO2 to purge vessels and push liquid as I did with beer, but the research I did on the topic led me to the conclusion that CO2 is not exactly the best gas to use for those purposes in winemaking. Unless making a sparkling wine, CO2 is meant to be limited to non-existent in the finished wine product. For this reason, many winemakers use argon gas where brewers would use CO2 to mitigate oxygen pickup. Not wanting to invest in a separate tank, regulator, and gas for this foray into winemaking, I decided to loosen my standards a bit when it came to oxygen. I found some comfort in my research in two findings. One is that wine can withstand some oxygen in the post-fermentation period without staling and certain styles, those aged in barrels, are quite tolerant of it to an extent. The other finding was an additive called potassium metabisulfite, the addition of which absorbs oxygen in fermented liquids like wine and is quite common in winemaking. With this knowledge I decided I was ready to enter the world of winemaking.
Experience
There are a lot of ways a curious person could get into winemaking and thankfully there are avenues with low barriers when it comes to time and money investment and knowledge. Just like there are equipment and ingredient kits for making beer at home, there are similar offerings for wine. My winemaking journey began with acquiring a basic equipment kit that included everything needed to make wine at home as well as a couple of boxed ingredient kits which included instructions on how to make them. The equipment included vessels for fermentation (bucket) and condition (carboy), a corker and corks, a siphon and tubing, cleaning and sanitizing mixes, a mixing spoon, a hydrometer and sample thief, a bottling wand, a wine bottle brush, an airlock, a packet of oxygen-based cleaner, and potassium metabisulfite. The ingredient kits came in a sturdy box and contained a bag of grape juice (aka must), dry yeast, oak chips, and various additives necessary to produce a clean and clear wine.
Related: Hands on Review: VineCo Winemaking Equipment Kit from MoreBeer!

I have heard brewing described as 90% cleaning and 10% brewing and I think that is a truism when making most fermented beverages. I certainly found that to be true with winemaking. Ensuring that all equipment that would encounter the unfermented, fermenting, or fermented liquid is as clean as possible and thoroughly sanitized is the paramount priority. Having established my practices when brewing to attain this goal I had the knowledge and plenty of oxygen-based cleaner and no rinse sanitizer already on hand to prepare the fermentation bucket and lid, carboy, bung, spoon, and airlock I would use for making wine.
With clean and sanitized equipment, I was just about ready to start mixing up the kit. The one ingredient I had not given much thought to was water. I use reverse osmosis water for brewing and rely on my recipe creation software to help me determine what additives I may need to ensure I attain the proper pH for mash and fermentation as well as to create the proper mineral profile to make sure the yeast remain happy while fermenting. Not knowing how to proceed in this realm for winemaking and wanting to get started quickly, I decided to use store-bought spring water. I knew that using distilled water would be like using my own reverse osmosis water and that spring water would still have some of the minerals the yeast would need to do their job effectively.
Following the instructions that came with the boxed recipe kit, I heated up some of the spring water and mixed it with one of the additives that came in the kit called bentonite which is made of clay. Its purpose is to absorb impurities in the wine to help ensure a clean finished product. After it was well incorporated, I added the grape must. This was as easy as removing the cap on the bag, placing it back into the box, and using the box handles to pour the must carefully into the bucket. To ensure that every bit of must is used, the instructions recommended adding water to the empty bag, shaking it, and emptying it as many times as it takes to clean the bag out and achieve the target volume of liquid.
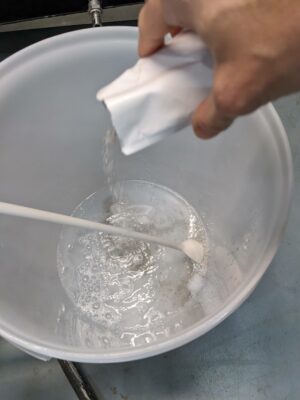 Mixing Bentonite
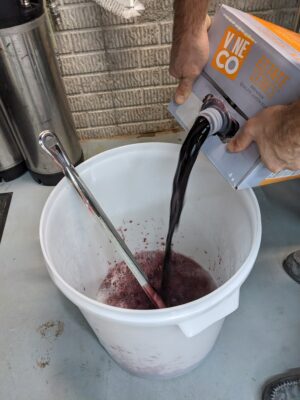 Pouring Must
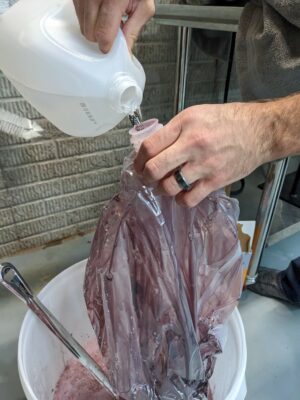 Cleaning Must Bag
With the liquid and necessary additives in the fermenter it was time to add the yeast. This was as simple as sprinkling the dry yeast onto the must/water solution. This was much simpler than the practice I use when brewing which involves making a yeast starter, letting it build up, crashing it, decanting spent wort, and pitching that into the proper temperature wort. I placed the lid on the fermenter and inserted the airlock filled with sanitizer. The yeast packet included the details for its ideal temperature range and being that the wine would be fermenting in my chilly basement, I placed a fermenter heating belt onto the bucket and set the temperature to stay within that range. The next part was just like brewing beer which involves waiting while the yeast does their work.
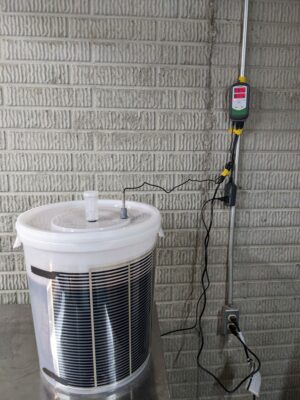 Fermenting With Belt
Also, like brewing beer, I relied on a hydrometer reading to determine when primary fermentation was complete. I waited a few weeks before taking a sample with the wine thief and confirmed that terminal gravity was achieved (~0.096 SG). Using the freshly sanitized auto-siphon and tubing, I moved the fermented must from the bucket into the sanitized carboy for conditioning. I was careful not to transfer much sediment, which included the dead yeast and the oak chips which had fallen out of solution. The volume in the carboy didn’t quite reach the neck and knowing that one way to mitigate oxygen at this stage is to make the exposed surface area as small as possible, I decided to top off the fermenter with about a bottle and a half of wine (a variety that was similar to the one I was making). With that addition it was once again time to wait. The kit recommended waiting four to six weeks before bottling.
Beer and Wine Party Pack – Selection Changes Regularly

Leading up to bottling day, I put a call out to some friends and family members I knew that are regular consumers of wine and asked them to save their bottles. Over the weeks I collected several dozen bottles and set about cleaning thirty or so for bottling the finished wine. One thing I learned in this process was that bottles come in an array of shapes, sizes, and thicknesses as well as have labels that are adhered using two main methods: with glue or with a sticker-backing. The glued-on labels were much easier to remove, especially after a long soak in oxygen-based cleaning solution and hot water. With the aid of some steel wool, the labels and glue were cleanly removed from the bottle. The sticker-backing labels proved much more difficult to remove. Even after soaking and using steel wool and tons of elbow grease, there were remnants of sticker remaining on the bottles. I would recommend only reusing bottles with glued-on labels or being ok with stickers remaining on the bottles. Alternatively, one can purchase new bottles from a homebrew shop and avoid this mess altogether.
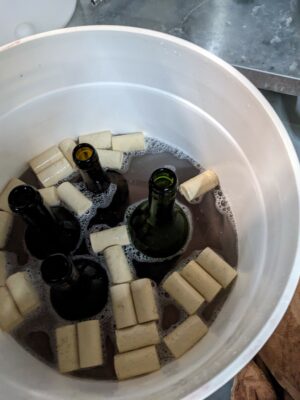 Sanitizing Bottles and Corks
With about thirty cleaned bottles and a bucket of sanitizing solution, I set about to package the wine. I placed the corks in the sanitizer and submerged a few bottles at a time into the same bucket. My first attempt at bottling did not go well. Wanting to limit the number of transfers of the finished wine, I attempted to use the auto-siphon attached to the bottling wand to fill the bottles. I had seen videos of winemakers doing this and figured I could make it work as well. What I didn’t anticipate was how difficult it was to create the initial siphon while using the spring-loaded bottling wand. At the bottom of the wand is a trigger of sorts, which is essentially a very thin plastic cylinder held down by the pressure of a spring. When this piece is pushed up by the downward force of the wand into a bottle’s bottom, the main body of the wand is exposed, releasing liquid into the bottle. This is assuming that there is liquid in the wand, an achievement made difficult by the fact that the auto-siphon needs the intended exit point of the liquid to be free-flowing and lower than the starting point of the liquid. To make matters trickier, the bottles I was attempting to fill did not have a flat bottom, but rather had what is called a punt: a concave shape that extends up into the inner part of the bottle like the point of a cone. Trying to position the small wand trigger on the point of the punt so that liquid would release was a bridge too far for me, and I bit the bullet by transferring the wine from the carboy into a bottling bucket with a spigot and used open tubing instead of the bottling wand. This setup was one that I would repeat for the second batch of wine I made as it was worth the extra transfer to avoid the massive pain of trying to bottle with an auto-siphon into punted wine bottles. I could just open the spigot tap to start the flow of wine and close it when the bottle was at the intended volume.
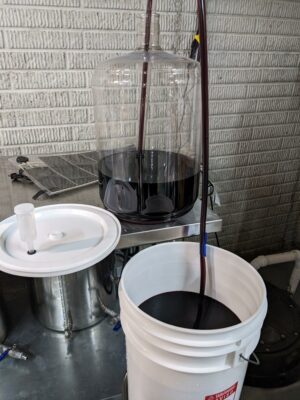 Transfer to Bottling Bucket
After I drained the bottling bucket, I had about thirty bottles of wine to cork. This was a wholly new process to me since I only used caps with beer – no corks. The corker I used was a double lever apparatus. It had a main body that the cork fit into through a side port, a bottom that mated to the mouth of a wine bottle with a convex shape serving to squeeze the cork down to size as it moved downward, and a top plunger that was connected to the hand levers on either side, which would push the cork down with downward motion of the levers. The levers also had grippers on the opposite side of the handles meant to hold the neck of the wine bottle while the levers moved downward. The plunger was connected to a threaded screw, the turning of which allowed for the depth of the plunger to be adjusted, with two nuts on the screw acting to prevent the depth setting from unintended changes.
Before the first attempt at corking, I tried to ensure that the plunger was at the correct depth by depressing both handles and seeing where the bottom of the plunger rested when fully extended. After some minor adjustments I tightened the nuts and corked the first bottle. Unfortunately, the cork wasn’t deep enough so I readjusted the plunger and tried again. The next one was a little too deep, so I once again readjusted. This trial-and-error process continued through the entire corking process which resulted in various cork heights in the bottles. They weren’t pretty as a group (or even individually in most cases), but I figured that as long as the cork was seated well and deep enough that they were functionally sealed, which is what I was going for with this first attempt.
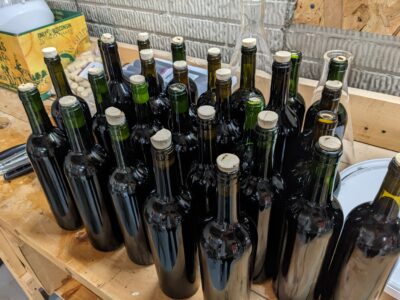 Poorly corked bottles
One other issue I had with the corker was that if the corker was at an angle part of the cork might be chipped off by the corker as it was pressed by the plunger and passed through the bottom of the corker’s main body. I tried to remedy this once I noticed it by applying even downward pressure and keeping the body of the corker perpendicular to the floor. The more I corked the less this happened, and I had better luck with the second bottling group.
Once bottling was complete the next steps involved more waiting. The bottles needed to remain vertical for a few days to let the corks expand fully and guarantee a full seal. After this period, the bottles can be rested on their sides. I moved the bottles to a wine rack and tried my best to wait at least three months before opening a bottle. Time is often touted as the key ingredient for a wine to develop its full potential and I wanted to ensure that the wine was more or less finished before testing it, but I also knew that no matter what it would continue to develop as it aged.
I repeated this process with another boxed kit and in the end had about 60 bottles of wine in my wine rack. I let time do its work as I waited patiently to try the Amarone wine I made first then the California Cabernet Merlot mix I made second.
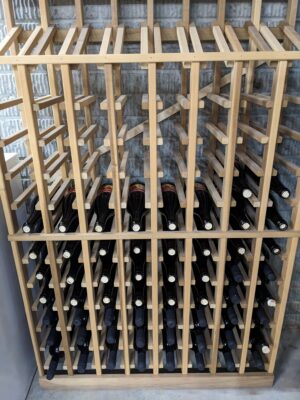 Wine Rack
After six months or so I decided the time was right to crack open a bottle of each of the wines to try them. I started with the Amarone. As a disclaimer, I am not by any means an expert taster, especially with wine, a point that perhaps I don’t need to make given the topic of this article. With that said, the aroma from the Amarone presented some berry notes, with blackberry being the predominant one. It also had a wisp of alcohol in the nose. The flavor continued the berry theme and added a tannic bite to the experience. The mouthfeel was round with a touch of carbonic bite – I wonder if I did not expel as much CO2 out of solution as I should have. It finished fairly clean with a slight residue of squeakiness on my teeth, similar to the aftereffects of drinking a tart juice. Overall, I enjoyed the wine.
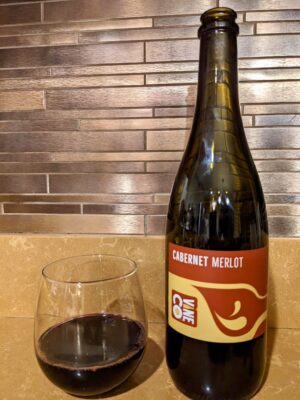
Shortly after drinking the Amarone, I found an occasion to open another bottle of wine and uncorked a bottle of the Cabernet Merlot mix. The aroma on this wine was not as present when compared to the Amarone. The only notes I could pick up were a faint alcohol aroma and a general red wine smell – I don’t know how else to describe it as it was quite neutral. The flavor was also a lot milder compared to the Amarone with perhaps a hint of cherry with all other flavors melding together. It was a pleasant drink all in all with the mouthfeel on the thin side but not to a degree that was off-putting.
Cabernet Merlot In Glass – Also: Cabernet Merlot Labels
Conclusions
After some time to reflect on the experience and enjoy some of the fruits of my labor, I am decidedly glad I took this foray into winemaking and had the chance to expand my beverage making skills. One of the aspects that drew me into homebrewing and keeps me in the hobby is that there is always something new to learn. Delving into the world of winemaking opens up so many new avenues to explore in that regard and it also allows me to create beverages that might cater towards non-beer drinking friends and relatives. Another benefit of making wine is that it doesn’t take a ton of equipment or fancy procedures to make a product that is on par or in some cases better than what I can buy at the store. There is also ample opportunity to tweak recipes and ingredients to craft a final product that is custom to my tastes and those with whom I share the beverage. Additionally, the amount of finished product to time invested ratio is much higher for winemaking. With only a few hours of work one could have about thirty 750ml bottles of wine whereas it would take twice as long or longer to have the same volume of packaged beer. Not bad!
That said, I’m not ready to throw my mash paddle away and go all in on winemaking – there are aspects of brewing that I like that I can’t find the same level of enjoyment with winemaking and some facets of brewing don’t really have a corollary in winemaking. For example, I really enjoy the process of mashing grain and boiling wort and hops. There is so much art and science wrapped up in that activity I enjoy and get pleasure out of continuously learning about. Undoubtedly, I could dive deeper in the art and science of wine must and could even explore growing and harvesting my own grapes or other fruit for winemaking, so there is a lot to discover in that arena to scratch similar itches as brewing does. One other way brewing beer may have an advantage for me is the waiting time consideration for enjoying the finished product. Unless I’m after a barrel aged beer or traditional sour, for example, I enjoy the beer I create in as little as two weeks’ time and at most a couple months. When it comes to wine, most of the creations I would make are meant to cellar for at least six months. Of course, there are exceptions in winemaking if one is as impatient as I am (e.g. a quick fruit wine).
For those who might be on the fence about expanding their skills to include winemaking I would say that it is worth the small investment in time and resources. Wine has been a popular beverage for thousands of years at this point and isn’t going anywhere anytime soon so cast your lot with the ancients and give it a go. I hope you find the process satisfying and that those who you share the finished product with are equally as pleased.
Make Your Own Wine!
- VineCo Wine Making Kits
- Winexpert Wine Making Kits
- On The House Wine Making Kits
- Wine Making Equipment Kits
- Winemaking Equipment Kit for VineCo Concentrate Kits W150 – Hands on Review
- Winemaking Equipment Kit (For Brewers) W105
- Winemaking Supplies
- Wine Bottles
Aaron’s Wine Making Series!
- Making Wine as a Homebrewer!
- Hands on Review: VineCo Winemaking Equipment Kit from MoreBeer!
- Hands on Review: VineCo Wine Kit Review!
Two Ways to Save on VineCo Kits – Selection Changes Regularly
Beer and Wine Party Pack – Selection Changes Regularly
Our Wine Kit Deals Roundup!
More Homebrew Finds!
- Last 50 Finds!
- Top Deals – a curated list of the best deals
- Homebrew Reviews – one of the largest libraries of homebrew reviews in existence!
- Our Top Posts – tips, how-tos, resources posts and more
- Let’s be Friends!
Recent Deals!

10 Most Recent Homebrew Resource Posts & How-To’s!

We are Homebrew Review HQ! Our 10 Most Recent Reviews

Quick Catch-Ups
- Our Last Fifty Finds
- Curated List of Keg Deals
- Curated List of Hop Deals
- Our 10 Most Recent Homebrew Resource Posts
- Top Deals – a curated list of the best of the best
- Our 10 Most Recent Reviews
This post may contain affiliate links. We may make a commission when you use our links. This will never cost you extra. Thank you for supporting Homebrew Finds!
greatdealsThank you to MoreBeer for providing the equipment and ingredients used in this write-up.
Make sure the components you use are compatible and rated for your intended application. Contact manufacturer with questions about suitability or a specific application. Always read and follow manufacturer directions. tag:lnksfxd tag:anwkseries top:wineforhomebrewers #tag:tpr