This review is by Homebrew Finds Contributor Brad Probert. Brad is an engineer, expert homebrewer and experienced reviewer. Grab a link to Brad’s website at the end of this review.
Limited Time DEAL – $300 off 17 Gallon System!
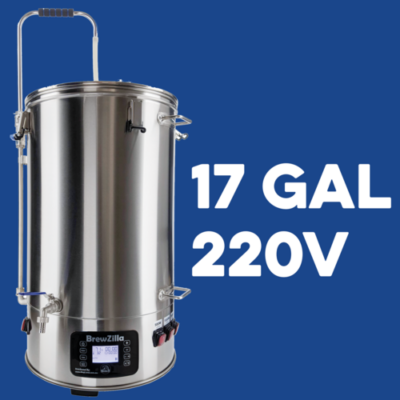
For a limited time MoreBeer has the 17 gallon BrewZilla marked down a whopping $300 to just $349.99. Shipping is also free to many US addresses. This is a great deal!
Gen 4 BrewZilla | All Grain Brewing System | Integrated Pump | Includes Wort Chiller | Wifi | Bluetooth| Rapt | 65L | 17.1G | 220V AG502.US
Hands on Review BrewZilla Gen4
I’ve brewed on several different all-in-one units. Like any brew system, they each have their own strengths and weaknesses. I did a hands-on review of the Robobrew when it first came out in late 2016. It has since changed its name to BrewZilla and is on the 4th generation of the brew unit. As you’d expect with repeated generations, they’ve been able to focus on fixing deficiencies in their previous models and also introduce new features.
The basic premise of an all-in-one brewing system is that your mash and boil kettle are in the
same vessel. So just like Brew In A Bag, after mashing, you pull the grains out and the wort stays behind to be boiled. They use electricity for heat, so they can be used outdoors where you can reach power or indoors where you have a venting system that can take care of all the steam you make during your boil.
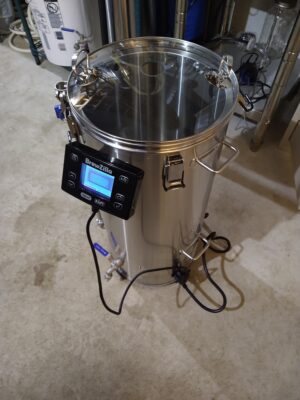
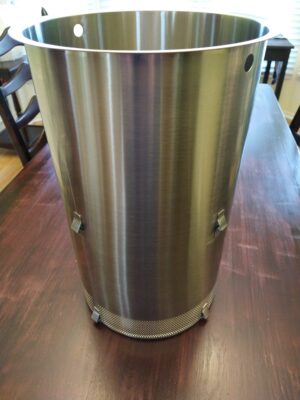
BrewZilla Without Jacket
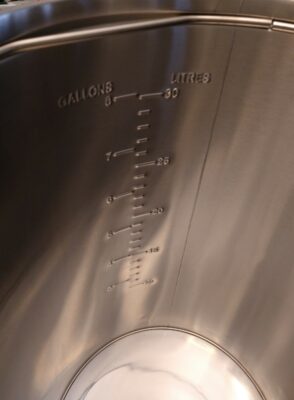
Stamped Volume Markings
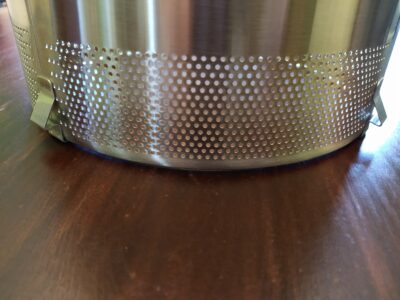
Here are some basic stats on the Gen4 BrewZilla. It’s available in a 35-Liter form (for 5-6 gallon batches) with either a 110V setup, or 220V. There is also a larger 65-Liter that is only 220V (targeted to 10-12 gallon batches). The 35L unit holds 9.25 gallons, the mash basket can hold up to 23.5 lbs. of grain, and its electric heating elements can output up to 1500W of power (110V system) or 2400W of power (220V system). The 65L unit holds 17.1 gallons, the mash basket holds 41.5 lbs. of grain, and 3500W of heating power. All the Gen4 units have a pump bolted into the base. The pump can be used not only for wort recirculation during the mash, but also to pump beer through your wort chiller apparatus (should you choose to not use the immersion chiller coil included with the BrewZilla). The pump is more modular and accessible than previous Gen models. To protect the pump from clogging with hop debris during the boil or whirlpool, there is a filter screen (a perforated stainless disc that sits at the bottom of the unit) that sits at the bottom of the kettle. The small magnetic drive pump has a pump head rating of 1.5 – 2.1 m (4.9 – 6.9 ft) and a max flow rate of 11-12 L/min (2.9 – 3.2 gal/min).
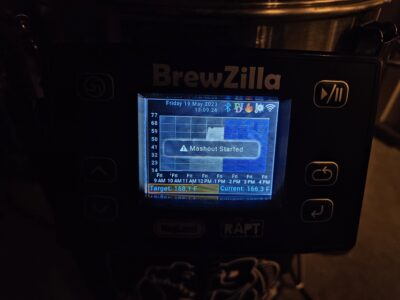 Control Panel Notification During Mash Profile
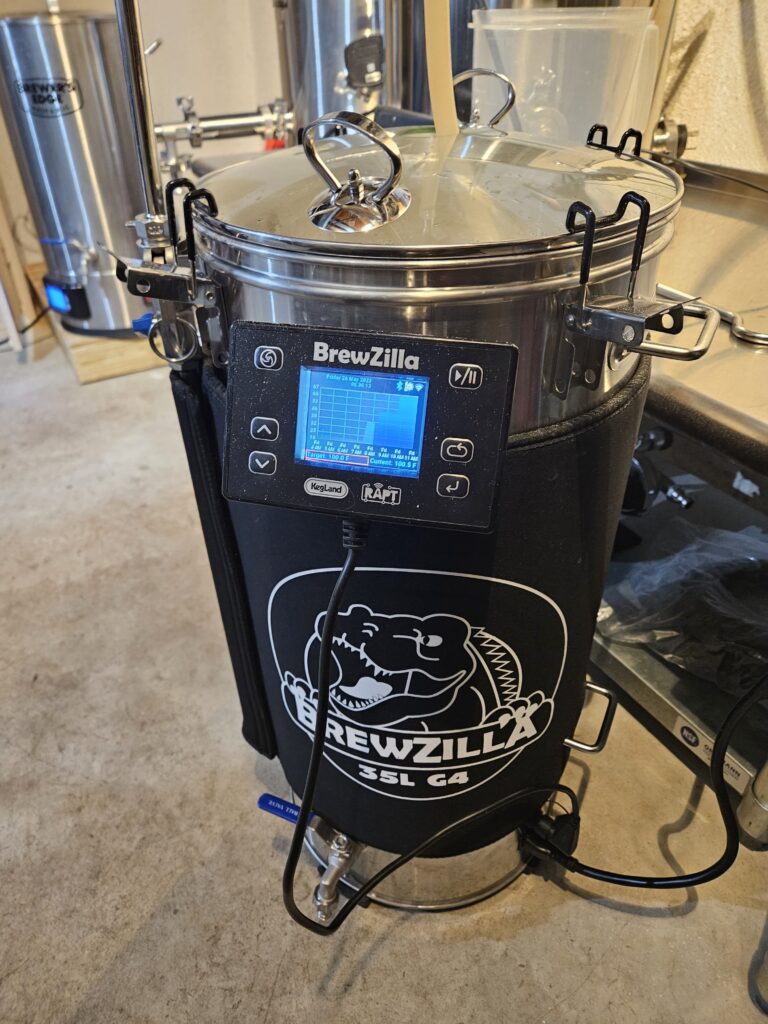
One of the key upgraded features of the Gen4 BrewZilla is the controller. RAPT Is Kegland’s line of wireless connected brewing devices. The BrewZilla now has a RAPT controller so it adds a lot of features that can be monitored and controlled over Wi-Fi. This includes basic things like monitoring temperature from your laptop/cell phone, but also allows you to program complex mash programs online and then download to your BrewZilla. You can also adjust control parameters on the fly such as pump output duty cycle and heater output level. If you get the optional Bluetooth thermometer, you can stick the temperature probe into the middle of your grain bed, and then have the controller use that as its control signal in combination with the built-in temperature sensor that sits on the floor of the unit.
 Bluetooth Temp Probe in Middle of Mash
Although All-in-One units are essentially BIAB, they use a stainless steel basket with holes in the bottom of it instead of a bag, and call it a “malt pipe”. These provide functional improvements over a nylon bag. The obvious one is they are way easier to clean. But they also allow you to ensure you get full flow through your grain bed by having holes only on the bottom. This means recirculating wort has no sneak paths out the side. The other benefit is malt pipes have simple brackets/feet welded onto the outside that allow you to lift your wet grains up and prop the malt pipe on the brew rig to drain or sparge. The BrewZilla has 2 sets of feet for this. One set is halfway up, allowing you to do the deadlift of grain & wort halfway and then let the liquid level drain down. Then when you lift it the full height, it’s not as heavy. It’s simple, but makes the process much better.
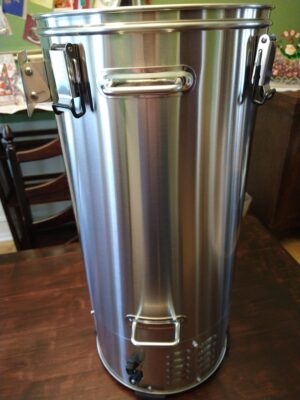
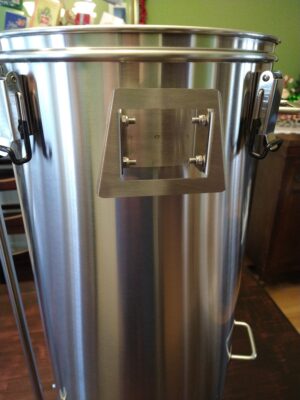
Welded-on Carry Handle (top) and Tip Handle (bottom)
There is a cool feature in the BrewZilla which normally only comes on much higher end systems, and that’s the central drain. With a concave bottom with a drain at the lowest point in the center, you don’t have to leave wort behind or goof around with tilting it to get the last drops of wort out at the end. This also enables the malt pipe to extend down lower and thus you can hold more grain (30% more than their Gen3). If you compared to other All-in-one units in the “5 gallon batch” size range, the 23.5 lbs. grain capacity is 30 – 50% more. This of course only matters if you’re trying to make high gravity brews. The drain in the floor is plumbed to the inlet of the pump below, and then you can direct pump output either to an external spigot for fast/easy transfer of wort out after brewing, or up the recirculation pipe for wort to get directed down on top of the mash.
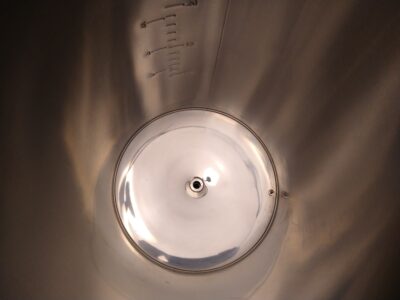
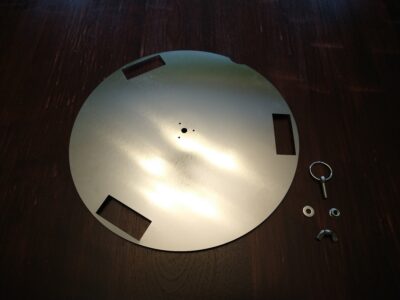
Polished Bottom with Center Drain and Built-in Temp Sensor to Side
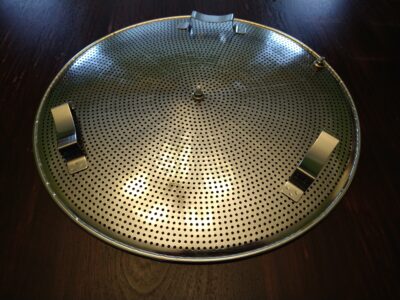
Bottom Side of Pump Filter Plate
To help with mash efficiency and mash temperature uniformity, they offer a Heat Exchanger Dish, which is just a stainless dish/plate that sits below your malt pipe and above the central drain. Without this dish in place, the flow of recirculating wort tends to go through the center of your grain bed, and straight out the drain. With the dish there, it directs the flow around the full circumference before it gets to the drain, which helps ensure a broader portion of the grist sees the flow.
Compare Prices, Review Continues Below:
This article contains affiliate links. We may make a small percentage if you use our links to make a purchase. You won’t pay more and you’ll be supporting Homebrew Finds and more content like this. Thank you for your support!
Another helpful option is the neoprene insulation jacket. This helps keep mash temperatures more consistent by cutting down heat loss through the walls of the unit. The jacket on BrewZilla also smartly covers the recirculation pipe to minimize heat loss during wort recirculation. The overall mash temperature response with a multi-step mash was impressive, with more detail provided in the Hands On section, below.
Hands on Trials
First off, all of the different parts were well made with good quality manufacturing. As I’ve found with all Kegland gear, it’s of good quality- but nothing flashy. The one exception was probably the smooth and highly polished dished bottom. That was flashy. And being a previous owner of a 1st Gen Robobrew, I was very happy to see the camlock fitting on the recirculation pipe and see that Kegland was obviously tuned in to customer feedback on their products.
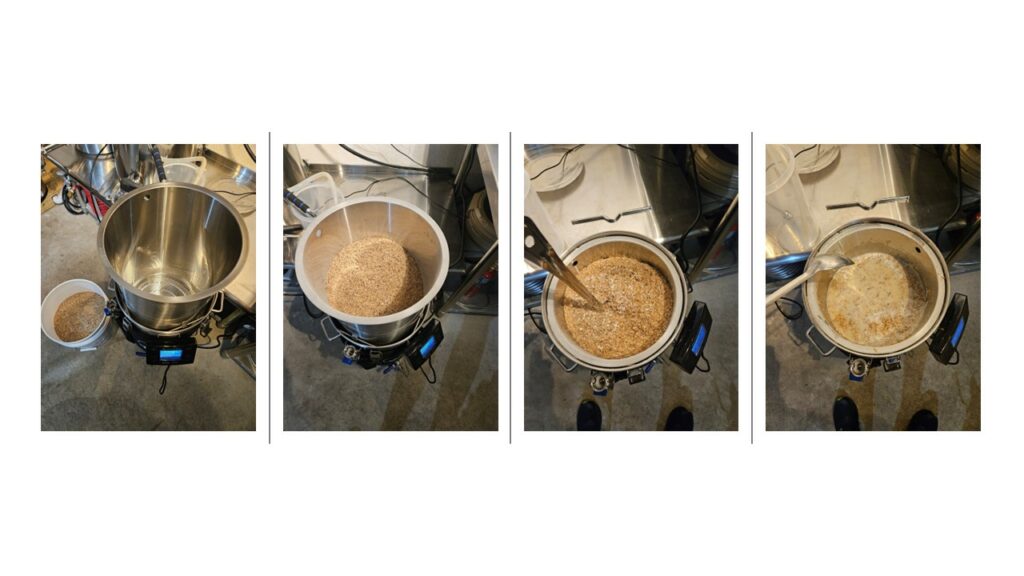
Mashing-in Sequence
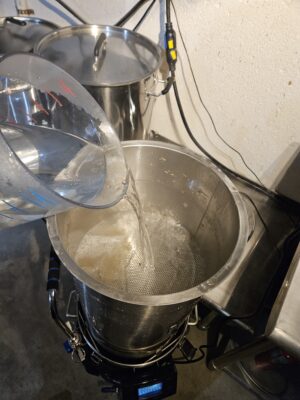
Sparging
I brewed three different batches before writing this review. Two of them followed a simple single temperature mash, and the third one I exercised the RAPT Controller more with a multi-step mash profile, with lots of monitoring via my smartphone. I was impressed with the mash efficiency I achieved. There can be a misconception that BIAB = lower mash efficiency, but really, it’s “full volume mash = lower efficiency”. I had previously done experiments with an Anvil Foundry that showed a sparge step can get you mash efficiencies > 80%. Therefore, my batches in the BrewZilla were all done with a sparge step. I rested the malt pipe at the top while pouring heated sparge water through it with a 1-gallon pitcher. The perforated plate sitting on top of the grain bed made it super simple to sparge like this and get a good water distribution pattern. The perforated plate also allowed me to push down very easily and squeeze out remaining liquid in the grains. If you’re in the school of thought that squeezing the grains is bad for your beer, this isn’t relevant for you. For the rest of us, being able to easily squeeze that out without making a mess was awesome. And it meant when I picked up the basket of spent grain, I didn’t have a trail of sugary malt drippings to clean up after. My first batch achieved 77% mash efficiency, the second one 80%, and the third 81%.
Recirc Flow Rate After CFC
I experimented a bit with the Bluetooth RAPT wireless thermometer, but I didn’t properly understand it at first. I thought the concept was I could choose whether to use the built-in sensor at the bottom of the unit or the Bluetooth thermometer, but that wasn’t the case. When you add the Bluetooth thermometer, it will then control to that temperature, but it still uses the built-in sensor as part of your heating in a way that lets you fine tune how the system as a whole responds to temperature steps in your mash. After tinkering with it a bit, I realized it has some really powerful potential, but requires a deeper dive and some experimentation to back it up. So I’ll save that for a future write-up.
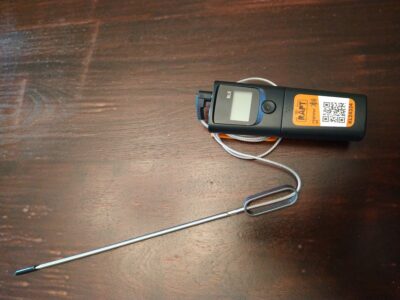 Bluetooth RAPT Thermometer
My typical brew system uses a 10-gallon kettle with a pump recirculating wort through a 240V RIMS with a 3500W heating element. With that set-up, I get about 3.1 degrees/minute temperature rise when doing multi-step mash profiles. I was therefore expecting this 120V/1500W system to be slow but was shocked to find similar performance that averaged around 2.5 degrees/minute. I attributed this capability to the neoprene jacket. On the plus side, that means you can do multi-step mashes even on only a 120V outlet and not take all day. But leaving the lid on as you heat to a boil is still a must. With the large opening in its domed top, it still can allow any volatized compounds to flow out.
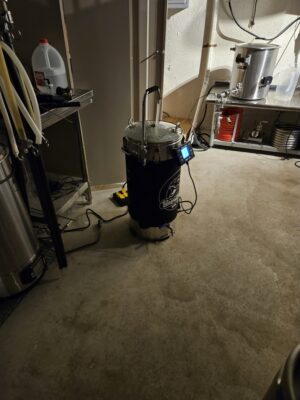
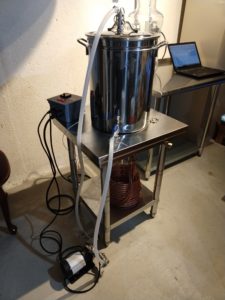
BrewZilla Mashing by Itself in Basement
I found the RAPT software a bit non-intuitive and as such, had a learning curve to it. Luckily, I did a trial run just with water in it so I could get a feel for where various controls were located and how it worked. I definitely recommend this before you try to do any multi-step mash program, or live monitoring of things from the App. Way less stressful when it’s just water! After I got the hang of it, I was able to monitor my mash well and know what was going on as it chugged away in the basement and I worked at my day job one floor above. One key thing I learned was the in-flight plotting of mash temperature isn’t a continuously updating graph, you have to hit refresh in the App to get the updated data that it is recording and holding. I assume this is for computing efficiency and Wi-Fi bandwidth load management. It was perfectly fine once I figured out how it worked.
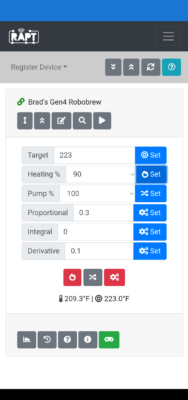
Screenshot of RAPT Controller Interface
The RAPT Controller allows you to program in multi-step mashes. But it’s a bit clunky as you figure it out. When you build the profile up using the App or Web interface, that profile sits on the RAPT server. My brain kept wanting to think I was programming the controller directly on the unit, but that’s not how it works. So after you program in the profile, you have to download it to the controller on your unit for it to work. You do all of this through the RAPT portal, and it only requires your BrewZilla to be powered on to let you download to it. This would be cool if you could just export something from Brewfather and then import it in RAPT, but you can’t. However, when you think about it, you probably don’t have that many different mash profiles, so it’s not really a big deal.
Malt Pipe
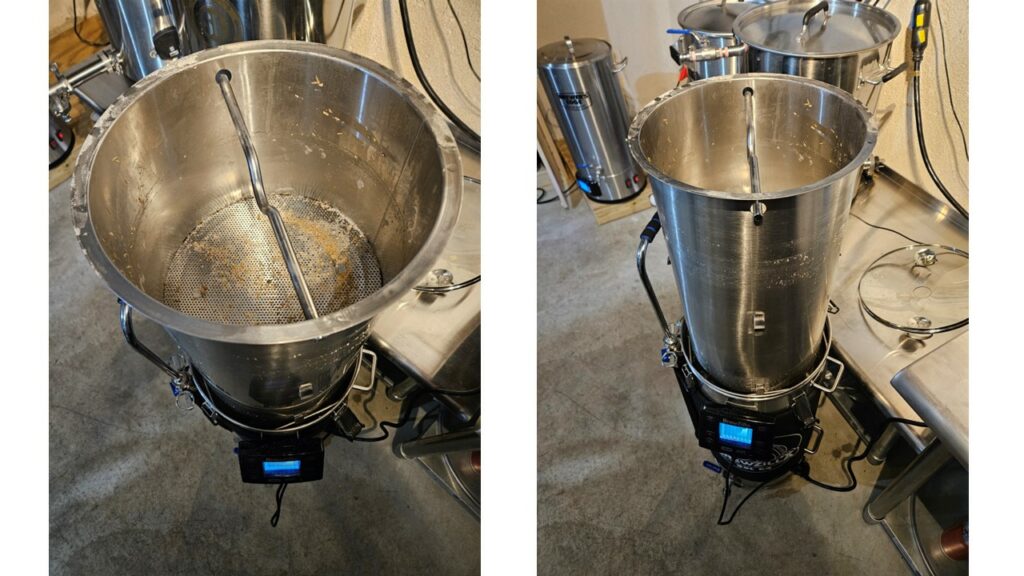 Draining Malt Pipe
One super cool feature of the mash profile programming is Kegland finally did what many have wanted these controllers to do for a long time. Rather than open loop programming a temperature and a time and guesstimating how long it will take for your mash to reach that temperature, you can tell it to not start counting down your mash step timer until it reaches the temperature. So if you want a 45-minute rest at 150F, you don’t have to think about how long it will take to get to 150F, it just heats up, and then starts the 45-minute timer when you hit 150F. I really liked this. You are also able to set up notifications at either the beginning or end of a particular mash step. I had it send an alert to my phone once it had reached mashout temperature and thus had 10 minutes left in my mash. That was cool, too. This isn’t quite as simple as it sounds, though. What I found was if the PID controller didn’t overshoot my target temp, I spent several minutes closing in on the target, but didn’t hit the temperature to start your countdown timer. So I’d end up with long mash times. I did some experiments with PID gains and the Bluetooth probe that got this working as I wanted, but I’ll detail that in a later write-up.
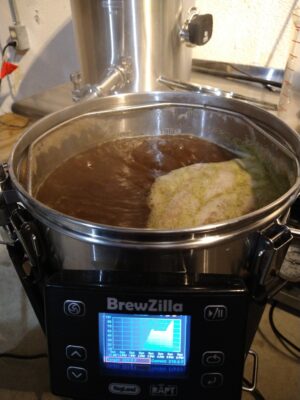
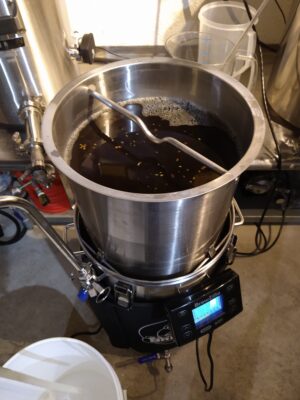
Rolling Boil at 75-percent Power
There wasn’t a boil timer interface, the controller was really just geared to controlling & monitoring mash temperatures. Not a big deal, as my Brewfather boil timer works great for this, so it isn’t a feature RAPT needs to spend time making. I could easily maintain a robust boil if I wanted to, but I like to keep it at just a good rolling circulation, so I dialed down the heating element power to 75% and maintained a constant churn of the wort and allowed boil-off of 0.4 – 0.5 gallons per hour. And the filter dish at the bottom of the kettle worked great to keep hop debris out of the pump, but not restrict flow. I had a thick cake of hop mush at the end when it was time to clean. Cleaning was fast and easy with parts light and easy to pull out, come apart, and rinse. And with the built-in pump, it was also easy to fill the unit up with cleaning solution at the end, circulate it through the unit & my Counter Flow Chiller to get everything clean.
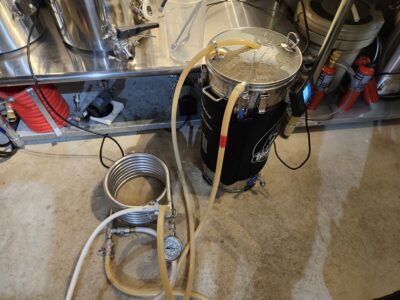
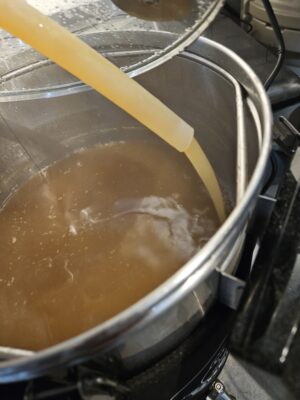
Chilling Wort Using CFC and Built-in Pump
For wort cooling at the end of the boil, I used the built-in pump and circulated wort through my CFC. With the camlock fitting on the BrewZilla, I could easily hook up my typical ½” silicone tubing hoses. I was unsure if the pump would be up to the job, but it handled it easily. I could get a good volume flow rate with the recirc valve wide open on the BrewZilla and could easily restrict it when I wanted a slower flow.
A couple of pro tips to wrap things up. First, is to make sure you add your grains to the malt pipe BEFORE you lower it into the vessel. This ensures the weight of the grain keeps the bottom plate in place, so that as you lower it down, the water doesn’t push the bottom plate out of position and create a sneak path for whole grains to get through. Second is to make sure you have the plug fully seated in your brew unit. This might sound stupidly logical, but with a 6-foot power cord, you might end up pushing the limits of where you want the unit to sit vs. where the outlet is you’re plugged into. I had the cable become partially unseated and I wasn’t aware- until I went to remove the cord at the end of a long session of PID controller experiments. If the cord isn’t fully seated, you get less electrical contact on the pins and less contact means higher heat as electricity flows through it. I ended up damaging the cord and the receptacle from overheating.

Conclusions
The BrewZilla Gen4 delivered. The controller worked great, and I absolutely loved the step mash ability to start the mash step timer using actual mash temperatures. The RAPT interface wasn’t quite as slick as I would’ve liked but overall worked flawlessly, with no glitches. And I was definitely surprised how well a mere 120V/1500W system could handle mash steps and boil intensity. The well-thought-out little pieces of the malt pipe and various recirculation designs showed to me a system that was engineered with actual brewing hours spent on the unit, which is great. I feel with all of this, I won’t have compromises on my brew day using an all-in-one system versus my bigger 2-vessel system. And that says a lot.
Special thanks to Kegland for providing the unit used for evaluation in this review.
Compare Prices, Review Continues Below:
This article contains affiliate links. We may make a small percentage if you use our links to make a purchase. You won’t pay more and you’ll be supporting Homebrew Finds and more content like this. Thank you for your support!
Data Plots
Related: Hands on Review: Robobrew (BrewZilla v1) All Grain Brewing System
More Photos
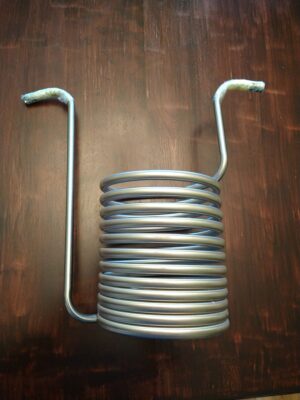
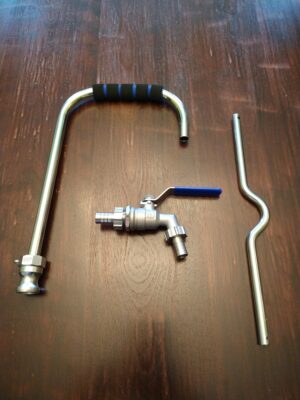
Included Immersion Chiller (Fittings Sold Separately)

Collecting Wort for Gravity Check
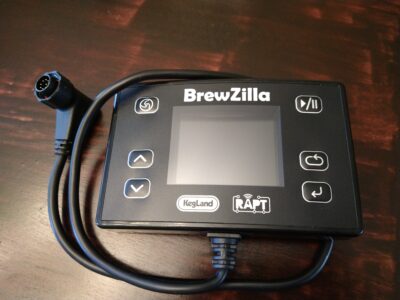
Control Panel and Cord
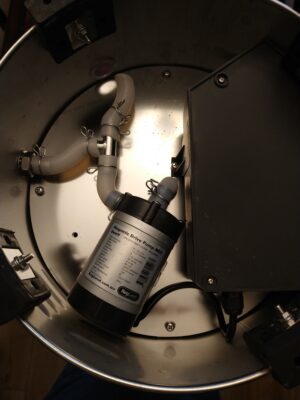
Easy Access Pump and Hose Routing Underneath
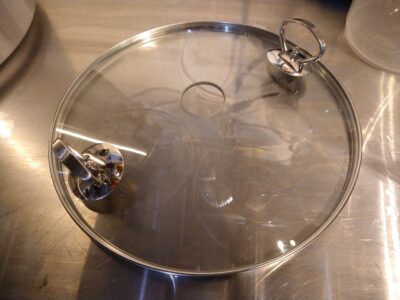
Glass Lid with Handles
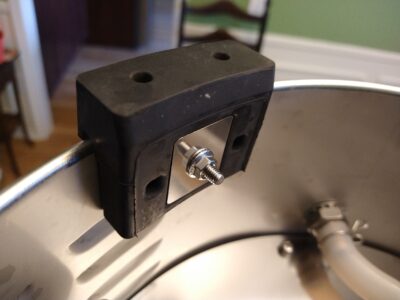
Hanger Plate for Control Panel
Heat Exchanger Dish
Holes in Malt Pipe to Help Flow
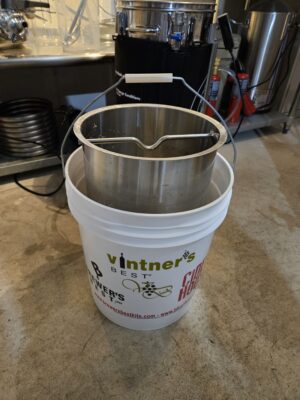
Malt Pipe Fits Perfectly in 8 Gallon Bucket
Malt Pipe Sitting at Halfway Point to Drain
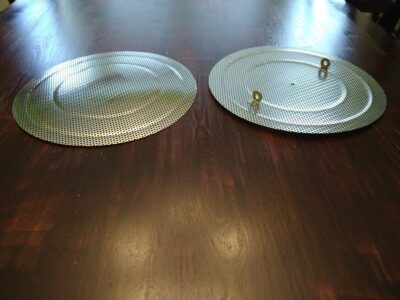
Malt Pipe Screen Bottom (Left) and Top (Right)
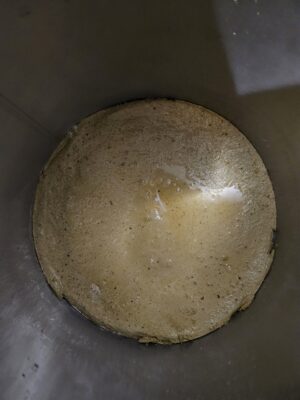
Hop Debris on Filter Screen At End

Neoprene Jacket
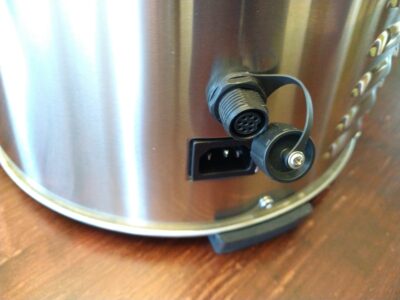
Power Connection for 110V Cord and Multi-pin Connector for Control Panel
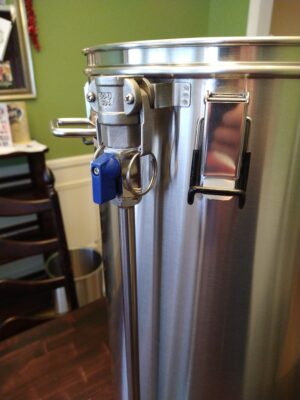
Recirc Pipe with Valve and Camlock Fitting
Recirc Pipe, Drain Spigot, and Malt Pipe Lift Handle
Robust Hard Rubber Feet
Convert RoboBrew to BrewZilla
If you’re looking to convert your Robobrew to a BrewZilla an upgrade board is available
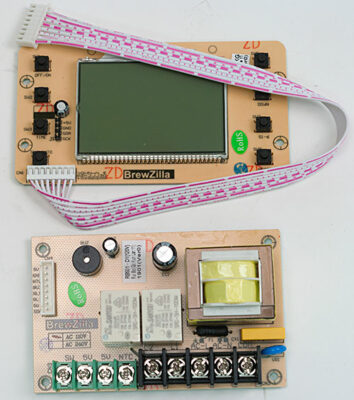
Robobrew Gen 3.1.1 Upgrade Board Set 110 volt via William’s Brewing
More Kegland Gear Reviews!

More Homebrew Finds!
Recent Deals!

We are Homebrew Review HQ! See Our 10 Most Recent Reviews

This post may contain affiliate links. We may make a commission when you use our links. This will never cost you extra. Thank you for supporting Homebrew Finds!
By Brad Probert. Check out Brad’s website – beersnobby.com
Special Thanks to Keg King with the help of MoreBeer for providing the unit used for evaluation in this review
Price, promotions and availability can change quickly. Check the product page for current price, description and availability.
Make sure the components you use are compatible and rated for your intended application. Contact manufacturer with questions about suitability or a specific application. Always read and follow manufacturer directions. tag:lnksfxd review:bprobobrew rs:7 #tag:tpru tag:watch