
Hands on Review: Robobrew (BrewZilla v1) All Grain Brewing System
This review is by Homebrew Finds Contributor Brad Probert. Brad is an engineer, expert homebrewer and experienced reviewer. Grab a link to Brad’s website at the end of this review.
Robobrew vs BrewZilla + Our BrewZilla Gen 4 Review
Since this review was released the Robobrew has been rebranded to the BrewZilla. This review is of of the original Robobrew (BrewZilla v1). Beyond the re-branding this system has had multiple version upgrades.
 Check out our review of the much newer BrewZilla Gen 4!
Upgrading RoboBrew/BrewZilla to BrewZilla 3:
If you’re looking to convert your Robobrew to a BrewZilla an upgrade board is available
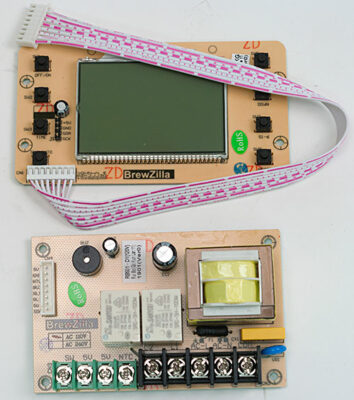
Robobrew Gen 3.1.1 Upgrade Board Set 110 volt via William’s Brewing
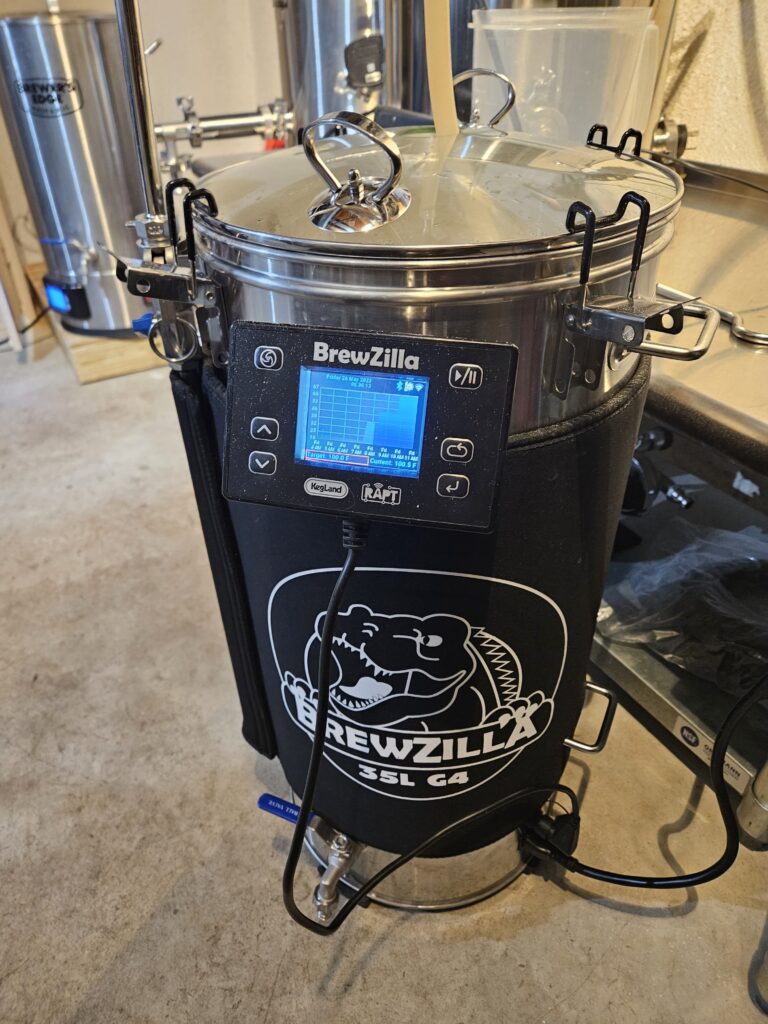
The Robobrew is an electric all-in-one eBIAB system. It allows you to brew the complexity of all-grain batches with the simplicity of electric heat/control in a single vessel system. There is a wide variety of these systems out on the market to choose from. Robobrew aims to be in the midst of these as far as features and function, but at a much lower price to attempt to get this tool in the hands of as many homebrewers as possible.
Compare Prices, Review Continues Below:
- BrewZilla William’s Brewing
- BrewZilla at MoreBeer
- BrewZilla All Grain Brewing System | Gen 4 | Integrated Pump | Includes Wort Chiller | Wifi | Bluetooth| Rapt | 35L | 9.25G | 110V AG500
- Gen 4 BrewZilla | All Grain Brewing System | Integrated Pump | Includes Wort Chiller | Wifi | Bluetooth| Rapt | 65L | 17.1G | 220V AG502.US
- BrewZilla All Grain Brewing System With Pump | Gen 3.1.1 | 35L/9.25G (110V) AG475A3
- BrewZilla All Grain Brewing System | Gen 3.1.1 | 65L/17.1G | Built-in pump | Wort chiller included | 220V AG490A3
- Search Amazon for “BrewZilla” – offerings and availability vary
This article contains affiliate links. We may make a small percentage if you use our links to make a purchase. You won’t pay more and you’ll be supporting Homebrew Finds and more content like this. Thank you for your support!
Robobrew System Overview

The Robobrew comes in 2 models- one with a built-in pump, and one without. The model without the pump retails for about $350, and the one with a pump for $480. Although a significant price jump, the $480 price tag is several hundred cheaper than its competition. Getting a unit with a pump allows you to take advantage of a lot of the process efficiencies from the eBIAB systems, with convenience of recirculation during mash and pressure-fed wort transfer into your fermenter.
The pump is built into the bottom of the unit, tucked away out of sight and out of the way. There is a stainless steel transfer pipe that takes output flow from the pump and sends it up top where it can be directed to where you want it to go. The pump inlet is through an opening in the bottom of the brew chamber. Also in the bottom is the wort temperature sensor and the two independently switched heating elements (1000W + 500W). Although the heating elements have their own manual on/off switch, the unit’s electric controller also has the ability to shut off and turn on power depending on measured mash temperature compared to your set temperature. Importantly, the controller is smart enough to know when it should be using one or both elements when it’s getting close to your set temperature. It also is smart enough to only switch on the 500W element while trying to hold a steady temperature and things start to drift a bit.
For mashing, you put your crushed grains into the stainless steel malt pipe, which has a false bottom mesh on the bottom of it to keep grains from getting circulated into the pump or scorched to the bottom. There’s also a second false ‘bottom’ screen, which slides down inside the malt pipe after you’ve filled it with your crushed grains. And if two false bottoms aren’t enough for you, Robobrew has you covered with a third false bottom that sits below the malt pipe, giving you another layer of defense against stray grain particles during the mash, but also importantly keeps hop residue from clogging up your pump or wort chiller.
The controller provides basic control function by allowing you to set a target temperature with simple + / – buttons and then letting the controller turn on the elements automatically to heat up and then switch off when the target temperature is reached. There is also a delay feature that allows you to program in a delayed start for when you want the target set temperature to kick in. Set it to something short like a few minutes and make a pseudo mash temperature step profile you program one step at a time. Or for longer times (up to 24 hours) if you want to fill it with water and have the unit turn on to be ready for you after work.
Hands on Trial
Brewing a couple of batches in the Robobrew helped me get a feel for how to work with it. For certain, it was straightforward to use, and mechanically sound with good controller function. However, it did require some compensations on my part. I noticed on my first brew day that as I poured 7 gallons of distilled water into it from seven 1-gallon jugs, that the embossed volume markings showed 7.3 gallons. That was a bit disappointing, but I just learned to compensate by noting the volume markings and doing the 0.3 gallon math. Contacting the folks at Keg King about this, they noted they had already discovered this issue with some units and had made adjustments with the welding set-up to ensure when the sides of the unit get welded to the base, they line up at the appropriate spot for the volume markers.
The other adjustment I had to make was in the temperature reading. The digital controller read out a temperature on the display that you might assume is the temperature of your mash. But a check with my calibrated thermometer showed the Robobrew was reading about 5-7 degrees hotter than what I measured in the bulk of the fluid. I had some discussion with Keg King about this and basically it comes down to sensor location (on the bottom of the brew vessel, where the heating elements are) and what they were really trying to accomplish with the sensor. Specifically, they wanted to ensure they were reading the hottest part of the mash so as to avoid unintentional scorching down by the elements. In the end, I’m not sure this gets accomplished, because I just did the math and set a higher target temperature. If I wanted the strike water to be 155 degrees, I knew to set the controller to 155 + 5 = 160 degrees. With this adjustment in mind, I would manually set the controller temperature to a setting using my offset and then monitor with my manual thermometer.

False Bottom Filtering Hop Trub
The false bottom that’s left in the vessel after you remove the malt pipe really did work awesome as a hop filter for the pump. Even while brewing a hop-heavy IPA, I didn’t have any issues clogging things up in the pump. And the thick green layer of hop residue on the bottom after I had drained and transferred everything to the fermenter made it clear why that was. The built-in pump was handy to have for pumping wort through my counterflow chiller and then into the fermenter. Although the Robobrew comes with a standard coil immersion chiller (in shiny stainless steel), it doesn’t come with all of the necessary fittings and hoses to make it ready to go out of the box. That was fine by me because I didn’t have need of or want to use a coil immersion chiller. As with all of these electric all-in-one eBIAB systems, clean-up was easy and nice having just the single vessel.
Temperature Measurement Experiment
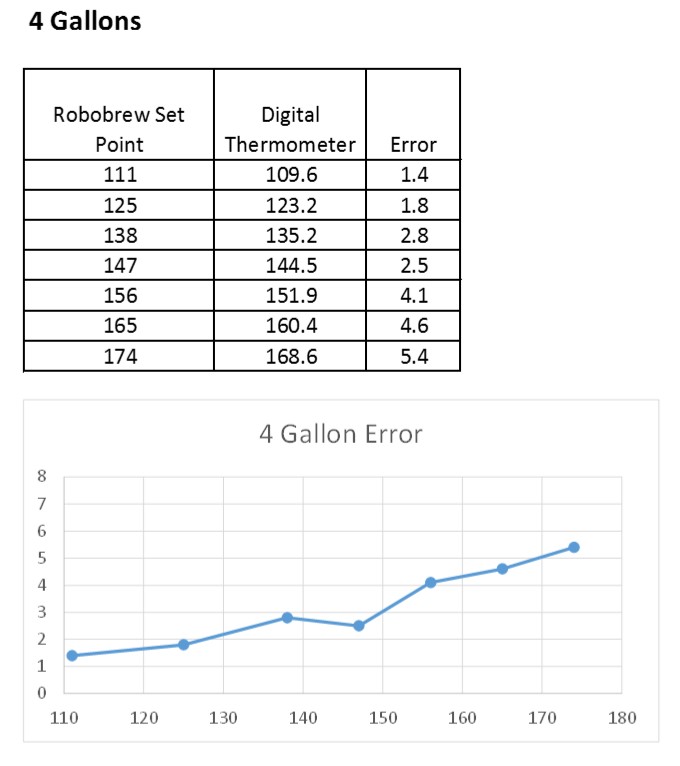
Wanting to better understand the temperature offset, I set up a couple of experiments where I compared the temperature reported by the Robobrew to that which I measured with my calibrated digital thermometer. I did 2 trials with water, one at a smaller volume (4 gallons) and one at a larger volume (7 gallons). These 2 volumes represented roughly what I’d use for a 2.5 gallon batch and a 5 gallon batch. You can see from the plots that both of them have a difference between what the temperature sensor is reading from the bottom of the vessel to what I was reading with my thermometer in the middle of the fluid. The difference was greater with the 7 gallon test than what I saw with the 4 gallon test. I also did a test where I took the 7 gallon volume and set it to hold a steady 152 F for a longer period of time. While I saw the same basic temperature error trend, the controller would switch on to try to control to the 152F, and as a result it held a constant temperature to within a degree during my 30-minute test.
My takeaway from these experiments was that I would need to factor in an offset when programming target temperatures. The temperature sensor error was smallest in the area of typical saccharification rest temperatures (~152 F), which was good. As other rest temperatures are perhaps a bit more flexible if I were to use just this 152 F temperature adjustment and apply it to any other mash step set points. Keeping the pump running to recirculate did a good job of keeping temperature steady and the controller was smart enough to just selectively turn on the 500W burner when needed if the temperature started to drop. This helped keep it from doing drastic swings. Armed with this data and a better understanding of the system capability, I feel my next brew session will go much smoother knowing how to adjust my target temperature and the ability for the unit to hold temperature well.
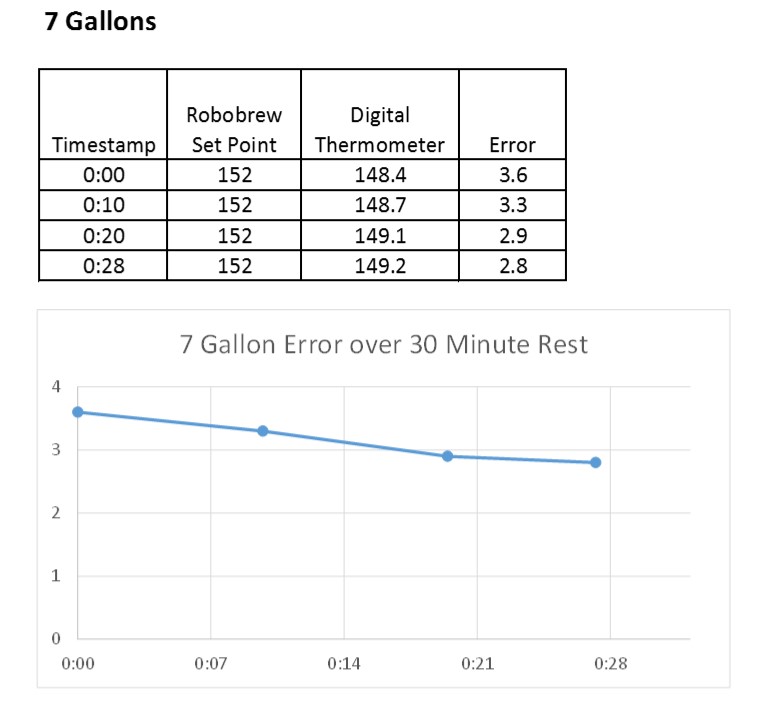
7 Gallon Temperature Test with 30 Minute Rest
More Temperature Tests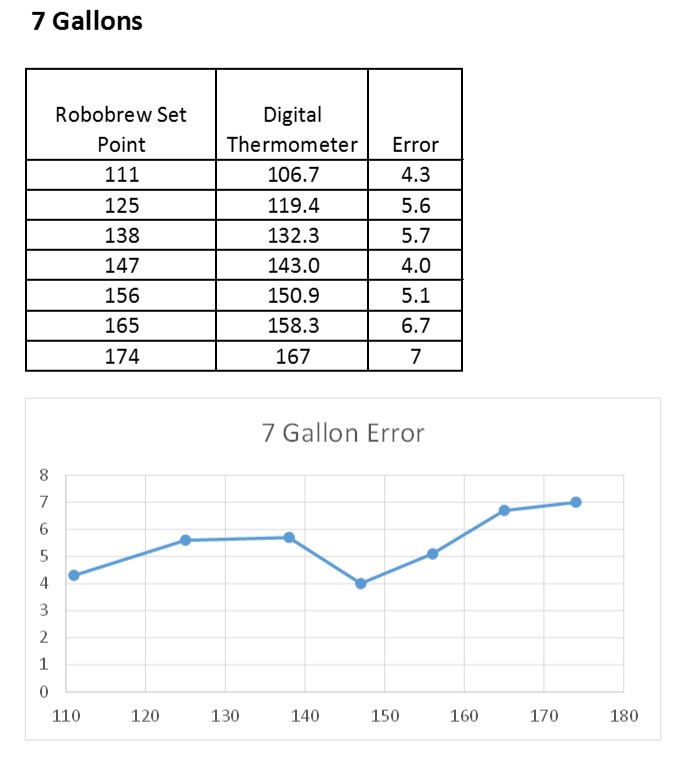
Summary
The Robobrew hit the mark for providing all the same functionality as its competition. It has some advantages like the second false bottom to prevent pump clogging and the delayed start timer, and comes in at a very affordable price compared to its main competition. There are some compensations you have to make with volume markings (if you get a unit like mine) and temperature set points. And although it has an overall good quality appearance, there are spots where you notice the thinner metal gauge in things like weld spots, trim edges, and part handling susceptibility to damage. But altogether, these items are relatively minor, and at the price of $480 compared to $890 for a similarly-equipped Grainfather model, it quite simply puts electric brewing within reach of a lot more folks. And that’s a good thing.
Compare Prices, Review Continues Below:
- BrewZilla William’s Brewing
- BrewZilla at MoreBeer
- BrewZilla All Grain Brewing System | Gen 4 | Integrated Pump | Includes Wort Chiller | Wifi | Bluetooth| Rapt | 35L | 9.25G | 110V AG500
- Gen 4 BrewZilla | All Grain Brewing System | Integrated Pump | Includes Wort Chiller | Wifi | Bluetooth| Rapt | 65L | 17.1G | 220V AG502.US
- BrewZilla All Grain Brewing System With Pump | Gen 3.1.1 | 35L/9.25G (110V) AG475A3
- BrewZilla All Grain Brewing System | Gen 3.1.1 | 65L/17.1G | Built-in pump | Wort chiller included | 220V AG490A3
- Search Amazon for “BrewZilla” – offerings and availability vary
This article contains affiliate links. We may make a small percentage if you use our links to make a purchase. You won’t pay more and you’ll be supporting Homebrew Finds and more content like this. Thank you for your support!
Robobrew vs BrewZilla + Our BrewZilla Gen 4 Review
Since this review was released the Robobrew has been rebranded to the BrewZilla. This review is of of the original Robobrew (BrewZilla v1). Beyond the re-branding this system has had multiple version upgrades.
Check out our review of the much newer BrewZilla Gen 4!
Note that the Robobrew has been rebranded to the Brewzilla since this review was released. This review is of Robobrew (BrewZilla v1). Check out our review of the much newer Gen 4!
BrewZilla Step by Step Guide
MoreBeer has put together an in-depth User Guide including illustrations and how-to videos
More Photos
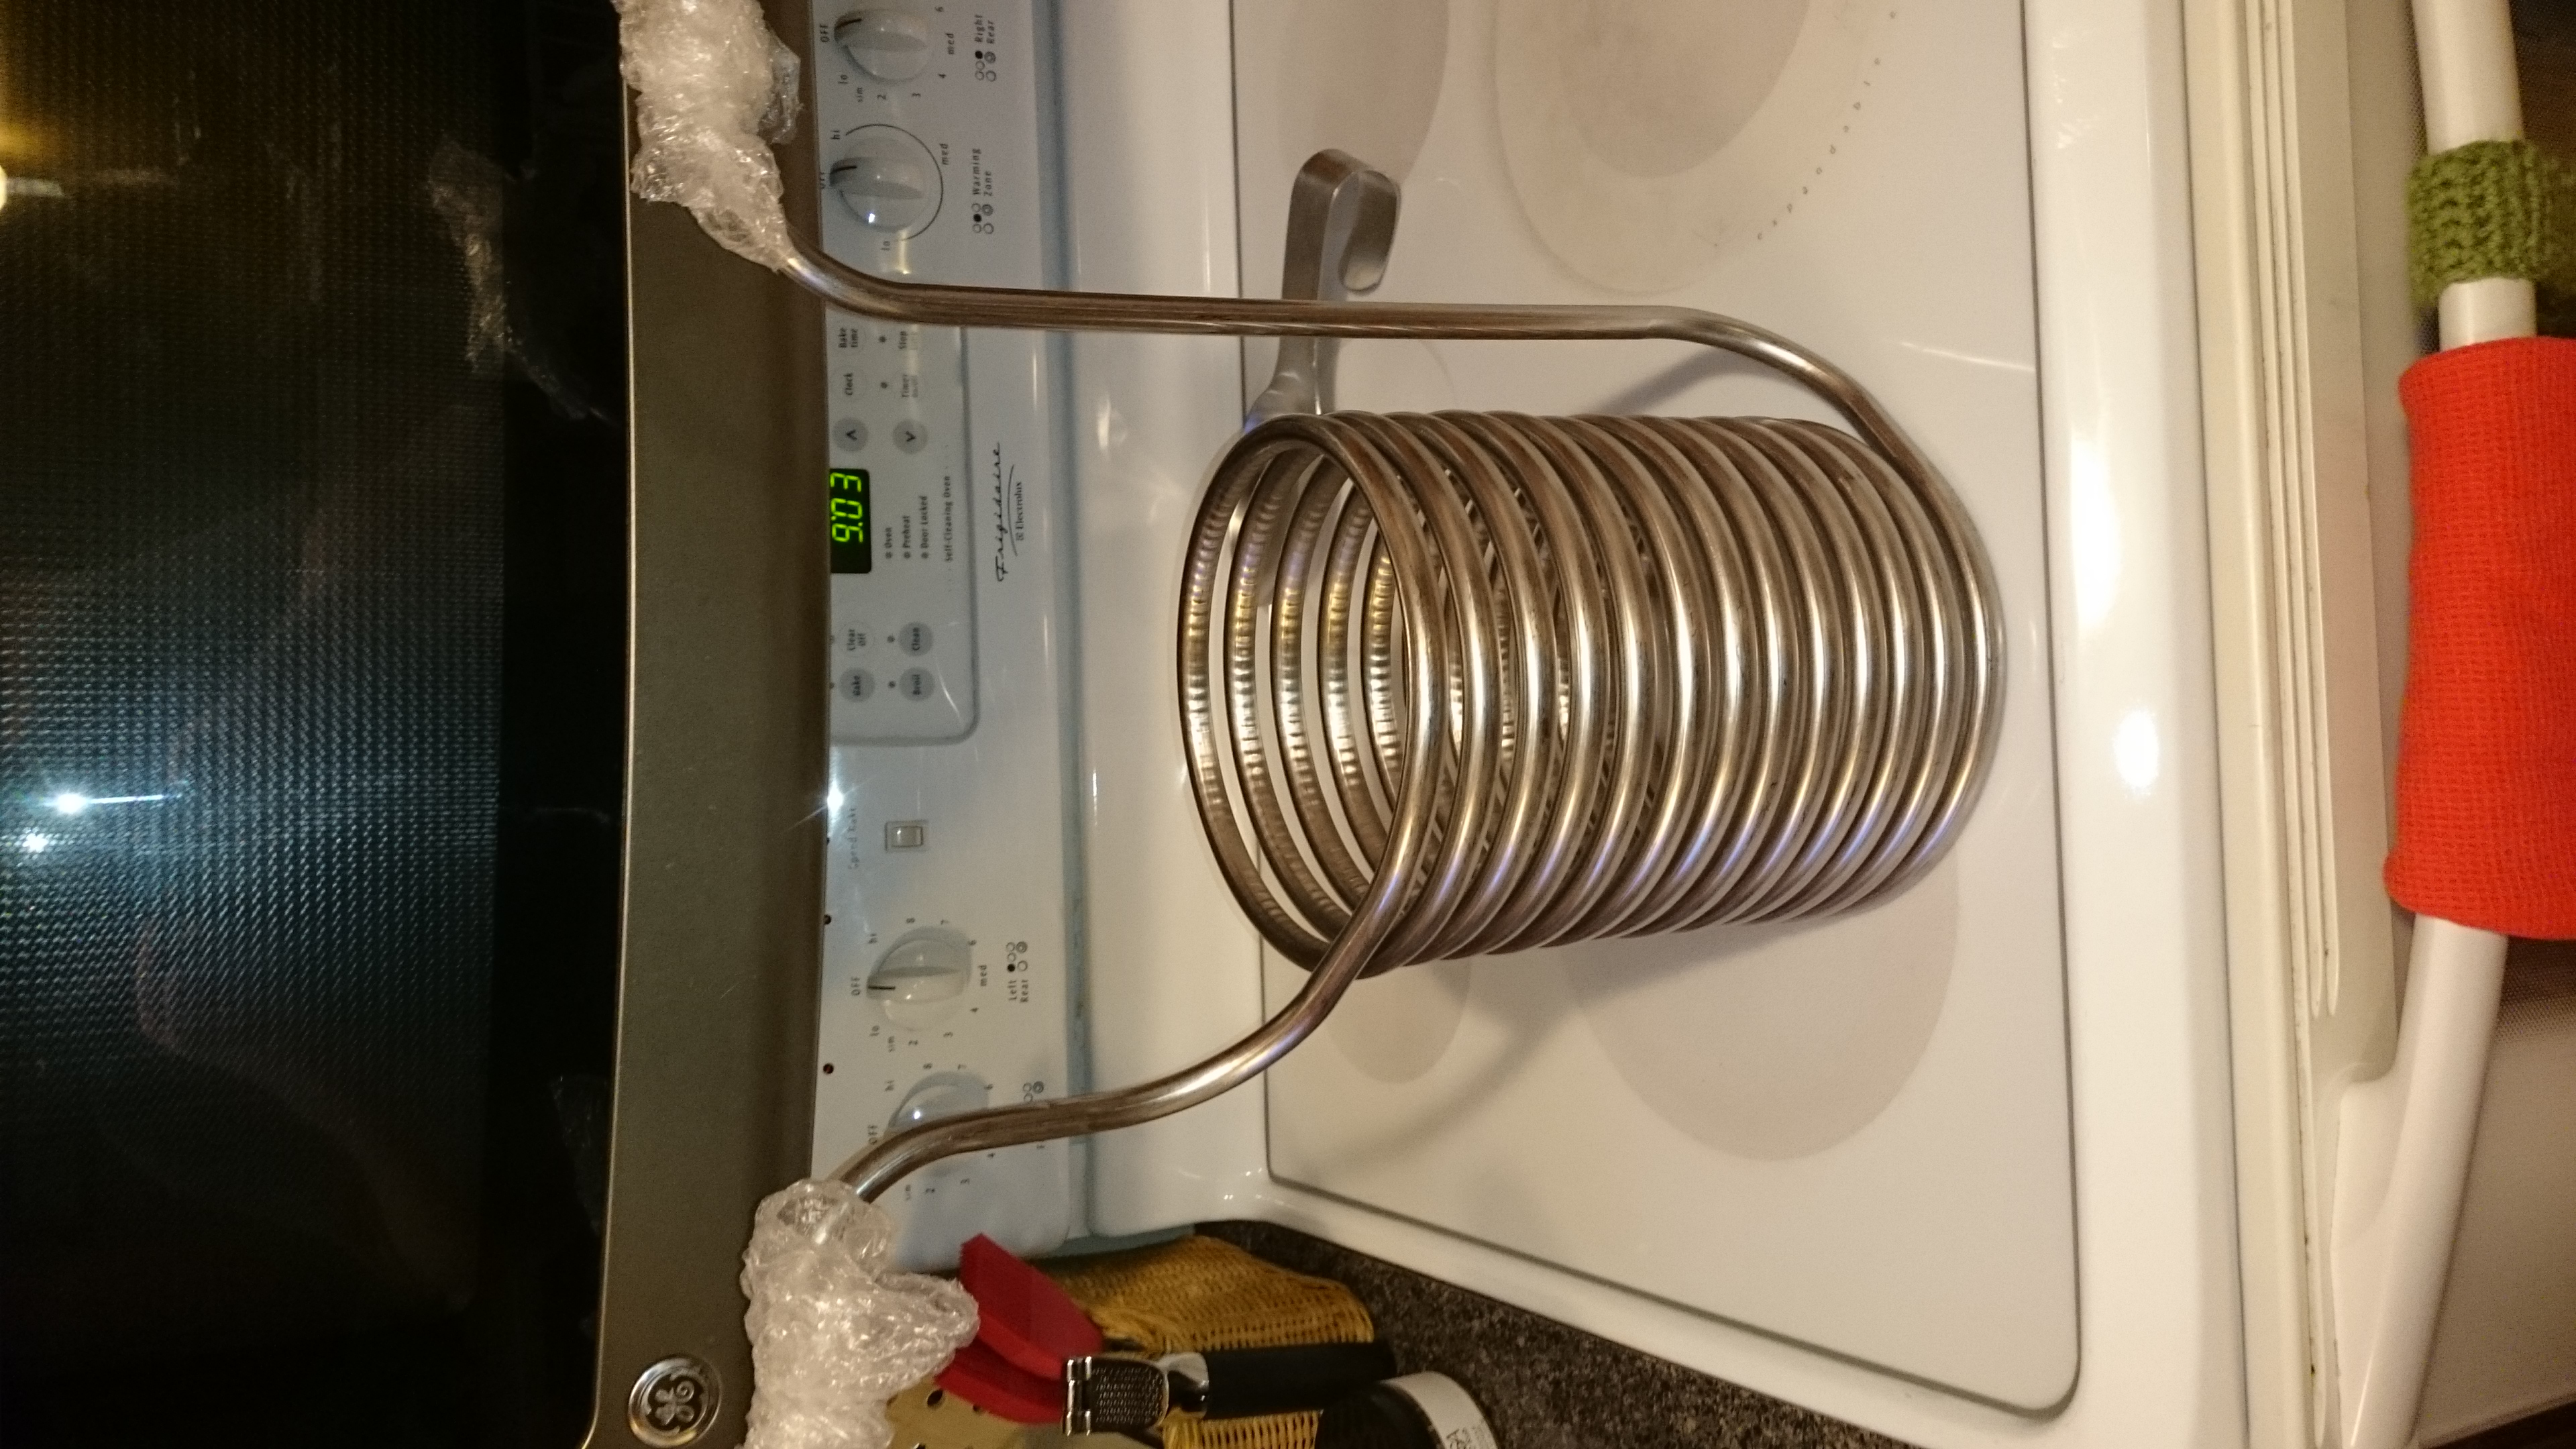 Robobrew Immersion Chiller Coi
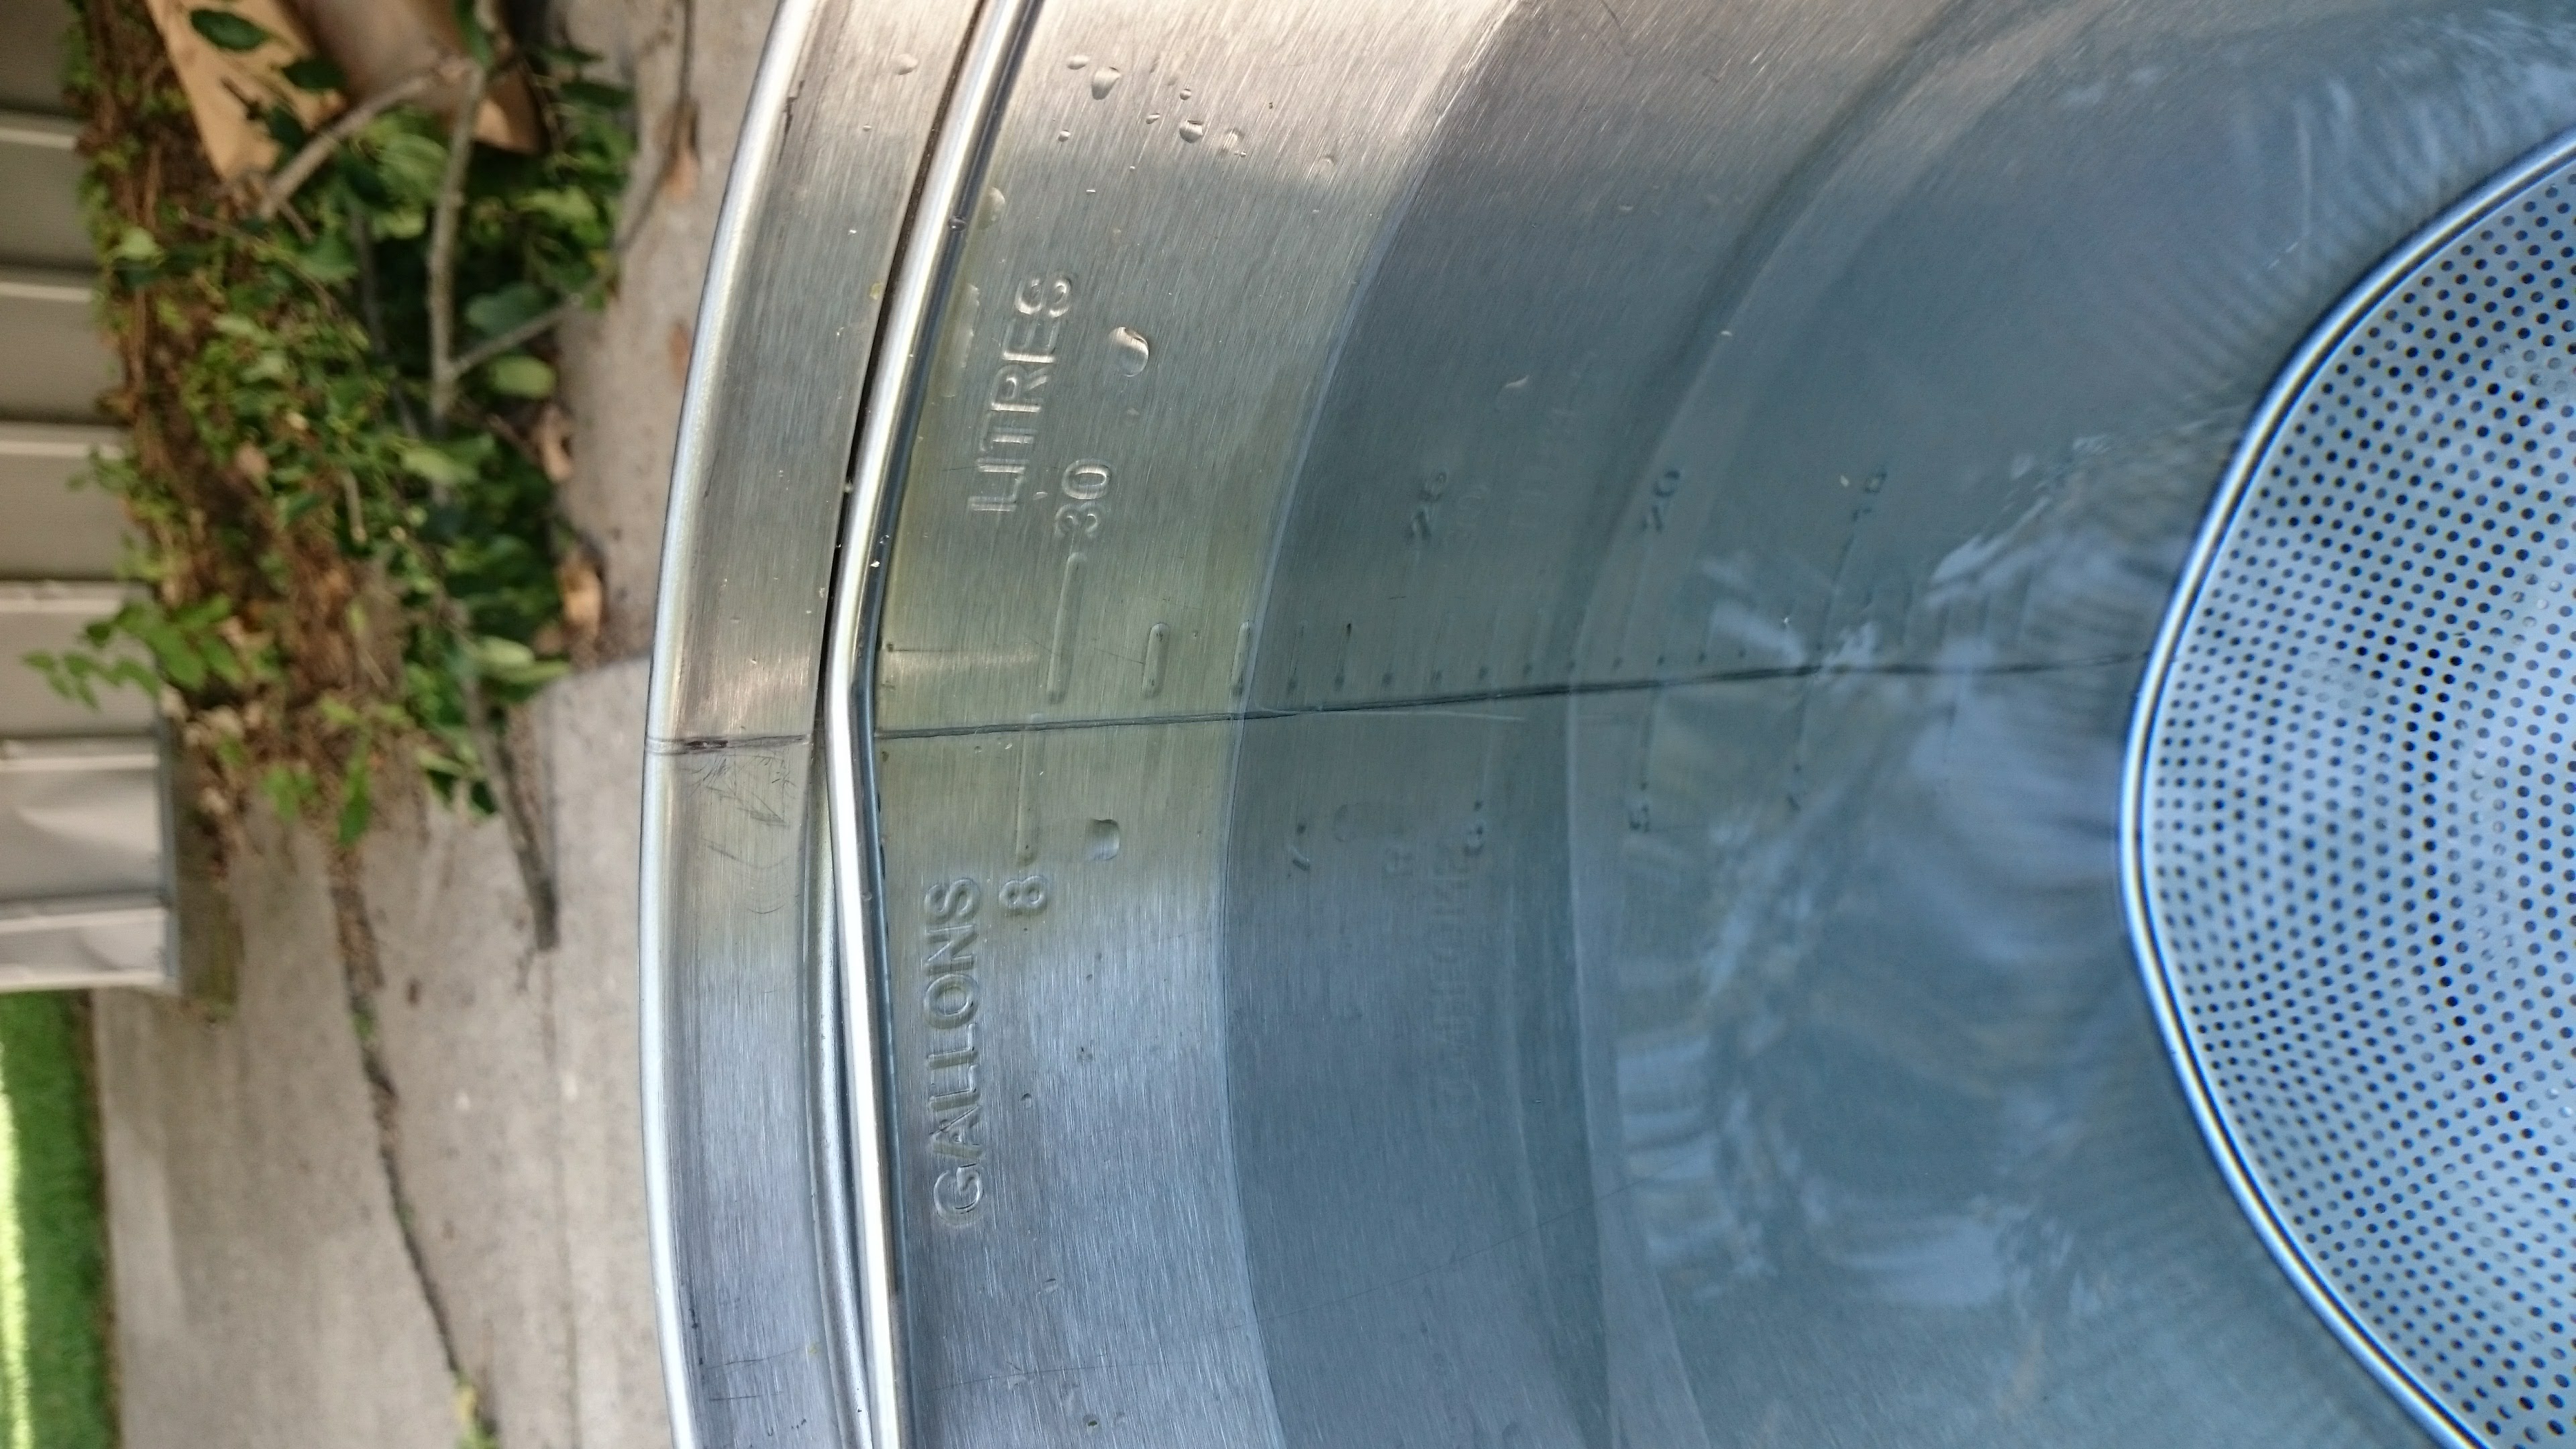 Robobrew filled with 7 gallons of water, but reading 7.3 gallons
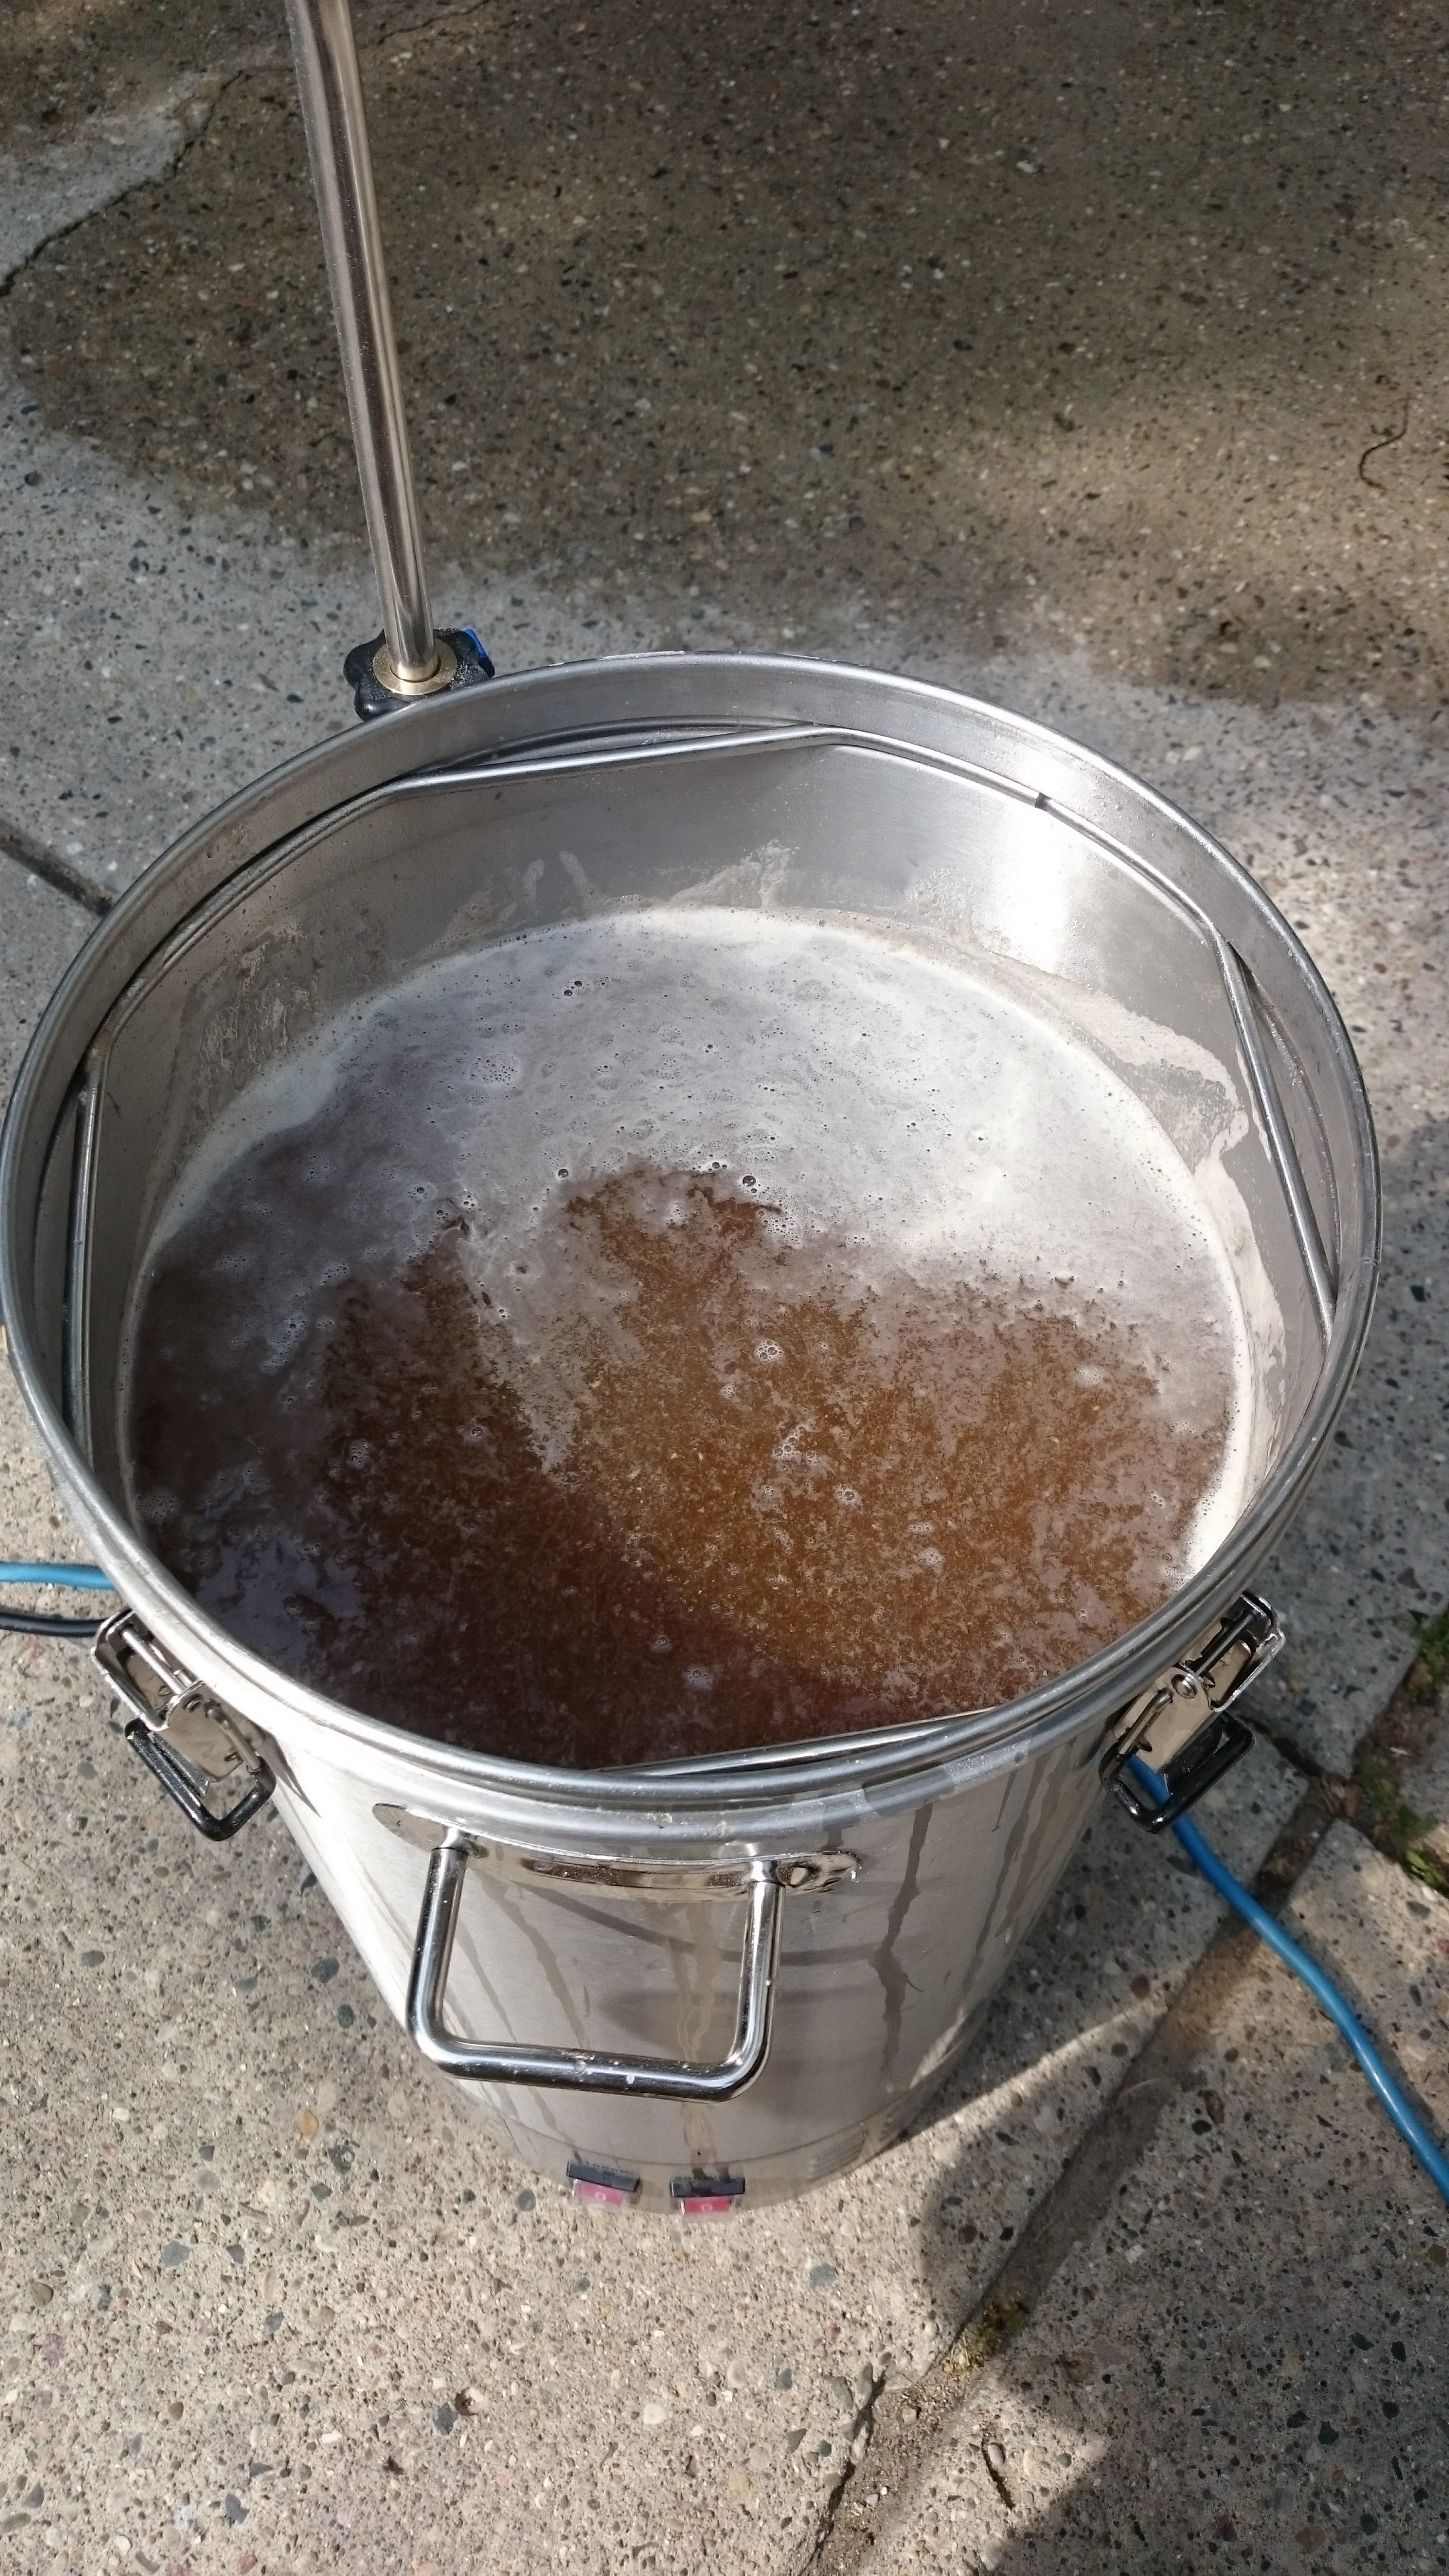 Boiling Wort in the Robobrew
More Kegland Gear Reviews!

More Homebrew Finds!
- Last 50 Finds!
- Top Deals – a curated list of the best deals
- Homebrew Reviews – one of the largest libraries of homebrew reviews in existence!
- Our Top Posts – tips, how-tos, resources posts and more
Recent Deals!

We are Homebrew Review HQ! See Our 10 Most Recent Reviews

This post may contain affiliate links. We may make a commission when you use our links. This will never cost you extra. Thank you for supporting Homebrew Finds!
By Brad Probert. Check out Brad’s website – beersnobby.com
Special Thanks to Keg King with the help of MoreBeer for providing the unit used for evaluation in this review
Price, promotions and availability can change quickly. Check the product page for current price, description and availability.
Make sure the components you use are compatible and rated for your intended application. Contact manufacturer with questions about suitability or a specific application. Always read and follow manufacturer directions. tag:lnksfxd review:v1robobrew tag:tpr