
Hands on Review: Inkbird Wireless Temperature Sensor IBS-TH1 and WiFi Gateway IBS-M1 + Keezer Reconfiguration and Temperature Analysis
This review is by Homebrew Finds Contributor Brad Probert. Brad is an engineer, expert homebrewer and experienced reviewer. Grab a link to Brad’s website at the end of this review.
Inkbird Wireless Temperature Sensor and WiFi Hub
Temperature is important to have control of at all stages of the brewing process. While the biggest area of focus on temperature is the mash or fermentation, there are other areas of the process where temperature is important to understand. And if there’s something you need to monitor or control, you better believe the homebrew hobby delivers with the gear. This review focuses on a wireless temperature sensor and a communications hub that helps make the data readily available remotely.
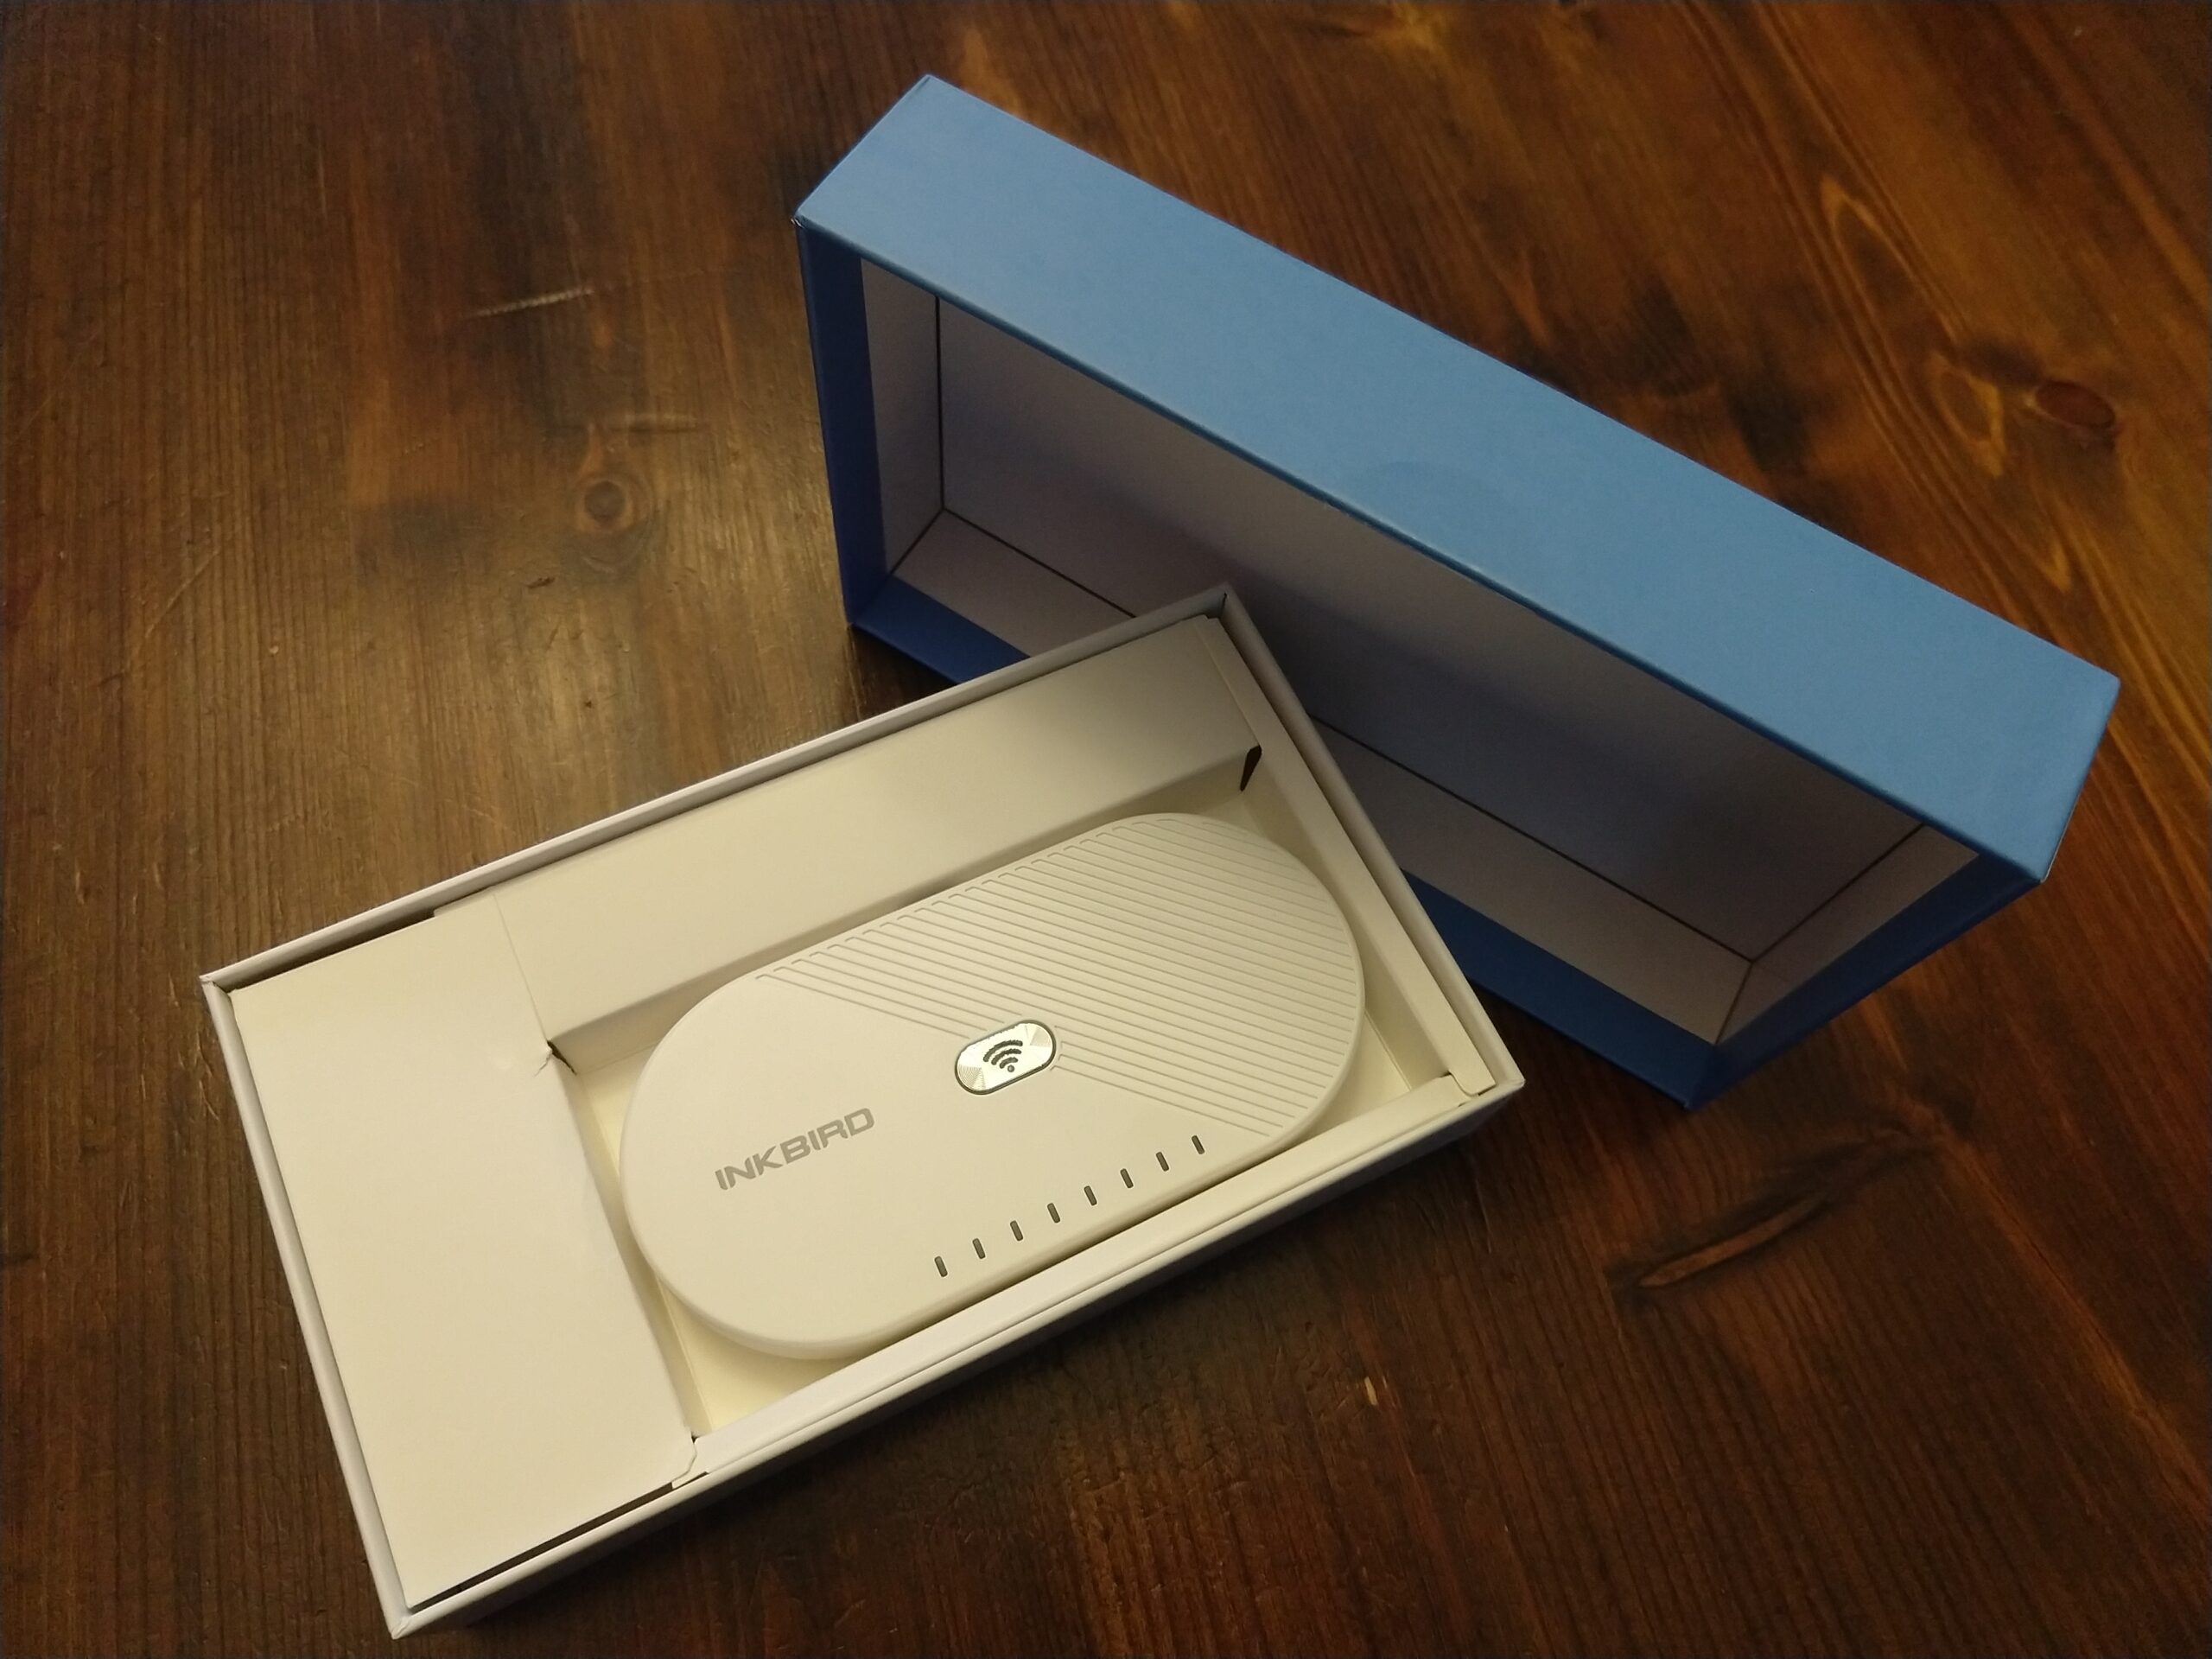 IBS-M1 in Box
Check Current Price, Specs & Availability, Review Continues Below
- Inkbird Thermometer and Hygrometer Smart Sensor Data Logger with Waterproof External Probe Magnet Alert for Android and iOS Used for Food Storage Brewing Reptiles Instrument IBS-TH1 – affiliate link, note that multiple variations of this product may be available, as such a different version may appear at this link
- Inkbird IBS-M1 WiFi Gateway Temperature Humidity Sensor,Supports Bluetooth and Wireless Thermometer Hygrometer Connection with Save and Export Data,Real Time and Remote Monitoring and Alert – affiliate link, note that multiple variations of this product may be available, as such a different version may appear at this link
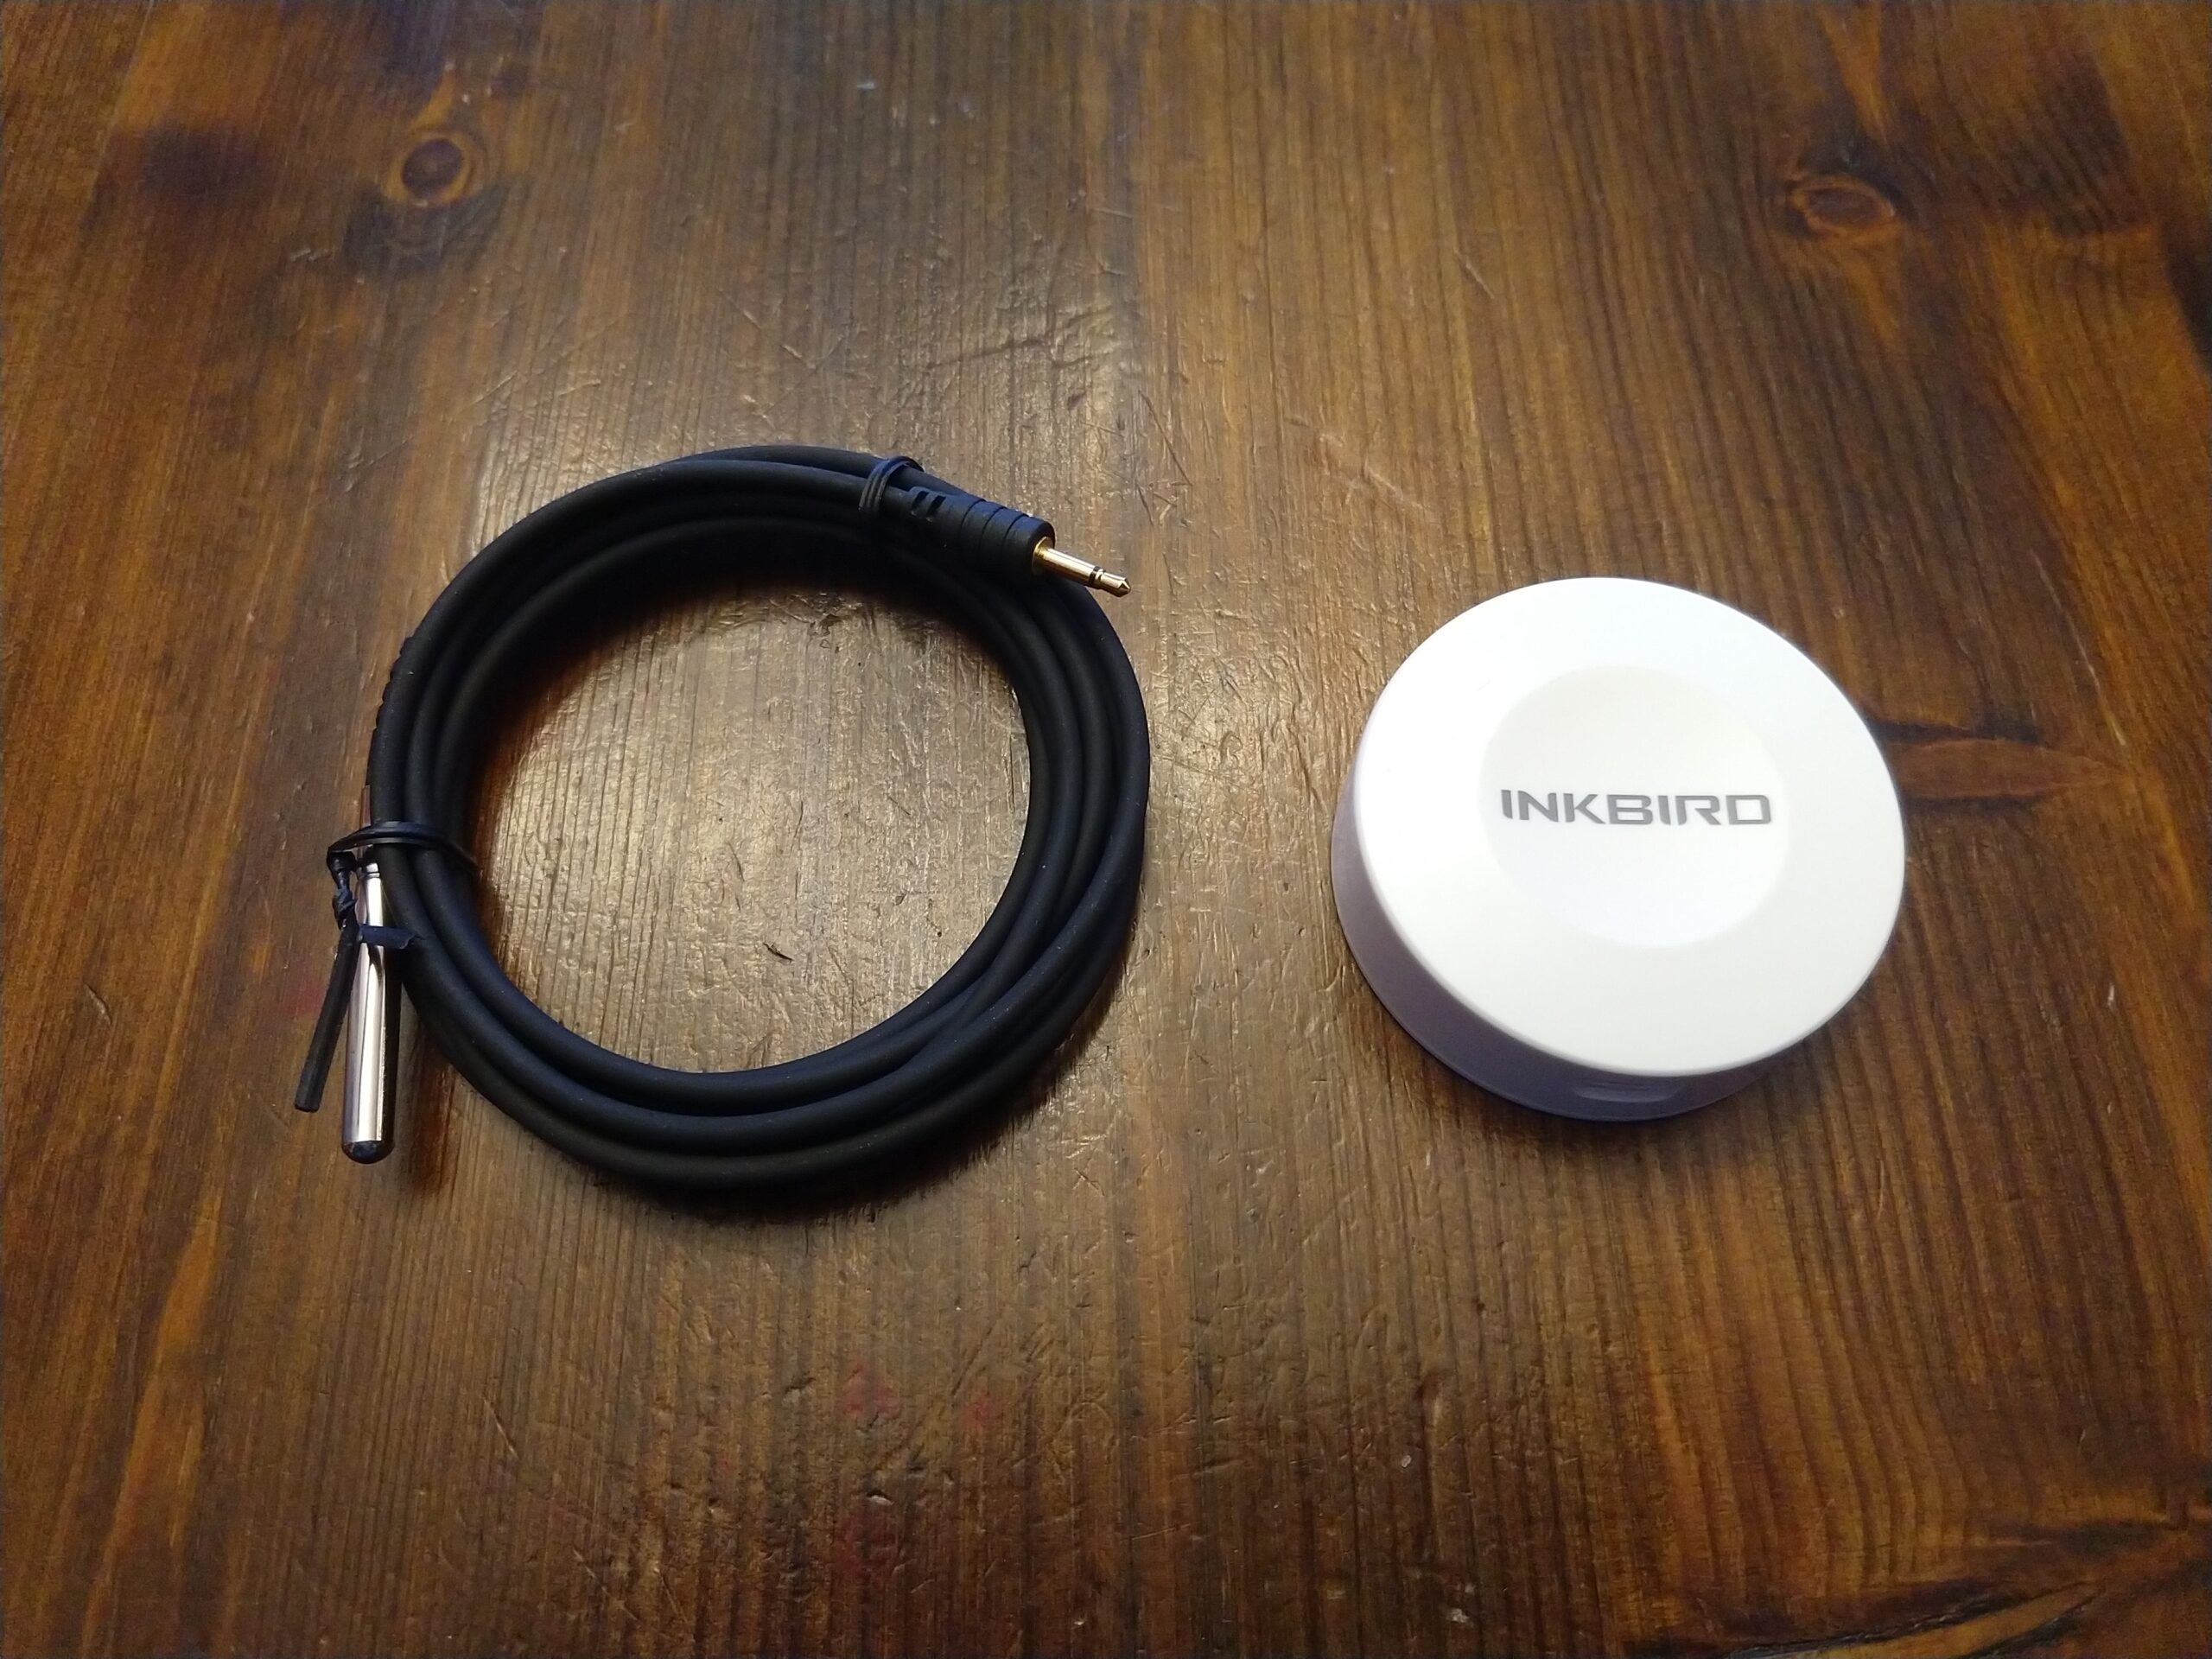
Inkbird makes temperature sensors and temperature controllers for all kinds of home uses, which can easily find their way into homebrewers’ toolboxes. The Inkbird IBS-TH1 is a wireless temperature and humidity sensor. It’s powered by an AAA battery and connects via Bluetooth to an Inkbird app on your phone. The unit is about the size of a hockey puck (2.2” diameter), and contains the humidity sensor and an onboard temperature sensor. There is also a jack for the provided external temperature probe. The probe has a 6.5 ft long lead that connects to a waterproof temperature-sensing tip.
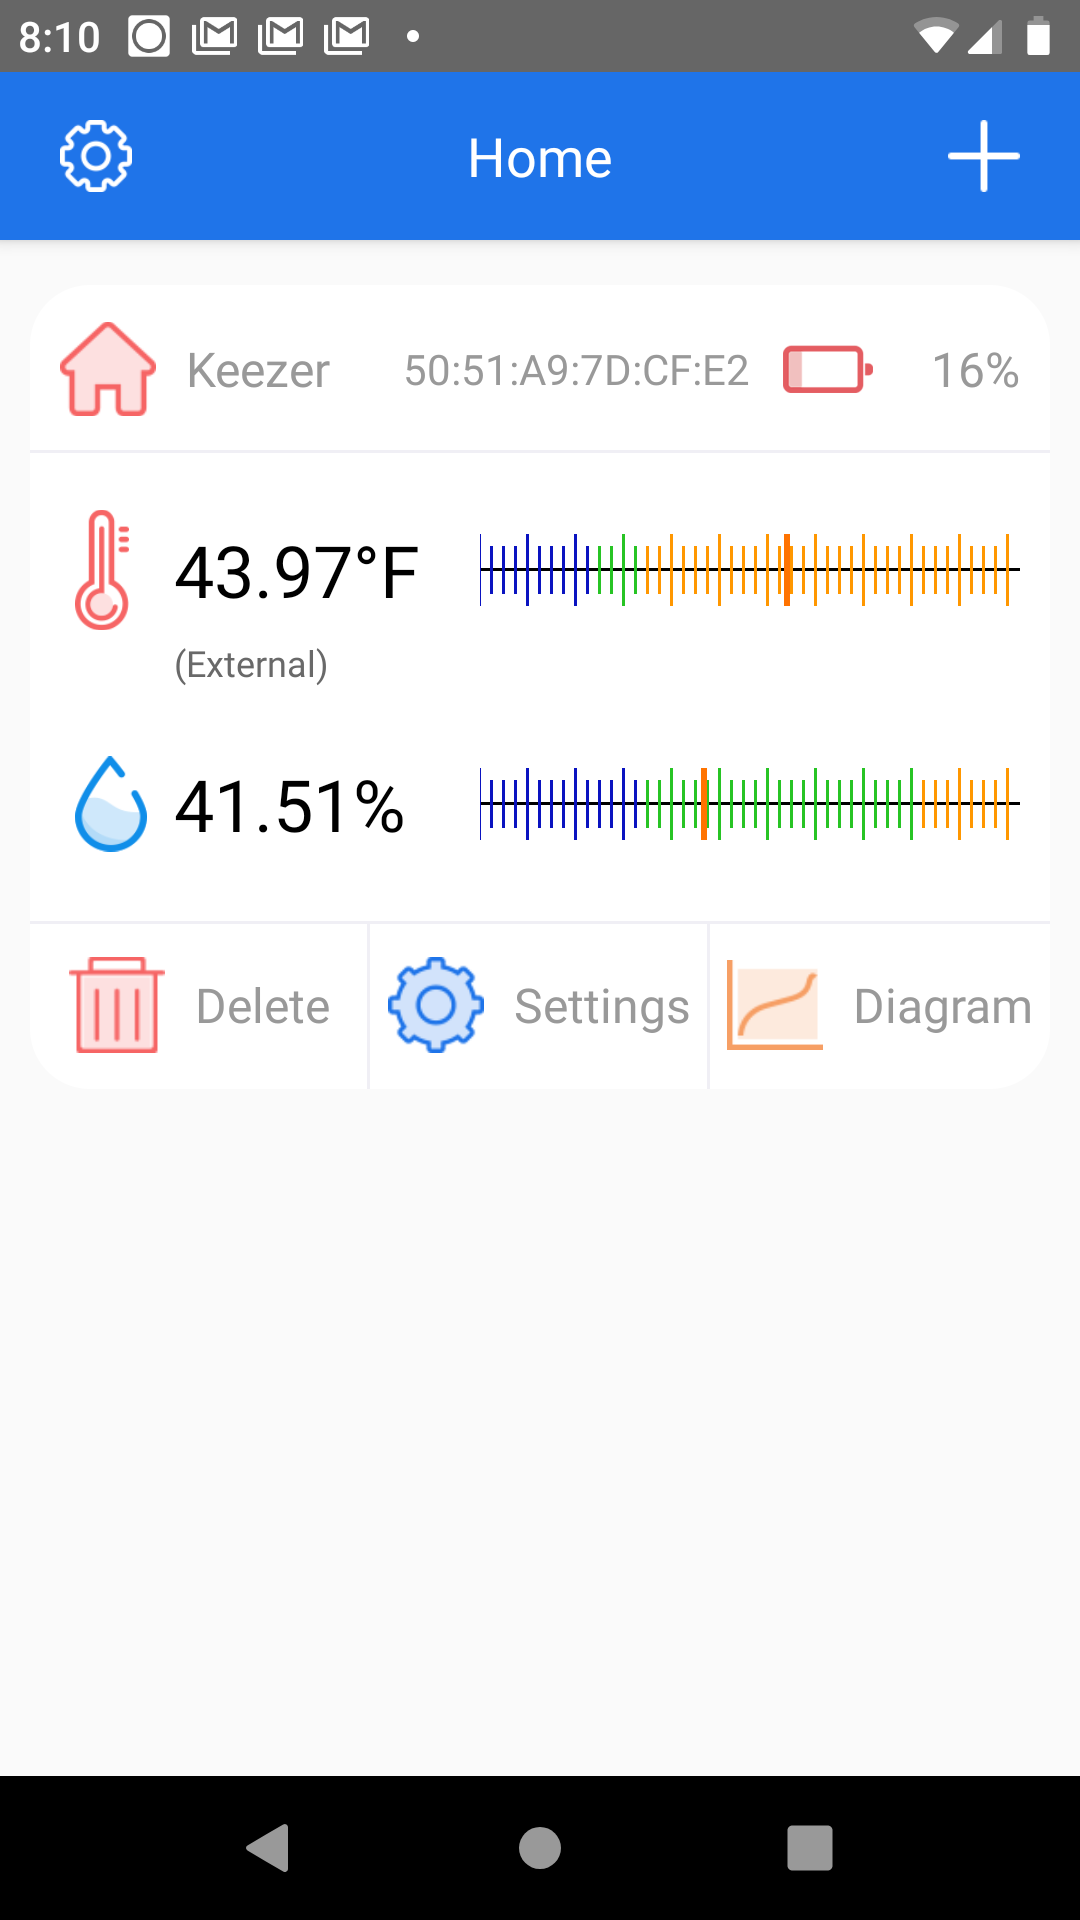 App Home Screen
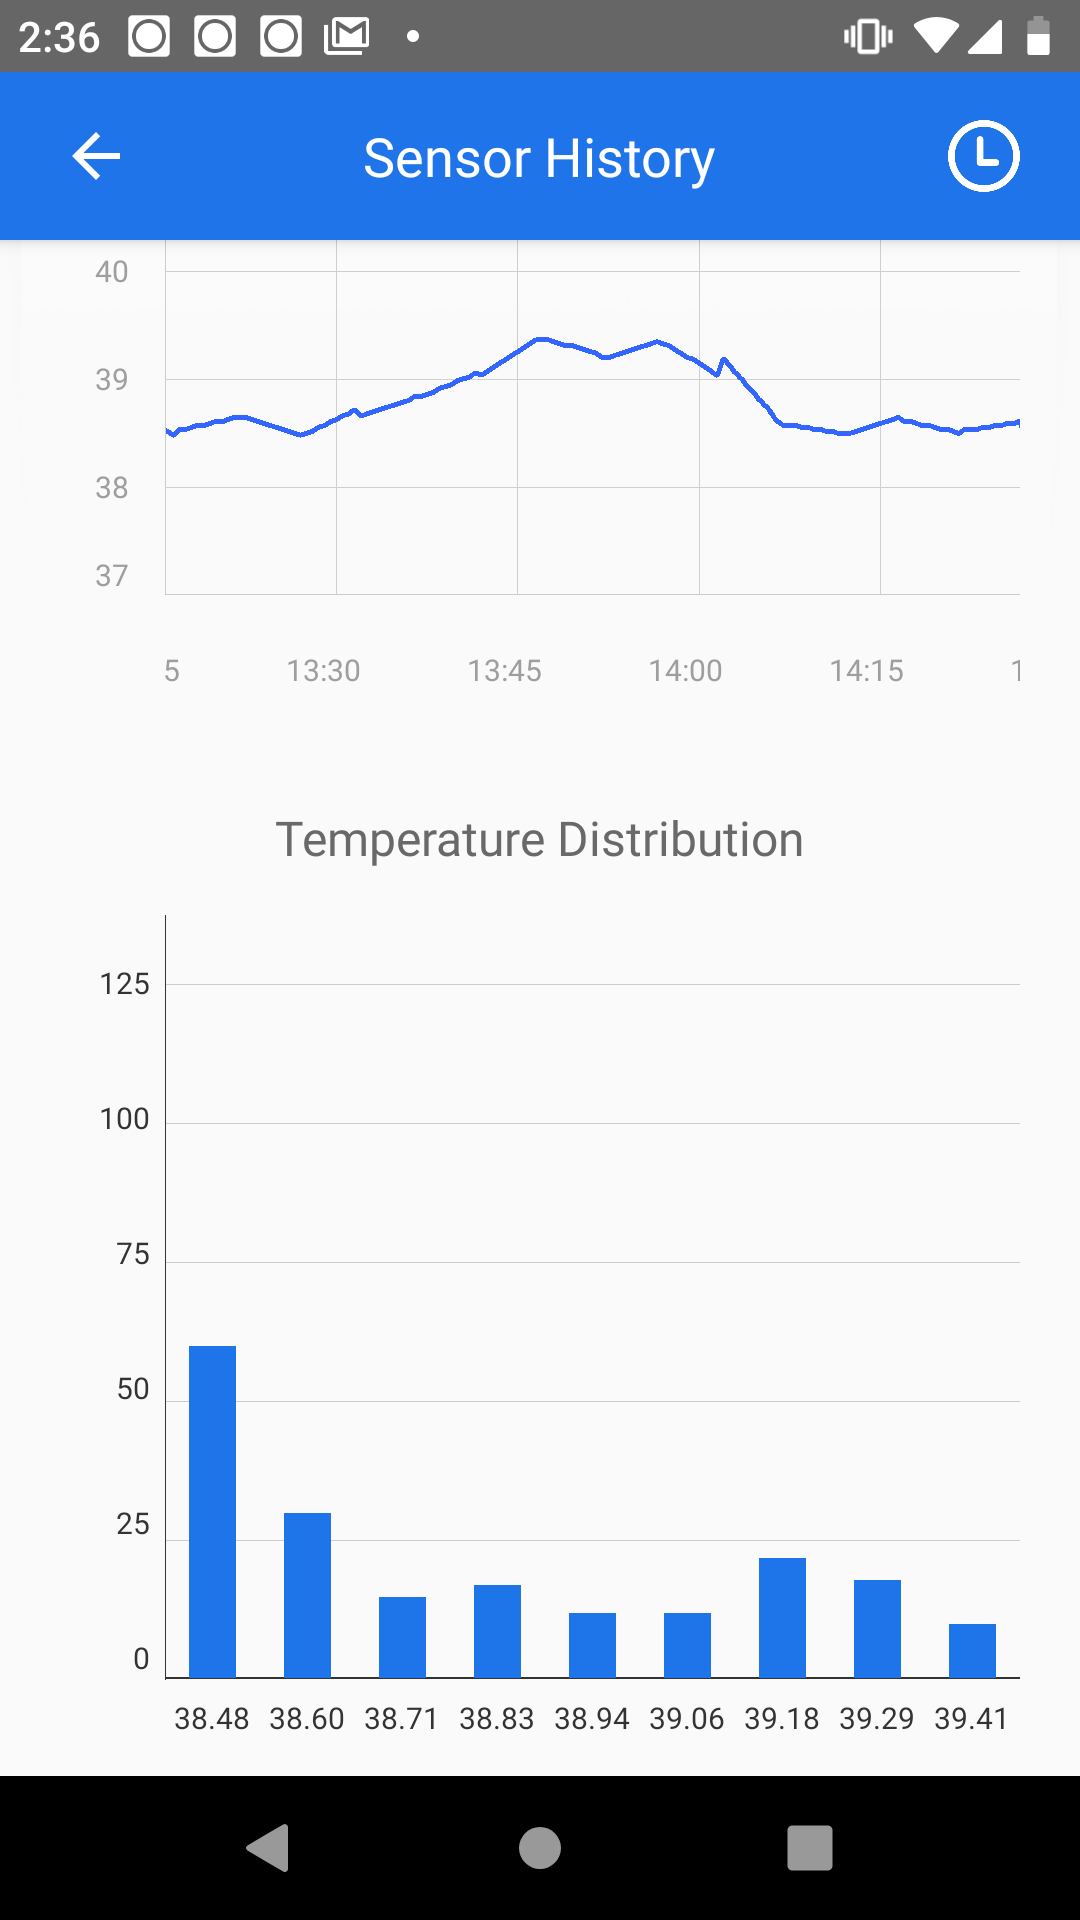 Temperature HIstorgram
The IBS-TH1 is unique for thermometers in that it logs data onboard the unit. Through the Inkbird app you set the time interval of data collection, from as frequently as 10 seconds, or as infrequently as 30 minutes. The onboard storage of the unit can hold up to 30,000 data points. Whenever you are within its 150 ft. Bluetooth range, you can review the current temperature/humidity, as well as pull up all of the historical data stored on it. Within the app you can also set min & max limits for the temperature and humidity, and if you’re within Bluetooth range, it will set an alarm off on your phone. It will only monitor one temperature at a time, so if you have the cable plugged in for the remote sensor, it will read/record that, and not the onboard sensor.
Related Review:

The temperature sensor in the body of the unit is able to read temperatures from -40F up to 140F, and the external temperature probe works from -40F up to 212F. Accuracy is about +/- 1 degree F for the temperature sensor in the unit, and +/-2 degrees F for the remote probe. The humidity sensor in the main body has an accuracy of about +/-4% Relative Humidity.
IBS-TH1 + IBS-M1
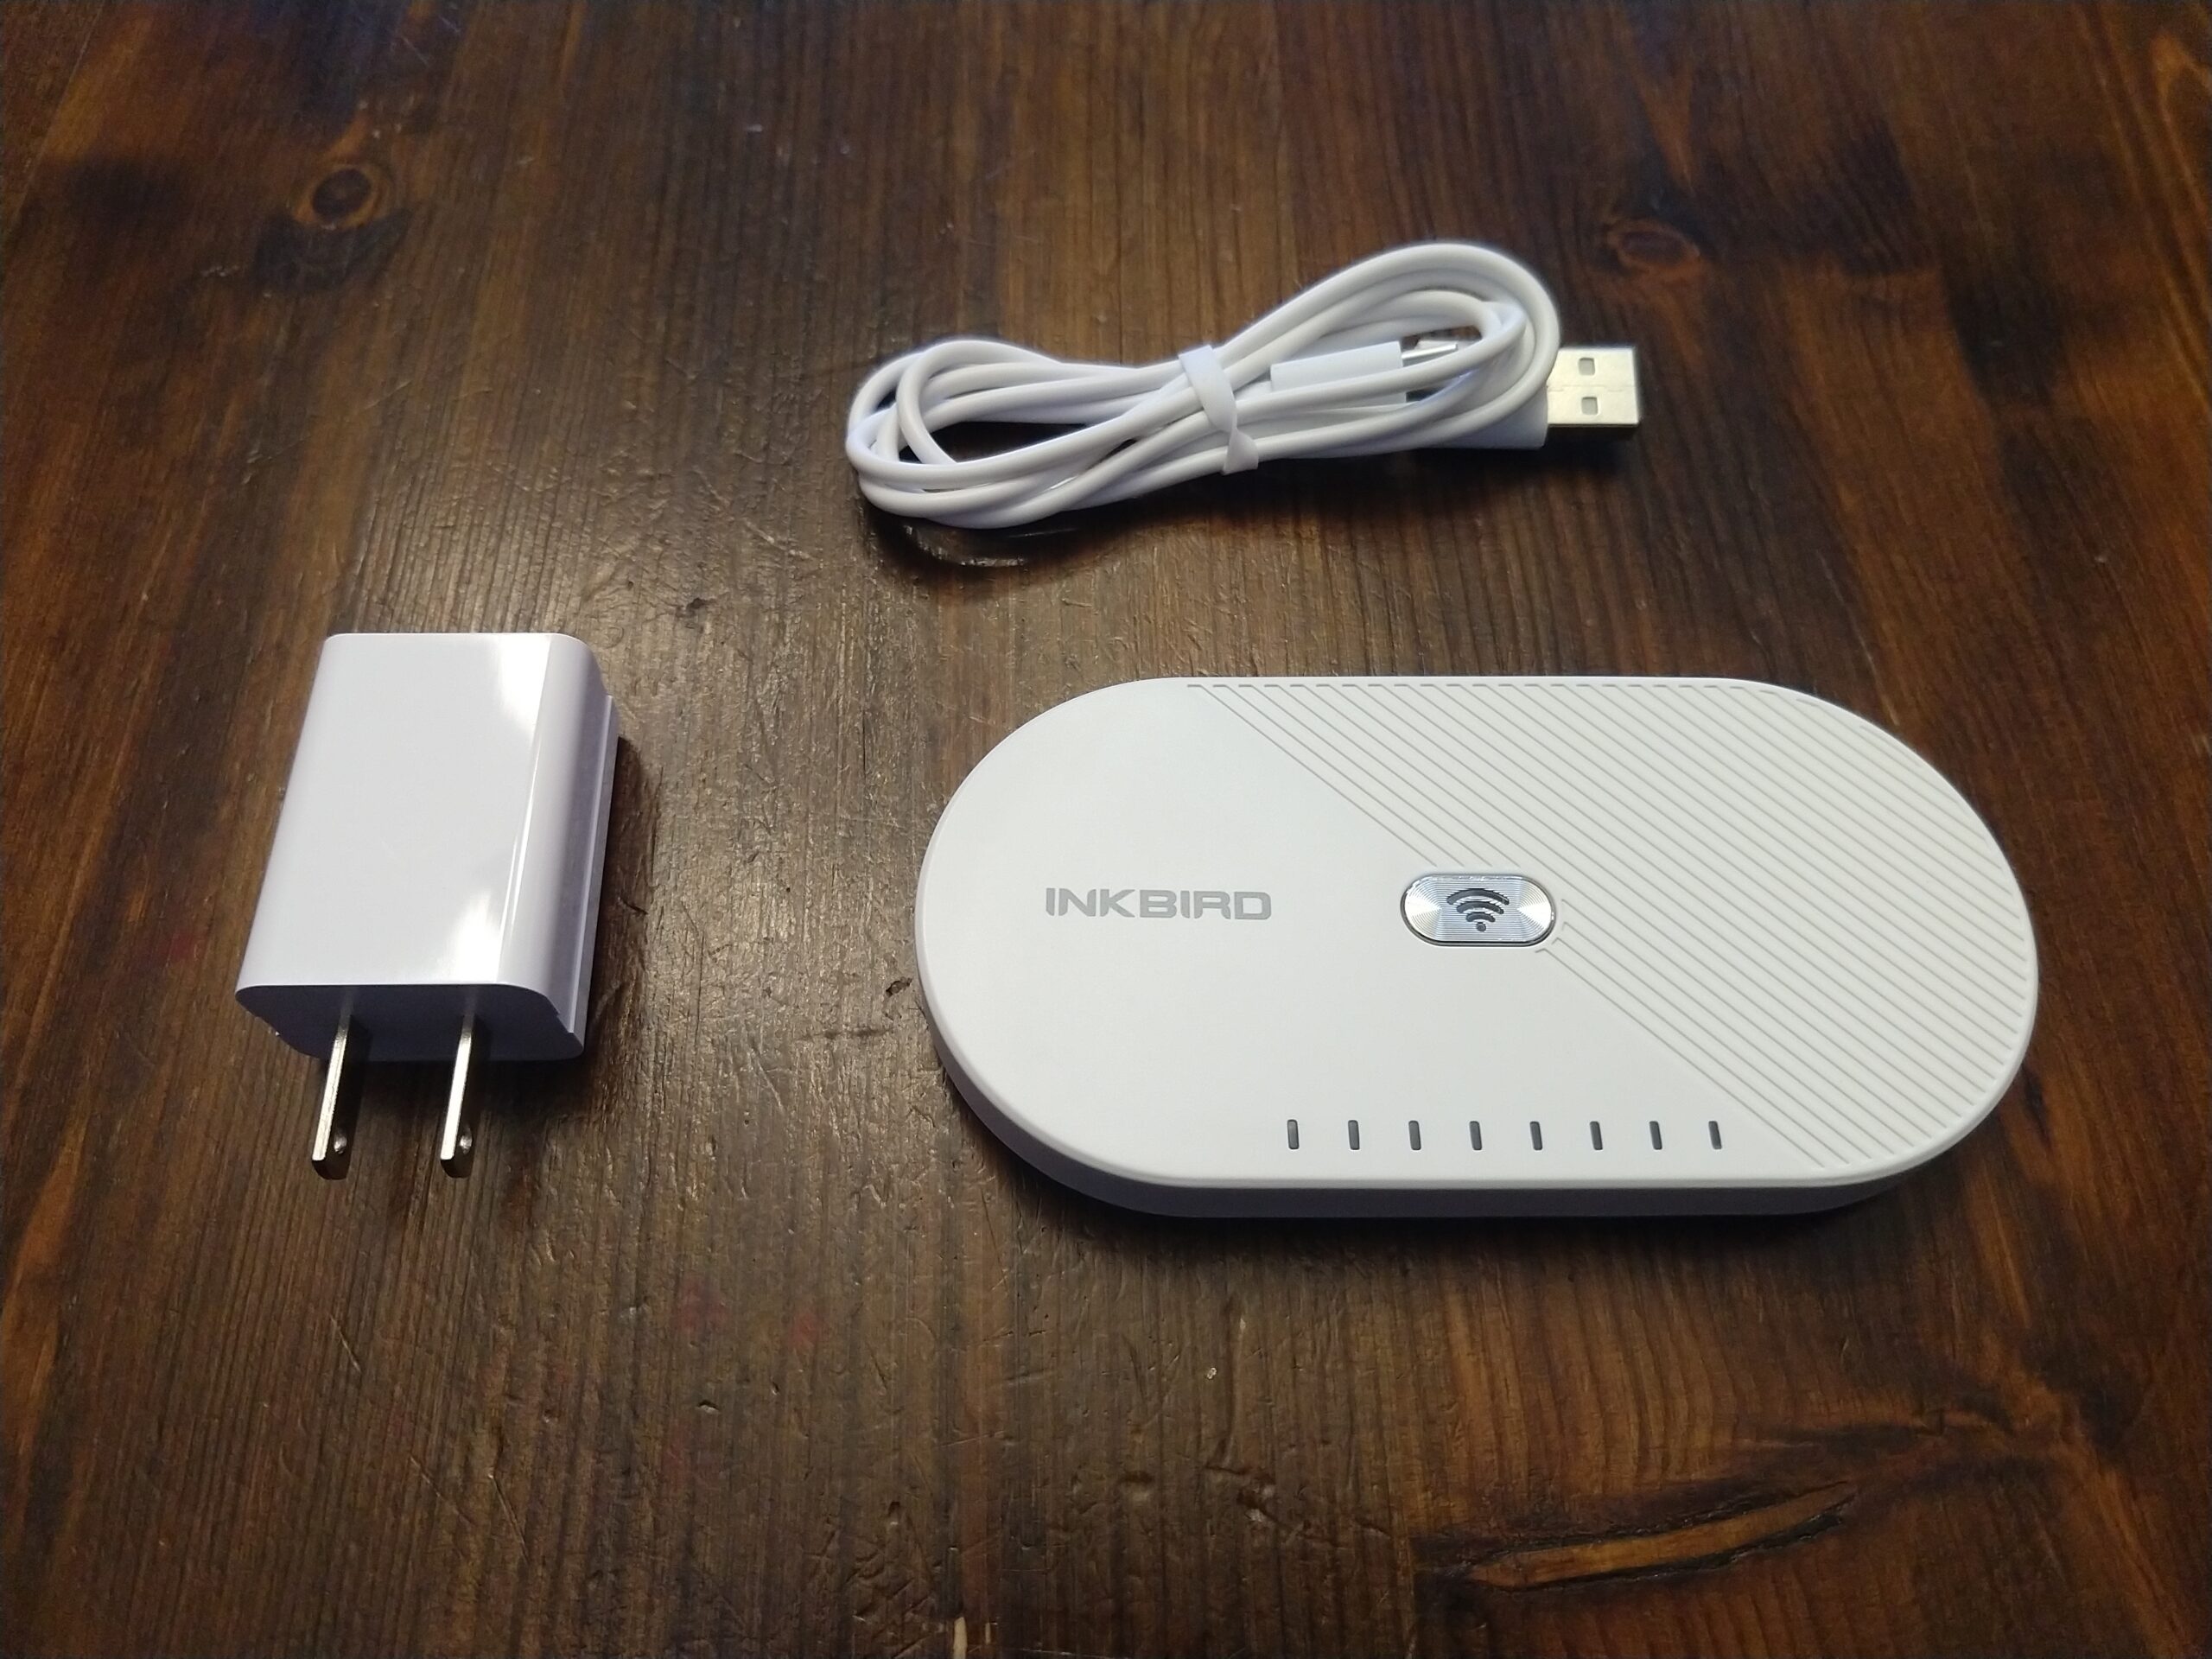
Although the Bluetooth is pretty powerful, a good compliment is the IBS-M1 WiFi Gateway module. It’s about the size of a cell phone, at ½” thick, and 5” long x 2” wide. It’s powered via USB cable and a provided power adapter. The Gateway can communicate with a Bluetooth device like the IBS-TH1 from up to 164 ft away (with no obstructions), and can connect with your home WiFi router up to 300 ft away to broadcast that signal. Then with the app on your phone, you can monitor your temperature sensor from anywhere. However, to download the data history, you still need to be within Bluetooth range.
Hands on Review
There’s a lot to be said about the right tool for the job making things easier. I am on a seemingly eternal quest to try and perfect my keezer. Part of that eternal quest is the perfect pour and trying to get rid of my first foamy pint. I had a few different layout ideas to try and improve this. But to tune it, and see the effect of my different improvements, I wanted data. The IBS-TH1 was perfect for this as it was cordless (so I could close it inside the keezer and not let warm air in to spoil the data), and it had the ability to log data over a long time (so I could monitor temperature cycles as the keezer kicked on and off).
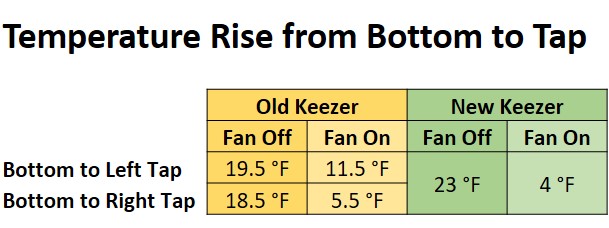
All the data described below is with my keezer controller set to 35F and the controlling probe hanging in the air near the back wall, about halfway down.
Keezer Reconfiguration and Temperature Analysis
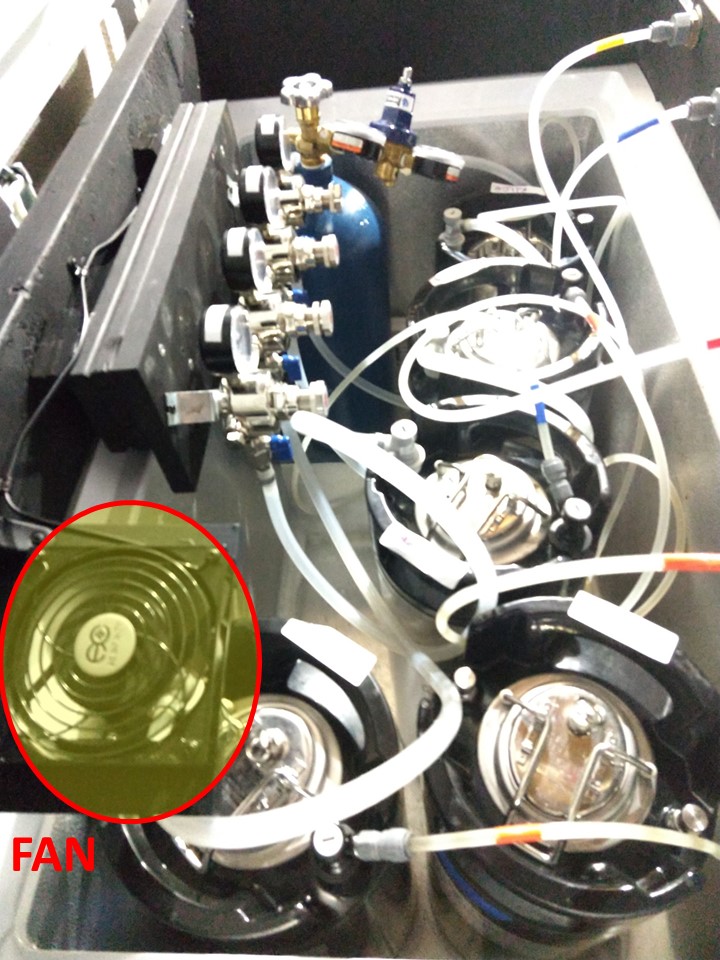 Old Keezer- Side View
 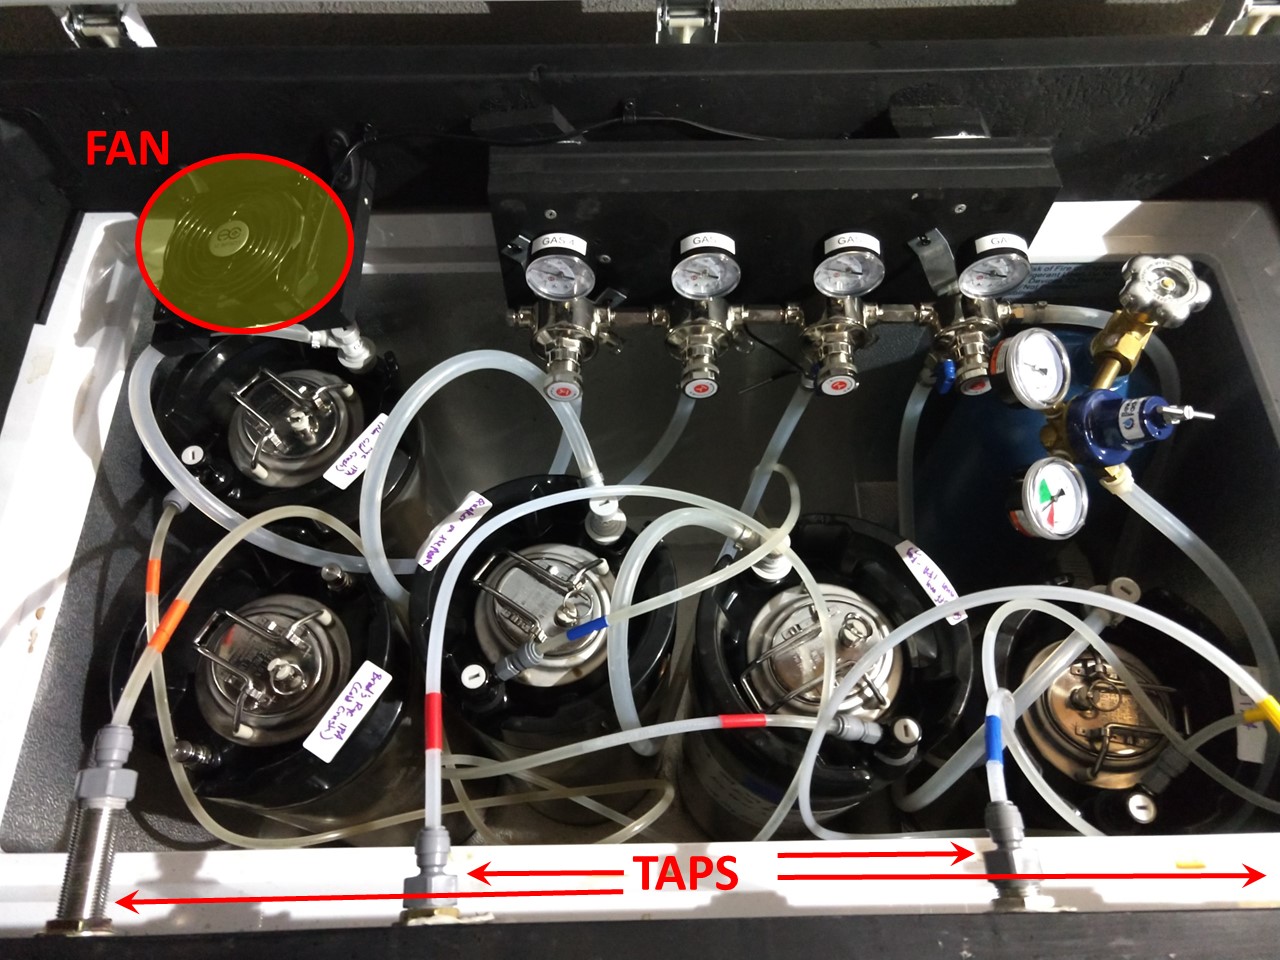 Old Keezer- Front View
In my old keezer design, the air circulation fan I had inside wasn’t strategically placed for airflow. It was mounted high on the collar, up near the lid. It was at a slight angle, and pointed downwards blowing air toward the kegs. It was essentially just wedged into a spot I could best fit. My 4 taps were evenly distributed from left to right in the keezer collar, spanning a distance of roughly 3 feet.
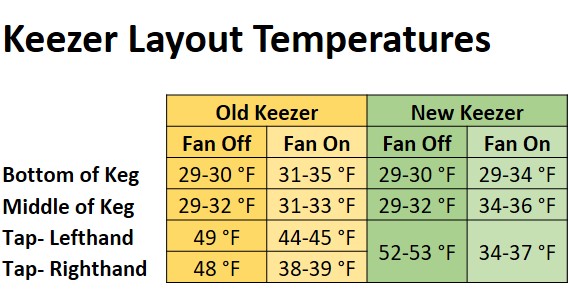
Without the fan, the bottom was too cold, below freezing, and the taps were about 20-degrees warmer. With the fan on, even in its non-ideal position, it evened out the temperatures throughout the keezer substantially. The bottom of the keezer wasn’t quite as cold as without a fan, and the taps were cooler. But not as cold as I wanted, so I decided to change things.
In my revised keezer layout, I focused specifically on getting the taps colder, to fight the first foamy pint. I gathered all of the taps at one end, spanning about 10” of width along the keezer collar. I then switched the taps over to 6”-long shanks, so they protruded further into the keezer. Lastly, I built a simple stand for my cooling fan and positioned the fan to sit on the compressor hump. The idea was to pull cold air up from the bottom and blow it directly onto the 4 tap shanks above.
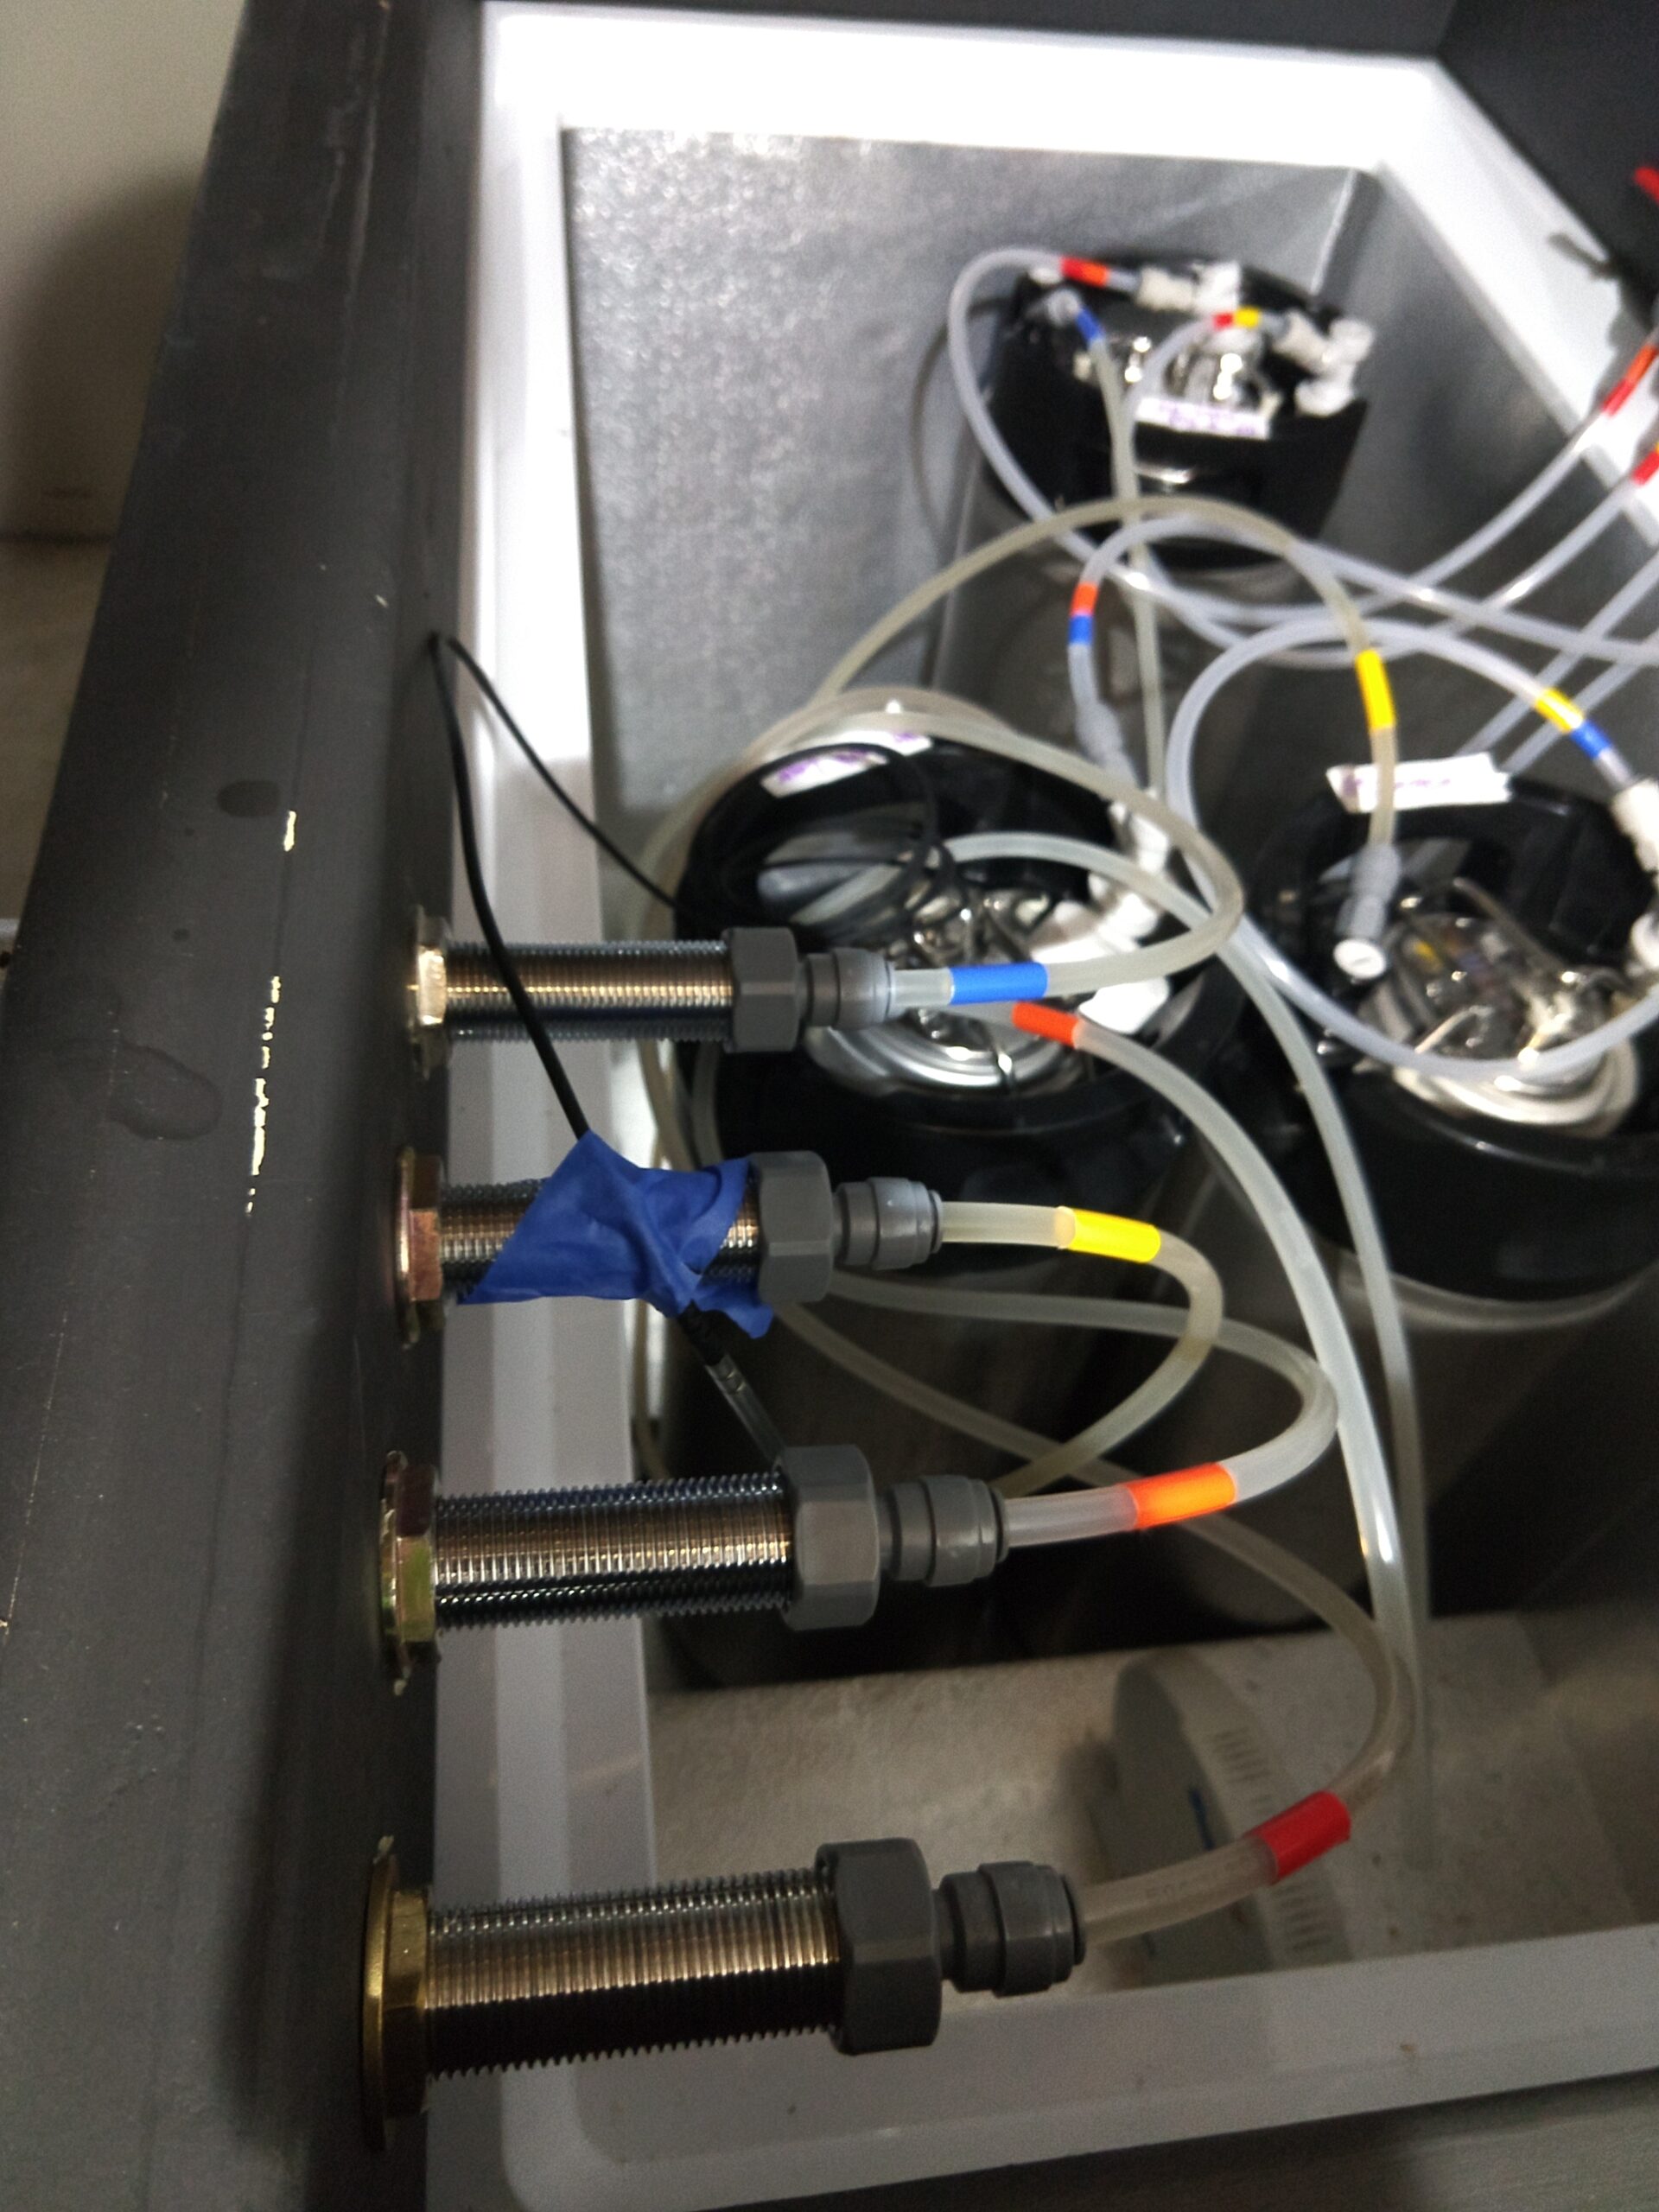 New Keezer- Taps Set up with Remote Probe to Monitor
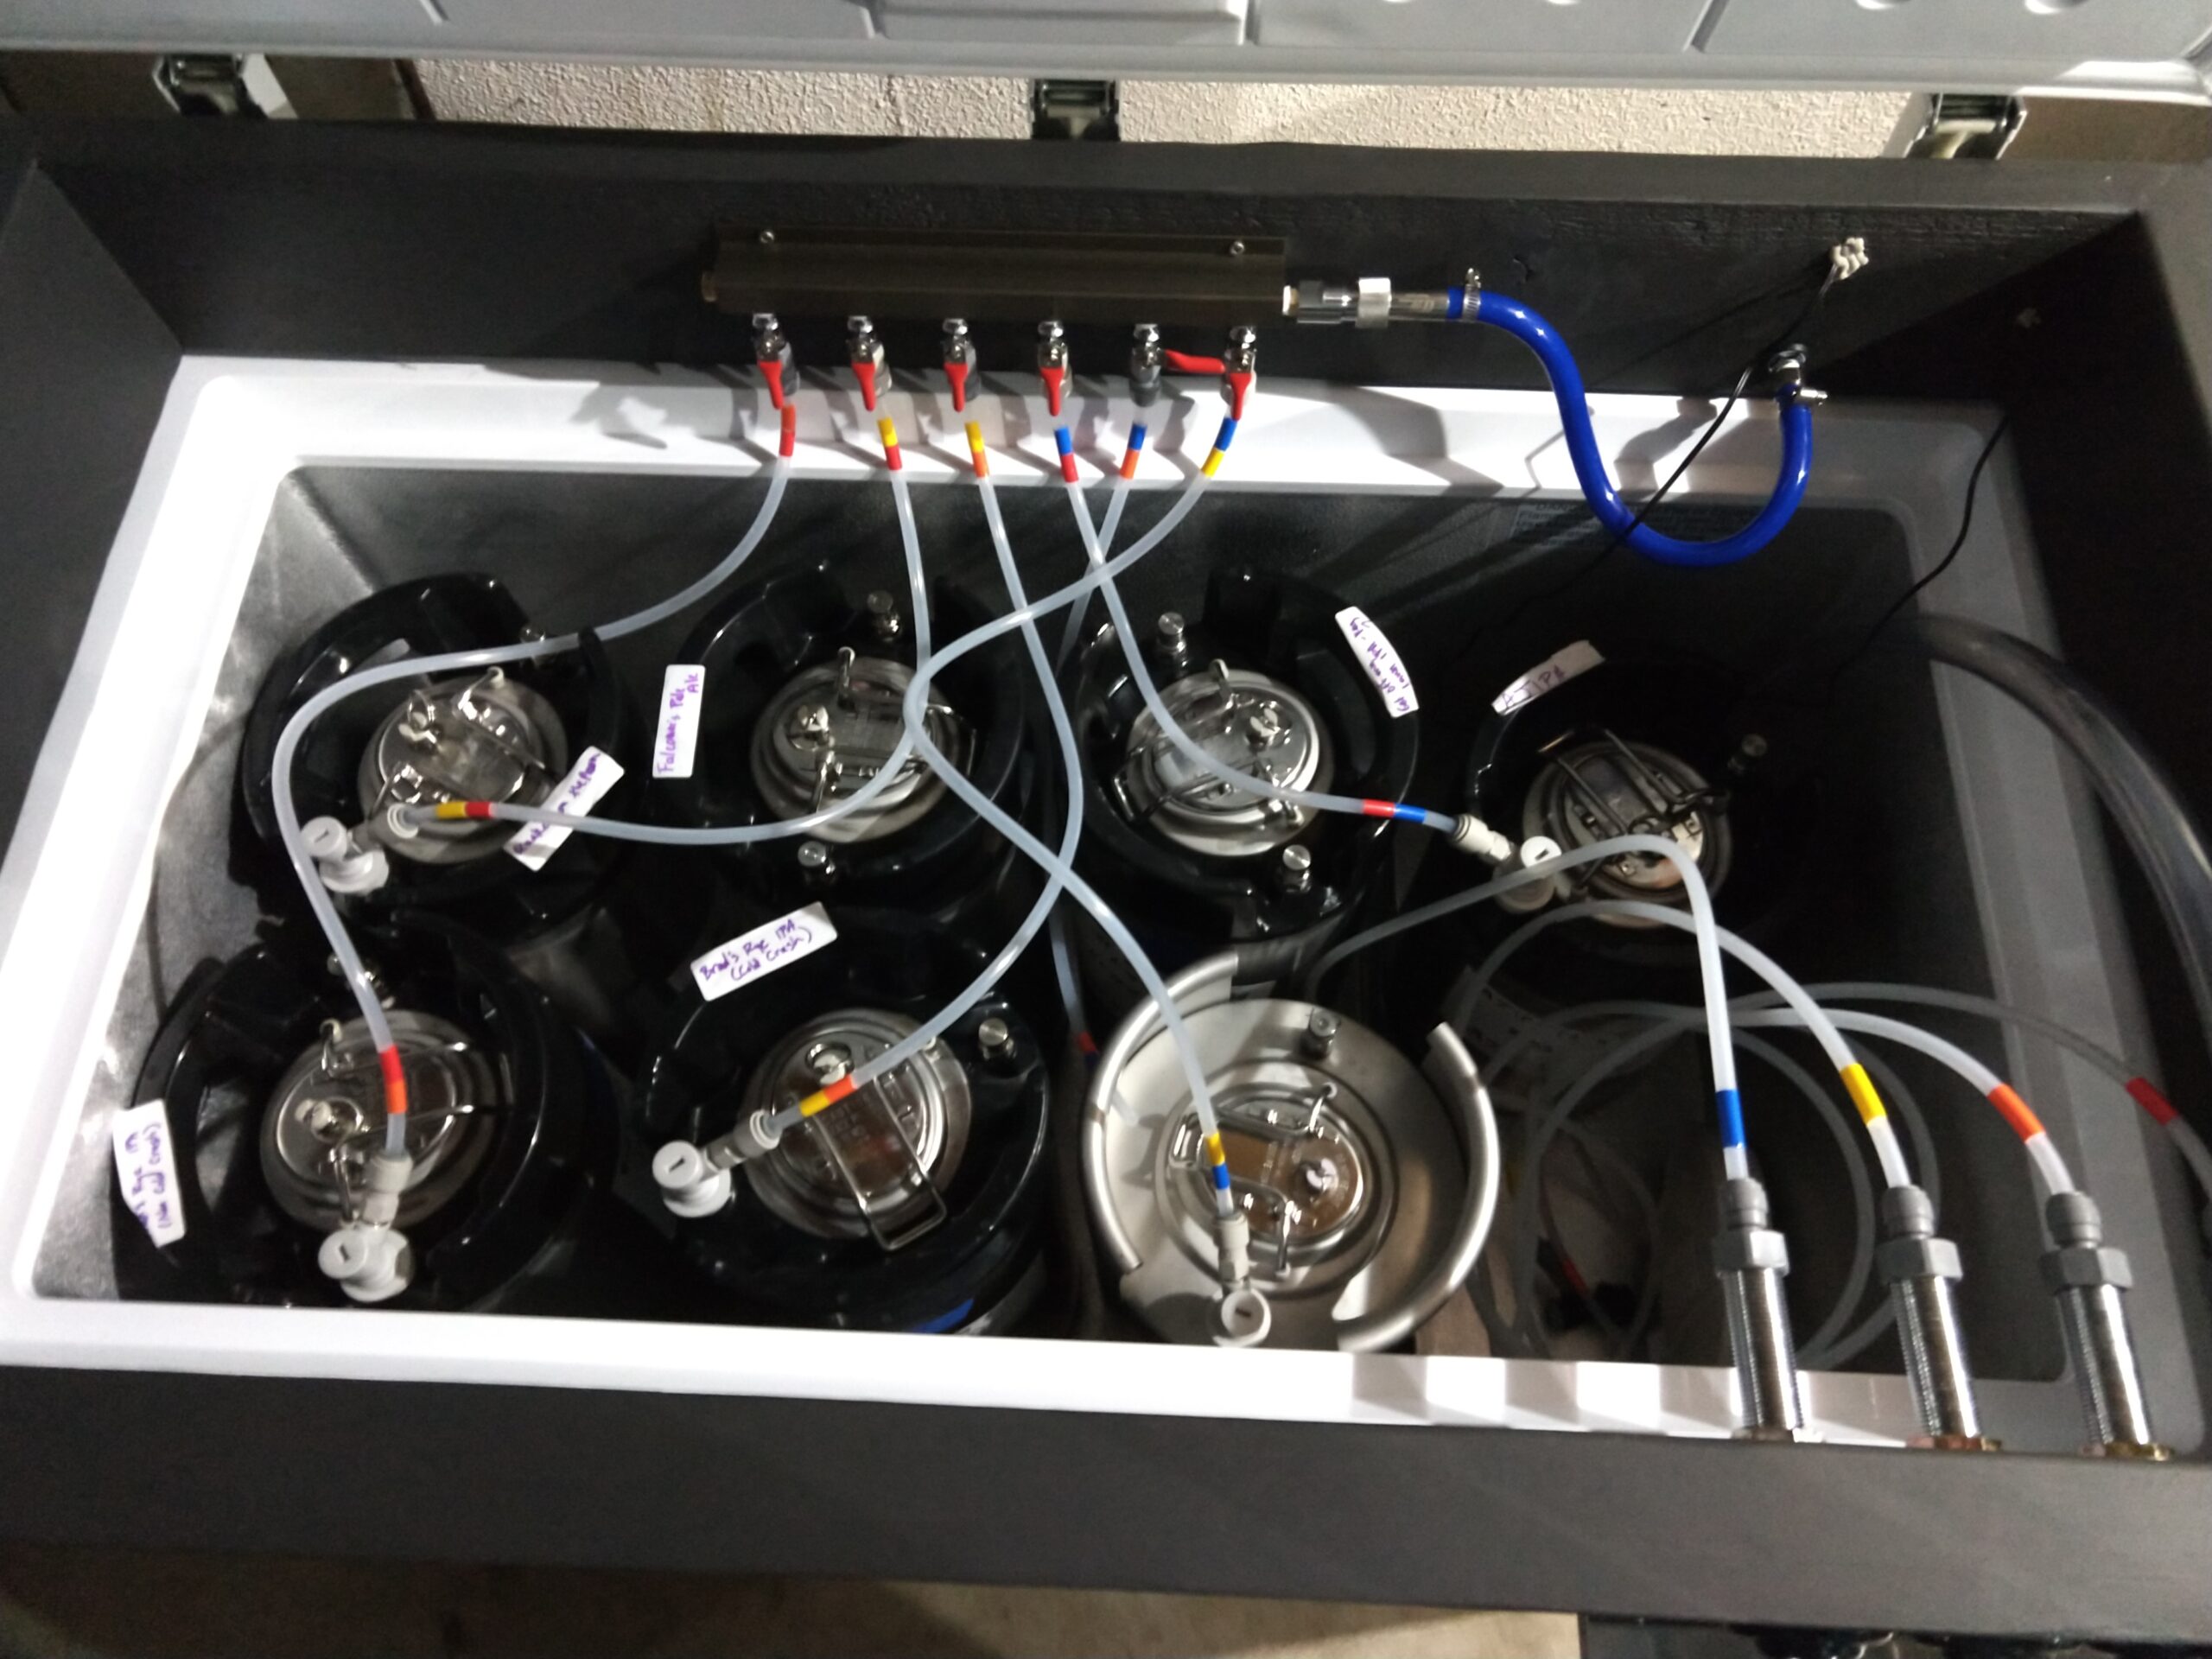 New Keezer- Front View
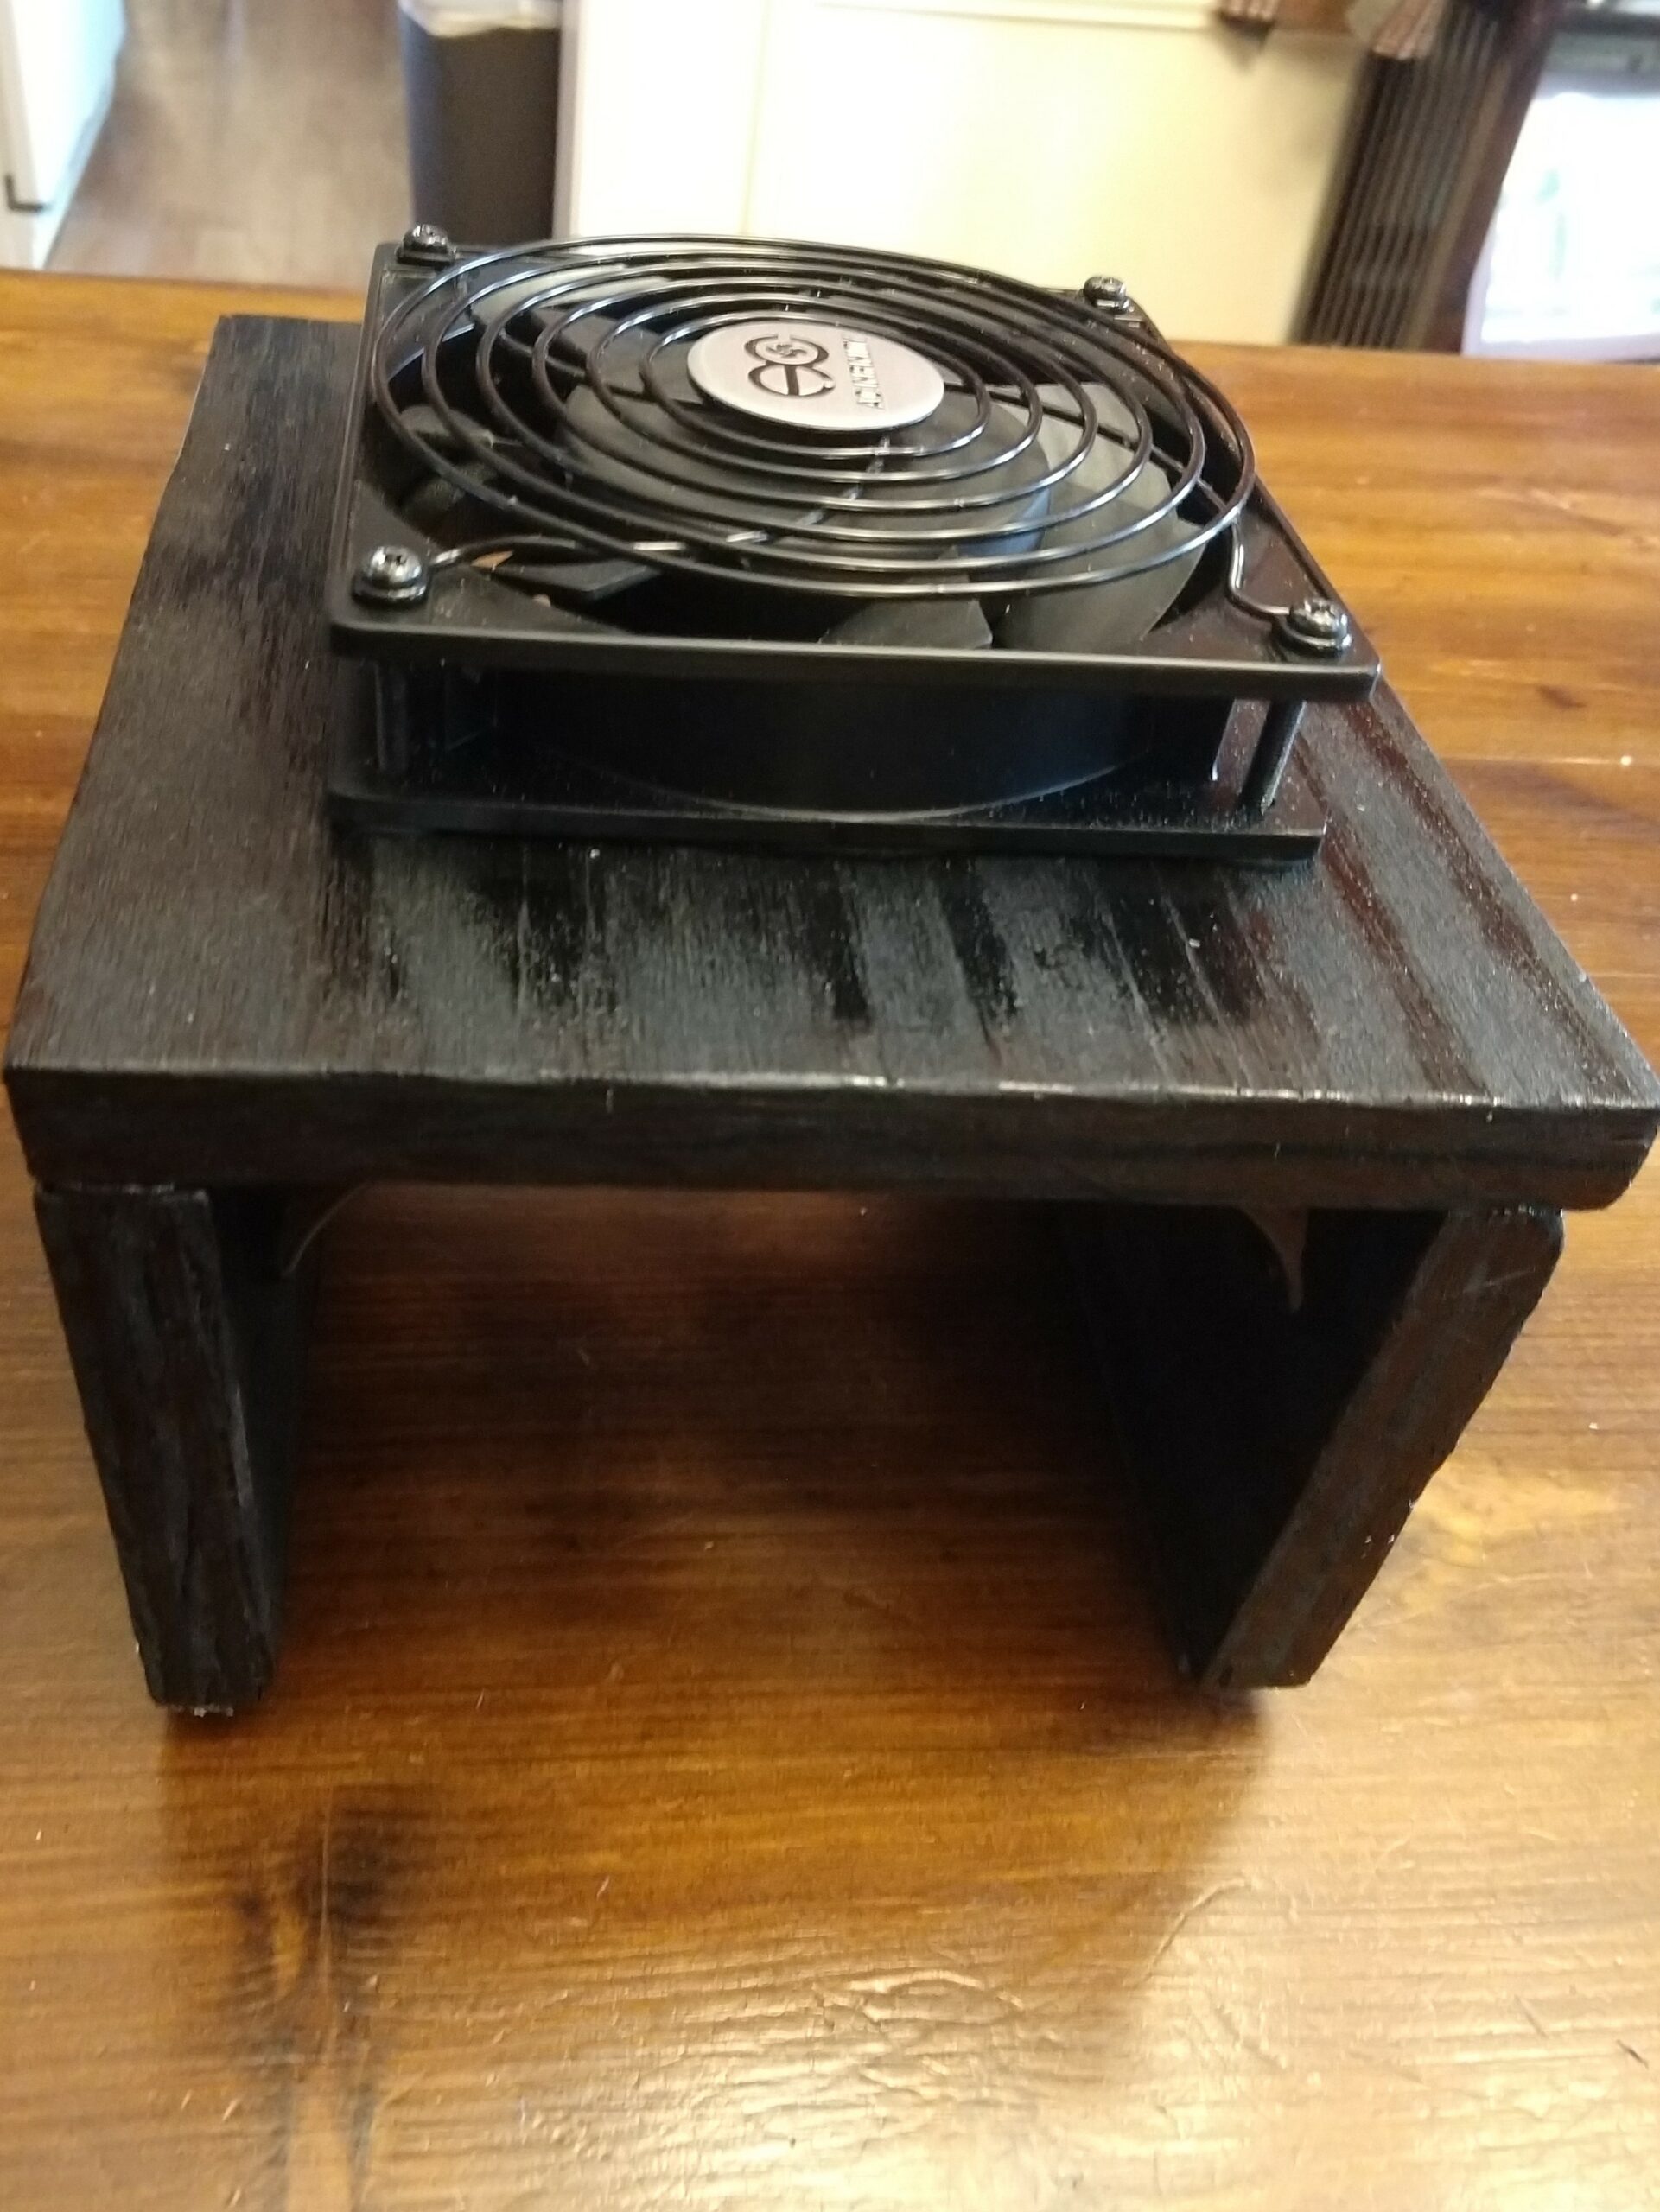 Cooling Fan Box- Elevated to Allow Airflow
With this new tap arrangement, the fan played an even more critical role. Without a fan, these taps were warmer than the old keezer layout without a fan. However, with the fan, the temperature at the shanks was very close to the temperature of the beer in the kegs, which is the best situation for eliminating foaming from cold beer hitting warm taps. And as evidence of how cool the taps are, they actually condense humidity out of the air on the outside of the keezer.
Related Review:

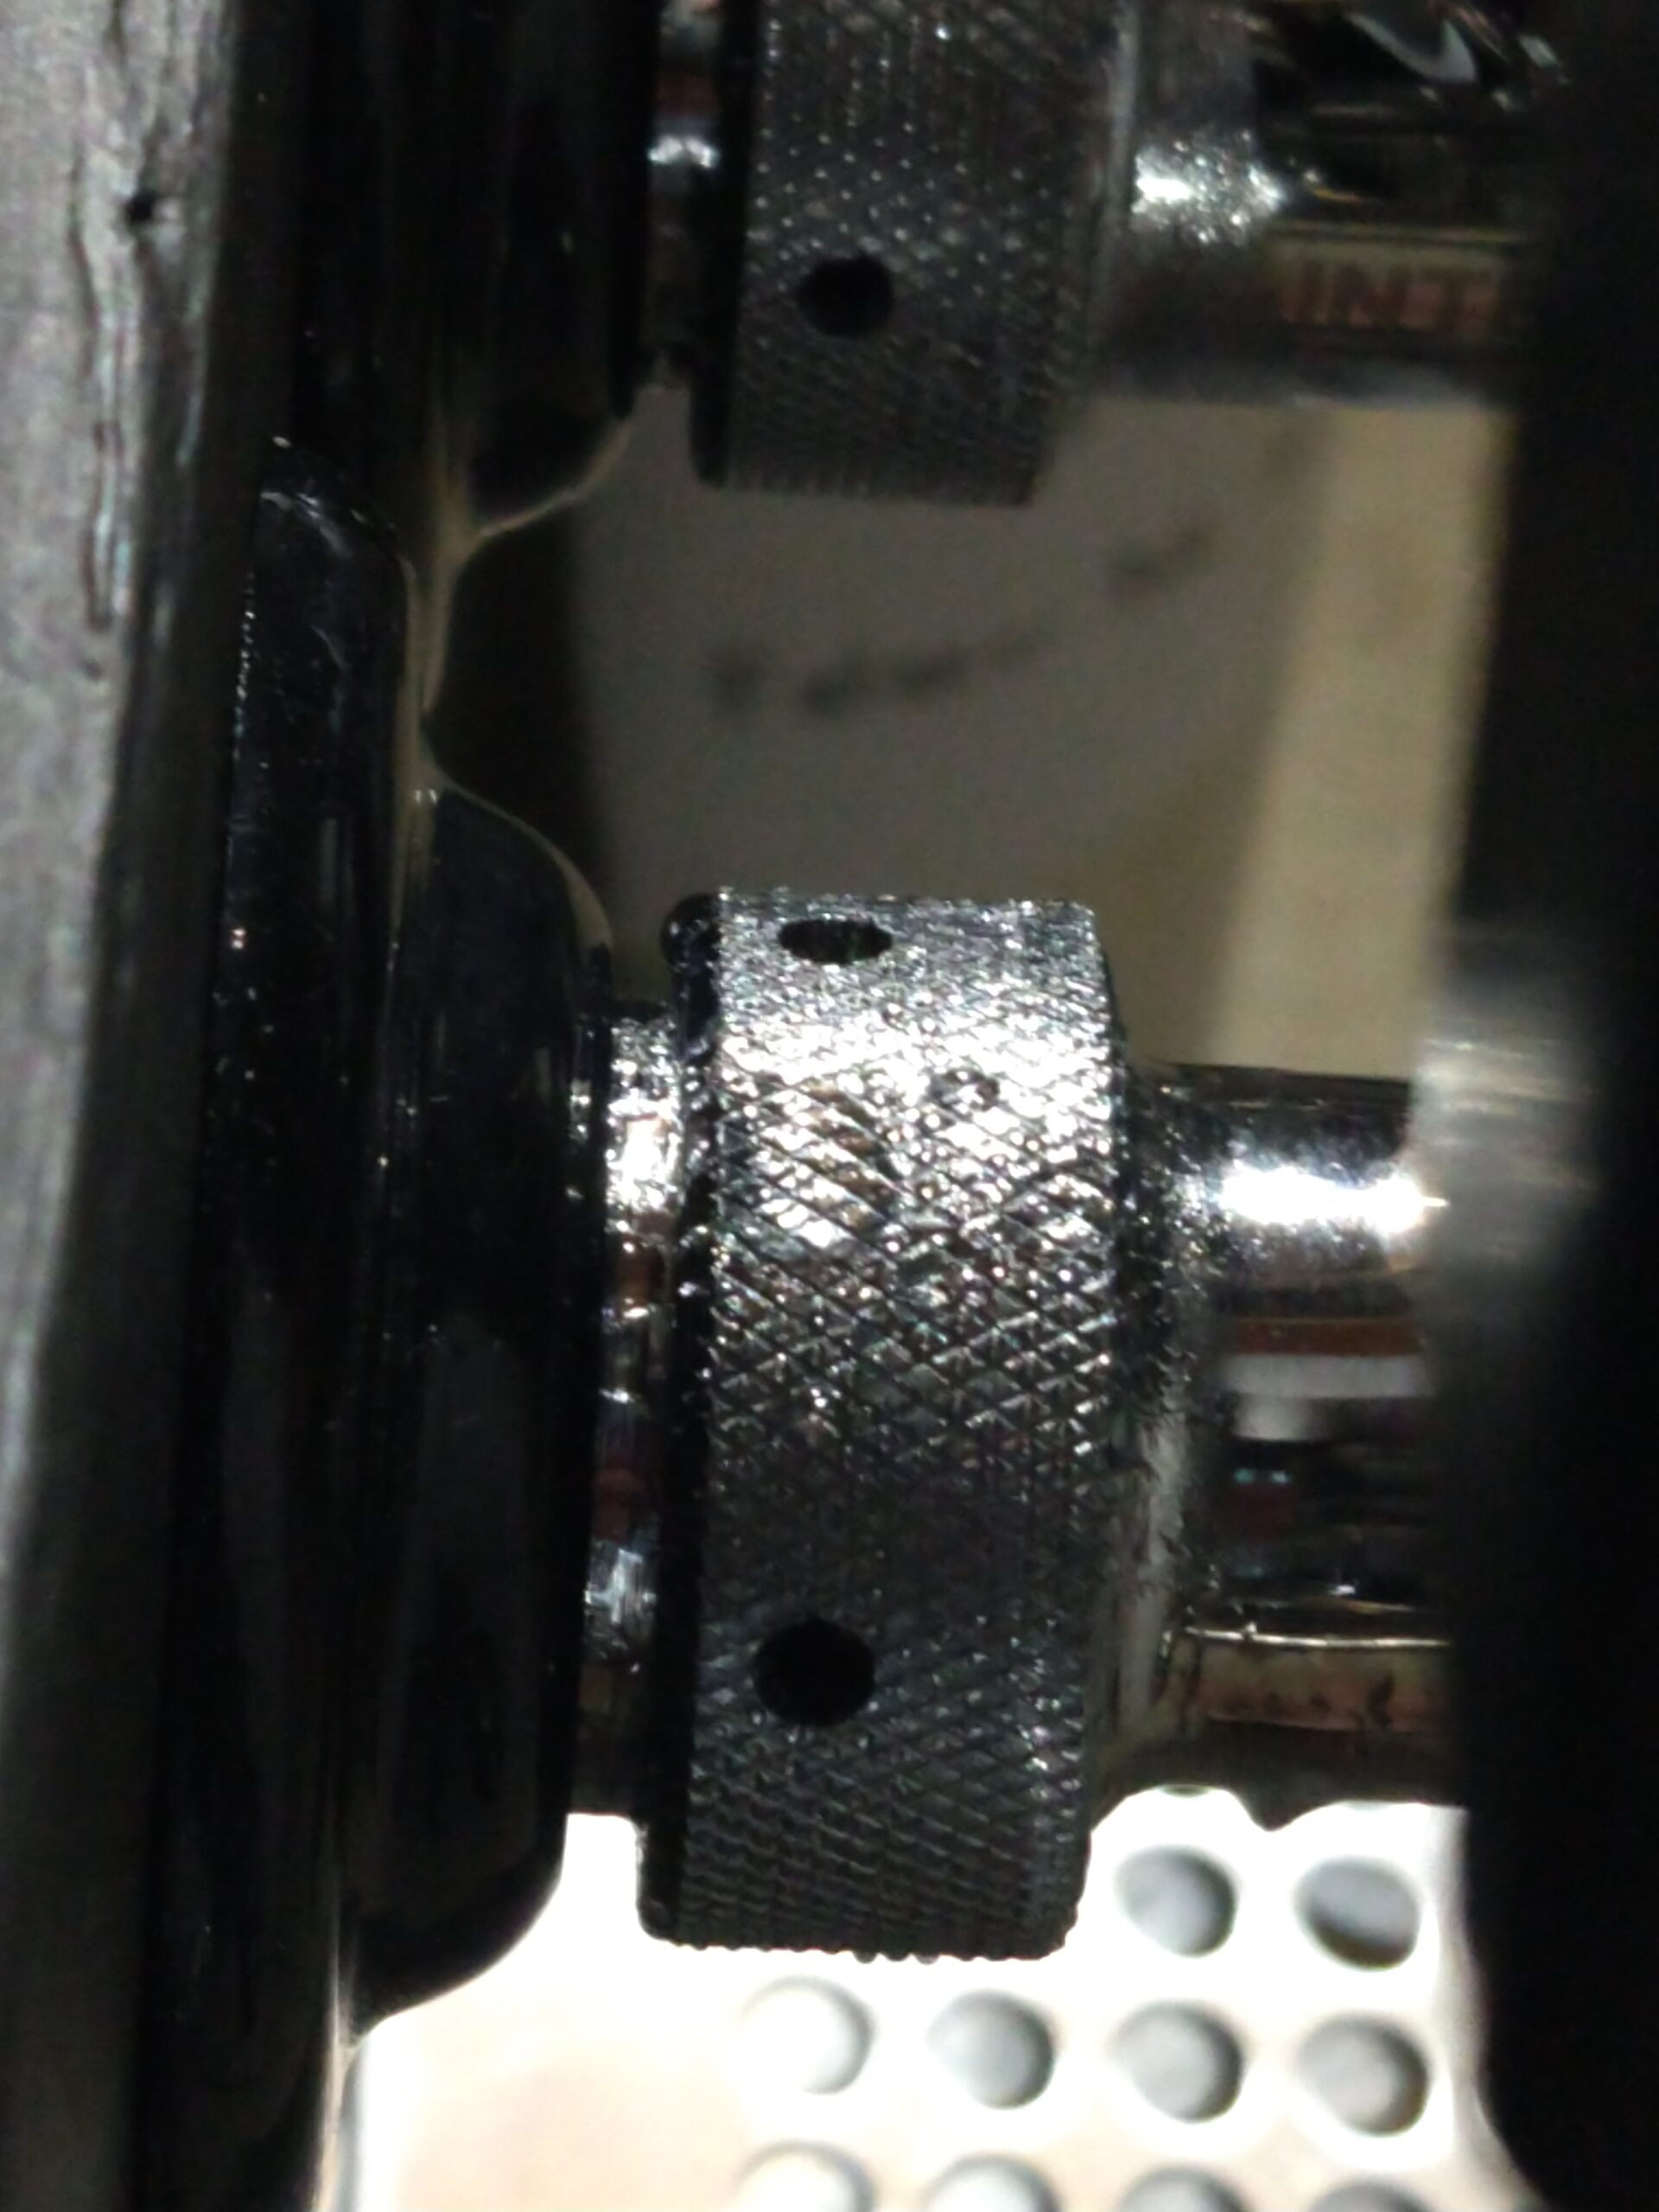 Taps so Cold Humidity Condenses on Them
The strength of the Bluetooth on the IBS-TH1 had no problem going through the keezer lid to my phone, both while I was down in the basement, and while I was one floor up, at ground level in my house. And with the data logging feature, I could catch up on the data that I couldn’t see while I was out of range. I also added the IBS-M1 WiFi gateway, and I could keep tabs on the current temperature from work when I was bored (of course before COVID moved my office to the house). The AAA Battery lasted 2-3 weeks on a fast data interval sitting inside the keezer, but I’m sure a slower data recording interval would have gotten it to last longer.
Temperature Plots
Conclusions
I made good use of the IBS-TH1 in the re-engineering of my keezer. Without it, I would’ve had a hard time coming up with the layout I did and knowing if it was actually successful. The IBS-TH1’s wireless, compact format lends it to a lot of uses, and the extra-long external probe helps even more. Different than most wireless thermometers, its ability to log data allows it to be used for long-term processes like tracking fermentation or shorter processes like a mash and then storing the data for electronic brew logs. And while you don’t need the IBS-M1 WiFi hub to collect this data, it works well if you want to keep an eye on real-time temperatures while you’re out of the house or out of town.
Check Current Price, Specs & Availability
- Inkbird Thermometer and Hygrometer Smart Sensor Data Logger with Waterproof External Probe Magnet Alert for Android and iOS Used for Food Storage Brewing Reptiles Instrument IBS-TH1 – affiliate link, note that multiple variations of this product may be available, as such a different version may appear at this link
- Inkbird IBS-M1 WiFi Gateway Temperature Humidity Sensor,Supports Bluetooth and Wireless Thermometer Hygrometer Connection with Save and Export Data,Real Time and Remote Monitoring and Alert – affiliate link, note that multiple variations of this product may be available, as such a different version may appear at this link
Related Top Posts!
- Kegerator Beer Line Temperatures & Reducing Foam with a Recirculating Fan
- Upgrade Your Kegerator – 6 Improvements!
More Homebrew Finds!
- Last 50 Finds!
- Top Deals – a curated list of the best deals
- Homebrew Reviews – one of the largest libraries of homebrew reviews in existence!
- Our Top Posts – tips, how-tos, resources posts and more
Also: Kegerator Tips & Gear | Keg Repair Part #s | Recent Keg Finds
Our Top Draft Resources!
- The Most Difficult Spot to Check for CO2 Leaks
- Keg O-Ring Materials Selection! – EPDM, Silicone and Buna-N?
- Why Do I Have Bubbles in My Beer Line? Diagnosing and Fixing Kegerator Foam Problems
- Five Benefits of Using Corny Kegs As Fermenters
- Rebuilding & Reconditioning Homebrew Kegs!
- Food Safe Replacement Keg O-Rings in Bulk
- Hands on Review: Kegland DuoTight Fittings & EVABarrier Tubing!
- Why Won’t My Homebrew Keg Carbonate? Fixing Draft Beer Carbonation Problems
- What Does a Flow Control Faucet Do?
- Upgrade Your Kegerator – 6 Improvements!
- Serve Homebrew on Any Kegerator & Convert Commercial Kegerator to Homebrew
- Tips and Gear for Growler Filling
- What’s the Difference Between Ball Lock Kegs and Pin Lock Kegs?
- Checking for Draft System CO2 Leaks – Using The Pressure Gauge Method
- Tip: Consider Oetiker Stepless Clamps for Kegerator Gas and Beer Lines
- Hands On Review: Inkbird ITC-308 Dual Stage Temperature Controller +WiFi Version
- Universal Poppets Tips and Tricks!
- Convert Your Mark II Keg & Carboy Washer to a Recirculating Draft Line Cleaning Pump!
- Step by Step: Finding and Fixing Keg CO2 Leaks
- Kegerator Beer Line Temperatures & Reducing Foam with a Recirculating Fan
- Kegging CO2 Use Estimations and Calculations
- Step by Step: Balancing Your Kegerator Draft System
- Building a Simple Ball Lock Draft Line Flushing Setup
- Build a Recirculating Draft Line Cleaning Pump
- Home Brew Keg Roundup – New & Used, 5 and 2.5 Gallon & More!
- Damp Kegerator? Fix Kegerator Condensation
- Portable Draft Beer Serving Options!
- Homebrew Temp Controller Roundup! – Kegerator and Fermentation – concepts, applications and models
- Bulk Keg Orings and Keg Repair Part Numbers


Kegerator Beer Line Temperatures & Reducing Foam with a Recirculating Fan
Special Thanks to Inkbird for providing units used for evaluation in this review.
By Brad Probert. Check out Brad’s website – beersnobby.com
More Homebrew Finds!
- Last 50 Finds!
- Top Deals – a curated list of the best deals
- Homebrew Reviews – one of the largest libraries of homebrew reviews in existence!
- Our Top Posts – tips, how-tos, resources posts and more
- Let’s be Friends!

This post may contain affiliate links. We may make a commission when you use our links. This will never cost you extra. Thank you for supporting Homebrew Finds!
Make sure the components you use are compatible and rated for your intended application. Contact manufacturer with questions about suitability or a specific application. Always read and follow manufacturer directions.
review:ibsth1 tag:tpr