
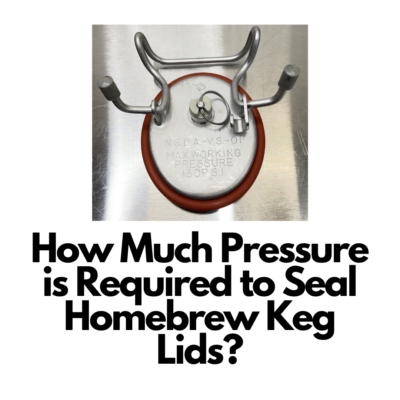
How Much Pressure is Required to Seal Homebrew Keg Lids?
How much pressure is required to seal a corny keg lid?
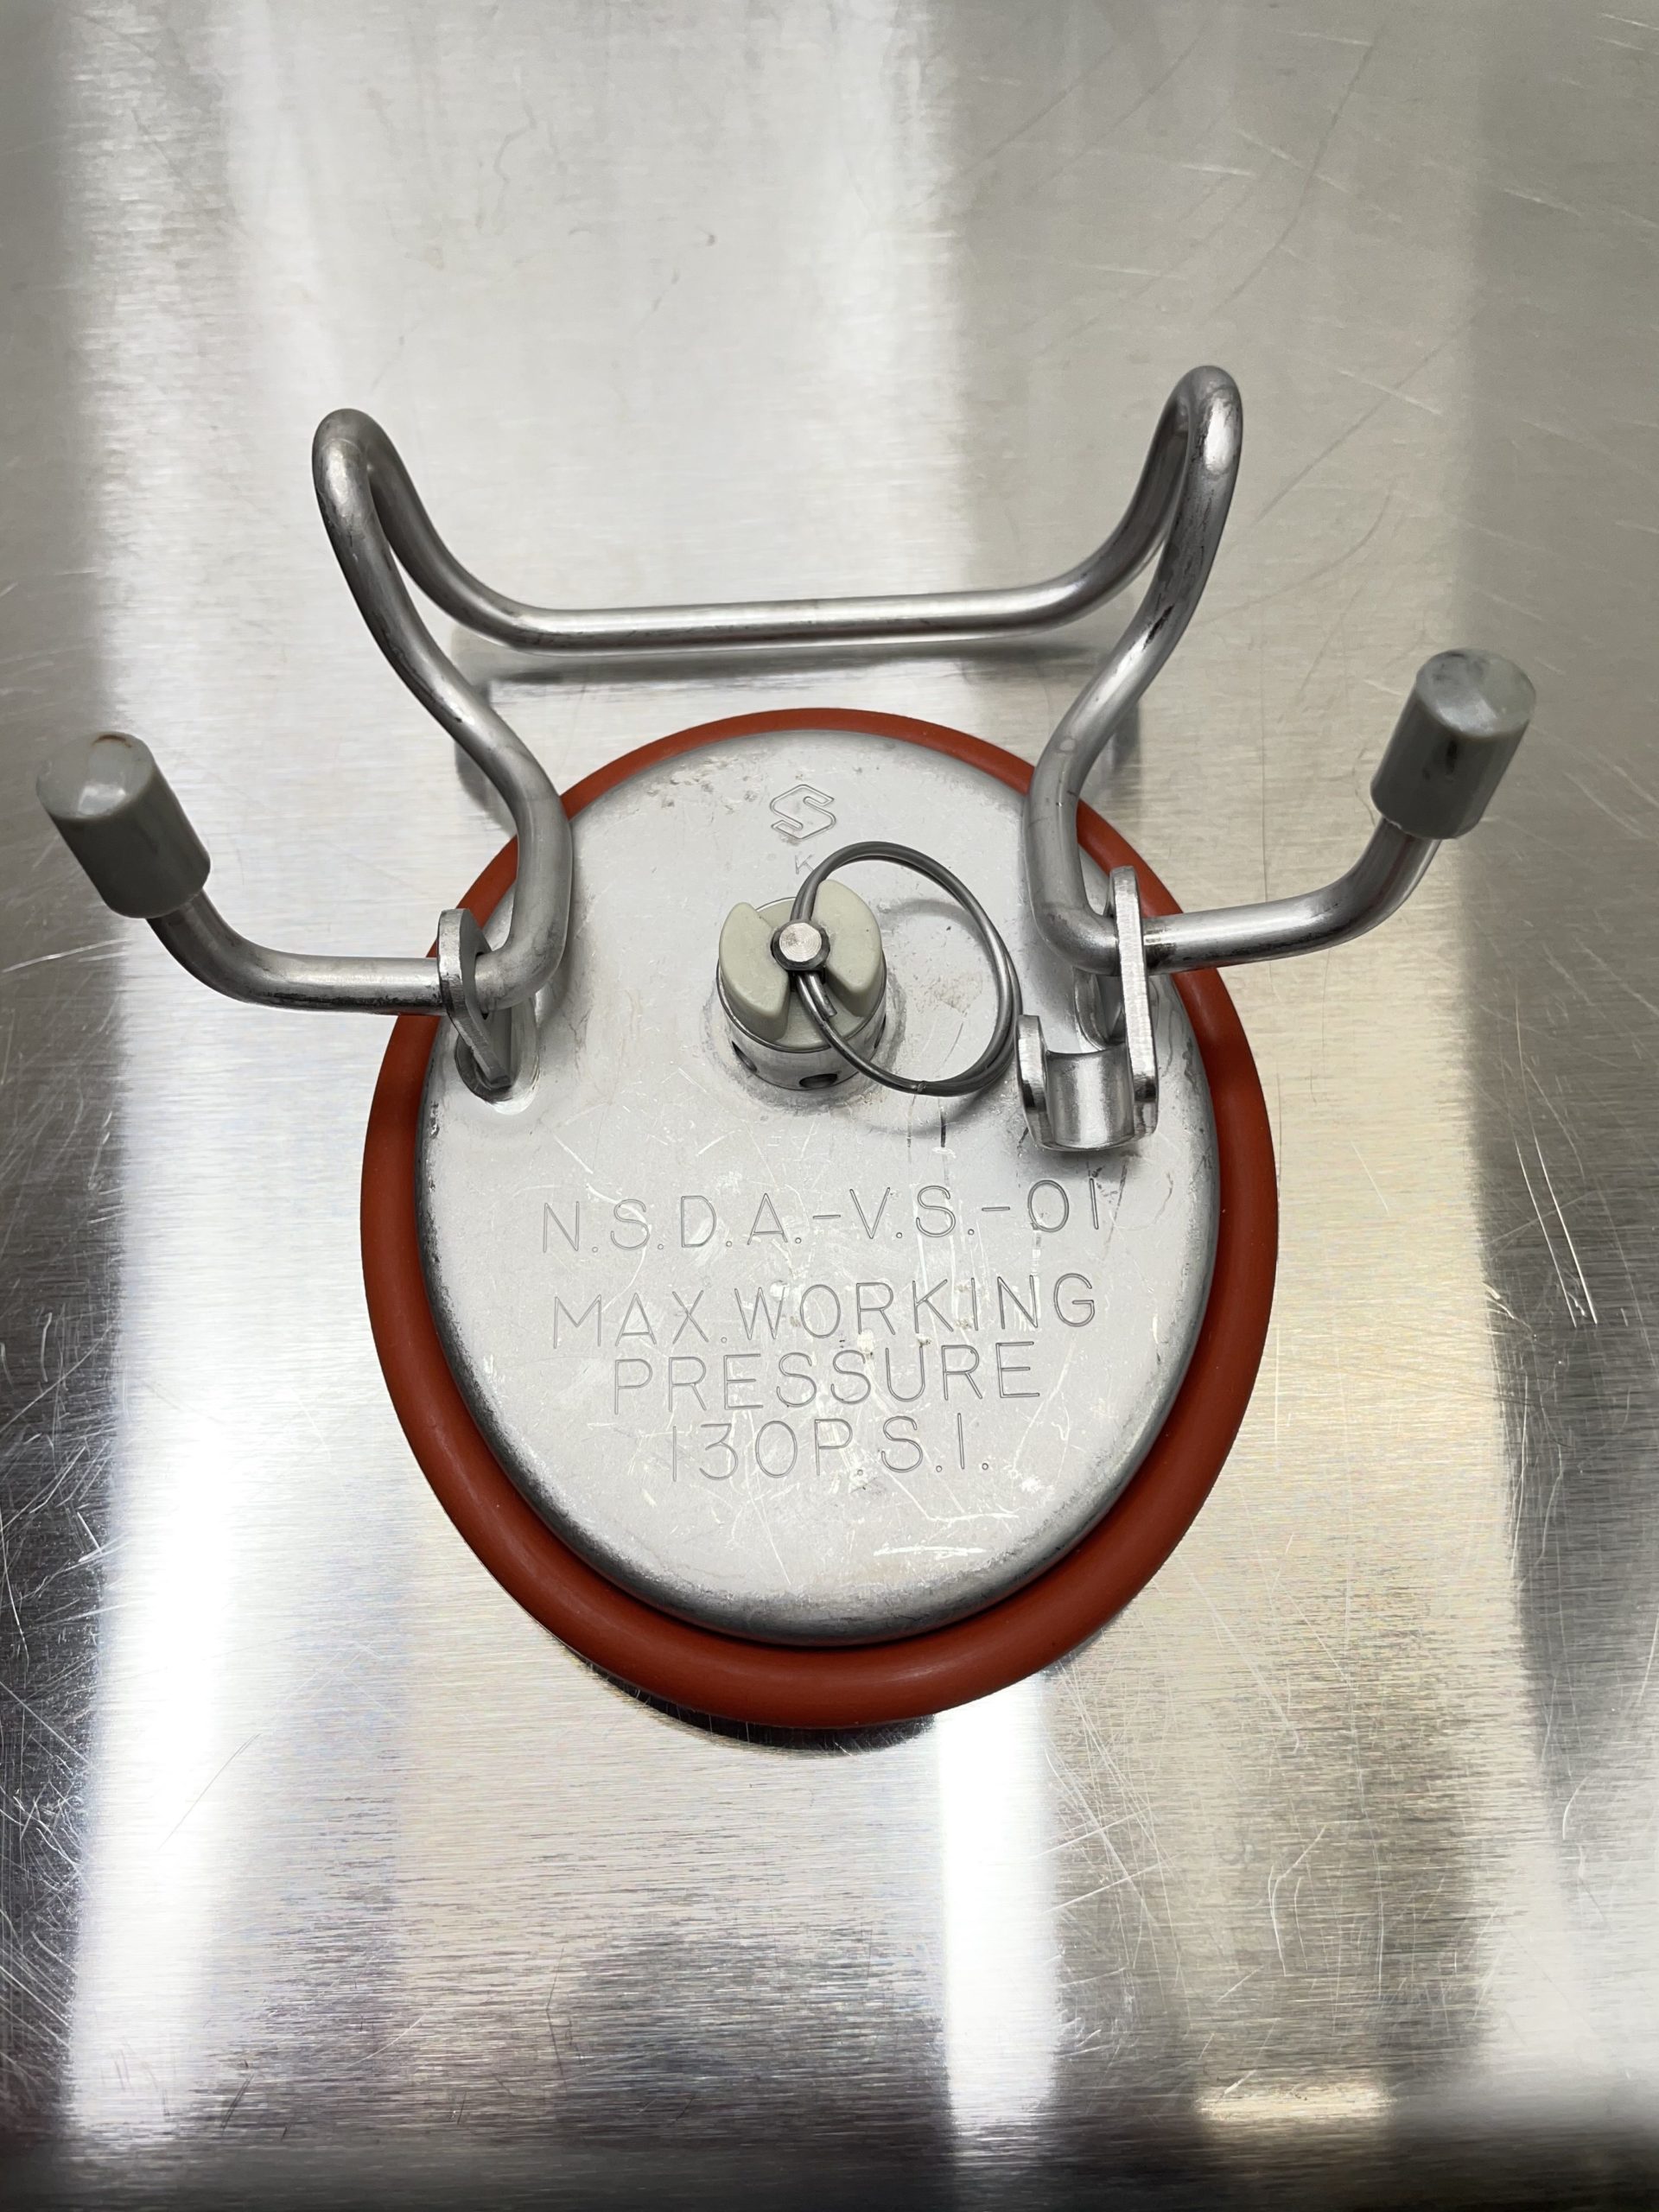
But, First… The Anatomy of a Homebrew Keg Lid
 From my keg rebuild post. With just replaced lid o-ring. This is silicone.
Standard homebrew keg lids are compromised of these general components…
- The main lid body. This is an oval shaped piece usually made from stainless steel that has a lip on on edge to hold an o-ring in place.
- The lid o-ring. This is an appropriately spec’d gasket that is required to enable a seal. I recommend replacing these yearly or at the very most every other year.
- The bail. This heavy duty wire flips back and forth to engage and disengage the lid. Depending on the design, the bail can also be used to hang the lid from a post when not in use.
- Keg lid feet. These go on the end of each side of the bail. It’s important that these are in good shape. These provide back pressure against the top of the keg to seat the o-ring and lid in place. They also protect the top of the keg from getting scratched by the bail.
- The PRV. The pictured lid is a ball lock style lid. the PRV is manual (and automatic). It’s located in the center of the lid and has a pull tab on it. A pin lock style lid is a little different when it comes to PRV. Those typically have automatic venting only. Ball lock style lids are preferable, in my opinion, and the two styles are generally interchangeable. See: What’s the Difference Between Ball Lock Kegs and Pin Lock Kegs? for more on this topic.
The lid provides an initial seal all by itself, but… it’s not pressure capable.
This is why, for years, I’ve advocated that brewers seal up keg lids with CO2 pressure if they’re naturally carbonating in the keg or fermenting under pressure. This ensures that you start out with a seal.
Buy How Much Pressure is Required to Seal a Keg Lid?
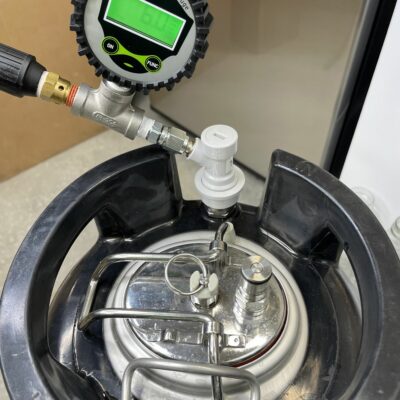
For my first series of tests, I used my Spunding Valve (with the PRV completely off) and started out at 10 PSI, testing 1 PSI increments. I used a ball lock QD equipped carbonation lid to make it easier to re-pressurize if I went past 1 PSI. I waited about 5 minutes at each PSI mark. I was looking for catastrophic failure, not a .1 degree change as any small change is mostly insignificant considering my equipment, the environment and test setup.
Test Series #1
 10 PSI start
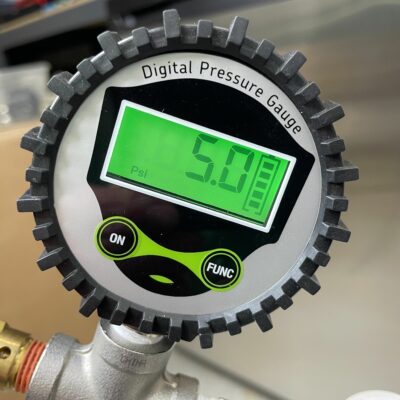 I won’t show every PSI jump, but we were still holding strong at 5 PSI
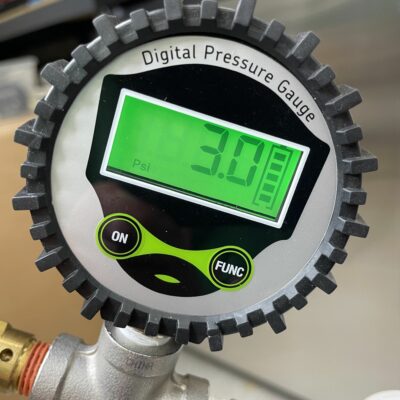 Start of the 3 PSI test
 And… catastrophic failure. 3 PSI was not enough to seal this keg lid.
Test Series #2
 I started over at 4 PSI and worked my way down by .5 PSI increment. 3.5 PSI held. I experienced a catastrophic failure (again) at 3 PSI.
Test Series #3
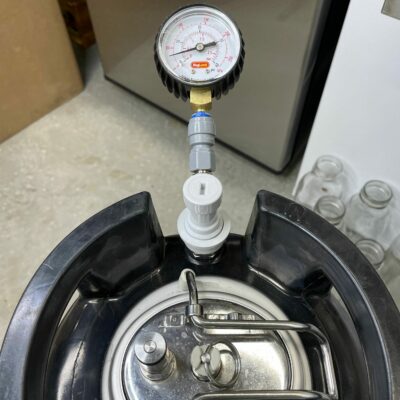 I had a concern that the 3.5 PSI limit was related to a limitation of the digital gauge I was using, Here’s the setup for series three. A ball lock QD with DuoTight Pressure Gauge, using a Valuebrew DuoTight Compatible Locking Clip. Those help to provide a better, more stable DuoTight connection.
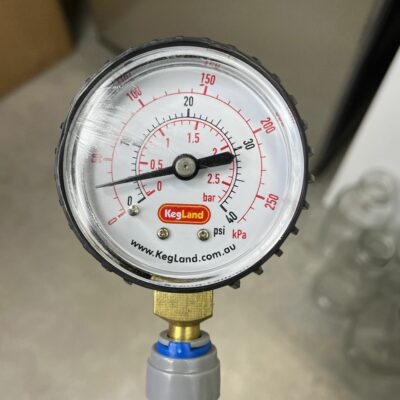 I started at about 5 PSI this time around.
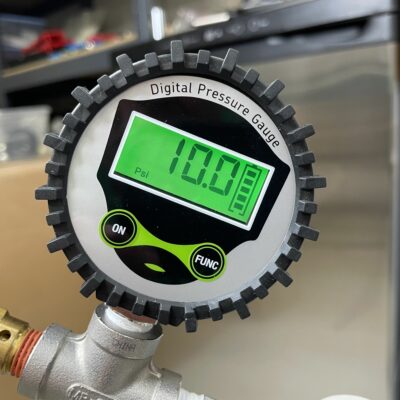
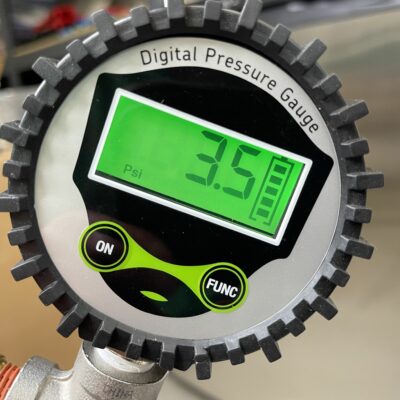
 This is the last point in my testing that I would consider stable. That’s about 3.5 PSI.
Answer: Based on my testing, I estimate that a minimum of about 3.5 PSI is required to seal a keg lid. This is general guideline that is going to vary based on a lot of factors – keg/lid condition, o-ring condition and potentially even temperature, weather and altitude. It also assumes a leak free keg.
Related:
- Finding and Fixing CO2 Leaks
- Kegging CO2 Use Estimations and Calculations
- DuoTight Compatible Locking Clips – via Valuebrew
- Rebuilding & Reconditioning Homebrew Kegs!

DuoTight Review!
Build a Spunding Valve
Rebuild Your Kegs!
Upgrade to EPDM O-Rings

Everything for Your Kegerator
More Homebrew Finds!
- Last 50 Finds!
- Top Deals – a curated list of the best deals
- Homebrew Reviews – one of the largest libraries of homebrew reviews in existence!
- Our Top Posts – tips, how-tos, resources posts and more
- Let’s be Friends!
Recent Deals!

10 Most Recent Homebrew Resource Posts & How-To’s!

We are Homebrew Review HQ! Our 10 Most Recent Reviews

Also: Kegerator Tips & Gear | Keg Repair Part #s | Recent Keg Finds
Our Top Draft Resources
- The Most Difficult Spot to Check for CO2 Leaks
- Keg O-Ring Materials Selection! – EPDM, Silicone and Buna-N?
- Why Do I Have Bubbles in My Beer Line? Diagnosing and Fixing Kegerator Foam Problems
- Five Benefits of Using Corny Kegs As Fermenters
- Rebuilding & Reconditioning Homebrew Kegs!
- Food Safe Replacement Keg O-Rings in Bulk
- Hands on Review: Kegland DuoTight Fittings & EVABarrier Tubing!
- Why Won’t My Homebrew Keg Carbonate? Fixing Draft Beer Carbonation Problems
- What Does a Flow Control Faucet Do?
- Upgrade Your Kegerator – 6 Improvements!
- Serve Homebrew on Any Kegerator & Convert Commercial Kegerator to Homebrew
- Tips and Gear for Growler Filling
- What’s the Difference Between Ball Lock Kegs and Pin Lock Kegs?
- Checking for Draft System CO2 Leaks – Using The Pressure Gauge Method
- Tip: Consider Oetiker Stepless Clamps for Kegerator Gas and Beer Lines
- Hands On Review: Inkbird ITC-308 Dual Stage Temperature Controller +WiFi Version
- Universal Poppets Tips and Tricks!
- Convert Your Mark II Keg & Carboy Washer to a Recirculating Draft Line Cleaning Pump!
- Step by Step: Finding and Fixing Keg CO2 Leaks
- Kegerator Beer Line Temperatures & Reducing Foam with a Recirculating Fan
- Kegging CO2 Use Estimations and Calculations
- Step by Step: Balancing Your Kegerator Draft System
- Building a Simple Ball Lock Draft Line Flushing Setup
- Build a Recirculating Draft Line Cleaning Pump
- Home Brew Keg Roundup – New & Used, 5 and 2.5 Gallon & More!
- Damp Kegerator? Fix Kegerator Condensation
- Portable Draft Beer Serving Options!
- Homebrew Temp Controller Roundup! – Kegerator and Fermentation – concepts, applications and models
- Bulk Keg Orings and Keg Repair Part Numbers
standarddraft pinned
This post may contain affiliate links. We may make a commission when you use our links. This will never cost you extra. Thank you for supporting Homebrew Finds!
greatdealsMake sure the components you use are compatible and rated for your intended application. Contact manufacturer with questions about suitability or a specific application. Always read and follow manufacturer directions. This is a Top Post! See: All Top Posts – toppost:co2seallid tag:tpr