
Hands on Review: Delta Brewing Systems Fermtank TC
This review is by Homebrew Finds Contributor Brad Probert. Brad is an engineer, expert homebrewer and experienced reviewer. Grab a link to Brad’s website at the end of this review.
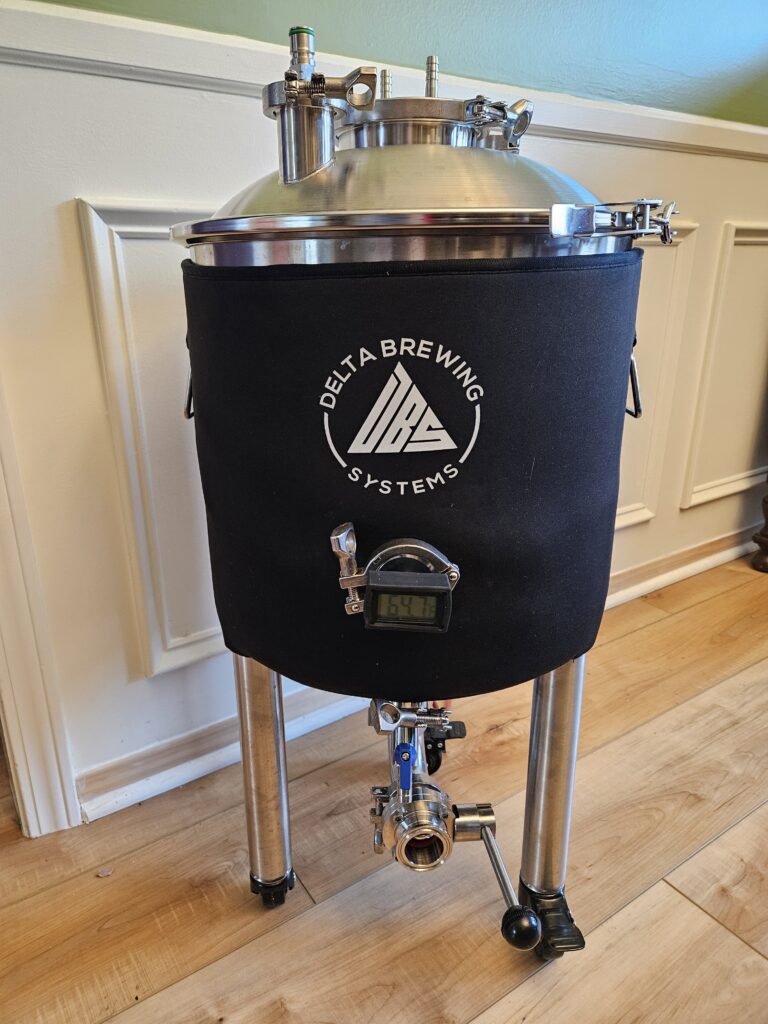
Delta Brewing Fermtank TC
Stainless steel is the material of choice for brewing equipment in general. For fermentors, that is especially the case. It is an ideal material for a fermentor because of its cleanability. Stainless is resistant to staining, is durable for scrubbing, and compatible with different cleaners. In contrast to plastic HDPE buckets, stainless can keep oxygen out of your fermenting wort.
Delta Brewing Systems offers a handful of homebrewing products, selling them since 2019. They sell two versions of their Fermtank stainless fermentor. The two have a lot of the same core features, but the recently released Fermtank with Tri-Clamps ups the game in a lot of key areas. The most obvious difference to other fermentors is the 8-gallon size. That size is designed to allow extra volume into the fermentor for those batches where you have a lot of dry hop debris left over (and thus you leave more liquid behind than you normally would). On paper, an 8-gallon fermentor sounds like overkill for a 5-gallon batch, but it’s designed to support all kinds of variations to get you 5 gallons into your serving keg. There are volume markings etched inside, starting at 3 gallons. The optional chilling coil extends down to the 3-gallon level (meaning if you want to chill your wort, you need more than 3 gallons). The thermowell sits at 3.75 gallons.

Main Fermentor Body
![]()
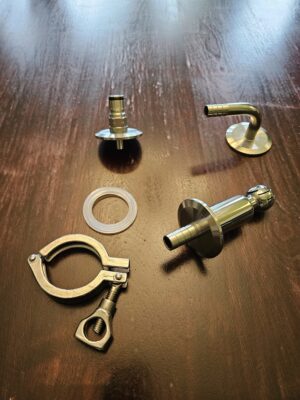
TC Clamps, Thermowell, Blanking Plate
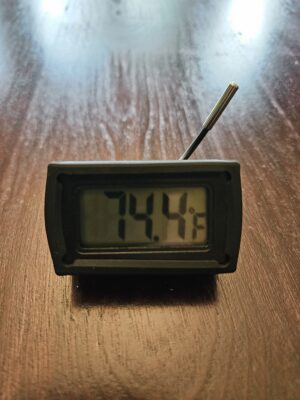
Digital Temperature Probe
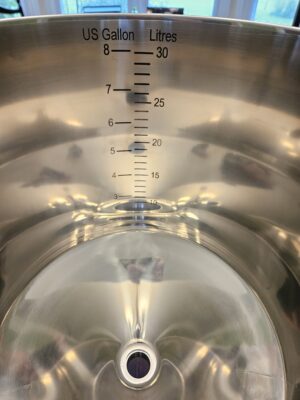
Etched Volume Markings
Check Current Price and Availability, Review Continues Below:
- The FermTank – 8 Gallon TC < the model reviewed here
- THE FERMTNANK – 14 GALLON FERMENTER
- THE FERMTANK – 8 GALLON FERMENTER
- THE FERMTANK – 4 GALLON SMALL BATCH FERMENTER
- Accessories
- All Delta Brewing Systems Fermenters
Related: Hands on Review: Delta Brewing Systems Fermtank
This article contains affiliate links. We may make a small percentage if you use our links to make a purchase. You won’t pay more and you’ll be supporting Homebrew Finds and more content like this. Thank you for your support!
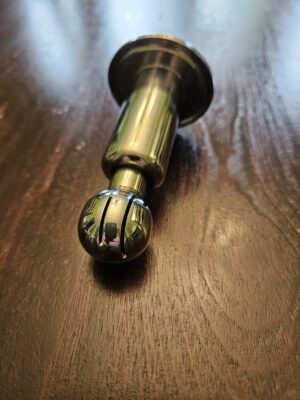
Both the standard Fermtank and the upgraded Fermtank TC have a dump valve at the bottom of the cone on the fermentor. But the Fermtank TC uses 1.5” piping for the dump valve instead of the 3/4” on the standard Fermtank. And that comes with a big increase in usefulness (see below in Hands On Review section). The dump valve is used to help make cleaning easier as you can set it in your sink and just rinse everything out the bottom. It can also be used during fermentation to purge accumulated debris periodically to avoid transferring any of that into your keg and to keep the beer from sitting on it and picking up unwanted flavors.
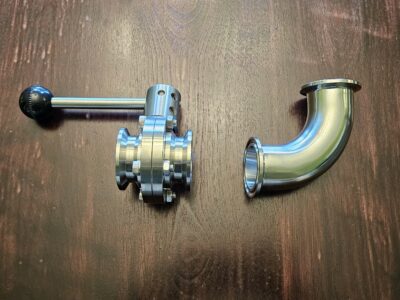
Dump Valve Elbow and Butterfly Valve
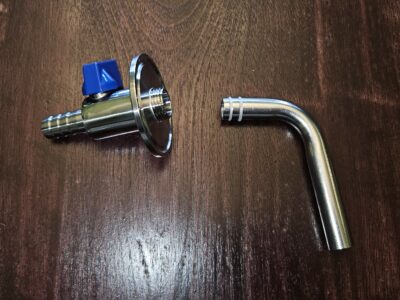
Spigot and Dip Tube
The lid on the Fermtank TC contains lots of functional options. It has two 1.5” TC ports and one large 4” TC port in the center. Delta Brewing sells 1.5” TC options of a blow-off tube barb or a TC plate with a gas ball lock post mounted to it. The gas post can either be used to feed CO2 into the fermentor for a closed transfer, or you can connect a spunding valve and keep a positive pressure inside the fermentor during active fermentation. With the standard sizing of the 1.5” TC, you can also use any accessories that mate to this size (dry hopper, blanking plate with liquid ball lock post and floating dip tube, etc.). The large 4” TC can be fitted with the cooling coil that Delta Brewing sells, and then combined with the insulated neoprene jacket to allow cool lagering fermentations. Or you can just use it as an opening for easy dry hopping when you remove the large 4” blanking plate.


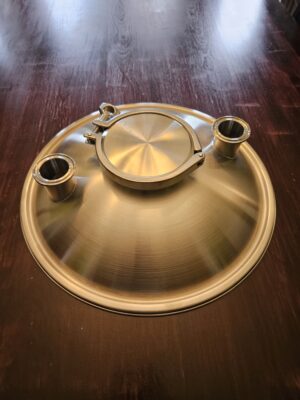
Lid with TC Ports
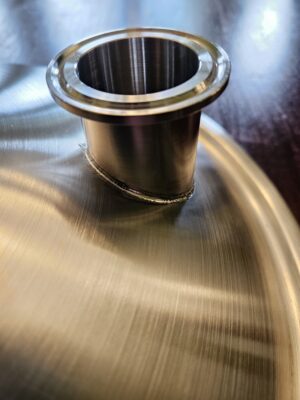
TC Port Weld
1.5-inch TC Accessories
CIP Spray Ball

3-piece Airlock with Stopper for TC port, TC gaskets

Neoprene Jacket Custom Fit to TC Fermentor


The other thing the new lid brings with the Fermtank TC is pressure capability. A new clamp is used to wrap around the flange between the lid and body of the fermentor. With this band clamp, it increases the pressure capability from the standard model’s 2 psi to a more useful 6 psi on the Fermtank TC. That’s still just mainly useful for closed transfers. You can’t do much of natural spunding carbonation with that, and you won’t have a wide range of adjustability if you want to play with pressurized fermentation. Keep in mind if you play with pressurization, you need to be careful to de-pressurize before taking off any TC fittings. Even at low pressures, those can become dangerous projectiles.
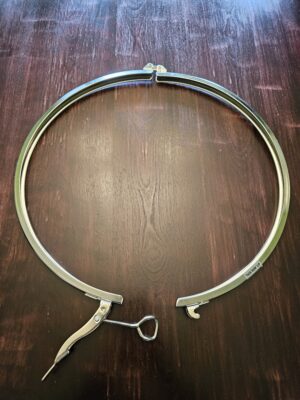
Lid Band Clamp
Hands on Review
I had previously reviewed the base Fermtank fermentor back in 2020. This Fermtank TC had very similar good build quality as I had seen previously. The TC welds were all smooth and of good quality. This was obviously important since one of the key benefits of TC ports is for cleanliness/cleaning. Aside from the TC feature differences, one thing that really stood out was the polish on the interior of the fermentor. Although a polished interior is somewhat typical for stainless fermentors anymore, this one stood out for its ability to easily clean back to original shine levels even after several crusty fermentations. I’m sure at some point it will stop being so shiny, but so far that point is further out than other fermentors I’ve brewed with.
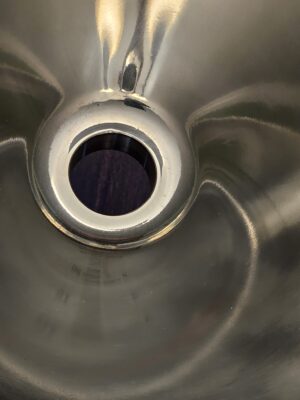
Center Drainport
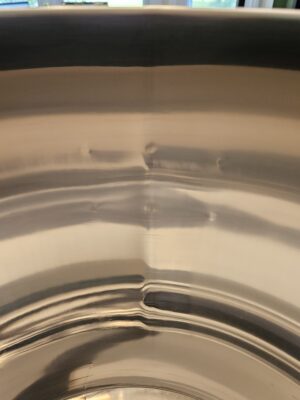
Polished Interior of Fermentor
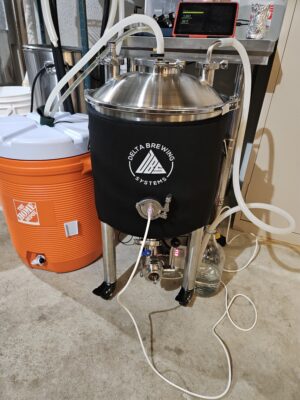
I fermented three different beers in the Fermtank TC as part of this review. The first was a Rye IPA with a fair amount of kettle hops (4.5 oz of pellets) and a good-sized dry hop (5 oz of pellets). I drained off about 1/5-gallon of fermentation sludge from the dump valve before adding the dry hops. I dropped the temperature in the fermentor from 71F to 55F and held there for about 20 hours before transferring out into a dedicated cold crash keg. My experience has shown this “cool crash” in the fermentor helps drop hop debris out and give a clearer transfer. However, that didn’t work the same when using the spigot drain with dip tube down into the cone. Pushing the beer out with bottled CO2 applied through the lid, I clogged up the ball lock on the keg with hops. Since I took care to sanitize & purge this keg before transferring the beer into it, I wasn’t particularly psyched about having to remove the ball lock fitting from the keg, clean it out, and then get things flowing again. I concluded I needed dry hop intervention next time around.
adstarsan
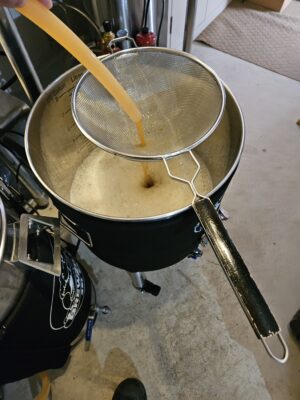
Filling Fermentor
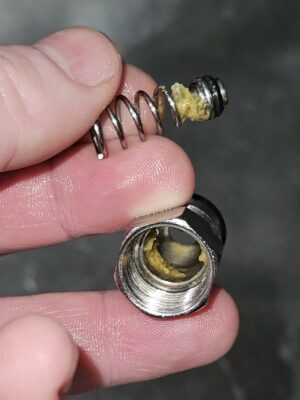
Hop Debris Clogging Ball Lock Post Without Dry Hop Management
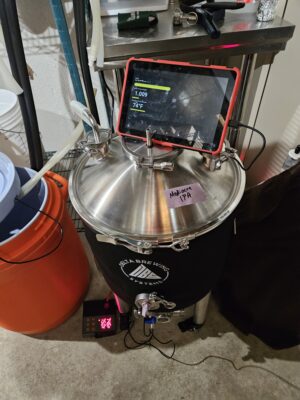
Tilt Can be Read But Can Require Bluetooth Close
Skipping ahead to my third fermentation trial, I did another IPA. This one had 4 oz. of hops in the kettle and 3.5 oz. of dry hops in the fermentor. I wasn’t interested in using hop bags, and my external Bouncer Filter had worked in the past for filtering out debris adequately but required a stop mid-transfer to clean out the filter. So, I opted for a floating dip tube. In this case, I “connected” the silicone tubing to the spigot’s dip tube. The diameter of this dip tube was much larger than the hose could stretch, so I simply pushed the silicone tubing inside the dip tube rather than stretching it over the outside. I did some trials with water prior to brew day, so I knew this worked. I did the same process of draining off about 1/4-gallon of fermentation sludge before dry hopping, and then cool crashed for about a day before transferring. I transferred successfully without clogging keg ball lock posts. But the arrangement of the tubing connected low in the fermentor meant tubing ended up bottoming out on the cone of the fermentor and leaving some beer in there. Not a lot, but you know- tears shed for every drop of wasted beer in the process… So, for the future, I planned to get a liquid ball lock post to mate to a 1.5” TC plate and then connect the floating dip tube to this. That should work great, as this type of setup has worked for me in the BrewBuilt X1 fermentor as well as Kegland FermZilla All Rounder.
![]()
Closed Transfer to Keg
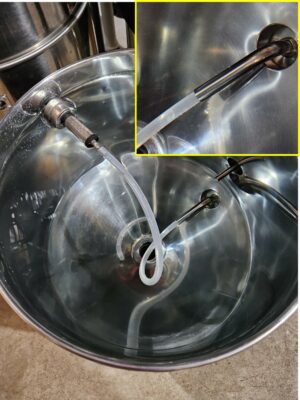
Floating Dip Tube Connected to Spigot Tube
Residual in Fermentor after Dry Hop with Floating Dip Tube
For the dry hop charges on both IPAs, I made use of the available 1.5” TC port in the lid to use my Brewers Hardware Dry Hopper. It worked great here, as well. A simple way to add dry hops with the minimal amount of oxygen exposure. The other 1.5” TC was used with the blow-off tube fitting for most of the fermentation, and then I switched over to the gas ball lock fitting plate and connected one of my spunding valves to keep just a minimal positive pressure (0.5 psi).


Using Dry Hopper
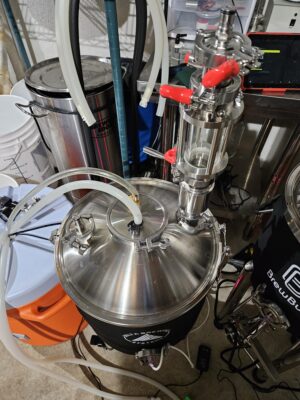
I used the chilling coil in the large 4” TC port. Coupled with the neoprene jacket, the temperature drop performance was shockingly good. My typical cold fermentations use a large Rubbermaid drink cooler filled with 4 gallons of water and five x 2L bottles of ice. I’ve used various cooling rods with different fermentors, but the Fermtank TC’s total surface area of the multiple cooling loops was impressive. On my second trial batch, I fermented a Baltic Porter. Into the fermentor, the wort was 69F. It dropped to my target of 52F in 2 hours and 20 minutes. That’s about twice as fast as my other fermentors with their cooling rods/coils.
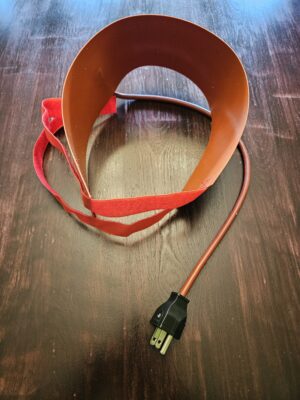
60W Heating Belt
Heat Belt Under Neoprene Jacket
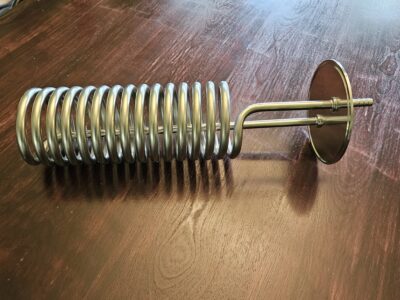
Cooling Coil Attached to 4-inch TC
Ice Water Connected to Cooling Coil
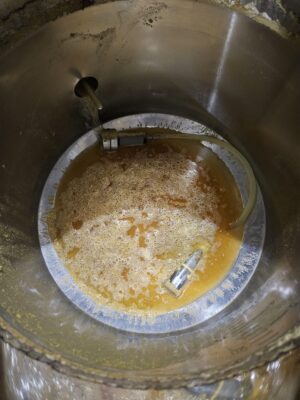
The dump valve on the Fermtank TC performed notably better than the base Fermtank I previously reviewed. On the base Fermtank, opening the dump valve pretty much never resulted in anything coming out if there was post-fermentation sludge. It could be used in cleaning if you pushed a flexible brush through to get things moving. But the 1.5” pipeworks and valve on the Fermtank TC worked perfectly. I had a TC plate with a hose barb on it, which I connected to the butterfly valve output. Then with a hose running into a pitcher, I was able to open the butterfly valve and drain off murky sludge until I was getting clear beer out of it. I know it’s debatable whether this results in improved beer taste, but the ability to purge foul-tasting sediment from the bottom of my beer just felt like a good thing to do.
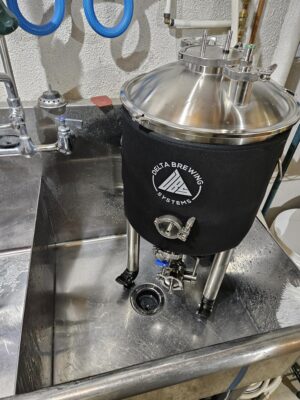
Easily Fits in 2×2 Sink for Cleaning
![]()
Emptying Fermentation Debris
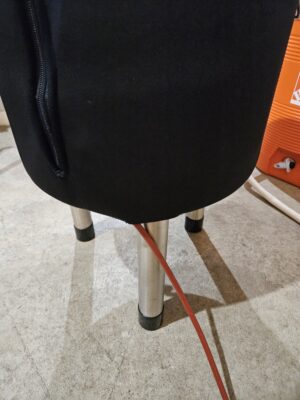
The last optional accessory I used were the wheels (casters) that screwed into the fermentor legs. These turned out to be a surprise & delight. I’ve never thought of wheels on fermentors as necessary, at least for the 5-gallon batch size I brew. But the convenience of being able to simply push the fermentor full of beer around my brew space turned out to be quite nice. I never realized how much I moved it. Little shifts like reaching the temperature controller to plug in the cooling pump, or shifting over as another fermentor full of beer got added- all were made simpler. These obviously aren’t unique to Fermtank, but they are an add-on option worth considering.
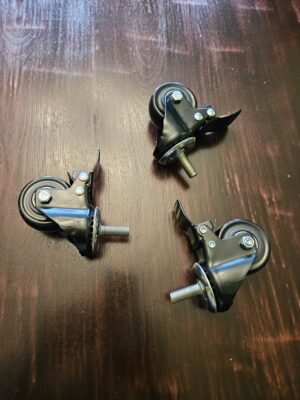
Wheels for Fermentor Legs
Conclusions
The build quality was good, and it was nice to see that even with my reviews spaced out over the past 3 years, Delta Brewing gear seems to be consistent with this. All the added functionality with the TC ports and boost in pressure capability really turned this into a very useful fermentor. I am completely sold on the value of 8-gallon fermentors, feeling slightly annoyed when I have to fill a 7-gallon fermentor now. I’m spoiled.
Thanks to Delta Brewing Systems for providing the fermentor used in this review.
Check Current Price and Availability:
- The FermTank – 8 Gallon TC < the model reviewed here
- THE FERMTNANK – 14 GALLON FERMENTER
- THE FERMTANK – 8 GALLON FERMENTER
- THE FERMTANK – 4 GALLON SMALL BATCH FERMENTER
- Accessories
- All Delta Brewing Systems Fermenters
Related: Hands on Review: Delta Brewing Systems Fermtank – TILT Hands on Review
More Tri-Clover/Tri-Clamp! Tri-Clamp Fittings at Proflow Dynamics
More Homebrew Finds!
- Last 50 Finds!
- Top Deals – a curated list of the best deals
- Homebrew Reviews – one of the largest libraries of homebrew reviews in existence!
- Our Top Posts – tips, how-tos, resources posts and more
More Fermenter Reviews!

Most Recent Deals

More Fermentation Related!
pinned
This post may contain affiliate links. We may make a commission when you use our links. This will never cost you extra. Thank you for supporting Homebrew Finds!
greatdealsBy Brad Probert. Check out Brad’s website – beersnobby.com
Special Thanks to Delta Brewing Systems for providing the unit used for evaluation in this review.
Price, promotions and availability can change quickly. Check the product page for current price, description and availability.
Make sure the components you use are compatible and rated for your intended application. Contact manufacturer with questions about suitability or a specific application. Always read and follow manufacturer directions. tag:lnksfxd review:dbstcfermtank tag:tpr