
Hands on Review: Blichmann Engineering BrewEasy Compact
This review is by Homebrew Finds Contributor Brad Probert. Brad is an engineer, expert homebrewer and experienced reviewer. Grab a link to Brad’s website at the end of this review.
Blichmann Engineering BrewEasy Compact
Blichmann came out with the BrewEasy in 2014. It was when all-in-one units were starting to pop up in the market everywhere. Blichmann went in a different direction, by building on the strength of their existing kettles, and finding an innovative way to connect them together. They came out with a revised model in 2021 that they call the BrewEasy Compact, but they still offer the original configuration and call it the BrewEasy Classic. This review will focus on the BrewEasy Compact.
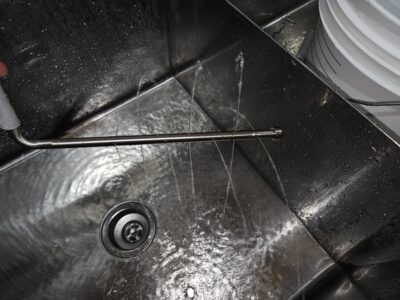
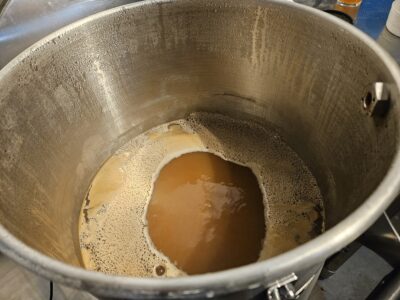
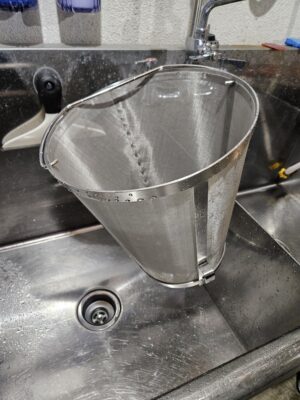
 Bottom of Mash Basket
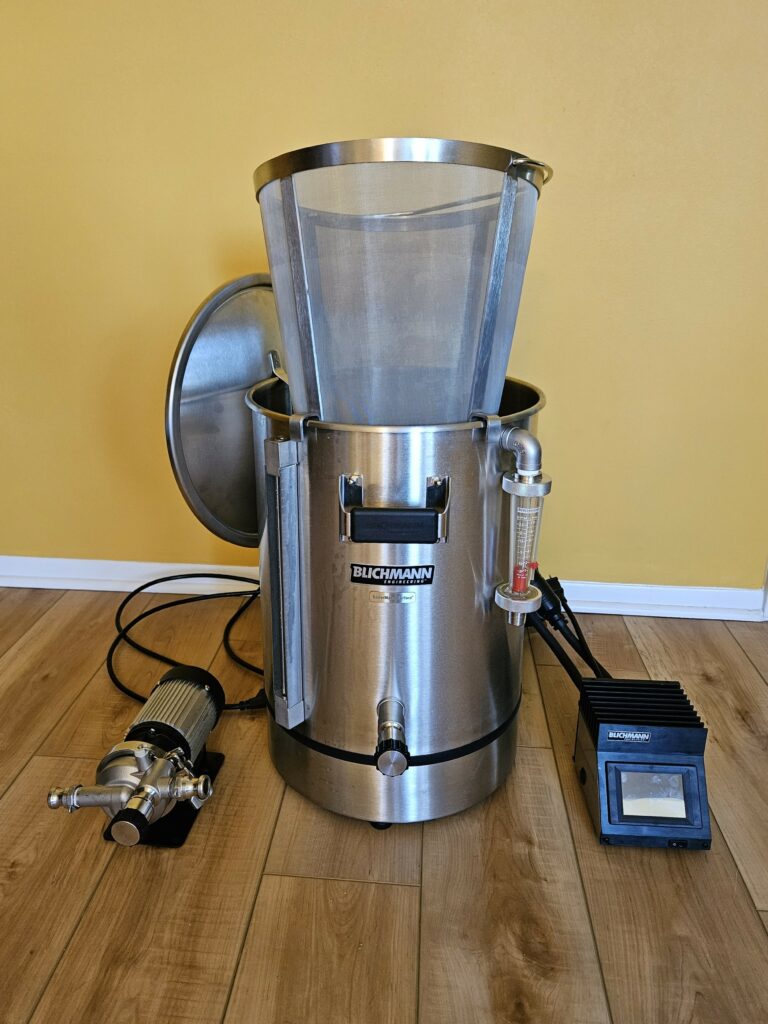
The BrewEasy Compact is a similar layout to other all-in-one brewing units in the market. There’s a kettle with malt basket that sits inside. When mashing, the grain sits in the basket, and a pump is used to continually recirculate wort through the grain. When mashing is finished, you lift the basket of wet grains out, drain them, and then the kettle changes focus to boiling the wort that is left. The Compact comes in both gas and electric power (120V or 240V). The electric version can come with either the Boil Coil heating element inside the kettle, or Blichmann’s new BoilerMaker Surface with the heating element bonded to the underside of the kettle. The Boilermaker Surface has the same kettle up top, but the heating elements are sealed away in their own space, like a basement apartment. This makes the kettle’s overall height about 6” taller (10-gallon Surface is 22” tall, and standard G2 kettle is 16.4”), but makes the kettle interior very uncluttered for ease of cleaning.
Looking for a Review of the BrewEasy Classic?
Compare Models, Prices and Availability, Review Continues Below:
This article contains affiliate links. We may make a small percentage if you use our links to make a purchase. You won’t pay more and you’ll be supporting Homebrew Finds and more content like this. Thank you for your support!
The BrewEasy Compact uses the standard Blichmann 10-gallon kettle and is targeted for making 5-gallon batches. In addition to the heat source options, you also have the option of having NPT threaded fittings or Tri-Clamp fittings. When configuring the system, you also have the option to bundle it with a whirlpool fitting and Blichmann’s Therminator plate chiller. All systems come with their clear-view flow meter, RipTide pump, and BrewCommander controller.
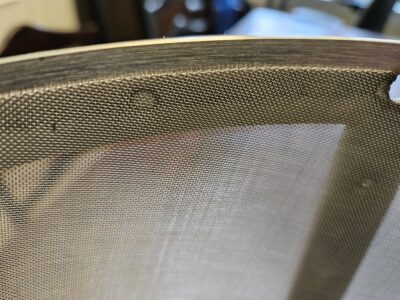 Closeup of Mesh Weld to Basket Frame
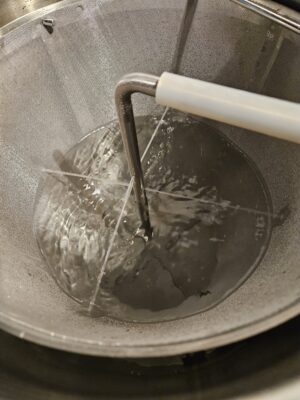
Inside Mash Basket
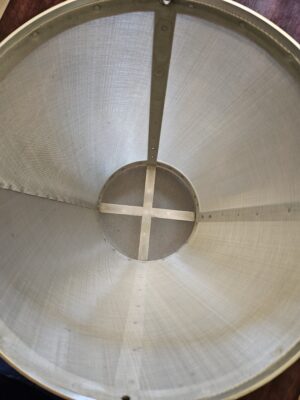
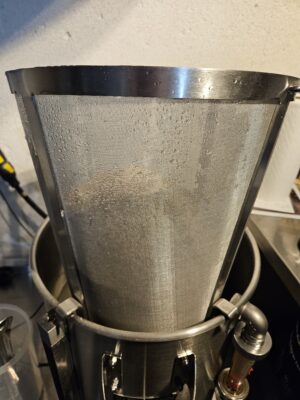
The Compact’s malt basket is different from other all-in-ones on the market. The basket is made of a 400-micron stainless steel mesh attached to a simple structural steel frame to ensure it keeps its shape. The basket also has hooks that allow you to hang the basket on the rim of the kettle for draining the malt after the mash, as well as holding it in place if you choose to do a batch sparge process. Most all-in-one systems have a malt basket that is like a second kettle with a false bottom that makes up the bottom. In the case of the BrewEasy Compact, the entire surface of the basket has holes, but all of them are much smaller. The 400-micron mesh size is in the range of BIAB mesh bags (typically 200 – 400-micron mesh).

 Spray Pattern Out of Center Recirc Tube
Center Recirc Pipe Spray Pattern
Also different from other all-in-one units, instead of the recirculating mash wort coming in at the top of the grain and working its way down through the grain bed, the BrewEasy Compact has a “sprinkler manifold” that sits in the middle of your grain bed. This is a stainless steel rod with a couple of small holes drilled into it. It passes through the kettle wall where the recirculating wort comes in and extends all the way down to near the bottom of your grain bed. Pressurized wort gets pushed out through the holes, allowing recirculated wort to spread throughout the entire grain bed at the same time, and not just depend on gravity to fall through the mash. The combination of this recirculation arm with the full mesh basket ensures even heating, good conversion efficiency throughout the entire grain bed, and decreased risk of grain compaction causing a stuck mash.
The temperature probe is installed through the side wall of the kettle, about halfway up (takes about 4.5 gallons to submerge the probe). The BrewCommander controller turns the heat on/off as dictated by the temperature probe, while following the profile you have programmed in. In mash mode it controls to the target temperature, and in boil mode it applies continuous heat. In both modes you can independently turn the pump on & off and set a unique controller output power %. See my full review of the BrewCommander controller here. You manually adjust the valve on the output of the RipTide pump to control the recirculation flow rate. This feeds into the kettle through the flow rate meter, so you can keep an eye on the flow rate to try to keep consistency between batches, and to watch out for any slowing or stuck mashes.
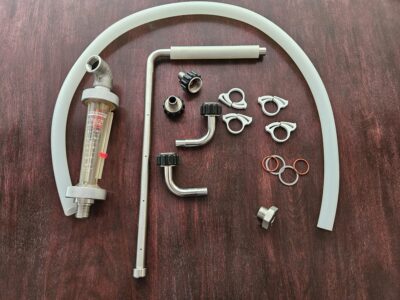 Recirculation Kit with Flow Meter, Quick Connects, and Center Mash Tube
Blichmann has a couple other unique aspects to the kettle/system. If you select the NPT thread fittings, it doesn’t mean everything gets installed with Teflon tape and a wrench. Instead, they have their unique quick-connect fittings that screw onto the NPT threads by hand. The fitting contains an O-ring inside, so no Teflon tape is needed. And with overmolded silicone grips, not only can you tighten them by hand when installing, you can remove them while hot without having to touch hot metal (although you do still have to manage hot dribbles of wort). The other unique feature is the volume markings on the kettles. Instead of being stamped into the kettle wall or etched/painted on, they use an external glass sight tube. As the liquid volume gets filled in the kettle, these tubes allow you to see the liquid level as it comes up the sight tube. There are protector shields on the sides of these tubes, and these shields have the volume marking on them. So, you can easily check the liquid level without removing the lid.
Hands on Review
I’ve brewed with several different all-in-one units over the years. I’ve also brewed on Blichmann’s BrewEasy Classic. The quality of all the parts was high. The implementation of the attached/hidden heating element was well-done with the Surface kettle. The two halves (kettle + heating compartment) were made of the same brushed steel surface, same diameter, and clean seal/gasket where the two were mated together. The BoilerMaker Surface kettle had several rubber feet added at the bottom- whether as an engineering thought exercise of how to design in robustness in the event of electrical failure, temperature isolation for a hot kettle sitting on your brew table, or just simply a way to make it less likely to scratch the tabletop- it showed the thoroughness of the Blichmann design process.
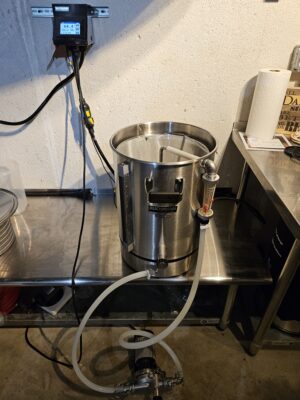 Kettle Set up on Brew Table
I was concerned about the steel mesh basket before I received the system. Steel mesh seems to be difficult to work with, as most homebrew gear I’ve seen made with it isn’t that pretty. That was not the case with the Blichmann basket. The skeleton/frame was robust, and the mesh was accurately sized to attach to it. There were no waves, gaps, or flared seams. Everything was tight and well-secured. So, this passed the initial inspection for me.

Most of my other brew gear uses camlock fittings, so I was a bit nervous about the NPT threads. However, after using the Blichmann QuickConnectors for a short time, I saw the value of them. They took slightly more time to screw down than a camlock. But the fact that they created a leak-free seal without any pipe thread tape, and you are completely disassembling the joint for cleanup at the end of brew day every time without ever involving a wrench. It was subtly impressive. The one downside with these fittings compared to camlocks is when you’re disconnecting a joint that has hot wort. The nature of unthreading leaves your fingers in the “hot wort dribble zone” longer than you would have with flipping a couple camlock levers.
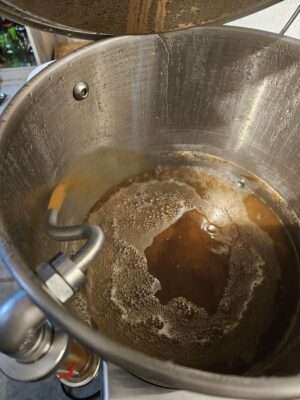
For evaluation, I brewed two batches in the BrewEasy Compact. The first was a British Bitter with 6.8 lbs. of grain and 1.3 oz of kettle hops for a 4-gallon batch. This was originally intended to be a 3-gallon batch, but I found after mashing in, I needed more water because the mash was way too dry. By the time I added enough water to get the mash workable, I ended up with more liquid than originally planned. It worked out, because I got higher mash efficiency than planned (hit 75% mash efficiency), and I just ended up a couple points low on OG with the bigger volume. This ended up being a full-volume mash, so I was impressed with the 75%.
My second brew trial was an IPA. The recipe had 13.1 lbs. of grain and 4 oz of kettle hops for a 5.5-gallon recipe. I didn’t have the equipment profile dialed in for mash tun deadspace (even though I should’ve learned from the first batch there is a lot of volume for liquid outside the grain basket…). But since this batch was planned for a sparge, I had water to steal from the sparge and get the mash workable. I ended up having to add 2.5 gallons of additional water to get the mash consistency to a decent level. I sparged with the remaining 1.5 gallons of water and hit 78% mash efficiency. It was at this point I determined I needed to break out some geometry and calculate volumes and see just how much water was sitting outside the basket.
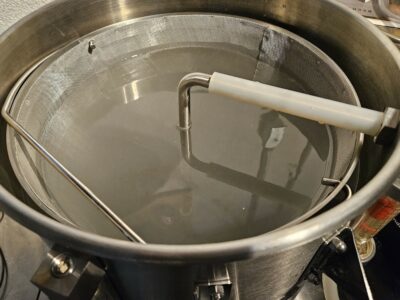 Strike Water
I quickly found the reason my profile was so far off. The tapered shape of the basket meant about half of the water added to the mash tun sat outside the basket, not helping with mash thickness. The IPA recipe had originally called for 4.5 gallons of strike water. But based on half of that water being outside the basket, I ended up with about 0.7 qt/lb. And when I added the 2.5 gallons, I got to approximately 1.25 qt/lb. thickness. With the tapered shape of the basket, it isn’t always 50% deadspace, so I plotted my curve. This curve represents some empirical results, as it seems the mesh side walls tended to make the mash looser than just the geometry would indicate.
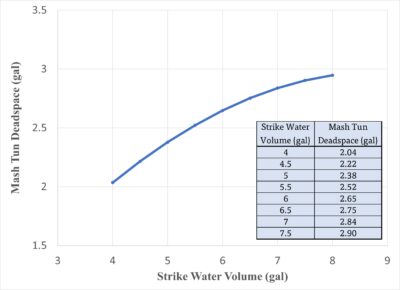
With so much mash tun dead space, it didn’t leave much water for a sparge, and it made me wonder if the typical mash efficiency boost would still be seen. So, I decided to do an experiment. I had some older Munich malt that was 10 months past the Best By date, all from the same sack of grain. Brief research indicated that conversion efficiency shouldn’t be affected, but flavor might be. I did two mashes- one targeting 1.25 qt/lb. with 13 lbs. of grain, and 1.3 gallons of sparge water. The other was a full volume mash with 11.5 lbs. of grain. Both had water adjusted with brewing salts to my typical Hoppy profile, and acid added to both, and both mashes measured 5.37 pH. I mashed for an hour at 152F, then ramped to 168F over 8 minutes, then sat at 168F for 10 minutes. I measured the gravity to calculate mash efficiency. The batch sparge mash measured 74% and the no-sparge mash measured 70%.
 Circulating Boil at 40% Power
The 3500W heating element seemed to be sufficient. I was able to get a nice circulating low boil (0.5 gal/hr boil-off rate) by setting the controller to 40-45% power output during boil, and a 1 gal/hr boil-off rate at 75% power output. I took advantage of the BrewCommander timer function to heat strike water for me while I slept (which is awesome). My brew session from mash-in to being finished with cleanup was just over 4 hours on the batch with a 45 min mash + 10 min mashout + 60 min boil. And right at 5 hours with a 75 min mash + 10 min mashout + 90 min boil.
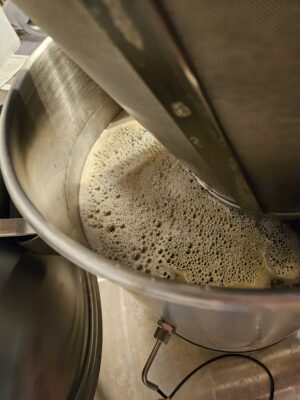 Bottom of Mash Basket Hanging with 7 Gallons of Wort
As far as volumes go, the BrewEasy Compact is marketed as being targeted for 5-gallon batches. The location of the temperature sensor required 4.5 gallons of water/wort to submerge it. So, trying to do smaller batches means you have to go no-sparge. And I wouldn’t really recommend going any less than a 3.5/4-gallon batch size. As for bigger batches, I found that at 7 gallons of wort, the liquid level just reaches the bottom of the mash basket as it rests on its hangars to drain the wort. The maximum batch size will go from there, based on the vigor of boil you target and of course duration of boil. I had no problems getting a 5.5-gallon batch out of it with a 90-minute boil, but I aimed for a less vigorous boil rate of 0.5 gal/hour. The mash basket supposedly can handle 18 lbs. of grain, and I’ve seen a reviewer make this happen, but it took very careful mixing and a fairly dry mash (to avoid grain particles from escaping over the top of the basket). The 13.1-lb mash was definitely no problem. And based on that, I would expect you could probably get a 14-lb mash to be a low-stress event. That works for me, personally, because I don’t typically brew anything over 7% ABV anyway.


 Mash Recirculation
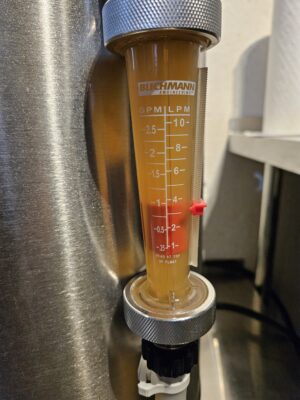
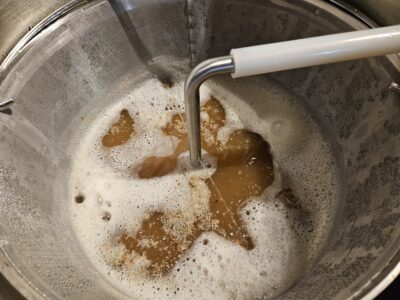
Flowmeter During Recirc
The flowmeter was helpful. The center recirculation pipe has a fair amount of resistance as wort must shoot out through the grain bed during recirculation. I found through the early part of recirculation that as the grain bed settled in, the restriction increased. So about 10 minutes into the mash on my small batch, the flowmeter showed me my flow rate had dropped from 1.25 gpm to a measly 0.25 gpm. I was able to adjust the flow restriction valve on the RipTide pump to get it back to circulating again. And on that smaller grain batch, the top holes of the recirculation pipe were above the grain bed, and a flow rate of 1.25 gpm was where I wanted to be to avoid a massive spray coming out. On the larger grain batch, a flow rate of just over 2 gpm had the ideal amount of flow through the bed. So, I could check the flow meter easily to know things were still going on inside the kettle as I wanted.
 Large Volume Mash
Small Batch After Draining
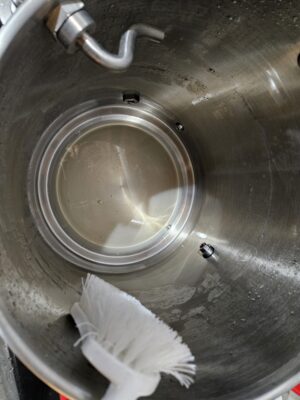
When it came time to cleanup, the benefits of the BoilerMaker Surface’s heating element tucked away underneath was very obvious. If you’ve used the Blichmann BoilCoil or other rod heating elements, you know the hassle of scrubbing the surfaces of those elements. They typically require special cleaning tools and another bucket to let the elements soak in cleaning solution first. But the Surface eliminated all of that. I filled the kettle with a bit of cleaning solution, and just as easily as cleaning the rest of my kettle, the heating element bottom was also cleaned. The mesh basket also cleaned nicely. I was worried with all the tiny holes I’d have grain stuck everywhere. But it just took a few rounds with the sprayer in my cleanup sink to get the stray grain bits out, and no scrubbing required. So cleaning was very nice.
 Using Whirlpool Fitting During Wort Chilling
![]()
Transfer to Fermentor After Wort Chilled
Conclusions
The BrewEasy Compact is clearly well-made, and thought has gone into the different aspects of its unique system with the center feed recirculation tube and the full-mesh basket. The BoilerMaker Surface kettle is a very clean execution and the whole system makes clean-up very simple. Multiple aspects of the system really push you to running 4-6-gallon batches for everything to work at its optimal, so it’s not the best option if you’re trying to make 2.5-3 gallon “half batches”. The unique system layout made me feel like I had some more learning ahead to really figure out the optimization point on recirculation flow rate, grain crush, and water volumes (sparge vs no-sparge). But it also felt like once I had that optimization figured out, it would be an extremely reliable and repeatable brew system.
Special Thanks to Blichmann Engineering for providing the unit used for evaluation in this review.
Compare Models, Prices and Availability, More Photos Below:
BrewFather Equipment Profile for BrewEasy Compact
Related Reviews:
- Hands on Review: Blichmann Engineering BrewEasy Classic
- Hands on Review: Blichmann BrewCommander Controller
- Hands on Review: Blichmann Engineering Riptide Homebrew Pump
- Hands On Review: Blichmann Engineering BoilerMaker G2 Homebrew Kettles
- Hands on Review: Blichmann Engineering BoilerMaker G2 Mash Tun
- Hands on Review: ProFlow Dynamics Stainless Steel Camlock Quick Disconnects
More Photos
Easy Cleaning Surface Kettle
Mash Basket Drying After Spray Cleaning
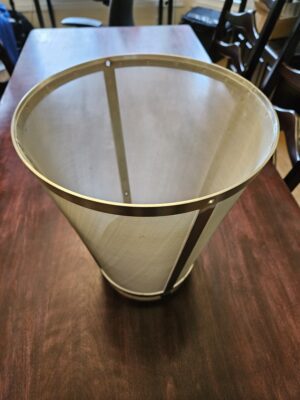
Tapered Mash Basket
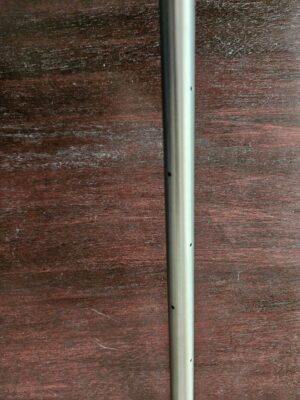
Recirculation Holes in Center Mash Tube
More Blichmann Engineering Reviews!

More Homebrew Finds!
- Last 50 Finds!
- Top Deals – a curated list of the best deals
- Homebrew Reviews – one of the largest libraries of homebrew reviews in existence!
- Our Top Posts – tips, how-tos, resources posts and more
- Let’s be Friends!
Recent Deals!

10 Most Recent Homebrew Resource Posts & How-To’s!

We are Homebrew Review HQ! Our 10 Most Recent Reviews

This post may contain affiliate links. We may make a commission when you use our links. This will never cost you extra. Thank you for supporting Homebrew Finds!
By Brad Probert. Check out Brad’s website – beersnobby.com
Make sure the components you use are compatible and rated for your intended application. Contact manufacturer with questions about suitability or a specific application. Always read and follow manufacturer directions.
Price, promotions and availability can change quickly. Check the product page for current price, description and availability. tag:lnksfxd review:blichbreweasycompact tag:tpr