
Hands on Review: Blichmann Engineering BrewEasy Classic
This review is by Homebrew Finds Contributor Brad Probert. Brad is an engineer, expert homebrewer and experienced reviewer. Grab a link to Brad’s website at the end of this review.
Blichmann BrewEasy Classic
Blichmann came out with the BrewEasy in 2014. It was when all-in-one units were starting to pop up in the market everywhere. Blichmann went in a different direction, by building on the strength of their existing kettles, and finding an innovative way to connect them together. They came out with a revised model in 2021 that they call the BrewEasy Compact, but they still offer the original configuration and call it the BrewEasy Classic. This review will focus on the BrewEasy Classic.
Compare Models, Prices and Availability, More Photos Below:
This article contains affiliate links. We may make a small percentage if you use our links to make a purchase. You won’t pay more and you’ll be supporting Homebrew Finds and more content like this. Thank you for your support!
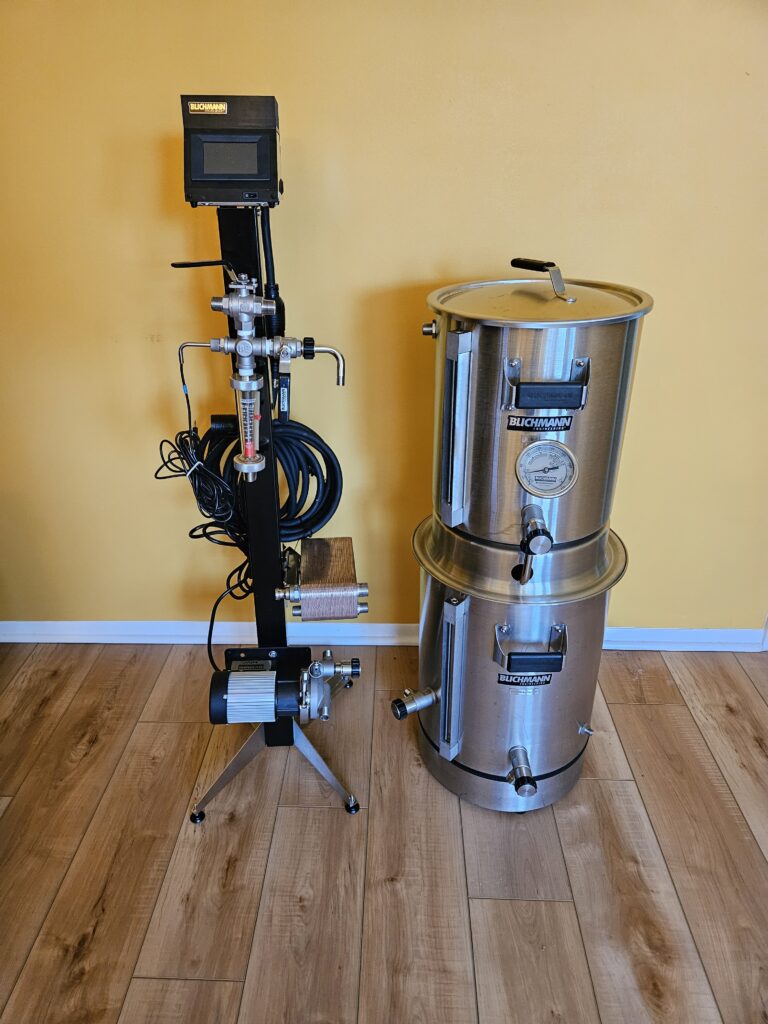
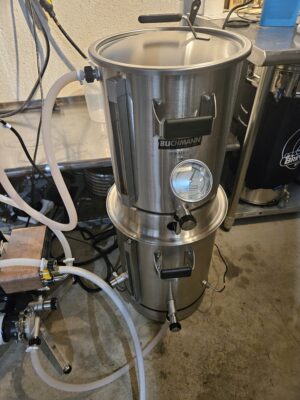
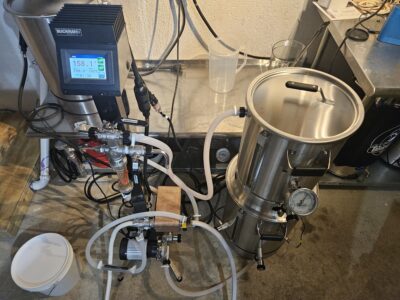
The BrewEasy Classic is a 2-Vessel system. To make it fit into the all-in-one category, it has some unique connections between the two kettles. There are a lot of add-on options that allow you to customize it. It comes in both gas and electric power (120V or 240V). The electric version can come with either the Boil Coil heating element inside the kettle, or Blichmann’s new Boilermaker Surface with the heating element bonded to the underside of the kettle. The Boilermaker Surface has the same kettle up top, but the heating elements are sealed away in their own space, like a basement apartment. This makes the kettle’s overall height about six inches taller (10-gallon Surface is 22” tall, and standard G2 kettle is 16.4”), but makes the kettle interior very uncluttered for ease of cleaning.
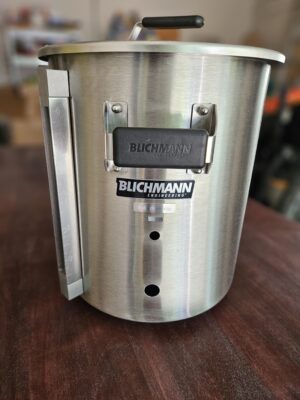
7.5 Gallon BoilerMaker G2 Kettle
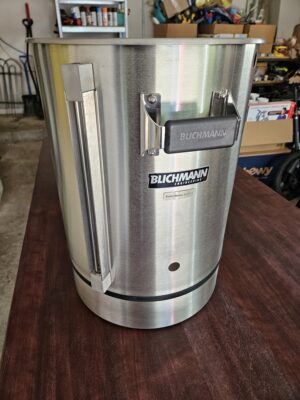
10 Gallon BoilerMaker Surface Kettle
Flow Control Valve and Dip Tube
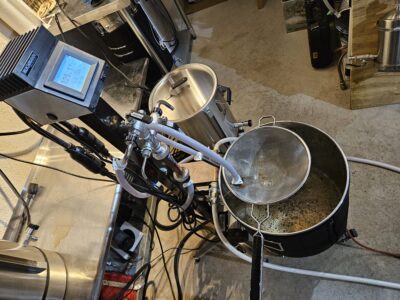
The BrewEasy Classic comes in five different sizes with different kettle size configurations, but the layout and operation between them all is the same. There are two kettles- one is a mash tun, the other a boil kettle. The “boil” kettle also applies heat to the wort recirculating during mash (which means the boil kettle also acts as a RIMS). To balance flow in the system, the mash tun uses the unique Blichmann Auto Sparge. This has an adjustable float arm attached to an inlet valve. You adjust the height of the float to keep the wort level above your grain bed. When the wort reaches that level, the float raises and shuts off the inlet flow. When the wort level drops, the float drops down and cracks open the inlet valve proportionally to let more recirculating wort flow into the mash tun.

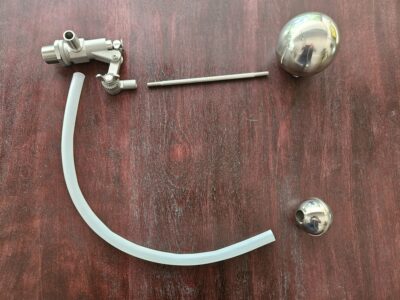
AutoSparge Arm
AutoSparge Set for Thicker Mash
AutoSparge Set for Thinner Mash
Related: Hands on Review: Blichmann Engineering AutoSparge
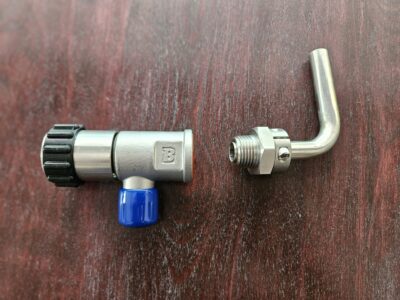
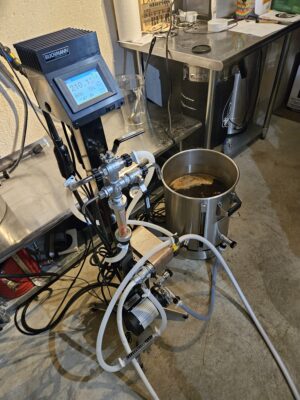
The two kettles stack on top of each other with a domed adapter lid for it to sit properly and have space for the drainpipe from mash tun to boil kettle. In this drainpipe you fit one of the provided fixed orifices (silicone discs with a sized hole in it). The orifices range from 0.5 gpm flow rate up to 2.0 gpm at 0.25 gpm increments. Blichmann recommends using the largest orifice size you can without a stuck mash. For 5-gallon batch sizes they recommend 0.75 gpm. The last piece of the flow system is the RipTide magnetic drive pump that takes wort out of the lower boil kettle and pumps it up to the mash tun. The orifice in the drainpipe controls the rate of flow into the boil kettle, while the pump constantly has wort ready to flow into the mash tun as the AutoSparge lets it in. So, on a 5-gallon batch setup, with the 0.75 orifice, you’re recirculating 0.75 gallons of wort per minute between mash tun and boil kettle. No flow valve adjustments needed.
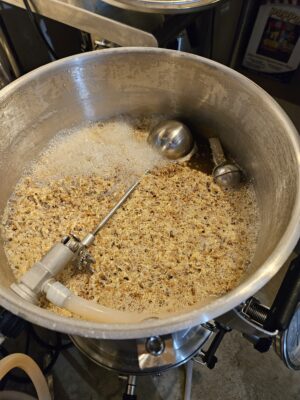
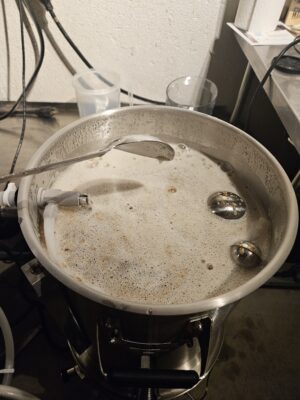
Kettles During Mash Recirculation
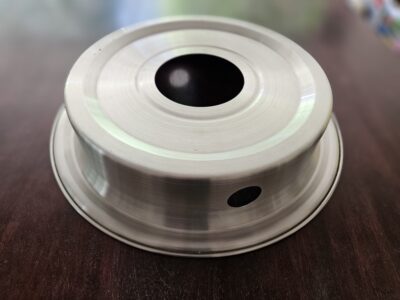
Adapter for Stacking Kettles
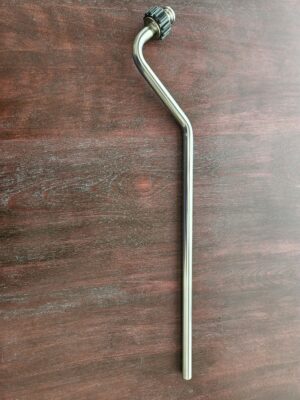
Drainpipe
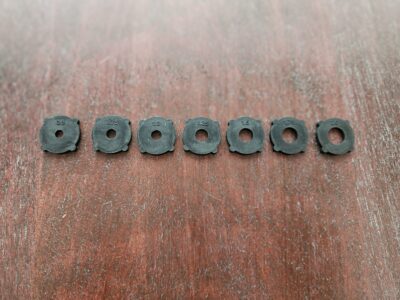
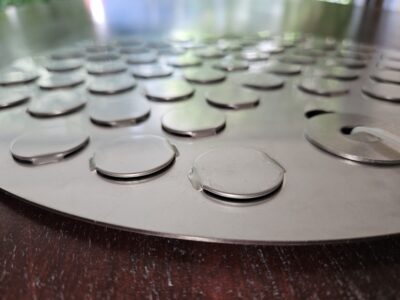
Flow Orifices
With the heating element in the boil kettle on the bottom, the system uses Blichmann’s BrewCommander controller to monitor temperature and adjust heat on/off accordingly. The temperature sensor sits in the wort in the kettle at the bottom, and the recirculation system brings that wort up top to be added on top of the mash. Once mash is finished, you turn off the pump and the wort then just uses gravity to drain down through the orifice pipe into the kettle. During this time, you can put the heating element on to full power to heat up to a boil as the remaining wort drains down. When finished draining, you remove the mash tun, adapter plate and orifice tube and boil in the lower kettle (while cleaning the mash tun gear). The BrewCommander has a touch screen interface, and you can program in mash profiles and a boil timer with times for boil additions that runs during your brew day, while it automatically controls the power. See: Hands on Review Blichmann Engineering BrewCommander

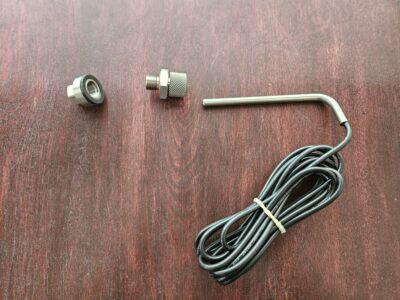
Temperature Probe
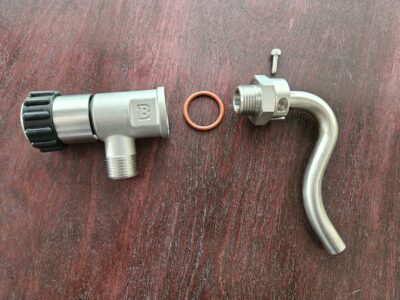
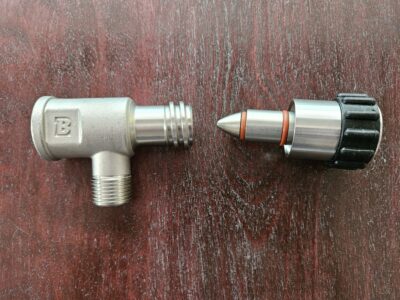
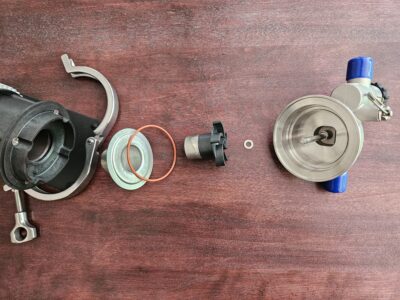
Blichmann has a couple other unique aspects to the kettles/system. Although the fittings are all NPT thread, it doesn’t mean everything gets installed with Teflon tape and a wrench. Instead, they have their unique quick-connect fittings that screw onto the NPT threads by hand. The fitting contains an O-ring inside, so no Teflon tape is needed. And with overmolded silicone grips, not only can you tighten them by hand when installing, you can remove them while hot without having to touch hot metal (although you do still have to manage hot dribbles of wort). The other unique feature is the volume markings on the kettles. Instead of being stamped into the kettle wall or etched/painted on, they use an external glass sight tube. As the liquid volume gets filled in the kettle, these tubes allow you to see the liquid level as it comes up the sight tube. There are protector shields on the sides of these tubes, and these shields have volume markings on them. So, you can easily check the liquid level without removing the lid. The sight tubes also double as a manometer, and you can monitor the fluid levels during mash recirculation to see if you are pulling wort out too fast from the mash tun and risking a stuck mash.


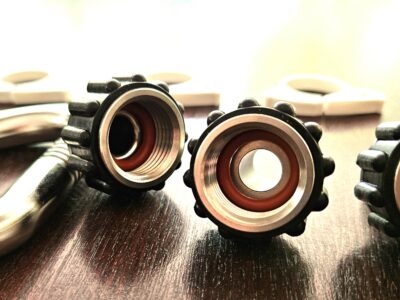
Quick Connect Fitting O-rings
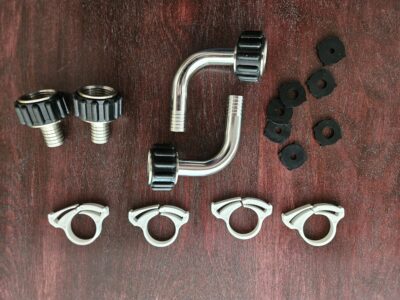
Quick Connect Fittings
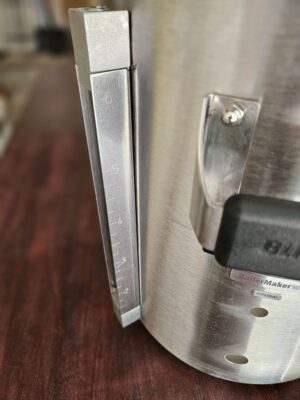
Volume Markings for Sight Glass on 7.5G Kettle
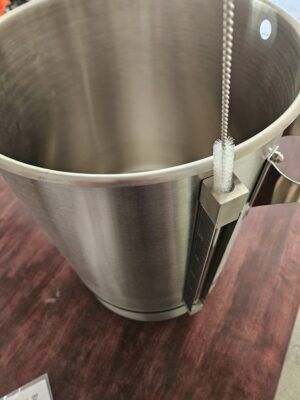
Cleaning Brush for Sight Glass
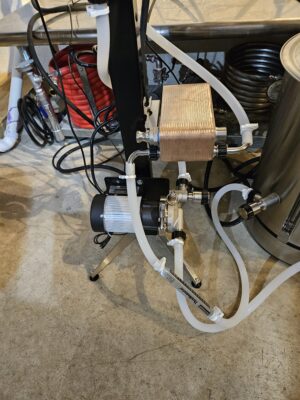
In addition to the base equipment described above, you can also add additional accessories to the system. You can add a whirlpool valve/arm kit that installs through a hole punched in the kettle wall, or an over-the-top whirlpool arm. There is a CommandStand which provides a vertical steel rail with pre-drilled holes to allow you to mount various accessories (pump, brew controller, plate chiller, multi-way valve & flowmeter) and it has four extended feet to give it stability while sitting on the floor. The option with a flow control manifold contains a clear plastic flow meter with a floating puck and graduated markings so you can visually see flow rate- and also wort clarity. The manifold has a port that branches off with its own valve so you can easily collect wort samples during brewing (pH sample, gravity samples). It also has a 3-position valve to send your wort in one direction during recirculation, off, or in another direction to send it to a wort chiller. The final add-on option is Blichmann’s wort plate chiller, the Therminator. The Therminator has threaded hose connections (with garden-hose fittings you can screw on) for cooling water in & out, as well as hot wort in and cool wort out.
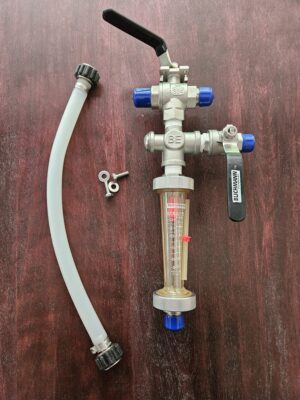
Flow Meter and Flow Control Manifold
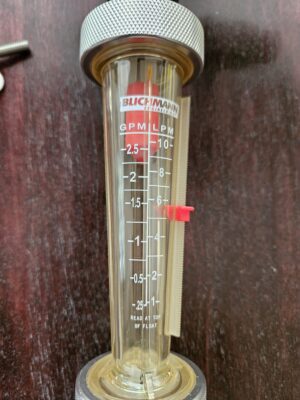
Flow Meter
Collecting Wort Sample During Brew Session
Flow Control Valve with Whirlpool Arm
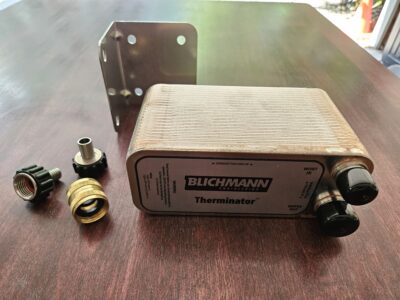
Therminator Plate Chiller
Hands on Review
I evaluated the system setup with the 7.5-gallon mash tun and 10-gallon boil kettle (for 5-gallon batches). The boil kettle was the 240V/3500W BoilerMaker Surface. I’ve always found Blichmann gear to have good build quality, and the BrewEasy was no different. The implementation of the attached/hidden heating element was well-done with the Surface kettle. The two halves (kettle + heating compartment) were made of the same brushed steel surface, same diameter, and clean seal/gasket where the two were mated together. The BoilerMaker Surface kettle had several rubber feet added at the bottom- whether as an engineering thought exercise of how to design in robustness in the event of electrical failure, temperature isolation for a hot kettle sitting on your brew table, or just simply a way to make it less likely to scratch the table top- it showed the thoroughness of the Blichmann design process. I previously reviewed the Blichmann G2 standard kettle, along with their unique “button louver” false bottom. See: Hands on Review: Blichmann Engineering BoilerMaker G2 Mash Tun
Button Louver False Bottom
Related: Hands On Review: Blichmann Engineering BoilerMaker G2 Homebrew Kettles
With this many parts, there was a lot of washing to be done first, and I had to keep things like washers and fittings grouped logically. Between the cleaning and screwing things together, I probably spent about 2 hours. But that included the base kettle system plus the optional Command Stand. Nothing was particularly complicated, it just seemed to take a bit of time. Most of my other brew gear uses camlock fittings, so I was worried that this wasn’t an option, and it only came with NPT threads. However, after using the Blichmann QuickConnectors for a short time, I saw the value of them. They took slightly more time to screw down than a camlock. But the fact that they created a leak-free seal without any pipe thread tape, and you are completely disassembling the joint for cleanup at the end of brew day every time without ever involving a wrench. It was subtly impressive. The one downside with these fittings compared to camlocks is when you’re disconnecting a joint that has hot wort. The nature of unthreading leaves your fingers in the “hot wort dribble zone” longer than you would have with flipping a couple camlock levers.
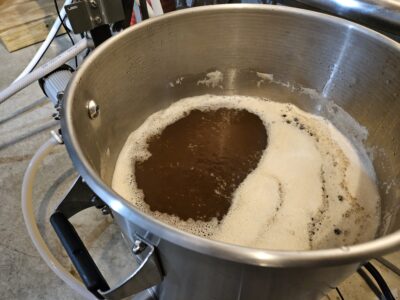
For evaluation, I brewed two batches in the BrewEasy Classic. The first was a Baltic Porter with 15.1 lbs. of grain and 1.4 oz of kettle hops for a 5-gallon batch. Blichmann notes that you’ll get about 10% lower mash efficiency than a typical system. I’m sure this is due to the fact you are doing a full volume mash with the entire volume of wort circulating through the whole system, and no-sparge mashes pay a lautering efficiency penalty. With this batch I only hit 60% mash efficiency. I know from jumping around between systems, there’s something with the first batch on a new system that always ends up underperforming on mash efficiency, so this wasn’t surprising to me. My second batch was an Irish Ale with 11.2 lbs. of malt and 2.4 oz of kettle hops for a 5-gallon batch. This time I hit 73% mash efficiency.
During Mash
The 3500W heating element seemed to be sufficient. I was able to get a nice circulating low boil (0.5 gal/hr boil-off rate) by setting the controller to 40-45% power output during boil, and a 1 gal/hr boil-off rate at 75% power output. I took advantage of the BrewCommander timer function to heat strike water for me while I slept (which is awesome). My brew session from mash-in to cleanup finished was 4 hours with the Baltic Porter and 4.5 hours with the Irish Ale. Both of those had a 60-minute boil. Mash times on the longer Irish Ale was 95 minutes (75 min mash + 10 min mashout + time to heat from mash to mashout). The Porter was 65 minutes of mash with a shorter mash step.
Low Circulating Boil
As an engineer, I was impressed with the system the BrewEasy Classic uses for wort circulation during mash. I used the recommended 0.75 gpm orifice in the gravity feed tube to control the run-off flow rate from mash tun to the boil/RIMS kettle. I left the pump on full and set the float to the level I wanted the wort in the mash tun. It just hummed along. I didn’t have to worry about an overflowing mash tun, as the simple float device just shuts off flow in the event of a stuck mash. And the fixed orifice made a good, repeatable recirculation flow rate for each batch, without having to mess around with adjusting valve opening positions. With that 0.75 gpm orifice in place, and the system circulating, the flow meter for wort going into the mash tun read… 0.75 gpm.
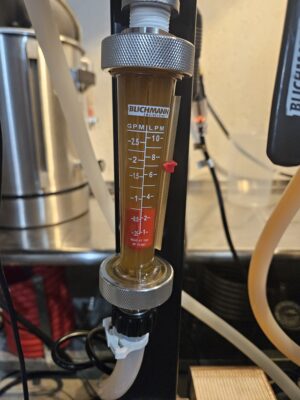
Flow Meter During Recirc Matching Drainpipe Orifice Selection
The vertical stacking of the two kettles together was a creative way to make a 2-vessel brew rig more space efficient. It did mean that when you get to the boil phase, you’re dealing with a kettle on the floor. So, it forced me to think through my processes to make sure I didn’t have a lot of steps that required me to fiddle around with connecting and disconnecting things (it’s easy to drop hops from above). But if you are floor space constrained, this can be a clever way to fit a bigger brew rig in your space than you thought you could.
Boil Phase
In addition to the base system, I also evaluated the Command Stand, Flow Control Manifold, and Therminator plate chiller. To the stand I also added the RipTide pump and the BrewCommander controller. I found it quite convenient to have everything bolted to one fixture- and a fixture that could easily be moved around. It was another space-saving concept by stacking all of this stuff vertically.


I spent a bit of time thinking about how to plumb the multi-way valve to see if I could get away with no hose connections needing to be made/changed during the brew day (I hate cleaning up spilled wort). I couldn’t quite do it. With the valve in one position, it would feed the recirculation into the mash tun, and then after mash, I could move that hose down to the whirlpool valve on the boil kettle. This could be done with cool wort and without spillage. This let me whirlpool in the kettle before sending through the wort chiller, which was nice. But when I moved the multi-position valve to the other direction, where I had my wort chiller connected, I needed to disconnect the connection to the kettle whirlpool because I circulate hot wort through my chiller to sanitize it. So that involved swapping hose connections (and learning I need to remember to close valves that are connected below the wort level…). Not a huge deal, but it made things seem complicated. Maybe that just required more practice.

Flow Control Manifold
Cooling Flow Back Thru Kettle Whirlpool Valve
I am not a fan of plate chillers. I had previous experience with the misery of cleaning them and one clogging up on me on brew day. But I gave the Therminator a try anyway. The chilling power of plate chillers is unmatched, and the Therminator is the same. With a boiling water experiment, water cooled from boil to 75F with a “wort” flow rate of 1 gpm with a single pass through the Therminator. While brewing a relatively low-hopped Baltic Porter (1.4 oz in a 5-gallon batch), I used the whirlpool fitting first for a few minutes, and made use of the rotating pickup tube to avoid picking up wort from the bottom of the kettle. I had no clogs, so that was good. But the cleanup was painful. It required about 10-12 flushes with combinations of hot water, and then hot water with cleaner until I was hop-debris-free on its output. I recirculated some of the time, sometimes let it soak with cleaner for a couple hours, and swapped the connections and backflowed. I think to make use of the awesome cooling power of these, you have to be serious about hop debris containment in your kettle, and I like to let my hops roam freely. For my second batch I connected to my Counterflow Chiller and was happy with the results.
Typical Hop Residue Seen Flushing Therminator
The flowmeter was cool, but seemed to really only be useful with clear wort. During mash recirculation it worked great. But with this system, that wasn’t really needed because the fixed orifice drainpipe determined my recirculation flow rate, while the AutoSparge arm kept my grains wet. Once I had post-boil wort, the “chunkier” nature of that wort seemed to make the flow rate less accurate. If you were using the flow meter in a system that didn’t have this orifice consistency, it might be much more useful in dialing things in for process consistency. And I suppose if you were struggling with stuck mashes or grains getting in your recirc, the flow meter might be invaluable at letting you quickly see that flow rate had stopped. I just didn’t have those problems with the button-louvered false bottom being so reliable.
The BoilerMaker Surface kettle definitely delivered on its promised features. In other 2-Vessel brewing systems, the RIMS heater is a separate unit, and as such requires extra connection lines running to & from it and some mounting configuration for the RIMS. With the Surface, the brewspace becomes slightly less cluttered. This of course doesn’t come into play with the BrewEasy Classic due to its layout of stacking kettles and using the boil kettle as your RIMS heating unit, but it’s easy to understand that benefit. When it came time to cleanup, the benefits of the Surface’s heating element tucked away underneath was very obvious. If you’ve used the Blichmann BoilCoil or other rod heating elements, you know the hassle of scrubbing the surfaces of those elements. They typically require special cleaning tools and another bucket to let the elements soak in cleaning solution first. But the Surface eliminated all of that. I filled the kettle with a bit of cleaning solution, and just as easily as cleaning the rest of my kettle, the heating element bottom was also cleaned. That was nice.
Conclusions
As an engineer, there were so many things that got me excited about this system. The ingenious orifice drain coupled with AutoSparge made me smile whenever I saw how flawlessly this worked. And something about the vertically stacked system and using just a single heat source for both RIMS control and boil made my efficiency affinity become activated. The Surface kettle definitely delivered, and seemed to make TC heating rods seem like old technology. The Therminator plate chiller didn’t win me over, and although the CommandStand seemed great for organizing things during & after brew day, the multi-port flow manifold didn’t seem to provide much notable convenience improvement for me. Overall, the BrewEasy Classic showed itself as a well-engineered system made with very high-quality parts that lended itself to being able to dial in a consistent brew process.
Special Thanks to Blichmann Engineering for providing the unit used for evaluation in this review.
Compare Models, Prices and Availability, More Photos Below:
BrewFather Equipment Profile for BrewEasy Classic
Related Reviews:
- Hands on Review: Blichmann BrewCommander Controller
- Hands on Review: Blichmann Engineering AutoSparge
- Hands on Review: Blichmann Engineering Riptide Homebrew Pump
- Hands On Review: Blichmann Engineering BoilerMaker G2 Homebrew Kettles
- Hands on Review: Blichmann Engineering BoilerMaker G2 Mash Tun
- Hands on Review Blichmann 1/2″ Linear Flow Valve – Install in any kettle
- Hands on Review: Blichmann Engineering BrewEasy Compact
- Hands on Review: ProFlow Dynamics Stainless Steel Camlock Quick Disconnects
More Photos
Adjustable Height Feet on BoilerMaker Surface Kettle
Brushed Finish Inside
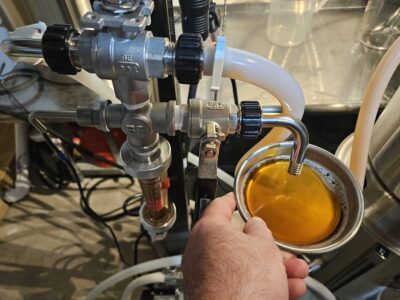
Chilled Wort Going into Fermentor
Inside of Flow Control Valve
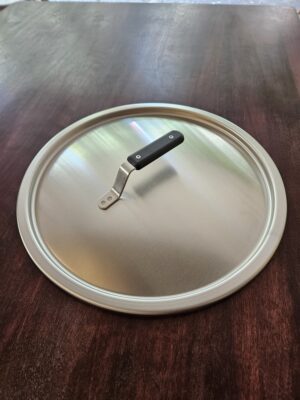
Lid
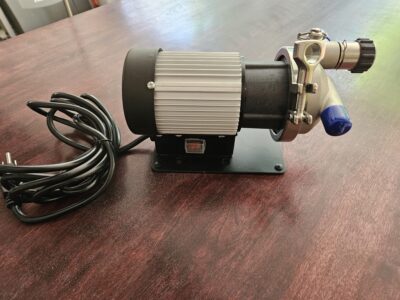
RipTide Pump
RipTide Pump Head Internals
Teflon Seals and O-ring to Make Rotating Valve
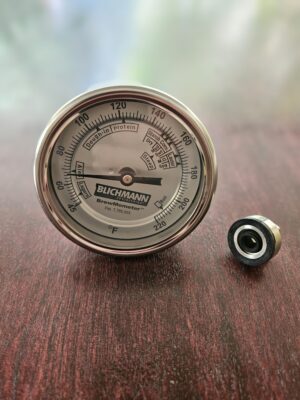
Thermometer for Mash Tun
More Blichmann Engineering Reviews!

More Homebrew Finds!
- Last 50 Finds!
- Top Deals – a curated list of the best deals
- Homebrew Reviews – one of the largest libraries of homebrew reviews in existence!
- Our Top Posts – tips, how-tos, resources posts and more
- Let’s be Friends!
Recent Deals!

10 Most Recent Homebrew Resource Posts & How-To’s!

We are Homebrew Review HQ! Our 10 Most Recent Reviews

This post may contain affiliate links. We may make a commission when you use our links. This will never cost you extra. Thank you for supporting Homebrew Finds!
By Brad Probert. Check out Brad’s website – beersnobby.com
Make sure the components you use are compatible and rated for your intended application. Contact manufacturer with questions about suitability or a specific application. Always read and follow manufacturer directions.
Price, promotions and availability can change quickly. Check the product page for current price, description and availability. tag:lnksfxd review:blichclassicbreweasy tag:tpr