
Hands on Review: Blichmann Engineering BoilerMaker G2 Kettle Customization
This review is by Homebrew Finds Contributor Brad Probert. Brad is an engineer, expert homebrewer and experienced reviewer. Grab a link to Brad’s website at the end of this review.
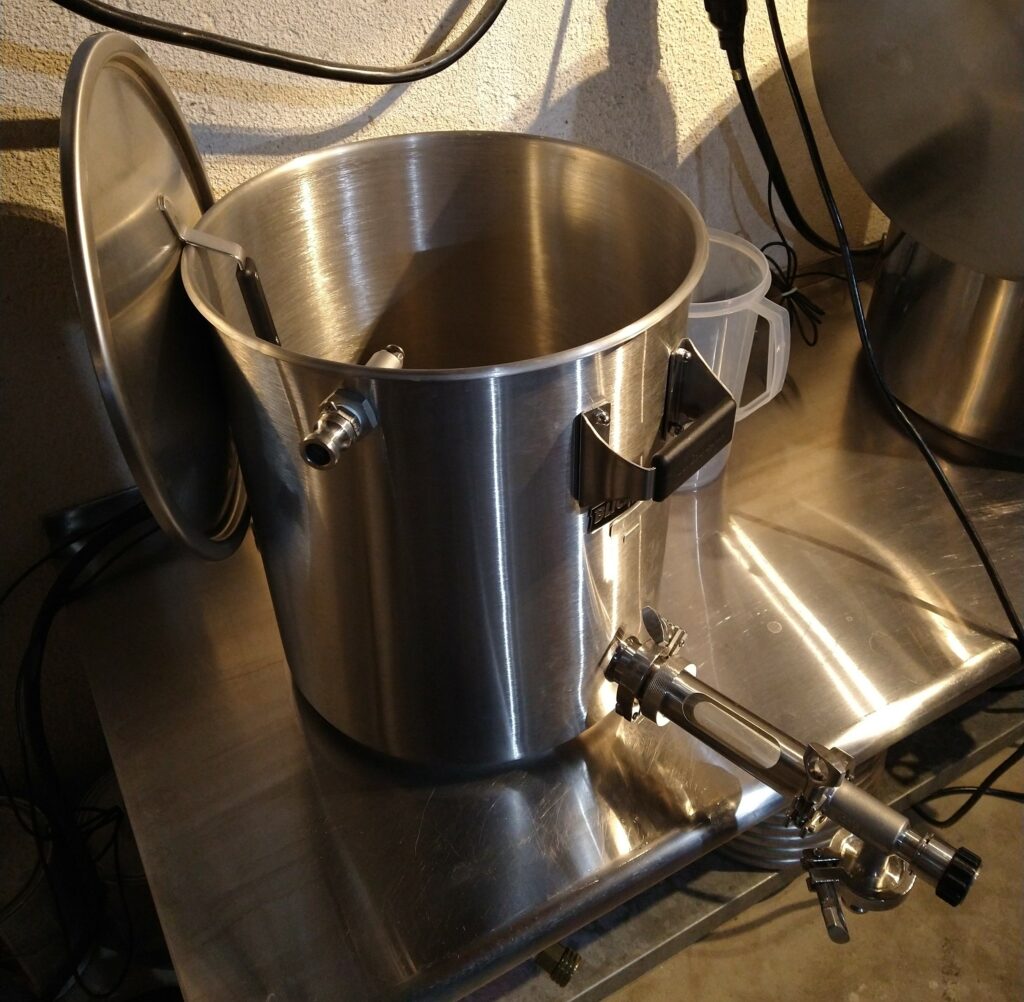
Blichmann Engineering BoilerMaker G2 Customized Kettle
Blichmann has made brew kettles for a long time, but it is only recently they added the ability for you to custom configure the G2 BoilerMaker Kettle to your liking. Although customization can feel like it makes things more complicated than just getting a “standard kettle”, it can also be viewed as making things simpler because you don’t have to invent a complicated workaround because your kettle doesn’t have the features you want. And doing internet searches of all the options out there can leave your head swimming as you try to find exactly what you want. If you find yourself in this scenario, custom kettle configuration is a great thing.
The most obvious customization choice is the kettle size. Blichmann offers choices on the smaller side that some vendors don’t (as small as 7.5 gallons), and they go up on the big size beyond others (as big as 55 gallons). Once you decide on the size of your kettle, you need to decide what type of ports/fittings you want. They give you the option of both the age-old standard of 1/2″ NPT, or the latest preference of Tri-Clamp (or Tri-Clover if you prefer, or simply TC). The 1/2″ NPT is handled via weldless fittings with o-rings.
Blichmann BoilerMaker G2 Kettle
This is built around Blichmann’s G2 Kettle. See our Hands on Review of the G2
Related: Hands on Review: Blichmann Engineering BoilerMaker G2 Mash Tun
Your customization order is done online through Blichmann’s website. You first pick which style of fittings you want on your kettle- TC or Threaded NPT. The minimum kettle requirement is a port for a drain valve. Everything else is optional. You can add a thermometer port, and you pick the location of it, as well as whether you want an analog or digital thermometer to be kitted for you. You can add the sight glass for volume markings or go without. You also have the option of adding any of these: AutoSparge, HERMS Coil, BoilCoil, Whirlpool port/valve, False Bottom, and HopBlocker. You can make it as complicated or as simple as you want it.
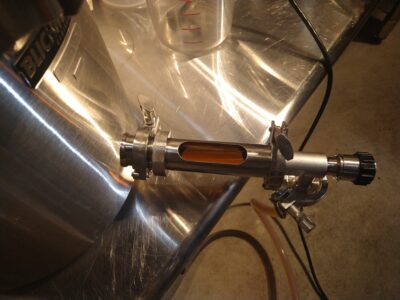 1-inch TC Sight Glass Added to Output
Compare Models, Prices and Availability, Review Continues Below:
- Blichmann Engineering BoilerMaker G2 Kettles at MoreBeer
- Blichmann Engineering BoilerMaker G2 Kettles at Adventures in Homebrewing
- Blichmann Engineering BoilerMaker G2 Kettles at Austin Homebrew Supply
- Blichmann Engineering BoilerMaker G2 Kettles at Great Fermentations
- Blichmann Engineering BoilerMaker G2 Kettles at Beer & Wine Hobby
- Search Amazon for “Blichmann Boilermaker Kettle” – offerings vary
Hands on Review
![]() Using Sight Glass to Tell Recirculating Wort is Clear
Using Sight Glass to Tell Recirculating Wort is Clear
I spec’d out a 10-gallon kettle to use as a mash tun for my 5-gallon batches. I opted for the 1.5” TC ports for two reasons: 1) TC ports are super easy to clean, and 2) I already had various TC fittings I could use. The drain valve came with a pickup tube with an overmolded TC gasket on the end to make it simple to connect to your drain valve of choice. I mated this with Blichmann’s G2 Linear Flow Valve. I already had a 1” TC compact sight glass from Brewer’s Hardware and I mounted this in between the pickup tube and the Linear Flow Valve. This sight glass is quite handy on a mash tun, as you can easily see the stability of your grain bed filtration while recirculating wort. The drain tube is designed to interface with Blichmann’s Button Louver false bottom, so it pulls liquid from below the false bottom.
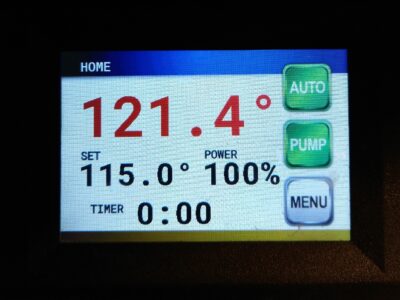 High Temperature Swings Trying to Control RIMS with Probe in Mash Tun – Hands on Review Blichmann Engineering RIMS Rocket
I added a TC port for a temperature sensor mounted slightly above, but offset from the drain valve port. During my normal mash process, using a Blichmann RIMS Rocket, my control temperature sensor is mounted at the output of the RIMS (standard RIMS set-up). However, I got a 1.5” TC plate with a hole and attached Blichmann’s weldless temperature probe fitting. This fitting allowed me to install a temperature probe directly into the body of the mash. Although a temperature probe in this location doesn’t work for RIMS control for various reasons, it was interesting to play around with and do some system characterization. And down the road, if I move to a BCS Controller or the like, I have some ideas of some more sophisticated algorithms that could make use of a combination of sensors both at the RIMS output and in the mash body. Always good to plan for the future!
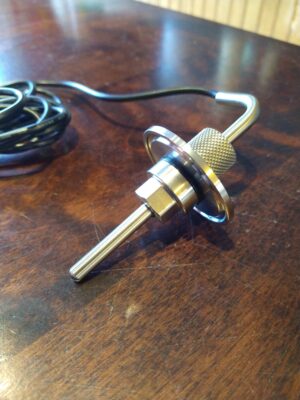 Fully Assembled Temperature Sensor
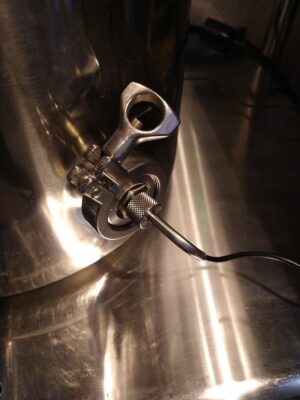 BrewCommander Temperature Probe Mounted to TC
I didn’t like the idea of the external sight glass for volume markings because it seemed like it would be tricky to clean, or at a minimum require some extra steps and keeping a special brush around, so I skipped that add-on. I didn’t realize at the time that this was the only volume markings for the kettle, but I managed through. Since I was using it as a mash tun, the only time I needed volume marking was when filling with the strike water volume. Of course, you could use the tried-and-true stick with your own volume markings, but I used Kegland’s Fill-o-meter. Using that, I would just program the amount of strike water, and let the digital meter/valve do the work, and I never missed not having volume markings on the mash tun.
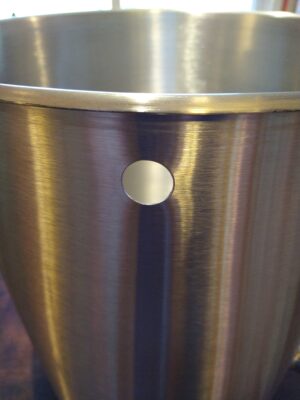
The last customization I added to the mash tun was a Blichmann AutoSparge. For this, it was just a hole punched near the rim of the kettle, and I used a weldless fitting to provide the 1/2″ NPT fitting on the inside for the AutoSparge. And to the outside, I added a camlock fitting for easy attachment and removal of hoses while brewing.
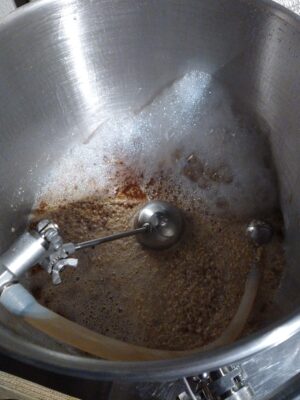 AutoSparge – Hands on Review – Working During Mash
Conclusions
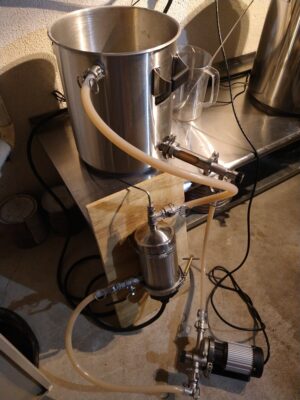 Kettle Recirculating through RIMS Rocket
While not infinitely configurable, there are a lot of options to customize the Blichmann BoilerMaker G2 kettle. And the kettle configuration website makes it easy to get the Blichmann accessory matched to each additional port location. If you’re upgrading from an existing kettle and already have these accessories and just want the added port, you’re out of luck there. If you select the added port, you also must get the add-on accessory that mounts there. So this constraint might not be the best option for you, unless you want a 100% new brew rig. But if it does work out for you, the build quality is great, and all the Blichmann accessories find a way of showing themselves as superstars in the world of brewing gear due to their well-thought-out design. So it’s a worthy option for your consideration.
Compare Models, Prices and Availability, Review Continues Below:
- Blichmann Engineering BoilerMaker G2 Kettles at MoreBeer
- Blichmann Engineering BoilerMaker G2 Kettles at Adventures in Homebrewing
- Blichmann Engineering BoilerMaker G2 Kettles at Austin Homebrew Supply
- Blichmann Engineering BoilerMaker G2 Kettles at Great Fermentations
- Blichmann Engineering BoilerMaker G2 Kettles at Beer & Wine Hobby
- Search Amazon for “Blichmann Boilermaker Kettle” – offerings vary
More Blichmann Engineering Reviews!

More Homebrew Finds!
- Last 50 Finds!
- Top Deals – a curated list of the best deals
- Homebrew Reviews – one of the largest libraries of homebrew reviews in existence!
- Our Top Posts – tips, how-tos, resources posts and more
- Let’s be Friends!
Recent Deals!

10 Most Recent Homebrew Resource Posts & How-To’s!

This post may contain affiliate links. We may make a commission when you use our links. This will never cost you extra. Thank you for supporting Homebrew Finds!
greatdealsMore Tri-Clover/Tri-Clamp! Tri-Clamp Fittings at Proflow Dynamics
Special Thanks to Blichmann Engineering for providing the unit used for evaluation in this review.
By Brad Probert. Check out Brad’s website – beersnobby.com
Make sure the components you use are compatible and rated for your intended application. Contact manufacturer with questions about suitability or a specific application. Always read and follow manufacturer directions.
Price, promotions and availability can change quickly. Check the product page for current price, description and availability. review:blichcustomg2 tag:tpr