
Five Benefits of Using Corny Kegs As Fermenters
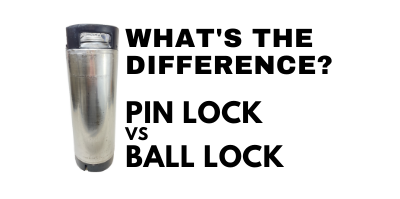
The containers we call Ball Lock and Pin Lock Kegs come from the soda industry. Also called Cornelius Kegs, Corny Kegs and Corney Kegs, they were originally intended to store and distribute soda pre-mix. The big soda companies decided on different style containers for their pre-mix. Pepsi landed on the Ball Lock style while Coke uses the Pin Lock style.
Homebrewers have since re-purposed these as homebrew beer kegs. It makes sense. These high quality stainless steel beverages that are meant for years of commercial food use. They’re also tough, can be had for cheap and are easy to move around.
What if someone said there was a pressure capable, heavy duty stainless steel fermenter that could be had for 50 bucks or so?
Great news…. kegs make great fermenters! Same high quality, stainless steel construction, toughness and easy portability, but this time used for fermentation.
Lots More About Kegs
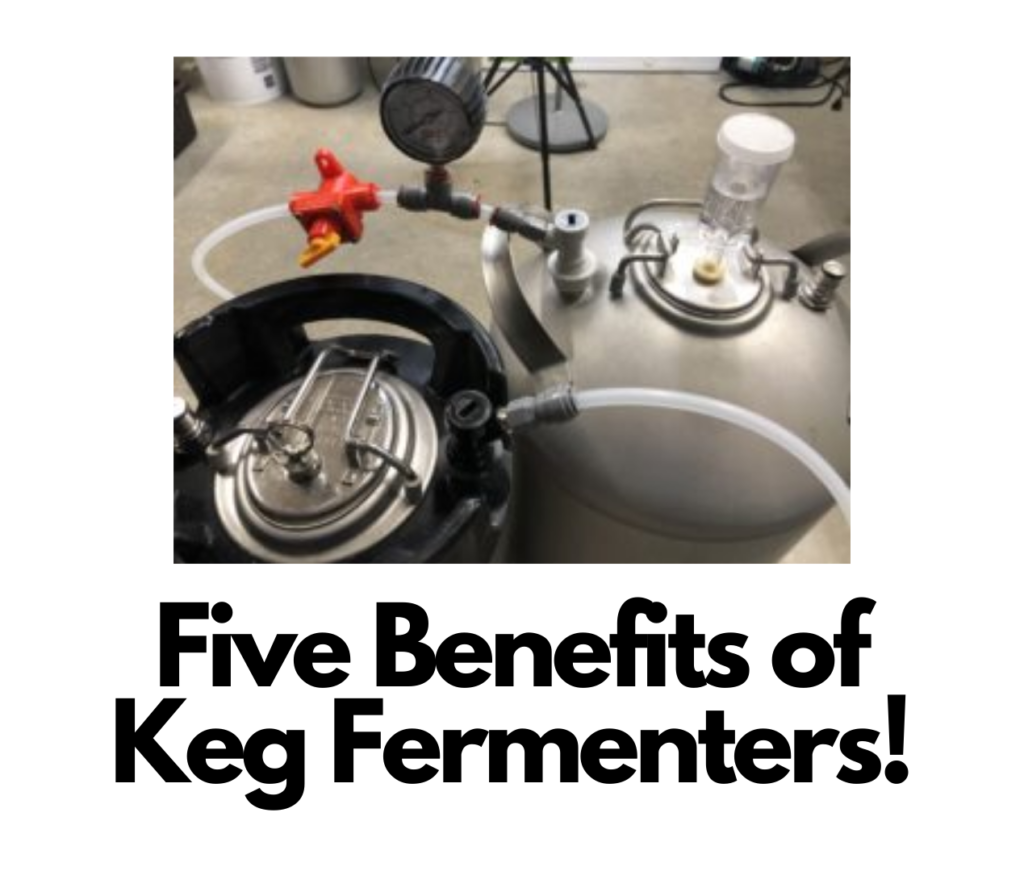
But First, How Do you Convert a Keg to a Fermenter?
One issue needs to be addressed to convert kegs into fermenters… handling CO2 produced by fermentation. Kegs are generally designed to be airtight. Fermentation requires that we allow excess CO2 to escape. I can think of three options…
- A blow-off tube. Remove the gas post or gas post poppet and get use tight fitting tubing to route CO2 to a container of sanitizer.
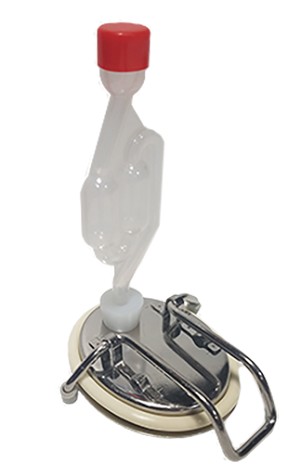
- Use a converted lid to add a stopper and airlock See: Cornelius Keg Fermenter Lid via Adventures in Homebrewing
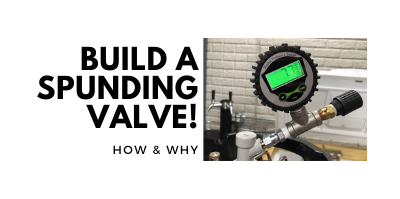
- Use a Spunding Valve – some of the technique and tricks mentioned in this post rely on a Spunding Valve
Keg Fermenter Sizing
A five gallon keg isn’t really suitable for a primary fermenter for a 5 gallon batch. You could use it as a secondary for a full 5 gallon batch, as a primary fermenter for smaller batches (maybe 3 to 4 gallons max) or you could split 5 gallon batches between two kegs.
There is a 6 gallon keg available that should allow you to ferment a 5 gallon batch.
10 and 15 gallon size ball locks have become readily available at relatively reasonable prices. A 10 gallon keg could easily accommodate a full 5 gallon batch (up to 7 or 8 gallons) while a 15 gallon keg should be able to easily handle a 10 gallon batch (up to 12 or 13 gallons).
- Torpedo Ball Lock Keg – 6 gal. KEG808 – Hands on Review
- Torpedo Ball Lock Keg – 10 gal. KEG810 – Hands on Review
- Torpedo Ball Lock Keg – 15 gal. KEG815
- 12 Gallon Ball Lock Kegs
Five Unique Benefits to Using Converted Keg Fermenter!
#1 Ferment Under Pressure
Since kegs are pressure capable, using a keg as a fermenter allows you to ferment under pressure!
See: Fermenting Under Pressure
# 2 Naturally Carbonate in the Fermenter!
Carbonating directly in your keg allows you to naturally carbonate your beer (saving CO2 and $) while maintaining reasonably tight control on carbonation levels. This could be done by adding priming sugar, capping fermentation prior to the completion of fermentation or more traditional krausening (adding wort back to the fermenter).
See: Naturally Carbonating in Your Fermenter with a Spunding Valve
#3 Use CO2 Produced by Fermentation to Purge Serving Kegs, Carboys & Fermenters
With the use of a specific Spunding Valve model you can easily re-purpose CO2 produced be fermentation to purge fermenters and kegs.
See: Use CO2 Produced by Fermentation to Purge Serving Kegs, Carboys & Fermenters
- Hands on Review: Kegland BlowTie Spunding Valve
- BlowTie 2 Diaphragm Spunding Valve with Gauge FE962 via MoreBeer
- Duotight Blowtie Spunding Valve with Gauge via William’s Brewing
- Kegland BlowTie v1Duotight BlowTie 2 Diaphragm Spunding Valve w/Integrated Pressure Gauge (0-23 PSI) for Pressure Fermentation – KL15042 affiliate link, note that multiple variations of this product may be available, as such a different version may appear at this link
- Hands on Review: Kegland DuoTight Fittings & EVABarrier Tubing
#4 Oxygen Free Cold Crash and Transfer
Since kegs are pressure capable you can more easily transfer under pressure to a serving keg and reduce oxygen pickup.
See: Oxygen Free Transfer and Cold Crash Using a Spunding Valve
#5 Use a Keg as a UniVessel Fermenter & Serving Keg
If you’re fermenting in a keg… you’re beer is already kegged! Swap out your fermenter modifications for standard keg pieces and you’re ready to go.
The one thing you’ll need to deal with is trub. Using a standard dip tube, you’ll most likely clog up your dip tube when serving or at the very least serve some undesirable pints.
Two solutions… trim your liquid out dip tube or (more preferable in my opinion)… use a floating dip tube. A floating keg dip tube allows you to draw off the top of your keg, allowing trub to stay at the bottom. This also generally means a lot less wasted beer vs a trimmed dip tube.
- Torpedo Keg Buoy ™ Floating Dip Tube KEG655 – Hands on Review
- Search: Floating Keg Dip Tube on Amazon
- Top Draw Beer Pick Up Tube via William’s Brewing
BONUS Benefit
Save even more time by using the “no chill method” when using compatible kegs. No chill, ferment in keg, serve in keg = loads of time savings and lowest oxygen pickup possible.
BONUS Benefit – Gelatin Fining
This process is from HBF Reader John – Let’s be friends! 8 Ways to Connect with HBF – Thanks John!
Gelatin Fining in a Cold Crash Primary Fermentation Keg
- Prepare gelatin mixture as you normally do for fining (I use one sachet/10 gallon batch of beer dispersed/hydrated in 375 ml of RO H20 and heated to 160 F)
- Place required amount of solution (in my case 125 ml/fermenter) in a 0.5 liter PET water bottle fitted with a carbonation cap.
- With the cap just barely threaded onto the bottle purge headspace with CO2 tightening the lid after approximately 10 seconds and pressurize the PET bottle with gelatin solution to 40 psi.
- Relieve pressure in fermentation keg through the PRV.
- Connect the PET bottle via the carb cap to the gas post of the fermentation keg taking care to ensure that the gelatin solution completely covers the inside surface of the carb cap or (if you used one) the silicone tube inside the PET bottle. This will immediately introduce the gelatin solution through the gas post.
- Pressurize the corny keg to (10 to 15 psi)
Conclusions
Homebrew Kegs can be easily repurposed as feature filled fermenters. The fact that they’re pressure capable allows for some unique versatility, especially compared to like priced entry level fermenters like buckets, carboys and PET fermenters. You can use brewing and serving techniques that would normally require you to purchase very expensive, purpose built equipment.
Kegs to Consider:
- Torpedo Ball Lock Keg – 6 gal. KEG808 – Hands on Review
- Torpedo Ball Lock Keg – 10 gal. KEG810 – Hands on Review
- Torpedo Ball Lock Keg – 15 gal. KEG815
- 12 Gallon Ball Lock Kegs
Related: Build a Dry Hopper for Cornelius Kegs!
 Building a Dry Hopper for Corny Kegs – Dry Hop Under Pressure!
What Else?
Got a tip or a trick in regards to using kegs for fermentation? Leave a comment or submit a tip so we can spread the word!
Everything About Spunding Valves!
A Spunding Valve allows you to maintain a set pressure. If pressure in the vessel exceeds the set point, it is expelled. It generally consists of an adjustable PRV valve, a tee, a gauge and a way to connect to your keg.
Keg Deals

Rebuild Your Kegs
More Homebrew Finds!
- Last 50 Finds!
- Top Deals – a curated list of the best deals
- Homebrew Reviews – one of the largest libraries of homebrew reviews in existence!
- Our Top Posts – tips, how-tos, resources posts and more
- Let’s be Friends!
Recent Deals!

10 Most Recent Homebrew Resource Posts & How-To’s!

We are Homebrew Review HQ! Our 10 Most Recent Reviews

More Fermentation Related!
- Our Fermentation Related Reviews – Fermenters and More
- Yeast Starters and Fermentation Resource Page
- Yeast: The Practical Guide to Beer Fermentation
- Compare Prices: StirStarter Stir Plate
This post may contain affiliate links. We may make a commission when you use our links. This will never cost you extra. Thank you for supporting Homebrew Finds!
Price, promotions and availability can change quickly. Check the product page for current price, description and availability.
Make sure the components you use are compatible and rated for your intended application. Contact manufacturer with questions about suitability or a specific application. Always read and follow manufacturer directions. tag:lnksfxd top:kegfermenter tag:tpr
Link to corny keg fermenter lid results in 404 error.
Thanks for the heads up! Should be fixed now.