
Build a Spunding Valve! – How and Why
A Spunding Valve allows you to maintain a set pressure. If pressure in the vessel exceeds the set point, it is expelled. It generally consists of an adjustable PRV valve, a tee, a gauge and a way to connect to your keg.
Homebrewing Applications of a Spunding Valve
- Pressurized fermentation. Ferment in a 5 or 10 gallon corny keg and use your Spunding Valve instead of an airlock. This allows you to ferment at your desired pressure.
- Dry hop under pressure. This allows you to dry hop earlier while reducing oxygenation. Active yeast are more likely to metabolize oxygen that’s introduced during dry hopping during active fermentation. Since CO2 is not exiting beer as vigorously under pressure, wanted compounds, flavors and aromas are more likely to stay in your beer under pressure.
- Naturally and accurately carbonate beer right in the keg.
- An airlock replacement. Keep the valve wide open for non-pressurized fermentations. Only do this if you have plenty of head space. This wouldn’t make a great blow off tube.
- Keg to keg transfers. Use the Spunding Valve to allow excess gas to exit the receiving keg as you transfer under pressure. Helps you achieve a slow, controlled and pressurized transfer.
- Fix over-carbonated beers.
- Test for keg leaks. Pressurize your keg to serving pressure. Put the Spunding Valve on (with the pressure set well above your serving PSI) and note the reading. The gauge should remain steady. If pressure drops, you know you have a keg leak. The digital build, see below, is especially helpful for this task, The digital gauge reads with .1 PSI resolution making pressure changes easy to spot. It’s worth noting that this checks the entire keg including gas body o-ring. That spot is hard to check and other way as it’s only in function when the gas QD is on. When the gas QD is on… it’s difficult to spray and check for bubbles underneath the gas QD. Thanks to Scott Janish for this tip!
- As an airlock for long term aging of beers. Airlocks can run dry over time. A Spunding Valve will not.
- Utilize CO2 from fermentation for flushing kegs and fermenters.
Naturally Carbonating with a Spunding Valve
Carbonation directly in your keg allows you to naturally carbonate your beer (saving CO2 and $) while maintaining reasonably tight control on carbonation levels. This could be done by adding priming sugar, capping fermentation prior to the completion of fermentation or more traditional krausening (adding wort back to the fermenter).
Basic Steps for Carbonating in a Keg Using a Spunding Valve:
- Ferment in a pressure capable fermenter. A 5 gallon keg works for small batches. Other options are available for larger batches including this like 10 gallon kegs.
- Prime the keg with your choice of priming sugar or wort (or start this process late in fermentation when some fermentable sugars remain)
- Determine your desired pressure based on temperature and desired carbonation using a carbonation chart. See: Balancing Your Draft System for a carbonation chart.
- Pressurize the keg to just over your desired final pressure.
- Attach the Spunding Valve
- Slowly dial down the pressure until you achieve your desired pressure – More about setting pressure
- Wait. As the remaining simple sugars are fermented, carbonation occurs and excess CO2 will be expelled from the spunding valve giving you just the right amount of carbonation. I give it a couple days after reaching target pressure. If you’re less sure how much fermentable sugar remained, I would suggest giving it a few days longer.
- Chill your keg, allowing your beer to absorb head space CO2 and reach equilibrium.
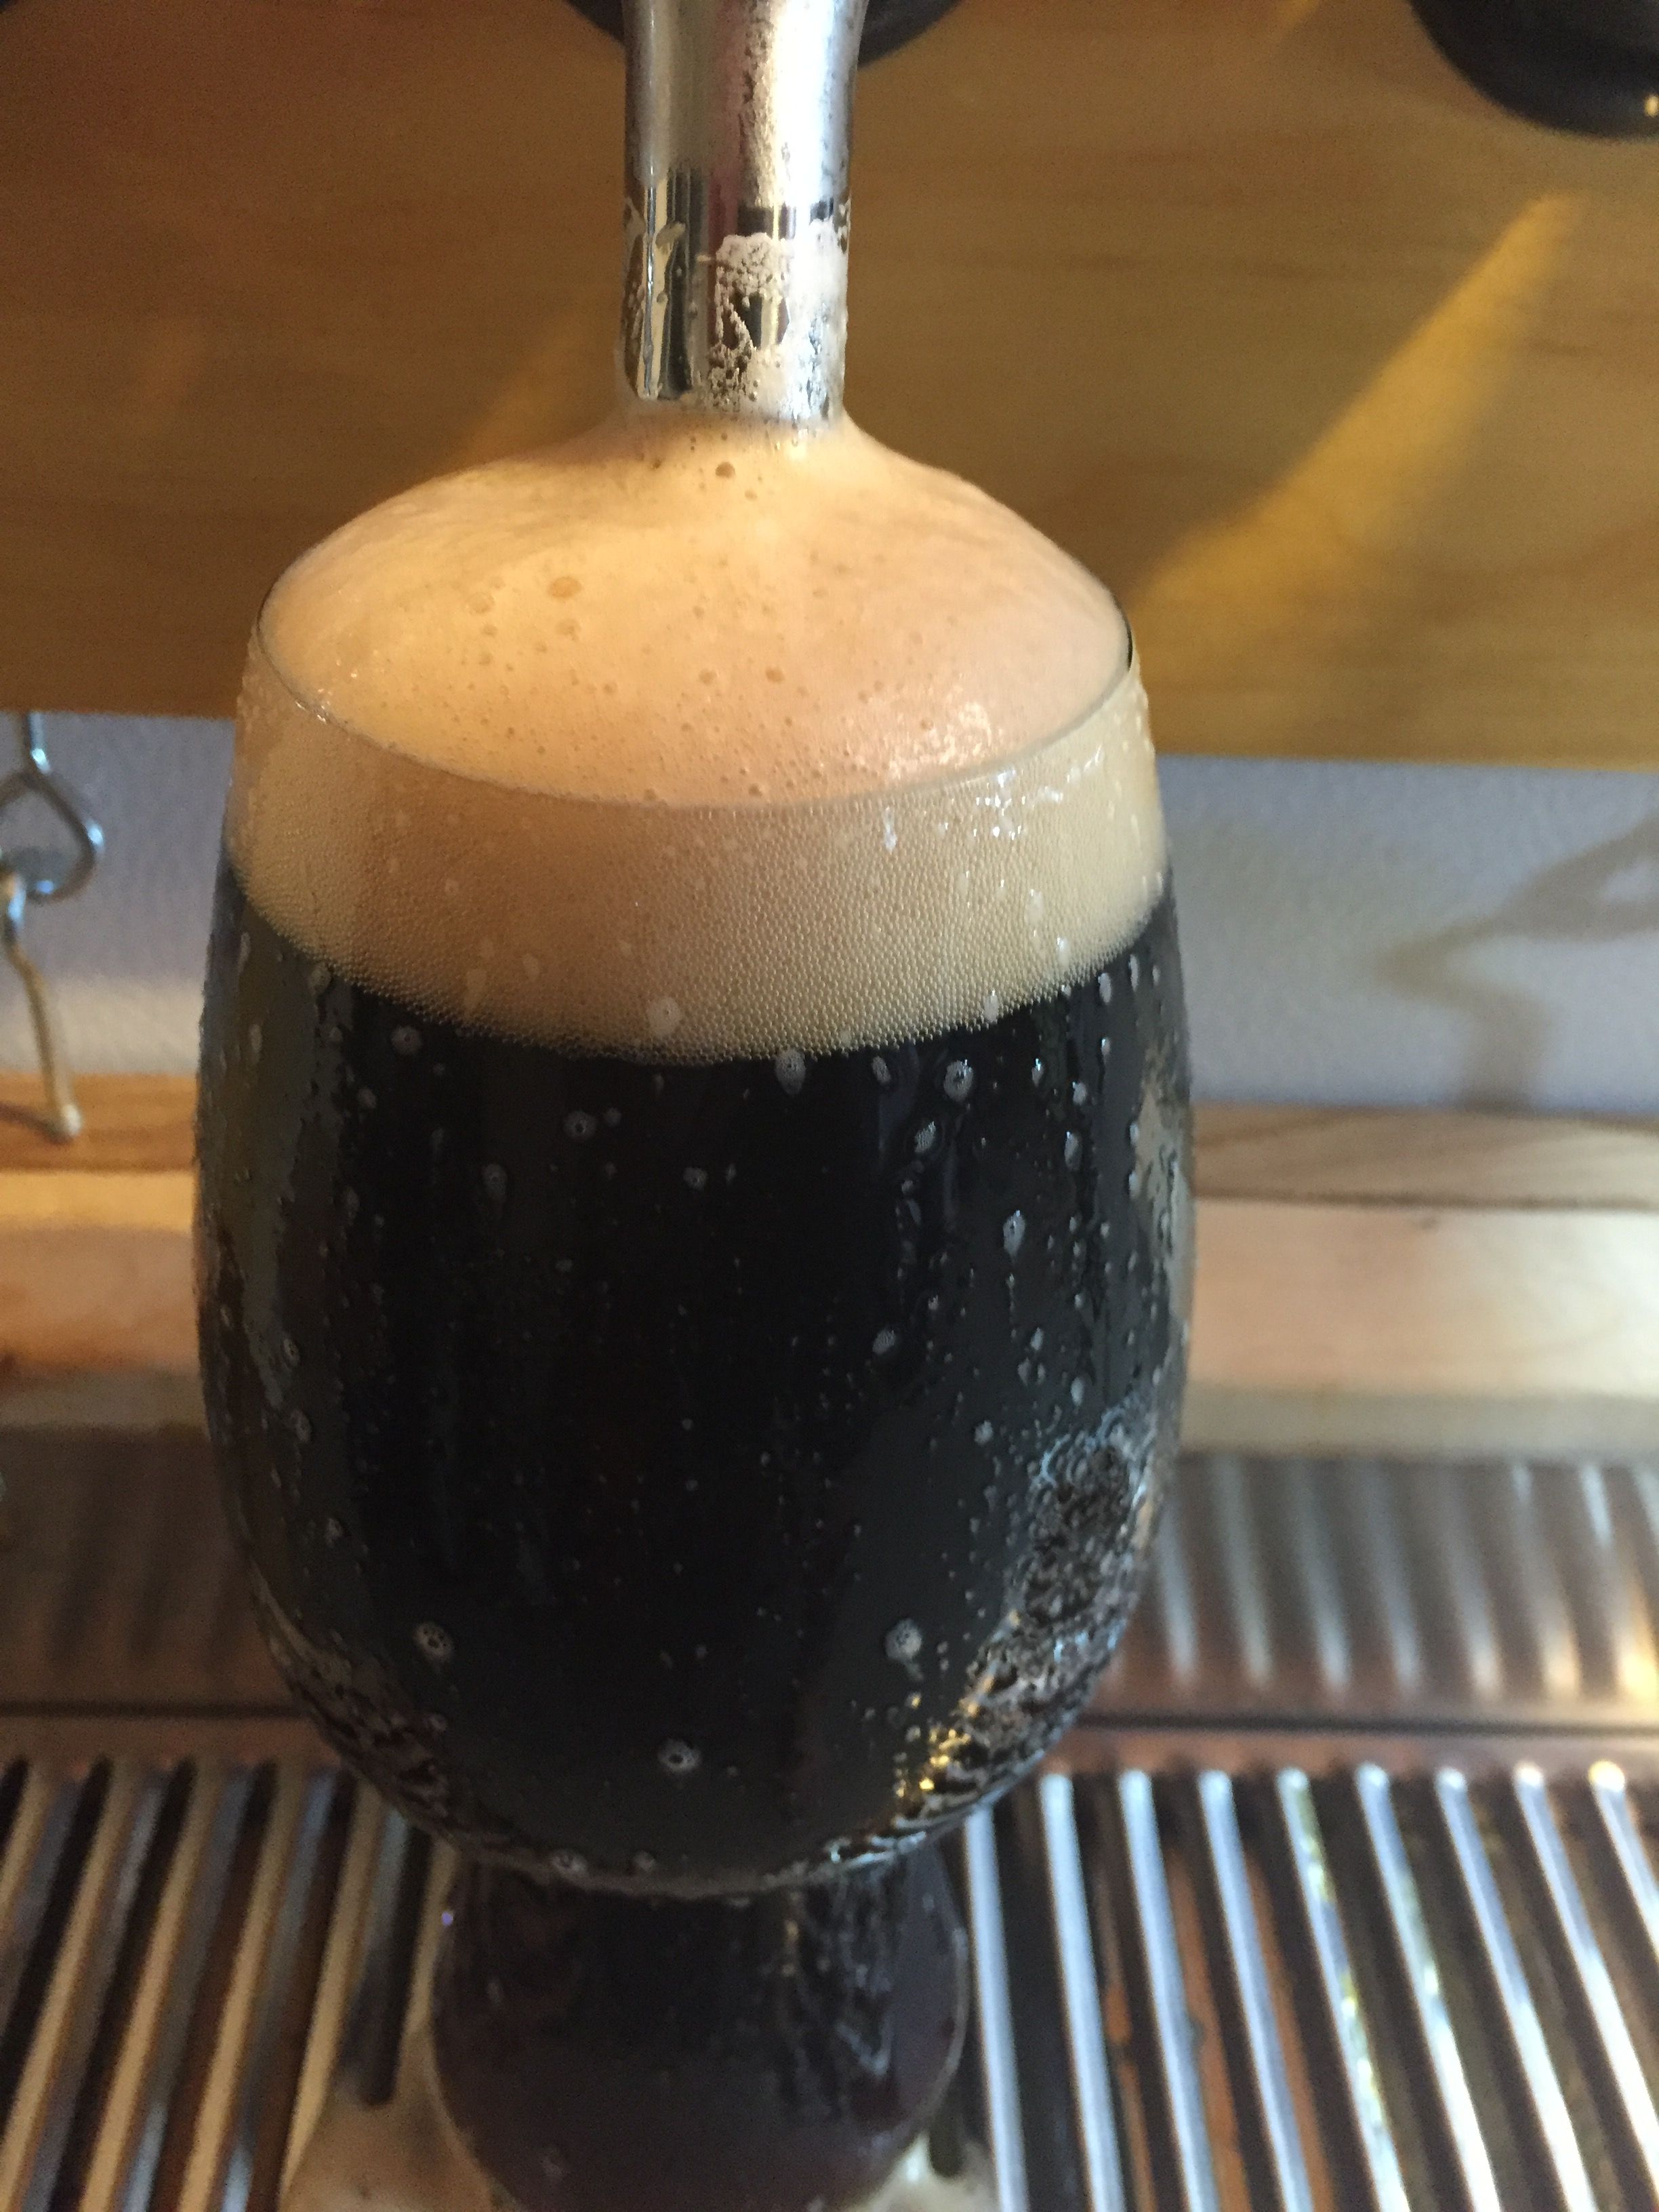
This is a 2.5 gallon batch of beer that I fermented and naturally carbonated all in a 5 gallon keg. I poured this immediately after it was transferred from the fermenter keg into a serving keg.
Fix Over-Carbonated Beers with a Spunding Valve
A Spunding Valve can assist with fixing over-carbonated beer.
- Determine your desired pressure based on temperature and desired carbonation using a carbonation chart. See: Balancing Your Draft System for a carbonation chart.
- Pressurize the keg to just over your desired final pressure.
- Attach the Spunding Valve
- Slowly dial down the pressure until you achieve your desired pressure – More about setting pressure
- The Spunding Valve allows excess pressure to vent until the new carbonation level is achieved.
- You can periodically agitate the keg to fix carbonation more quickly.
Oxygen Free Cold Crash and Transfer Using a Spunding Valve
Check out my Step by Step Process for Cold Crashing & Oxygen Free Transfer with the help of a Spunding Valve
Fermenting Under Pressure!
Check Out Our In-Depth Resource Post on Pressurized Fermentation
Use CO2 Produced by Fermentation to Purge Serving Kegs, Carboys & Fermenters

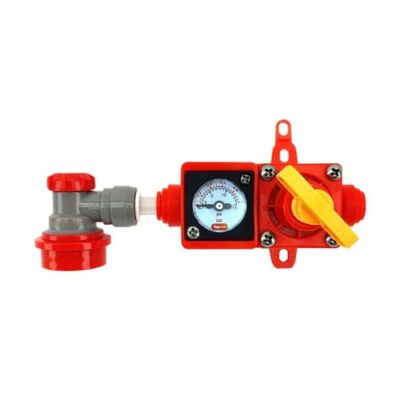
This technique requires a BlowTie Spunding Valve. Since the the BlowTie has a defined output port, you can use it to capture CO2 produced by fermentation. The “out” side of the BlowTie is a DuoTight connection, just like the “in” side. Use compatible EVABarrier tubing and fittings and you can route outgoing CO2 wherever you’d like. The primary application I can think of for using this is to purge kegs, carboys and fermenters. The pictured setup shows a 10 gallon keg converted to a fermenter. The “out” side of the BlowTie is connected to the liquid out side of an empty keg. That allows incoming CO2 to purge the keg from bottom to top. The lid PRV valve for the receiving keg is open to allow pressure to vent. Of course you could tee the “out” side and flush multiple kegs or vessels using the CO2 produced by a single fermenter.
- BlowTie 2 Diaphragm Spunding Valve with Gauge FE962 via MoreBeer
- BlowTie 2 Spunding Valve | Complete Kit | Duotight Ball Lock Quick Disconnect (QD) FE964 via MoreBeer
- BLOWTIE 2 DIAPHRAGM SPUNDING VALVE WITH GAUGE via cornykeg.com
- Duotight Blowtie Spunding Valve with Gauge via William’s Brewing
- BlowTie 2 Diaphragm Spunding Valve with Gauge – via Keg Connection
- BlowTie Spunding Valve w/ Built-In Gauge & CMB Disconnect – via Keg Connection
- Kegland BlowTie v1Duotight BlowTie 2 Diaphragm Spunding Valve w/Integrated Pressure Gauge (0-23 PSI) for Pressure Fermentation – KL15042 – affiliate link, note that multiple variations of this product may be available, as such a different version may appear at this link
- Canada & International – Search eBay for “Kegland BlowTie” to search for an offering that ships to you
Related: Hands on Review: Kegland DuoTight Fittings & EVABarrier Tubing!
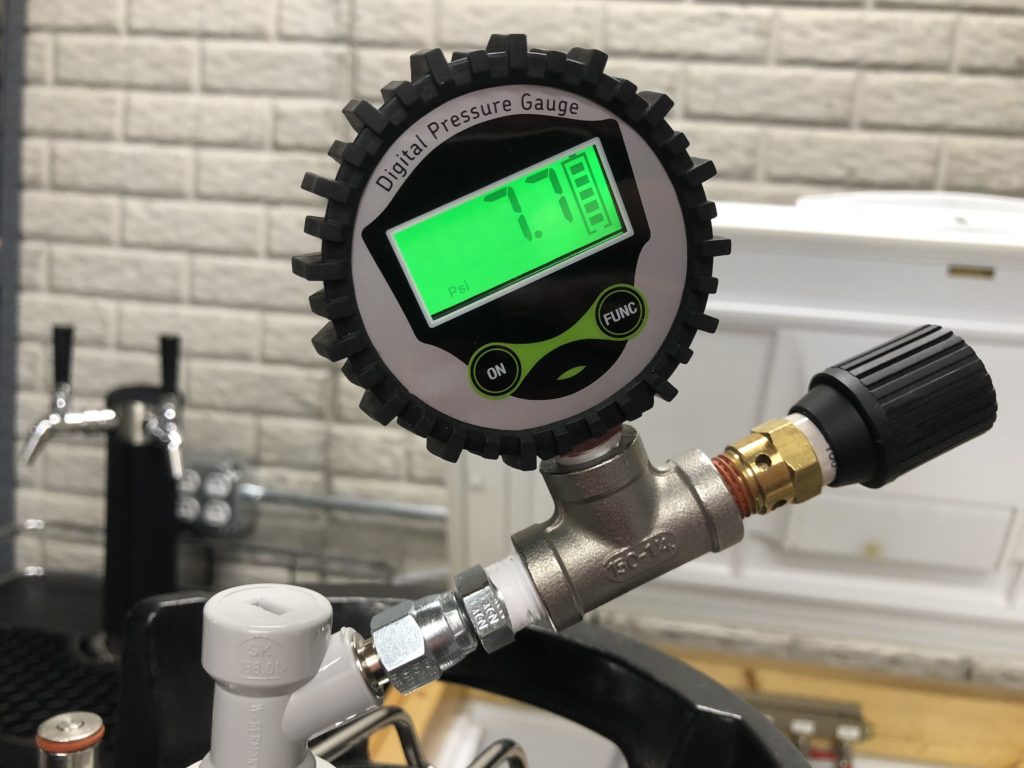
Setting Spunding Valve Pressure
When setting desired pressure… start higher than your desiged set point and slowly work your way down. As the valve gets close to where it is going to eventually settle, it slows down the release of gas. Working your way slowly down, helps you hit your desired pressure without passing it (going too low).
 Here I’m dialing in my desired pressure. Also pictured: Thermapen Mk4 [Review].
Building A Spunding Valve
Important Note: Product pages may display other size variations of the fittings used here. If a particular size is out of stock, sometimes suppliers link to another size. All thread sizes for this build, both NPT and flare, are 1/4″. If you want to replicate this build, pay special attention to the fitting sizes that are used and double check to make sure you’re purchasing the correct size fittings.
Because availability of fittings can be an issue, when available, I’ve linked to multiple options and vendors for each build type.
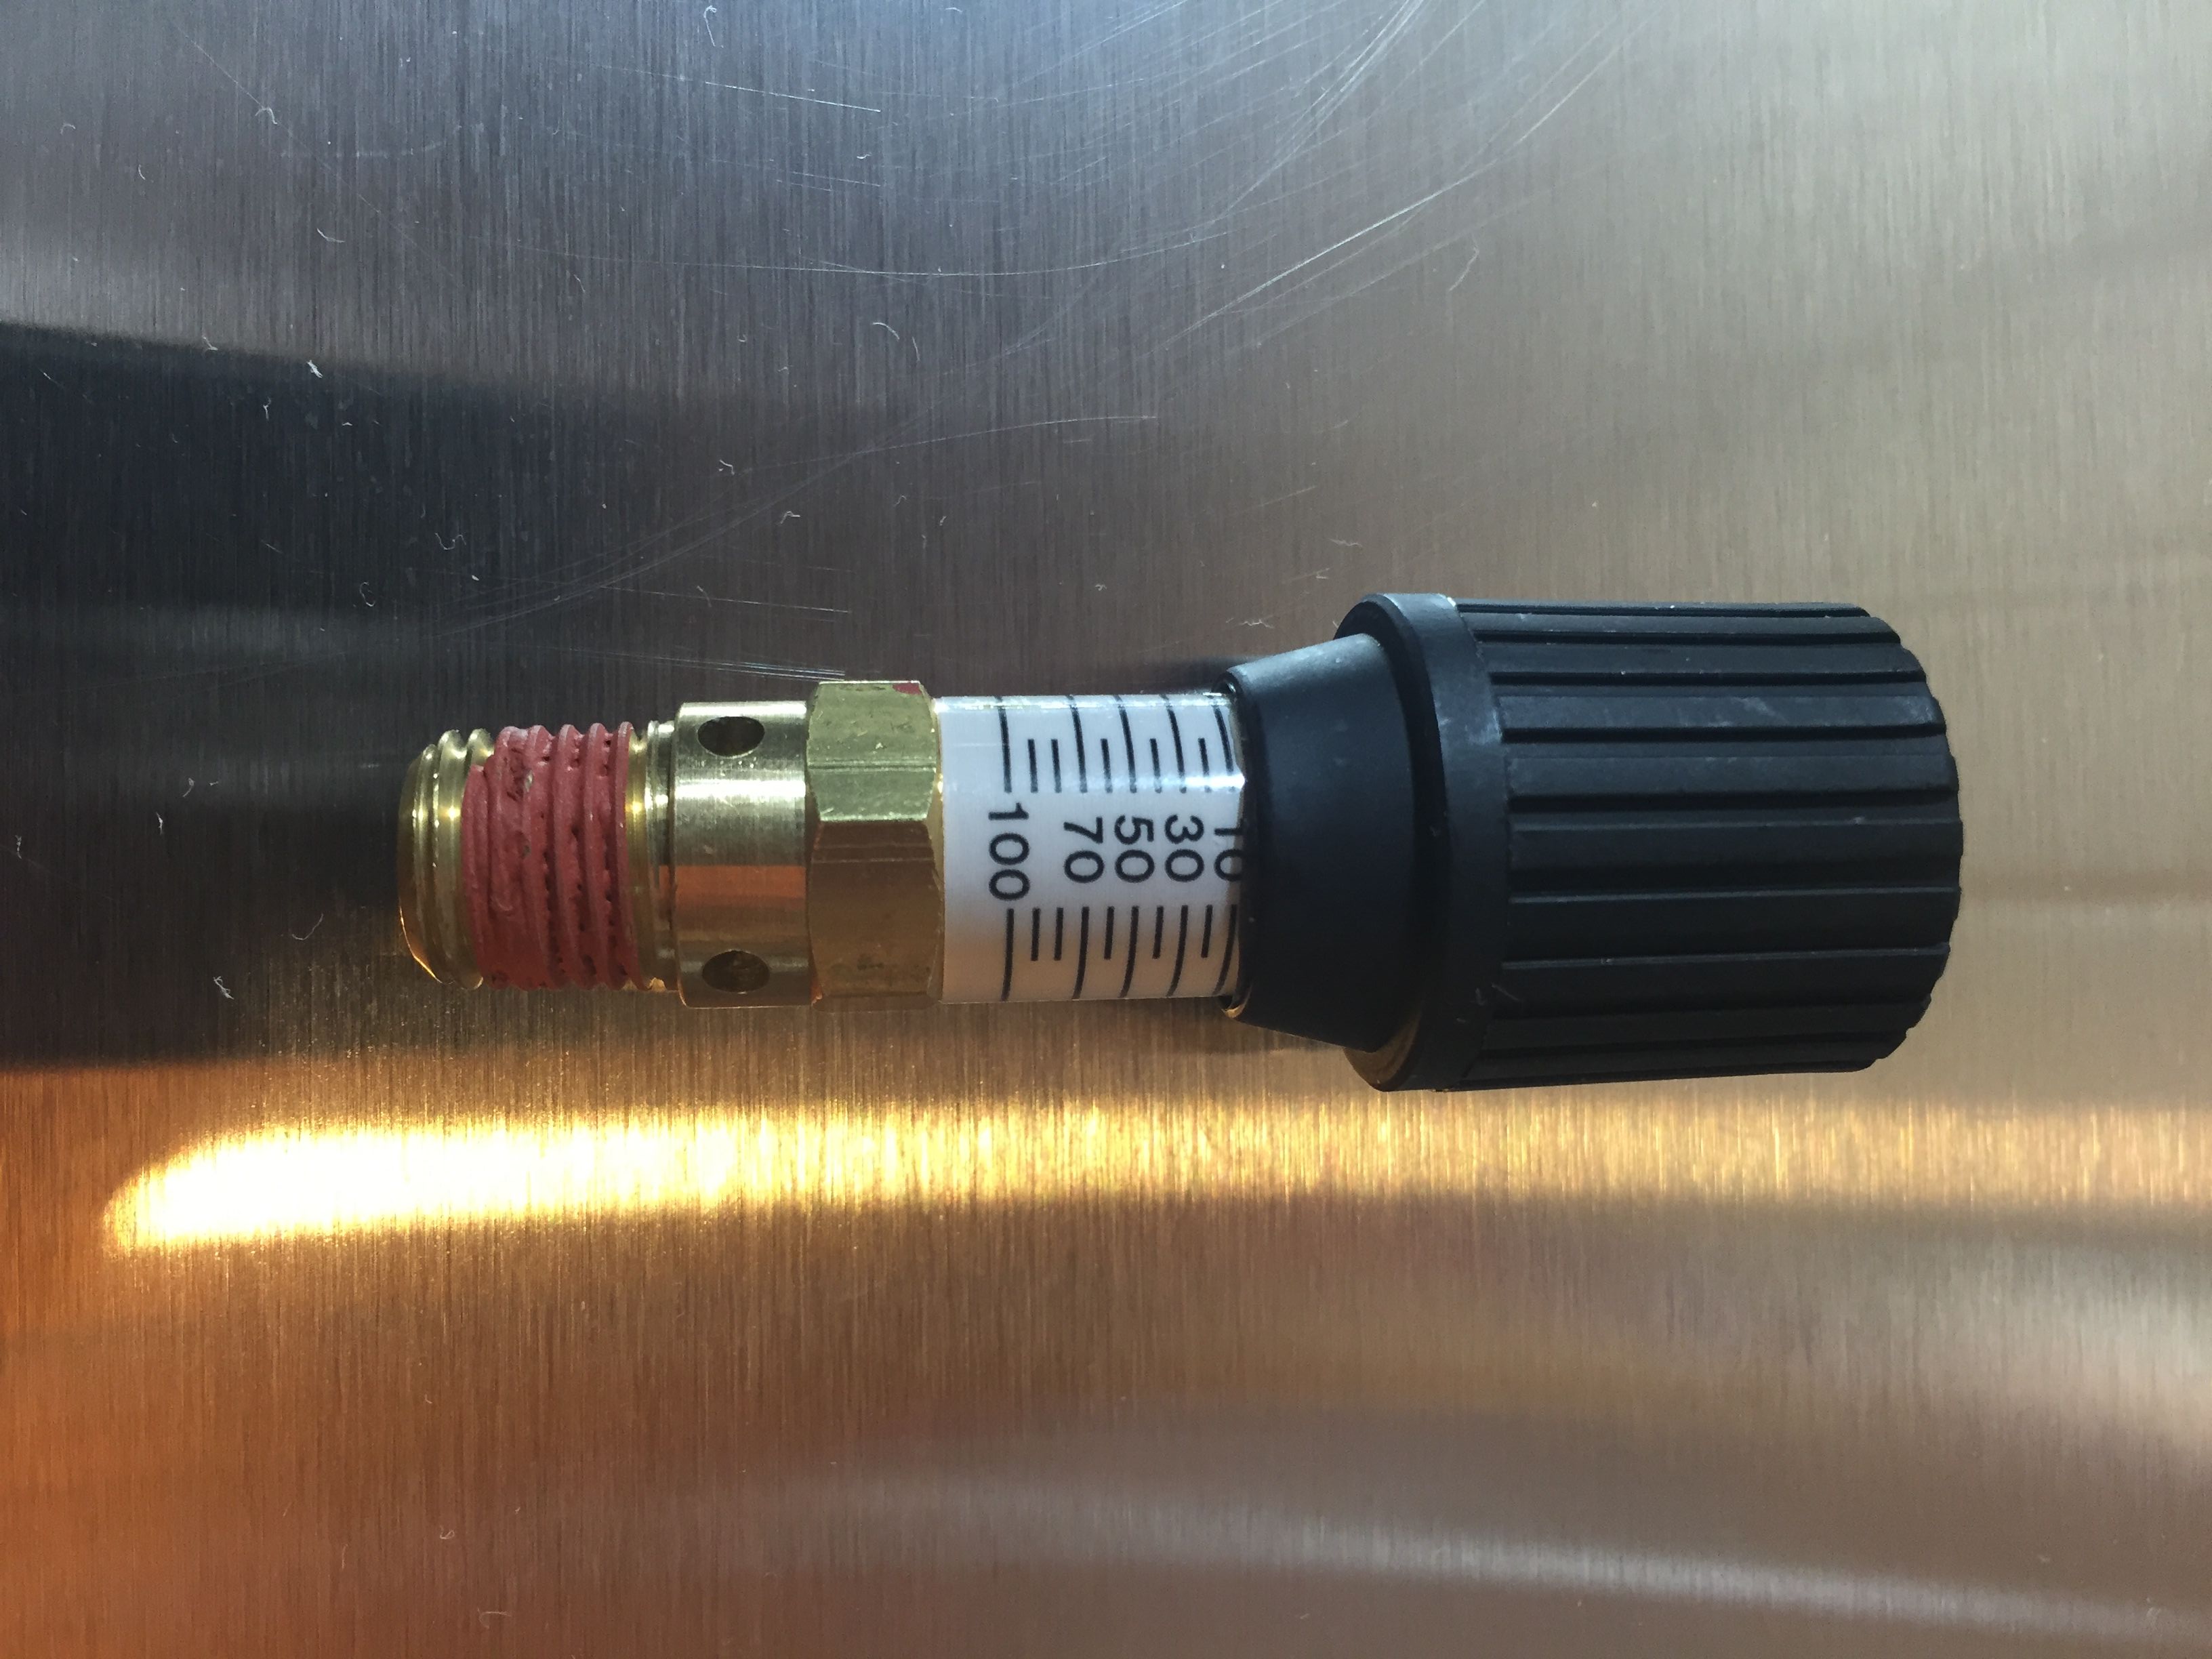 This valve [Control Devices CR Series Brass Pressure Relief Valve, 0-100 psi Adjustable Pressure Range, 1/4″ Male NPT] is the heart of this Spunding Valve build. It is essentially a manually adjustable pressure relief valve. This one is adjustable from 0 to 100 PSI. There is no homebrewing-related situation I’m aware of that would have you at 100 PSI. Generally you’d be at or below 30 PSI. As always, you’ll want to ensure that all components in your system (kegs, tubing, etc) are rated for your desired pressure. Also, always read and follow manufacturer’s instructions and guidelines.
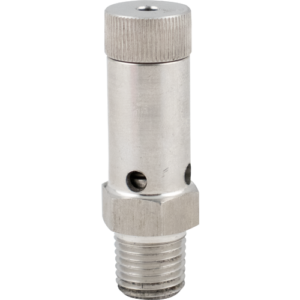 A stainless options is now available! Adjustable Stainless Gas Pressure Relief – 1/4 in. MPT via MoreBeer – note that this is a stock photo
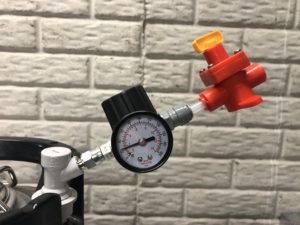 For years the only PRV option we have used is the Control Devices Brass PRV featured in the previous photo. We’ve also thoroughly reviewed Kegland’s BlowTie Assembly. That is a Kegland DuoTight/EVABarrier/BlowTie solution.
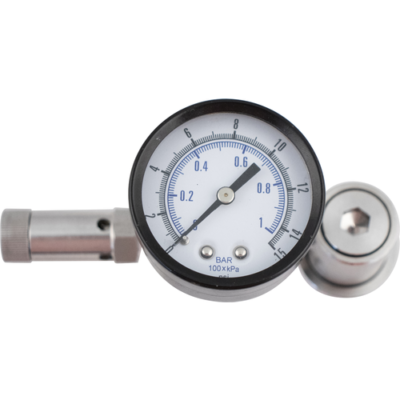
You can also use the BlowTie Diaphragm Spunding Valve as part of a DIY Build. The key to connecting the BlowTie to this build (and probably most DIY builds) is using a Duotight 8mm ¼” NPT Adapter. That connects to a 1/4″ NPT tee. From there you add a small piece of 8 mm EVABarrier Tubing and the BlowTie valve.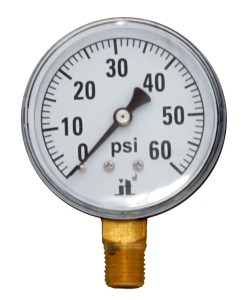 My first Spunding Valve build featured a 30 PSI gauge. That’s good for almost every situation. With this update I wanted the ability to go to a little higher pressure if needed. I used a Zenport DPG60 Gauge. It reads 0 to 60 PSI.
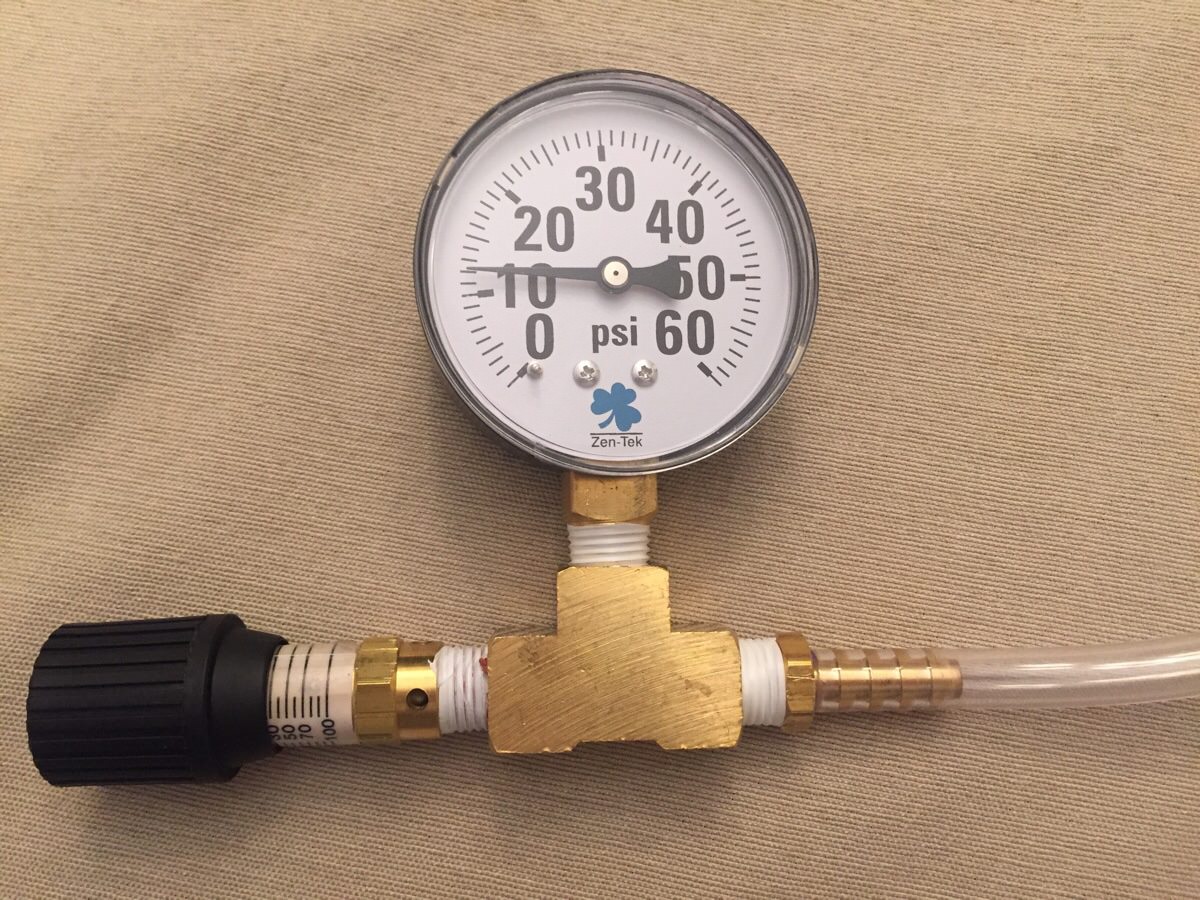
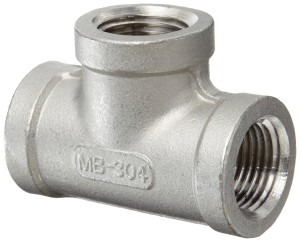 This stainless 1/4″ tee fitting connects the relief valve, pressure gauge and a final connection fitting together. Practically speaking any properly rated 1/4″ NPT threaded tee fitting should work.
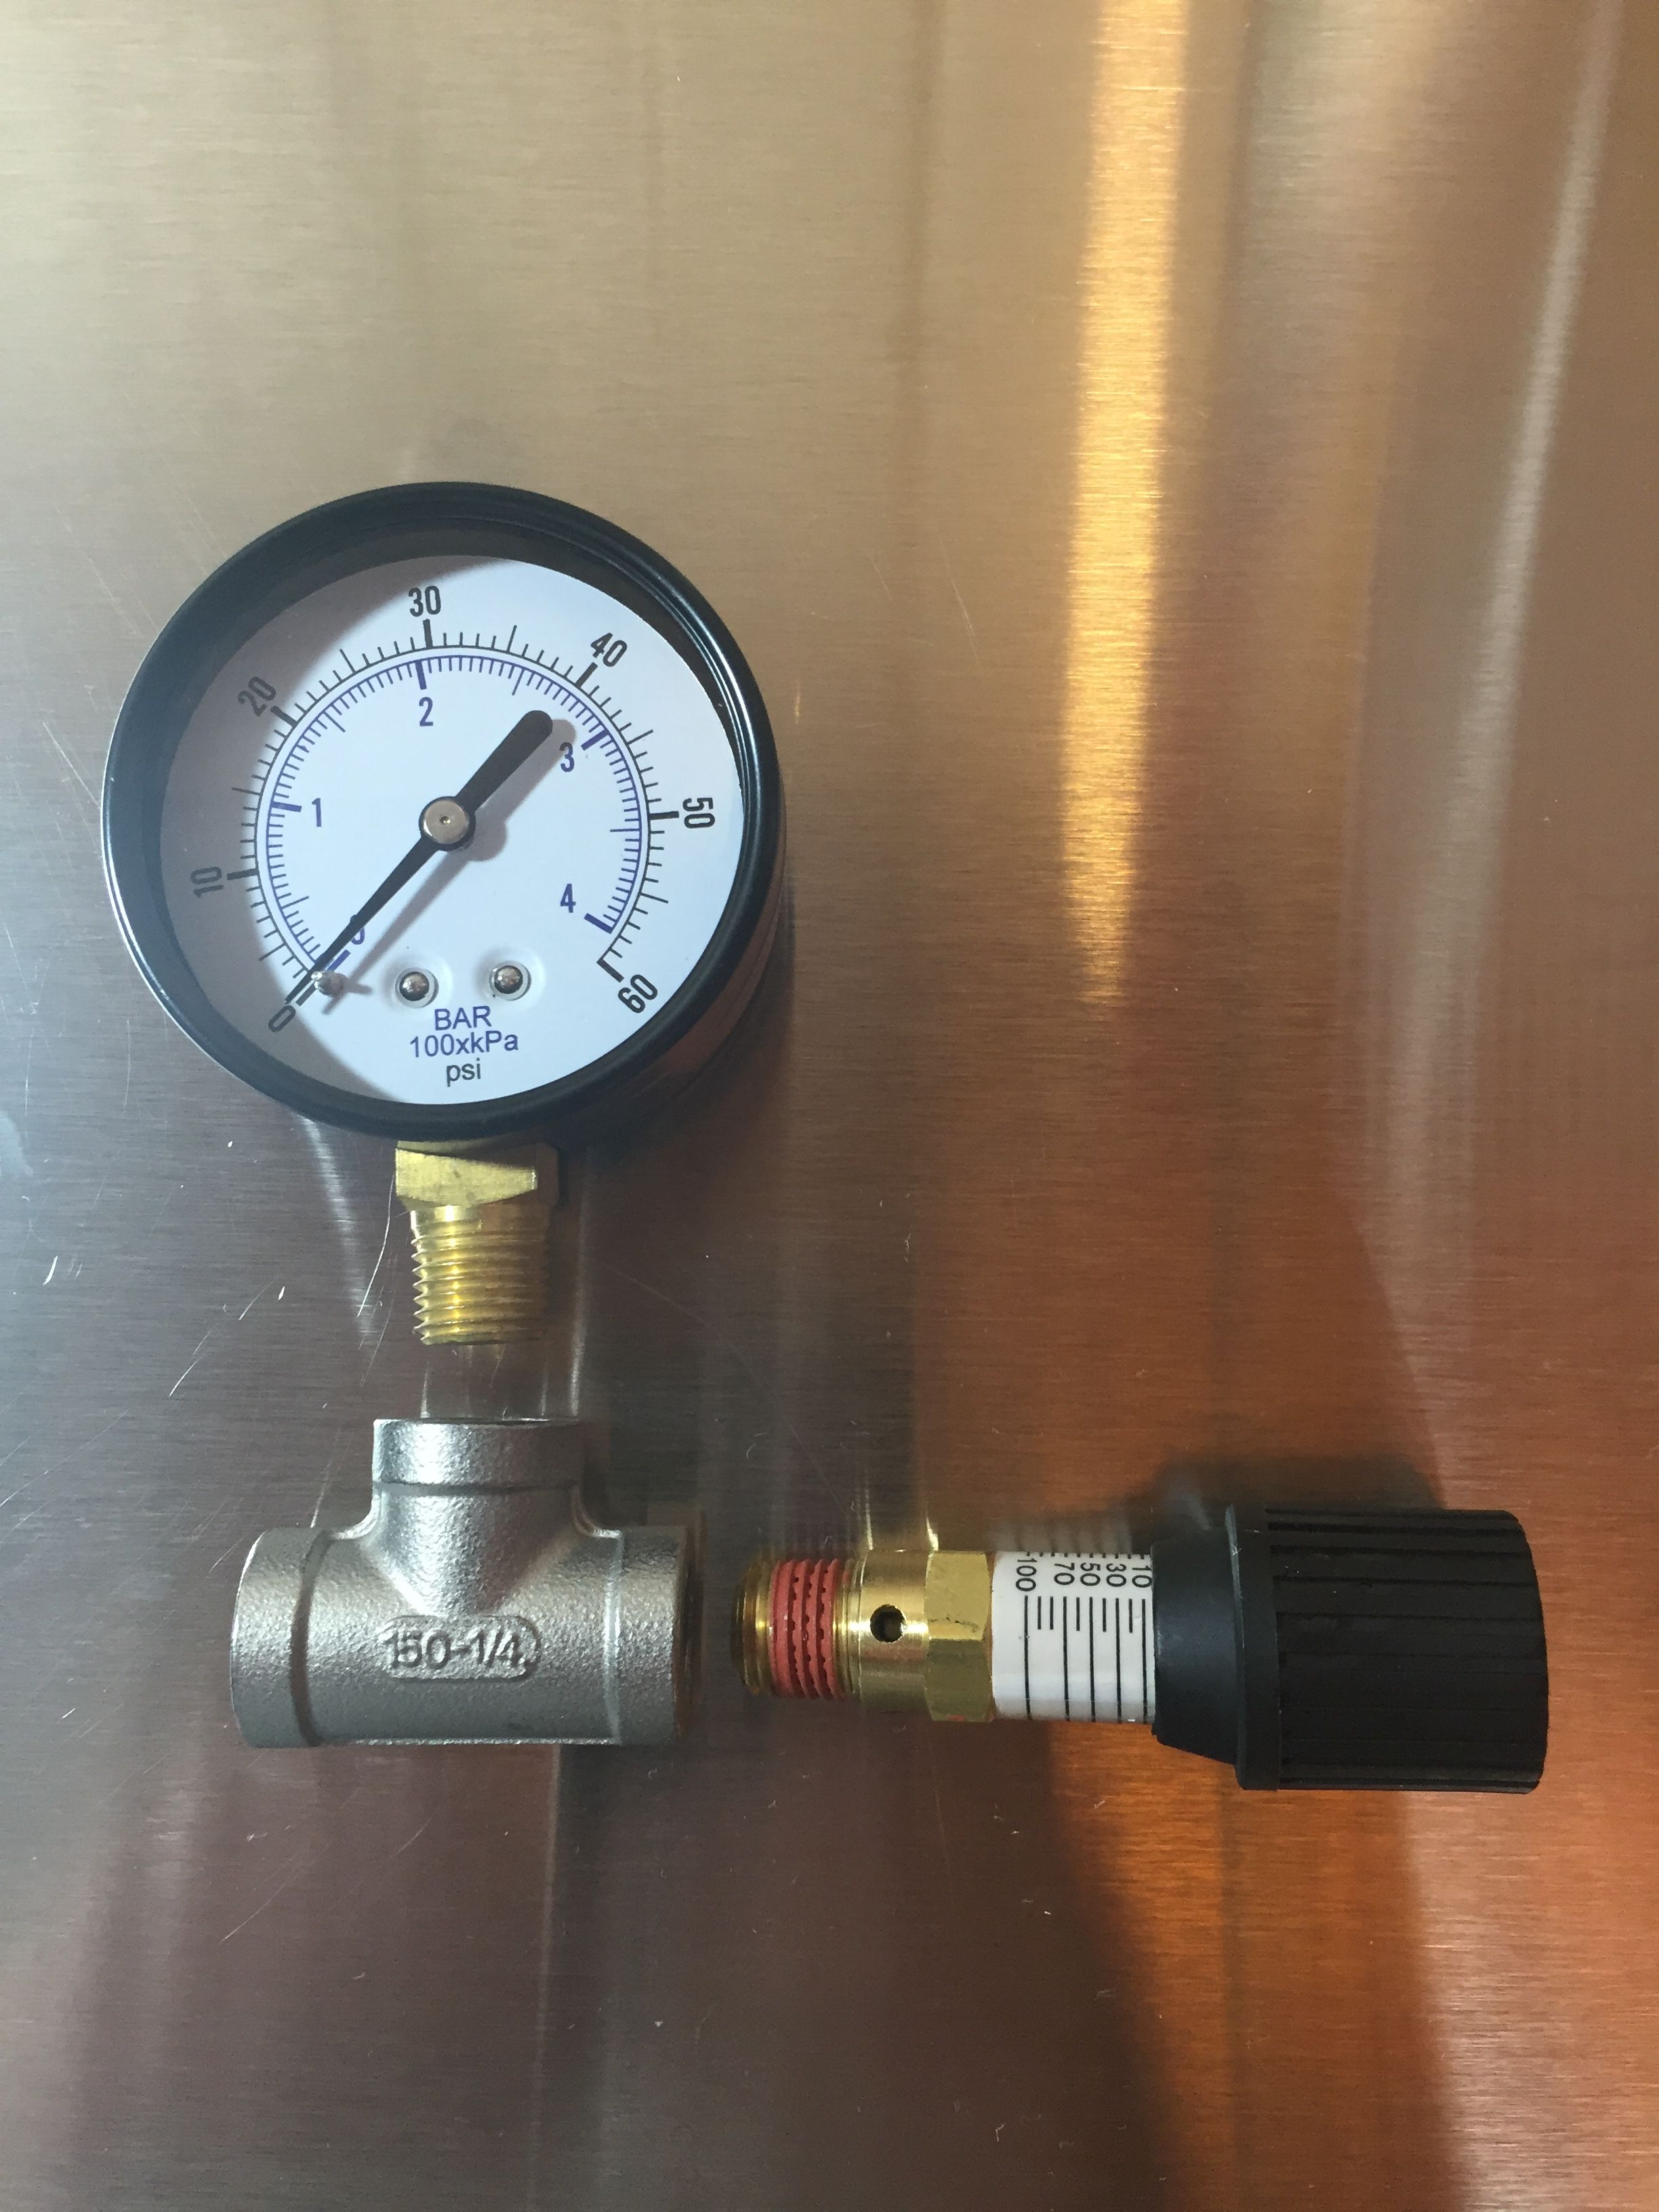 The tee fitting, gauge and valve together. The gauge required valve sealant tape, the relief valve came with some sort of thread sealant.
The only thing that remains is choosing how the assembly will connect to your serving or fermenting keg. These are grouped into general connection styles. Some styles have similar fittings that accomplish the same thing. Additional fitting options for each build can be found in the complete parts list toward the end of this post. When I’ve tried a fitting, I’ve included a photo.
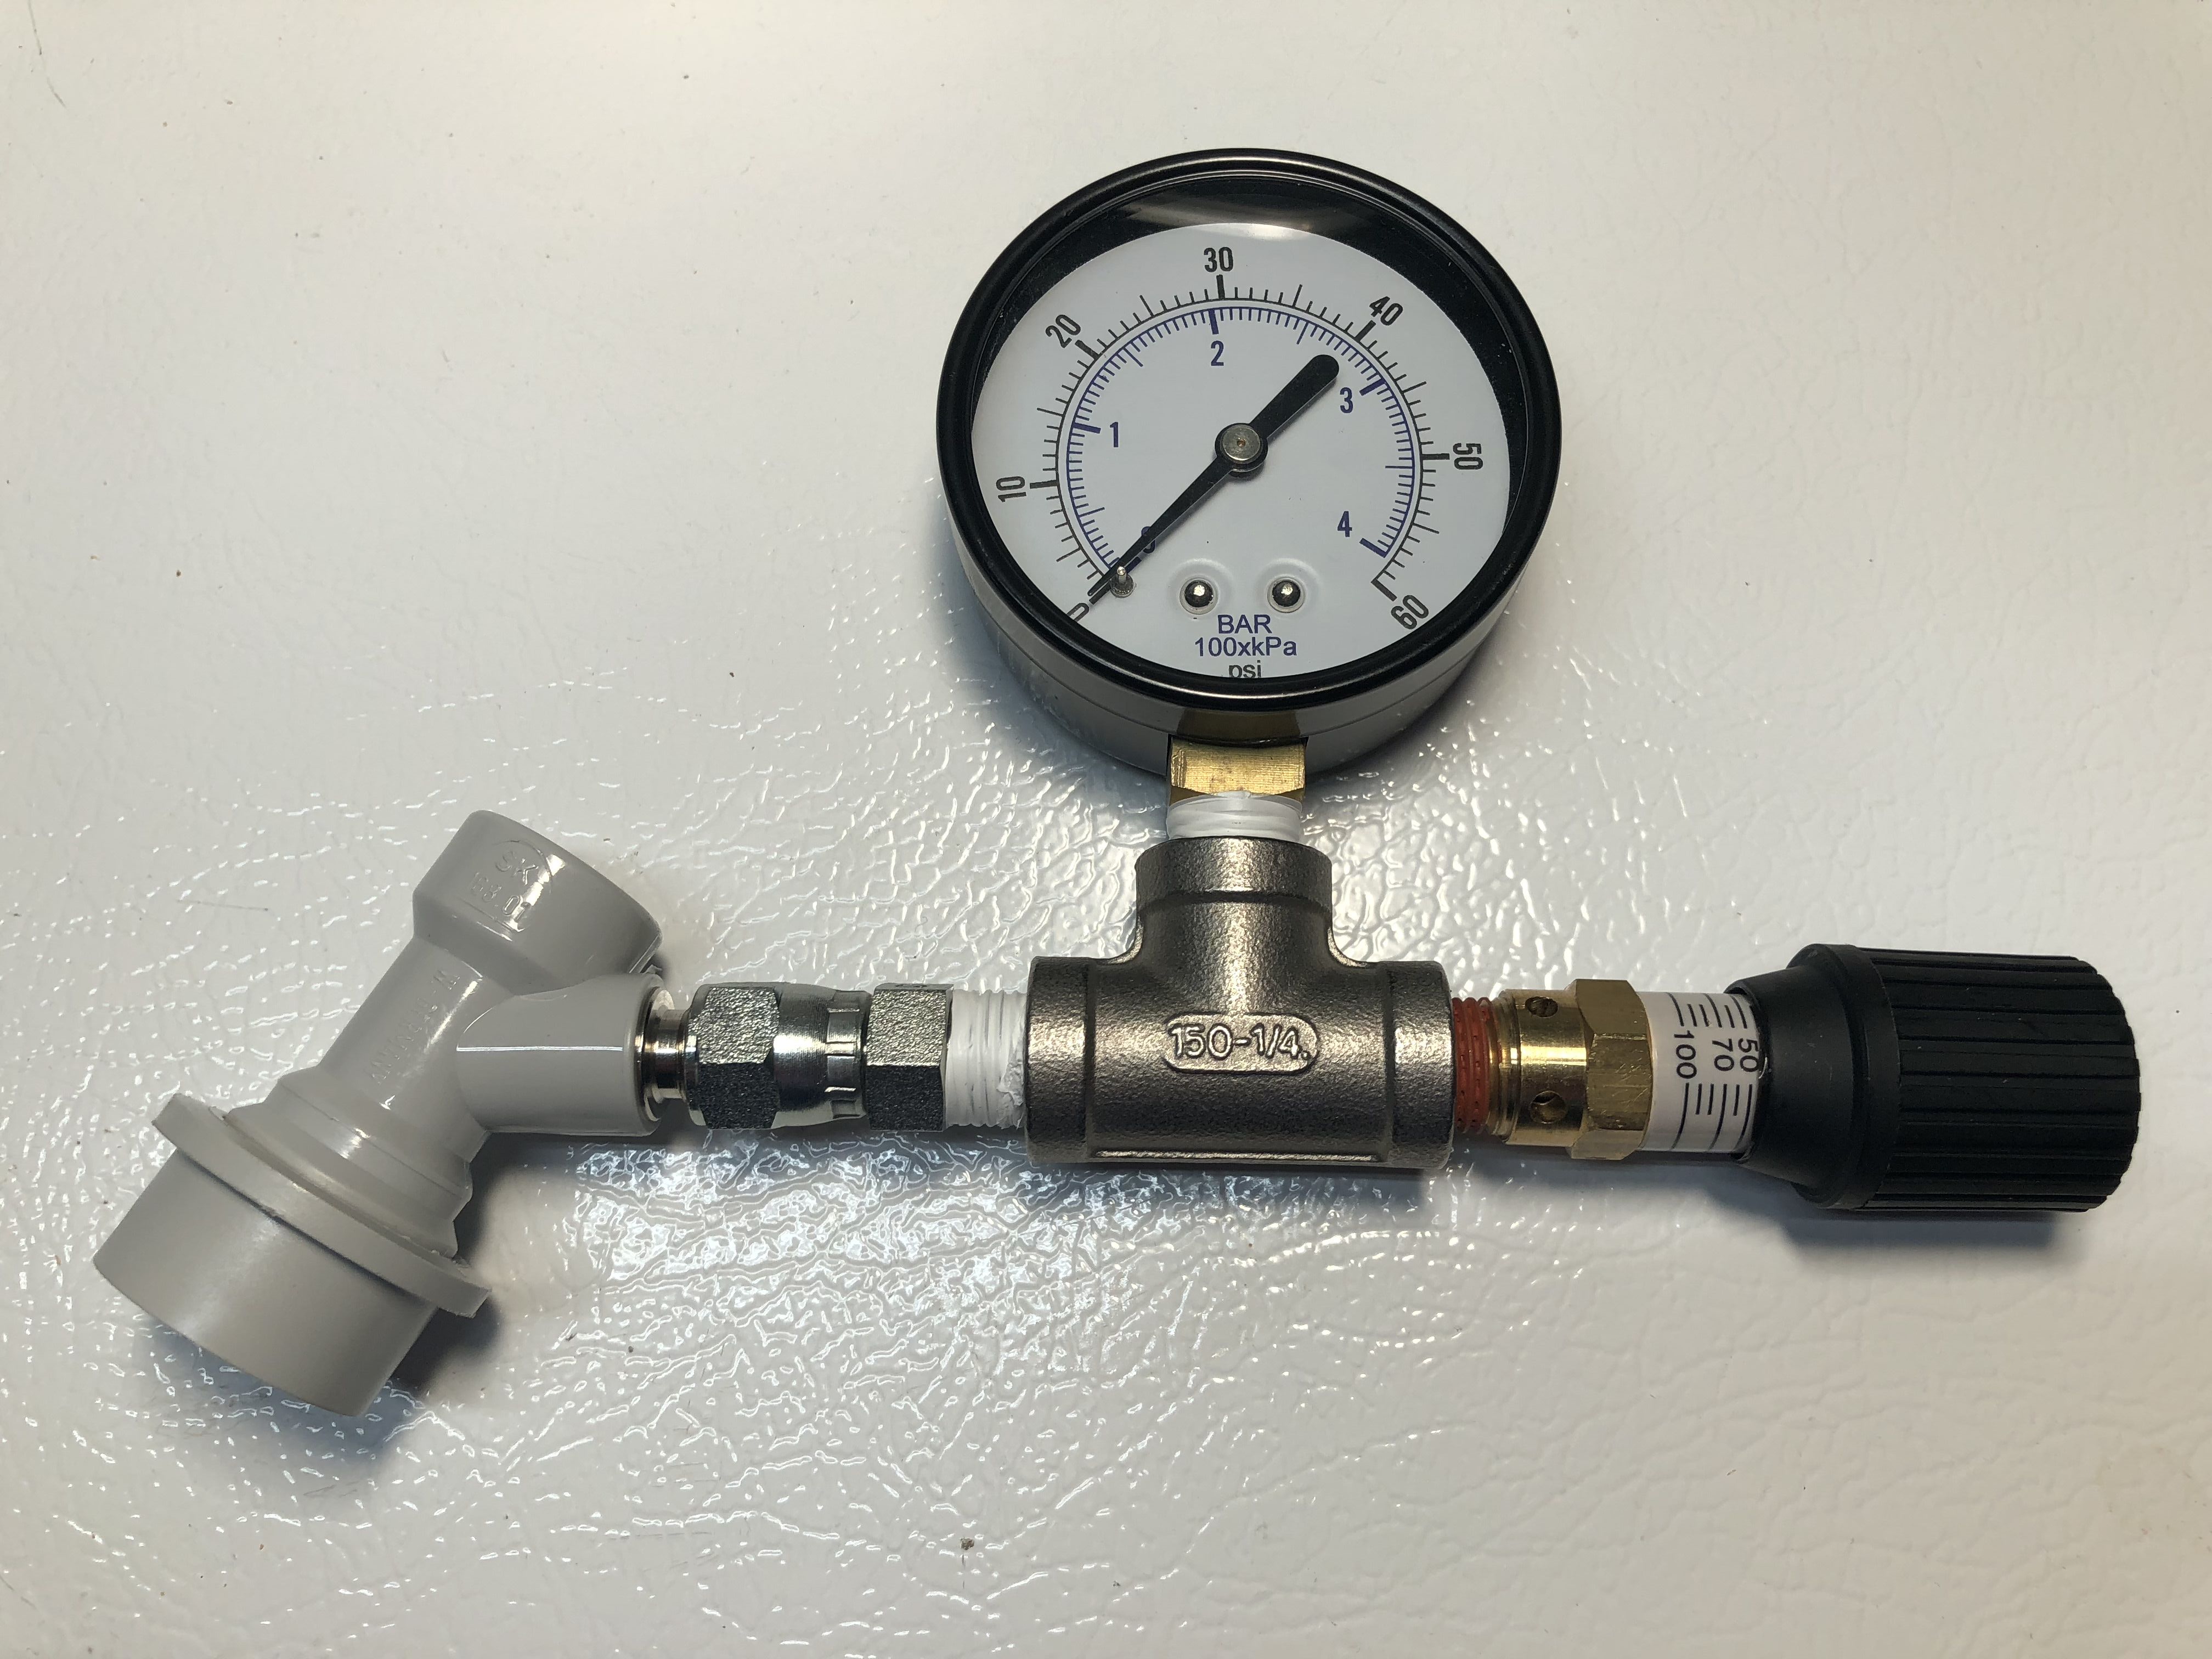
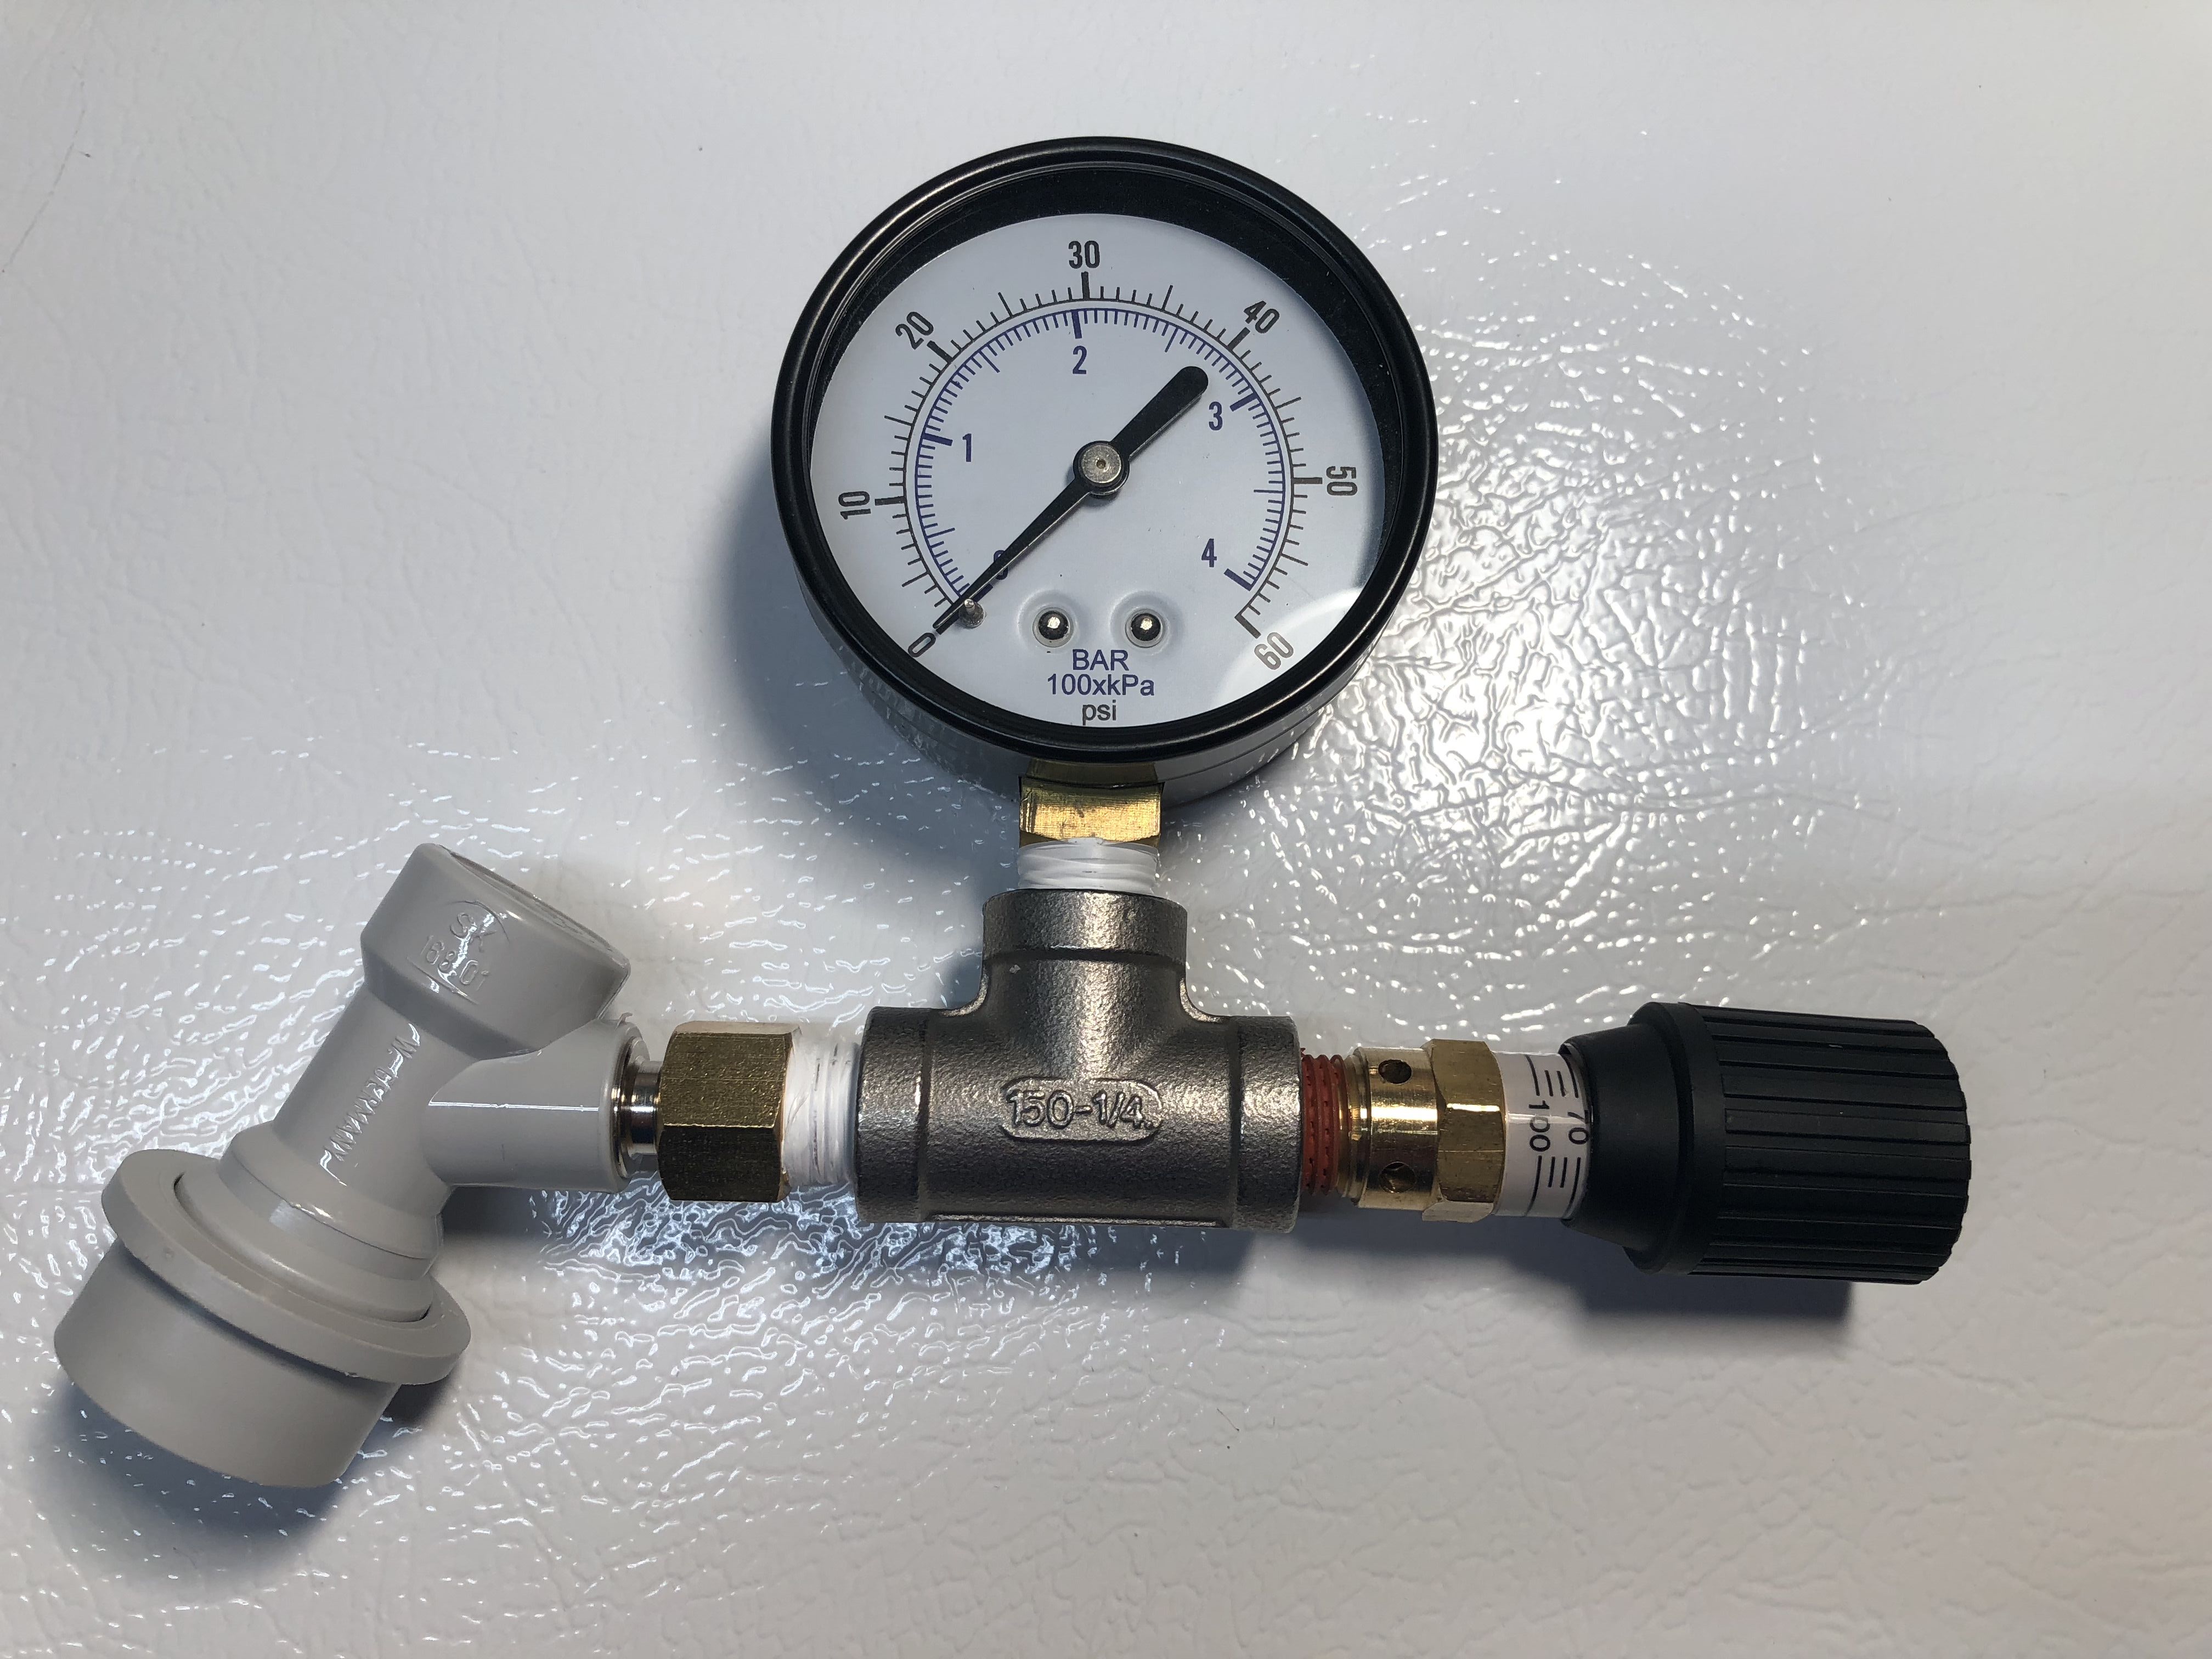
Style 1: FFL (Female Flare) connection ready to connect to a pin or ball lock QD. This version consists of Gas ball lock QD (it could just as well be a pin lock QD) – this fitting [1/4″ NPT Male x 1/4″ JIC Size] (* sizing note) – Stainless Tee – pressure gauge and this valve [Control Devices CR Series Brass Pressure Relief Valve, 0-100 psi Adjustable Pressure Range, 1/4″ Male NPT]. Valve Sealant tape goes on the first fitting and the pressure gauge.
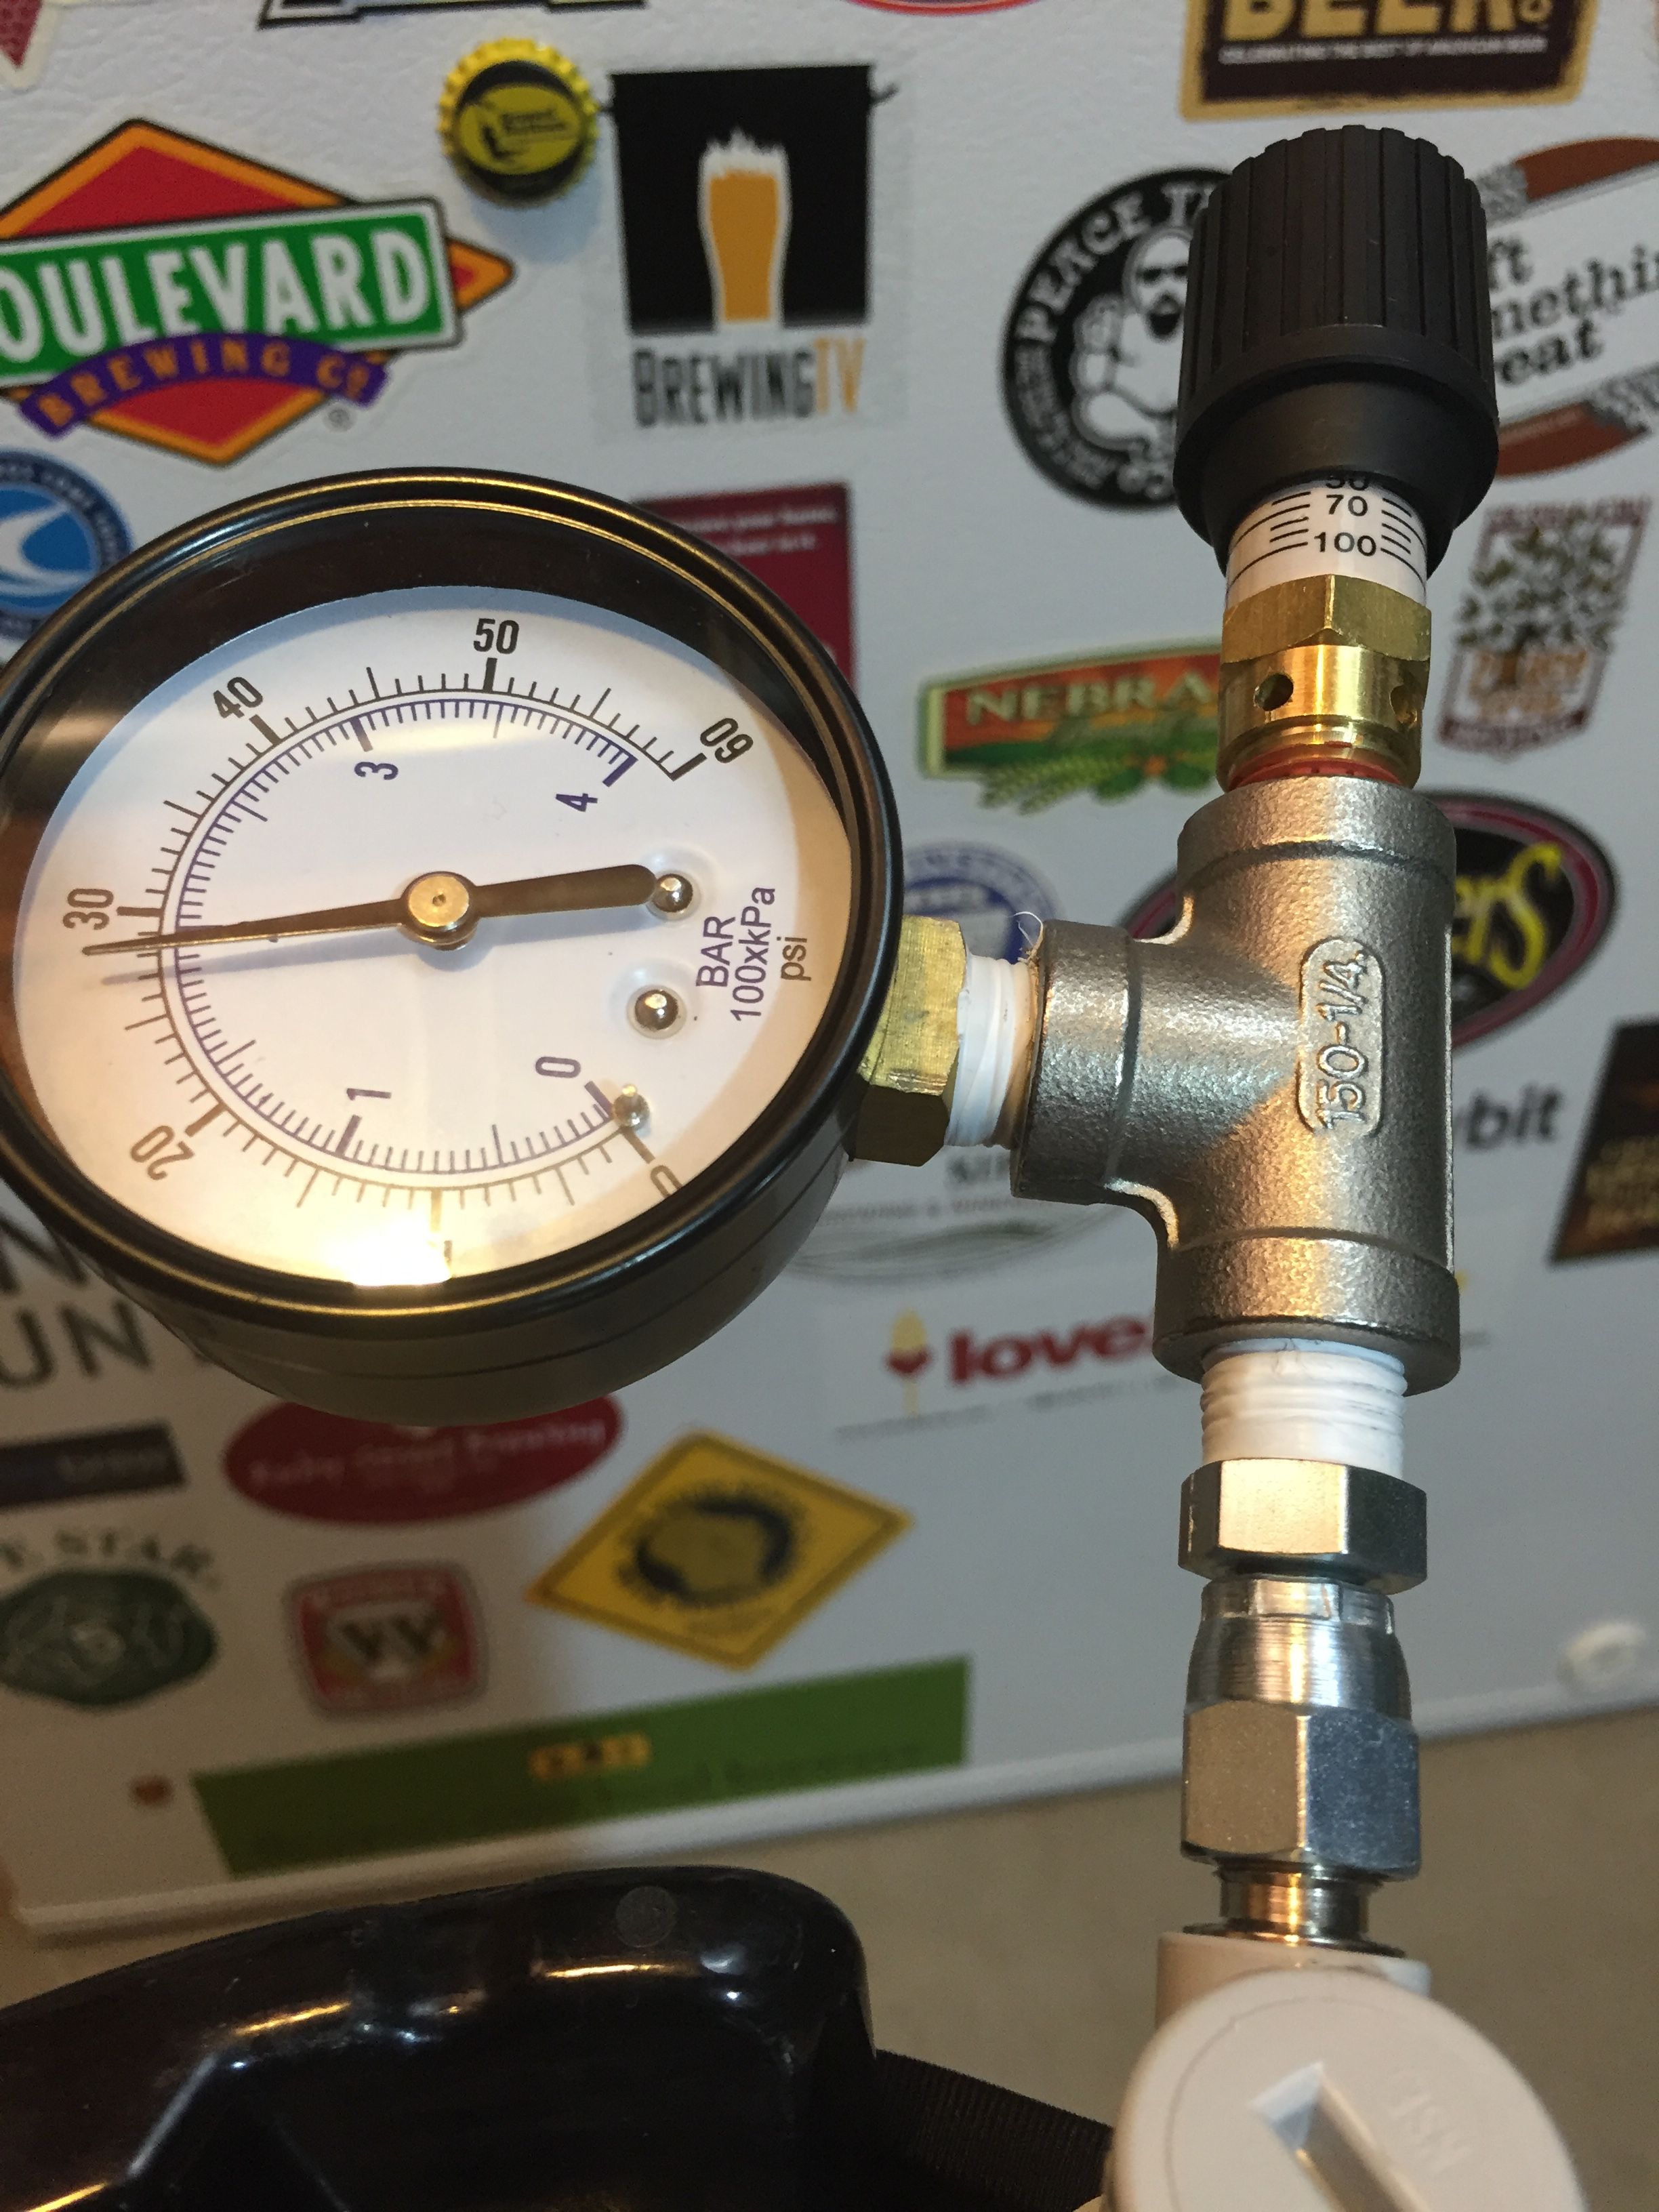 Style 1 in action
 Style 1 Variation: Using a brass fitting – LASCO 17-6783 1/4-Inch Female Flare by 1/4-Inch Male Pipe Thread Brass Adapter (* sizing note)
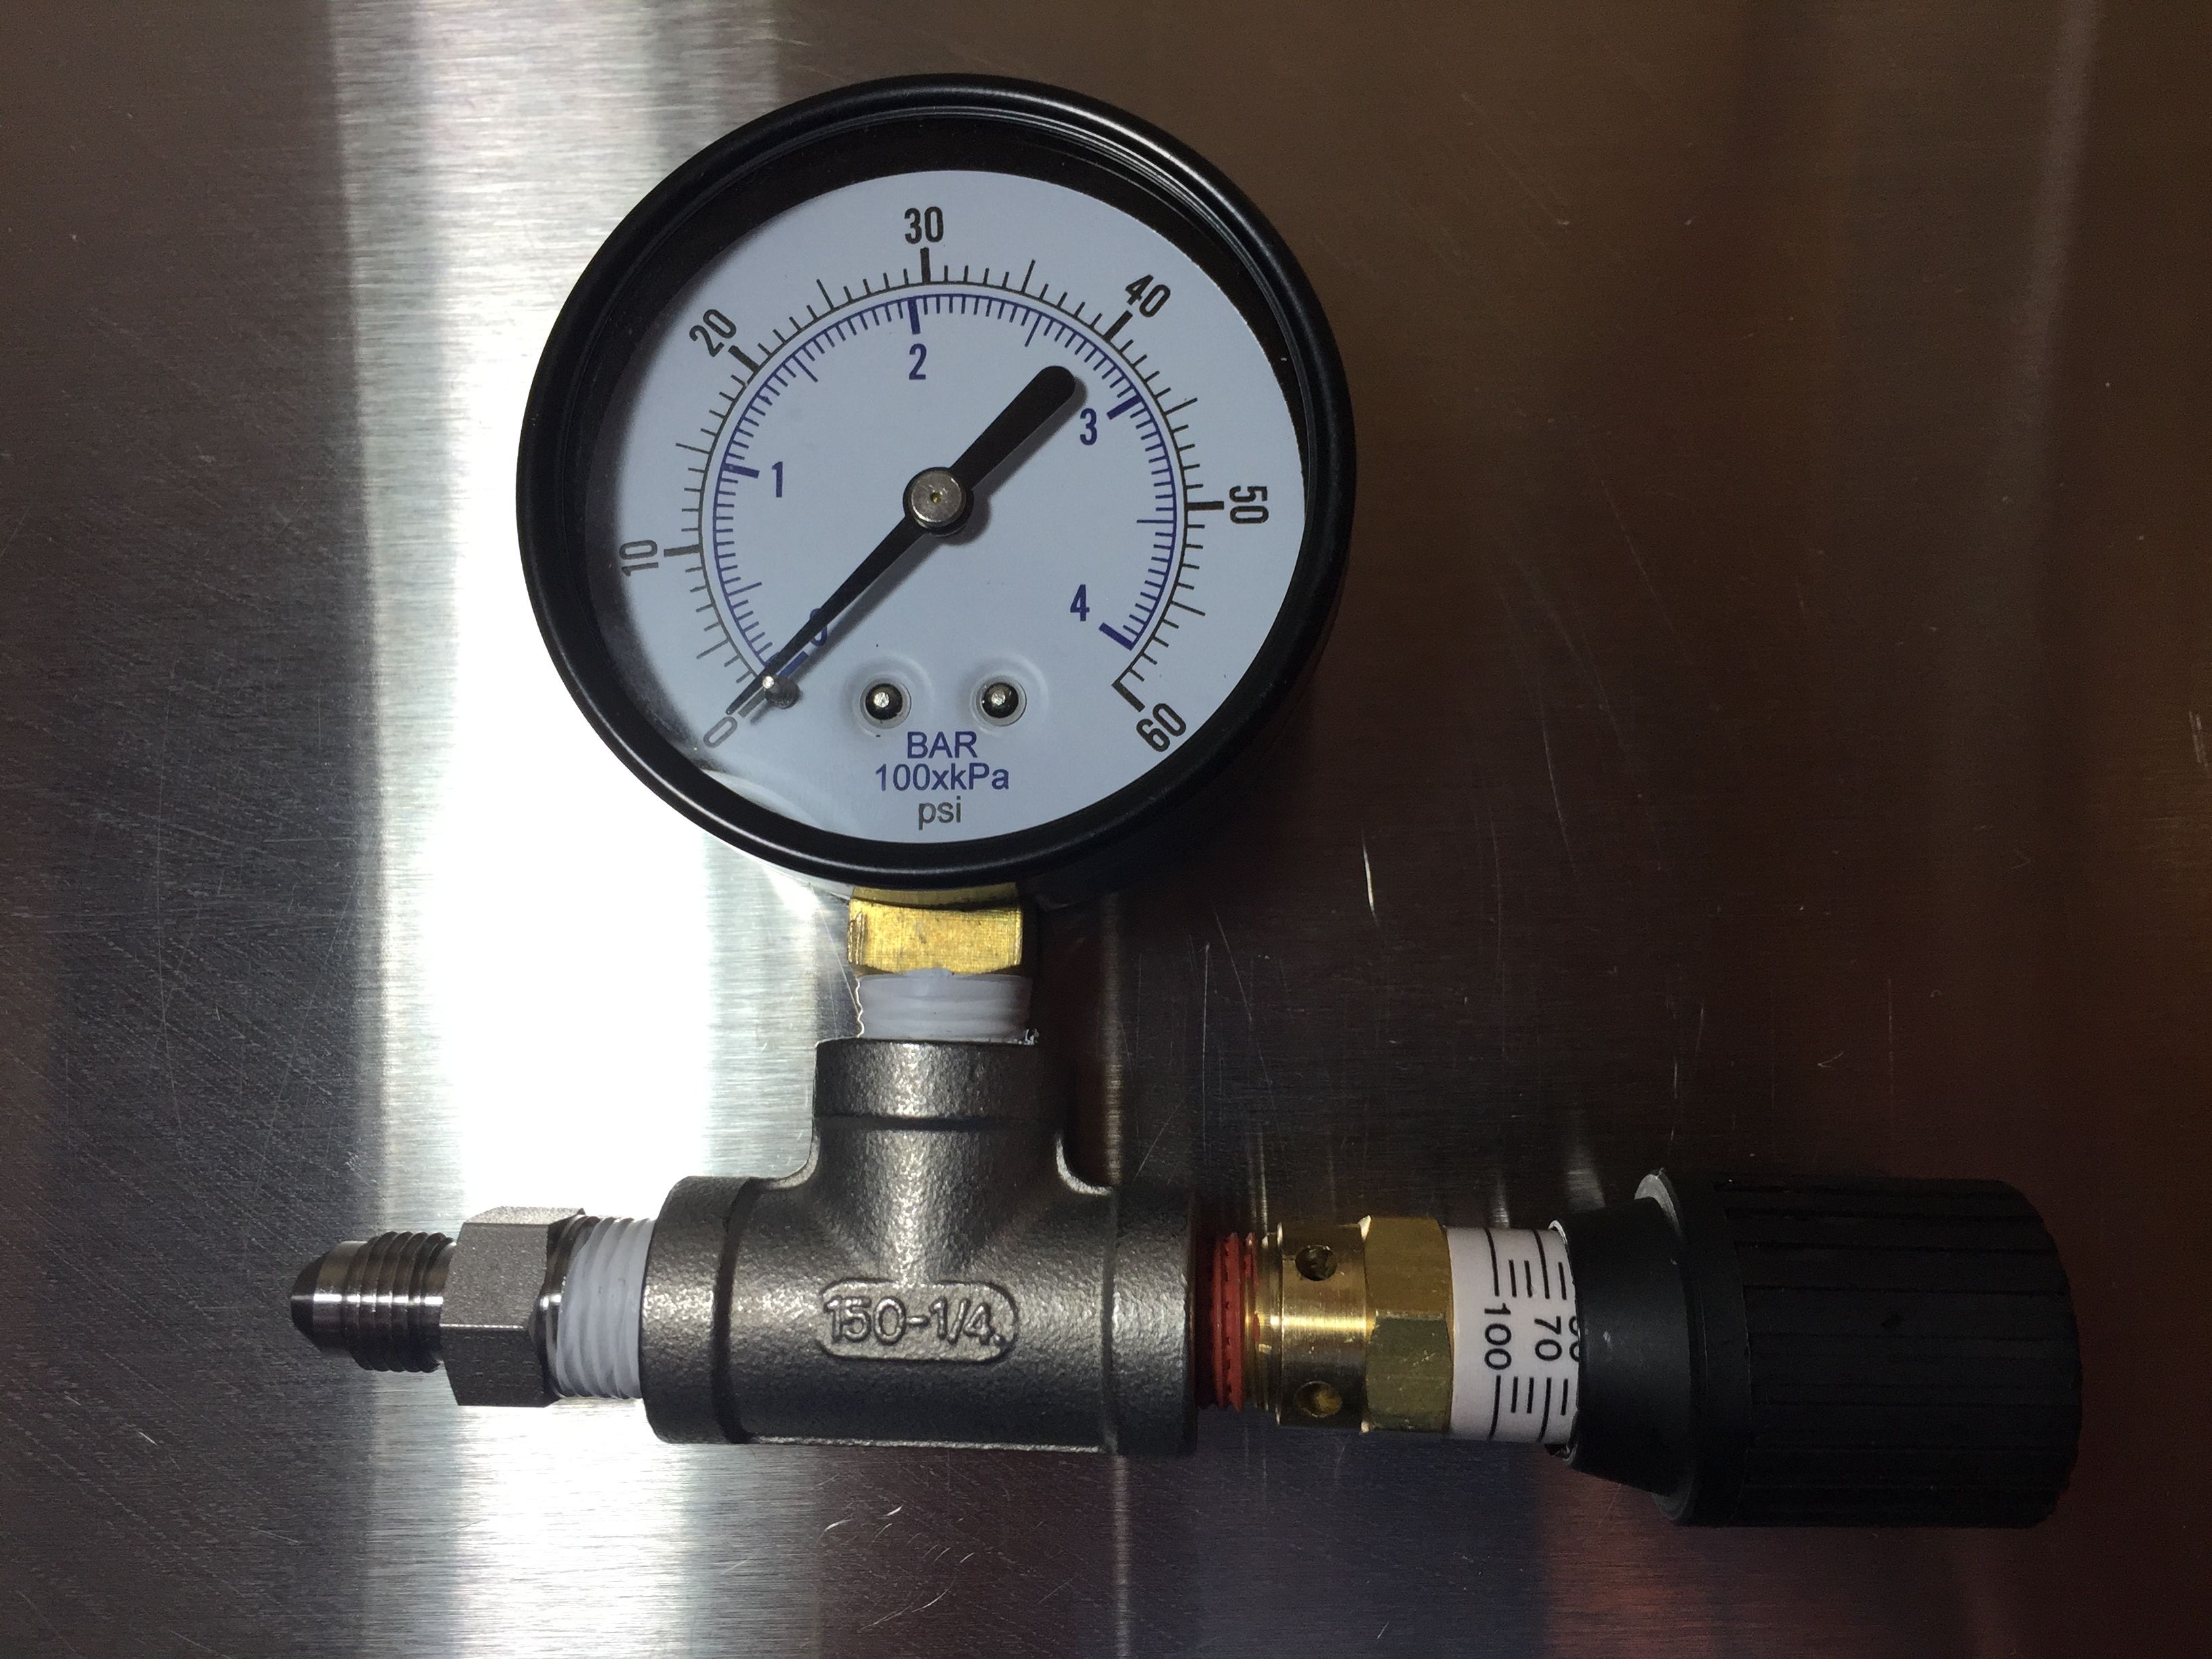 Style 2 [as of the most recent update to this post, this fitting is not available in the size I used for this build, pay close attention to the note about thread size that follows]: MFL (Male Flare) connection ready to connect to a flare 1/4″ swivel nut. This version consists of this fitting [1/4″ NPT Male x 1/4″ JIC Male] (* sizing note) – Stainless Tee – pressure gauge and this valve [Control Devices CR Series Brass Pressure Relief Valve, 0-100 psi Adjustable Pressure Range, 1/4″ Male NPT]. Valve Sealant tape goes on the first fitting and the pressure gauge. The 1/4″ MFL can connects to 1/4″ FFL female flare of your choice.
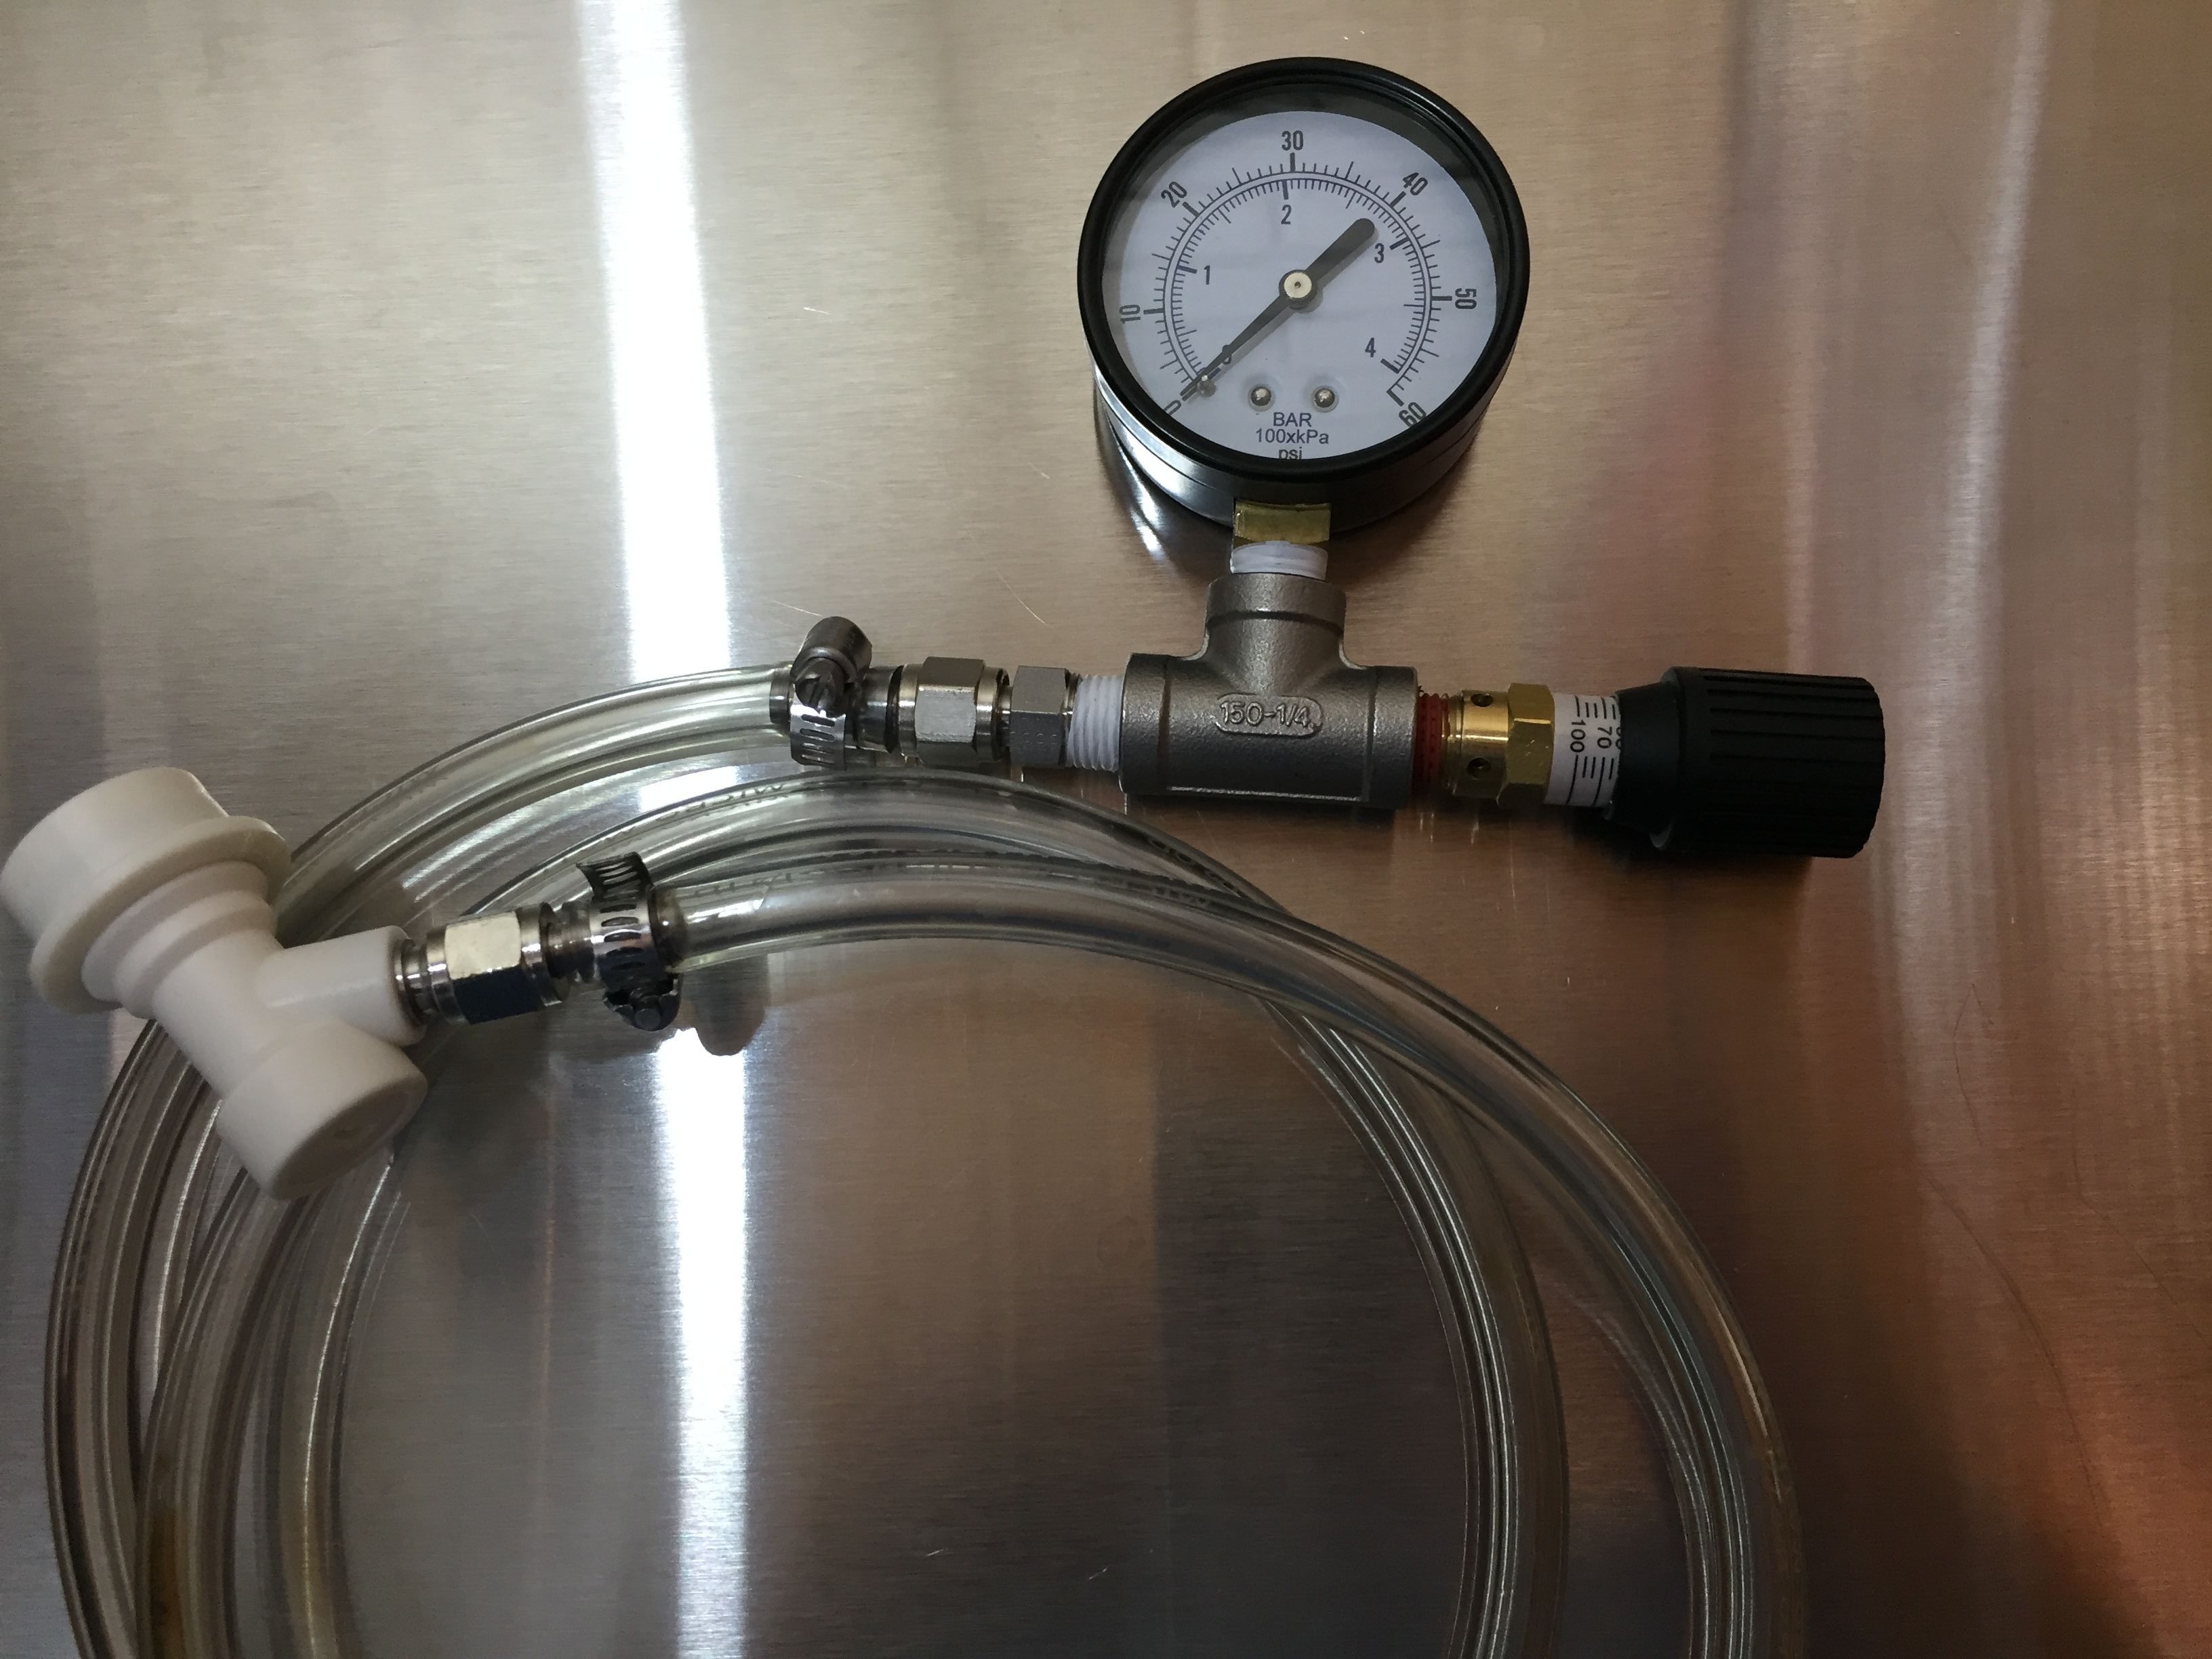 Style 2 with tubing
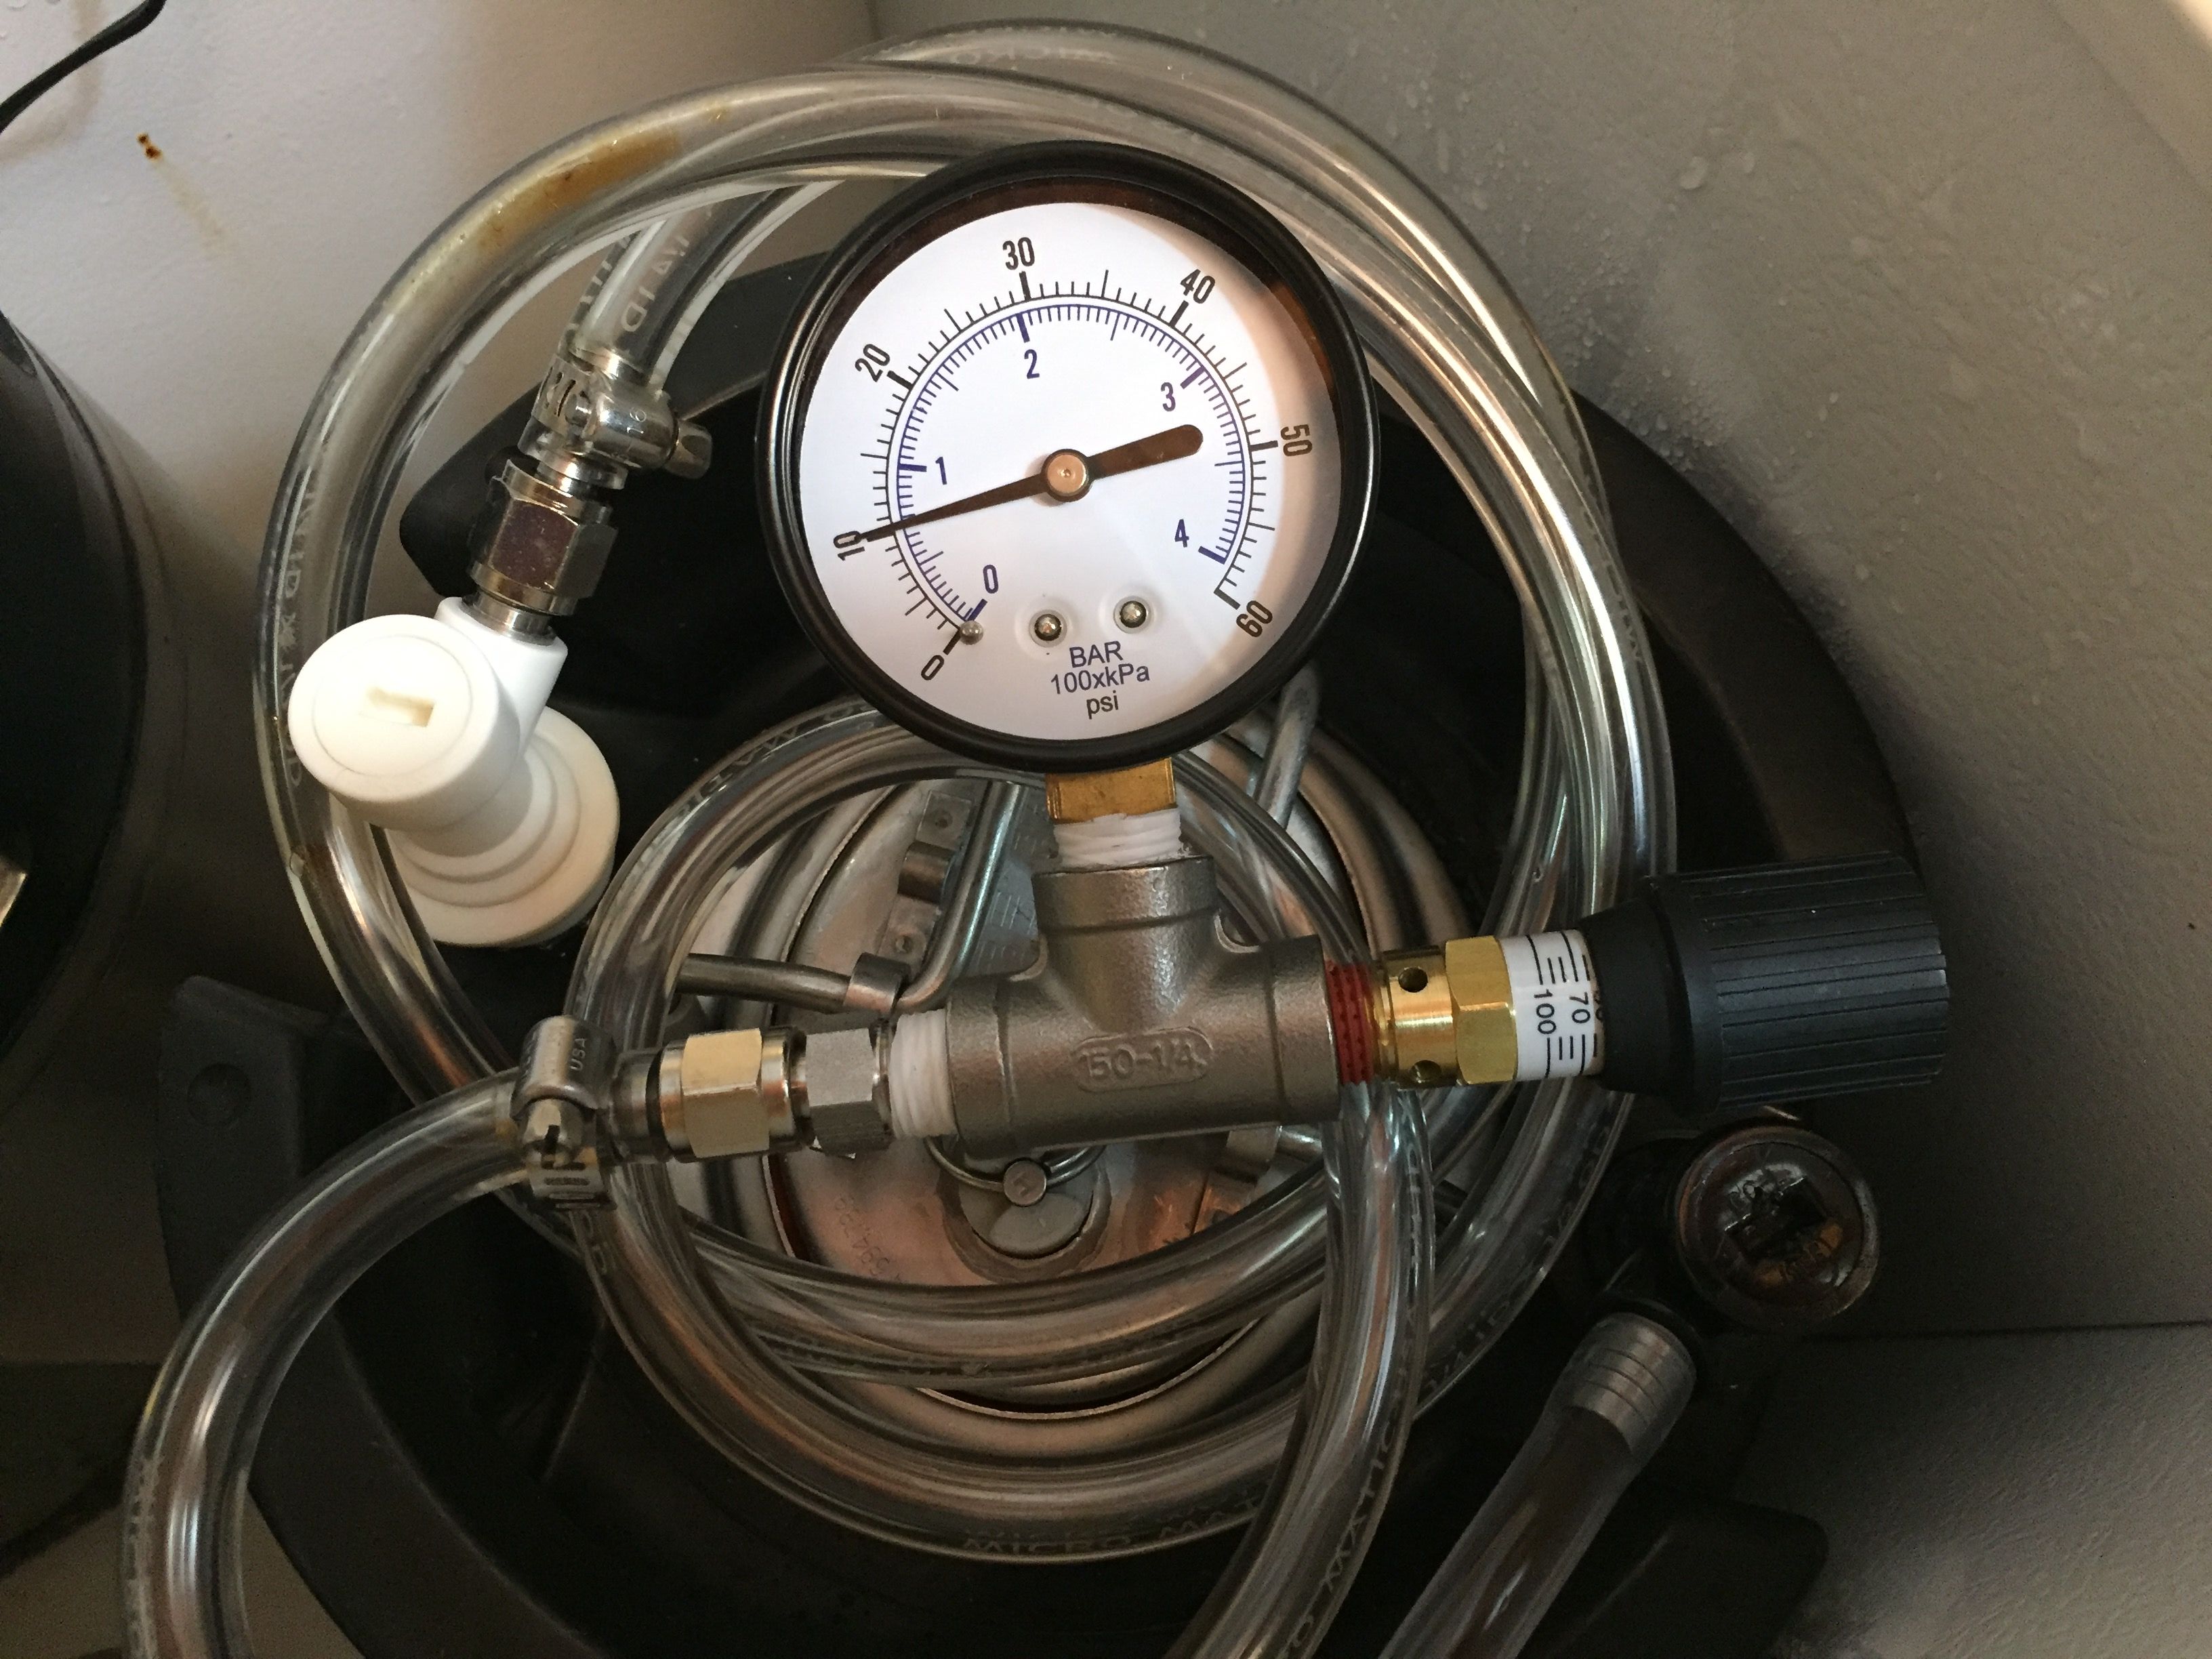 This version is nice if you’re tight on space. You can coil it up on top of a keg or set it off to the side.
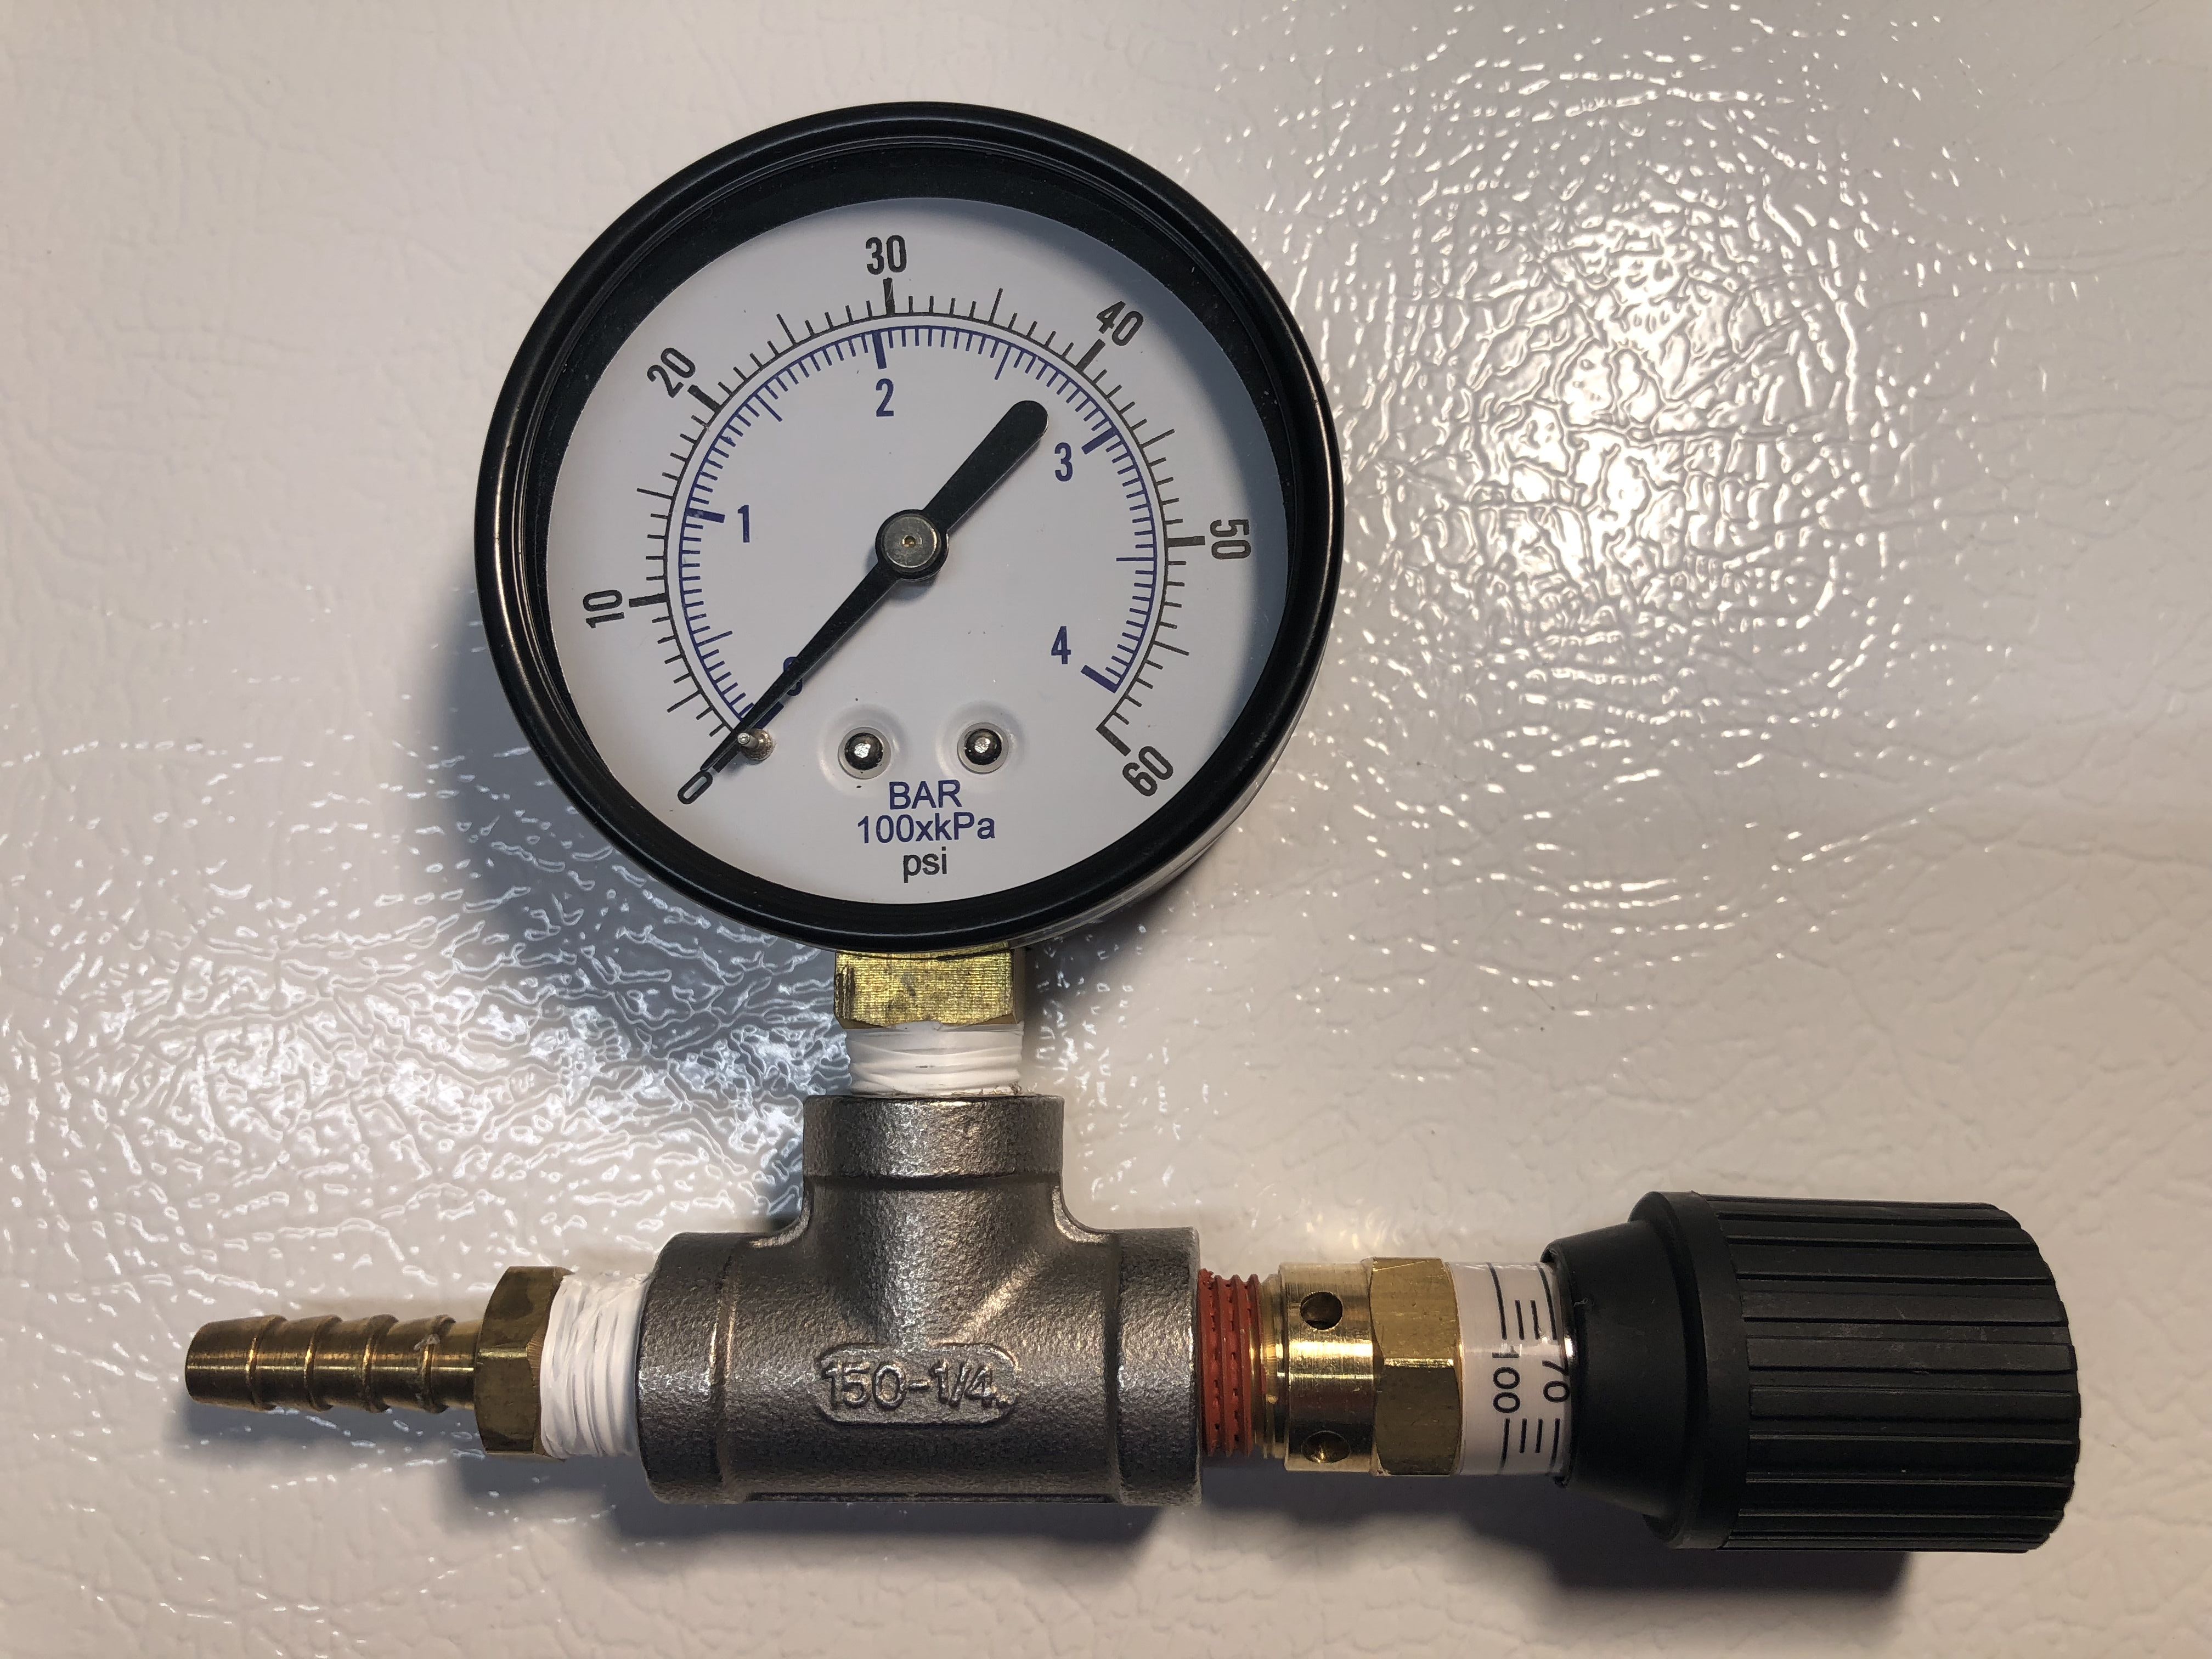
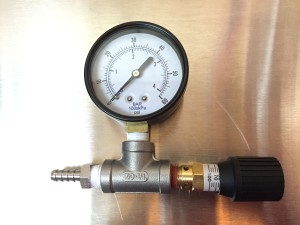 Style 3: 1/4″ barb – Ready for whatever 1/4″ ID tubing you’d like to use. This version consists of this fitting [1/4″ Hose Barb 1/4″ Male NPT] (* sizing note) – Stainless Tee – pressure gauge and this valve [Control Devices CR Series Brass Pressure Relief Valve, 0-100 psi Adjustable Pressure Range, 1/4″ Male NPT]. Valve Sealant tape goes on the first fitting and the pressure gauge.
Style 3 Variation: Using a brass barb – Anderson Metals 57001 Brass Hose Fitting, Adapter, 1/4″ Barb x 1/4″ NPT Male Pipe (* sizing note)
Style 3 Variation: Using a brass barb – Anderson Metals 57001 Brass Hose Fitting, Adapter, 1/4″ Barb x 1/4″ NPT Male Pipe (* sizing note) and brass tee – Anderson Metals 56101 Brass Pipe Fitting, Barstock Tee, 1/4″ x 1/4″ x 1/4″ NPT Female Pipe – thank you to /u/workaccount32 on reddit for this photo
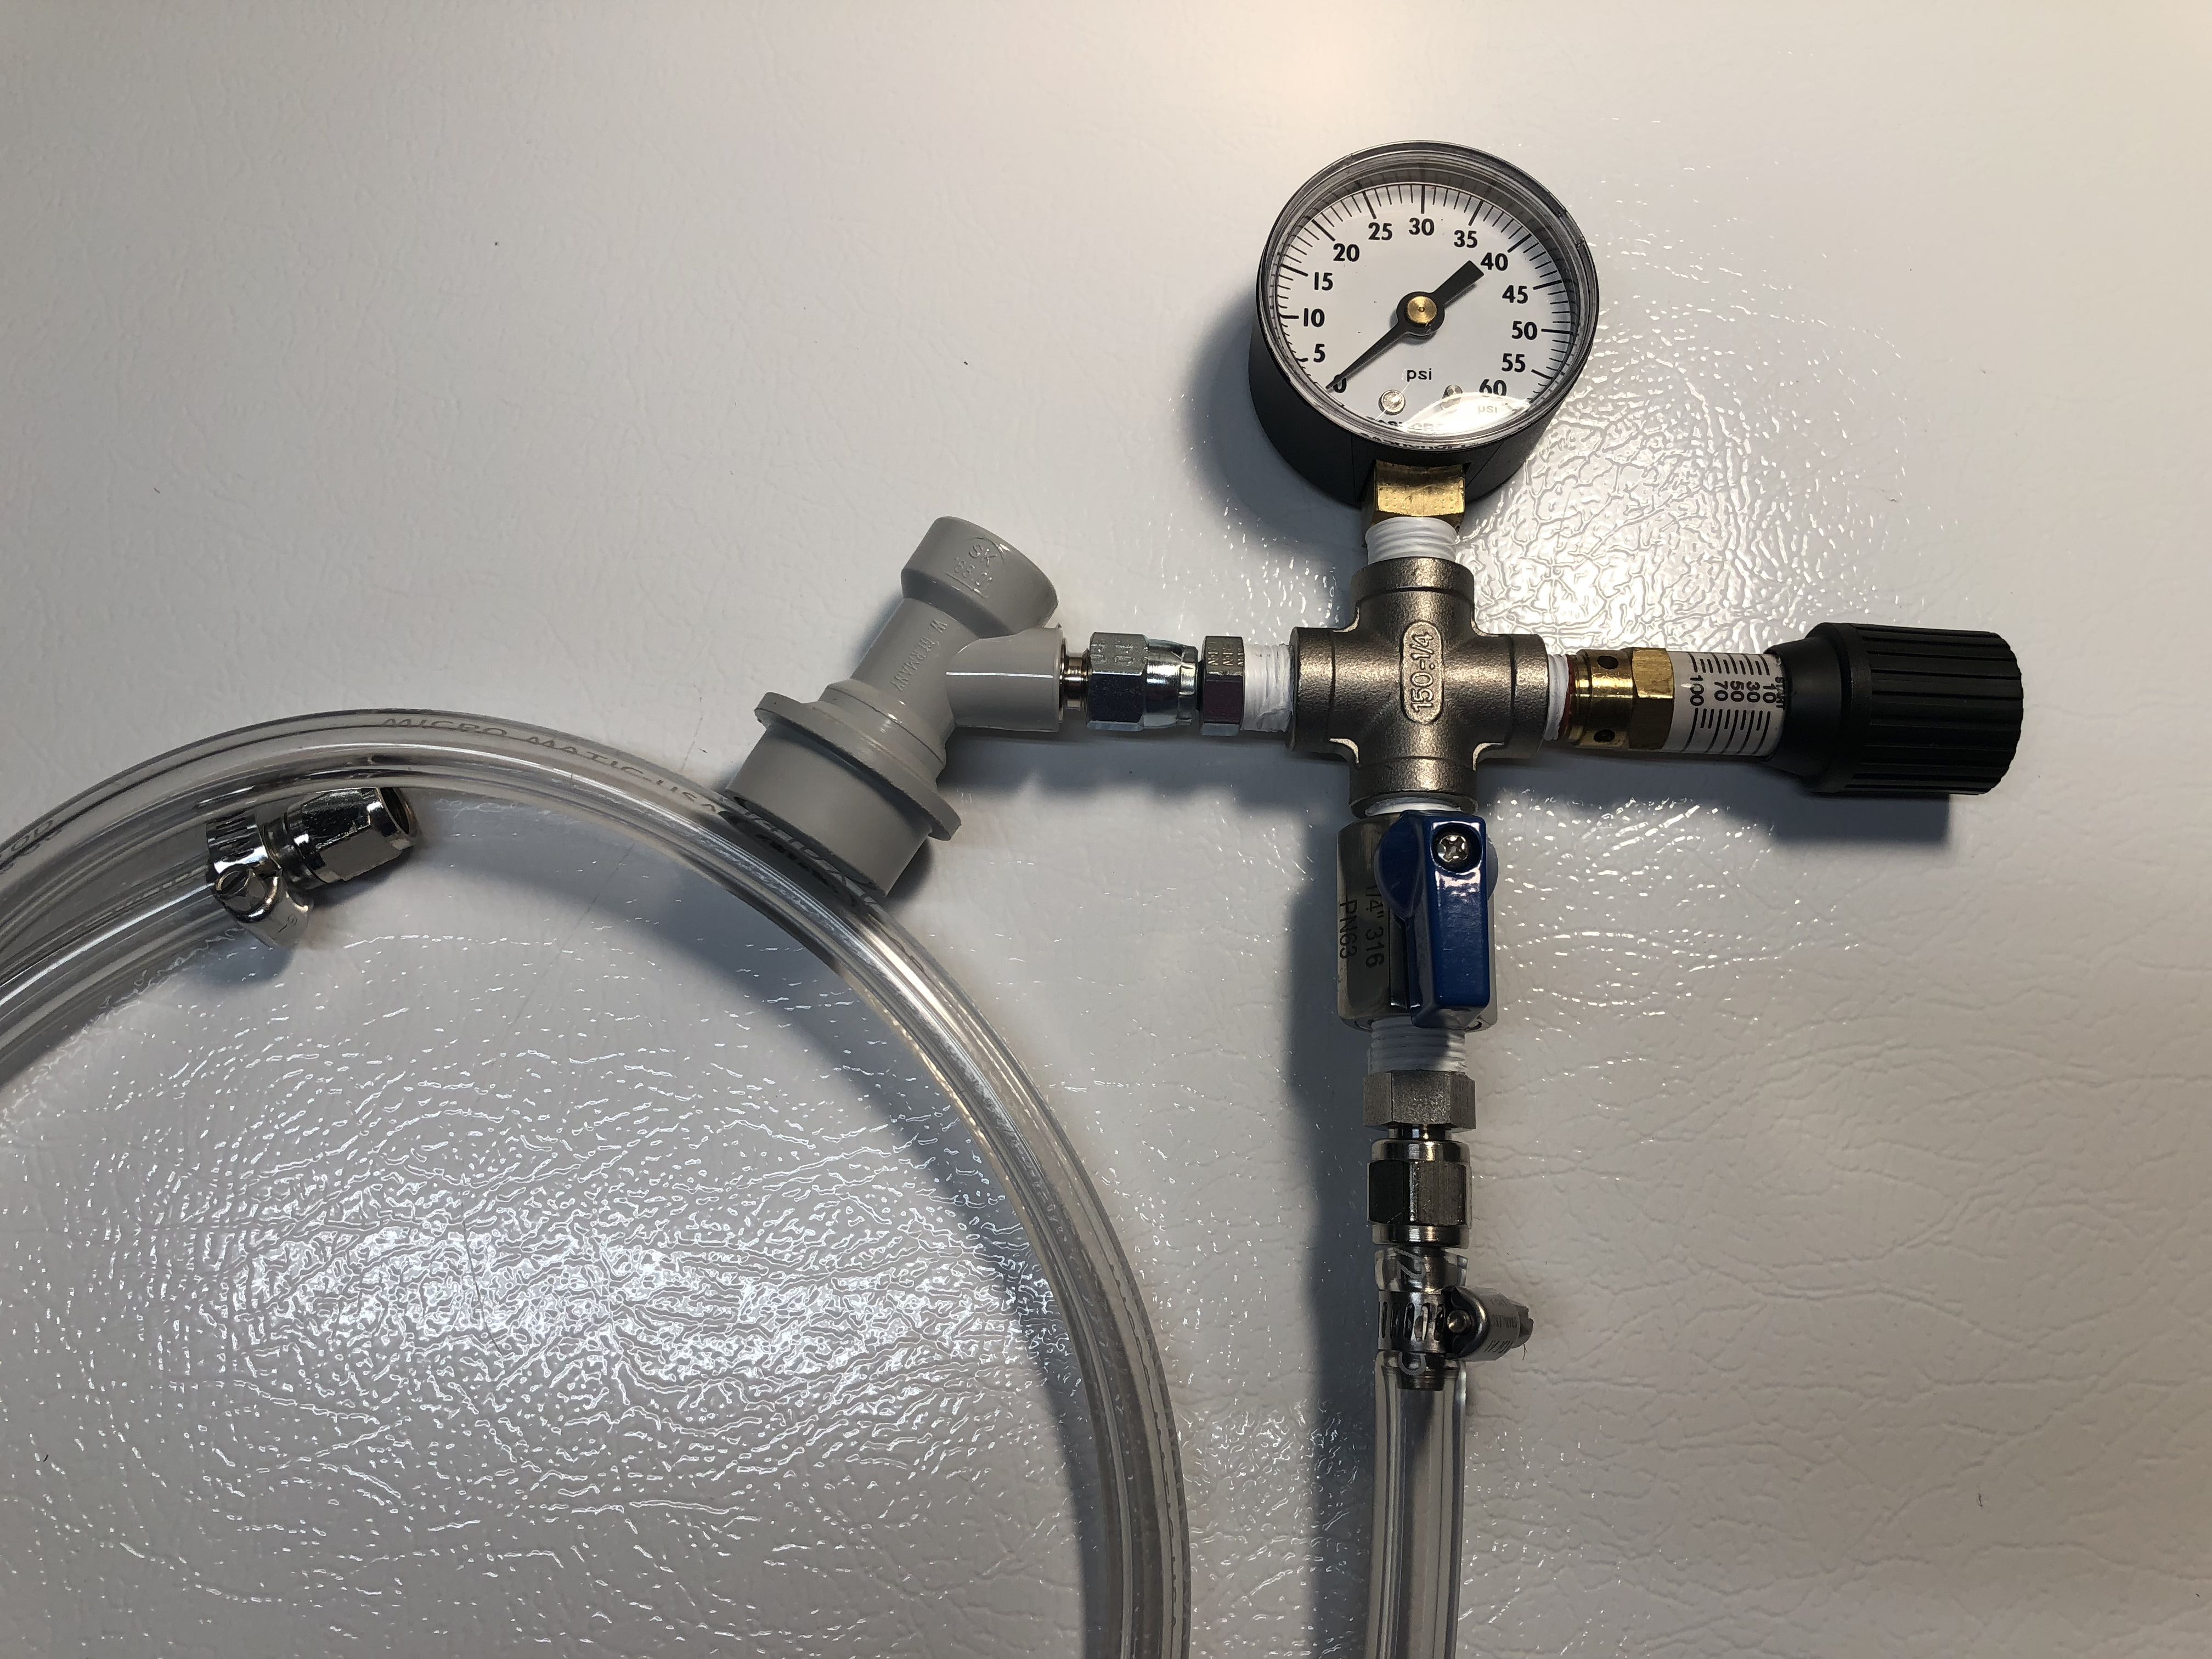
Style 4 : This build uses a cross fitting instead of tee fitting. The additional leg has a ball valve [1/4″ Stainless Steel (316) Mini Ball Valve – FxM NPT] on it. My thinking on this was to give you the option to use one Spunding Valve on multiple kegs. This could be for any of the functions mentioned above. Pick the connectors you want for your intended purpose. One idea – ferment one beer under pressure and use that pressure to force carbonate another beer to save CO2.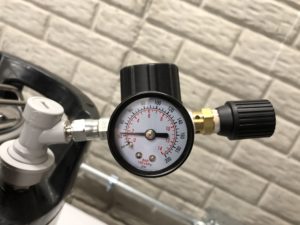 This version utilizes Primefit’s Part CR1401G. Most of our builds consist of a PRV Valve + tee + gauge + connection option. Generally four parts in total. The CR1401G replaces two parts, both the tee and gauge. See: Spunding Valve Build: Using Primefit CR1401G Replacement Air Regulator for more details
Spunding Build Parts List
As outlined in the different build types detailed in this post, a Spunding Valve assembly can be built in a number of different ways based on your desired application, budget and parts availability. This parts list is broken up into sections by component type.
Adjustable PRV Valves:
- Control Devices CR Series Brass Pressure Relief Valve, 0-100 psi Adjustable Pressure Range, 1/4″ Male NPT
- BlowTie: BlowTie Diaphragm Spunding Valve FE960 – via MoreBeer + Complete Lineup, BlowTie Diaphragm Spunding Valve – via William’s Brewing + Complete Lineup – Note: This option requires a BlowTie Diaphragm Valve + a small piece of 8 mm” ID EVABarrier Tubing + a Duotight 8mm ¼” NPT Adapter
- Stainless Option! Adjustable Stainless Gas Pressure Relief – 1/4 in. MPT via MoreBeer
- Not Recommended: A note about… Control Devices NC Series Brass Non-Code Safety Valve, 25-200 psi Adjustable Pressure Range, 1/4″ Male NPT – I’m including this because people have asked me about using this for Spunding Valve builds. I don’t recommend it because of it’s minimum pressure. The lowest this can be set at is 25 PSI. In my opinion that’s too high for a Spunding Valve. It may work for some applications, but it’s not nearly as versatile as the 0 to 100 PSI PRV featured in my builds.
Pressure Gauges:
- Zenport DPG60 Zen-Tek Dry Air Pressure Gauge, 60 PSI – OR – Digital Low Pressure Gauge with 1/4” NPT Bottom Connector and Rubber Protector by Uharbour, 0-60 psi, Accuracy 1%, Resolution 0.1psi – This is featured in this post
- Digital Low Pressure Gauge with 1/4” NPT Bottom Connector and Rubber Protector by Uharbour, 0-60 psi, Accuracy 1%, Resolution 0.1psi – This is featured in this post
- Winters PEM Series Steel Dual Scale Economical All Purpose Pressure Gauge with Brass Internals, 0-30 psi/kpa, 2″ Dial Display, +/-3-2-3% Accuracy, 1/4″ NPT Bottom Mount – I’ve not personally used this one – What are others saying? Search this product’s Amazon reviews for “spunding”
- PIC Gauge S101D-254D 2.5″ Dial, 0/60 psi Range, 1/4″ Male NPT Connection Size, Bottom Mount Single Scale Dry Pressure Gauge with a Black Steel Case, Brass Internals, Chrome Bezel, and Plastic Lens – I’ve not personally used this one
- Note Any properly rated 1/4″ NPT gauge – search 1/4″ pressure gauge on Amazon to shop around
Tee Fittings:
- Stainless Steel 304 Cast Pipe Fitting, Tee, Class 150, 1/4″ NPT Female
- Anderson Metals 56101 Brass Pipe Fitting, Barstock Tee, 1/4″ x 1/4″ x 1/4″ NPT Female Pipe
- WYNNsky Metals Brass Pipe Fitting Barstock Tee 2 PCS 1/4″ x 1/4″ x 1/4″ NPT Female Pipe 2 PCS 1/4″ NPT X 1/4″ Hose ID Brass Hose Barb Fittings – note that this includes two tee fittings as well as two barb fittings
- Note: Any properly rated 1/4″ x 1/4′ x 1/4″ tee should work – search 1/4″ npt tee on Amazon to shop around
Tee+Gauge Option:
- Primefit CR1401G Replacement Air Regulator with steel-Protected Gauge, 1/4″ Npt – (* sizing note) – Most of our builds consist of a PRV Valve + tee + gauge + connection option. Generally four parts in total. The CR1401G replaces two parts, both the tee and gauge. See: Spunding Valve Build: Using Primefit CR1401G Replacement Air Regulator for more details
PTFE Tape:
Keg Fitting Options: – How do you want your Spunding Valve to connect to kegs or fermenter? I’ve tried many of these fittings myself. For fittings I’ve tried, I include a link to a photo
Style 1 – Female Flare, Connect to Pin or Ball Lock QD (* sizing note)
- Brass: LASCO 17-6783 1/4-Inch Female Flare by 1/4-Inch Male Pipe Thread Brass Adapter – PHOTO
- Steel: Brennan Industries 6505-04-04 Steel Straight Tube Fitting, 1/4″-18 NPTF x 7/16″-20 SAE Thread, 1/4″ Male NPTF x 1/4″ Female JIC Swivel – PHOTO – out of stock as of this update (* sizing note)
- Steel: Eaton Weatherhead 9100X4X4 Carbon Steel SAE 37 Degree (JIC) Flare-Twin Fitting, Swivel, Adapter, 1/4″ NPT Male x 1/4″ JIC Female – PHOTO – out of stock as of this update (* sizing note)
Torpedo Stainless Steel Ball Lock Disconnect with 1/4 in. MPT Threads!
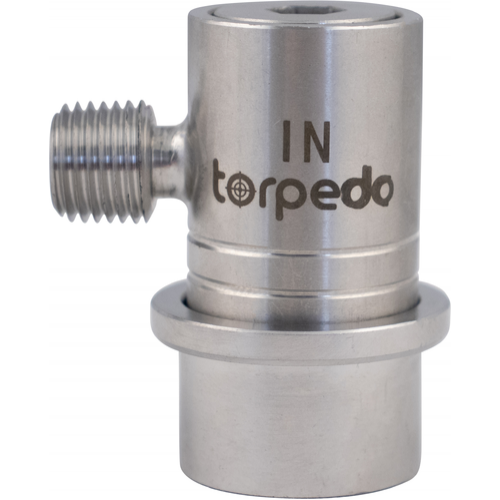 Torpedo Ball Lock x 1/4″MPT. This Ball Lock Keg QD is stainless steel and eliminates the need for the JIC to NPT fitting. That’s a big cost savings as stainless options for this style of fitting and generally expensive. Beyond that, it’s a simplification of the build. One less item to buy, adjust and maintain.
Torpedo Ball Lock Disconnect Gas In (Stainless) – 1/4 in. MPT KEG735
Style 2 – Male, Flare, Connect to tubing via Swivel Fittings (* sizing note)
Stainless Steel: Eaton Weatherhead 5217X4X4 Stainless Steel SAE 37 Degree (JIC) Flare-Twin Fitting, Adapter, 1/4″ NPT Male x 1/4″ JIC Male – PHOTO – (* sizing note)
Steel, 10 pack: Eaton Weatherhead C5205X4X4 Carbon Steel SAE 37 Degree (JIC) Flare-Twin Fitting, Adapter, 1/4″ NPT Male x 1/4″ JIC Male (Pack of 10)
Stainless: 1/4″ NPT TO 1/4″ FLARE STAINLESS ADAPTER – via William’s Brewing
Not available as of this update: Stainless Steel: HFS (R) Twin Fitting, Adapter 1/4″ male SAE 37 Degree Flare to 1/4″ Male NPT ; Stainless Steel 304 – PHOTO
Style 3 – 1/4″ Barb, use tubing clamp to connect directly to tubing (* sizing note)
- Stainless: Parker 316 Stainless Steel Barb Connector To Male Pipe 1/4″ Hose Barb 1/4″ Male NPT – PHOTO
- Brass: Anderson Metals 57001 Brass Hose Fitting, Adapter, 1/4″ Barb x 1/4″ NPT Male Pipe – PHOTO
- Stainless: BARB TO ¼” NPT FITTING – via William’s Brewing
- Brass Combo – This package gets you two brass tees and two brass barbs: WYNNsky Metals Brass Pipe Fitting Barstock Tee 2 PCS 1/4″ x 1/4″ x 1/4″ NPT Female Pipe 2 PCS 1/4″ NPT X 1/4″ Hose ID Brass Hose Barb Fittings
Finding JIC Fittings:
Search: As mentioned previously, availability of fittings in the proper sizes can be an issue. This has proven especially true for the keg fitting options piece. The two thread types for that piece in this build are 1/4″ npt and 1/4″ SAE JIC. This Amazon Search may be helpful in finding compatible fittings for the build you’d like to complete. Note: that search may very well return fittings that are not helpful for this project. Pay attention to thread size, material and fitting gender. If you find a great fitting that isn’t listed here, Submit a Tip and let us know about it.
Gas Keg Disconnects:
A Digital Spunding Valve!
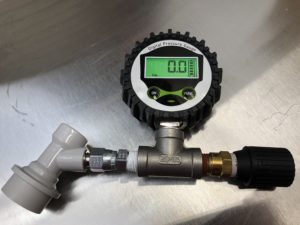 Building a digital Spunding Valve is as simple as using a digital gauge in your Spunding Valve Build.
I tried a couple different digital gauges and settled on this one – pictured in the assembly above. The other gauge I tried was much more expensive and didn’t really work well. It drifted wildly. This was a reasonable price and has given me accurate and consistent readings. This photo shows two gauges hooked up to the same keg – agreeing on PSI.
 The really nice thing about this digital gauge is the .1 PSI resolution. That’s really handy if you’re using the gauge to try and find leaks. It allows you to see pressure changes more quickly.
My gauge came with this user manual/specifications sheet – front | back. One quick tip… the threads aren’t super long. The first time I put this digital Spunding Valve together, I noticed the pressure dropping, again… the .1 PSI resolution is handy for spotting just this issue! Anyway, I didn’t have the gauge quite tight enough and it was showing a slow leak. Easy fix, I took the gauge off, put a couple extra wraps of teflon tape around it and tightened it a little more. Whammo!
Shop Around: Search Amazon for “digital gauge 1/4″ npt” and look for a unit that’s appropriate spec’d for your application
A Stainless Steel Spunding Valve!
Well… mostly stainless. It’s going to be tough to get a stainless steel pressure gauge, Beyond, that, mostly stainless steel components are available.
- Adjustable Stainless Gas Pressure Relief – 1/4 in. MPT D1833L – Stainless Steel PRV via MoreBeer
- Search Amazon for “1/4″ stainless steel tee” – look for 1/4″ MPT/FPT threads and proper specs
- Torpedo Stainless Steel Ball Lock Disconnects at MoreBeer
- Stainless Steel Ball Lock Disconnects at Adventures in Homebrewing
- Style 2: Eaton Weatherhead 5217X4X4 Stainless Steel SAE 37 Degree (JIC) Flare-Twin Fitting, Adapter, 1/4″ NPT Male x 1/4″ JIC Male – PHOTO – (* sizing note)
Style 1: To connect the tee to an MFL QD, a swivel JIC to NPT fitting is required. Those are tough to find in stainless steel and usually… very expensive. A solution to this piece of the puzzle is a very innovative ball lock QD that MoreBeer offers. Instead of the typical flare threading, this one features MPT threads. That means you don’t need a transitional fitting to get to the tee!
Torpedo Ball Lock Disconnect Gas In (Stainless) – 1/4 in. MPT KEG735
Ready Made Option – Ball Lock Spunding Valve (w/ Pressure Gauge) FIL42AS
“Cheapest” Spunding Valve Build
Thank you to /u/workaccount32 on reddit for this photo
Cheapest Option: Generally speaking, the brass variations of the fittings featured in our various Spunding Valve builds are probably going to be the most economical route to go. This is a general statement and may not always be the case. Check product pages for current prices and availability.
Product pages may display other size variations of the fittings used here. If a particular size is out of stock, sometimes suppliers link to another size. All thread sizes for this build, both NPT and barbs, are 1/4″.
- Control Devices CR Series Brass Pressure Relief Valve, 0-100 psi Adjustable Pressure Range, 1/4″ Male NPT – (* sizing note)
- Zenport DPG60 Zen-Tek Dry Air Pressure Gauge, 60 PSI – (* sizing note)
- Anderson Metals 56101 Brass Pipe Fitting, Barstock Tee, 1/4″ x 1/4″ x 1/4″ NPT Female Pipe – OR Brass Combo, below – (* sizing note)
- Anderson Metals 57001 Brass Hose Fitting, Adapter, 1/4″ Barb x 1/4″ NPT Male Pipe (* sizing note) – OR Brass Combo, below – (* sizing note)
- Dixon Valve TTB75 PTFE Industrial Sealant Tape, -212 to 500 Degree F Temperature Range, 3.5mil Thick, 520″ Length, 3/4″ Width, White – or similar
Brass Combo – This package gets you two brass tees and two brass barbs: WYNNsky Metals Brass Pipe Fitting Barstock Tee 2 PCS 1/4″ x 1/4″ x 1/4″ NPT Female Pipe 2 PCS 1/4″ NPT X 1/4″ Hose ID Brass Hose Barb Fittings – this combo would replace the two Anderson Metals Fittings above – (* sizing note)
Ready Made Spunding Valves
Some ready made options are now available. Here’s a rundown of off-the-shelf options.
Pictured: BlowTie Spunding Valve Assembly via my Hands on Review
Kegland BlowTie v2 – Hands on Review
- BlowTie 2 Diaphragm Spunding Valve with Gauge FE962 via MoreBeer
- BlowTie 2 Spunding Valve | Complete Kit | Duotight Ball Lock Quick Disconnect (QD) FE964 via MoreBeer
- Duotight Blowtie Spunding Valve with Gauge via William’s Brewing
- BlowTie 2 Diaphragm Spunding Valve with Gauge – via Keg Connection
- BlowTie Spunding Valve w/ Built-In Gauge & CMB Disconnect – via Keg Connection
- Kegland BlowTie v1Duotight BlowTie 2 Diaphragm Spunding Valve w/Integrated Pressure Gauge (0-23 PSI) for Pressure Fermentation – KL15042 affiliate link, note that multiple variations of this product may be available, as such a different version may appear at this link
Kegland BlowTie v1 – Hands on Review
- BlowTie Diaphragm Spunding Valve FE960 – via MoreBeer
- BlowTie Diaphragm Spunding Valve Complete Kit FE961 – via MoreBeer
- BlowTie Spunding Valve w/ External Gauge & CMB Disconnect, Complete Kit – via Keg Connection
- BlowTie Diaphragm Spunding Valve – via Keg Connection
- BlowTie Diaphragm Ball Lock beer Spunding Valve Complete Kit for Home Brewing beer corny beer keg affiliate link, note that multiple variations of this product may be available, as such a different version may appear at this link
More Pre-Built Spunding Valves
- FermZilla Spunding Valve Kit – This is from William’s Brewing and marketed for use with FermZilla fermenters it also works with ball lock kegs. It appears to be identical to the Complete Kit from MoreBeer. The unit I reviewed BlowTie Review should identical or nearly identical to this setup.
- Stainless Steel Torpedo Spunding Valve – also available in a cheaper version that does not includes a gauge. Handy if you have another way to set pressure. Ball Lock Spunding Valve FIL42S
- Pin Lock Sounding Valve via eBay, In my opinion 15 PSI is on the low side.
- Blichmann Spunding Valves – available in both NPT and Tri-Clamp variations
- Ss Brewtech Sspunding Valve – available in two options – under 2 size options – under 2 BBL and up to 3 BBL – tri-clamp equipped. Primarily designed for use with Ss Brewtech’s compatible fermenters, but could be used in other applications. If you’re looking for a budget option… keep looking
Spunding Valve Tips & Troubleshooting
- Check for leaks. If you’re using a version that has a QD installed in some form or fashion, you can pressurize it on a keg and then take it off. There will be a small drop when you take it off, but the pressure should remain steady after that. If it’s going down, make sure everything is tight. If you don’t have a QD… spray with Star San or soapy water until you are leak free.
- I’ve found the scale on the adjustable PRV that I’ve used – Control Devices CR Series Brass Pressure Relief Valve, 0-100 psi Adjustable Pressure Range, 1/4″ Male NPT – to be largely unhelpful. This is the reason that a gauge, in my opinion, is essential.
- Setting desired pressure can be tricky. See our tips for making that easy.
Side Note: JIC Fittings
JIC stands for Joint Industry Council. JIC fittings are a machined flare fitting with a 37 degree seating surface. Generally speaking flare style keg quick disconnects (both ball and pin lock) are JIC with a 37 degree angle. If you’re looking to put together a flare version Spunding Valve, you’ll be looking for a compatible 37 degree JIC fitting. More about JIC via Wikipedia
Related Resources!
Homebrew Finds is Spunding Central! Check our related resources and more detailed builds
- Spunding Valve Build: Using Primefit CR1401G Replacement Air Regulator
- Hands on Review: Kegland BlowTie Diaphragm Spunding Valve!
- Oxygen Free Cold Crash and Transfer Using a Spunding Valve
- Using a Keg as a CO2 Source for Portable Serving!
- Canada: Build a Spunding Valve! – How and Why
 Support Homebrew Finds, Keep Quality Homebrew Content Coming
More Homebrew Finds!
- Last 50 Finds!
- Top Deals – a curated list of the best deals
- Homebrew Reviews – one of the largest libraries of homebrew reviews in existence!
- Our Top Posts – tips, how-tos, resources posts and more
- Let’s be Friends!
Recent Deals!

10 Most Recent Homebrew Resource Posts & How-To’s!

We are Homebrew Review HQ! Our 10 Most Recent Reviews

Important Note About Fitting Sizes and Availability
Product pages may display other size variations of the fittings used here. If a particular size is out of stock, sometimes suppliers link to another size. All thread sizes for this build, both NPT and flare, are 1/4″. If you want to replicate this build, pay special attention to the fitting sizes that are used and double check to make sure you’re purchasing the correct size fittings.
This post may contain affiliate links. We may make a commission when you use our links. This will never cost you extra. Thank you for supporting Homebrew Finds!


Make sure the components you use are compatible and rated for your intended application. Contact manufacturer with questions about suitability or a specific application. Always read and follow manufacturer directions. tag:lnksfxd top:spundingvalve rs:7 tag:tpr
Is this control device accurate?
https://www.amazon.com/gp/product/B007GDY3CU?&linkCode=ll1&tag=hombrefin-20&linkId=611514a74ce6c69dc5f543a5ac3f6aa1&language=en_US&ref_=as_li_ss_tl
I can’t seem to get it adjusted to the right levels. I’m dry hopping under pressure in my 1 gallon keg. If I set the control device to 10 PSI, CO2 leaks out even with very minimal pressure. My pressure gauge does not read anything at all. Any help would be much appreciated.
In my opinion, you cannot rely on the markings on this PRV to be accurate. Even if they are correct, they don’t give you near enough precision. That’s where the gauge comes in.
Is this control device accurate? I can’t seem to get my gauge working along with it
In my opinion, you cannot rely on the markings on this PRV to be accurate. Even if they are correct, they don’t give you near enough precision. That’s where the gauge comes in.
Hi Dave thank you for the article. Just wanted to mention that 1/4″ tubing will not fit on the 1/4″ barb to 1/4″ male NFT (link below) that you recommended. The barb was closer to 5/16″. Luckily, my ball lock disconnects with barb that I bought were also at 5/16″ so I could use those together with the barb to male NFT
https://www.amazon.com/gp/product/B000FMYFGI/ref=as_li_tl?ie=UTF8&camp=1789&creative=390957&creativeASIN=B000FMYFGI&linkCode=as2&tag=hombrefin-20&linkId=BC57HDKMER2N6P6T
Does it not work to screw a barb-swivel fitting directly into the 1/4″ tee? I guess I’m confused why those 1/4″ to 1/4″ flare fittings are needed
The tee if female NPT/FPT. If you want to go to flare, you’d need 1/4″ NPT to 1/4″ flare fitting and then you could use the barb swivel fittings. If you could find a 1/4″ FPT x 1/4″ FPT x 1/4″ flare, that would also work.
*i mean, “so no Teflon tape on prv fitting?” Why not?
The Control Devices PRV comes with a thread sealent pre=installed. I have used teflow tape on that as well, depending on the connection and how many times I’ve reused the PRV for different builds. Out of the box, going into a stainless thread, you probably don’t need teflon tape because of the sealant. If it leaks, adding some tape would be a good next step.
I built two Spundings from the HBF directions. Thank you! I built one with a $4 dial gauge and the other with the pictured $16 digital gauge. It worked once and died. I returned it. The second one went wild with readings changing all over the place. I returned it and got another $4 dial gauge but different from the above that “keeps on ticking” to use an old commercial. I check kegs, pressure dry hopping, etc. Thanks again, HBF!
Hey, so I am just having issues with this idea. I have my beers kegged, get my priming sugar water ready based on temp and psi using the chart, add it into the beer, seal it up and put on the spunding valve and never see the beer do anything. No PSI movement and doesnt even seem to carbonate. I know there is yeast in the beer so it must be a loose seal or something. idk. my third different keg/beer and the same results. I feel like its just easier ot throw it on C02 and let it carbonate it for me instead.
Hey Nate! A couple things – I’d make sure you’re getting a complete seal on keg. Like 10 PSI. Other than that, we’re still talking fermentation here, so make sure the kegs are in a spot that’s warm enough. If neither one of those fix the issue then I would search for a leak either in the spunding valve or the keg.
When fermenting under pressure, wouldn’t the spunding valve act as a blow off as the gas is released, damaging it?
Not sure I understand what you’re saying. The adjustable PRV vents pressure in excess of the set point.
Yes, I wasn’t very clear. I’m not worried about the gas doing the damage, but the krausen (?) would cause problems, wouldn’t it?
Gotcha, Yes krausen could be an issue. I think that pressure fermentations have less krausen in general, but you would want to make sure there’s enough head space so krausen doesn’t come out the spunding valve. Another comment on here details a method to clean the valve. I haven’t tried that out, but I think the best thing to do make sure you have appropriate head space so this doesn’t happen.
I am pretty sure it depends on how you do it. From what I have been told, you want to transfer it into your final keg with around 4 points left which should be enough fermentation left with the yeast to create around 2.4 volumes of c02 and shouldn’t mess with the spunding valve as long as you are leaving normal head space in the keg. Granted this is purely natural carbonation using the yeast to create and carbonate the beer for you. No adding in priming sugar or anything. More or less the way that German breweries will do it along with doing LODO as far as brewing. I havent done this method yet but plan on doing it my next batch if I can get everything done in time. This guy is going from finished wort to fully naturally carbonated lager beers in 7 days.
If you are using Option 1 to transfer beer to a keg and you overfill the keg, what prevents beer from coming out the spunding valve and worse into the pressure gauge. Can the spunding valve be cleaned and sanitized easily? Seems like Option 2 with the hose might have an advantage for this purpose.
Great question! The answer is… nothing. You’d want to be careful not to do that. You could clean out most of the fittings, but probably not the gauge and maybe not the adjustable pressure relief valve. You’re right that option 2 would have an advantage in this regard as you’d be able to see the beer coming.
Actually, there is a way to clean the valve! Fill a clean keg with a gallon of distilled water, pressurize it through the gas line, then hook up the spunding valve to the liquid line. Dial the valve down to zero and water will shoot out, so you might want to do this in a bathroom/outside. Let the gallon of distilled water run through, and then run co2 through the valve to dry it. Cheers.
With Option 1, I was losing approximately 1 PSI per day, until I forced teflon tape into the swivel joint of the 1/4″ NPT Male x 1/4″ JIC Female fitting. Now it’s holding steady.
Thanks for adding the alternative source/parts.
The link for the 1/4″ NPT male x 1/4″ JIC flare isn’t available on the link you provided
Smallest size I saw was 1/2″…
Know of any other sources to buy this piece? I would prefer to stick with the smaller footprint of “option 1”. Thanks!
Hey Jake. Those links go to the general part page and then you select your size from there. I’ve tried to note that throughout the post. There have been availability problems for a while. I’m looking for alternate sources/parts but haven’t come up with anything yet.
Hi, amazing article thank you. I really need this, one very important question tho.
If I set my desired pressure to 20 psi, when the tank reaches more than 20psi it will open and release pressure. Does it close again at 20psi to maintain that desired pressure? Or does it just release all the pressure in the tank so you have to start building pressure again from zero?
The valve is open if pressure is over 20 psi and closed if under 20. So it will build up to 20 and then maintain it.
For clarification, I don’t believe that you can reliably determine pressure using any of the markings on the adjustable PRV valve. The gauge, in my opinion, is a necessary component.
I purchased the valve and have a question when using. The markings for the valve readings aren’t very accurate. The gauge reads 10 psi for example and the valve is set to almost 30 to keep the gauge stable at 10 psi. Is this your experience?
No, that’s not my experience. The gauge reads a couple PSI off of what my regulator says, but I’m not sure if it’s wrong or if the regulator is wrong. In any case, they are close.
I notice the same issue.
It is off by quite a bit — goo thing the gauge is on there!
Great idea to have the Schraeder valve on there as well. You could use a regular air hand pump to move cleaner and santizer through kegs and save on CO2.
I use a variation of option 2 on a conical for co2 transfer. If you use a cross instead of a tee you can throw a triclamp on the additional side or cap it off as needed for testing the guage (or fermenting in a keg). The MFL side is used with a gas line to transfer the beer in my case. That same line also can thread onto a beer gun, which is one advantage to using MFL’s. I didn’t think about it until reading this article, but I can cap that MFL off to use as a spund. The conical can’t hold the pressure like a keg can, but I can get a jump on it a save a couple days off the carbonation process by setting at 10psi or so. I’ll have to try it next time. Thank you.
Nice write up. I just kegged my first beer. Is there any reason to use the female over the male flare fitting? or vice a versa.
Hey Dave! – I suppose it comes down to how and where you’re going to use it. I like the “option 1” build the best. I like being able to attach this right on a keg with no tubing. It’s a neat, clean setup. Having said that I think the second option is good too. Practically speaking, they all do the same thing.
Also good for bringing your keg back down to proper pressure if you over-carb