
Hands On Review: German Made Speidel Fermenters
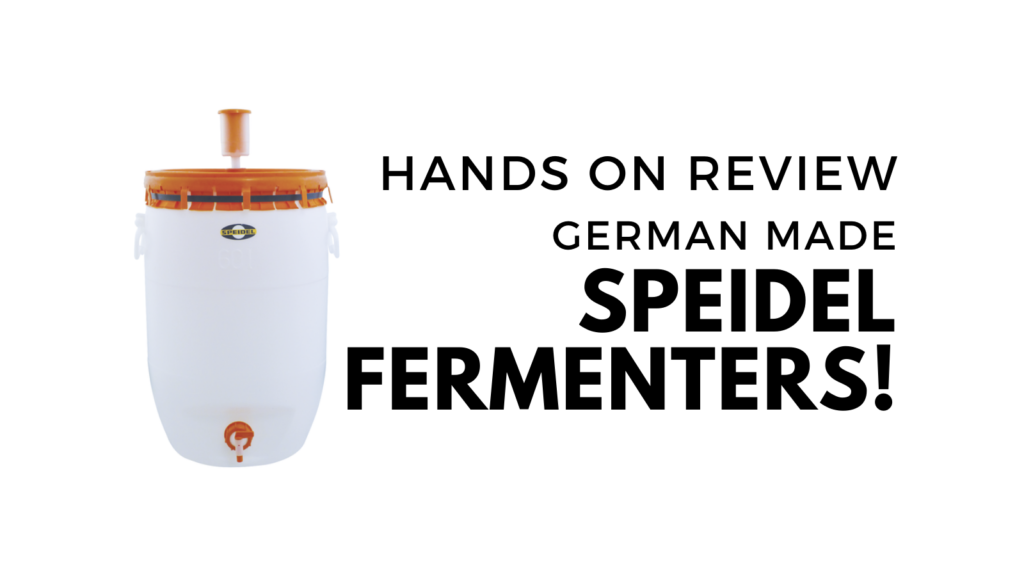
Hands on Review Speidel Fermenters
German Made, Speidel Fermenters are available in a range of sizes 3.2 gallons all the way up to… 132 gallons. Check out the full lineup including accessories and replacement gaskets.
I’ve owned a 5.3 gallon Speidel fermenter since October of 2011. I use it for small batch BIAB beers. I’ve been very impressed with that fermenter. More recently, I picked up the 7.9 gallon version so that I can ferment full 5 gallon batches with all the same advantages. This is a hands on review of both fermenters.
Compare Prices, Speidel Fermenters, Review Continues Below:
- Full Lineup of Speidel Fermenters and Accessories at MoreBeer
- Speidel Plastic Fermenter | Round HDPE Storage Tank | 60L | 15.9 gal
- Speidel Plastic Fermenter | Round HDPE Storage Tank | 30L | 7.9 gal
- Speidel Plastic Fermenter | Round HDPE Storage Tank | 20L | 5.3 gal
- Speidel Plastic Fermenter | Round HDPE Storage Tank | 12L | 3.2 gal
- Full Lineup of Speidel Fermenters and Accessories at Great Fermentations
- 15.9 GALLON SPEIDEL PLASTIC FERMENTER (60L)
- 7.9 GALLON SPEIDEL PLASTIC FERMENTER (30L)
- Speidel Fermenters & Accessories at Adventures in Homebrewing
- Speidel Fermenters & Accessories at Austin Homebrew Supply
- Search “Speidel Fermenter” at Amazon, Offerings Vary
NorCal Accessories for Speidel Fermenters
Since their introduction NorCal Brewing Solutions has introduced a number of accessories to extend and enhance Speidel Fermenters
- NorCal Brewing Solutions Blow Off Tube with Thermowell for Speidel Fermenters
- NorCal Brewing Solutions Tri Clover Dip Tube, Thermowell Combo for Speidel Fermenters
- NorCal Brewing Solutions Thermowell, Airlock Grommet Combo for Speidel Fermenters
- NorCal Brewing Solutions Blow Off Tube for Speidel Fermenters
- NorCal Brewing Solutions Dip Tube, Thermowell Combo for Speidel Fermenters, NPT Male
- NorCal Brewing Solutions Stainless Steel 1.5″ Tri Clover x 39″ Long Racking Cane for Speidel Fermenters and Storage Tanks
- NorCal Brewing Solutions 1/2″ NPT Full Coupling Adapter for Speidel Fermenters
- NorCal Brewing Solutions Gas In Ball Lock with Pressure Relief Valve for Speidel Fermenters
- NorCal Brewing Solutions Stainless Steel Cap with Grommet for Speidel Fermenters
- NorCal Brewing Solutions Stainless Steel Cap with Grommet for Speidel Fermenters
- NorCal Brewing Solutions CO2 / Nitrogen/Other Pressurized Gas Racking/Transfer Tool for Speidel Plastic Fermenter/Storage Tank
- Search Amazon for “NorCal Speidel” for additional options
This article contains affiliate links. We may make a small percentage if you use our links to make a purchase. You won’t pay more and you’ll be supporting Homebrew Finds and more content like this. Thank you for your support!
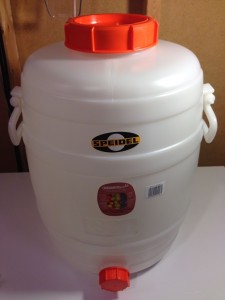
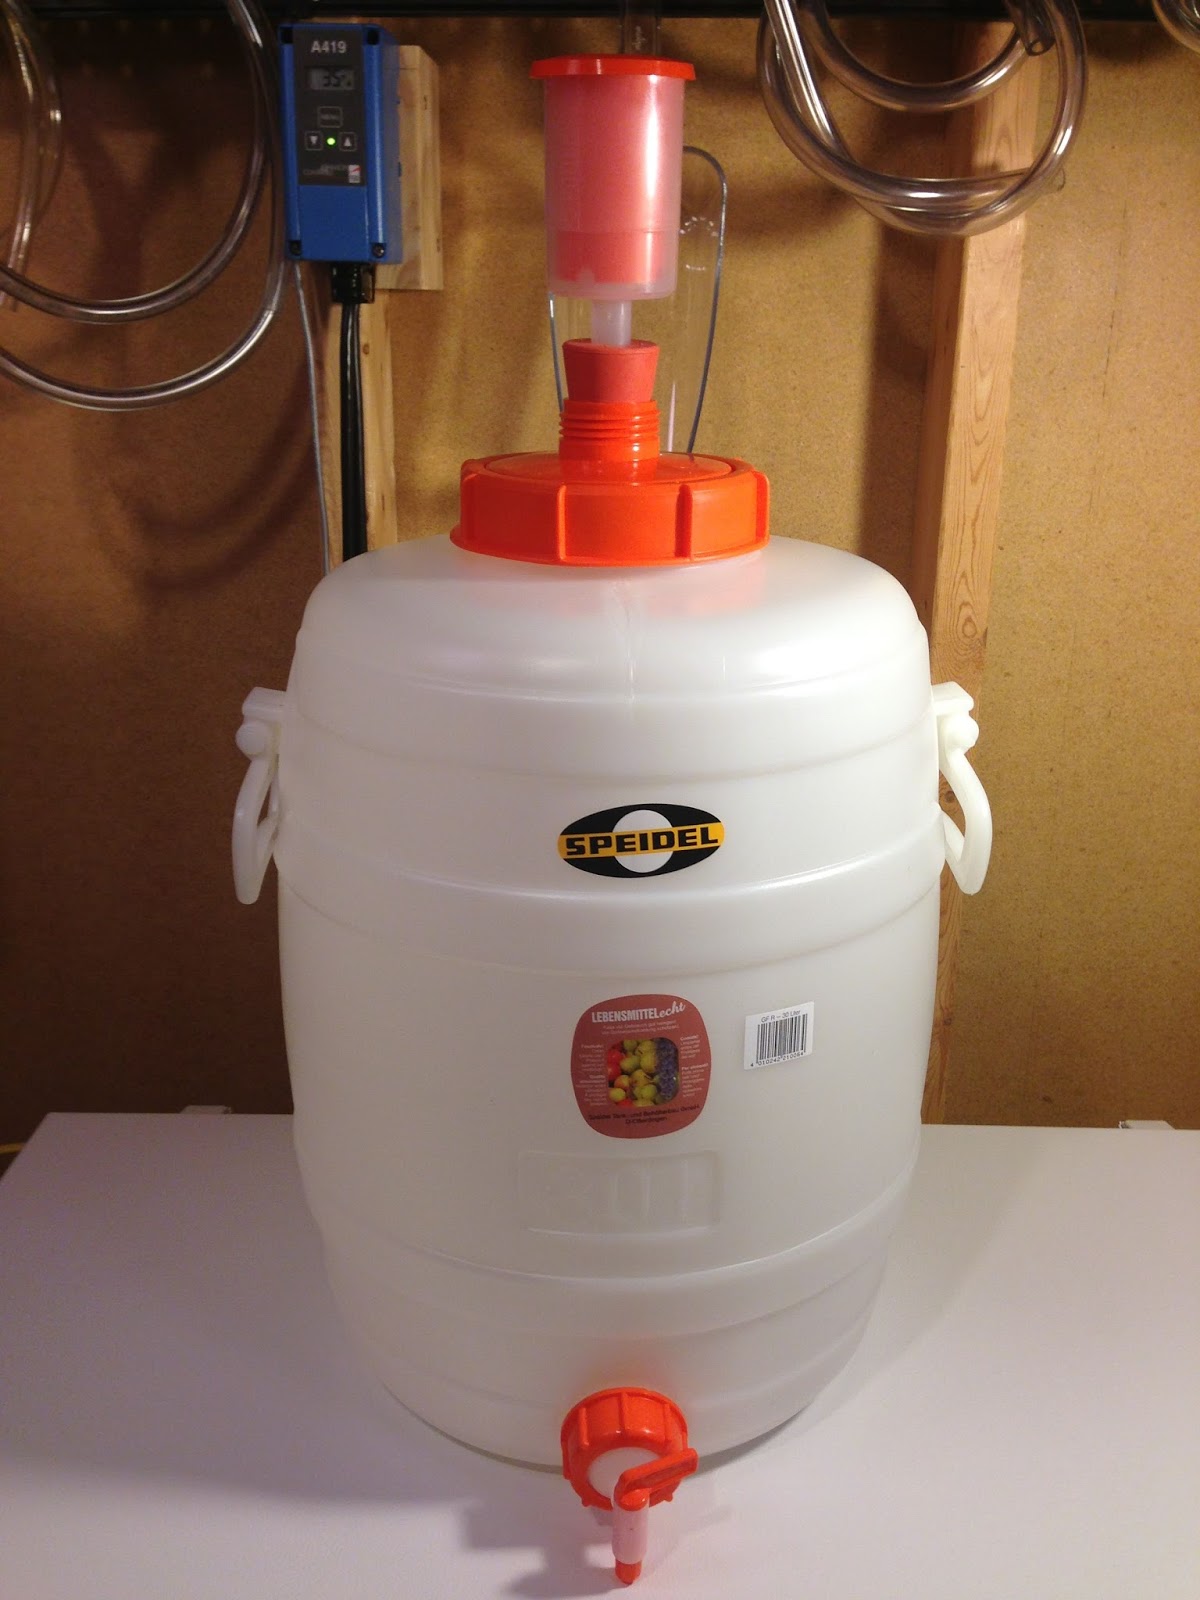
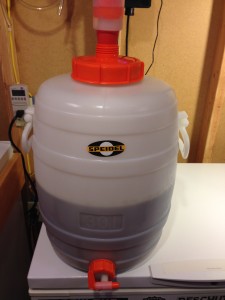
Here’s the 7.9 gallon fermenter with lid and storage cap on. It’s made of heavy duty HDPE that can handle up to 140 deg F. HDPE is not… glass. The benefits of that are… no dropping a glass fermenter down a couple steps and having it shatter and getting glass shards in your feet and spending the day cleaning up the beer you just made and never getting to drink any of it. Ask me how I know :(. Don’t get me wrong, I still have glass fermenters, there are pros and cons. A pro of this design is safety.
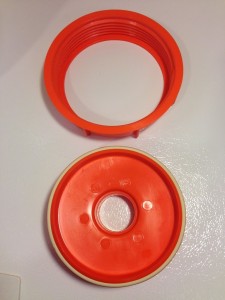
The lid disassembled. There are two parts. An outer ring and the inner lid. Notice the O-ring on the lid portion. Every connection (lid or cap) has an O-ring. I like that a lot. I’ve used other plastic fermenters that are leaky. The net result of that, for me at least, was no airlock activity because CO2 is leaking out other places. Because the Speidel is well built and has airtight O-Ring connections, that has never happened when I’ve used the Speidel. As a bonus, replacement lid gaskets are available.

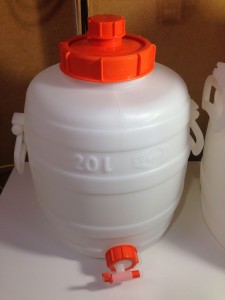
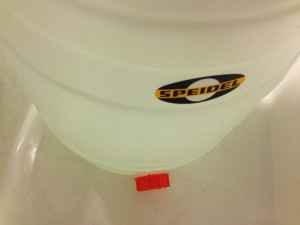
The center portion of the lid with the storage cap installed. The storage cap and spigot are the same size and threading.

Storage cap installed on the spigot port
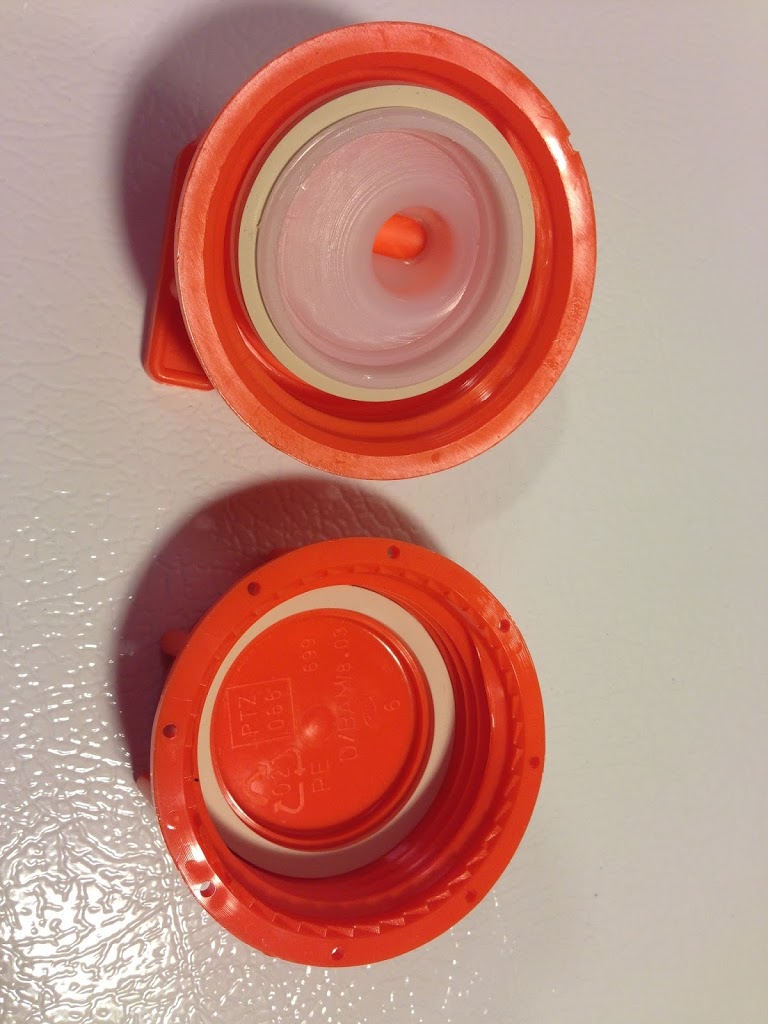
The spigot (top) and storage cap (bottom)

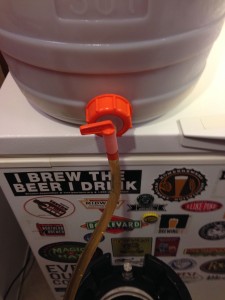
The stopper, airlock and spigot. If you look closely at the front of the spigot, you’ll notice that there is a small hole in it. That is designed to allow any beer left in the tubing to finish draining after the spigot is turned off.

The airlock installed
Speidel logo on the front of the fermenter

Heavy duty handles. Per the product specifications, each handle is rated for up to 66 lbs or 132 lbs in all. That fact shows up in the product description starting at the 15.9 Gallon size. I’m assuming it’s true of all sizes.

A look at the inside of the fermenter
Assembled

Side by side. The 7.9 gallon/30 Liter next to the 5.3 gallon/20 Liter
This is how I’ve been storing the 5.3 gallon. Assembled with the spigot on bottom and the storage cap on top. I leave everything threaded but loose. That keeps out most of the dust, but still provides a little airflow.
Here is the 7.9 gallon Speidel with a batch ready to be kegged. As you can see I continue to keep the spigot oriented sideways during fermentation. The O-Ring provides a good enough seal that you can carefully loosen the spigot slightly and rotate without leaks. I flush it with Star San and then drain a bit of beer to clear up anything that might have settled in the spigot or in the area just beyond the spigot inside the fermenter.
Slip some sanitized tubing over the spigot and make sure the tubing goes all the way to the bottom of the keg and you’re transferring.
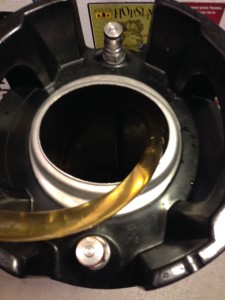
A look at the keg. Clear beer transferring to my keg. No siphoning required.
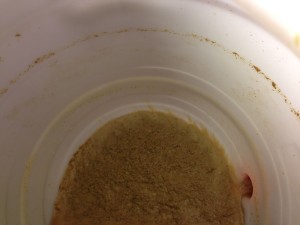
Here’s the trub. This was an IPA with a good amount of hops both in the boil and some dry hops. The recipe had quite a few late addition hops. I transferred most of that over from the boil kettle. It’s worth noting that if you use lots and lots of hops it’s possible that the trub layer will go up to or over of the spigot. I’ve had that happen on a couple of occasions. Some ideas to help with that for beers with lots and lots of hops – use hop bags in the boil or fementer or work on a cleaner transfer from your kettle to the fermenter. If it happen’s it’s easy enough to siphon out of the fermenter. This hasn’t been a big problem for me, but it’s worth mentioning.

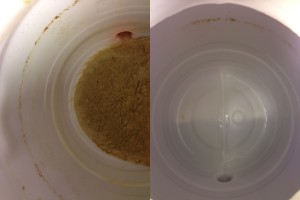
20.15 Seconds. One thing I have been impressed with from day 1 (with my 5.3 gallon) is how easy these are to clean out. There’s something about size and height of the spigot hole that just seems to make it easy. To illustrate this, I had my son run a timer. That timer started after I removed the spigot and got the hose and got the hose turned on. I did not wait for trub to drain out of the fermenter. I quickly took off the spigot, grabbed the hose and turned it on. It took 20.15 seconds to go from the picture above to…
.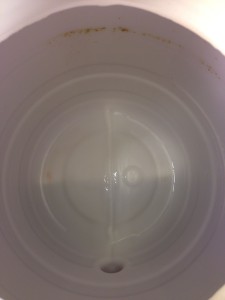
You can see that it is nearly clean. There is some stuff sticking to the walls toward the top of the fermenter. It’s not completely ready for PBW and it’s not what I would normally do. I was going for speed. I would have taken another 30 or 45 seconds and sprayed the rest out. My point is that it’s easy.
Side by side
After rinsing out the Speidel, I put the solid cap on the spigot hole and fill with hot water and PBW
.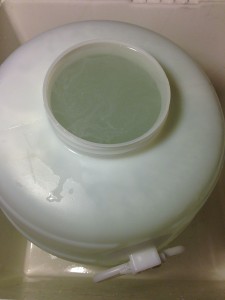
The 7.9 Gallon Speidel with hot PBW solution soaking in it. I’ll let this sit for anywhere from 30 minutes to overnight. A quick drain and rinse and the fermenter is good to go. I’ve never scrubbed the inside of these with anything.
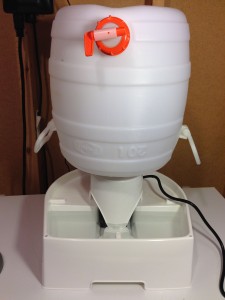
If you’re a Marks Keg and Carboy Washer owner or prospective owner and wonder if this fits on that, the answer is… yes. It’s not like cleaning a bucket, standard fermenter or keg in that I would feel comfortable walking away. The openings (both 5.3 and 7.9 gallon versions) are large enough to sit on top, but not so large that I would trust them to be stable on their own. So, plan on staying close. As illustrated, it’s a breeze to clean this thing without the Keg and Carboy Washer, but the two do work together.
Speidel Accessories
Since this post was published a slew of new Speidel accessories are available including stainless spigots, thermowells, Stainless pickup/dip tubes, fermentation monitors and more.
Conclusions
I have bought my 5.3 gallon Speidel back in October of 2011. It’s a great fermenter! Quality construction and a great set of features that make easy work of the job of fermentation, transfer and clean up. The 7.9 gallon version is nearly identical, with the exception of capacity. After using these for years, I can heartily recommend Speidel Fermenters to you
Compare Prices, Speidel Fermenters, Review Continues Below:
- Full Lineup of Speidel Fermenters and Accessories at MoreBeer
- Speidel Plastic Fermenter | Round HDPE Storage Tank | 60L | 15.9 gal
- Speidel Plastic Fermenter | Round HDPE Storage Tank | 30L | 7.9 gal
- Speidel Plastic Fermenter | Round HDPE Storage Tank | 20L | 5.3 gal
- Speidel Plastic Fermenter | Round HDPE Storage Tank | 12L | 3.2 gal
- Full Lineup of Speidel Fermenters and Accessories at Great Fermentations
- 15.9 GALLON SPEIDEL PLASTIC FERMENTER (60L)
- 7.9 GALLON SPEIDEL PLASTIC FERMENTER (30L)
- Speidel Fermenters & Accessories at Adventures in Homebrewing
- Speidel Fermenters & Accessories at Austin Homebrew Supply
- Search “Speidel Fermenter” at Amazon, Offerings Vary
NorCal Accessories for Speidel Fermenters
Since their introduction NorCal Brewing Solutions has introduced a number of accessories to extend and enhance Speidel Fermenters
- NorCal Brewing Solutions Blow Off Tube with Thermowell for Speidel Fermenters
- NorCal Brewing Solutions Tri Clover Dip Tube, Thermowell Combo for Speidel Fermenters
- NorCal Brewing Solutions Thermowell, Airlock Grommet Combo for Speidel Fermenters
- NorCal Brewing Solutions Blow Off Tube for Speidel Fermenters
- NorCal Brewing Solutions Dip Tube, Thermowell Combo for Speidel Fermenters, NPT Male
- NorCal Brewing Solutions Stainless Steel 1.5″ Tri Clover x 39″ Long Racking Cane for Speidel Fermenters and Storage Tanks
- NorCal Brewing Solutions 1/2″ NPT Full Coupling Adapter for Speidel Fermenters
- NorCal Brewing Solutions Gas In Ball Lock with Pressure Relief Valve for Speidel Fermenters
- NorCal Brewing Solutions Stainless Steel Cap with Grommet for Speidel Fermenters
- NorCal Brewing Solutions Stainless Steel Cap with Grommet for Speidel Fermenters
- NorCal Brewing Solutions CO2 / Nitrogen/Other Pressurized Gas Racking/Transfer Tool for Speidel Plastic Fermenter/Storage Tank
- Search Amazon for “NorCal Speidel” for additional options
From HBF Readers:
- Ronnie: These are the best! Having gone from bucket to glass carboy to better bottles to the 15.9 speidel, the speidel tops them all. Easy to clean and cheap!
- Facebook Friend Sean: Speidel fermenters are AWESOME!! Thanks for posting those.
- Kyle Says: Mine is full right now! Love this fermenter, no more differences in flavor because I had to split my batch to ferment. Easy open top makes is a breeze to clean. Should be on every homebrewers wish list.
- Facebook Friend Tim: I have of the 7.8L Speidel fermenters and I love them, simply the best for the money!
- Muncie Says: I have the 30L and it is my “go to” fermenter. Just a great product. No need for a blow off tube for this 5 and 6 gallon batches.
- Anonymous: I have the 60L and it is awesome. Very high quality and easy to use / clean. The handles are sturdy even completely full, but if you do fill it up all the way, be prepared to get a friend to help you move it.
- Tony: Gotta pipe in on these. I have the 20L and 60L tanks. The quality is high. They come with a bung and airlock made for these larger tanks. They also have spigots and big lids to make cleaning a snap. The spigot on the 20 is about 1 1/2 inches above the bottom of the tank. On the 60 it is closer to 3″. This allows for transfers with the spigot without pulling in too much of the yeast cake. I just line up the spigot and pour directly into my keg. No hoses, siphons, funnels, etc. Easy. The handles are great. You can lift the huge 60L one alone, but it’s really heavy, even with only 11 gallons… there’s lots of room for more, so you could easily make a 12 gallon batch in there too without needing a blowout tube. Headroom is great on these. With the 20L, it has room for the 5.5 gallon batches I make, and I have no issues with blow-outs, even with big IPAs. NOTE: I do use defoamer, which I think helps a lot. On the 60L, there’s tons of room above an 11 gallon batch. My current batch of amber ale had only about 2 inches of foam and another 6″ of headspace. There are other cheaper options, and you can find nice HDPE tanks on ebay that are similar, but they won’t have it all together, purpose built like these.
More MoreBeer Reviews+Related:

More Homebrew Finds!
- Last 50 Finds!
- Top Deals – a curated list of the best deals
- Homebrew Reviews – one of the largest libraries of homebrew reviews in existence!
- Our Top Posts – tips, how-tos, resources posts and more
More Fermenter Reviews!

Most Recent Deals

Related: Homebrew Fermentors – Deals, Discounts and Coupons! + Reviews
More Fermentation Related!
- Our Fermentation Related Reviews – Fermenters and More
- Yeast Starters and Fermentation Resource Page
- Yeast: The Practical Guide to Beer Fermentation
- Compare Prices: StirStarter Stir Plate
This post may contain affiliate links. We may make a commission when you use our links. This will never cost you extra. Thank you for supporting Homebrew Finds!


Price, promotions and availability can change quickly. Check the product page for current price, description and availability.
Make sure the components you use are compatible and rated for your intended application. Contact manufacturer with questions about suitability or a specific application. Always read and follow manufacturer directions. tag:lnksfxd review:speidelfermenters rs:7 tag:tpr
I’ve been using 20l and 30l Speidel fermenters for more than six years. They’re the best for carrying down to the basement fermeezer and to clean. Using some NorCal parts and some ingenuity I’ve converted them to pressure transfer and recently to floating dip tubes. I’ve been doing the pressure transfers for nearly five years with absolutely no issues! I have a Spike Flex+ but I still use the Speidels for most brews.
So was the spigot hight enough to keep all the trub in the tank when you opened the spigot? Was any filtering necessary?
Thanks
Hey Randall! This depends on the beer. If there are a lot of hops in the beer it can be an issue. Only really had a serious problem one time when I used lots and lots of dry hops. Trub was visibly above the spigot so I decided to siphon. In general, this hasn’t been a big problem for me.
It was mentioned to turn the spigot sideways and then flush it with Star San then flush with some beer. Seems like a bit of overkill and unnecessary.
I read somewhere several years ago that another method was to cover the spigot with sanitized tin foil. I went a bit further and have had no issues to date.
I take a small piece of paper toweling and soak it is star san. I then twist it up into the spigot opening to seal it off. And then I just take a small piece of tinfoil dip it in san star and cover the spigot area pinching it to the outside of the spigot. At bottling time I remove the tin foil. Pull out the paper toweling. Then I simply spray some san star into the spigot opening and the outside of it. No need to flush any beer IMHO and proceed to bottle or keg
My idea behind flushing with a bit of beer is less about sanitation and more about clearing up anything that might have settled on the inside of the spigot.
When racking from the spigot, do you leave the airlock in or install the cap? I’m worried about added oxygen when racking.
I just take the inner part of the airlock out. There’s no way to get around having oxygen come back in the top of the fermenter. It will either do that, or beer will stop flowing. I think the key is doing it slowly to prevent sloshing around and such.
What is a dead space of both 20L and 30L?
I won one of these in a raffle, what size tubing do you use on the spigot? 1/2″ ID seems loose and 7/16″ ID seems VERY snug. Do i need to seek out 12mm?
Did you ever get an answer to this? I’m using 1/2″ and there’s a lot of air getting in while transferring.
I think it’s 7/16″, but I’m not 100% sure. More Beer links to 1/2″ in “you may also need” but I’m certain that’s too big.
3.3″ silicone tubing works great.. A nice snug fit and it won’t slip off even if it’s wet from Starsan.
Is a Speidel tank good enough to be used as secondary fermenter??
Can a carboy cap fit on the lid to the 30l fermenter? I’ve read varrying reports of this. Can you add a picture if it does?
Thanks
Great review. I’ve been wondering about these – you’ve addressed all my questions/concerns:-)