
Hands on Review: Fermzilla Conical Fermenter
Thank you to HBF Contributor Aaron Nord for this hands on review! Aaron is an advanced award winning brewer, a long time reader and a serial tipster!
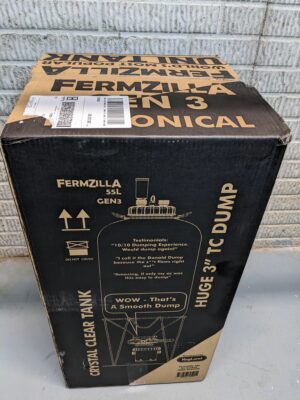
FermZilla Tri-Clamp Conical
There have been some exciting new offerings over the last five years or so in the homebrewing fermenter market. With loads of offerings from companies like Spike, Ss Brewtech, Blichmann Engineering, Kegland, as well as from a product line called BrewBuilt developed by MoreBeer, a home brewer has a lot to choose from when considering upgrading or replacing an existing fermenter. One of the features that is becoming more common on new fermenter offerings is the ability hold pressure, either to enable pressure transfers or to allow fermenting under pressure – both of which enable low-oxygen brewing along with other advantages. If a brewer wanted to upgrade to a pressure fermenter there are a range of prices and options to consider. For those who want to try pressure fermentation before investing many hundreds or even thousands of dollars, thankfully there are some excellent newer plastic options that perform the job admirably.
Related: Fermenting Under Pressure
Kegland is a noticeable leader in the pressurized fermenters market. With their line of FermZilla fermenters, a brewer can experiment with pressure fermentation without investing a ton of money to see if this method fits into their brewing operations. I have been a satisfied user of the FermZilla All Rounder fermenter for nearly three years now. Before that I was using a Chronical from Ss Brewtech. While both have their advantages, forced to choose between the two I would choose the All Rounder for its flexibility, cost, and higher pressure rating (the Chronical only held a few psi to allow for transfers). One thing that the Chronical has that the All Rounder is missing is the ability to dump trub and collect yeast. Thankfully there is another option from Kegland that combines the flexibility of the All Rounder with the trub and yeast management of a conical fermenter.\
Limited Time Deal:
MoreBeer has two different combo packs that include the FermZilla conical on sale as of this update.
- Fermzilla Tri-Conical Ultimate Combo Pack | Pressure Kit, Blowtie 2 Spunding Valve & Insulating Jacket Included | Gen 3.2 | 7.1G | 27L FE215
- BrewZilla Ultimate Grain to Glass Combo Pack | Gen 4 BrewZilla All Grain Brewing System | WiFi/Bluetooth/RAPT Enabled | Neoprene Jacket & Hop Spider Included | FermZilla Tri-Conical Fermenter | Pressure Kit & Blowtie 2 Spunding Valve Included AG580 – BrewZilla Review
Check each product page for price and availability.
Check Current Availability, Pricing & Specs:
- Complete Lineup of FermZilla Fermenters & Accessories at MoreBeer
- FermZilla Fermenters at William’s Brewing
- FermZilla 27 Liter Tri Conical Fermenter
- FermZilla 55 Liter 3.2 Tri Conical Fermenter < the exact model reviewed here
- Search Amazon for “FermZilla” – offerings vary
Related Reviews:
- Hands on Review: FermZilla All Rounder Fermenter
- Hands on Review: Kegland Hop Bong
- Hands on Review: Fermentasaurus, FermZilla v1
There are now three generations of conical plastic fermenters from Kegland. The first two generations have a somewhat complicated means of integrating the collection container on the conical bottom of the fermenter involving a seal that mates between a male and a female threaded coupling. Although a clever design, the threaded connections add complexity that the third generation has aimed to remove. The third generation is marketed as a Tri-Conical Fermenter as opposed to simply the Conical Fermenter of the first two generations. This additional descriptor indicates that this generation makes use of tri-clover fittings, a connection with which most experienced brewers have some familiarity. Instead of the complicated assembly and threading of the first two generations, the Tri-Conical fermenter simplifies the connection points while retaining the other desirable features of the first two generations.
This review will focus on the 13.2 gallon/55-liter version of the FermZilla Tri-Conical Fermenter, Generation 3. MoreBeer lists the following items as part of this kit:
- FermZilla 55L Tank with 3″ T.C. Bottom Port
- 3″ x 2″ T.C. Butterfly Valve
- 1000 ml Collection Container & Lid with 2″ T.C. Connection
- Stainless Steel Stand with Swing Handles
- Stainless Steel Handle Assembly
- Top Lid with PRV (35 psi)
- 3″ tri-clamp with gasket
- 2″ tri-clamp with gasket
- 3-Piece Airlock
- Graduation Sticker
- Adhesive Thermometer
- Spare Seals
FermZilla Tri-Clamp Conical Components
The 55L tank is almost identical to the FermZilla All Rounder, made from the same food-grade, clear plastic with the one difference being the bottom. Where the All Rounder has a concave and closed bottom, the Tri-Conical has a sloped conical bottom the ends with a three-inch tri-clamp flange. The plastic material starting from the taper up to and including the flange is a higher density plastic. The flange’s mating surface has a recessed ring that is expected of tri-clamp joints, made for the silicone gasket that is included in the kit. The top of the tank has the same threaded mouth as the All Rounder and will fit the same lid.
![]() Tank on Stand
Tank on Stand
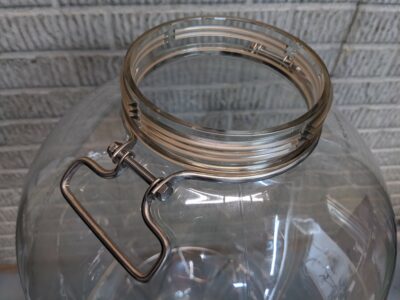
Tank – Top Opening
![]()
Empty Tank Upside Down
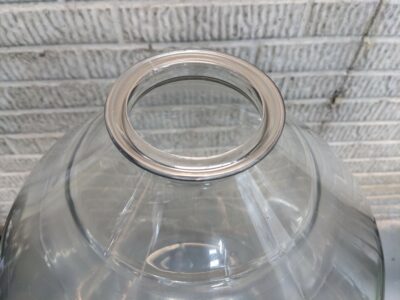
Bottom Opening
Included in the kit is a butterfly valve, like the one that comes with the FermZilla Hop Bong. This one is different in that it has a three-inch opening on one side and a two-inch opening on the other. This allows it to connect to the 3-inch bottom of the fermenter and the two-inch top of the collection jar lid that comes with the conical kit. The butterfly valve has a large handle that is simple to maneuver, and it is easy to feel when the flange has closed as it mates with a rubber ring on the inside of the valve to create its seal. One thing I will note on this is that since the outer body of the butterfly valve is mostly made of plastic it is advisable to be careful when handling, avoiding dropping it or knocking it on anything. The most fragile point, and possibly the only real one, is the mating surface of the flange. It has that same recessed ring that the bottom of the conical to accept a silicone seal. The outer edge could easily chip and reduce the integrity of the seal if it were dropped or bumped with enough force.
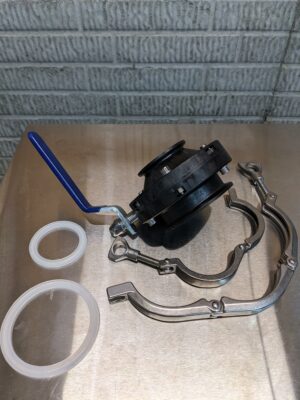 Butterfly Valve with Gaskets and Clamps
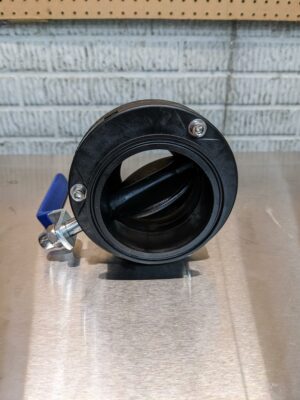
Butterfly Valve
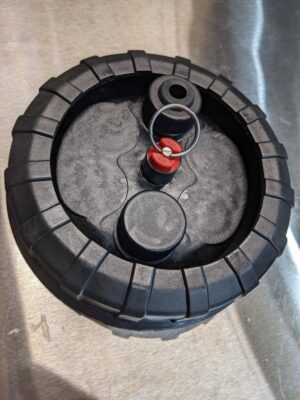
The 1000ml collection container is made of chemical and heat resistant material called Tritan plastic. Kegland notes that it can withstand boiling temperatures for extended periods. It is noticeably much harder than the conical’s main chamber, with a smooth, curved bottom along with six leg-like extensions on the bottom to allow for standing on its own. Just under the threads for the lid are two PCO 1881 threaded ports. This type of thread is the same one might find on a 2-liter soda bottle and is used in other FermZilla product like the aforementioned Hop Bong. It accepts threaded carbonation caps, both plastic and metal, that can commonly be found with the same threading. There are two lids that come with the collection container – a black one with a 2-inch tri-clamp joint on the top and a threaded inner portion as well as a white lid with a flat, enclosed top.
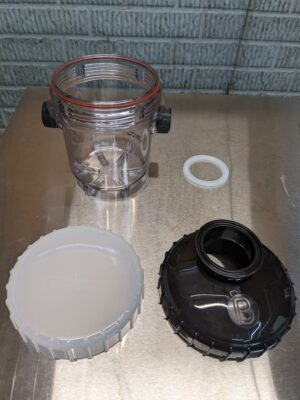 Collection Jar – Disassembled
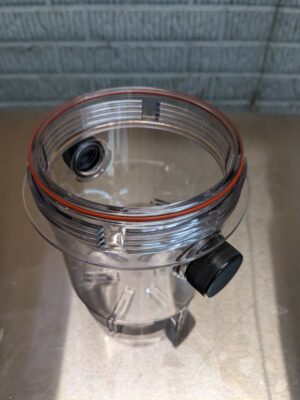
Collection Jar – Open
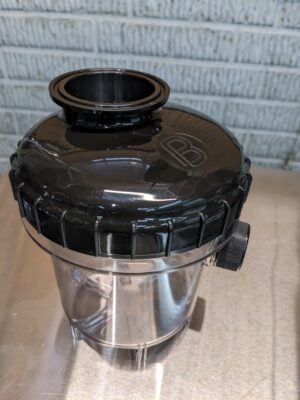
Collection Jar – With TC Lid
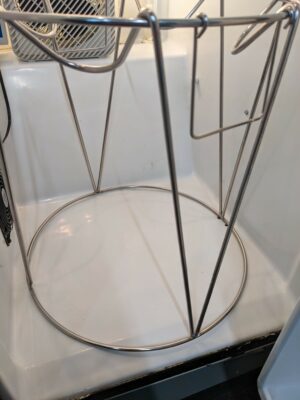
The stand and handle assembly are made from the same stainless-steel material. The handle is straightforward to assemble and can be done with a set of small wrenches. The stand is wider and taller than the one that comes with the All Rounder to account for the conical bottom and affordance for the collection container. The stand has two handles on it that make moving the assembled conical easier, if it isn’t too full.
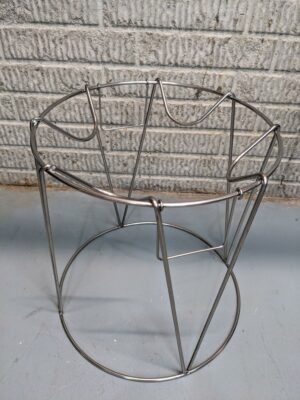 Stand
Stand
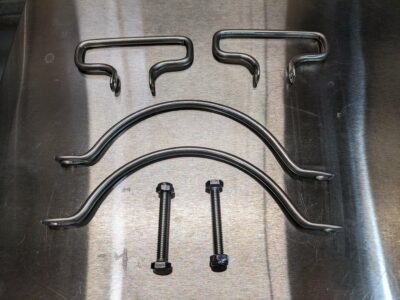
Handle – Disassembled
The lid for the main tank is the same one that comes with the All Rounder and has a 35 psi Pressure Relief Valve and two PCO 1881 ports and space for drilling out up to four more ports. The lid sits just inside the conical’s top opening with assistance from a small diameter silicone gasket (positioned in a recess of the lid) as well as top-down pressure applied by the threaded ring when tightened.
 Lid
Lid
Hands on Review FermZilla Tri-Clamp Conical
Generally, the experience using the Tri-Conical compared to the All Rounder is the same except for the features offered by the conical bottom and its potential attachments to the bottom. This hands on review will focus on what is different between the two.
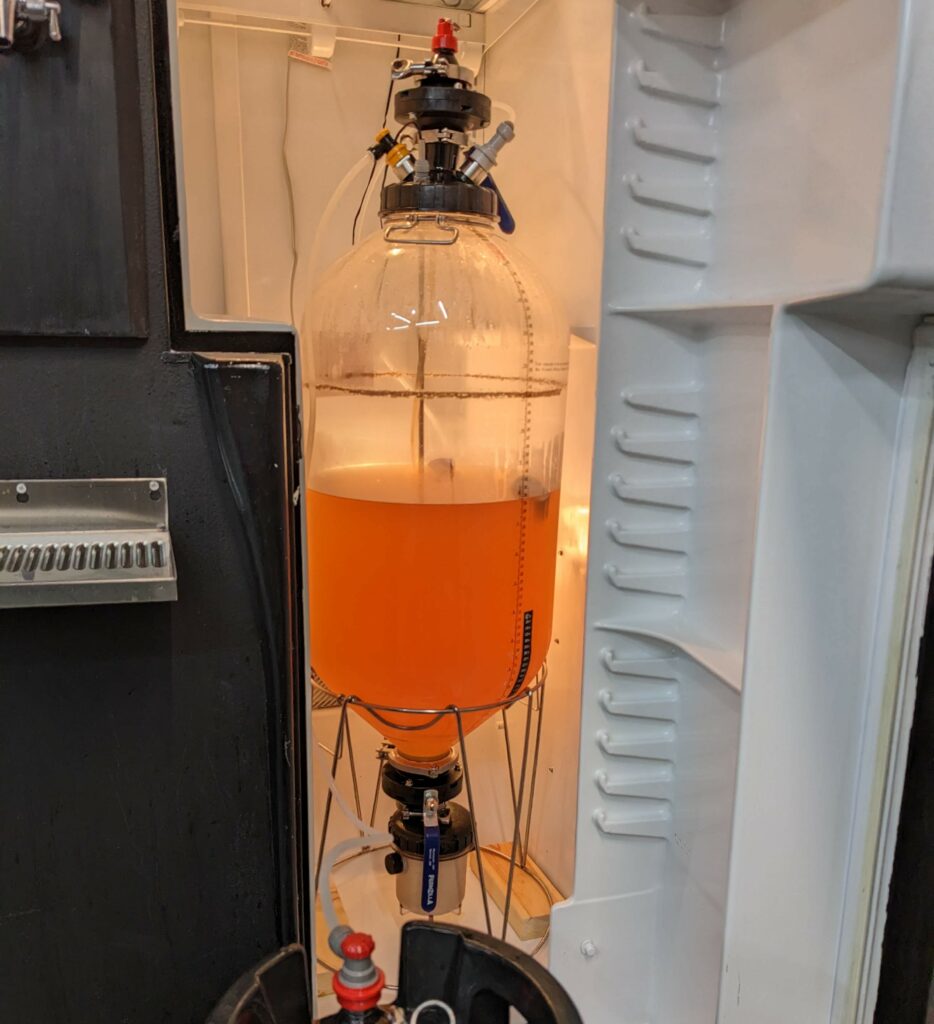
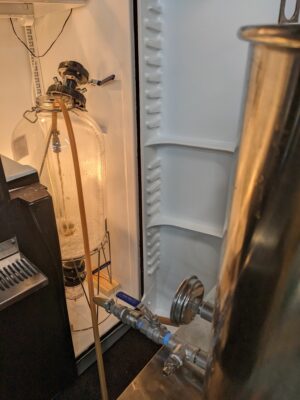
The first thing I noticed when comparing it to the All Rounder was that it seemed to be a bit more top heavy and prone to falling over. Albeit I was using the extended lid that comes with the Hop Bong kit so that contributed to the top-heaviness. However, since the bottom is not as wide and stout it felt kind of like a tricked out 4×4 truck with a 10-inch lift kit as opposed to the All Rounder which felt a bit more like a truck with a more reasonable 2-inch lift. The Tri-Conical is indeed taller when fully assembled, so tall in fact that it barely fit inside the fermentation chamber side of my refrigerator. The stand is a bit wider that the one that comes with the All Rounder which prompted me to place some 2×4 wood risers under the stand for the inside of the door to have enough clearance to close. This is a temporary fix until I can come up with a better solution.
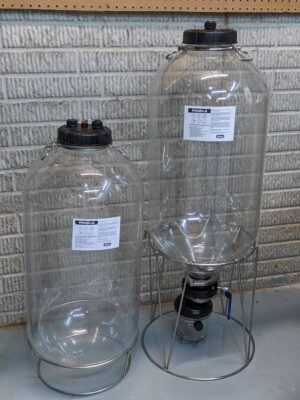 Tri-Conical and All Rounder Side By Side
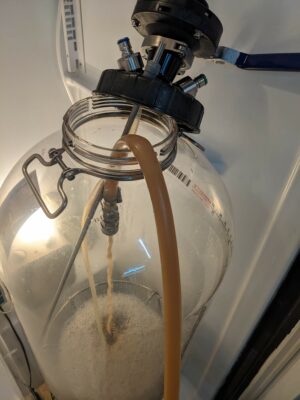
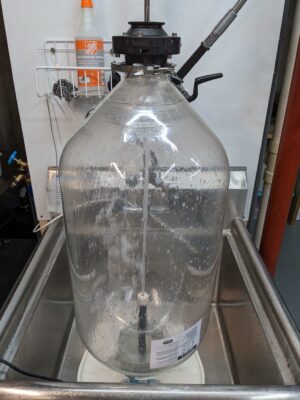
Filling Fermenter
Filling Fermenter
Stand Too Wide In Refrigerator
One of the advantages of using a conical I was looking forward to most was the ability to dump trub that was collected on the transfer from the kettle. I employ a fine crush for my brew in a bag setup and do not filter when transferring from the kettle. This process inevitably results in a fair amount of trub in the fermenter. I left the butterfly valve closed at the bottom of the fermenter when transferring from the kettle and since my first batch using the Tri-Conical was a lager I let it cool to 50 degrees F. Once there I dumped nearly a gallon of trub that had collected at the bottom of the fermenter.
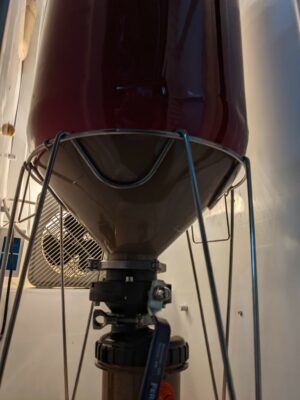 Tank – Trub from Kettle
Dumping the trub was straightforward. As mentioned previously, the action on the butterfly valve is such that it is noticeable when the valve separates from the rubber ring it mates with to create the seal. It does take a good amount of force to turn the valve, but the longer handle on the valve certainly helps with that. As soon as the valve was open the collection jar filled up with trub and wort. Opening the valve didn’t seem to upset the composition of the sediment too much. I was expecting the cleaner wort sitting on top of the trub to mix in when the valve opened, but if it did it was only to a limited extent. After the collection jar was filled, I closed the valve and disconnected it. Since the jar is only 1000ml and I had nearly a gallon (or ~3800ml) of trub to dump I decided to leave the jar off and collect the remaining trub in a separate container. I needed a container that was both large enough for the intended collection volume and slim enough to fit under the fermenter and within the stand. In the end I settled on a 64-ounce grain scoop like this one which worked quite well:
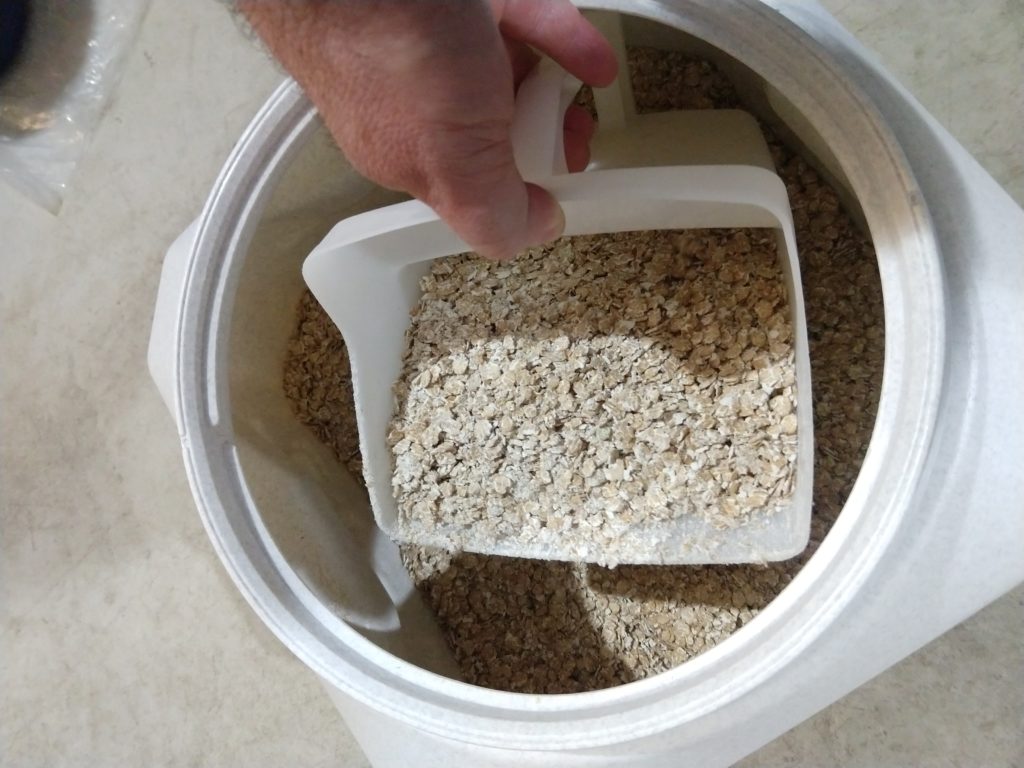 64 oz Rubbermaind Scoop – More Info Can be Found in our Vittles Vault Review
As I cracked the valve open, I was careful not to open it all the way. I wanted to maintain control of the flow to prevent losing too much wort as well as prevent the possible mixing of trub and wort at the top of the trub. Near the end of collection, I could see the wort was pouring fairly clear with only a small amount of sediment left behind, so I decided to close the valve and call it good.
One reason I left some trub behind is because I was getting close to the minimum volume I was targeting for fermentation. I subsequently modified my equipment profile in my brewing software (BrewFather) to increase the target fermenter volume by a gallon to account for this loss and allow for the dumping of some wort when getting rid of trub.
Another feature I was looking forward to that the Tri-Conical offers was the ability to oxygenate my wort while it was in a closed fermenter. I have an oxygenation wand that I have used with some success but have been more interested in the ability to either oxygenate in line with the transfer from the kettle or using an oxygen stone in the fermenter. Other than the cool factor, the other reason to do this would be to avoid sticking another foreign object in sanitized wort, in this case the oxygen wand. To achieve this with the Tri-Conical I attached an oxygen stone to a Duotight 8mm to ¼” flare fitting which I then connected to a carbonation cap. This apparatus barely fit through the side ports of the collection container with the end of the oxygen stone nearly touching the bottom of cap on the opposite side port.
![]() Collection Jar – Empty with O2 Stone
Collection Jar – Empty with O2 Stone
To oxygenate, I hooked up my oxygen tank using a gas ball lock quick disconnect, turned the tank regulator until I could see bubbles on the surface of my wort, and set a timer for 60 seconds. It worked out quite well.
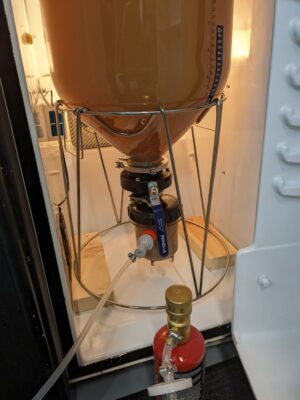 Oxygenating
After oxygenating I pitched my yeast and left them to do their thing. Of note, Kegland recommends leaving the bottom butterfly valve open during the entirety of fermentation and only close it once terminal gravity has been confirmed.
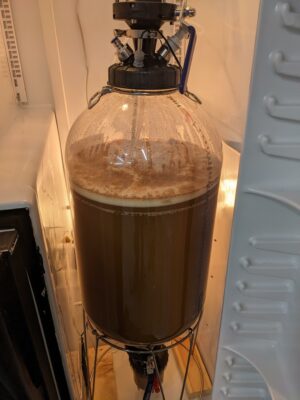 Tank – Mid Fermentation
After my brew hit terminal gravity, I performed a cold crash to 38 degrees F and let it sit for a couple of days to encourage the yeast to drop out of solution. After the yeast appeared to have mostly dropped, I decided to collect it. I closed the valve and disconnected the collection container from the bottom of the valve.
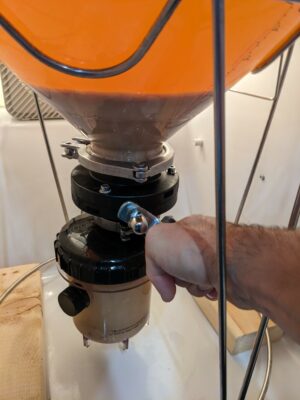 Collection Jar – Mid Dump
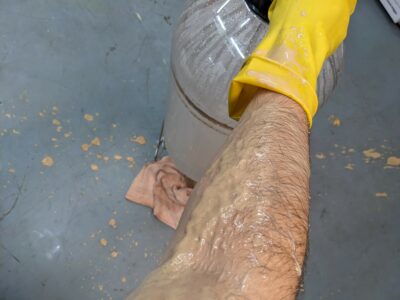
This process was a bit messy since there is inevitably always going to be some residual liquid between the bottom of the butterfly valve flap and the top of the collection container mouth. I would recommend having a towel or tray under the fermenter to catch this excess.
With more than 1000ml of yeast to collect I emptied the collection container into another vessel and reattached it to the bottom of the butterfly valve. Given the space restrictions, it was tricky to reattach it with only two hands. I used one hand to hold up the collection container and the other to attach the tri-clamp. With enough practice this may become second hand, but even with a few brews completed at this point, it is still a challenge. After the collection container was connected once again, I collected more yeast and repeated until most of the yeast was out of the fermenter.
![]() Collection Jar – Empty After Dump 2
Collection Jar – Empty After Dump 2
Racking the clear beer into kegs was a simple process that was identical to what I have done with the All Rounder which involved using CO2 to push the beer out of the fermenter’s carbonation cap by way of the floating dip tube.
![]() Transferring – Mid Transfer
Transferring – Mid Transfer
![]() Transferring – Transfer Complete
Transferring – Transfer Complete
With all vessels that can be pressurized, it is important to read the instructions and warnings closely and follow the safety procedures outlined by the manufacturer. Ensure that before opening a pressurized vessel the pressure is relieved and equal to the ambient air pressure. Failing to do so can lead to potential injury or damage and a shower of yeast and wort all over your brewery.
The collection jar deserves a few separate notes. For one thing, the black cap can be prone to cross threading if not careful. I don’t know whether to attribute this to the thread construction or the gasket, but one should ensure that it is properly attached prior to hooking it up to the fermenter. If not sealed properly, this will serve as a potential point for leaking. Kegland notes in their documentation for the Tri-Conical how important it is to ensure that the lid is on all the way and even provides side-by-side photos of what right and wrong look like with regard to tightening. In my experience, it took a great deal of torque to fully tighten it which inevitably made it difficult to unscrew when disassembling the parts for cleaning. I would highly recommend making use of strap wrench to aid in removal. This tool is often paired with the FermZilla fermenters on the Kegland sales pages, but they can also be found at most auto parts stores since one of their original purposes is as a tool to remove oil filters on cars.
Another potential issue with the collection container lid is the gasket getting kinked up. If not seated properly or if too much friction occurs, the red gasket, which is quite stretchy and has a small diameter, can fold over on itself. To prevent this, Kegland recommends adding some food grade lubricant, like Keg Lube, to the gasket and all seals and gaskets for the added benefit of prolonging their life. The potential for kinking the gasket is just one more thing to keep in mind when dealing with this rig to ensure a smooth brew day.
One last note on the collection jar deals with the caps for the side ports. This area may also be a source for leaking if the caps are not fully tightened. Since they are pretty much identical to 2-liter soda bottle caps, users should be familiar enough with them and can be tightened with a high level of torque without the fear of over-tightening. These caps are so similar to the 2-liter soda bottle lids that they even come with the safety seal on the bottom. I would recommend removing that extra bit of plastic as it can interfere with the tightening process. In pressure testing the assembled fermenter I did notice a leak at this point on one occasion, which I remedied quickly by giving the tightening the cap until I didn’t hear the leaking sanitizer and CO2. This experience served to highlight one of the many areas that should be checked when performing the recommended leak tests.
When it came time to cleaning the fermenter, I intended to follow the same process as I used for the All Rounder. This starts with using a sprayer to blast out all the left behind wort and yeast chunks as best I could and follow that up with a 10-15 minute session on my Mark II Keg Washer with hot water and cleaning solution. Like the All Rounder, the Tri-Conical was difficult to situate on the keg washer’s stand. I took off the keg washer base’s standoff bracket and that helped make sure it didn’t tip over. I also left the dump valve on the bottom so it was closed, otherwise the cleaning solution would just blast though it and clean my ceiling. Having an opening on the top and bottom of the Tri-Conical made scrubbing the inside a bit easier than the All Rounder. For the latter I had to stretch my arm to the max to try to scrub the inside bottom with a cleaning cloth. The Tri-Conical was more accessible in that regard. Given that it has more bells and whistles, there was more to clean and inspect compared to the All Rounder, but that is part of the cost of using it.
 Tank with Butterfly Valve on Keg Washer
Conclusions, More Photos Below:
Overall, I am impressed with the FermZilla Tri-Conical. It offers nearly all the benefits that come with a pressurizable stainless steel conical fermenter at a fraction of cost. Add in the fact that it is made by Kegland, a trusted homebrew gear manufacturer, I know this unit will last, hold up to many future brews, and integrate with numerous existing and forthcoming accessories in Kegland’s fermenter product line. In deciding whether to upgrade to the Tri-Conical I would advise giving some consideration to the reality that with added features come added responsibilities. While it is handy to have the ability to oxygenate, dump trub, harvest yeast and add dry hops through the collection jar, this added component and the fittings that enable its use mean there are more areas for maintenance, cleaning, and potential leaks. So, ensure that the benefits will match or outweigh the added time and work before opting in. I am certainly pleased with my decision to do so and can see myself enjoying this unit for years to come.
Check Current Prices, Specs & Availability:
- Complete Lineup of FermZilla Fermenters & Accessories at MoreBeer
- FermZilla Fermenters at William’s Brewing
- FermZilla 27 Liter Tri Conical Fermenter
- FermZilla 55 Liter 3.2 Tri Conical Fermenter < the exact model reviewed here
- Search Amazon for “FermZilla” – offerings vary
Related Reviews:
- Hands on Review: FermZilla All Rounder Fermenter
- Hands on Review: Kegland Hop Bong
- Hands on Review: Fermentasaurus, FermZilla v1
More Photos:
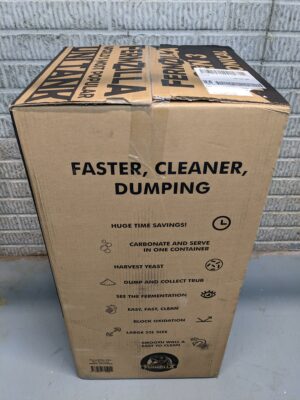

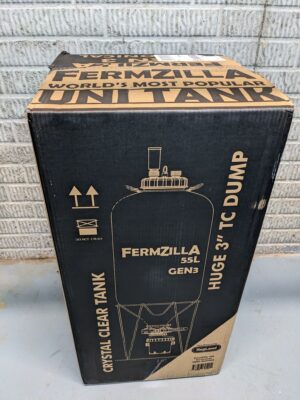
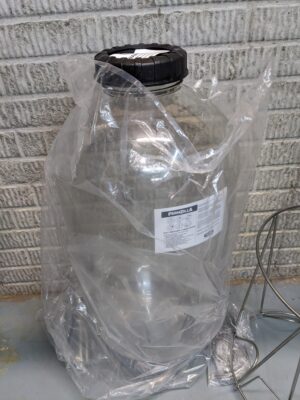 Tank – Unwrapped
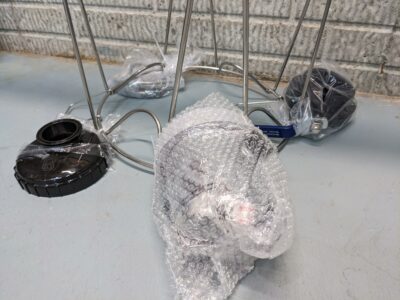 Components – Unwrapped 2
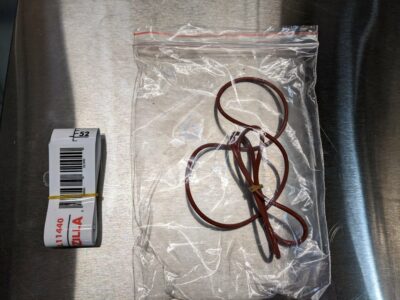 Seals and stickers
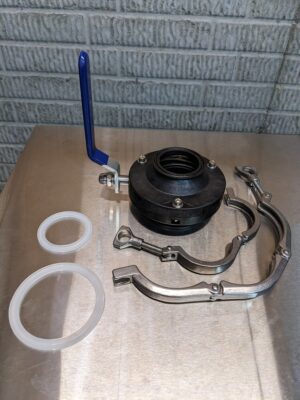 Butterfly Valve with Gaskets and Clamps
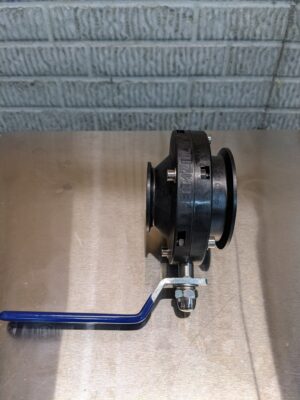 Butterfly Valve – Side ViewButterfly Valve – Bottom View
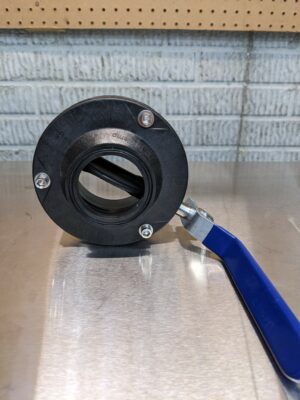 Butterfly Valve – Bottom View 2
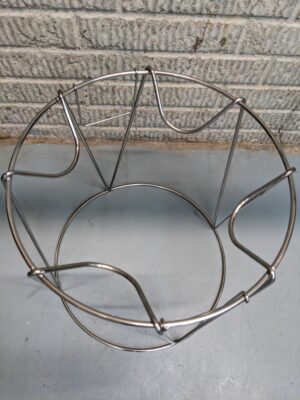 Stand – Top View
More Tri-Clover/Tri-Clamp! Tri-Clamp Fittings at Proflow Dynamics
More MoreBeer Reviews+Related:

More Kegland Gear Reviews!

More Fermenter Reviews!

More Homebrew Finds!
- Last 50 Finds!
- Top Deals – a curated list of the best deals
- Homebrew Reviews – one of the largest libraries of homebrew reviews in existence!
- Our Top Posts – tips, how-tos, resources posts and more
- Let’s be Friends!
Recent Deals!

10 Most Recent Homebrew Resource Posts & How-To’s!

We are Homebrew Review HQ! Our 10 Most Recent Reviews

More Fermentation Related!
- Our Fermentation Related Reviews – Fermenters and More
- Yeast Starters and Fermentation Resource Page
- Yeast: The Practical Guide to Beer Fermentation
- Compare Prices: StirStarter Stir Plate
This post may contain affiliate links. We may make a commission when you use our links. This will never cost you extra. Thank you for supporting Homebrew Finds!
Special Thanks to MoreBeer for providing the unit used for evaluation in this review.
Price, promotions and availability can change quickly. Check the product page for current price, description and availability.
Make sure the components you use are compatible and rated for your intended application. Contact manufacturer with questions about suitability or a specific application. Always read and follow manufacturer directions. tag:lnksfxd review:fermzilla rs:7 #tag:tpr
Editors note, comments prior to 7/14/2023 pertain to an older version of FermZilla. Some general concepts may still hold true, but exact features, functionality and specs have changed.
Hi ,
Really useful review.
Just curious how you would use a hydrometer using this fermenter? Would you take a sample using the collection port and then discard that volume? Or could you in theory leave a hydrometer in the vessel during the whole fermentation?
Thanks
The problem with leaving it in the whole time is going to be that CO2 being released will make the hydrometer difficult to read. Beyond that krausen would probably make it difficult to read. Theoretically yes, practically I don’t think it would be very helpful. Better to get a refractometer and take small samples as needed. If you want continuous readings, something like a TILT may be the answer.
Thank you Brad, nice “hands-on” review, well written. I just came across both the Fermentasaurus and your review tonight, but see the date on the review was nearly a year ago, which is great for my question. How’s the durability? Still no leaks at connection points? How has the butterfly valve survived? I really like many (many) aspects of the Fementasaurus (not the least of which is the name), but want to ensure it can stand up to the test of time. Thanks for any insight you can provide.
First time using the fermentasaurus, so far I really like it. Not having to transfer wine to different stages is great.
I emptyed the bottom bottle twice to remove dead yeast. In a week my wine is ready to bottle, but it seems there is still some yeast left down in the neck of the fermentasaurus and not dropping down to the bottom bottle.
Any suggestions?
I noticed the same, that ~95% of the yeast gets in the bottle, but there is a coating on the cone part before it. I presume some sort of agitation (tapping, etc.) might get it to shake free and travel the rest of the way down. I never tried any methods like that, though. I guess I figured I was getting most of it, so not worth solving…
Were you using the pressure kit with a spunding valve to control fermentation pressure accurately?Or just relying on the red relief valve on the pressure lid?
I filled it with pressure from my keezer. Since it has a ball lock fitting in the lid, I just took a gas quick connect from my keezer and hooked it up. So it wasn’t a super-controlled trial, just wanted something simplistic to see how it worked.
Right now I mainly use it as a secondary (if I need a secondary), and just make use of the pressurized lid to evacuate the headspace of oxygen and replace it with CO2. And for that I don’t need a controlled pressure. Just run a few fill-vent-fill cycles while hooked up to the gas line on my keezer.
Great review Brad! I’m considering a conical and this is definitely on top 3 list.
A couple of comments regarding your review:
“prepared to transfer the beer to a keg, and as I slowly cracked the lid to relieve pressure, the strangest phenomena occurred in the fermenter. Almost like it was boiling, the middle of my beer started to bubble and froth.” – I can say with almost absolute certainty that this is CO2 coming out of solution in the beer and is not a strange phenomena, but something that should be familiar to anyone who has ever opened a 2 liter coke bottle. Gas solubility in liquid. in this case CO2 in beer, is a function of pressure, and in venting the fermenter you reduced the pressure and some of the CO2 came out of solution.
Also, “So the pressure that built up while it finished fermenting eventually forced the hops down into the beer rather than floating in a layer up top” – A static pressure exerted on a system cannot force hop matter down into a liquid that the same static pressure is applied to. What likely happened here is that the CO2 that was “boiling” out of solution, likely forming at nucleation sites on the hop matter and thus agitated it up back to the top of the beer, where it never had time to settle out again.
I learned a painful lesson recently about co2 coming out of solution. I used a stainless steel dry hopper on a keg of room temperature beer that had been sitting in the sealed keg for a while. It had a lot more carbonation than I anticipated and I was faced with a near mentos and diet coke scenario. The stainless dry hopper provided tons of nucleation points to cause the co2 to come out of solution and, whammo, I had a mess on my hands. Next time, I’ll chill the beer first if there’s a possibility it’s partially carbonated.