
Hands on Review: BrewBuilt X1 Uni+ Conical Fermenter!
This review is by Homebrew Finds Contributor Brad Probert. Brad is an engineer, expert homebrewer and experienced reviewer. Grab a link to Brad’s website at the end of this review.
X1 Uni+ Conical Fermentor
Fermentors are like the cars of the brewing world. There is a wide range of prices, appearances, and features. And just like cars, the most basic model (plastic bucket with a lid) will get the job done. But the basic model has limitations, and you soon find yourself eyeballing the next step up the fermentor food chain to either get one that’s flashier (stainless) or one that has more features (pressure fermentation capable). Of course, the ultimate is one that’s both shiny and has more features (stainless pressure-capable conical).
 Fermentor Before Any Assembly
BrewBuilt is a division of MoreBeer that creates homebrew gear. They make a variety of products, and recently launched a series of stainless pressure-capable conical fermentors they call the X1 Uni. The X1 comes with a lot of different accessories for added features, depending on what you want. You can buy the add-ons piecemeal, or they come bundled into different hardware kits. There is the base X1 Uni, the X1 Uni+ that bundles some add-ons and temperature capabilities, and the X1 Uni Pro that also includes a heat pad, Peltier cooler, and a temperature controller.
Check Current Price, Models & Availability, Review Continues Below:
- BrewBuilt X1 Uni+ Conical Fermenter
- BrewBuilt X1 Uni Conical Fermenter
- BrewBuilt X1 Uni Pro Conical Fermenter
- X1 Parts & Accessories
- Complete BrewBuilt Conical Lineup
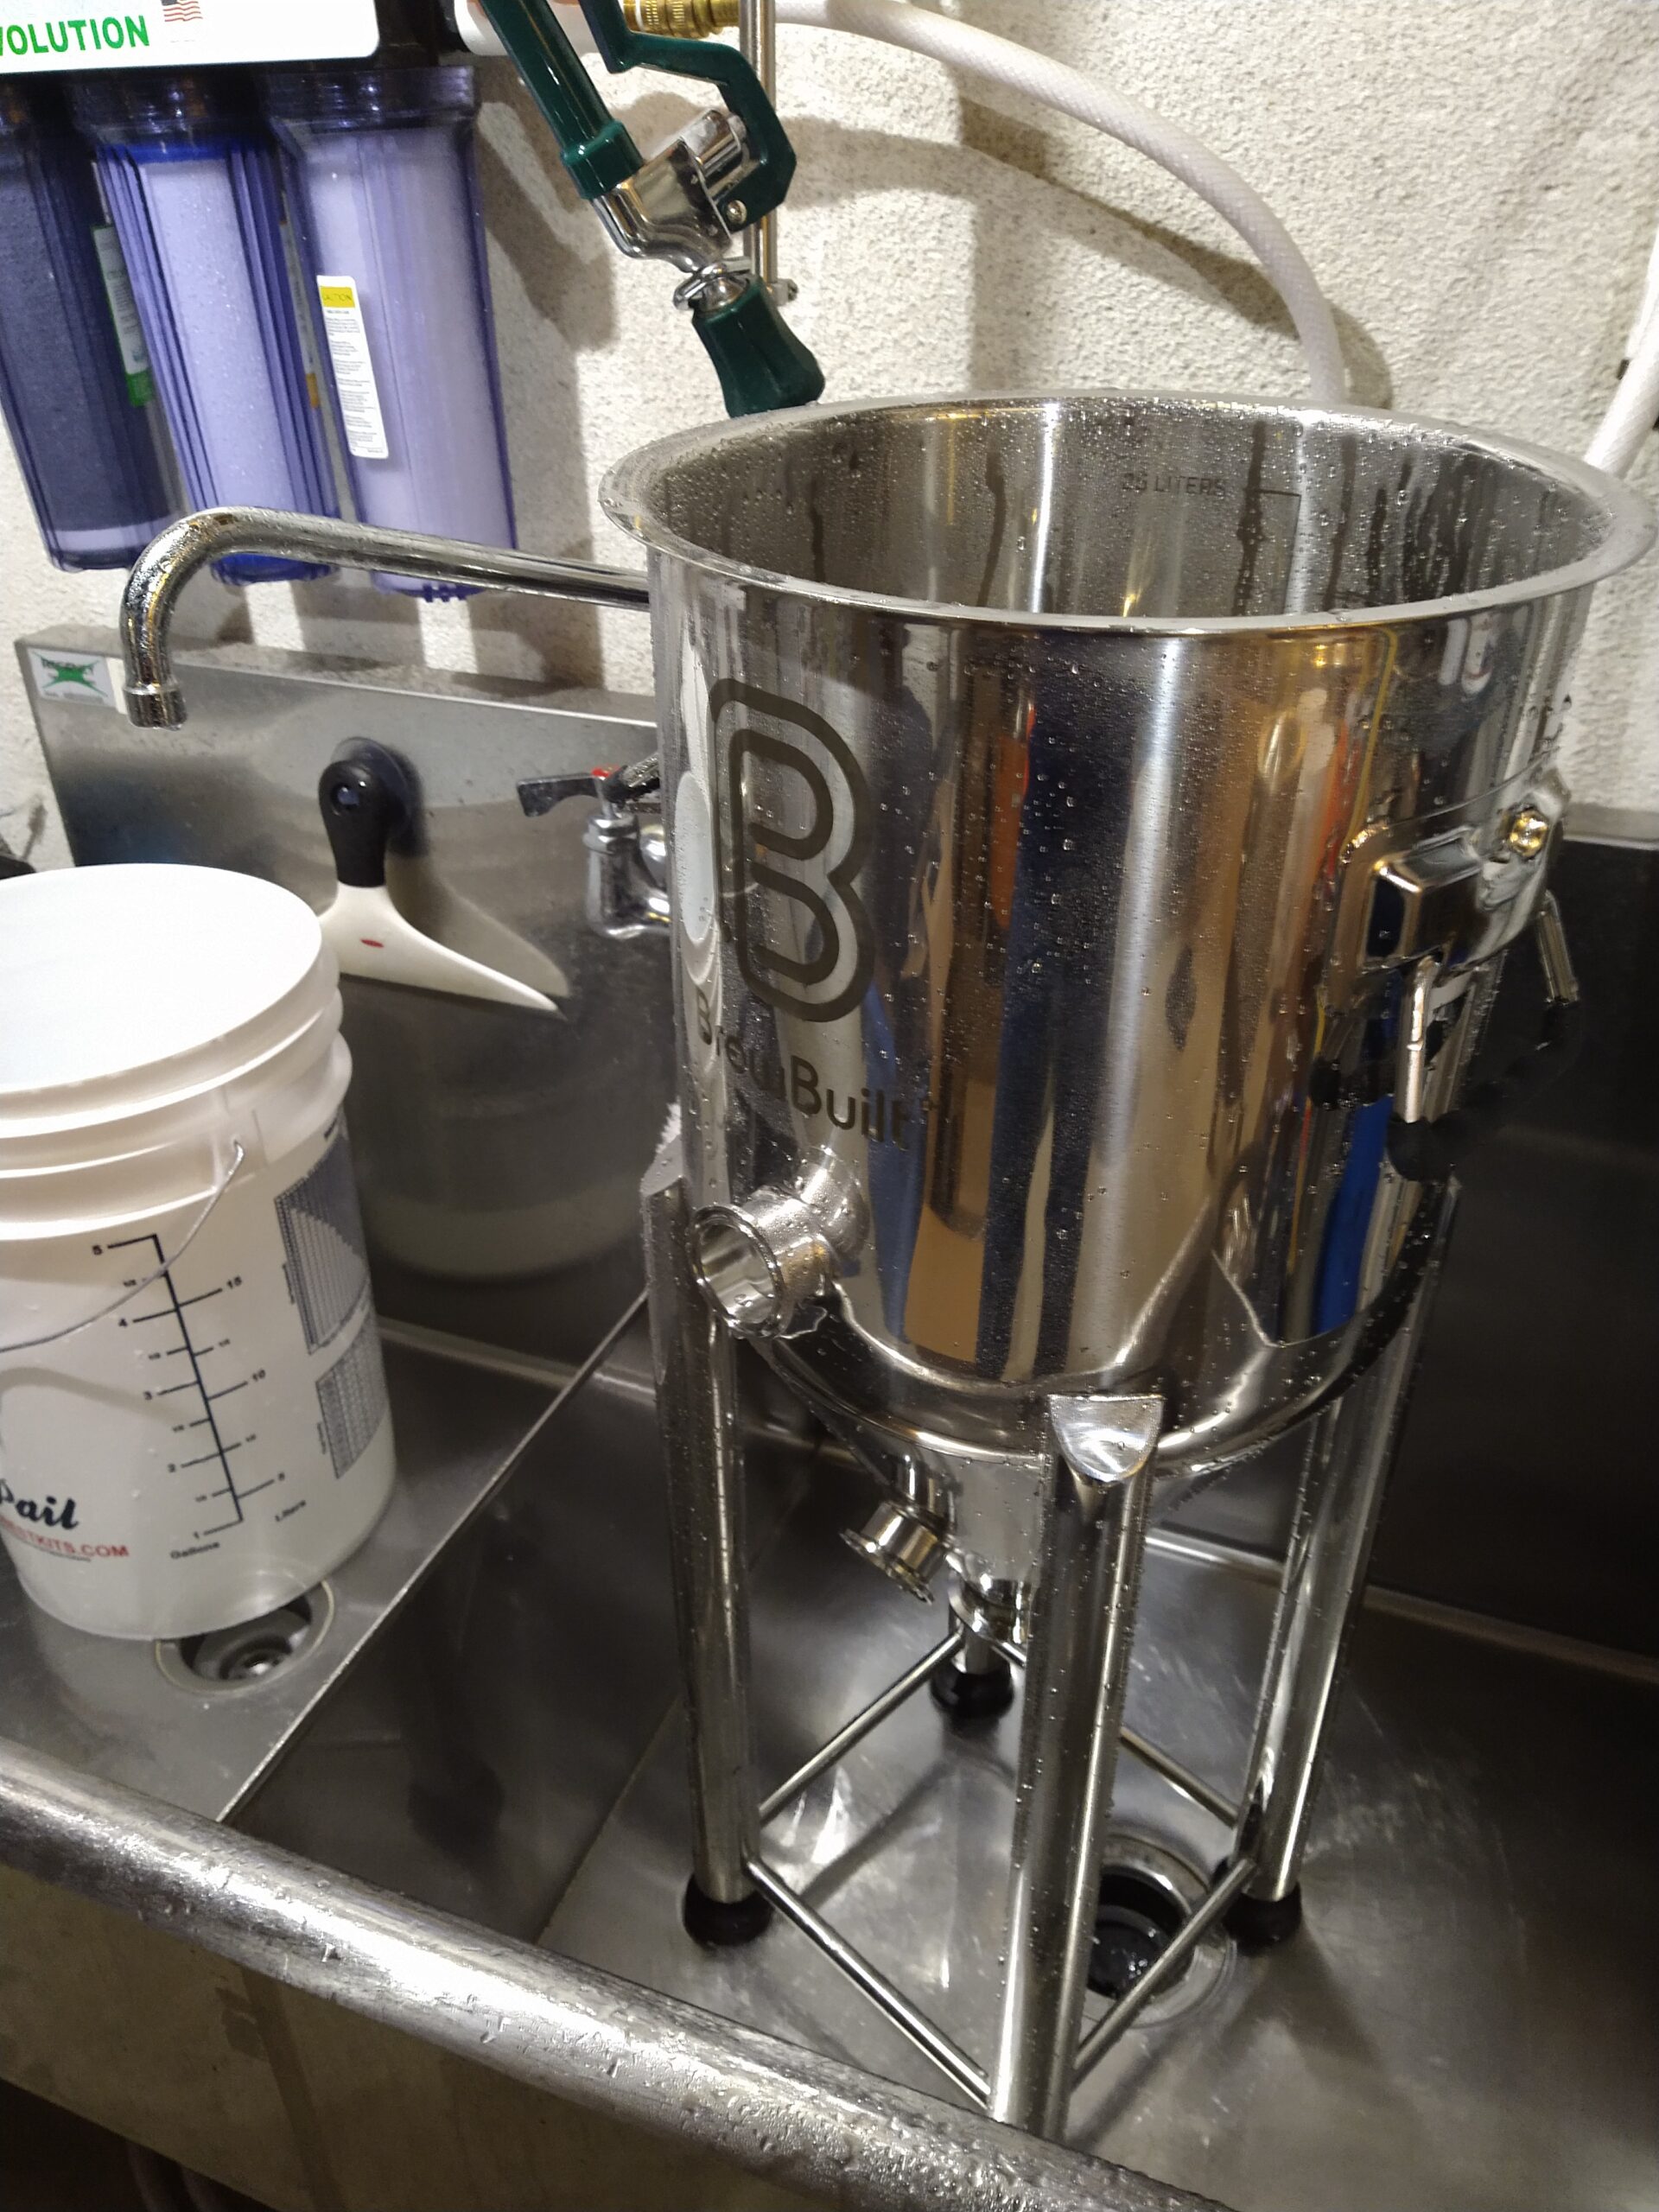 Cleaning Fermentor Before First Use
 Controller Temperature Probe Installed in Thermowell
All versions of the X1 contain the same base stainless steel conical, with the true/steep angled cone so that yeast/trub/hob sediment actually slides down to the bottom of the cone. At the bottom of this cone is a 2” TC port and butterfly valve. Halfway up the side of the cone is a sample valve attached via a 1.5” TC port. The sample valve has a knurled knob, with a fine-pitch thread, allowing a wide range of control of the flow from small amounts for wort samples, to all the way open for beer transfers out. Above the cone is another 1.5” TC, containing a thermowell for monitoring the temperature of your fermentation. The TC ports make for easy disassembly for cleaning and are also capable of pressurized fermentation.
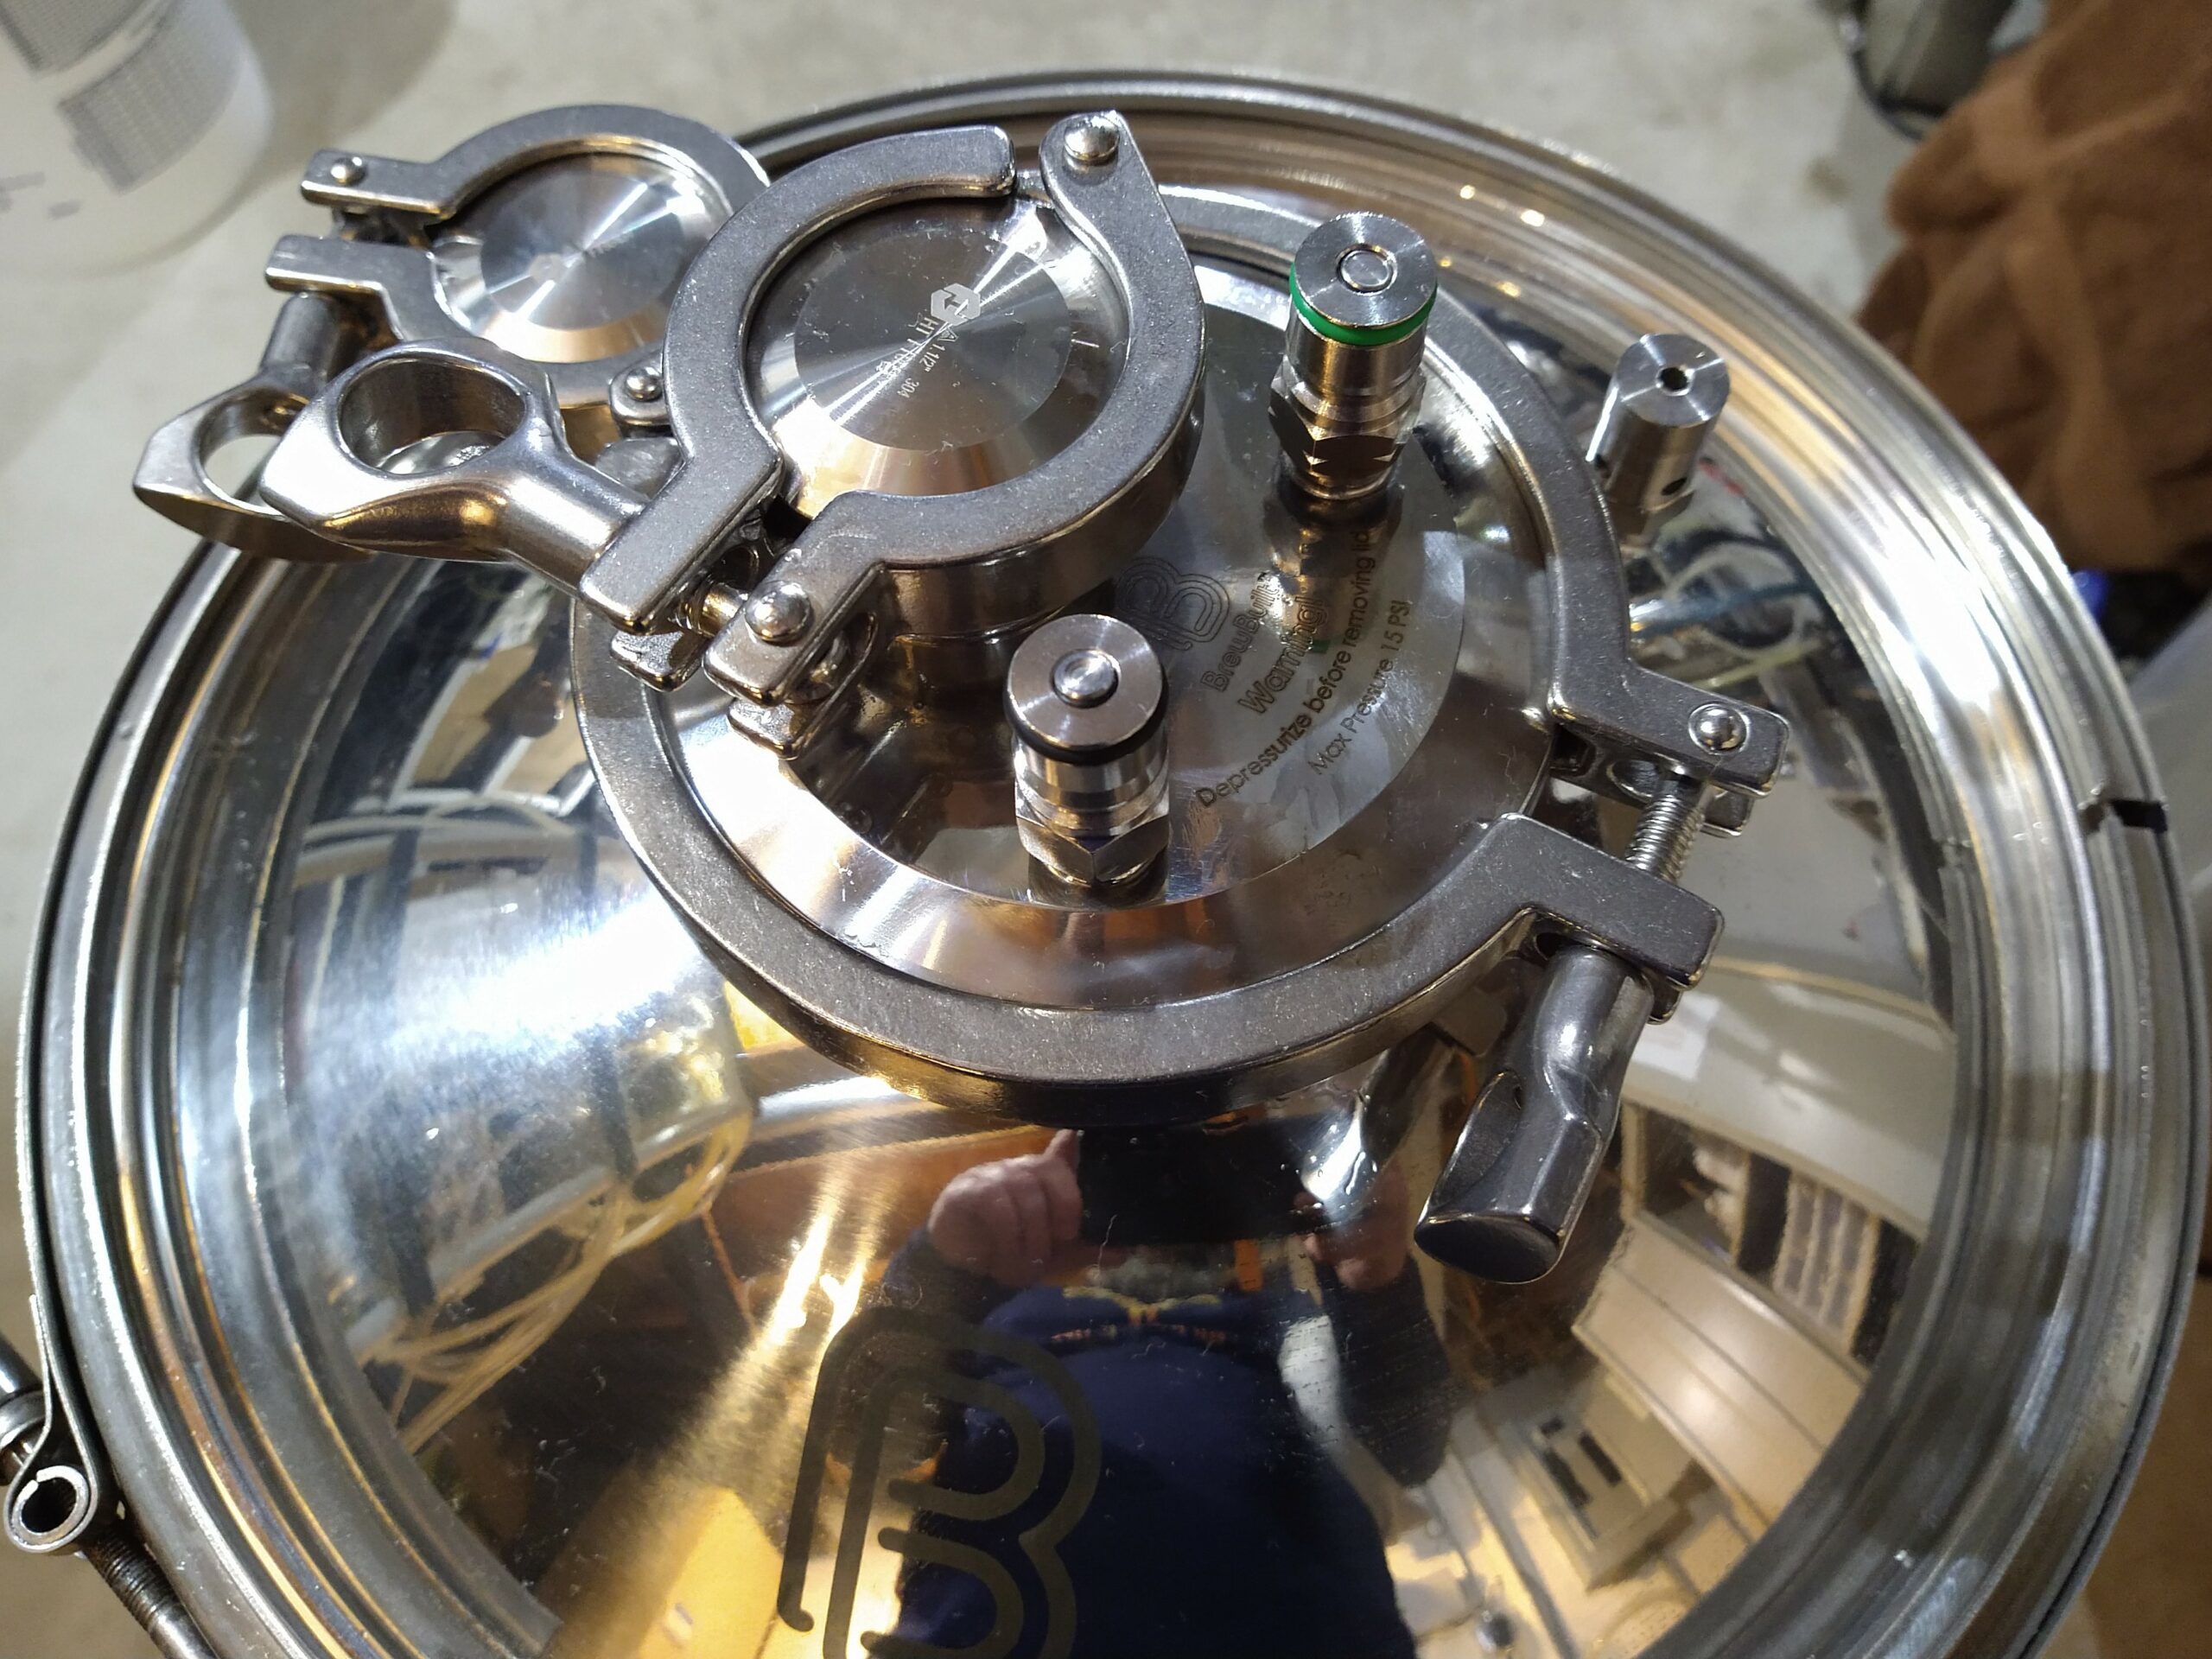 Lid with Pressure Pack Installed
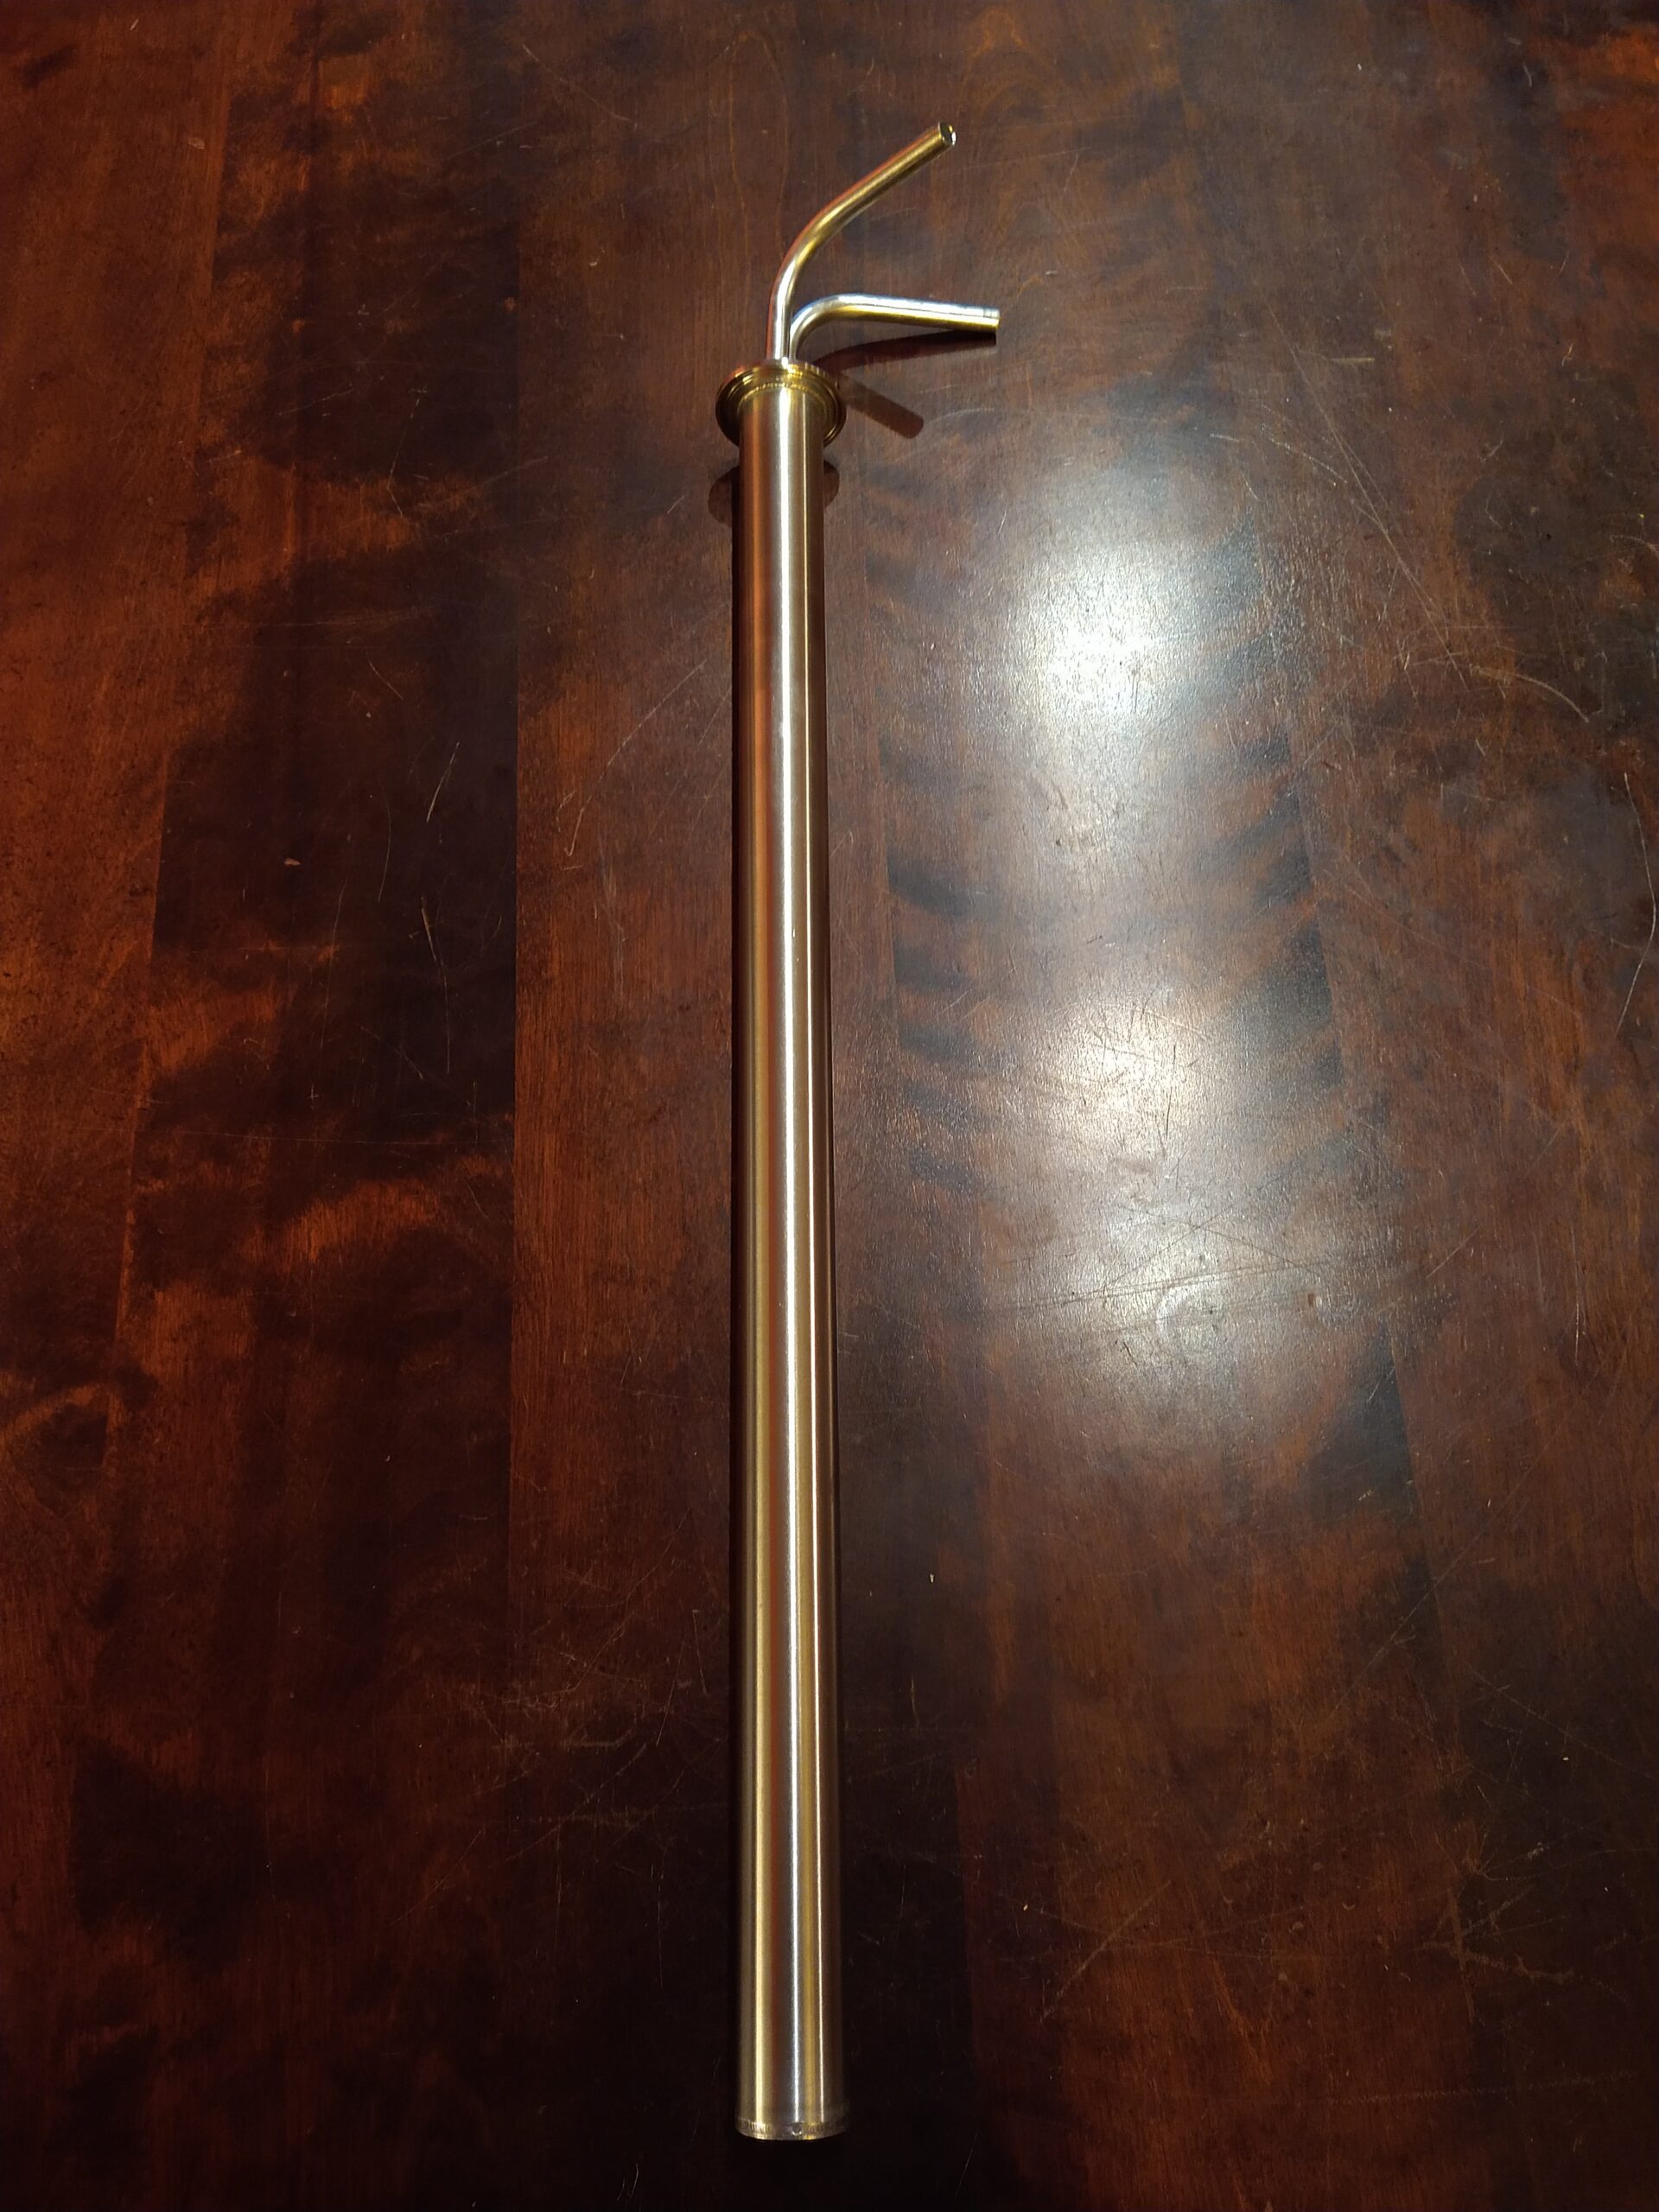
The lid is the key to pressure capability. The X1 has a large band clamp around its full circumference, along with a thick black gasket that sits in a groove in the lid. The domed lid has a large 4” TC flange and a smaller 1.5” TC flange. The base model comes with blanking plates over these openings, plus a TC U-shaped stainless blow-off attachment that attaches to the 1.5” TC flange in the lid. The U-shape allows you to get a 1/2″ ID blow-off hose to your blow-off container without risk of hose pinch. Since these TC flanges are industry standardized, you can attach a variety of accessories to them if you don’t want to just use them as dry hop hatches. Lastly, on top of the lid is also the 15 psi PRV blow-off valve.
 Blow Off Tube Installed
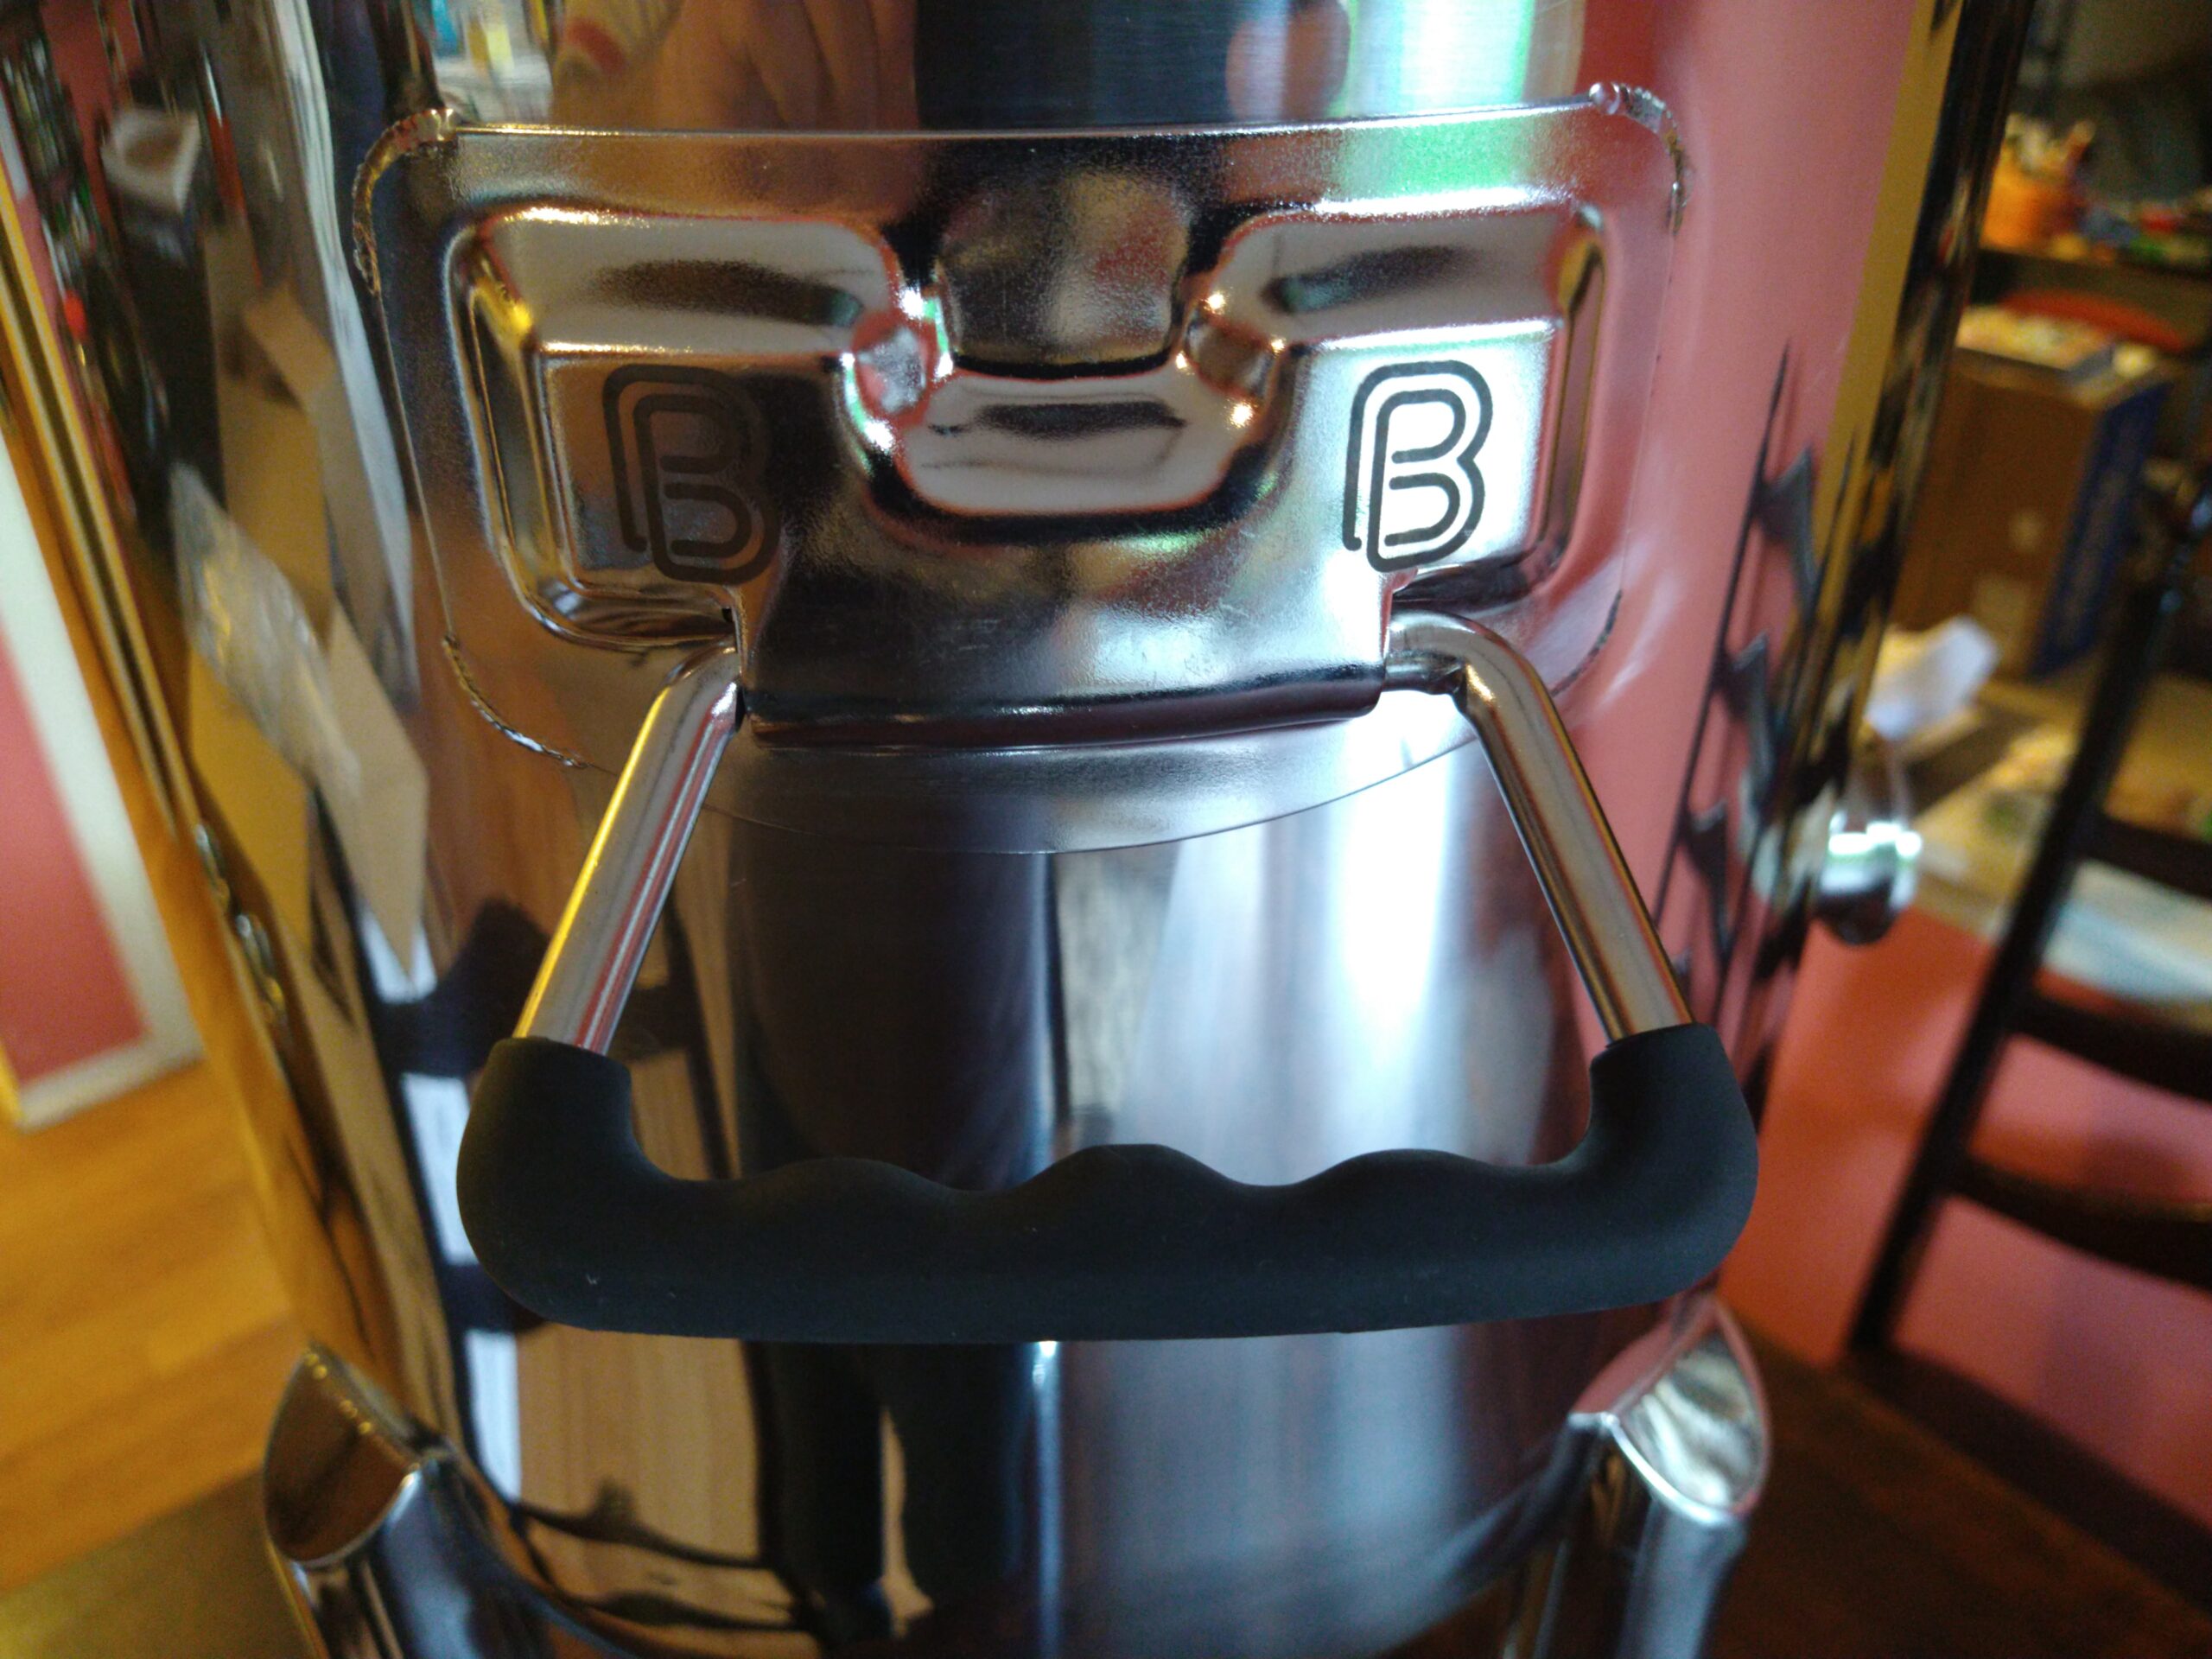 Well-Engineered Handles
Other features of note on the base X1 model are sturdy handles on each side of the fermentor body with large hand grips overmolded onto them. The handles rotate down to get out of the way when not in use and have built-in travel limiters so when you pick up a fully loaded fermentor, they don’t rotate up smash your fingers against the body of the fermentor. BrewBuilt also bucked the 3-legged trend and put 4 legs onto the X1. With adjustable level feet in the bottom of them, and reinforcing bars that brace between each leg, it provides solid, sturdy footing.
 CoolStix Cooling Rod
Stepping up to the X1 Uni+ includes some of the optional add-on accessories, bundled together to save some money vs buying them separately. The first is the addition of a CoolStix cooling rod with a TC mounting flange and a neoprene jacket that goes around the body of the fermentor. The CoolStix rod has an inlet and outlet quick connect fitting that you can either pump in ice water from a cooled water reservoir you provide, or a glycol chiller. On the 7- & 14-gallon X1 Uni+, the CoolStix is a single rod that mounts on the 1.5” TC port on the lid, whereas on the larger 27- & 42-gallon units, it has a multi-cooling rod configuration to tackle the larger volume, and this is mounted on a 4” TC flange. The X1 Uni+ also comes with what they call the Flex Chamber, which holds about 40 fluid ounces. It has a 2” TC flange that connects to the bottom of the conical and can be used to collect/dump trub during fermentation or to harvest yeast. It can also be used as a dry hop chamber. It has two threaded side ports, to which you can attach a ball lock carbonation cap and then fill/purge the chamber with CO2 if you use it to dry hop. The last option the X1 Uni+ provides is the Pressure Pack. The Pressure Pack is a 4” TC plate with a gas ball lock post for adding CO2 head pressure, a liquid ball lock post with a floating ball dip tube attached for clear beer transfers out, and another blank 1.5” TC port. The 1.5” TC port is where you mount CoolStix cooling rod on the 7- & 14-gallon units.
 CoolStix Connected to Cooling Lines
The top end model is the X1 Uni Pro. It is similar to the X1 Uni+, and contains the neoprene insulation jacket, the Pressure Pack, and the Collection Chamber. But instead of the CoolStix cooling rod, it contains an electric heat wrap to add heat at the bottom of the conical, a Peltier device for cooling at the top of the fermentor, and a controller that operates both devices to maintain your set temperature. The Peltier device uses some cool electro-physics, providing cooling power by flowing electrical current inside of it. It’s an electrical chiller. It’s mounted directly to the side of the fermentor to provide the cooling through the wall of the fermentor. Peltier coolers are designed to maintain fermentation temperature, not for cold crashing (not enough cooling power). The Uni Pro is a big step up in price but offers a clean heating & cooling solution for your fermentation.
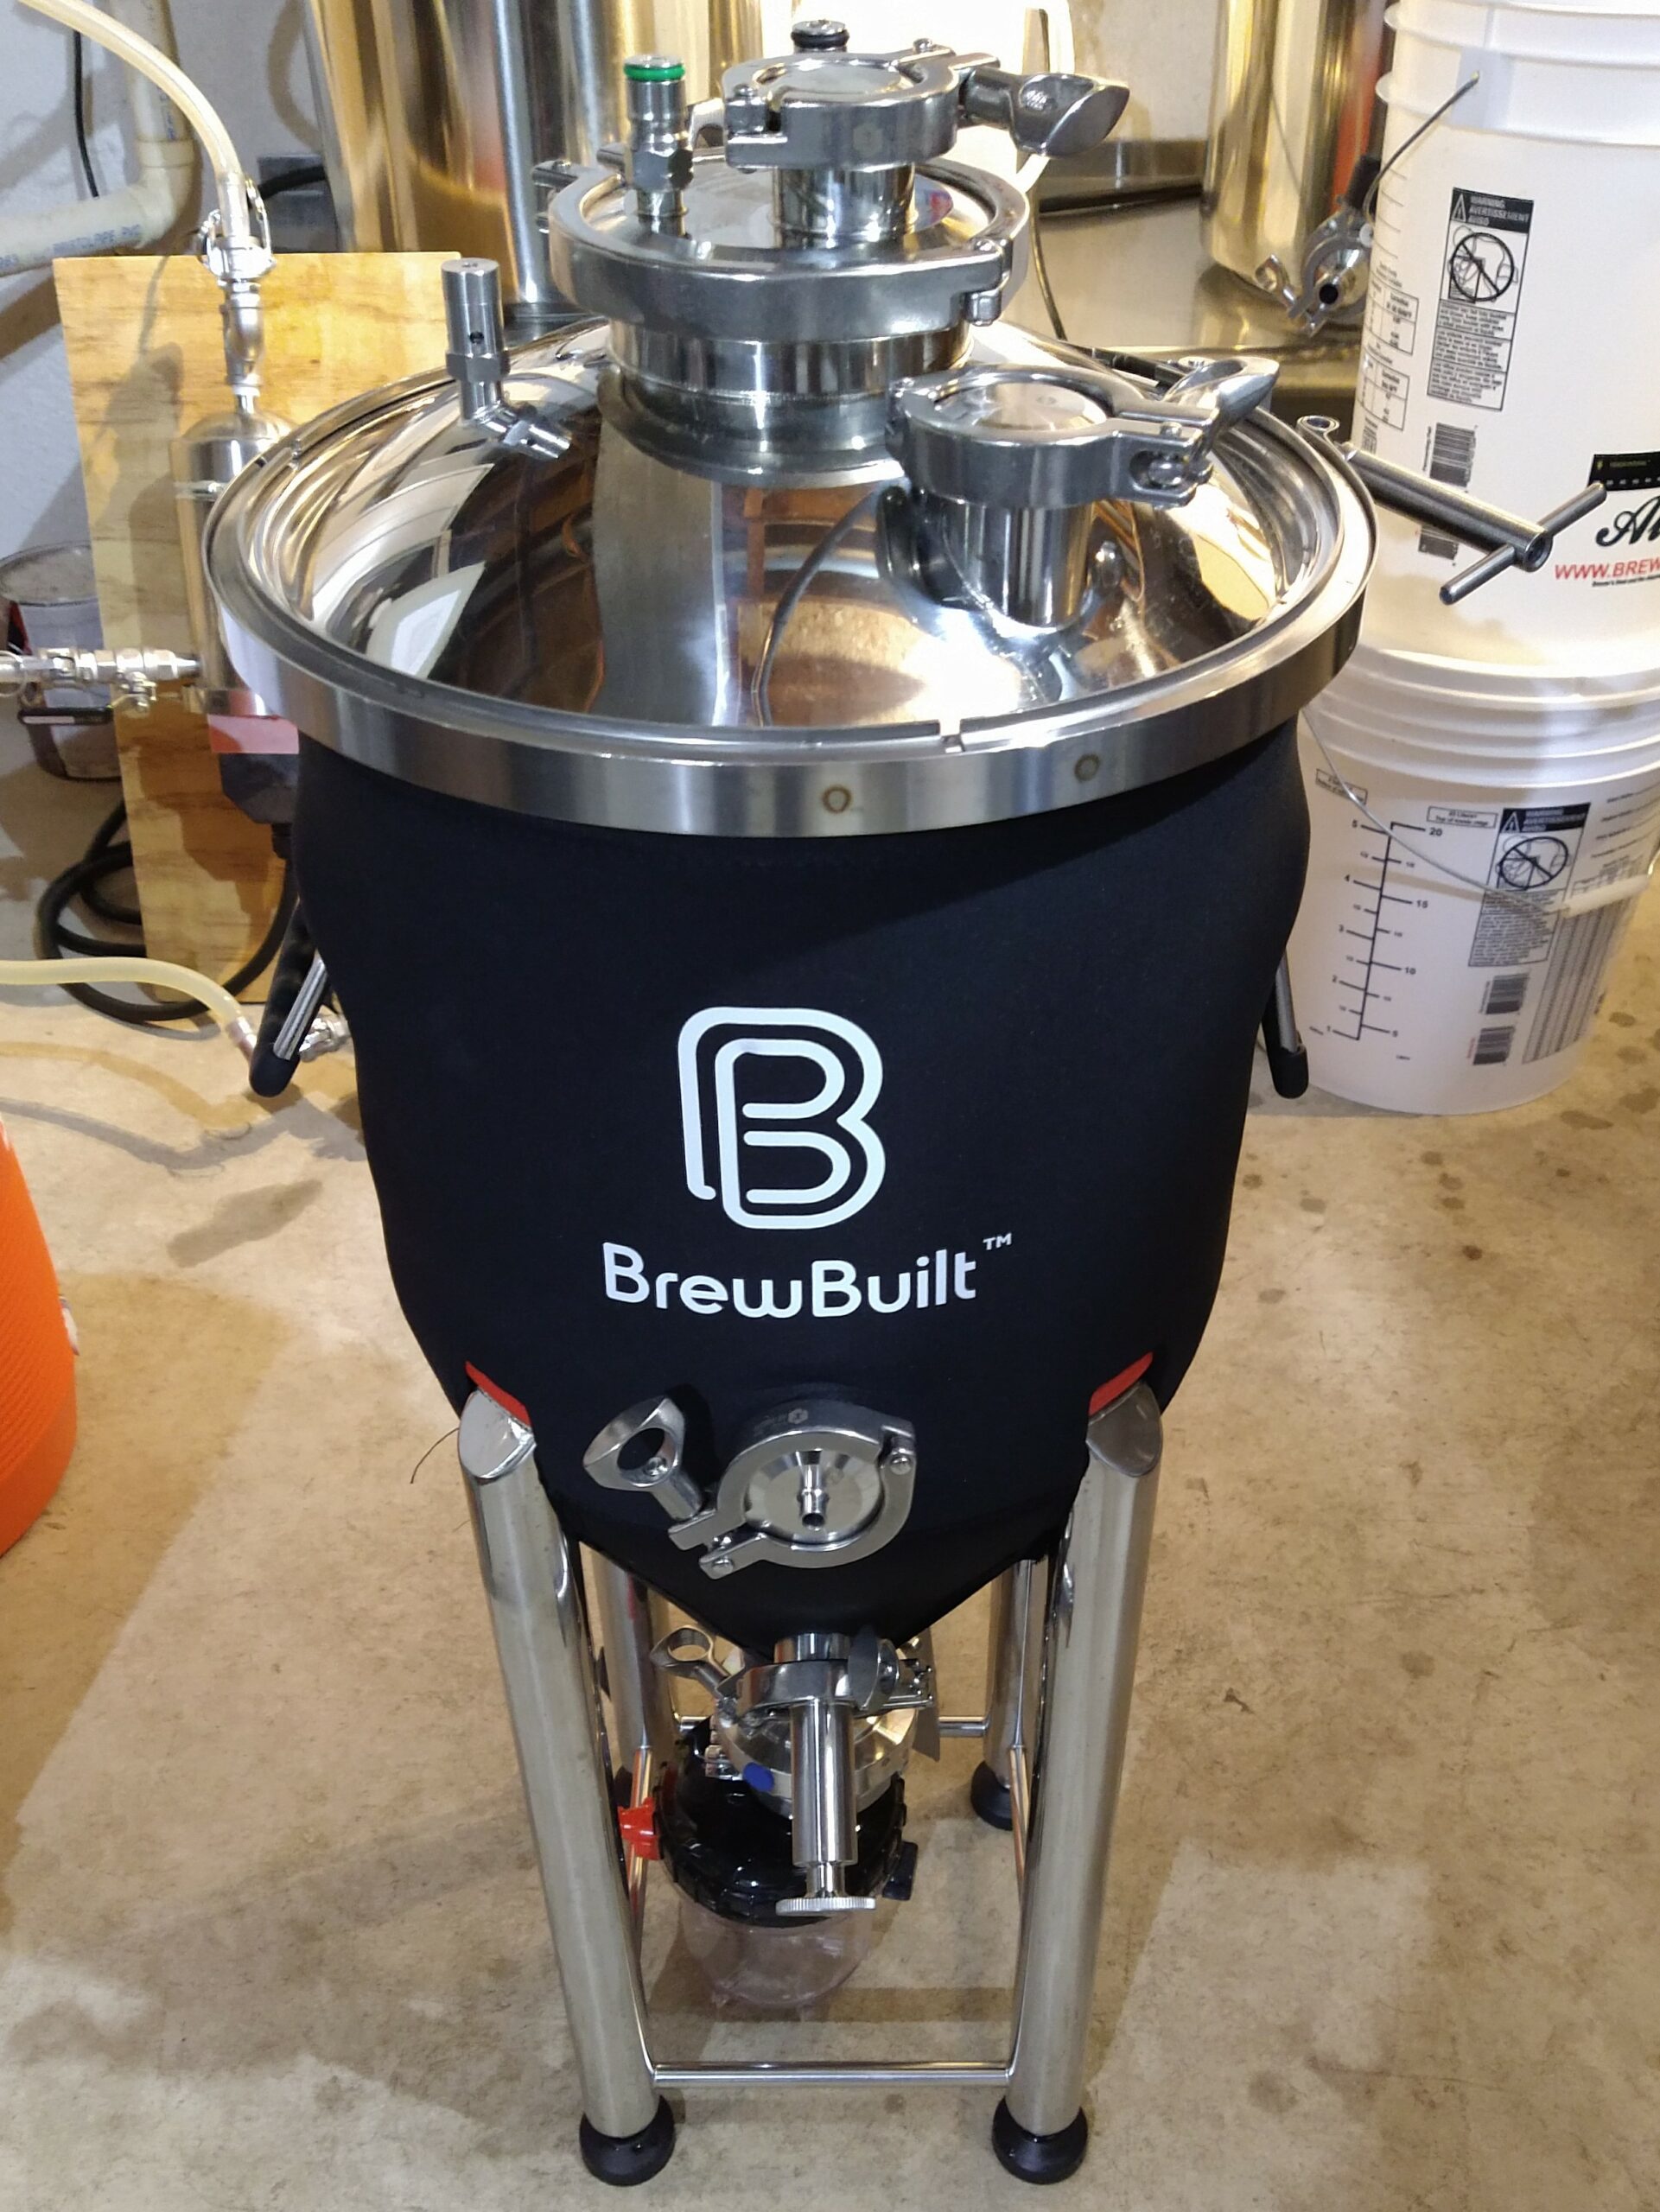
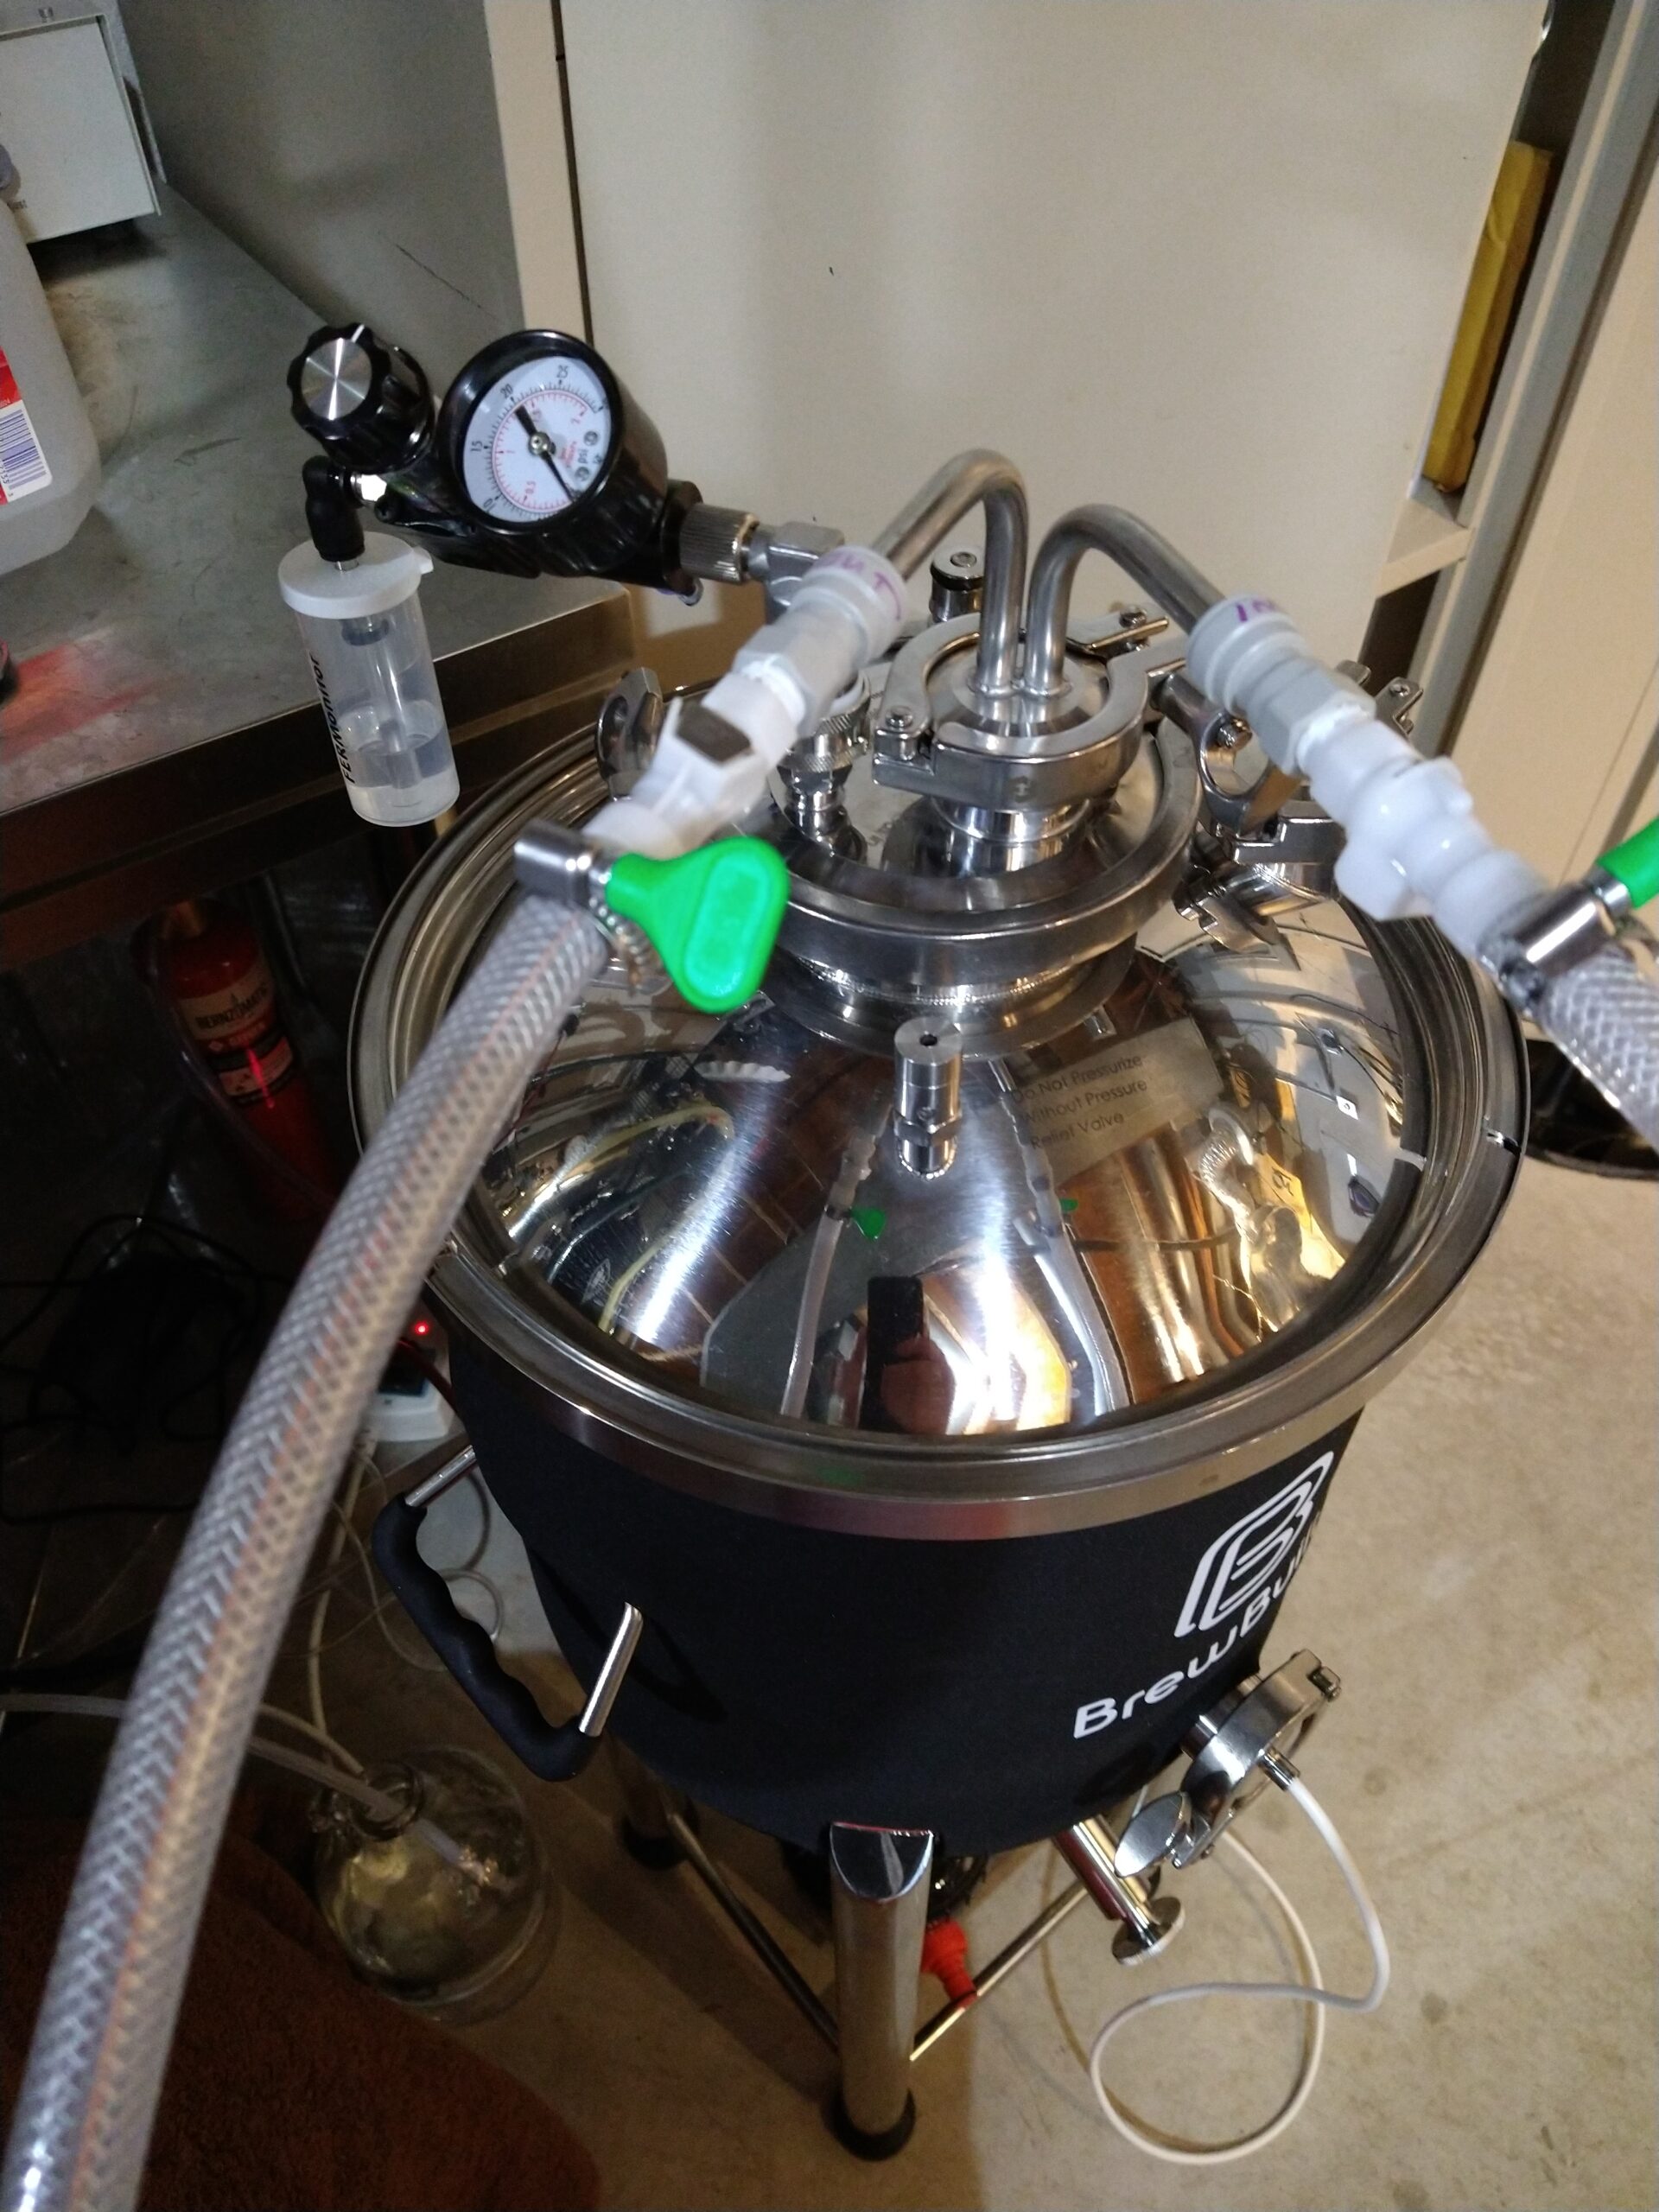
Full Assembled Fermontor
Hands on Review
For my hands on trial, I evaluated the X1 Uni+ 7 Gallon fermentor. On opening and unboxing, it seemed a bit intimidating. So many clamps, gaskets, and pieces. I was worried I might actually have to follow an instruction manual- but not so. There were a lot of pieces to clean, but everything was very logical/obvious for how to connect. The polished finish of the interior of the fermentor was impressive. Aside from the glamorous “shiny object effect” of this, it made it really easy to clean after fermentations, as crud didn’t want to hang on that tightly.
For my first fermentation, I put everything together, then pressurized it with CO2 from my tank so I knew what pressure I was applying and could gauge the pressure-holding capability of the X1. Everything worked well, and I confirmed the PRV started bleeding pressure at just above 15 psi. I started that fermentation off with the blanking plate installed, and after I dry hopped, I installed the CoolStix cooling rod, to be used as a “cool crash” once fermentation was done. However, I learned from this that changing/adding things while a ferment was in process was a bad idea, because I couldn’t ever get this properly pressure sealed. Investigating it afterwards, I couldn’t find any assignable cause, and a CO2 pressure check again found no leaks after taking everything apart and putting it back together. I never had problems again with that joint, so I learned my lesson and installed the CoolStix from the start and didn’t mess around with it during fermentation.
The CoolStix performance was good for holding fermentation temperature and could drop temperature pretty quickly if the wort was a bit warmer than I wanted before pitching yeast. I found it very useful for “cool crashing” if I dry hopped. It wasn’t what I’d call a “true cold crash”, as I wasn’t able to get the temperature down to freezing-ish temps, but dropping from 70F to 50F was enough to get hops to precipitate out if I gave it ~24 hours to do so. And dropping a 5-gallon batch from 70F to 50F took about 7.5 hours in a 68F basement, pumping chilled ice water through it. The Uni doesn’t come with a heat pad, but I found the Delta Brewing Systems Fermtank Heating Belt worked great, with the Velcro straps straddling the thermowell, and the whole thing fitting easily under the neoprene jacket.
With all the joints on the fermentor, cleaning is not something to shortcut. I found the thermowell could collect bits along its length you couldn’t get fully cleaned without removing the TC. Another unique consideration was the silicone TC gaskets. Silicone gaskets are well-suited to TC joints on brewing kettles because of silicone’s high temperature capability. However, on a fermentor, there are other aspects that might make you want to change out the silicone gaskets for EPDM gaskets. First being that silicone is very oxygen permeable, which is not a good thing for fermenting beer. It also does not tolerate acidic sanitizers that well, and a lot of us use Star San in our fermentors. Lastly, it absorbs fermentation products which can leave them smelling like sour apple after you’re all cleaned up. Going back to my cleaned fermentor several days later, I removed the lid to be greeted to this tart aroma wafting up. The silicone gaskets that were below the fermenting line had picked up the odor, as did the floating dip tube hose. For the floating dip tube, there isn’t an alternate to silicone, so this required a good soak in cleaning mixture and then air drying it to get rid of the aroma. And from discussions with MoreBeer, they plan to be changing over to EPDM TC gaskets on the X1 soon. MoreBeer has said when this change is made they will send existing owners EPDM gaskets.
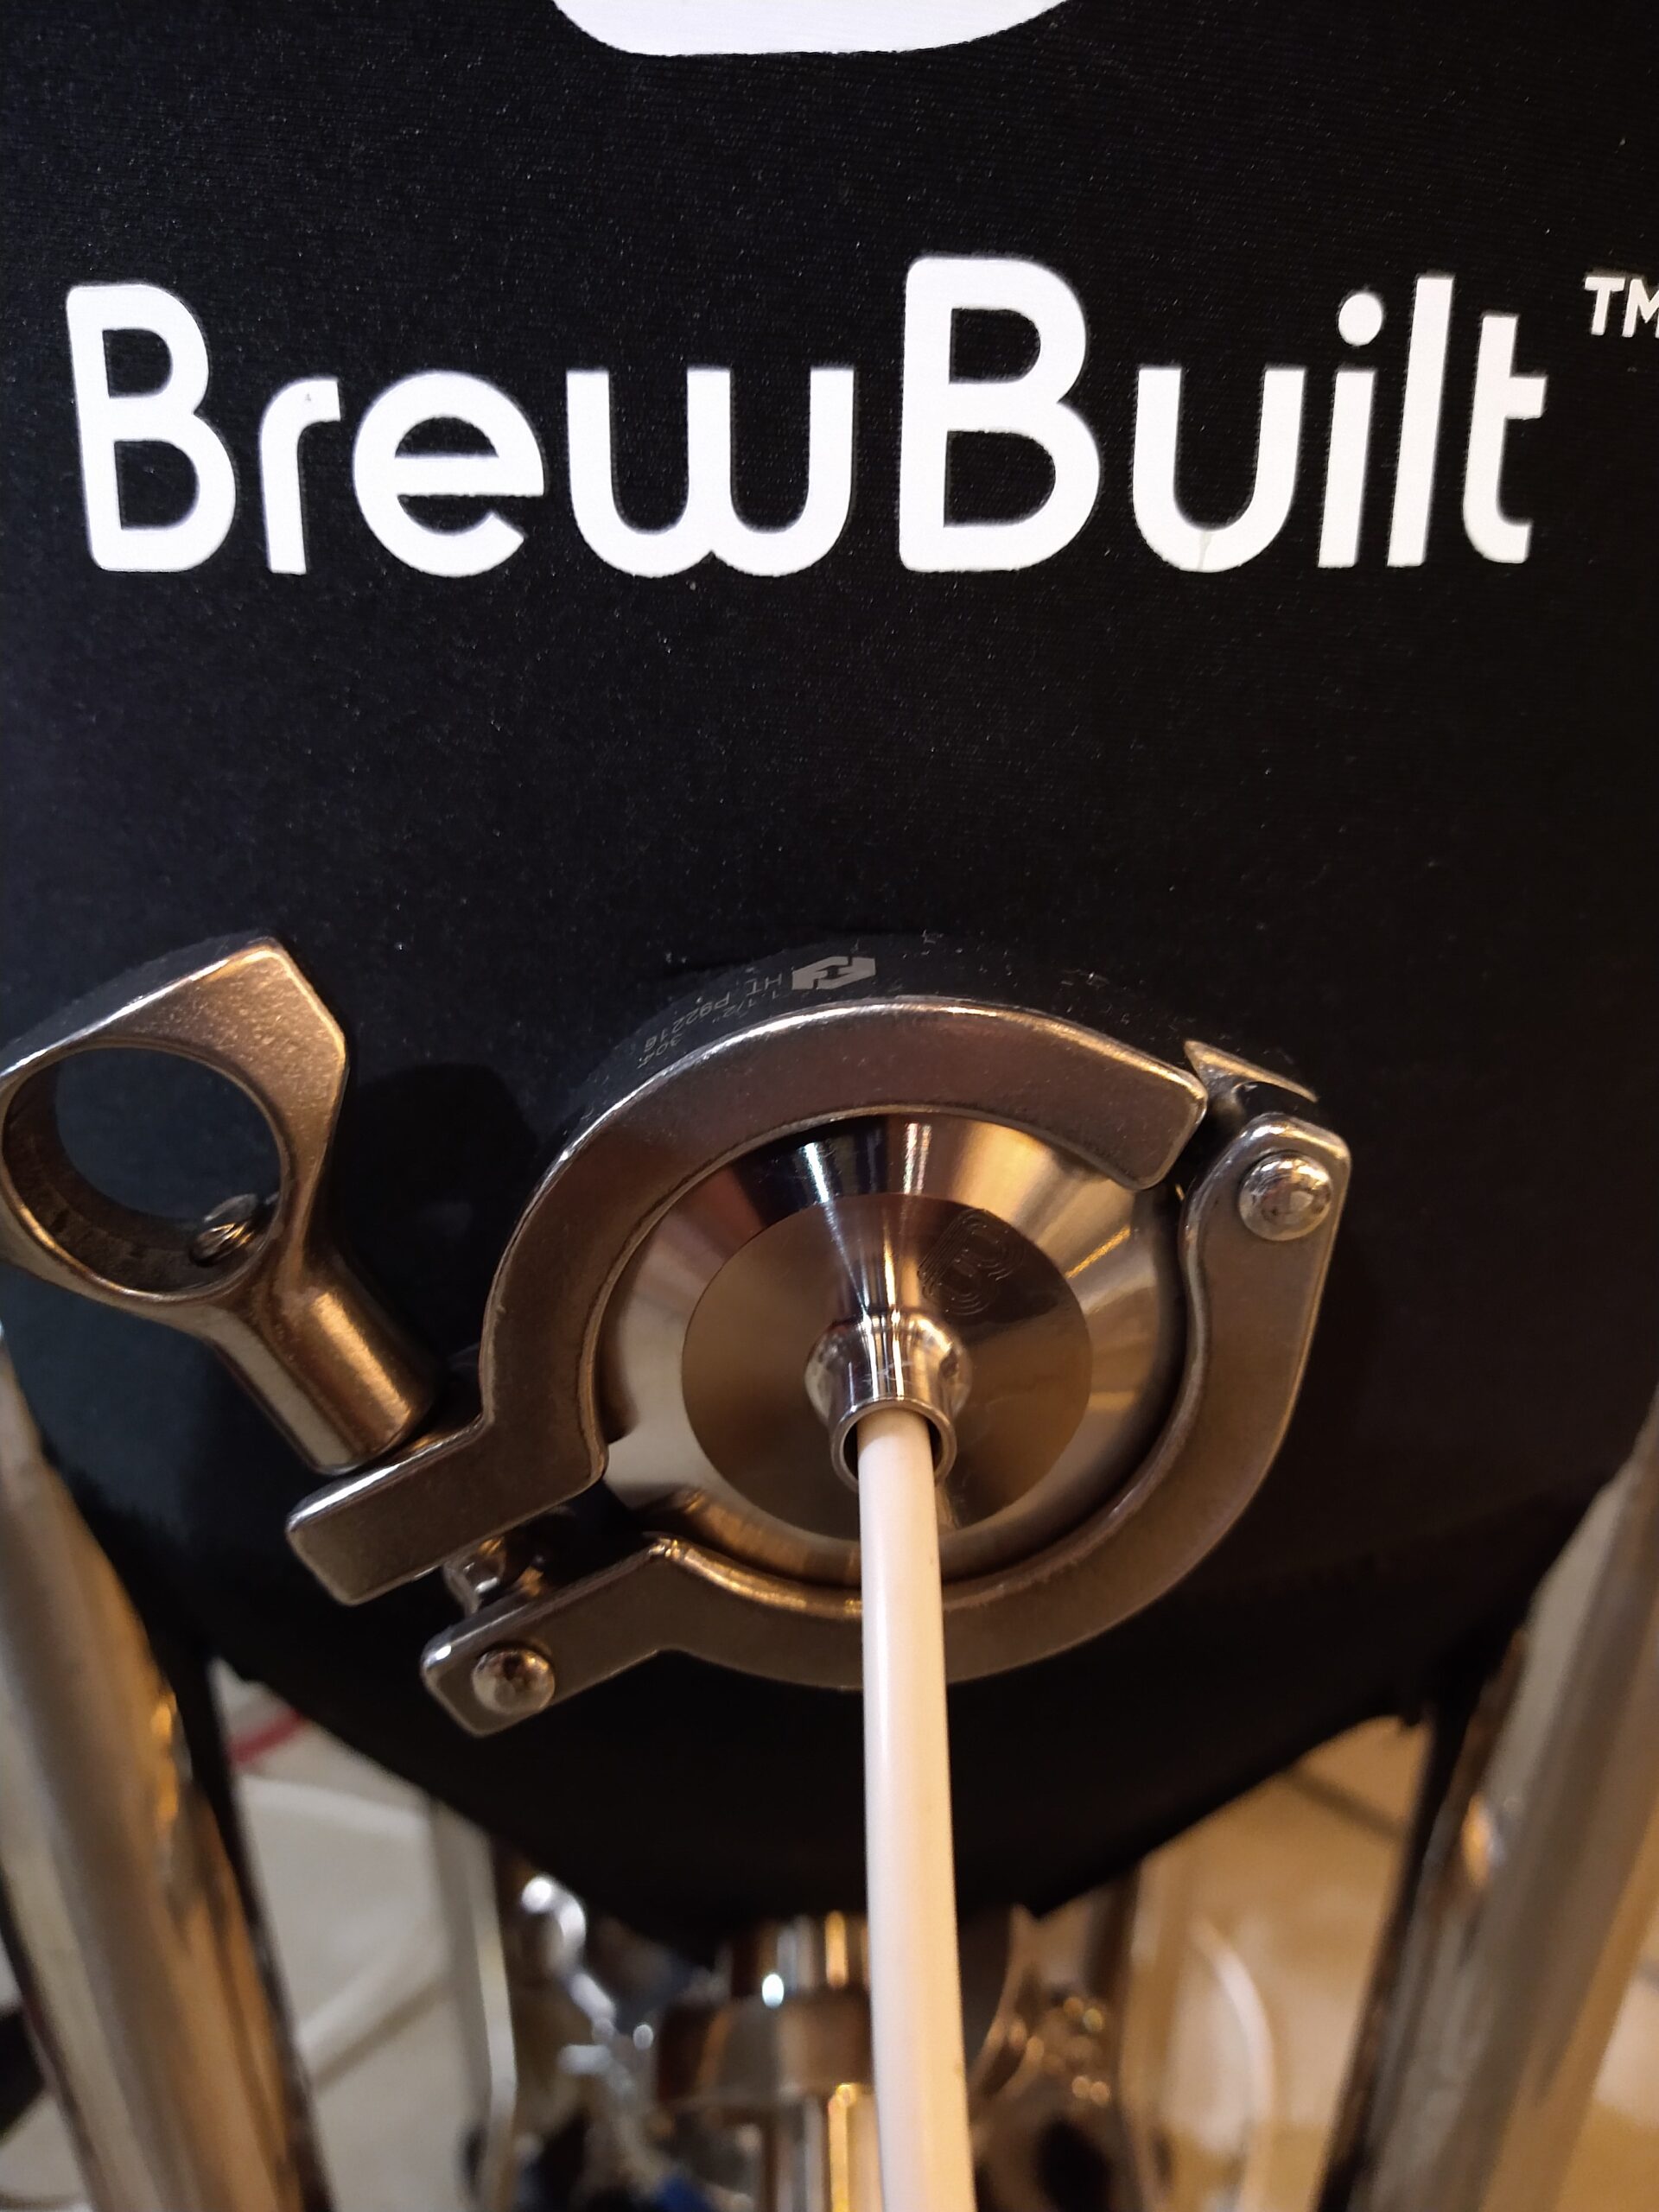
 Floating Dip Tube at Correct Length
The floating ball dip tube was awesome with respect to clear beer transfers into the keg. But this did require some care. First was to trim the length of the silicone tubing so that it hung straight down with the ball float just touching the butterfly at the bottom of the cone. Otherwise, it’s too long and it can get bound up near the bottom and end up with the tip sitting above the beer level before you’re fully drained. The other thing that you must plan through is dry hopping. While the yeast and trub naturally drop out to the bottom, dry hops sit up top and take a while to drop. I was able to accelerate this greatly by dropping the temperature at least 24 hours prior to transfer to the keg. When I did this, I was able to eliminate the inline filter I used to use with other fermentors that had hoppy beers in them. Combined with the gas port up top, transfers out to a keg were incredibly painless, as I hooked up my CO2 tank and pushed the beer out through the floating dip tube.
![]() Using CO2 Tank for Closed Transfer to Keg
Using CO2 Tank for Closed Transfer to Keg![]() Closed Pressure Transfer from X1 – Related: Torpedo Keg Review
Closed Pressure Transfer from X1 – Related: Torpedo Keg Review
I used the collection ball at the bottom for 2 purposes. I don’t harvest yeast, so I can’t comment on using it for that. But I did use it to pull off the bottom precipitate and dump the trub and yeast towards the end of fermentation. Some people debate whether that improves your finished beer taste or clarity, but it was just so easy with the Flex Chamber, it was pointless not to. After dumping and cleaning it, I used it for dry hopping. I bought a Kegland plastic ball lock carbonation cap (KL10788) and screwed that on over one of the threaded fittings on the Flex Chamber. In my opinion, this is a mandatory add-on if you’re going to dry hop. Filling it up with my dry hop pellets, I re-attached the TC to the bottom of the cone, then filled the chamber with CO2 while keeping the butterfly valve still closed to keep the beer out. After filling, I loosened the cap on the other side of the Chamber and bled off the CO2/air mix. I did a few of these cycles, to purge the dry hops as much as possible, then applied CO2 pressure so the dry hops were sitting in a pressurized chamber of CO2. At that point, I opened the butterfly valve, and pressurized CO2 launched hop pellets up into the beer as gravity let the beer cascade down into the Flex Chamber. I never maxed out the Chamber with dry hops, with my biggest dry hop charge being 5 oz of pellets, which made the Chamber just under half full. One tricky setup was the handle of the butterfly valve had to be oriented just right so it didn’t hit the lid of the Flex Chamber, or the support rod between the legs of the fermentor. This is something MoreBeer said they would be addressing with a shorter handle valve in 1st Quarter of 2022. They will be reaching out to current X1 owners once these are available, and sending out a free replacement.
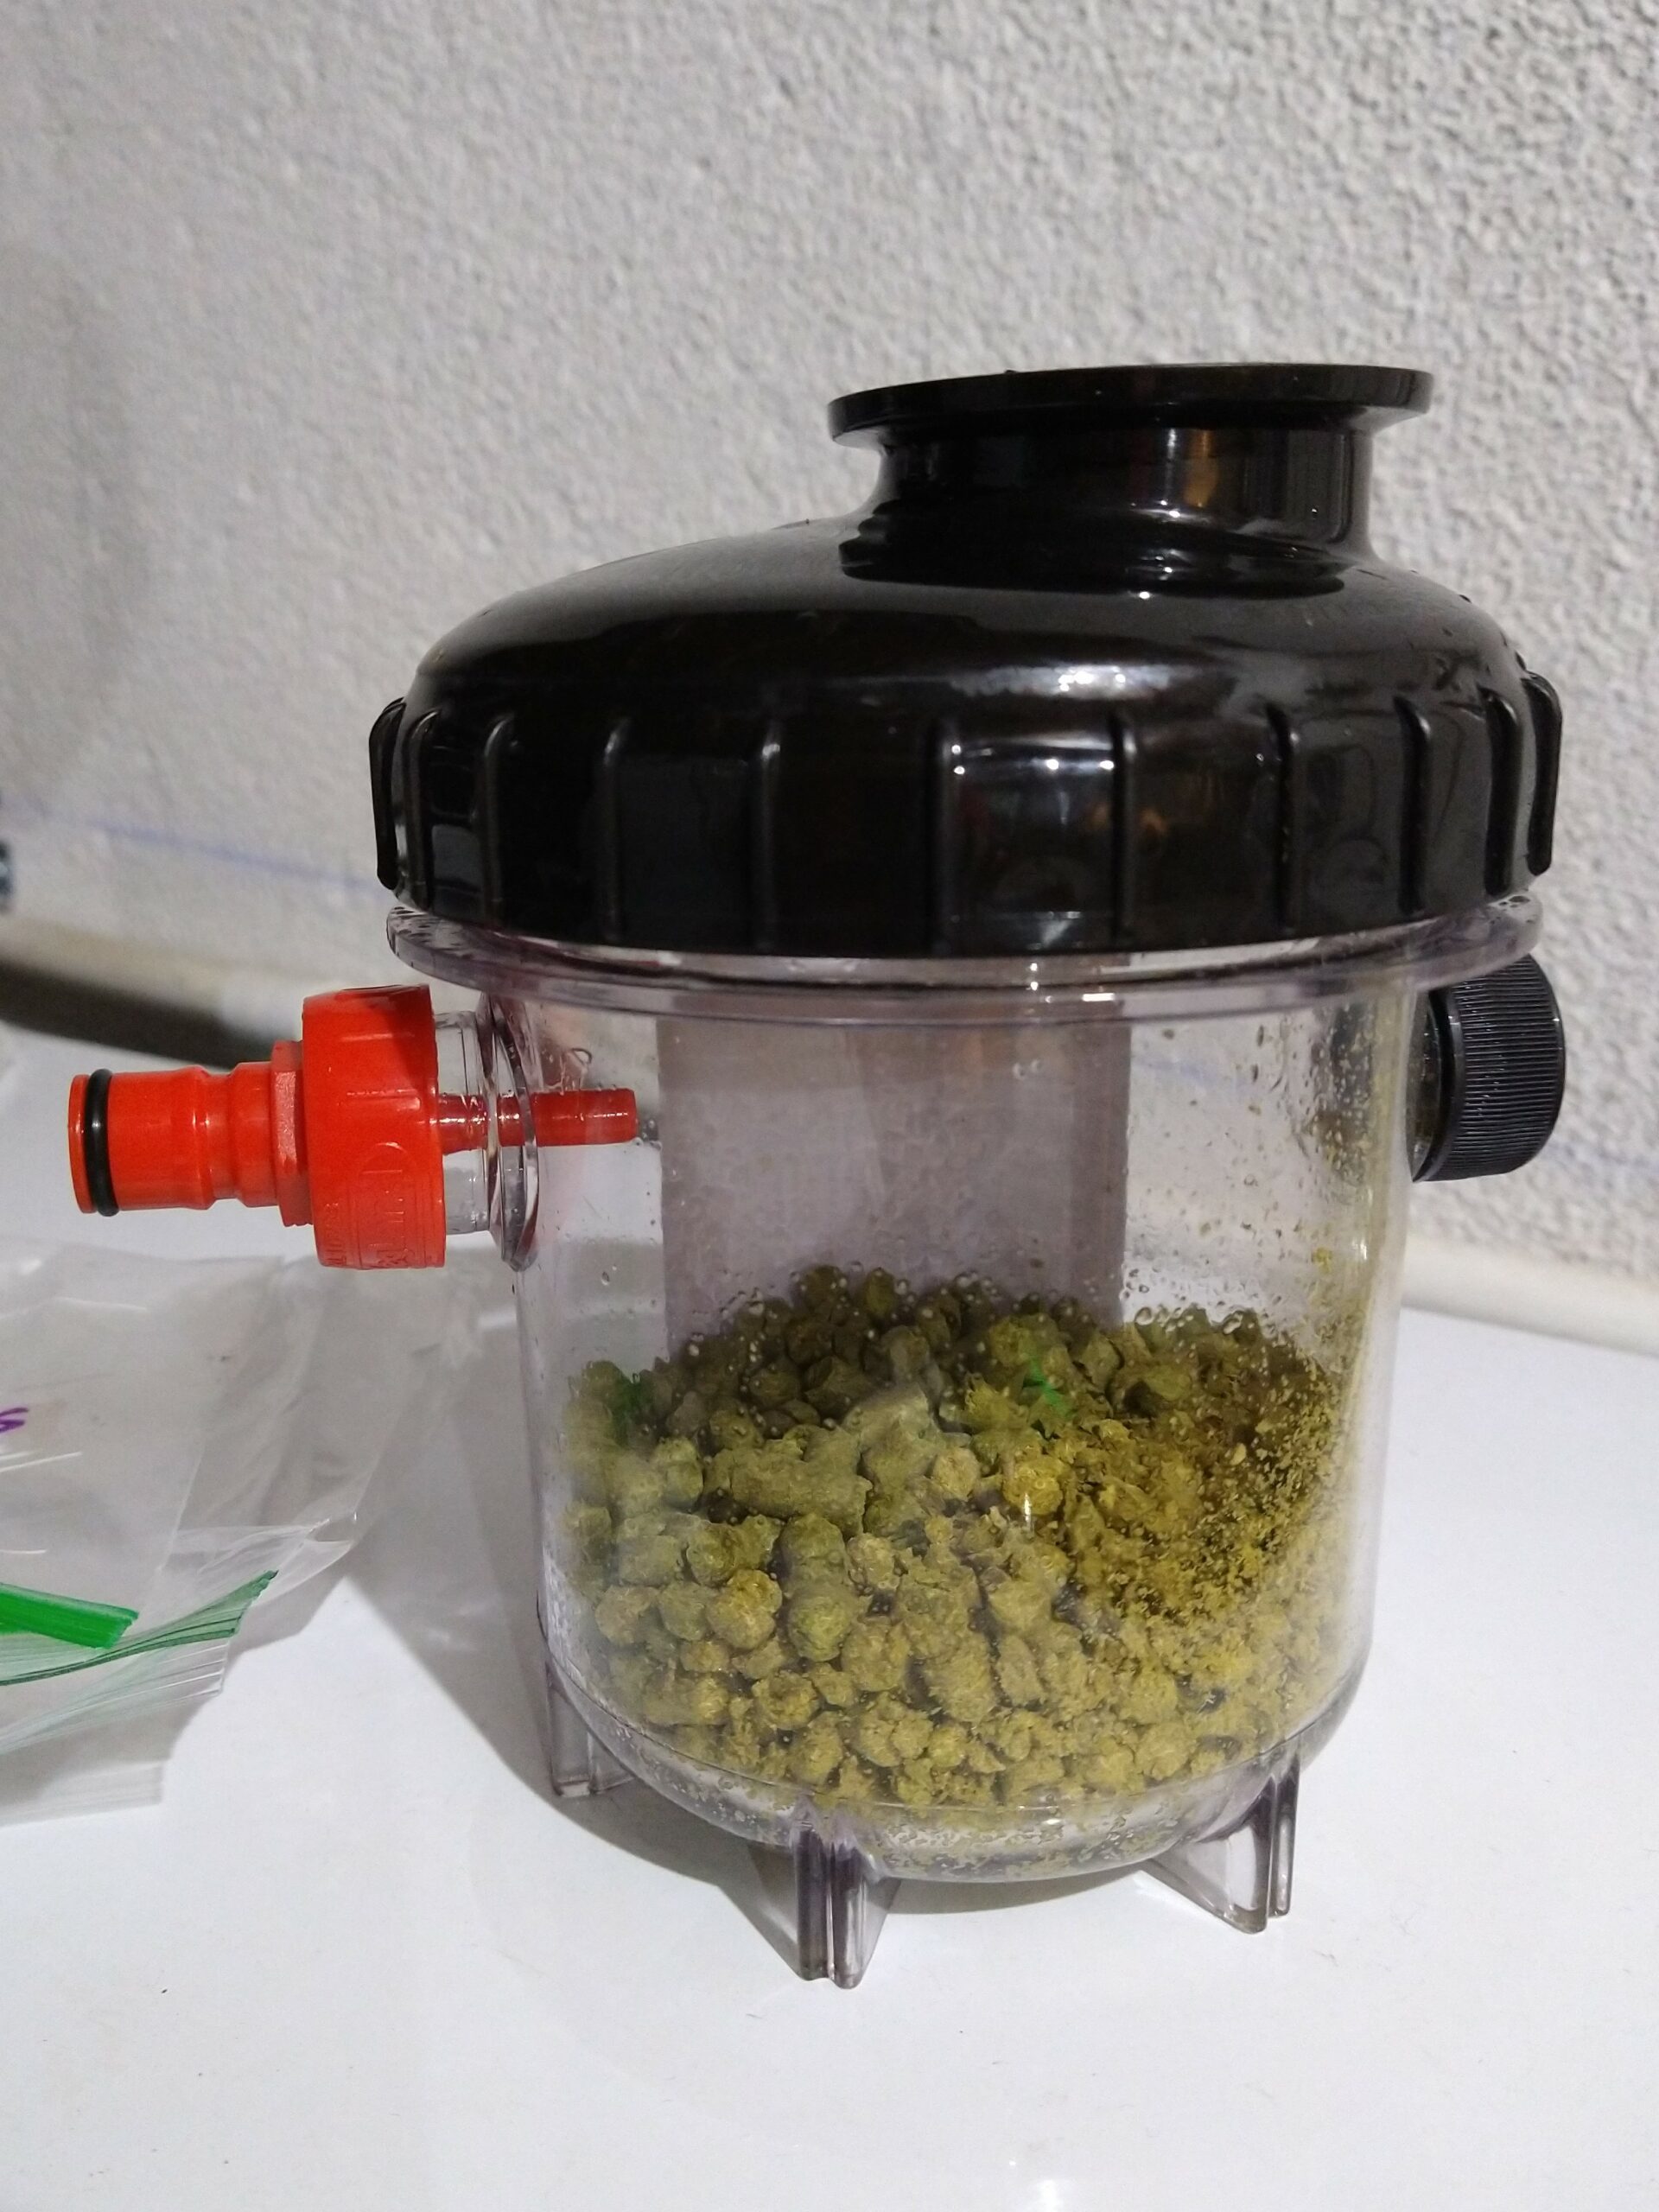 5 oz Dry Hops in Flex Chamber
 Purging Flex Chamber of Dry Hops with CO2
I explored pressurized fermentation on several batches. Other than my one mysterious sealing problem when I tried to install the CoolStix rod during a fermentation batch, the equipment worked well for pressurized fermentation. The X1 doesn’t come with a spunding valve, so you need to provide your own to connect to the gas ball lock post. I was able to ferment at 15 psi without running into the PRV kicking on (opened just after 15 psi). This is a very common pressurized fermentation pressure, so that is good. If you want to fully carbonate in the fermentor, 15 psi won’t get you there (you’ll need about 30 psi), so you’ll need to still add pressure in the keg to get higher vols of CO2. I found if I needed to adjust pressure down, loosening the band clamp on the lid was the best method. With a fine thread pitch on the tightening screw, I could very easily ease in to bleeding off pressure slowly, and the large circumference meant if I wanted to bleed it off faster, it was much faster than trying to do through the PRV or one of the TC ports on the lid.
Conclusions
If you’re shopping for a stainless pressure-capable conical fermentor, you know you’re going to be dropping some serious money. The X1 seems to check a lot of boxes with good build quality, and lots of functions/features available with the industry-standard TC ports of various sizes. It handled pressurized fermentation great. Although I was limited to 15 psi, the main benefits of pressurized fermentation lie in controlling lager yeast flavors at room temperature, as well as oxygen-free processes during fermentation and transfers, so the carbonation bit isn’t a serious limitation. And I definitely used all the add-on functionality in the X1 Uni+ kit.
Check Current Price, Models & Availability, Review Continues Below:
- BrewBuilt X1 Uni+ Conical Fermenter
- BrewBuilt X1 Uni Conical Fermenter
- BrewBuilt X1 Uni Pro Conical Fermenter
- X1 Parts & Accessories
- Complete BrewBuilt Conical Lineup
Related Resources & Reviews:
Lots More Photos!
 The X1 being used with Brewers Hardware Dry Hopper
Features and Finishes
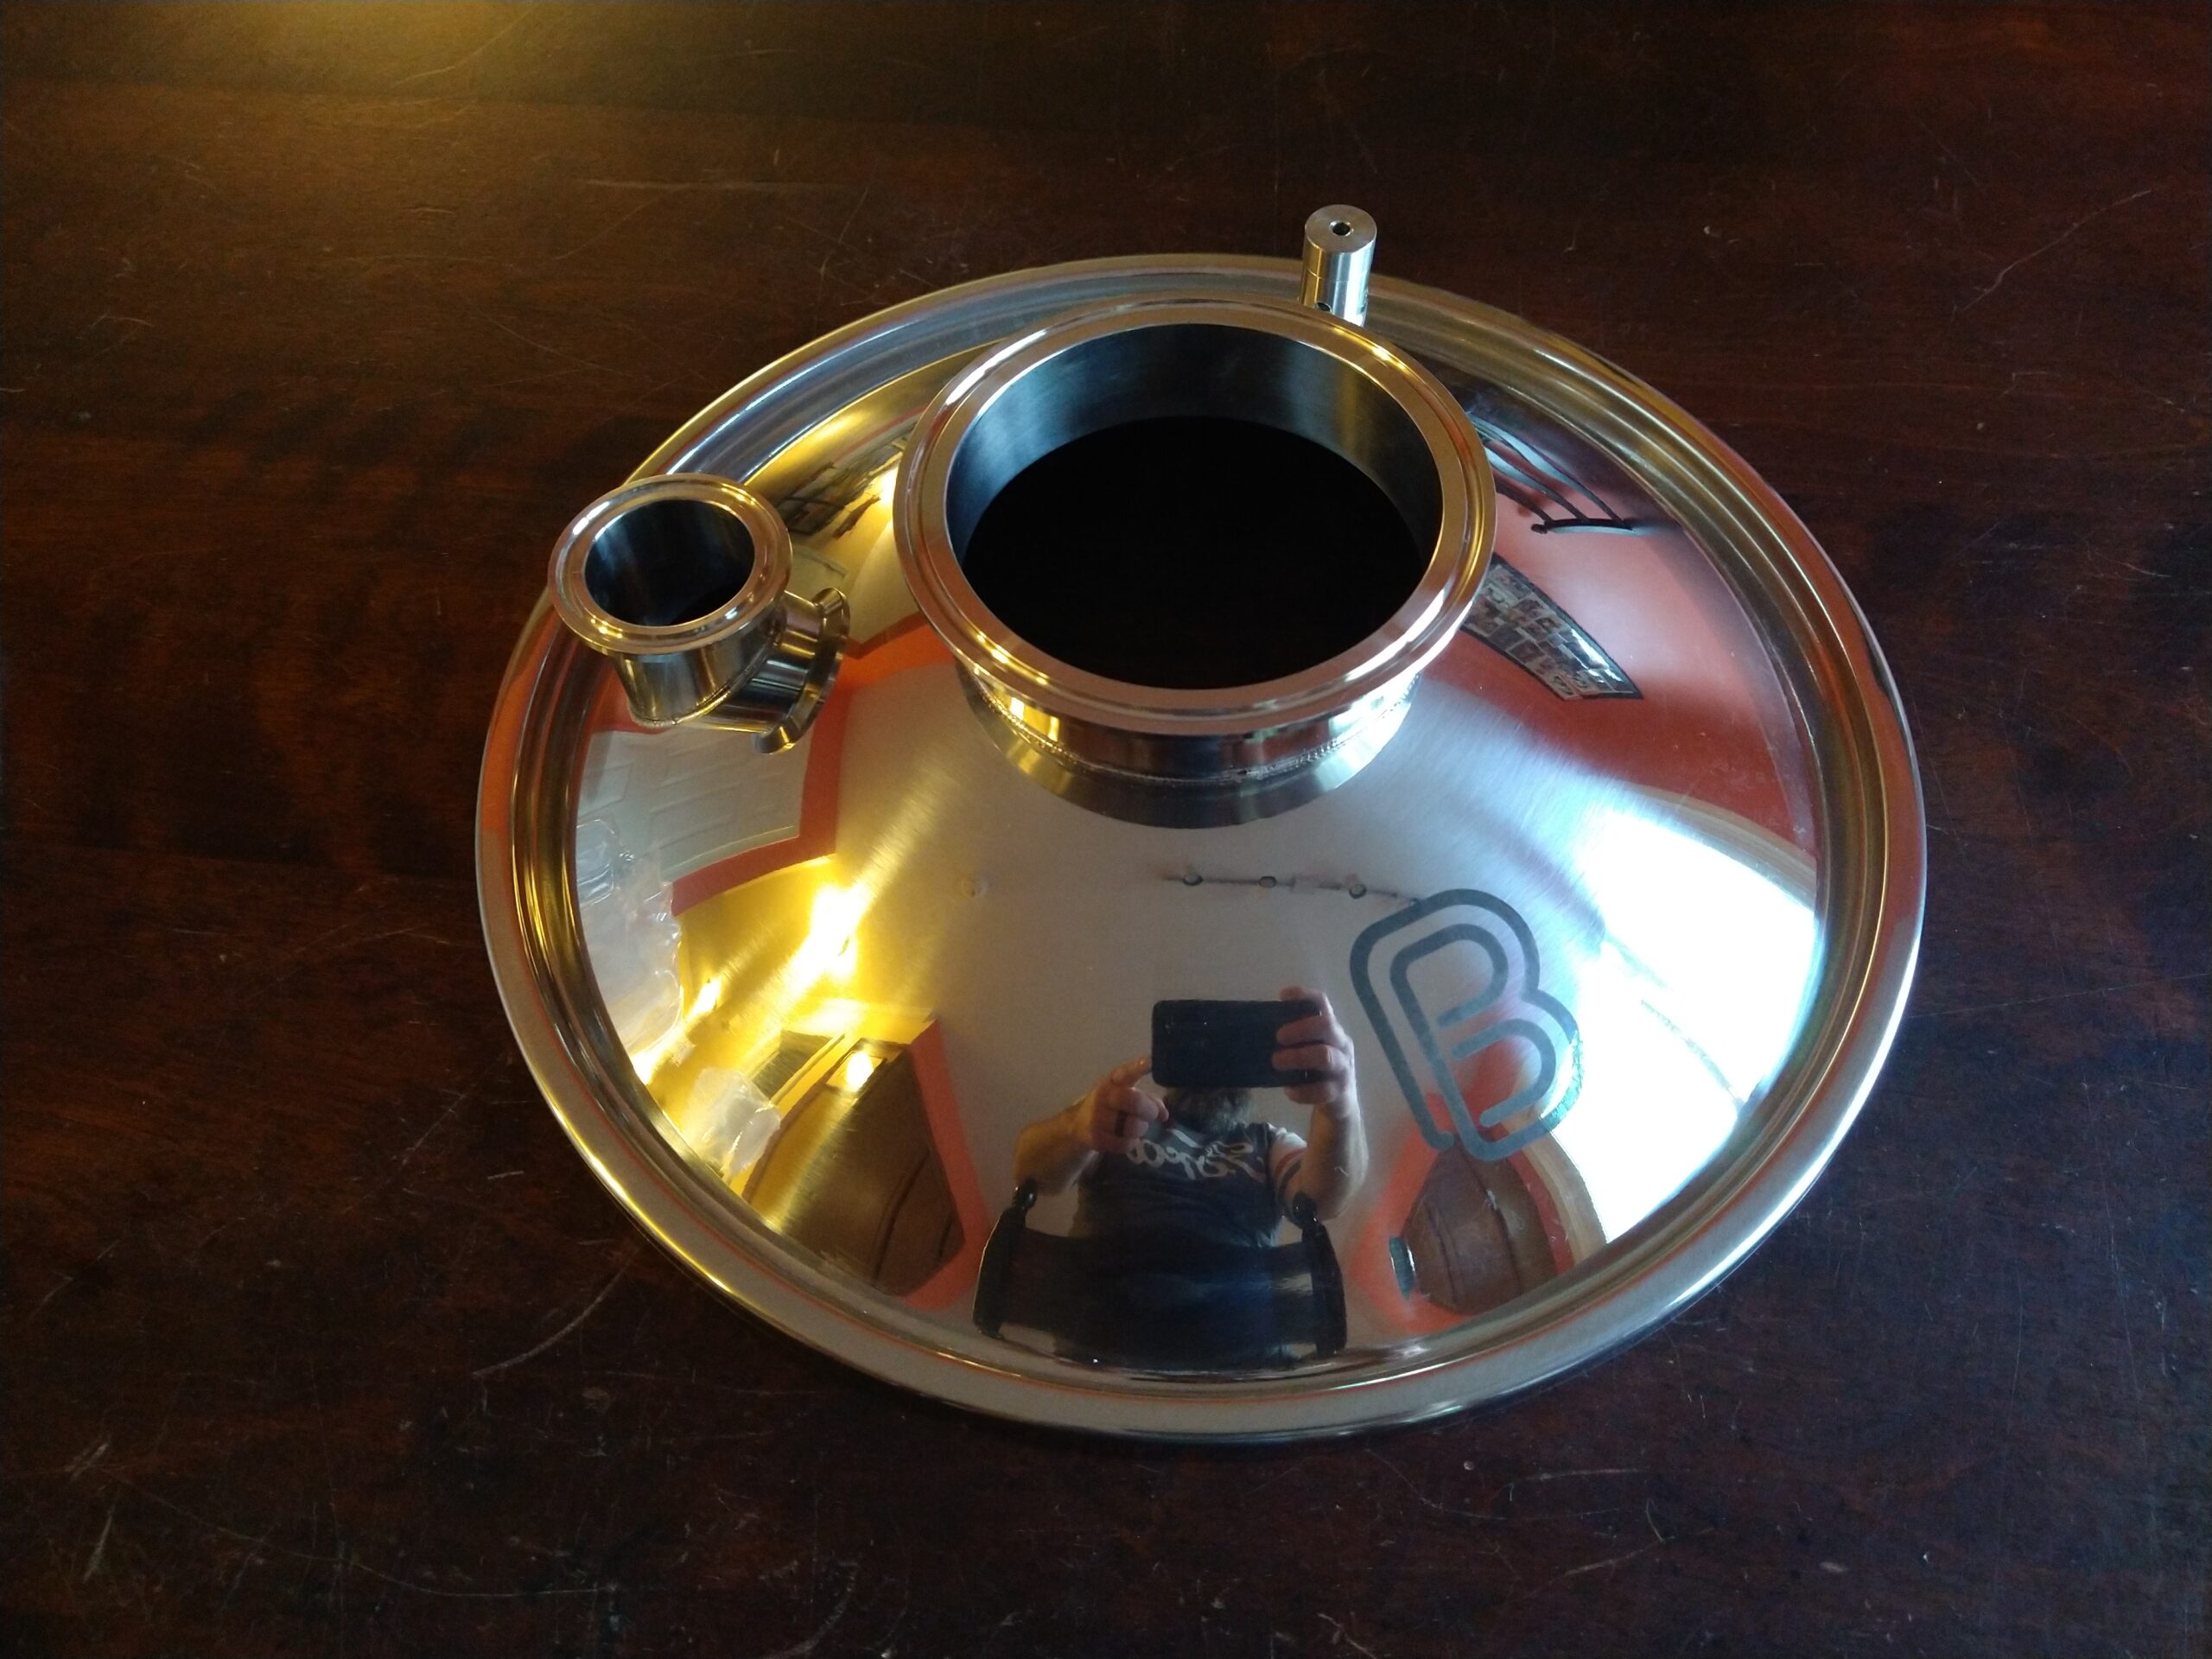 Domed Lid with TC Flanges and PRV- Mirror Finish
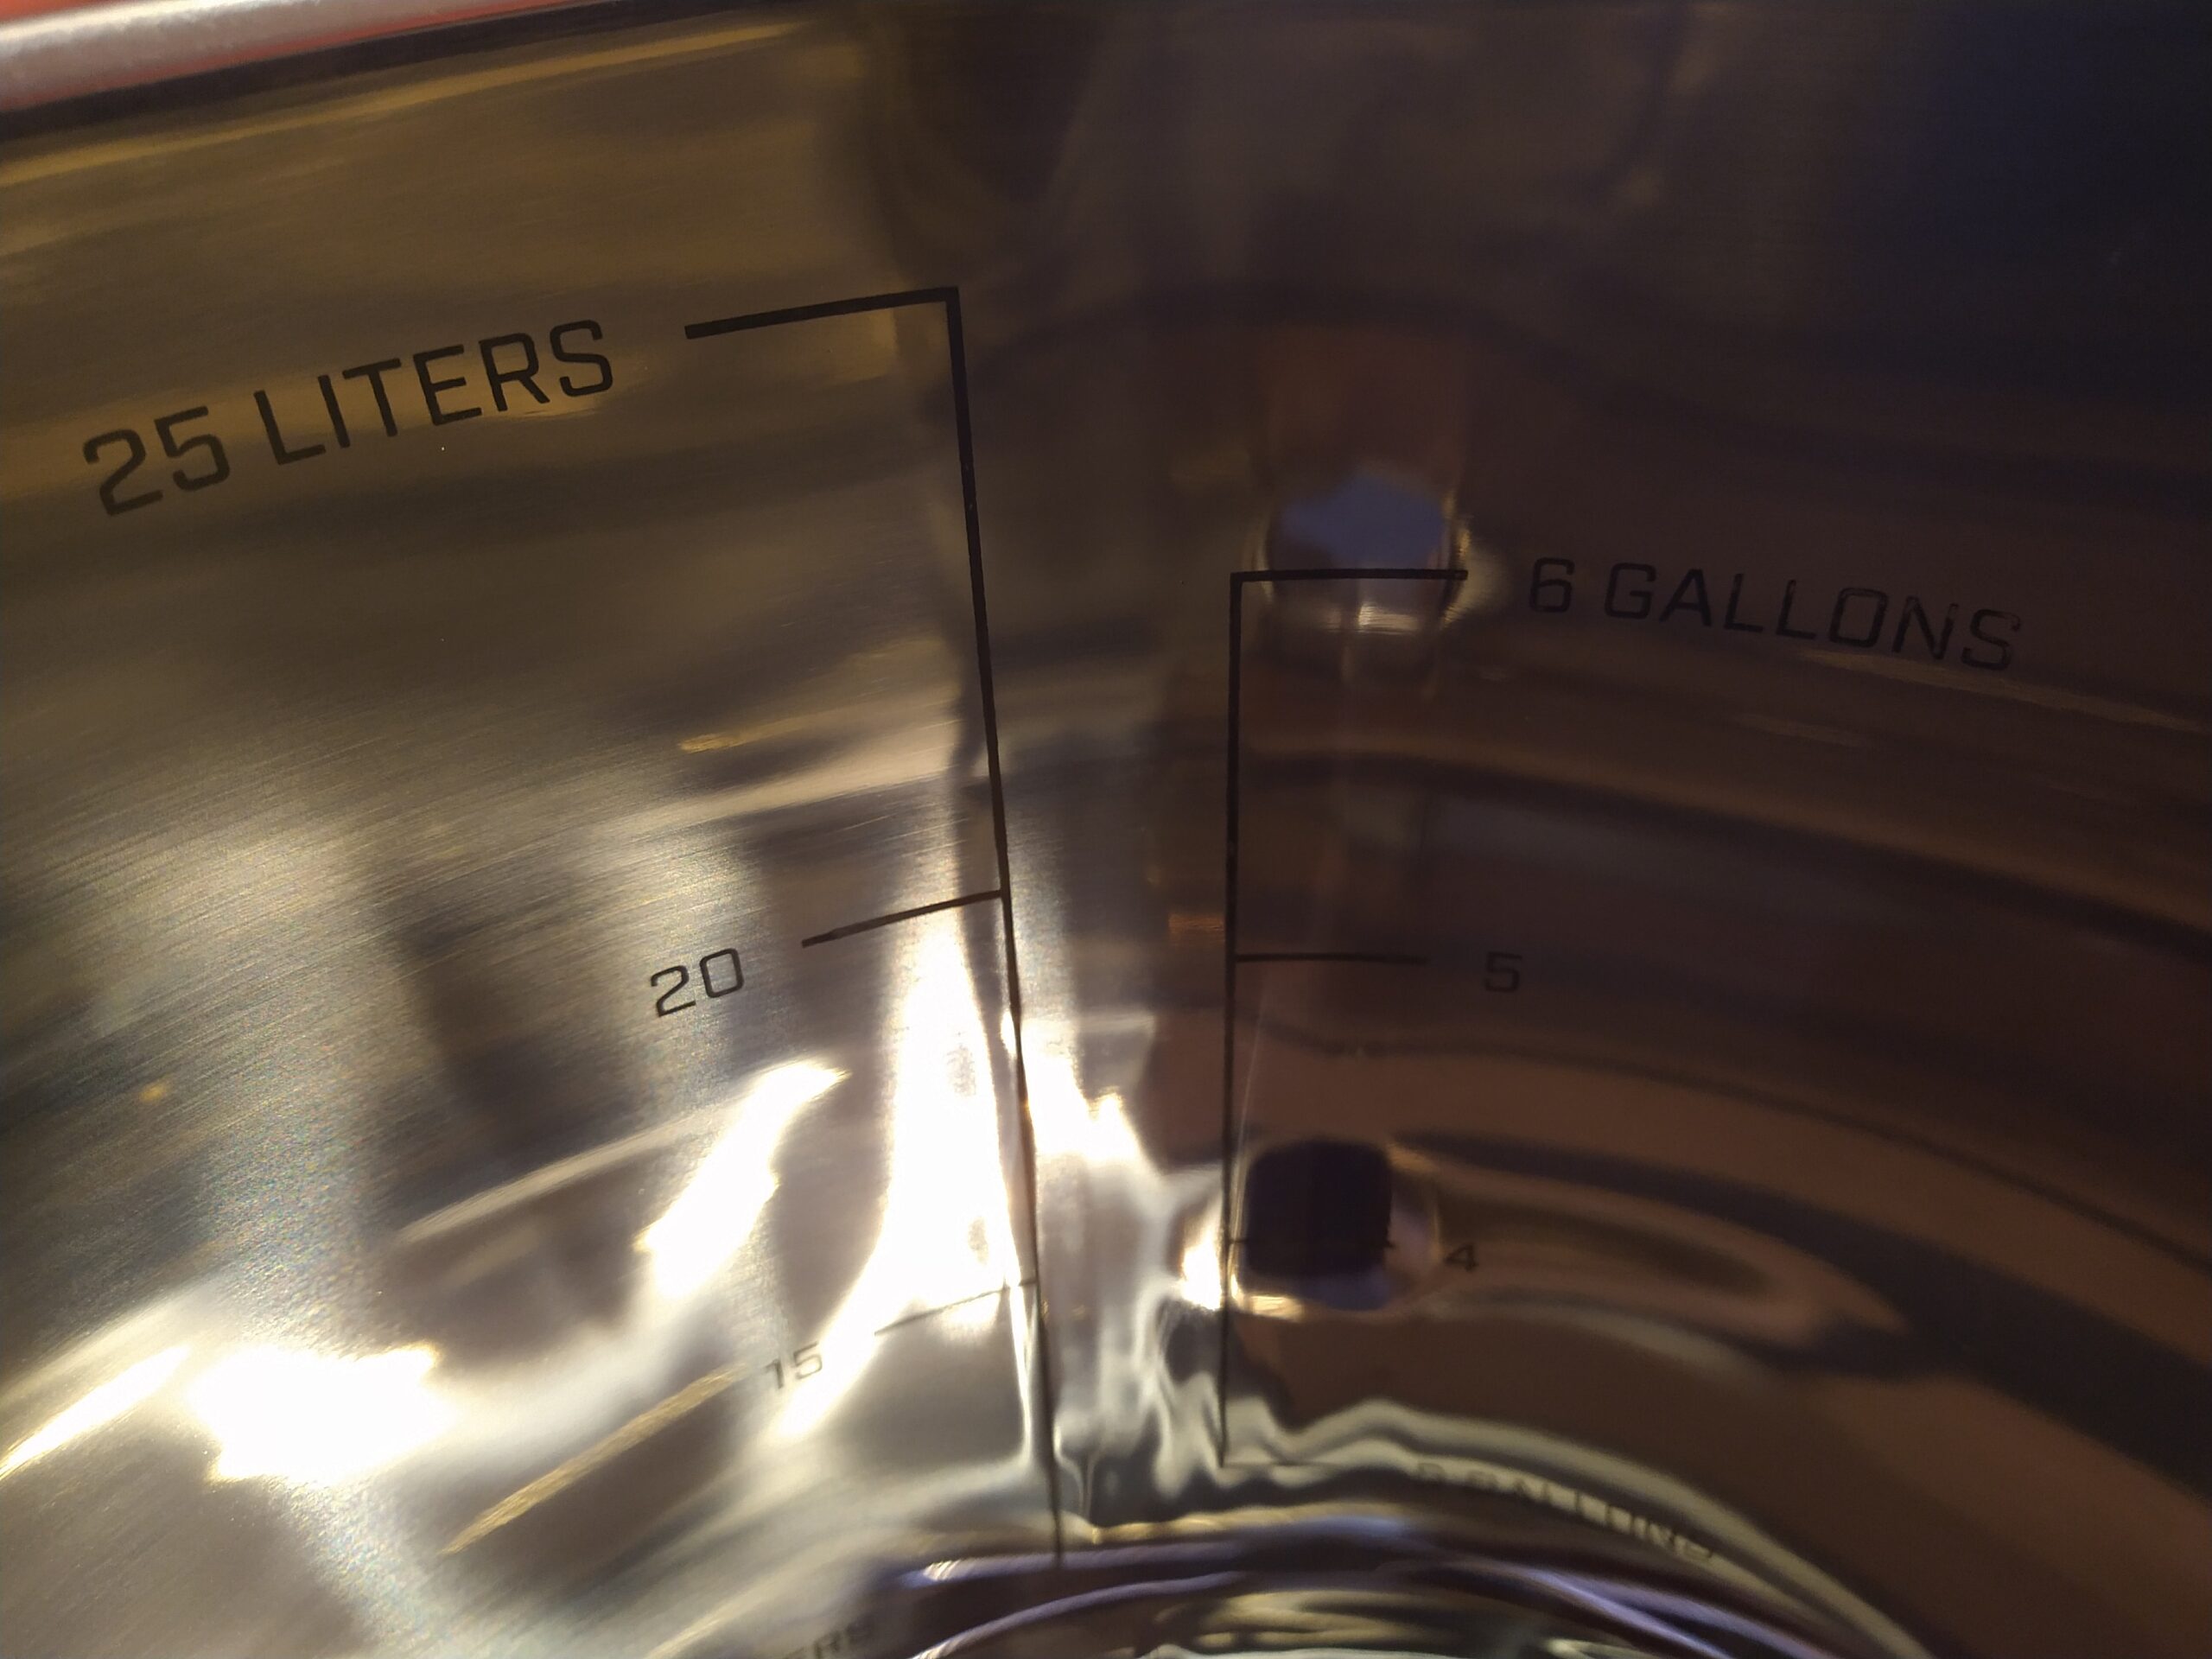 Etched Volume Markings
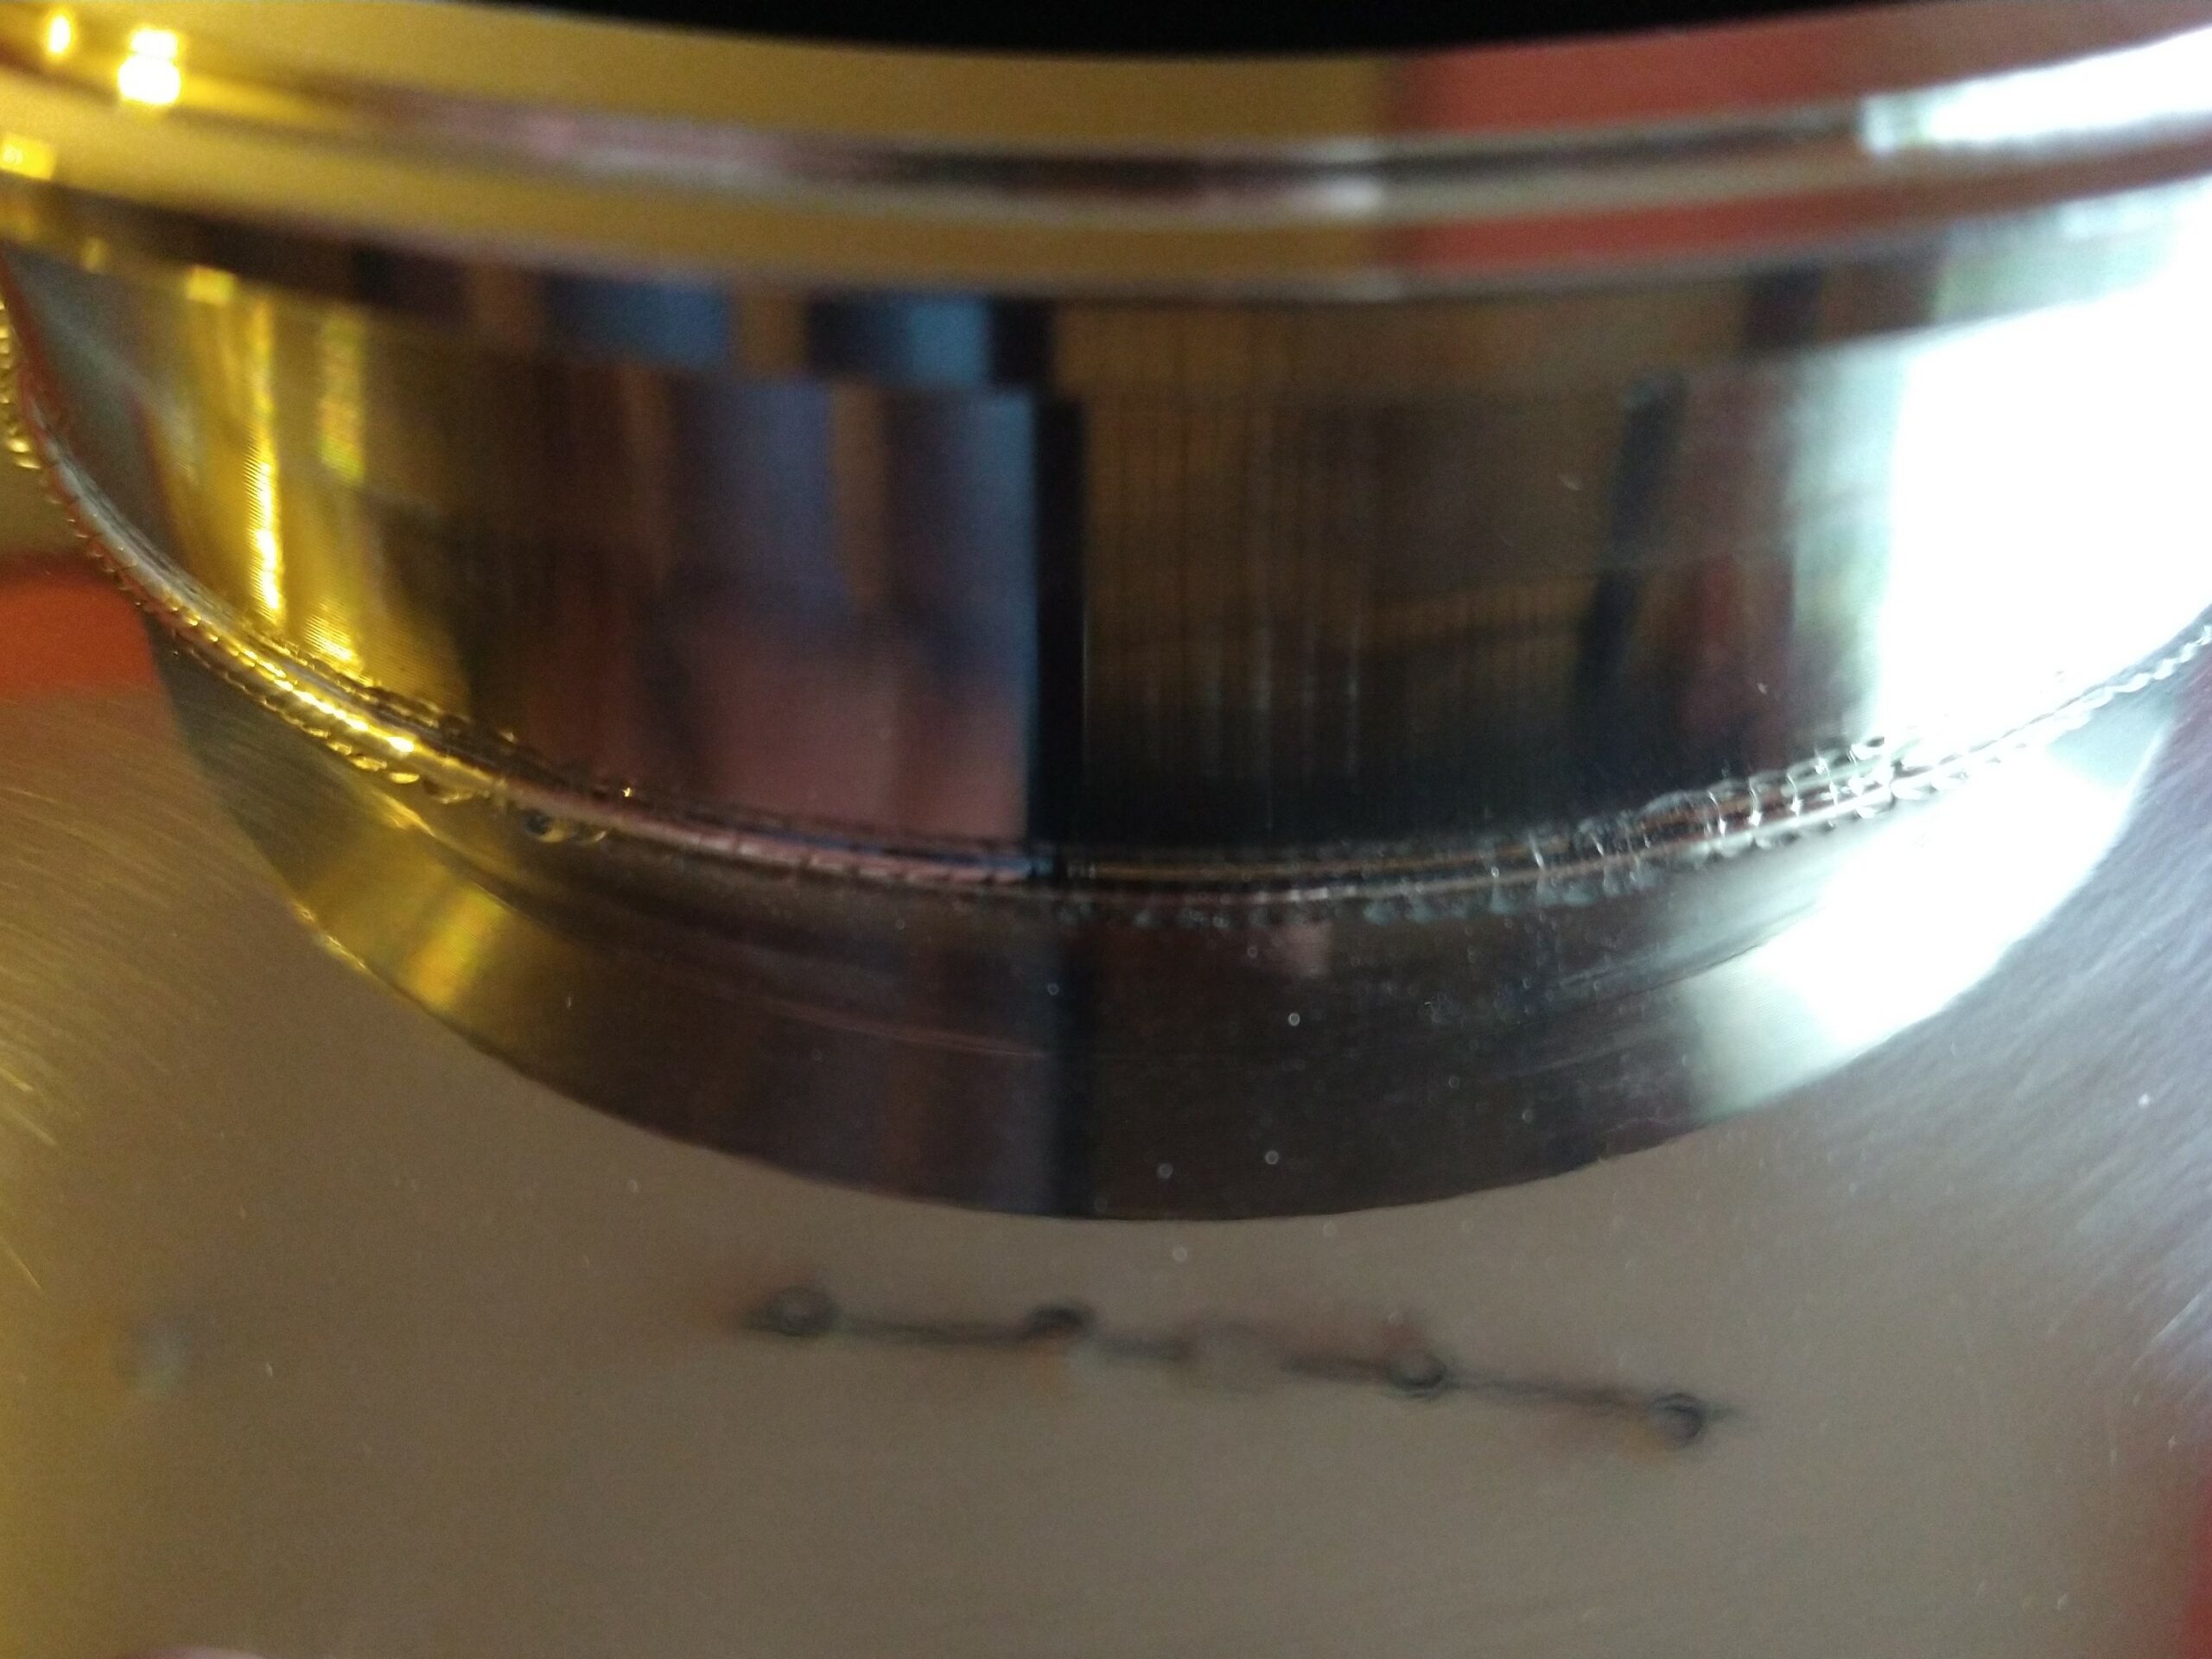 High Quality Robotic Welds on Outside
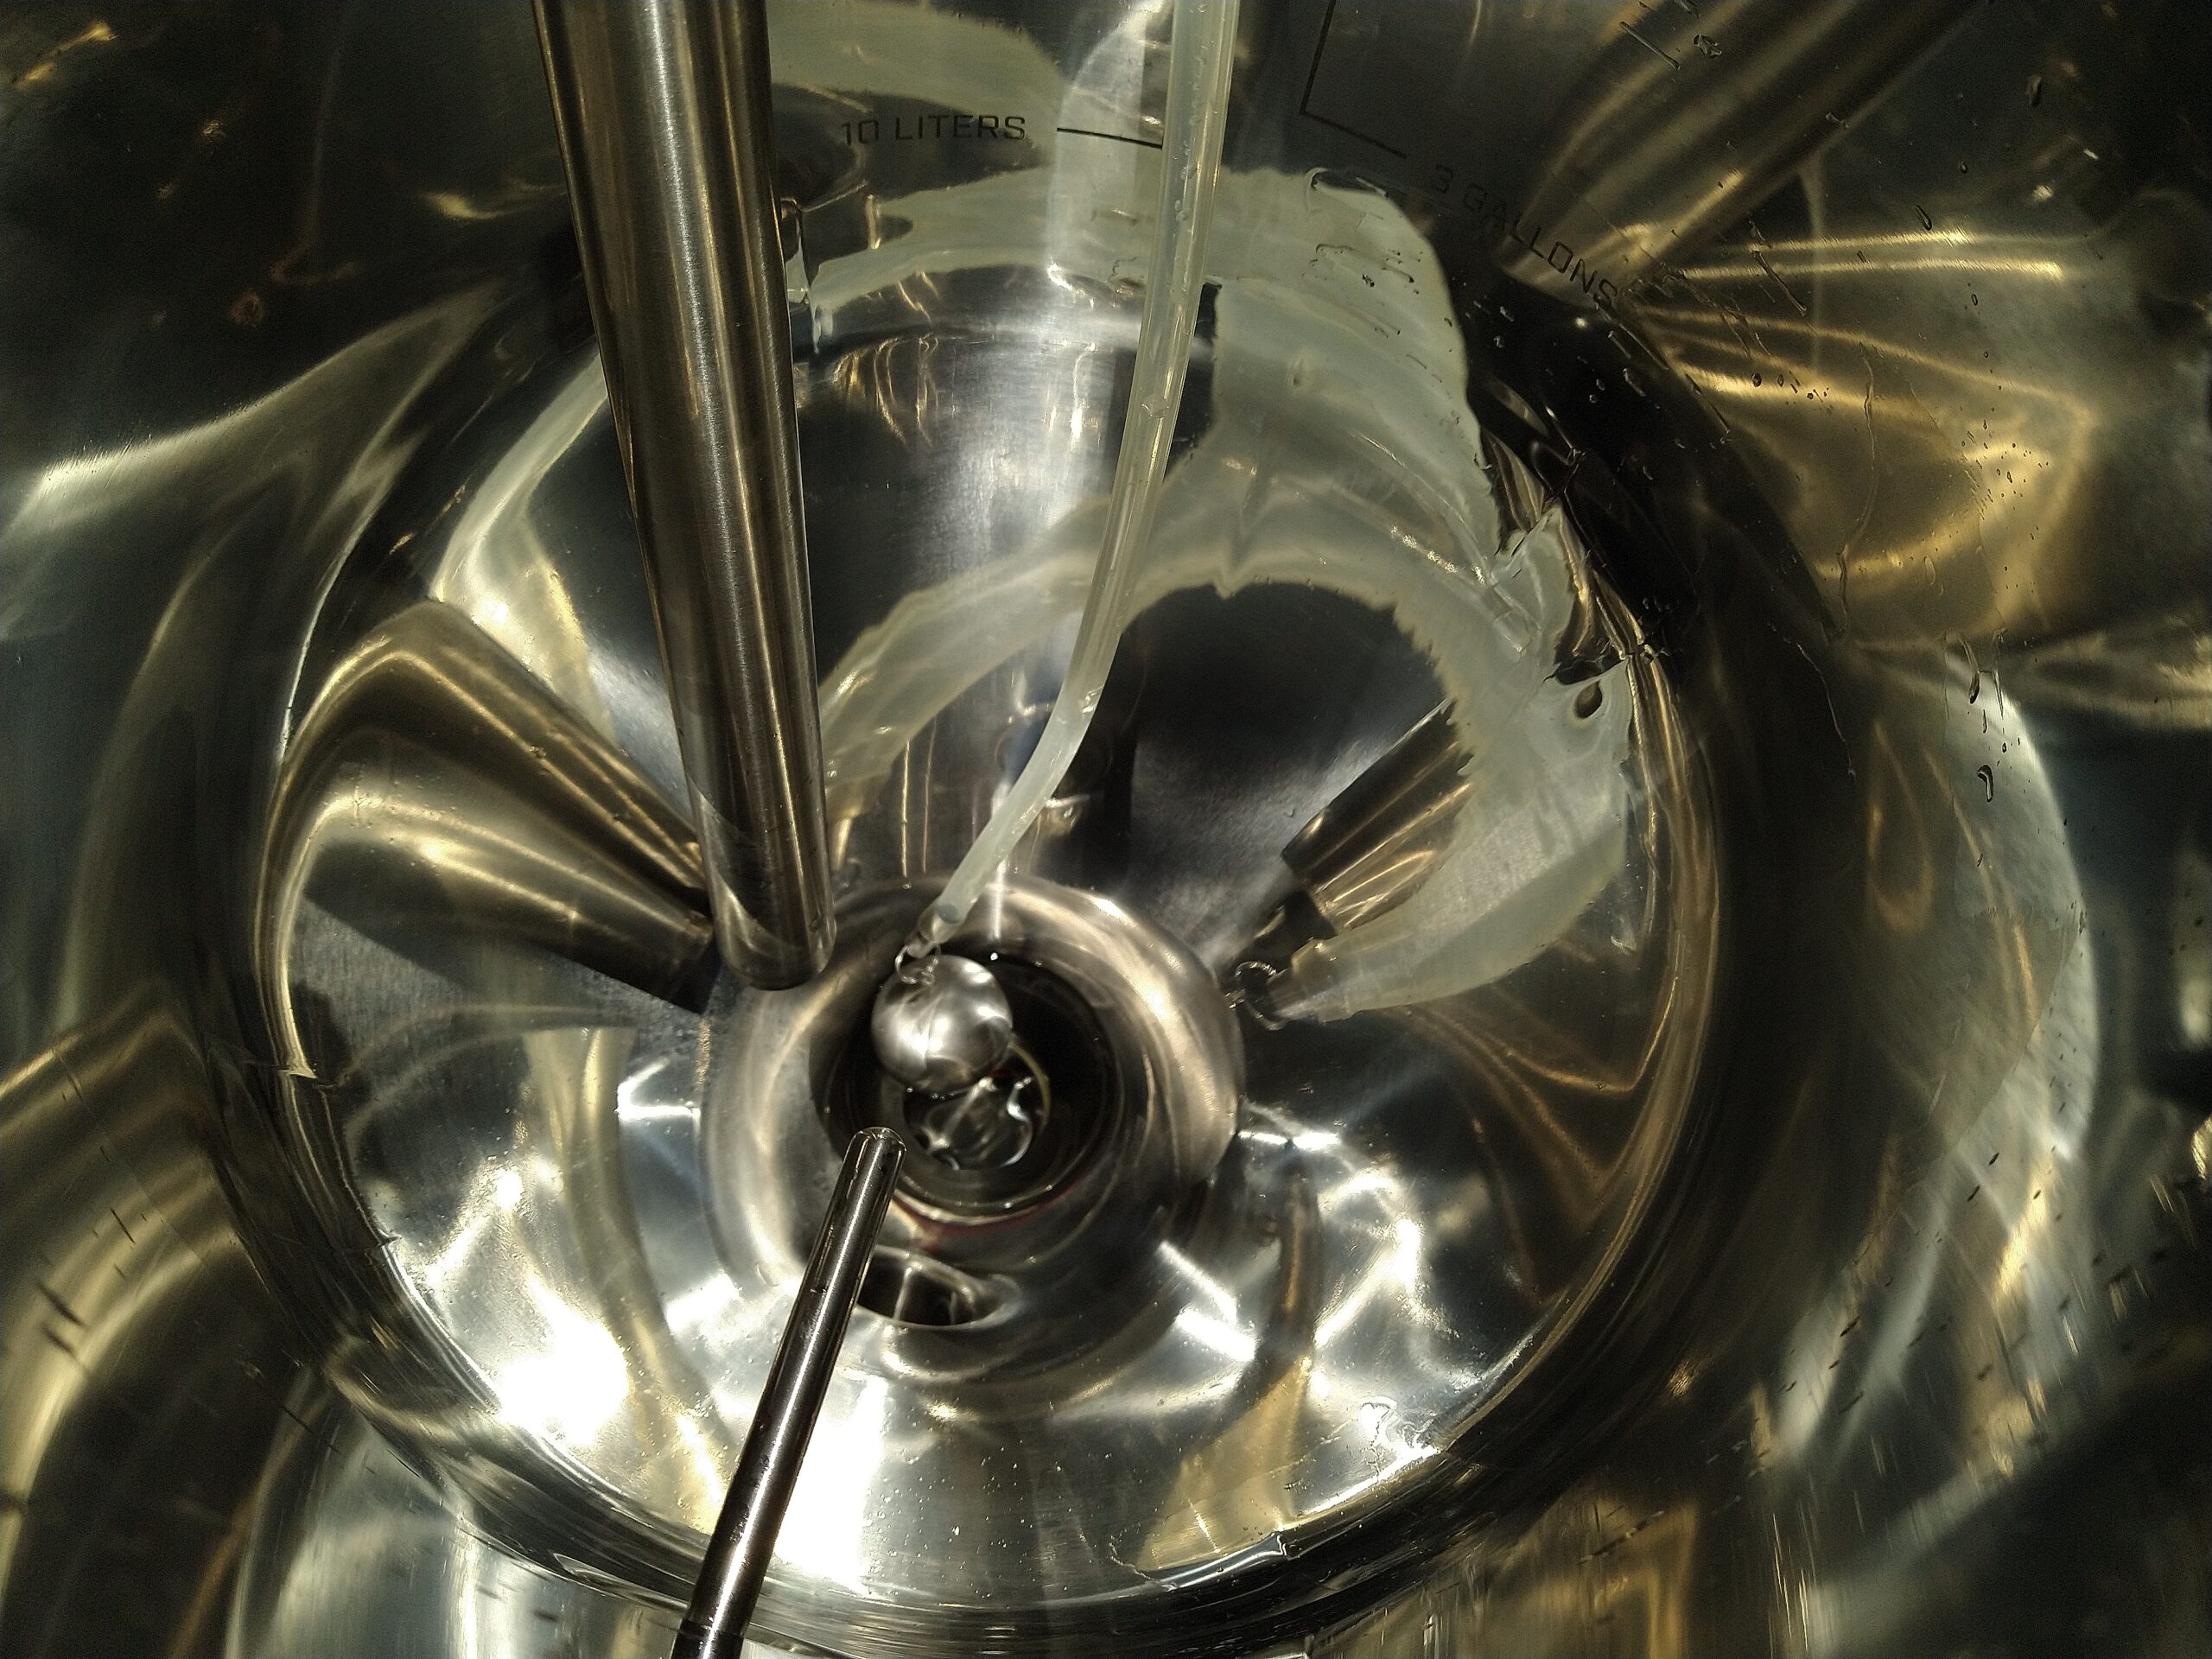
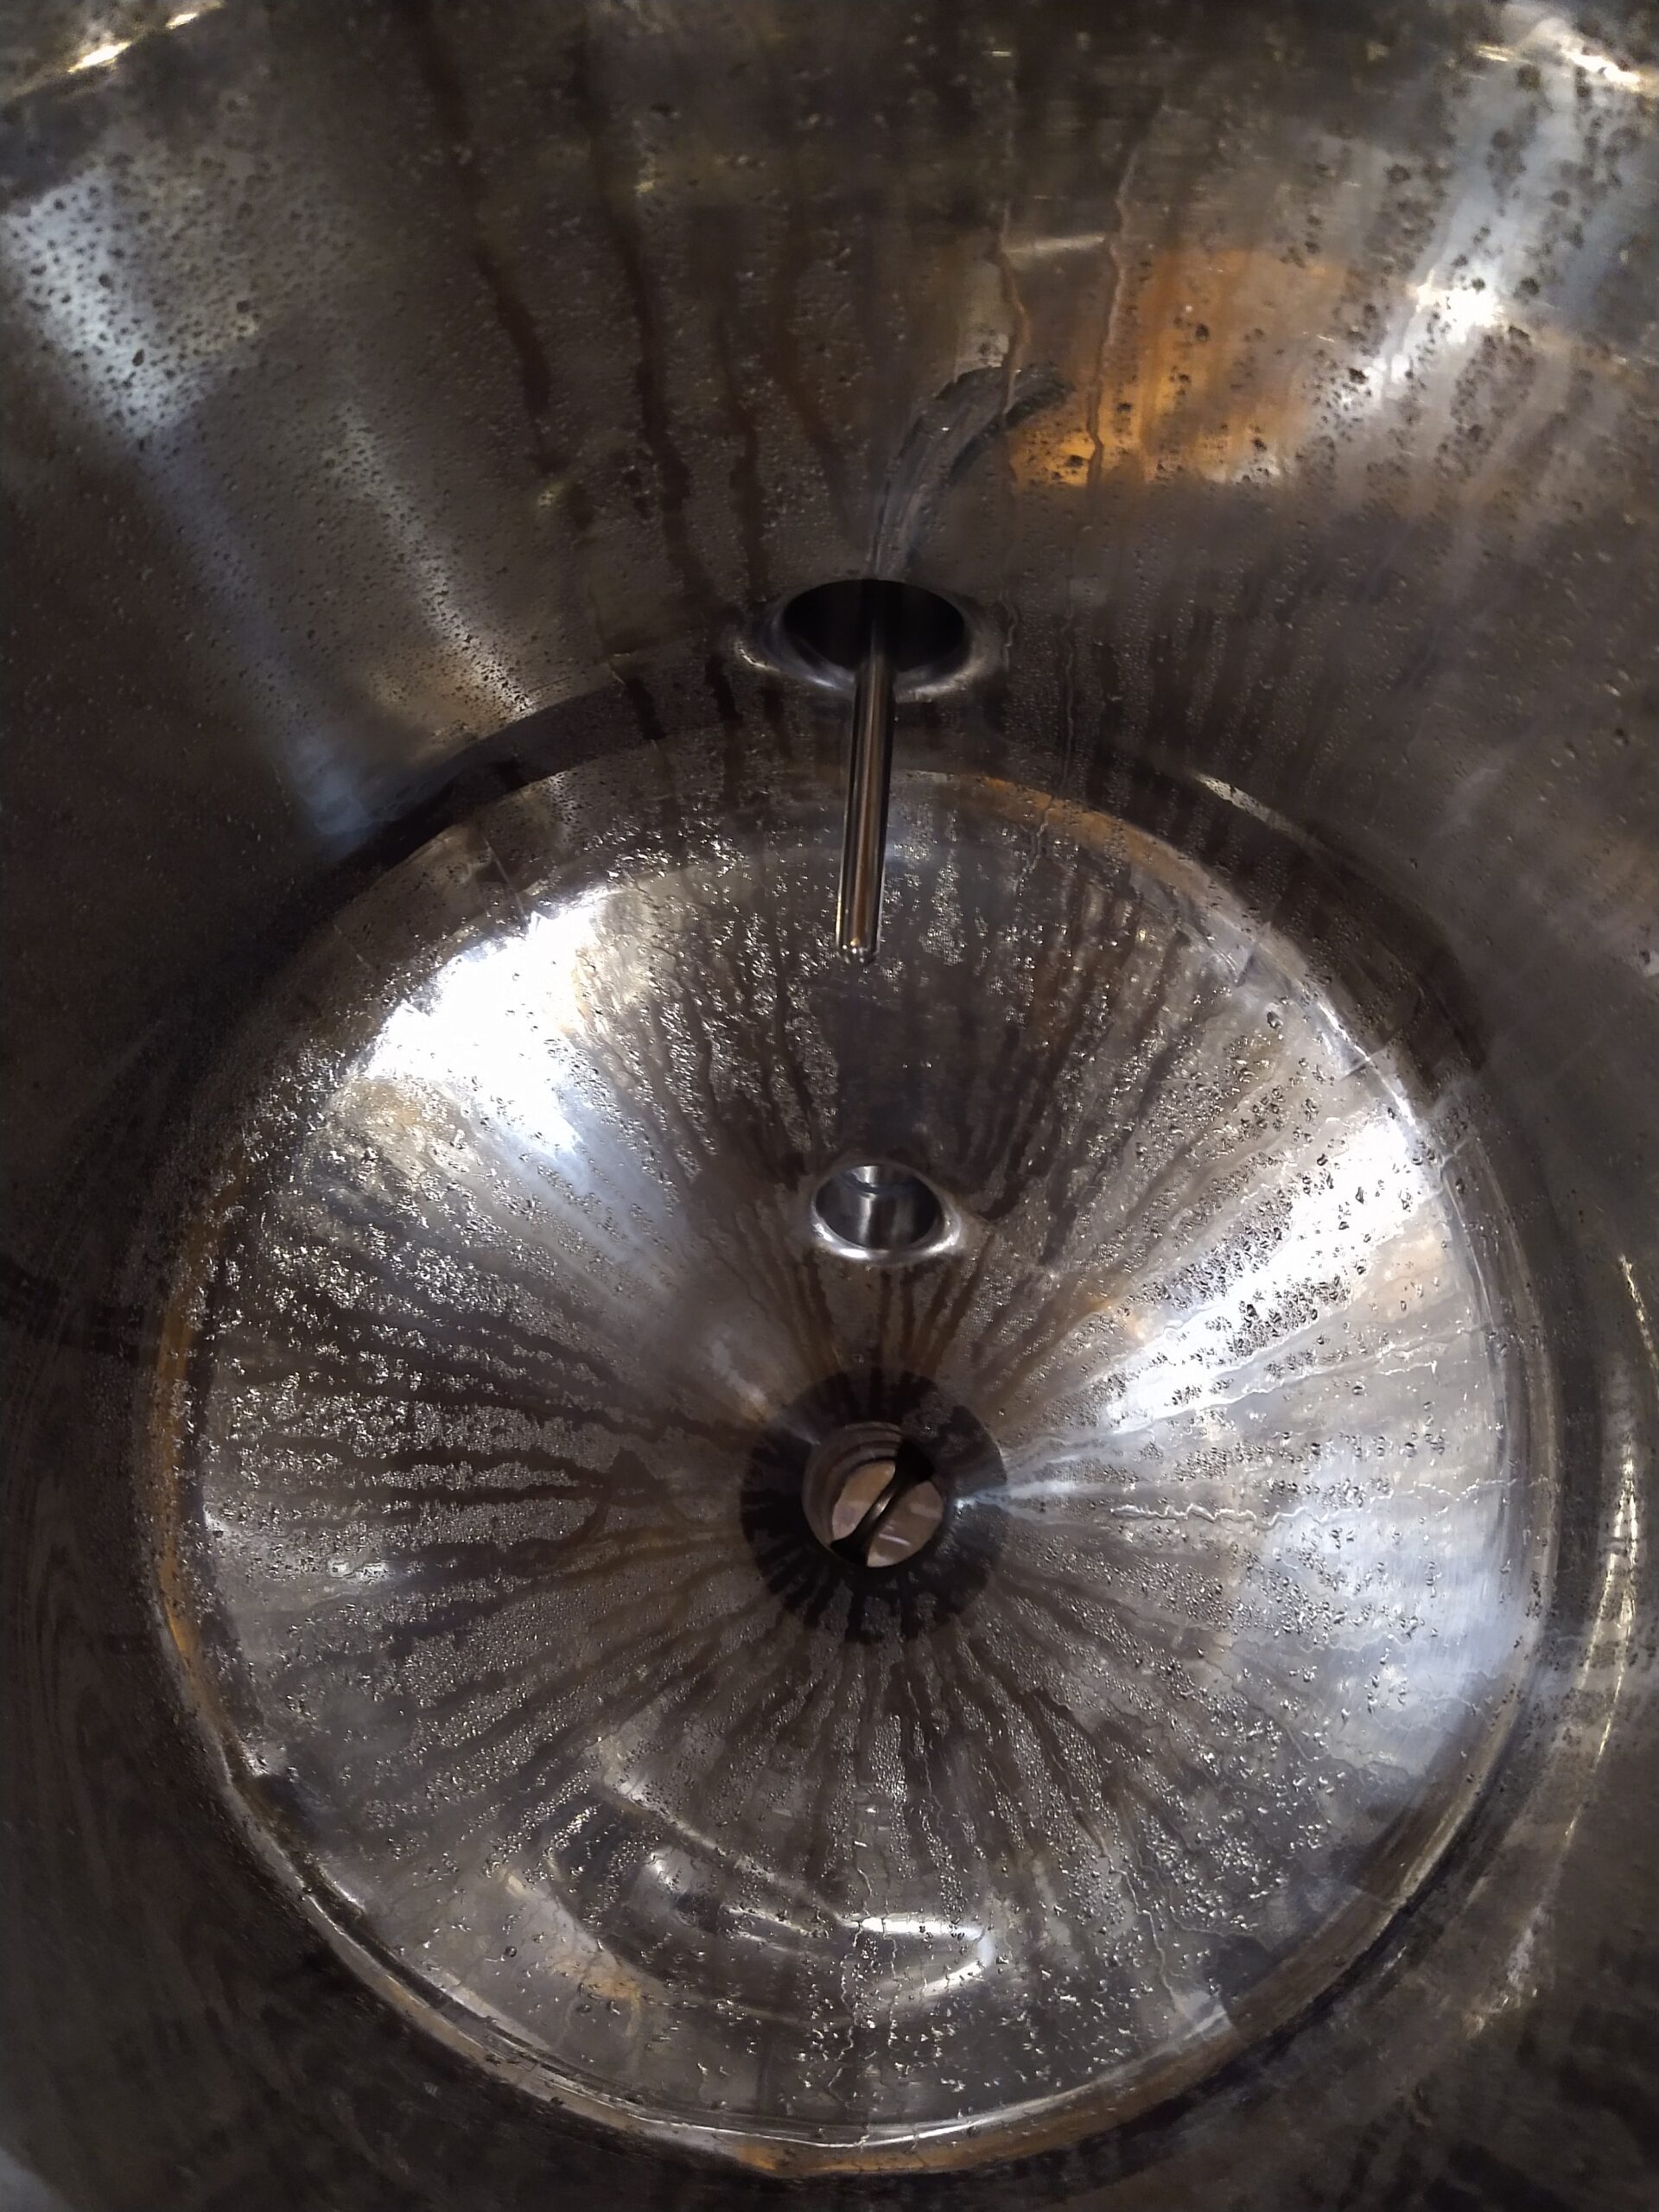 Inside of Sanitized Fermentor with Thermowell Installed
 Seal in Lid
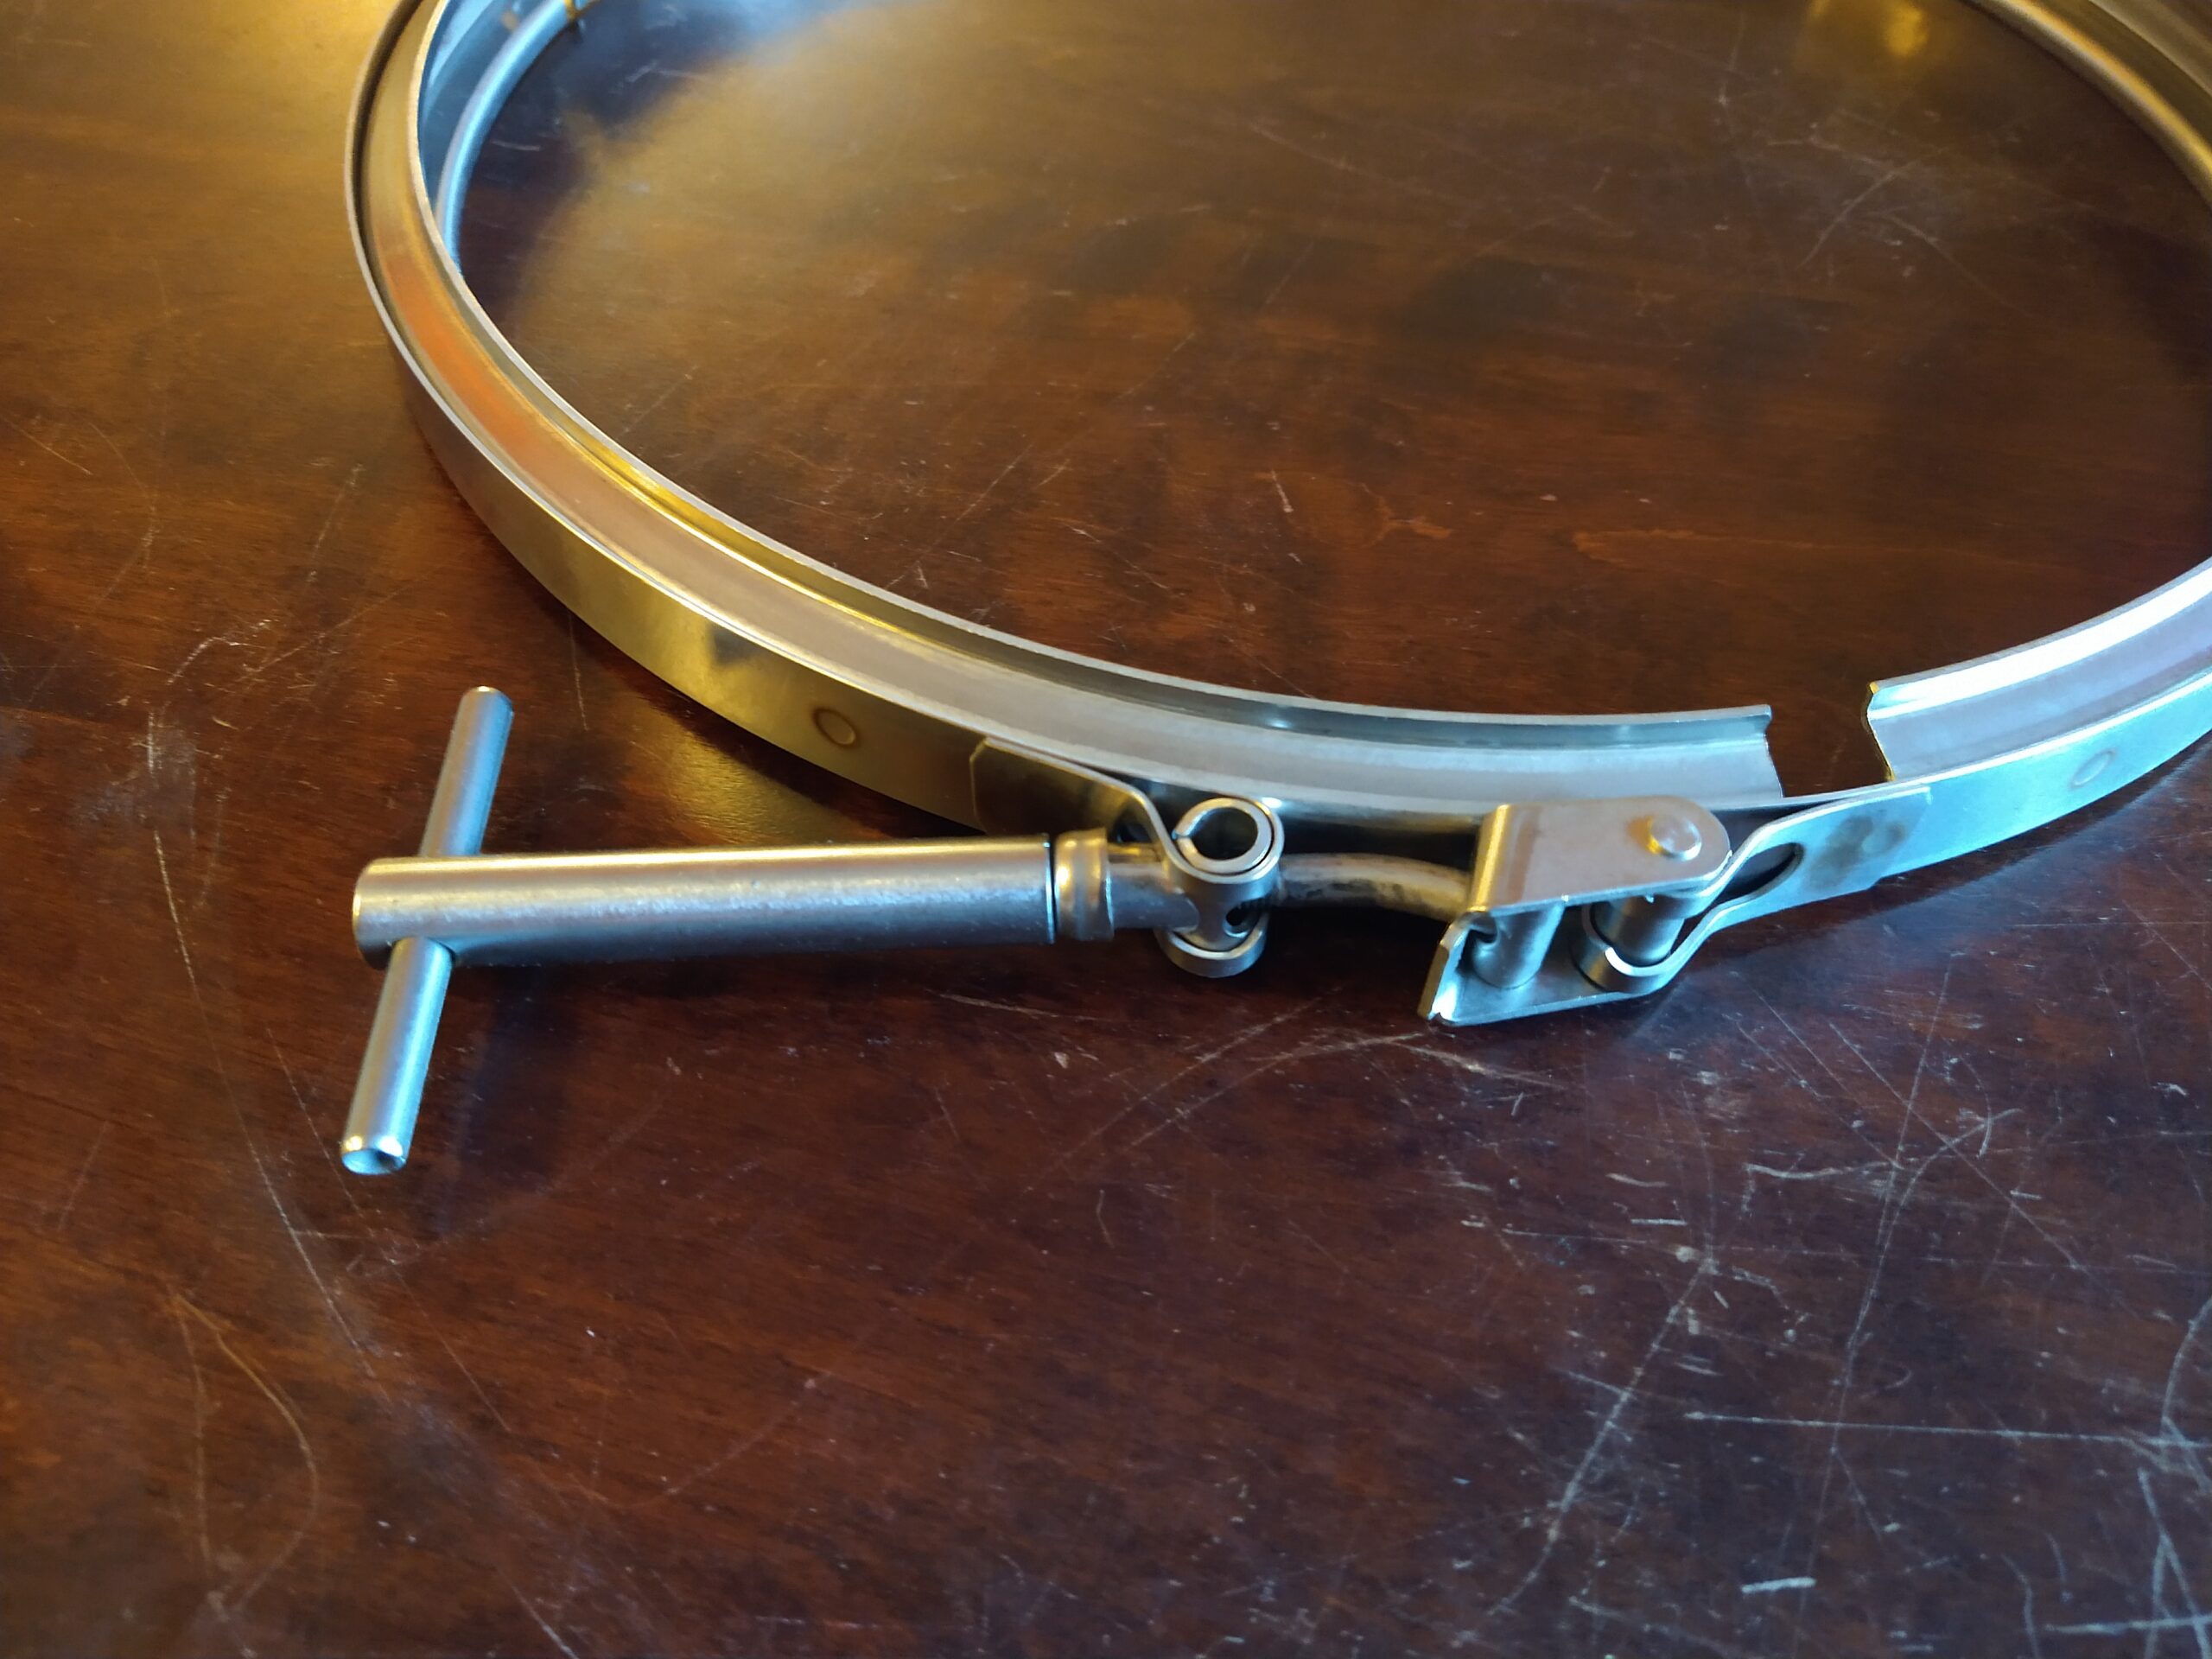 Lid Band Clamp
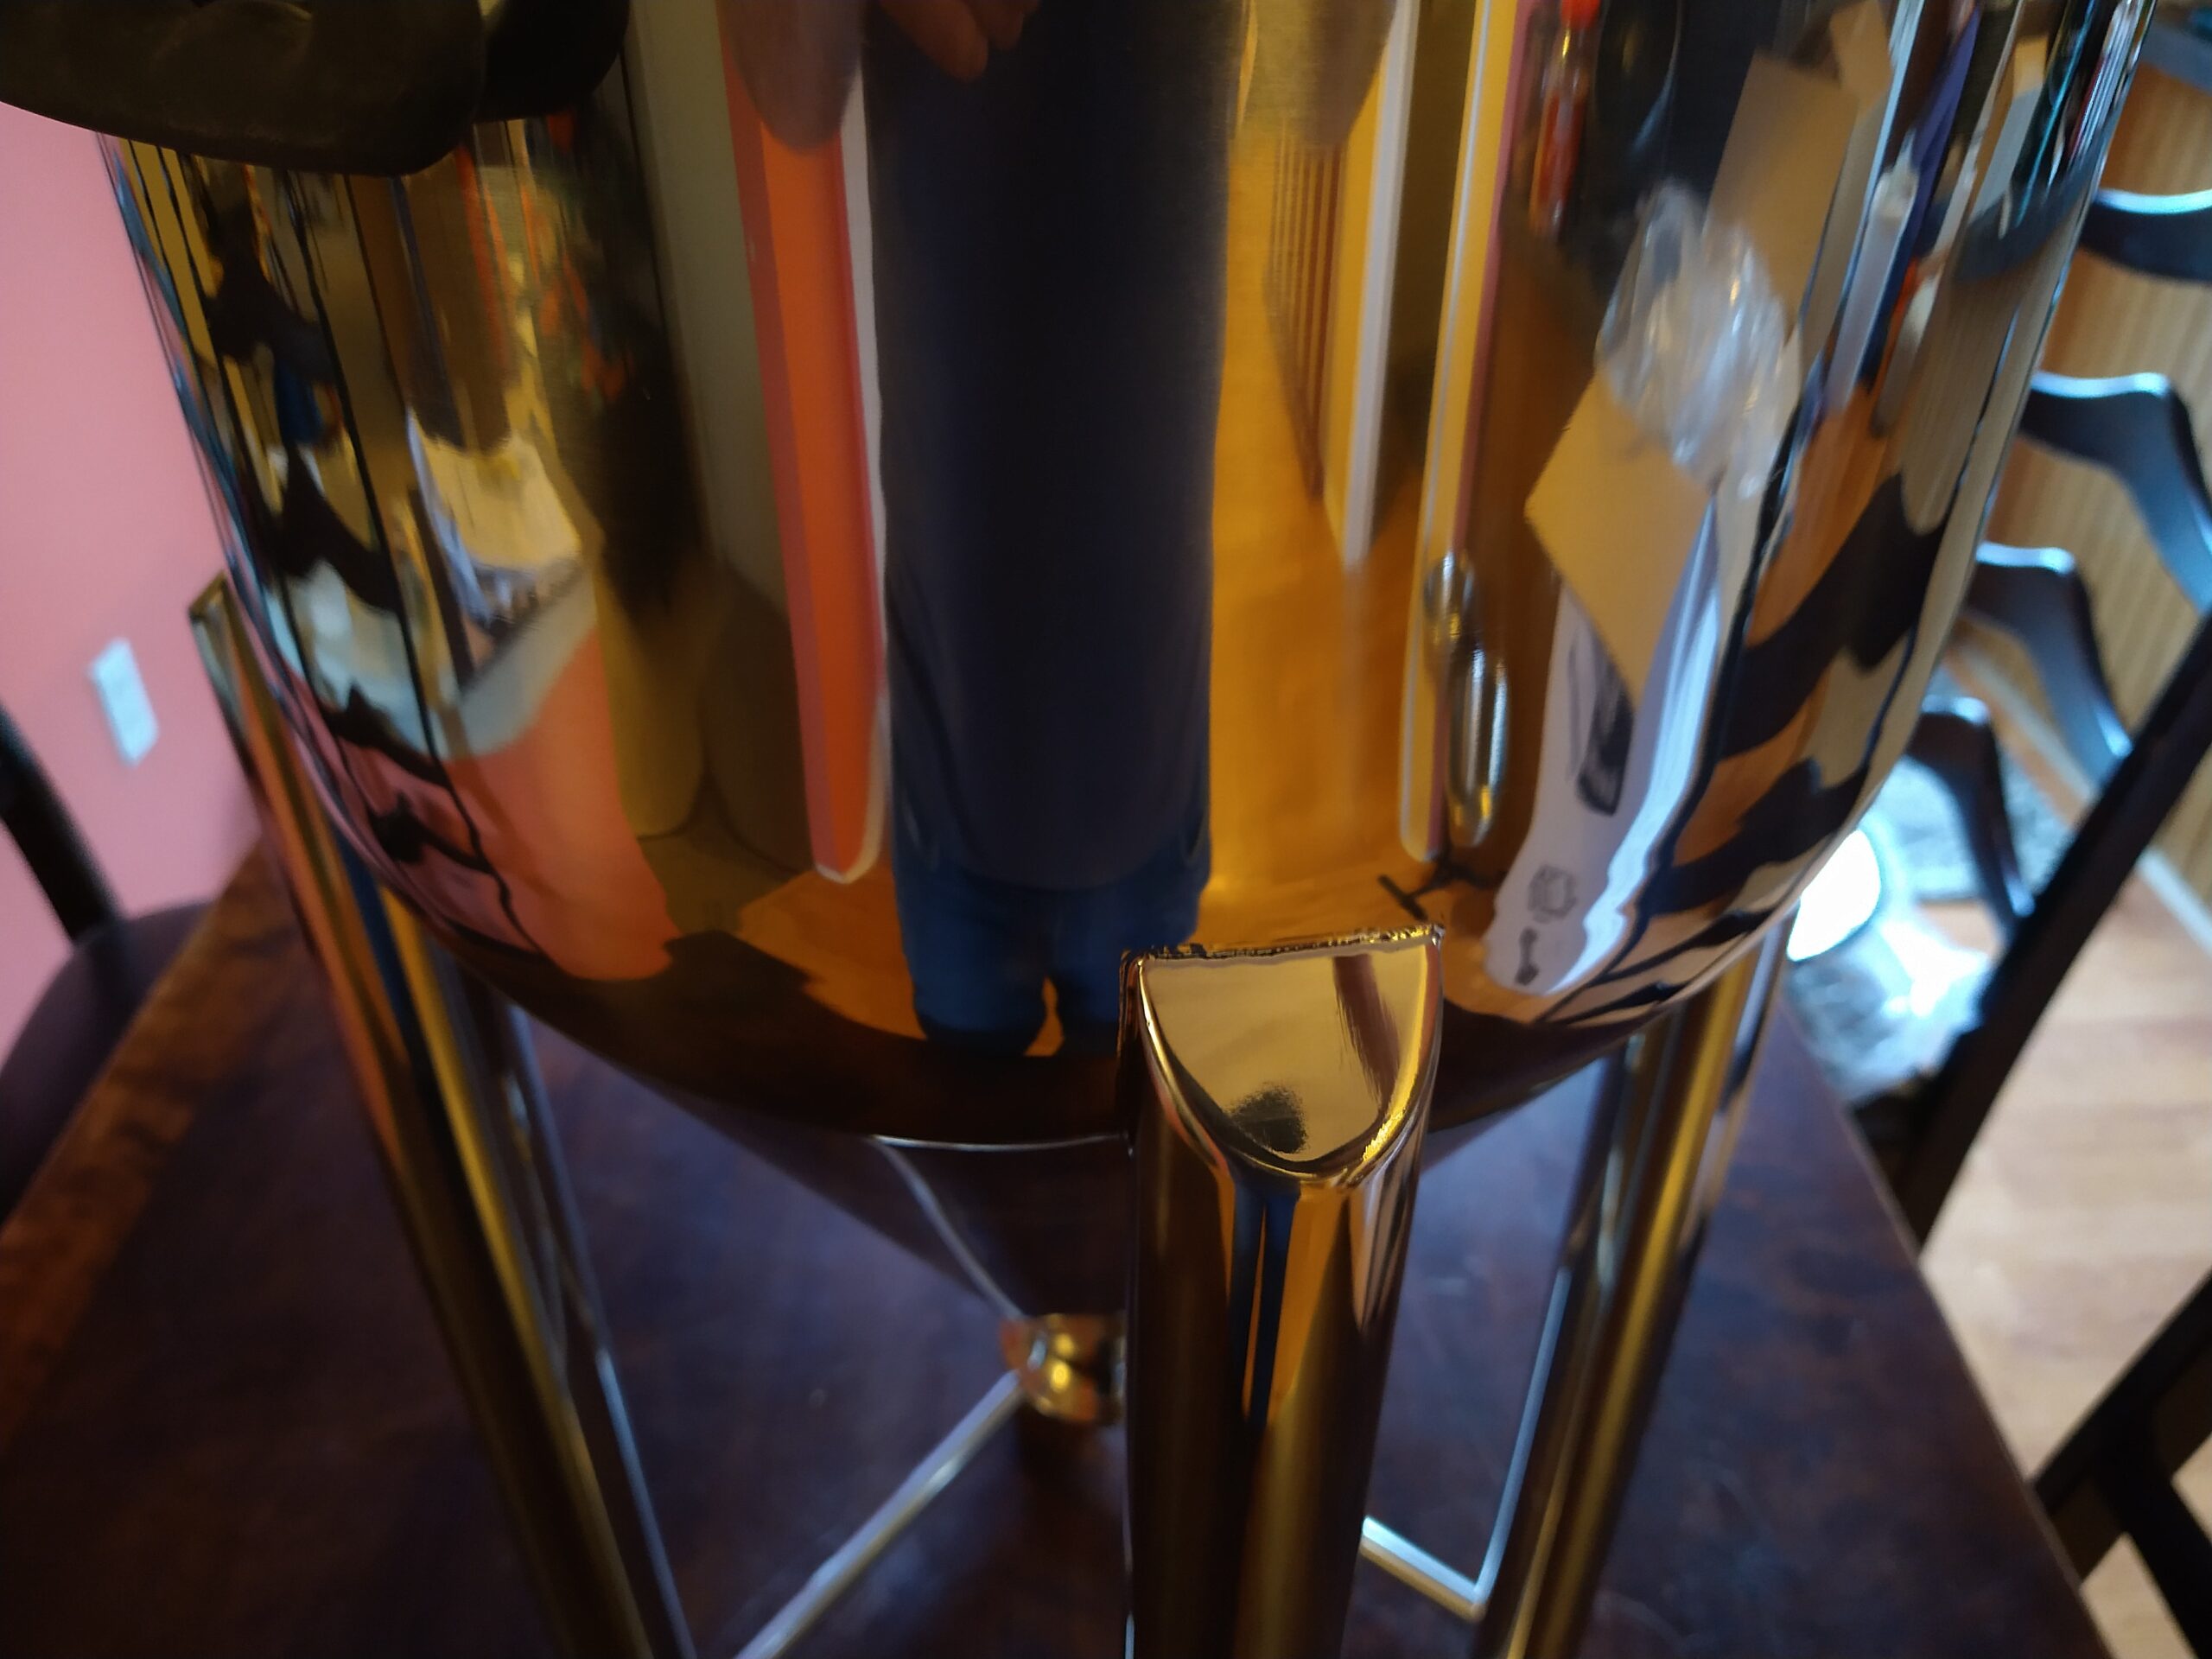 Robotically Welded Support Legs
 Sample Valve
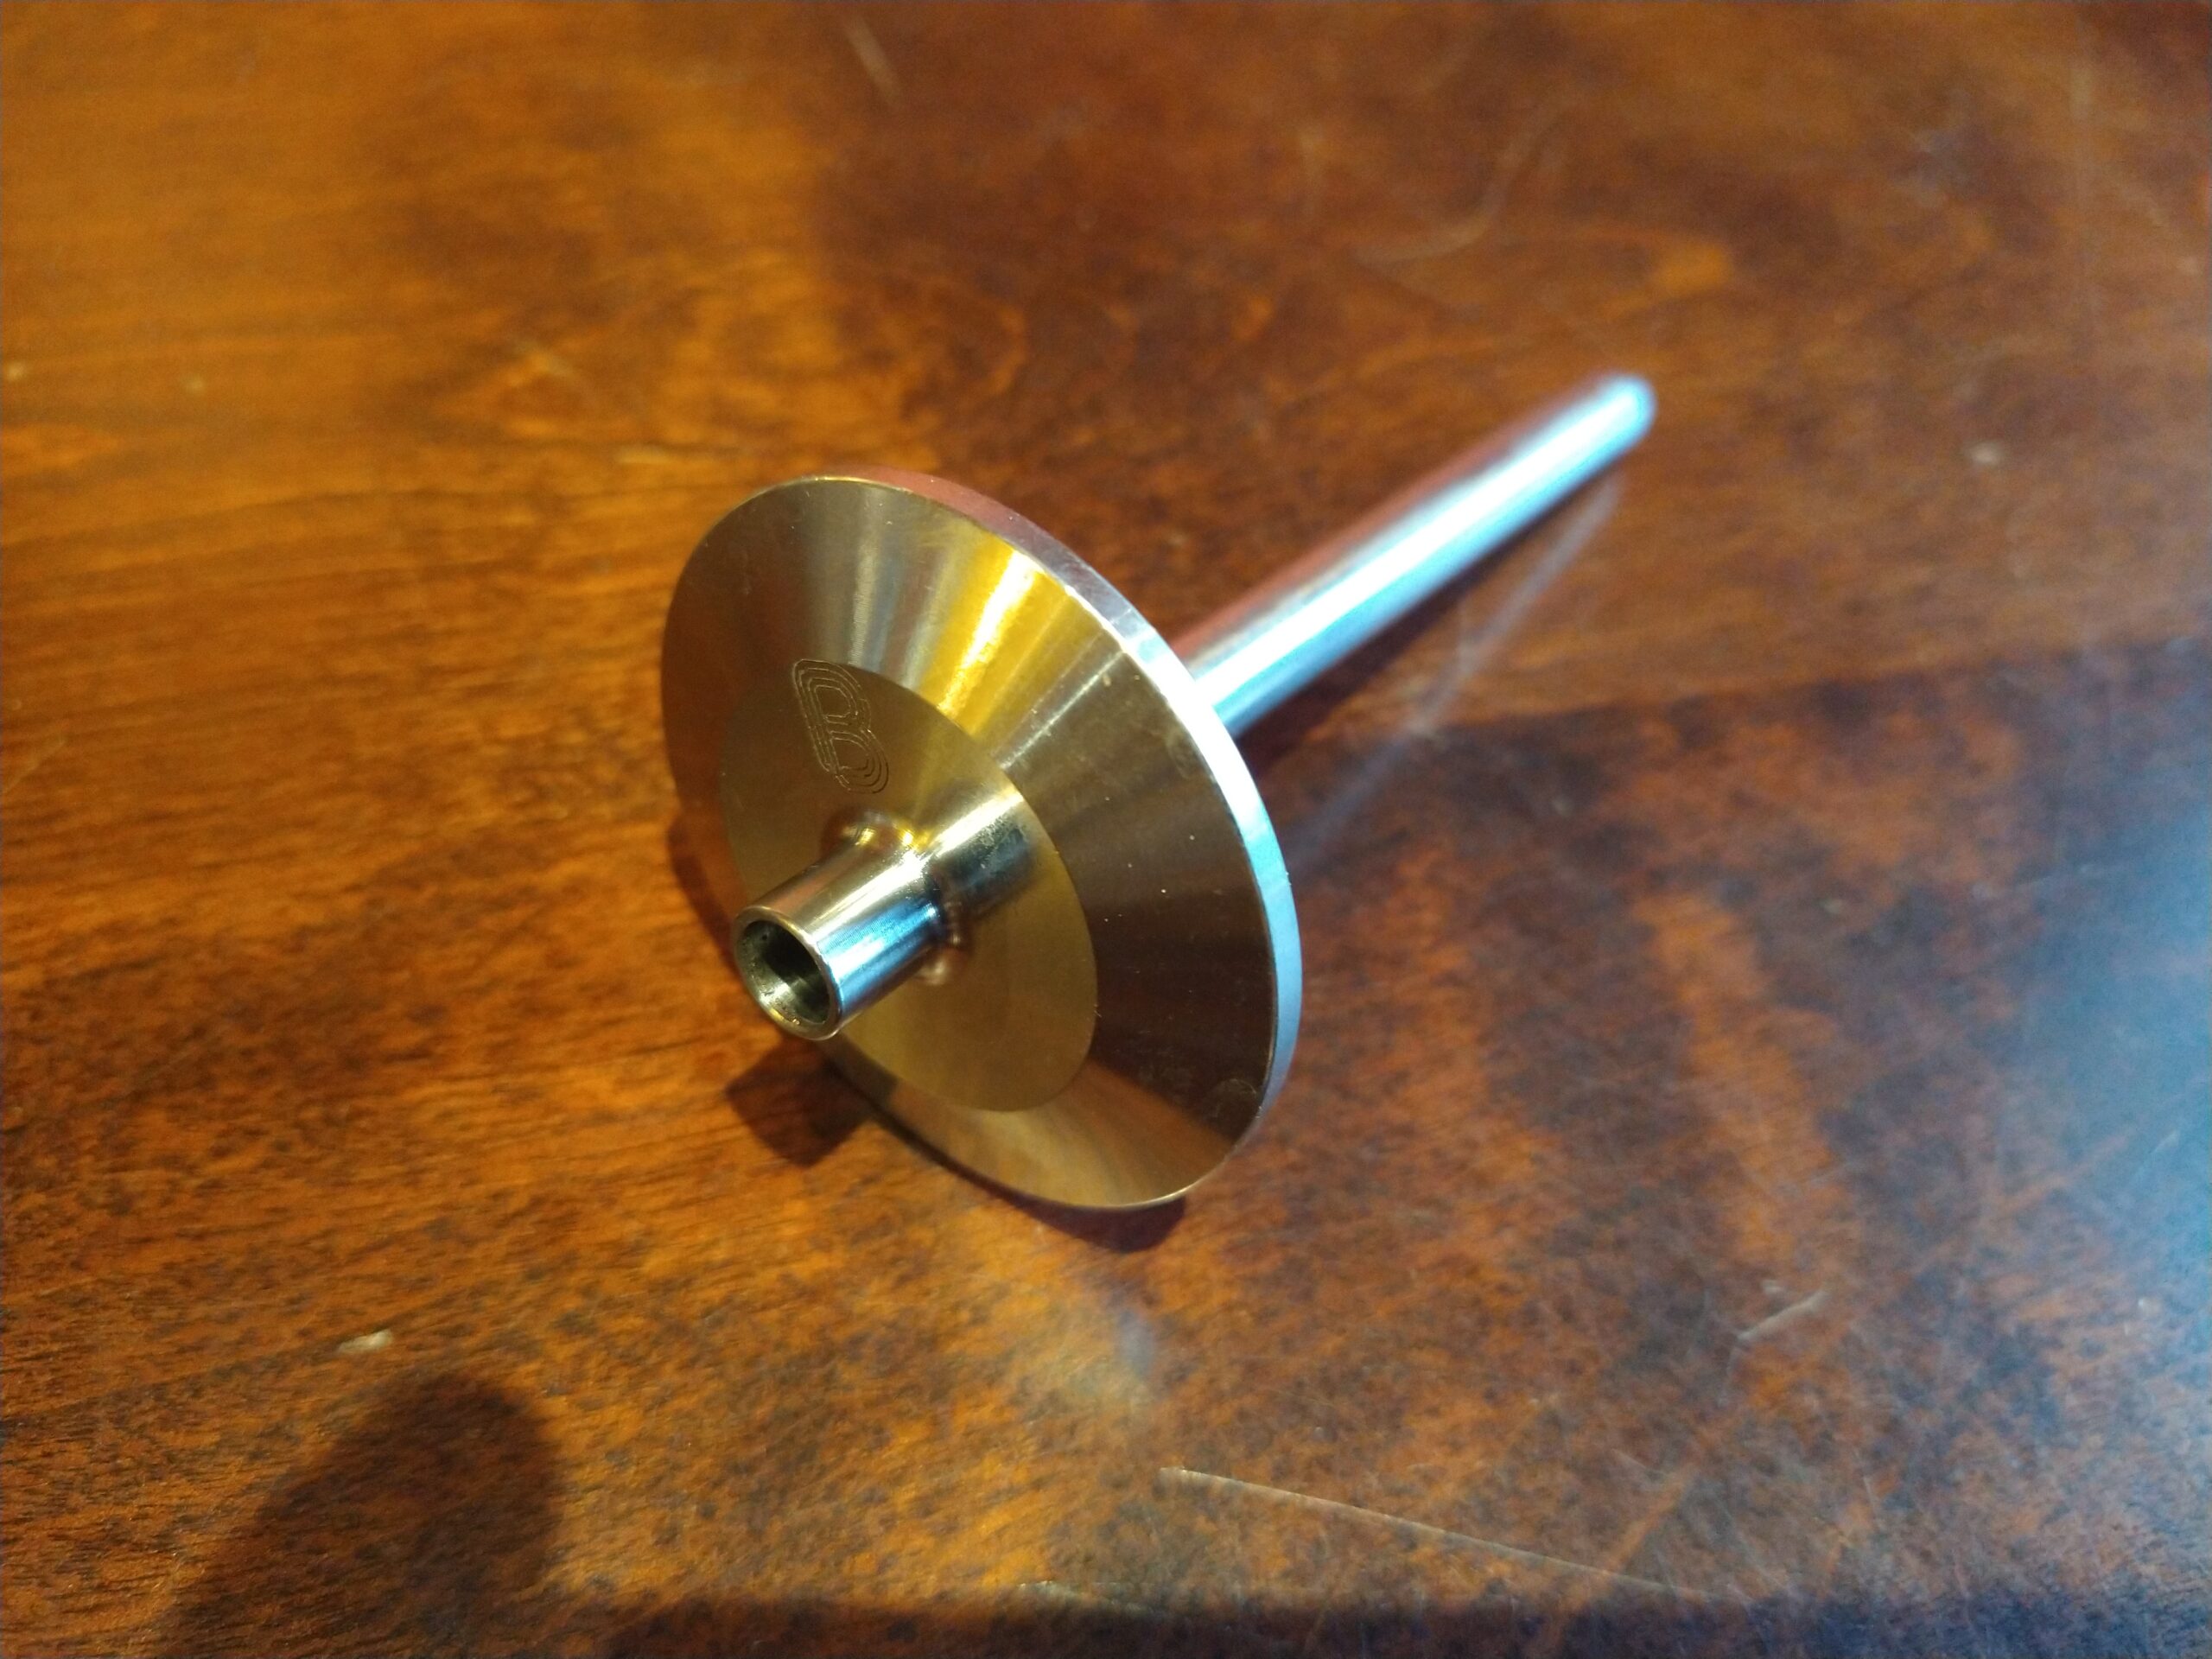 Thermowell
 U-Shaped Blowoff Tube Fitting
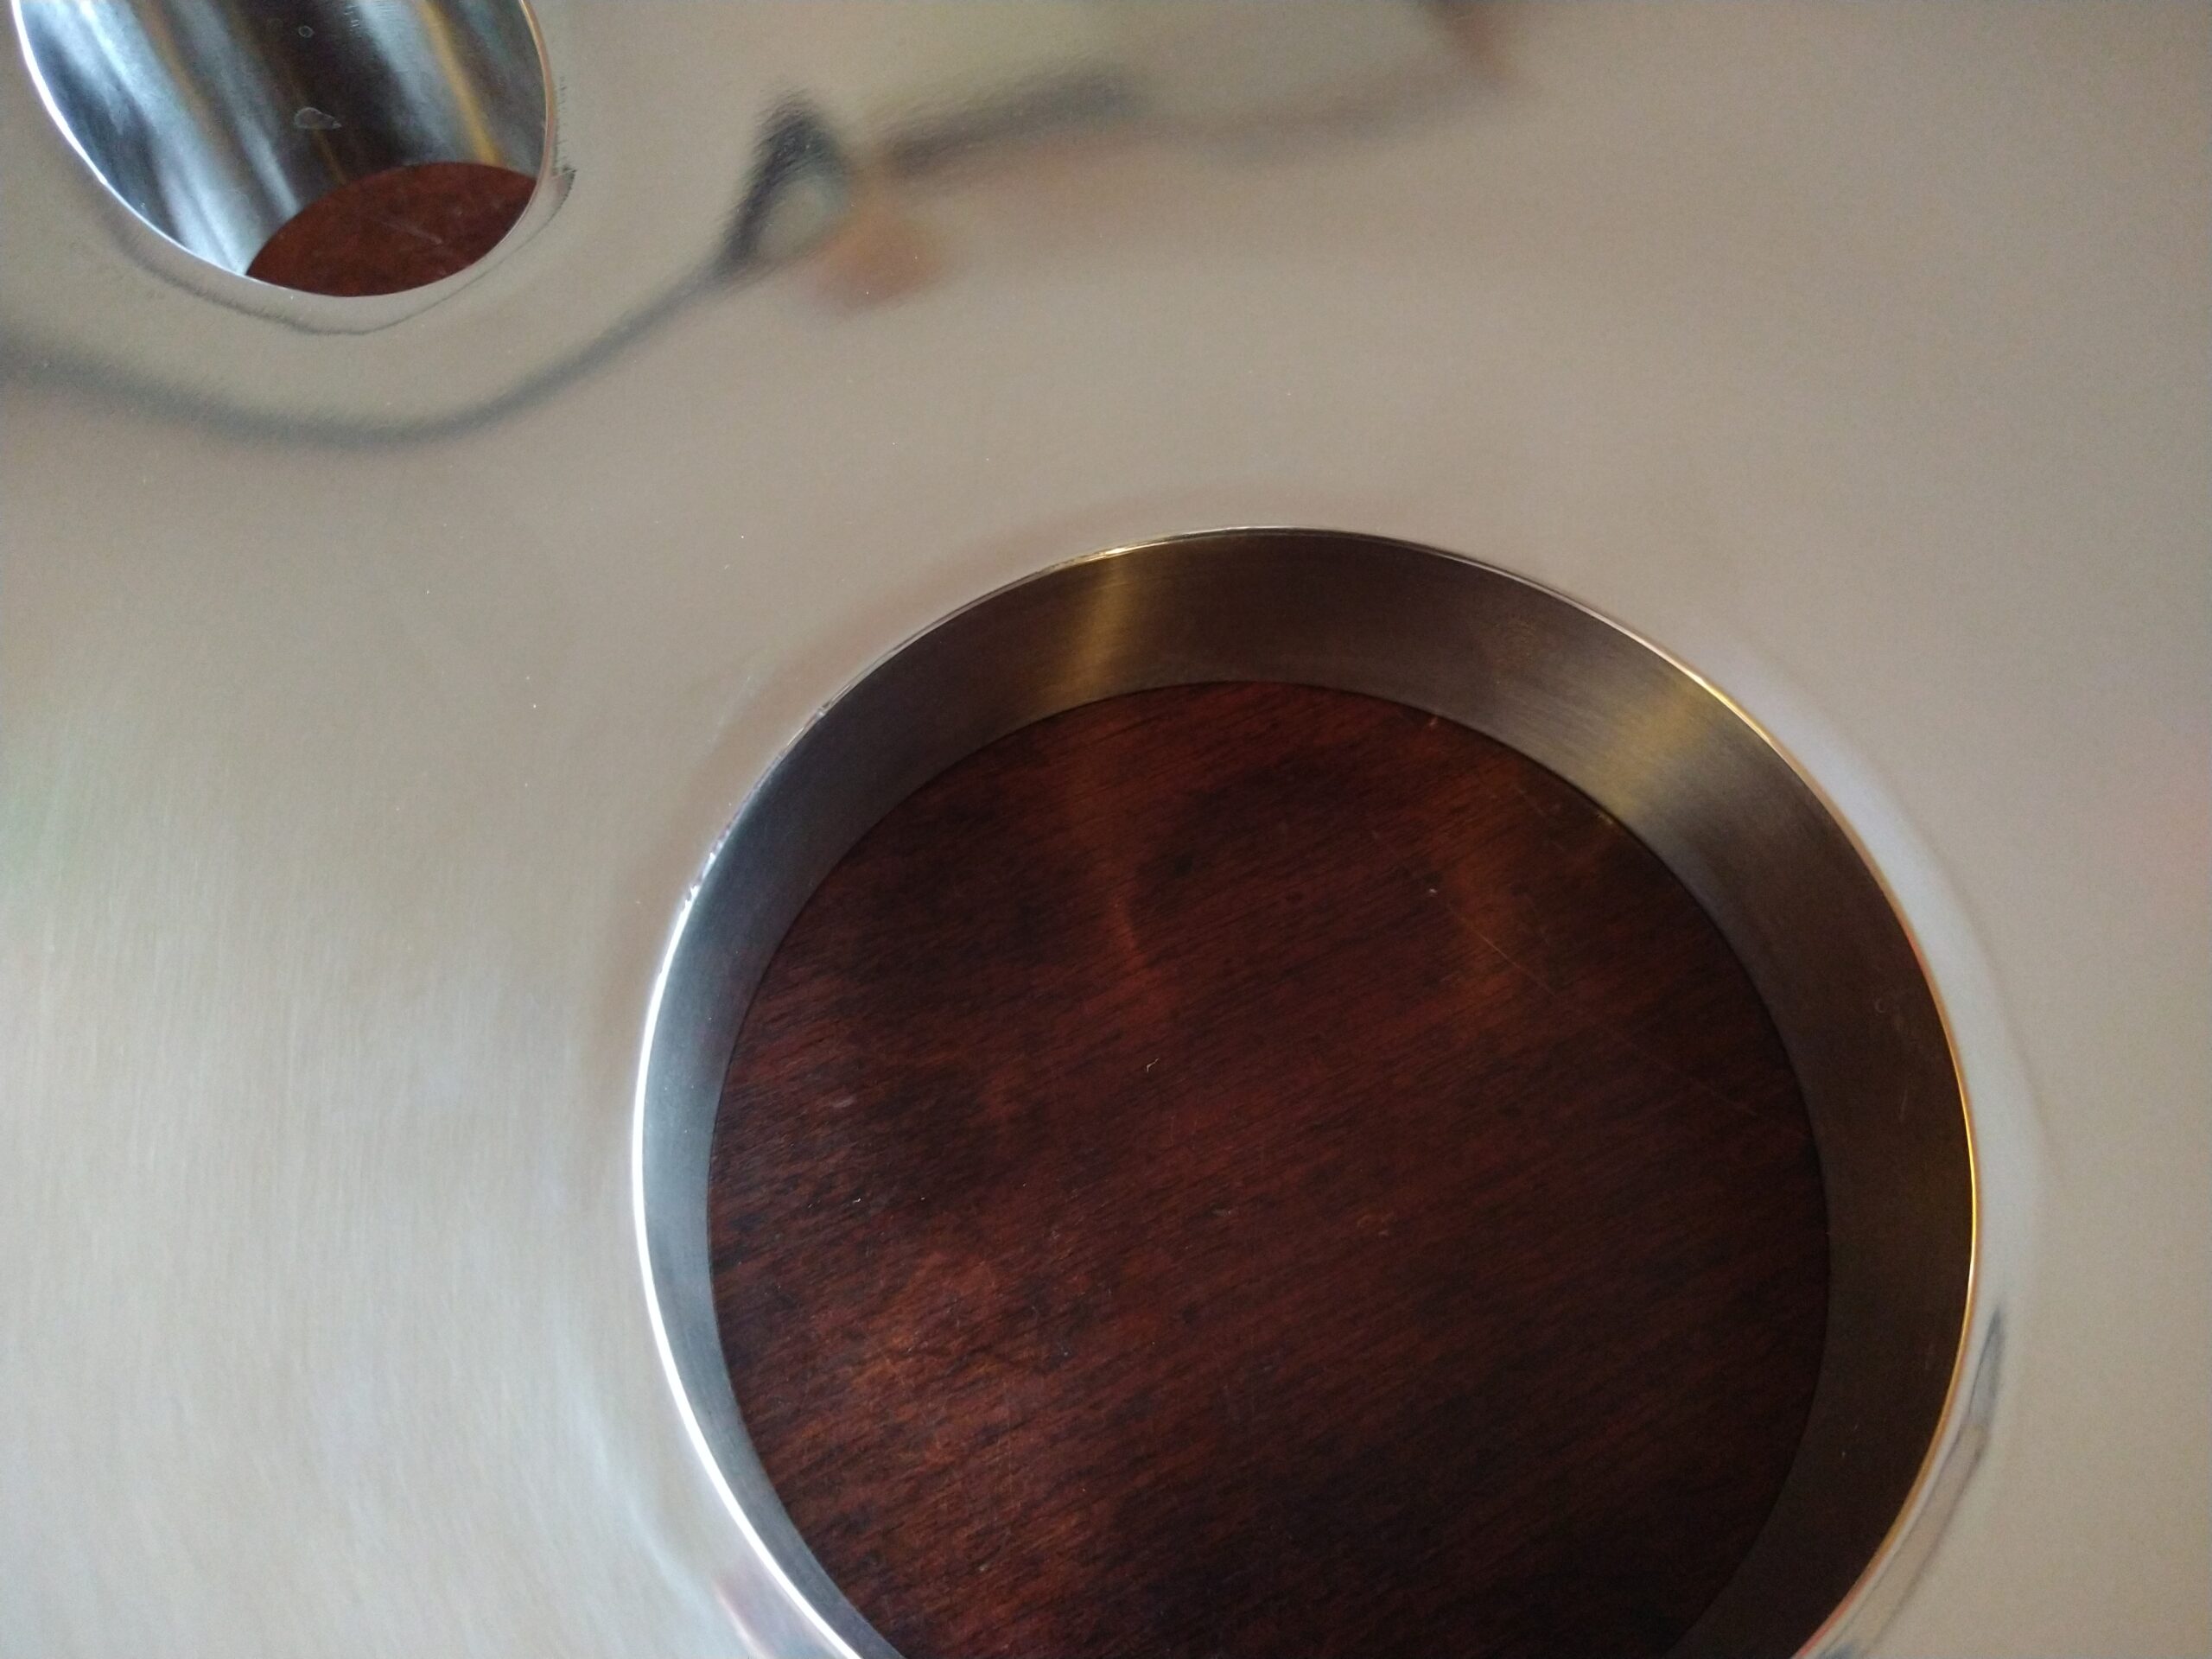 Seamless Highly Polished Welds Inside
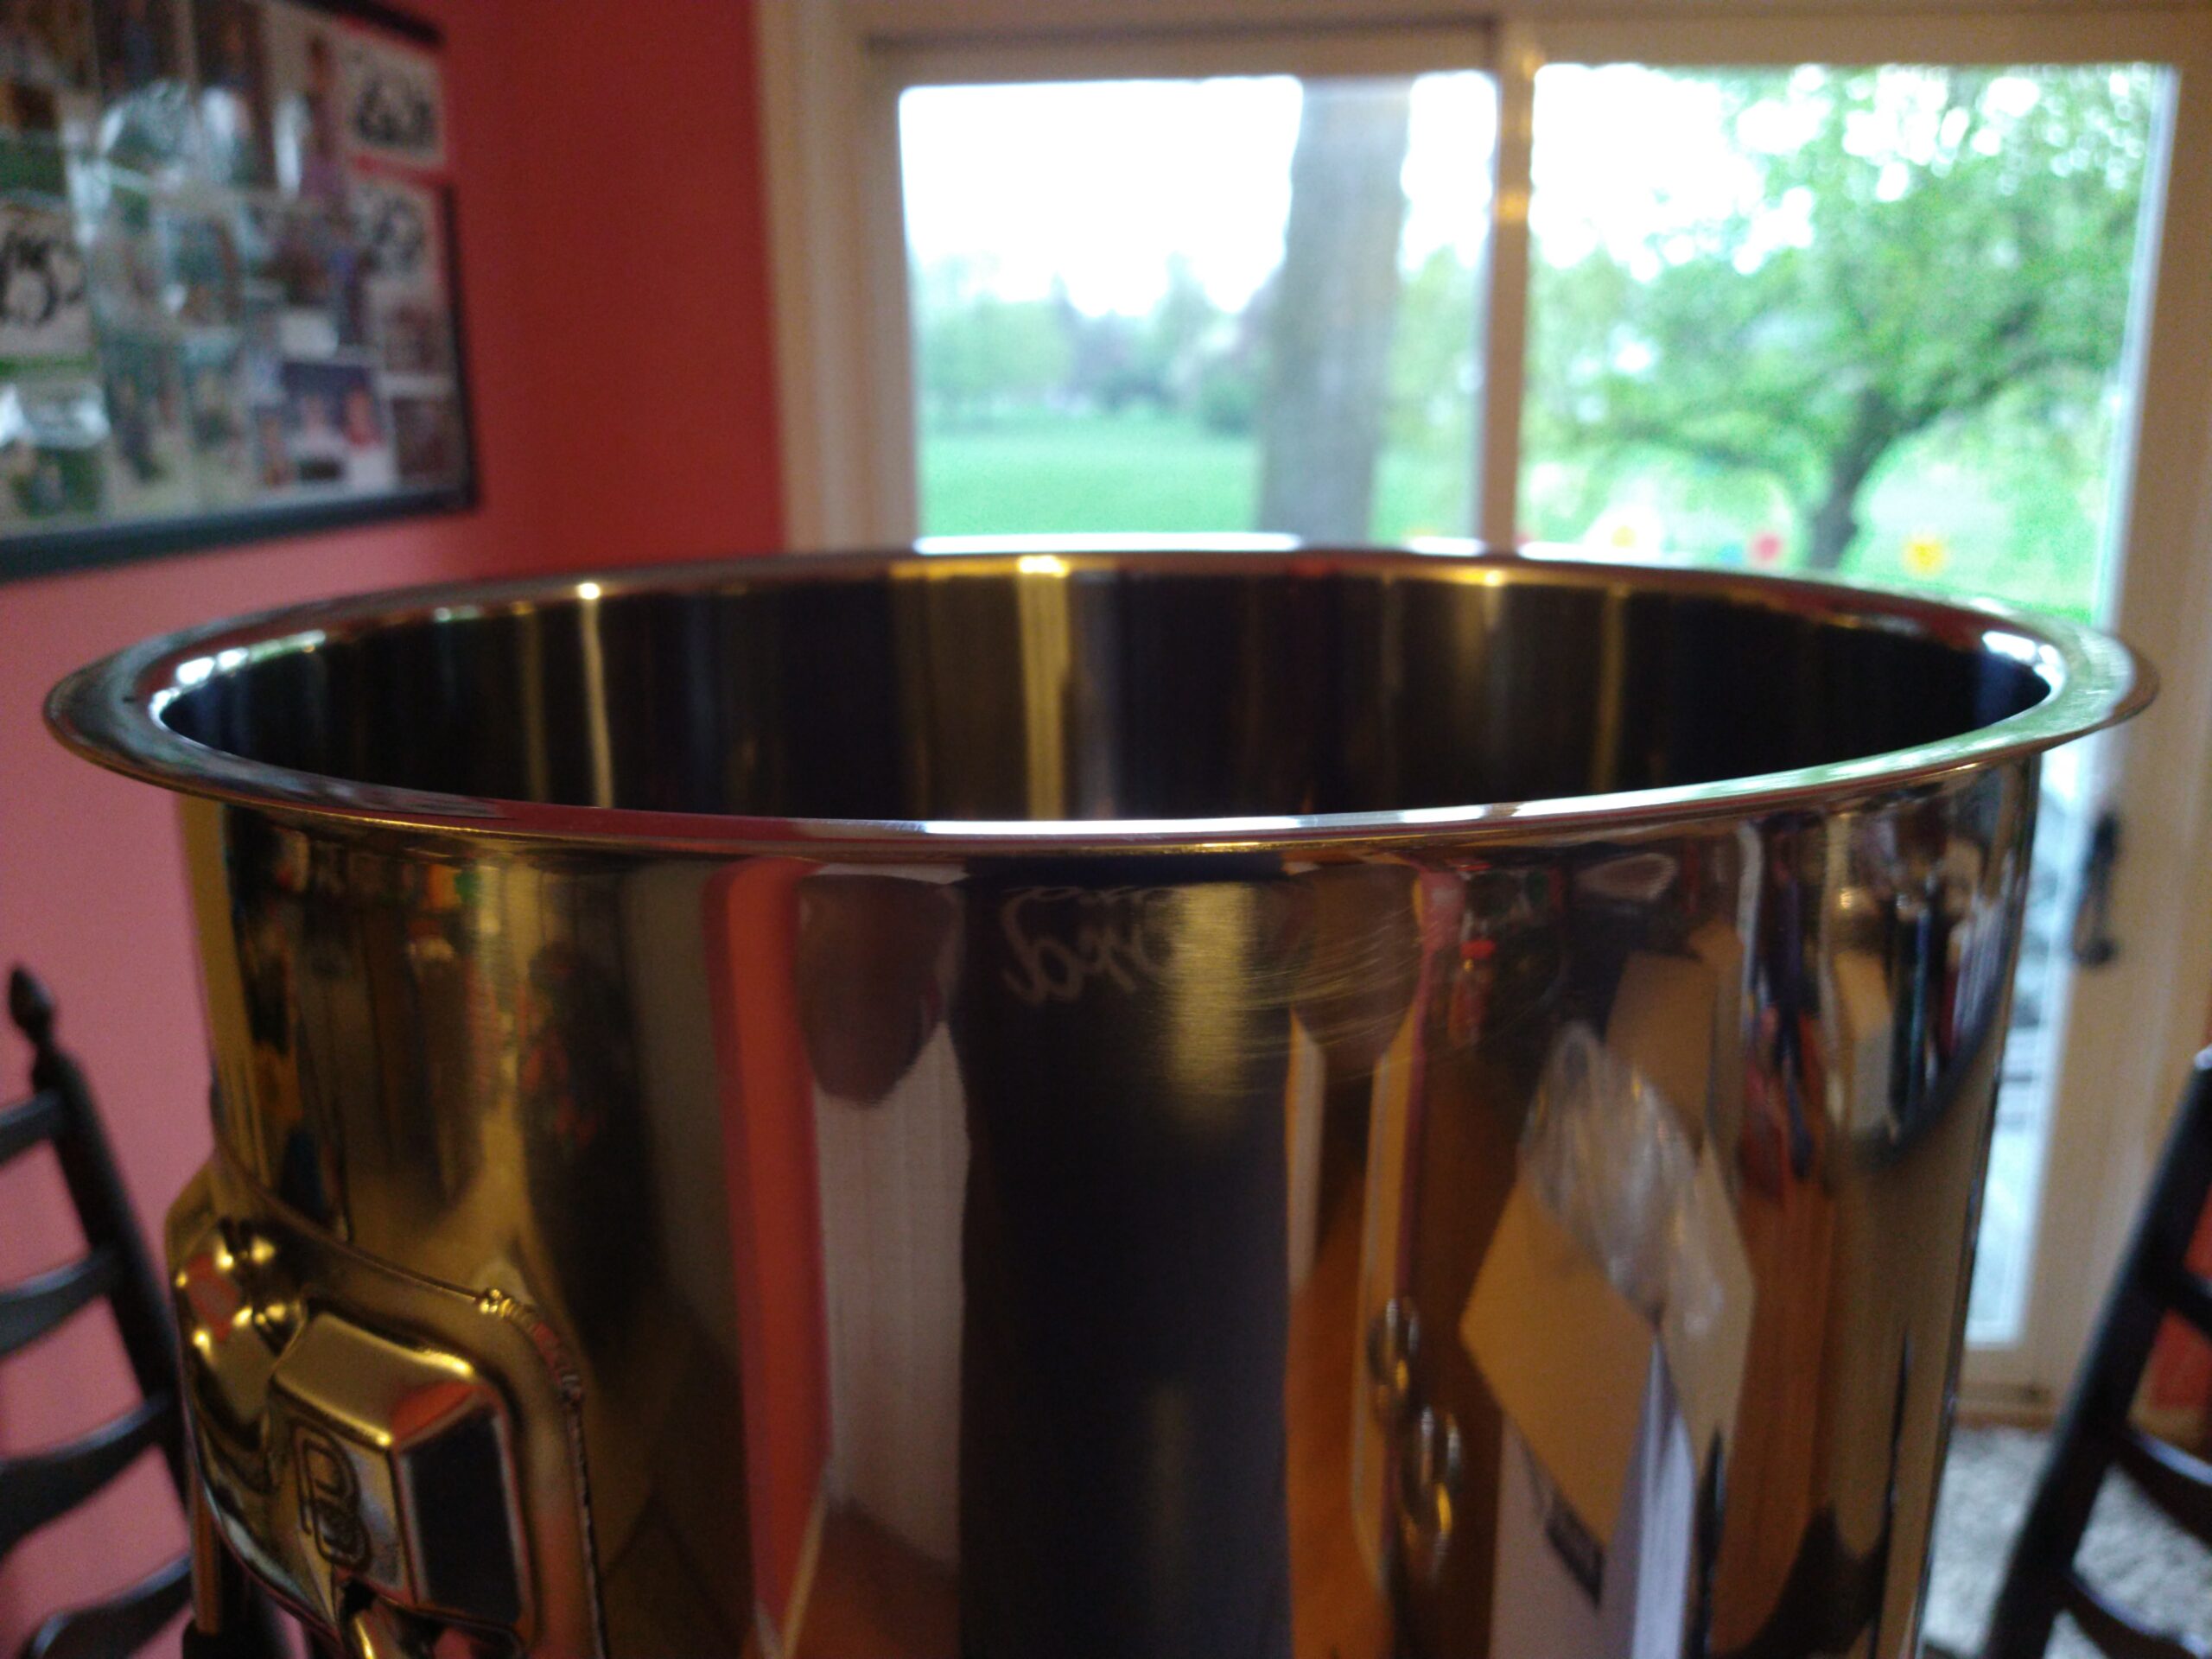 Top Sealing Flange
 Neoprene Jacket
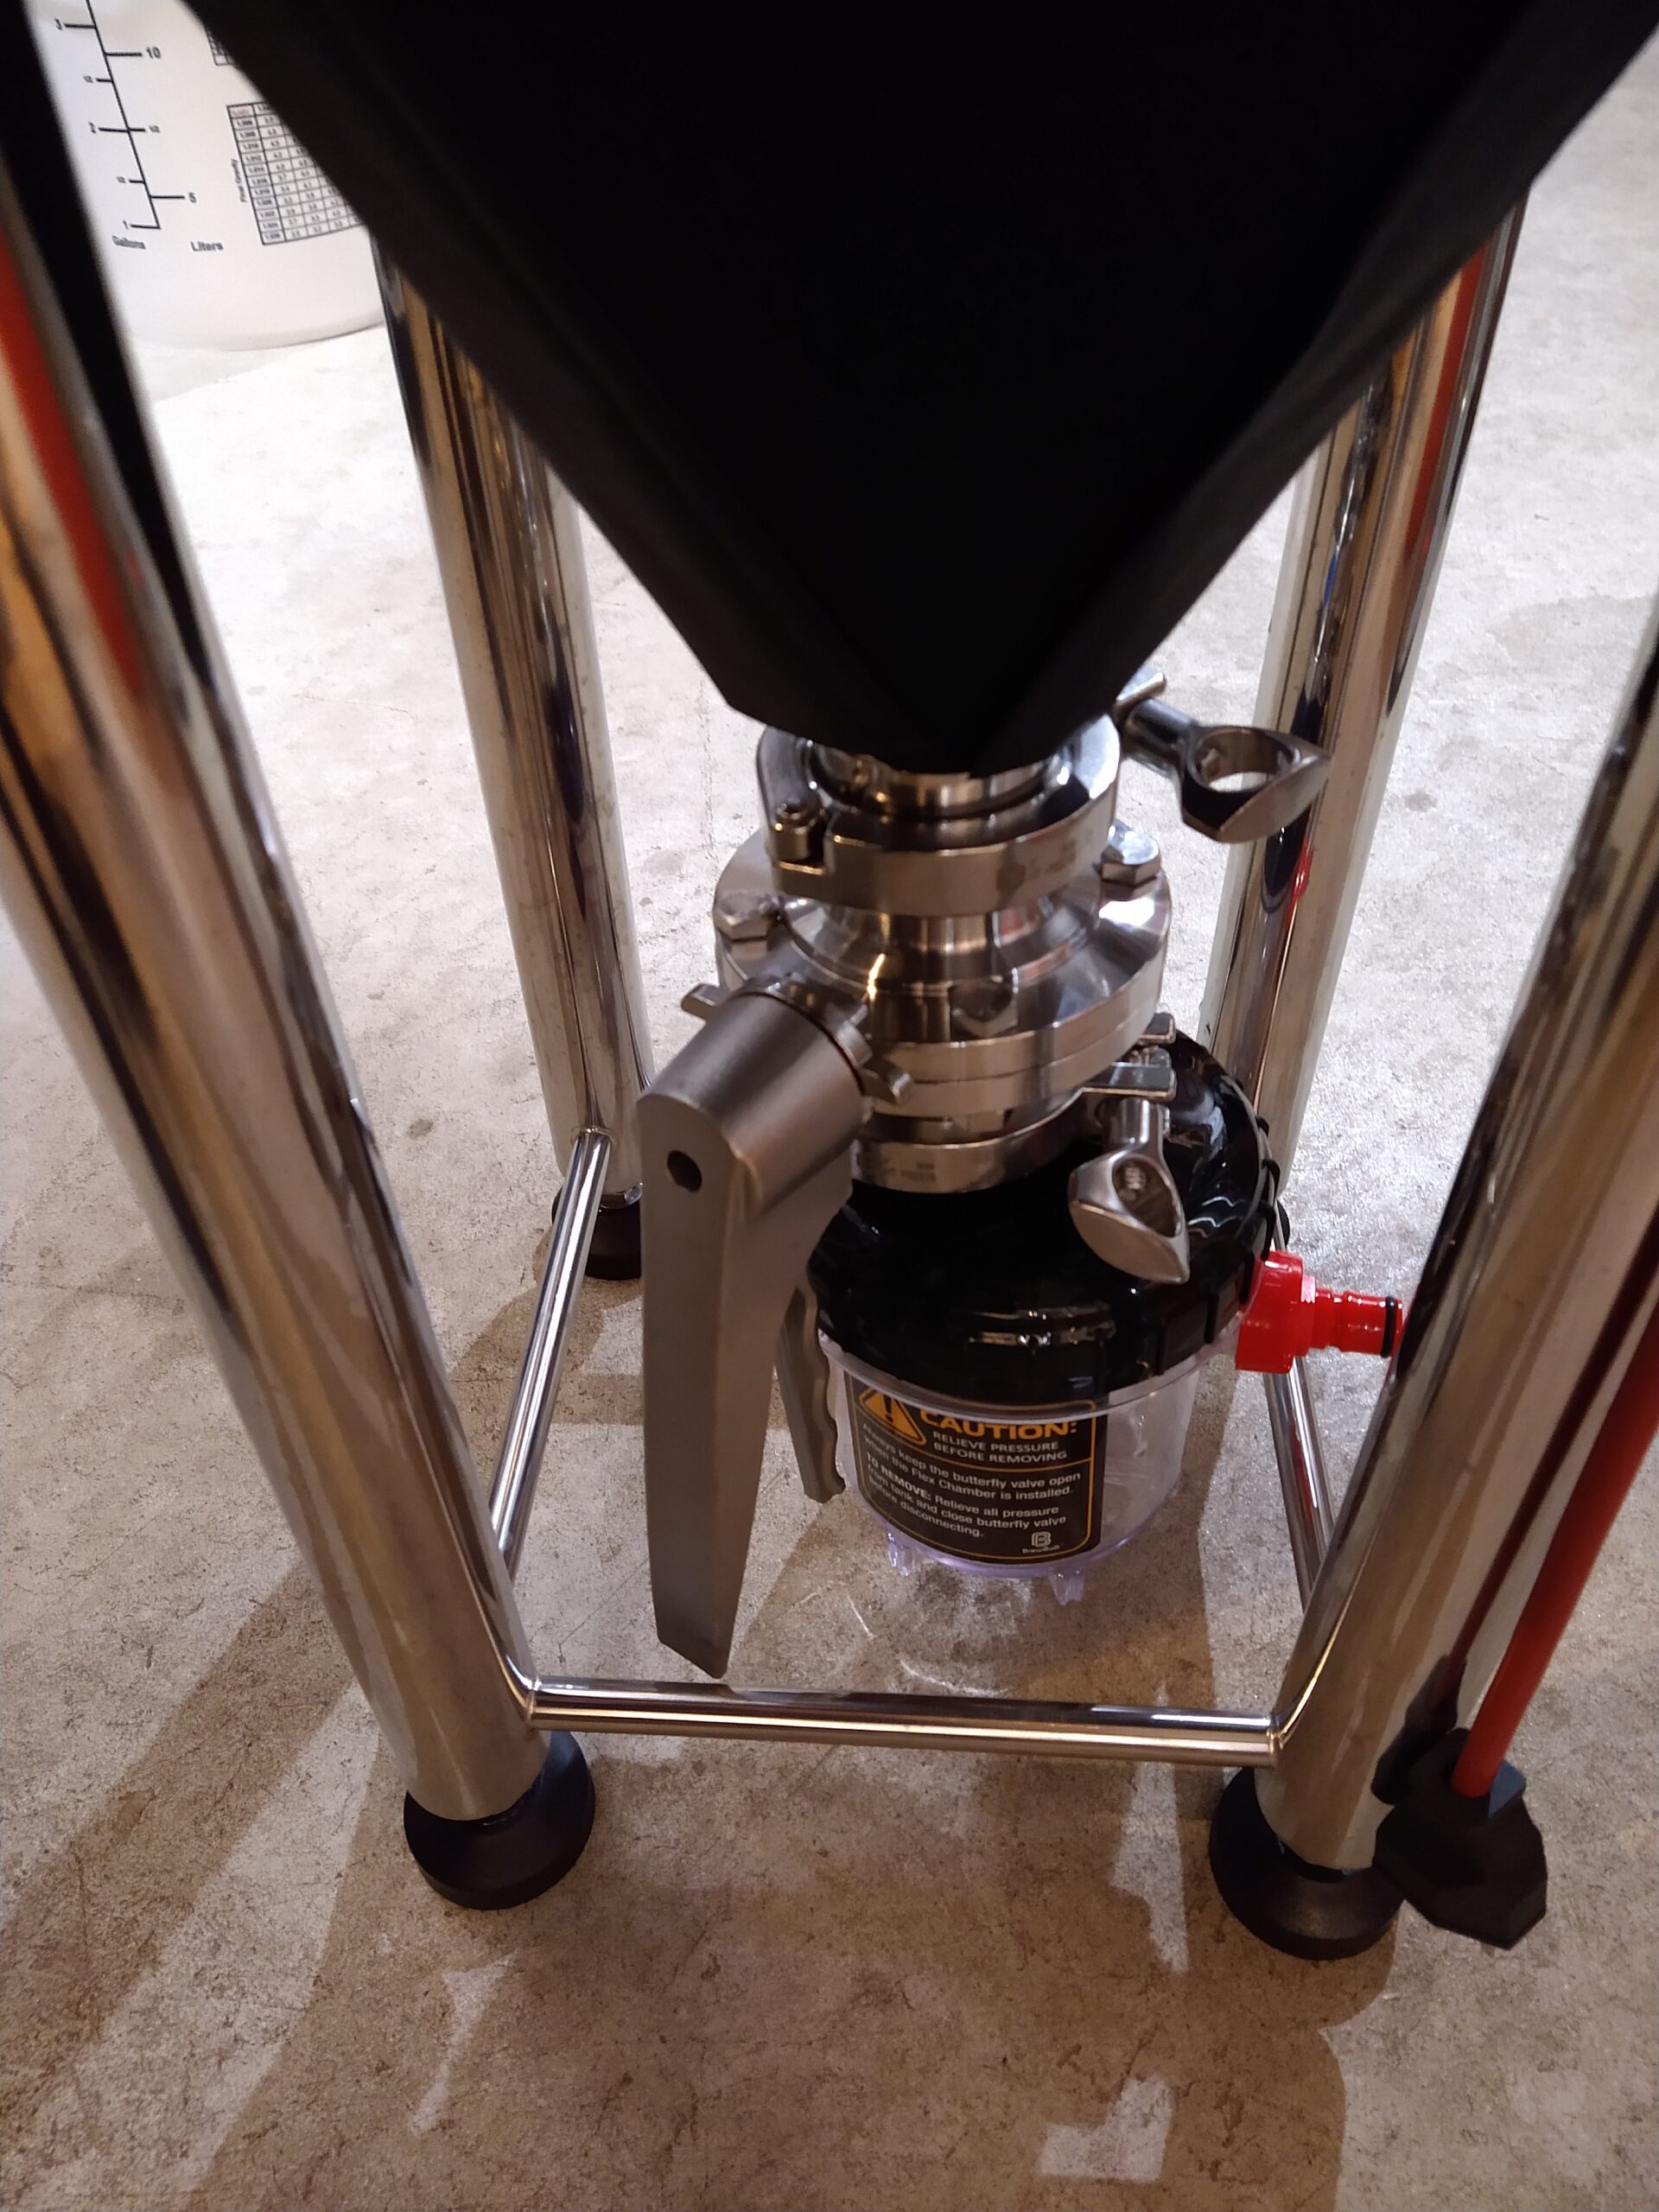 Precise Positioning of Butterfly Handle
Flex Chamber
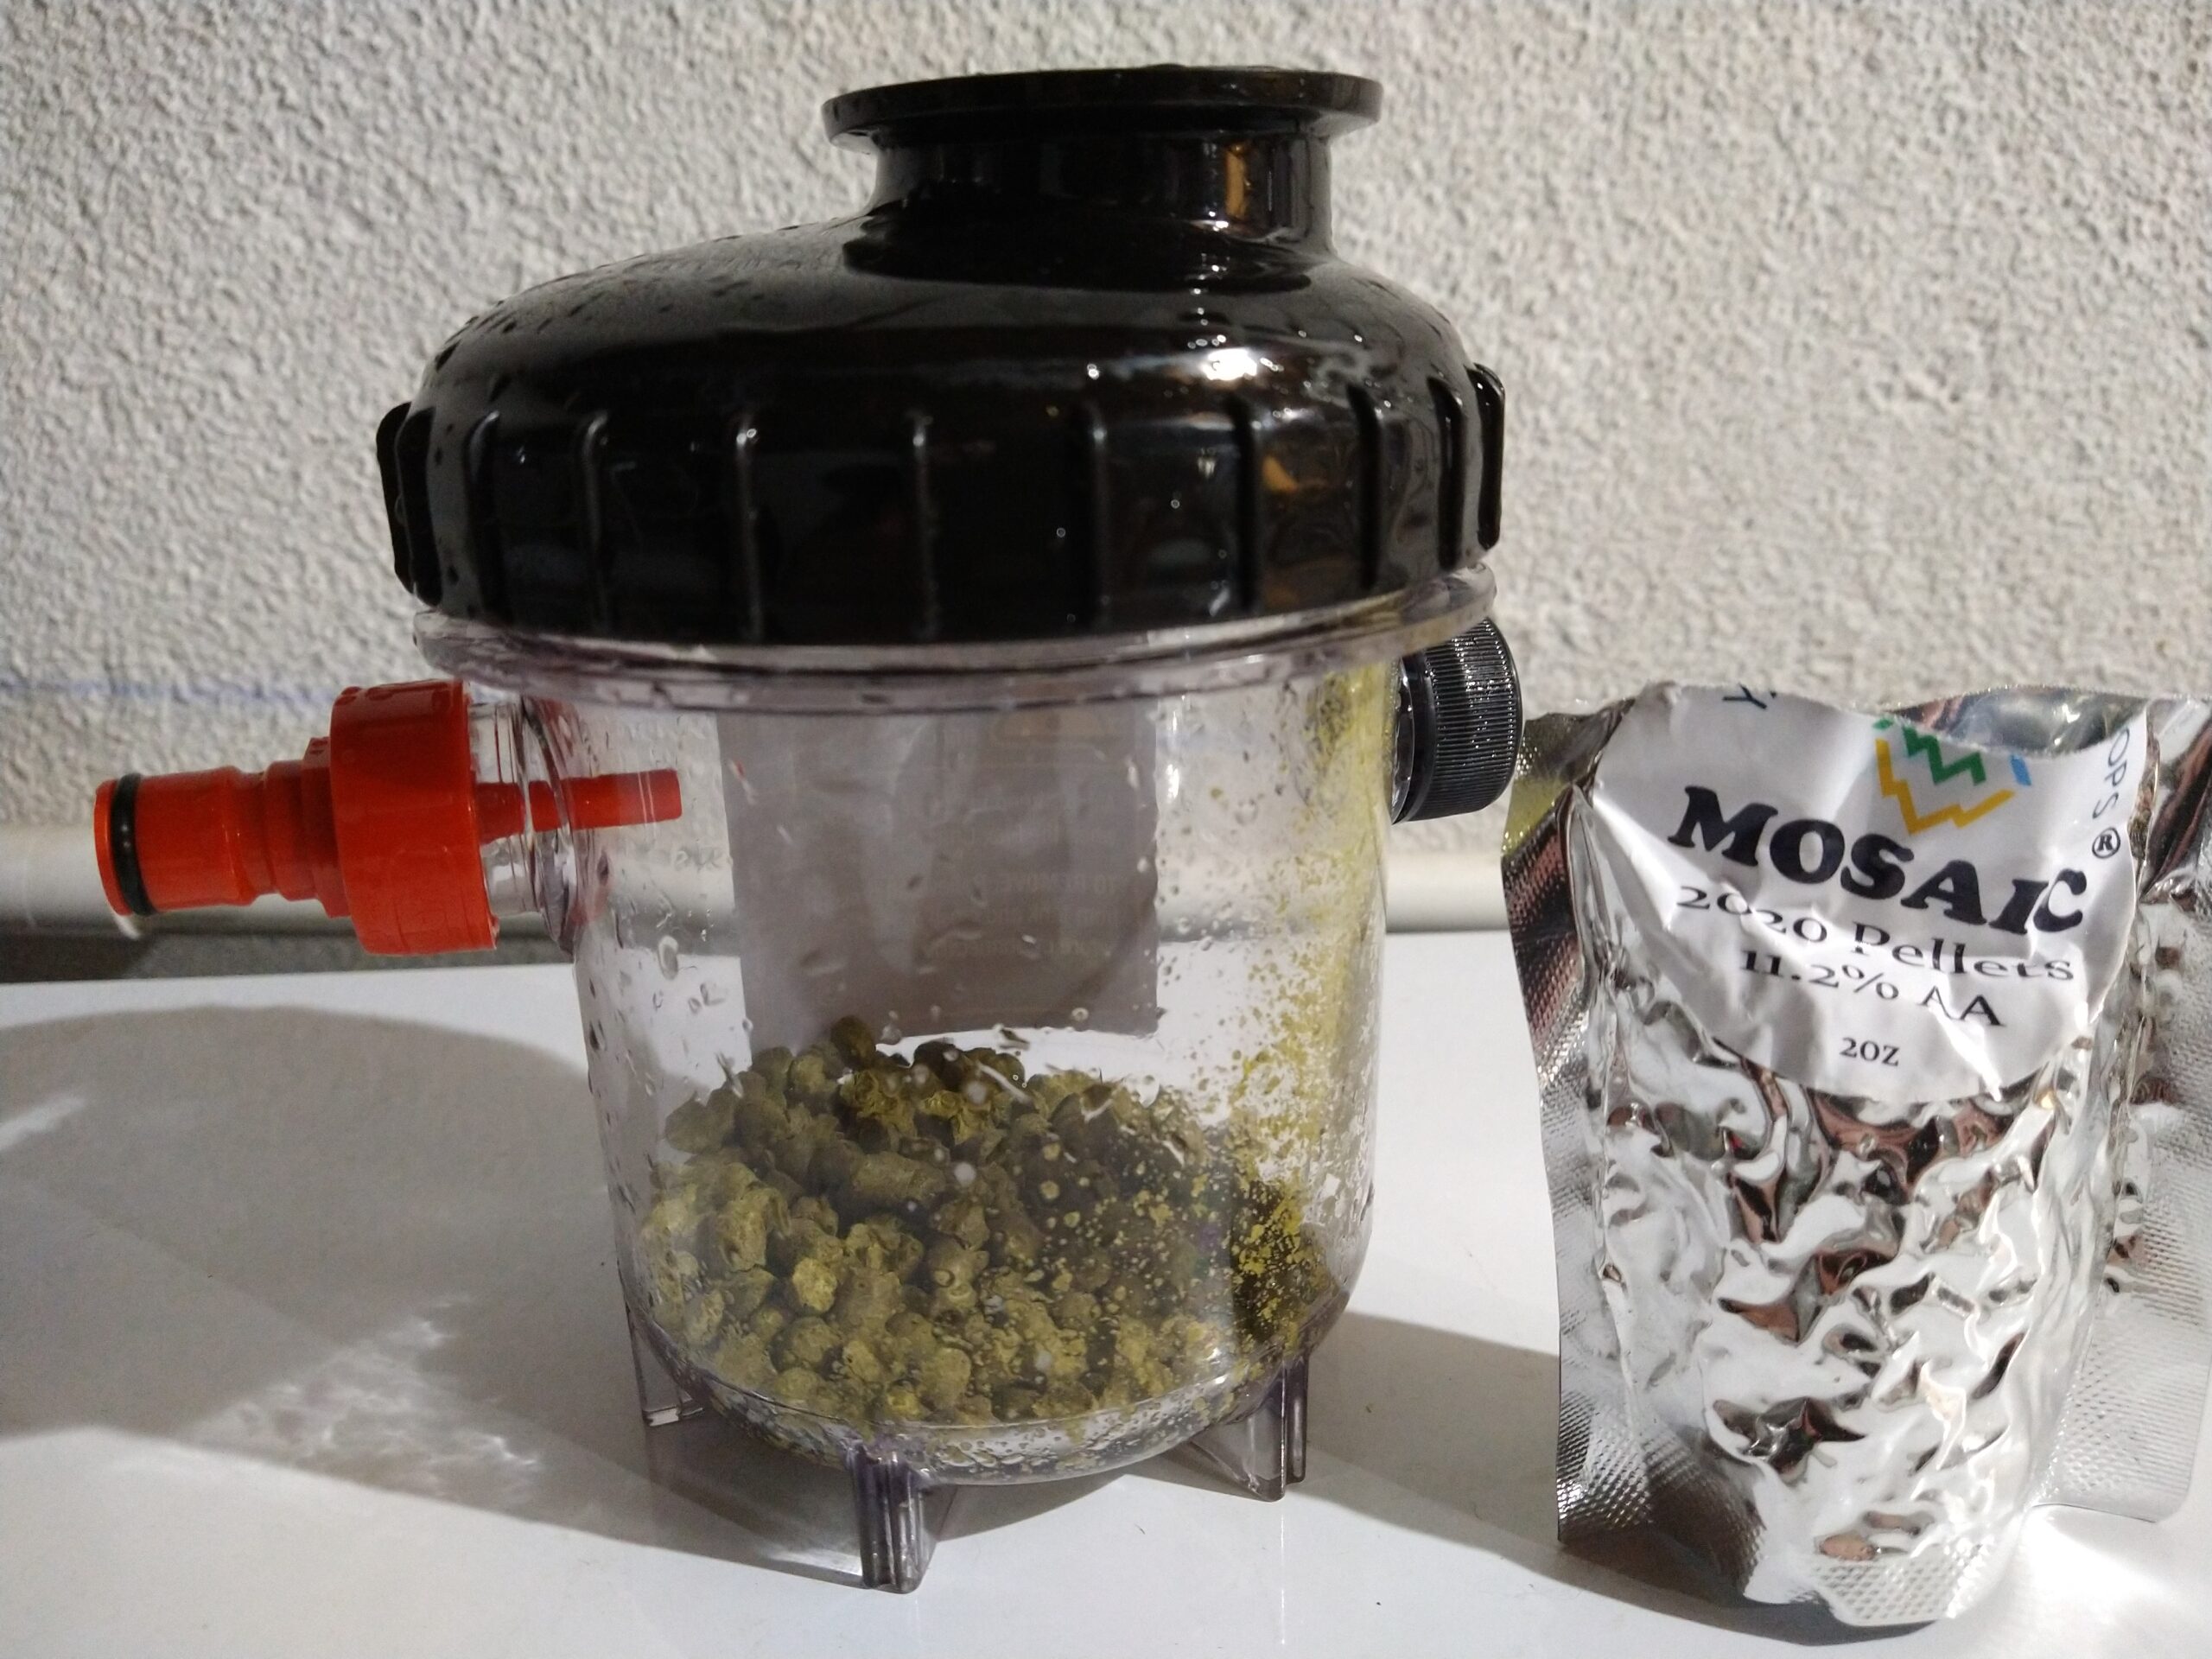 2 oz Dry Hops in Flex Chamber
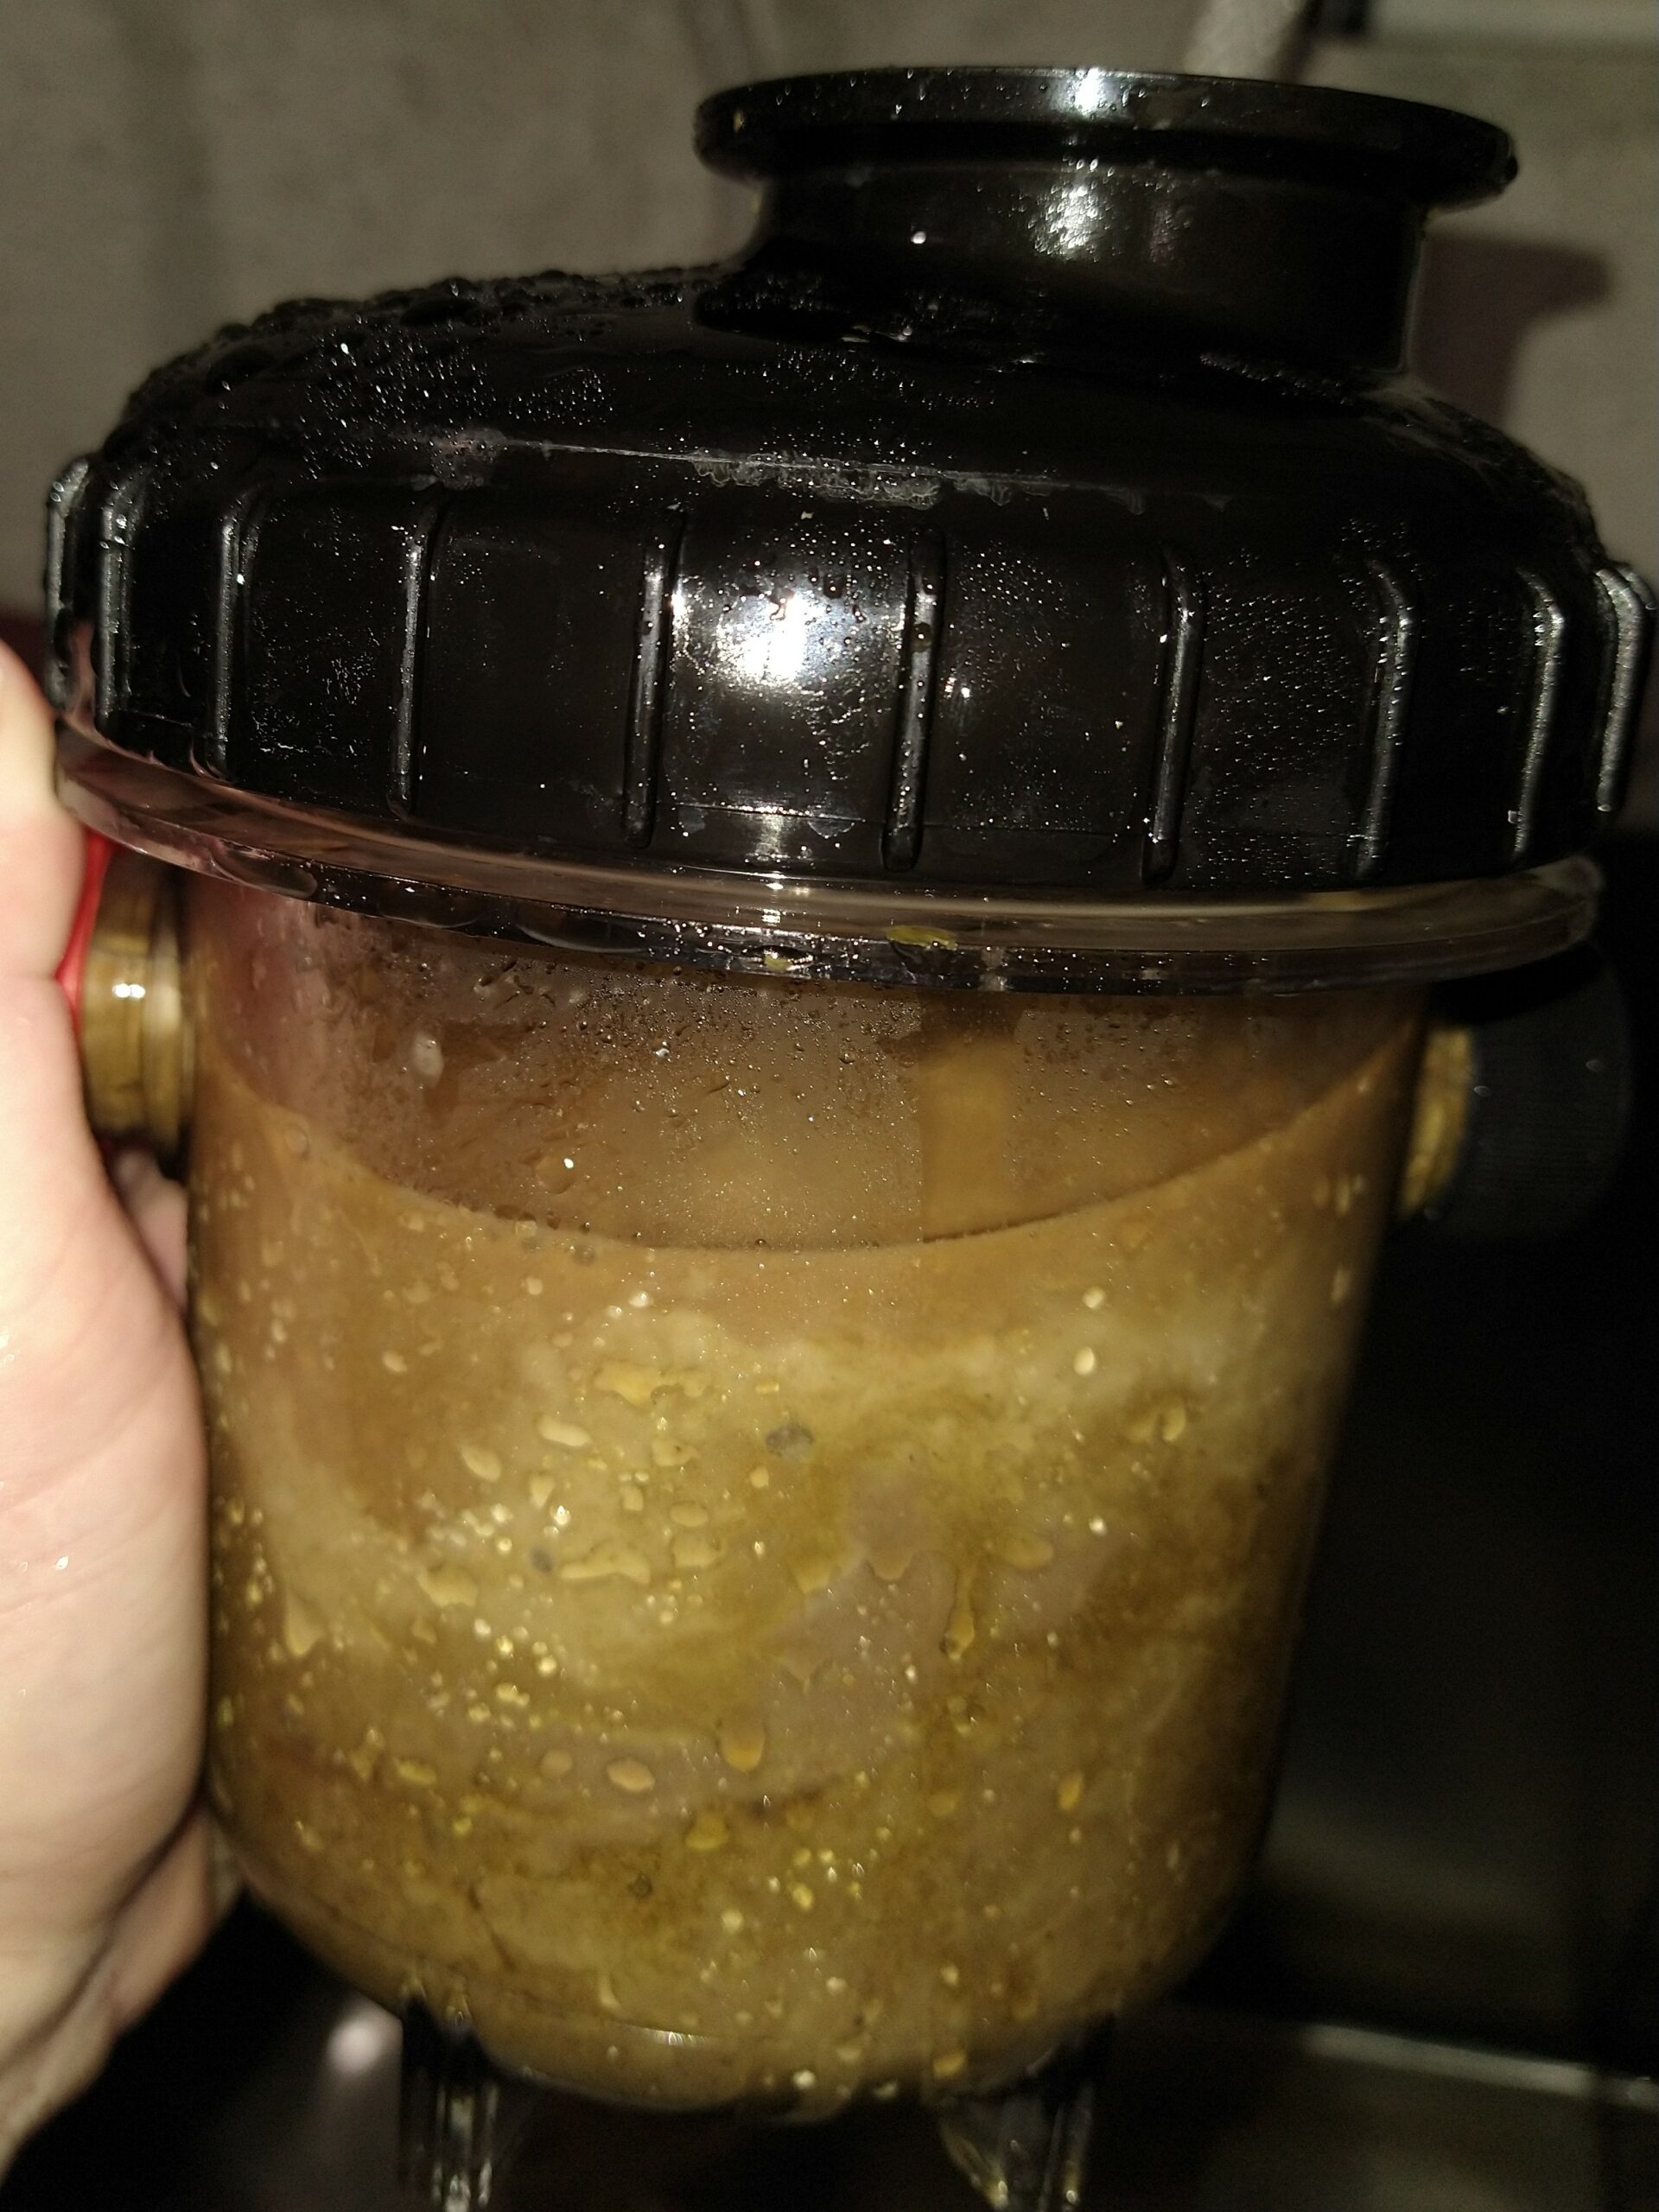 Fermentation Sludge Removed in Flex Chamber
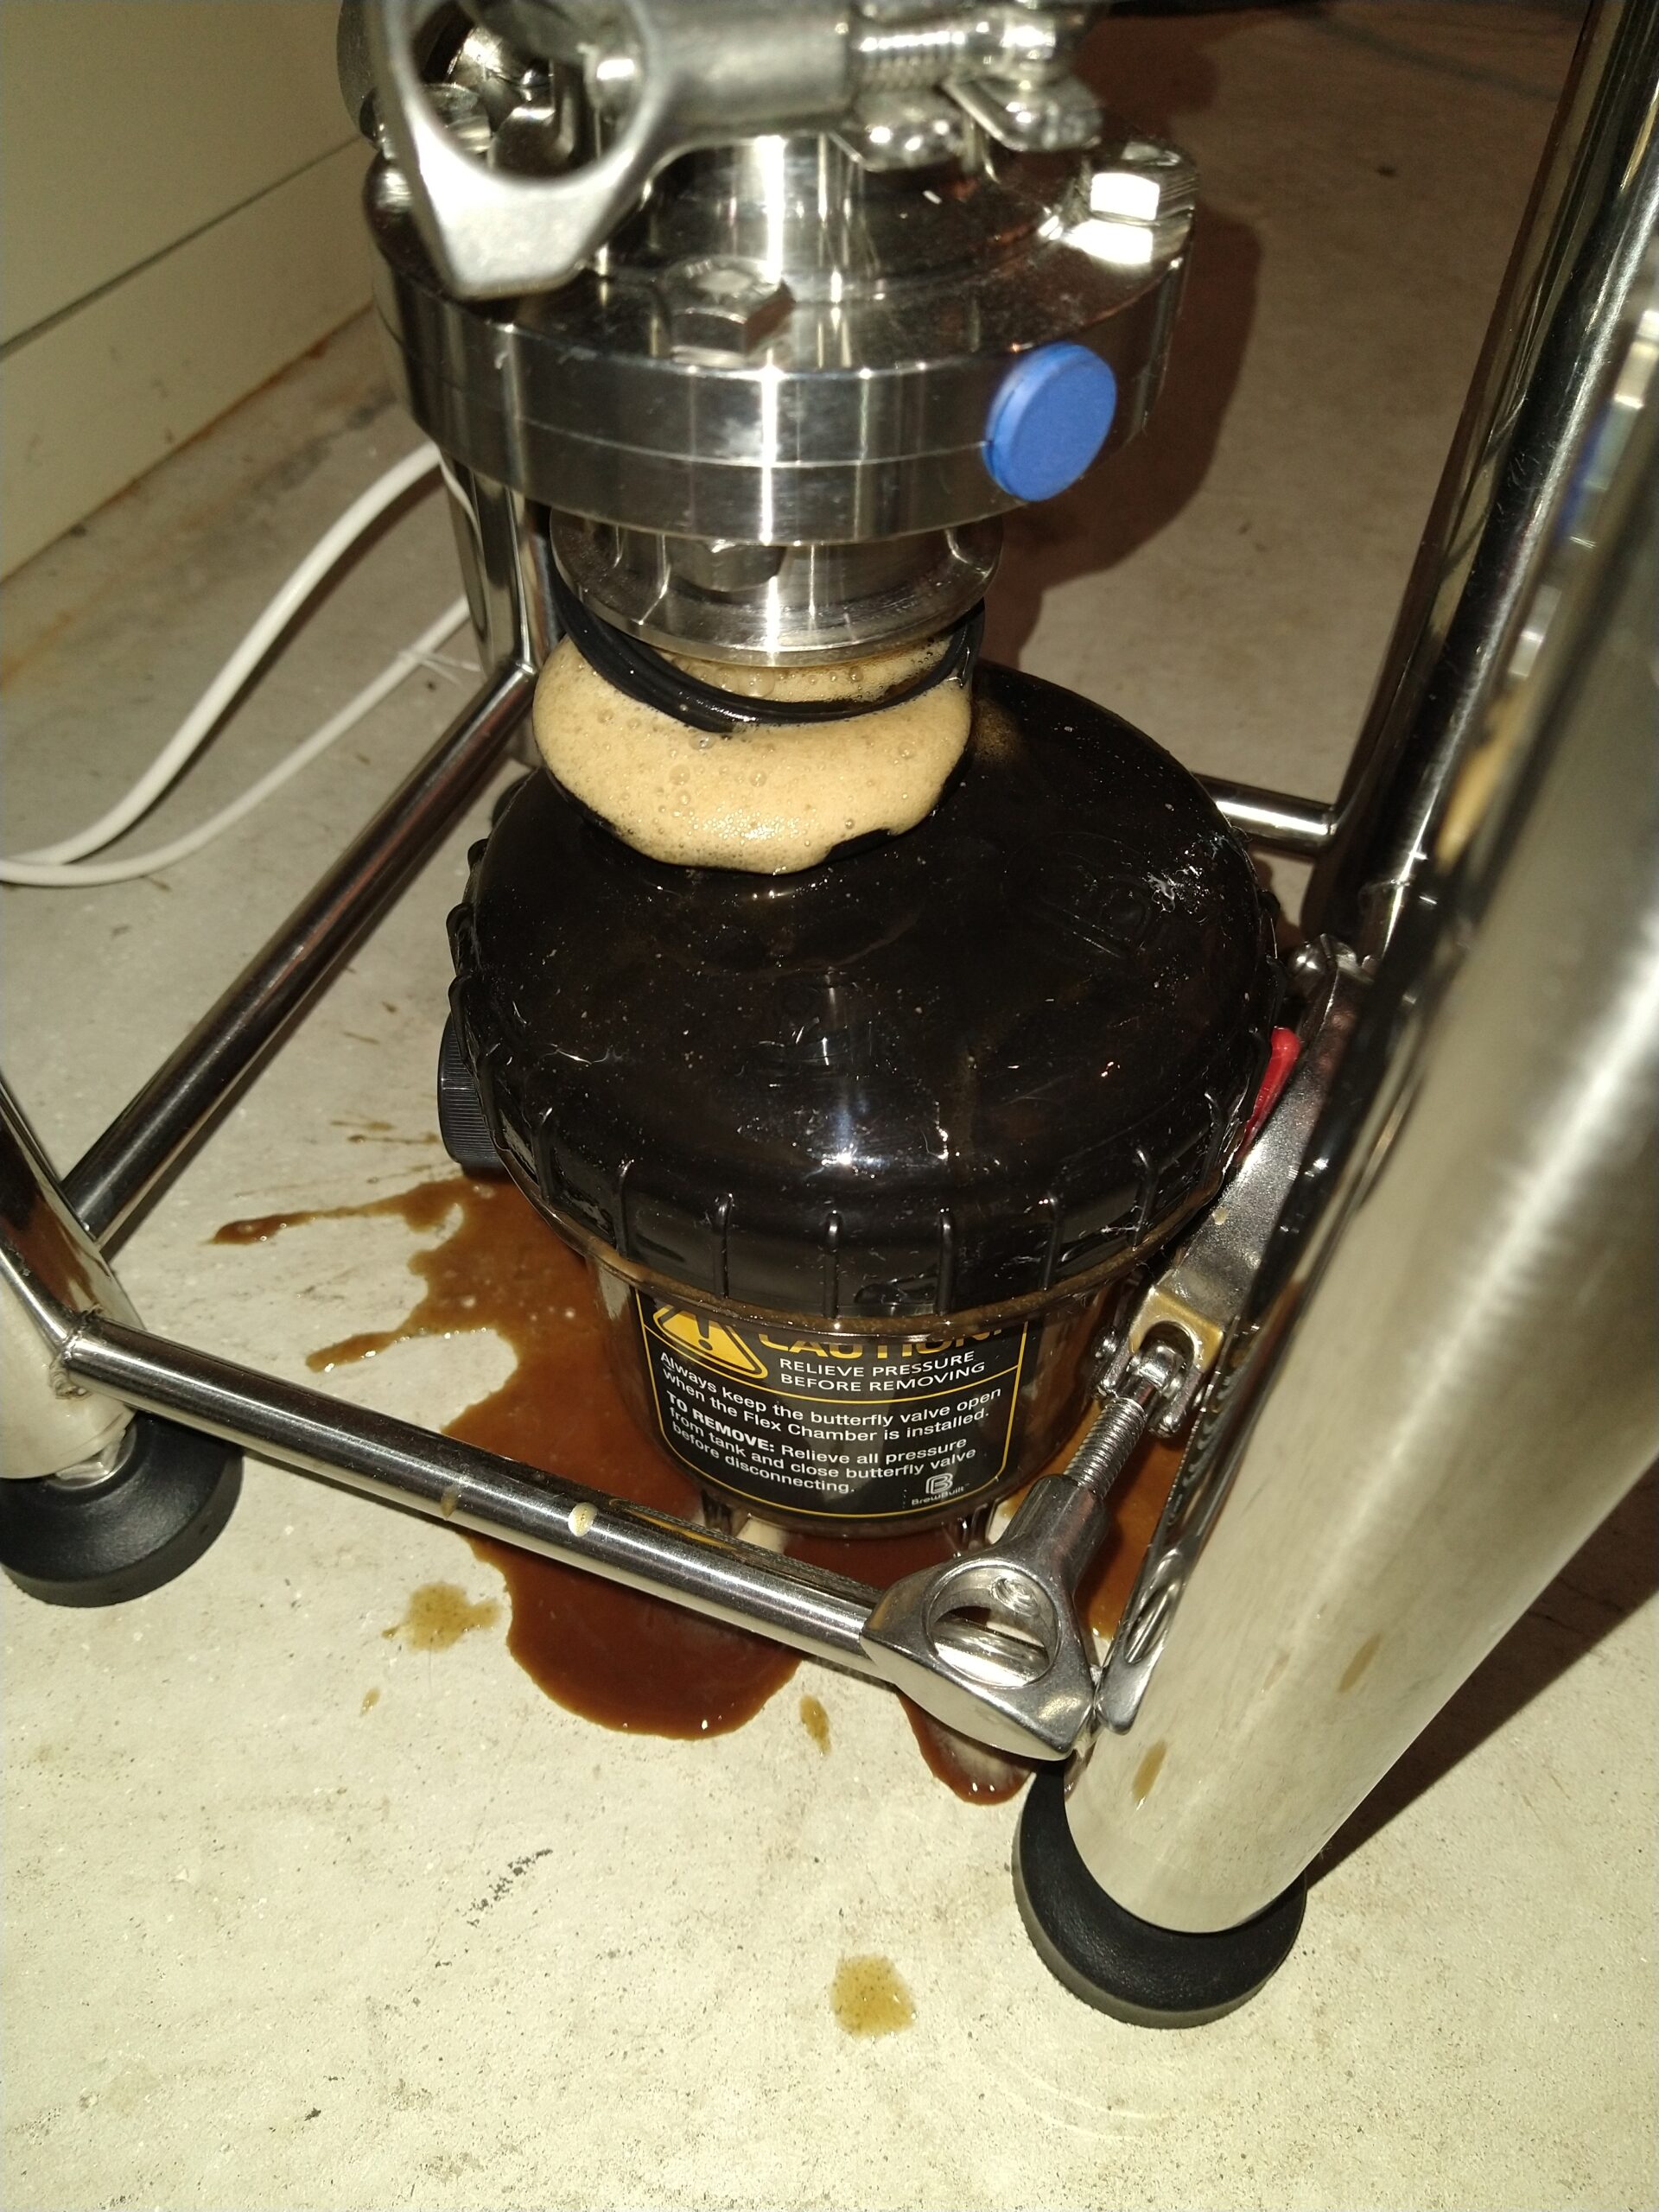 Removing the Flex Chamber is a Messy Job
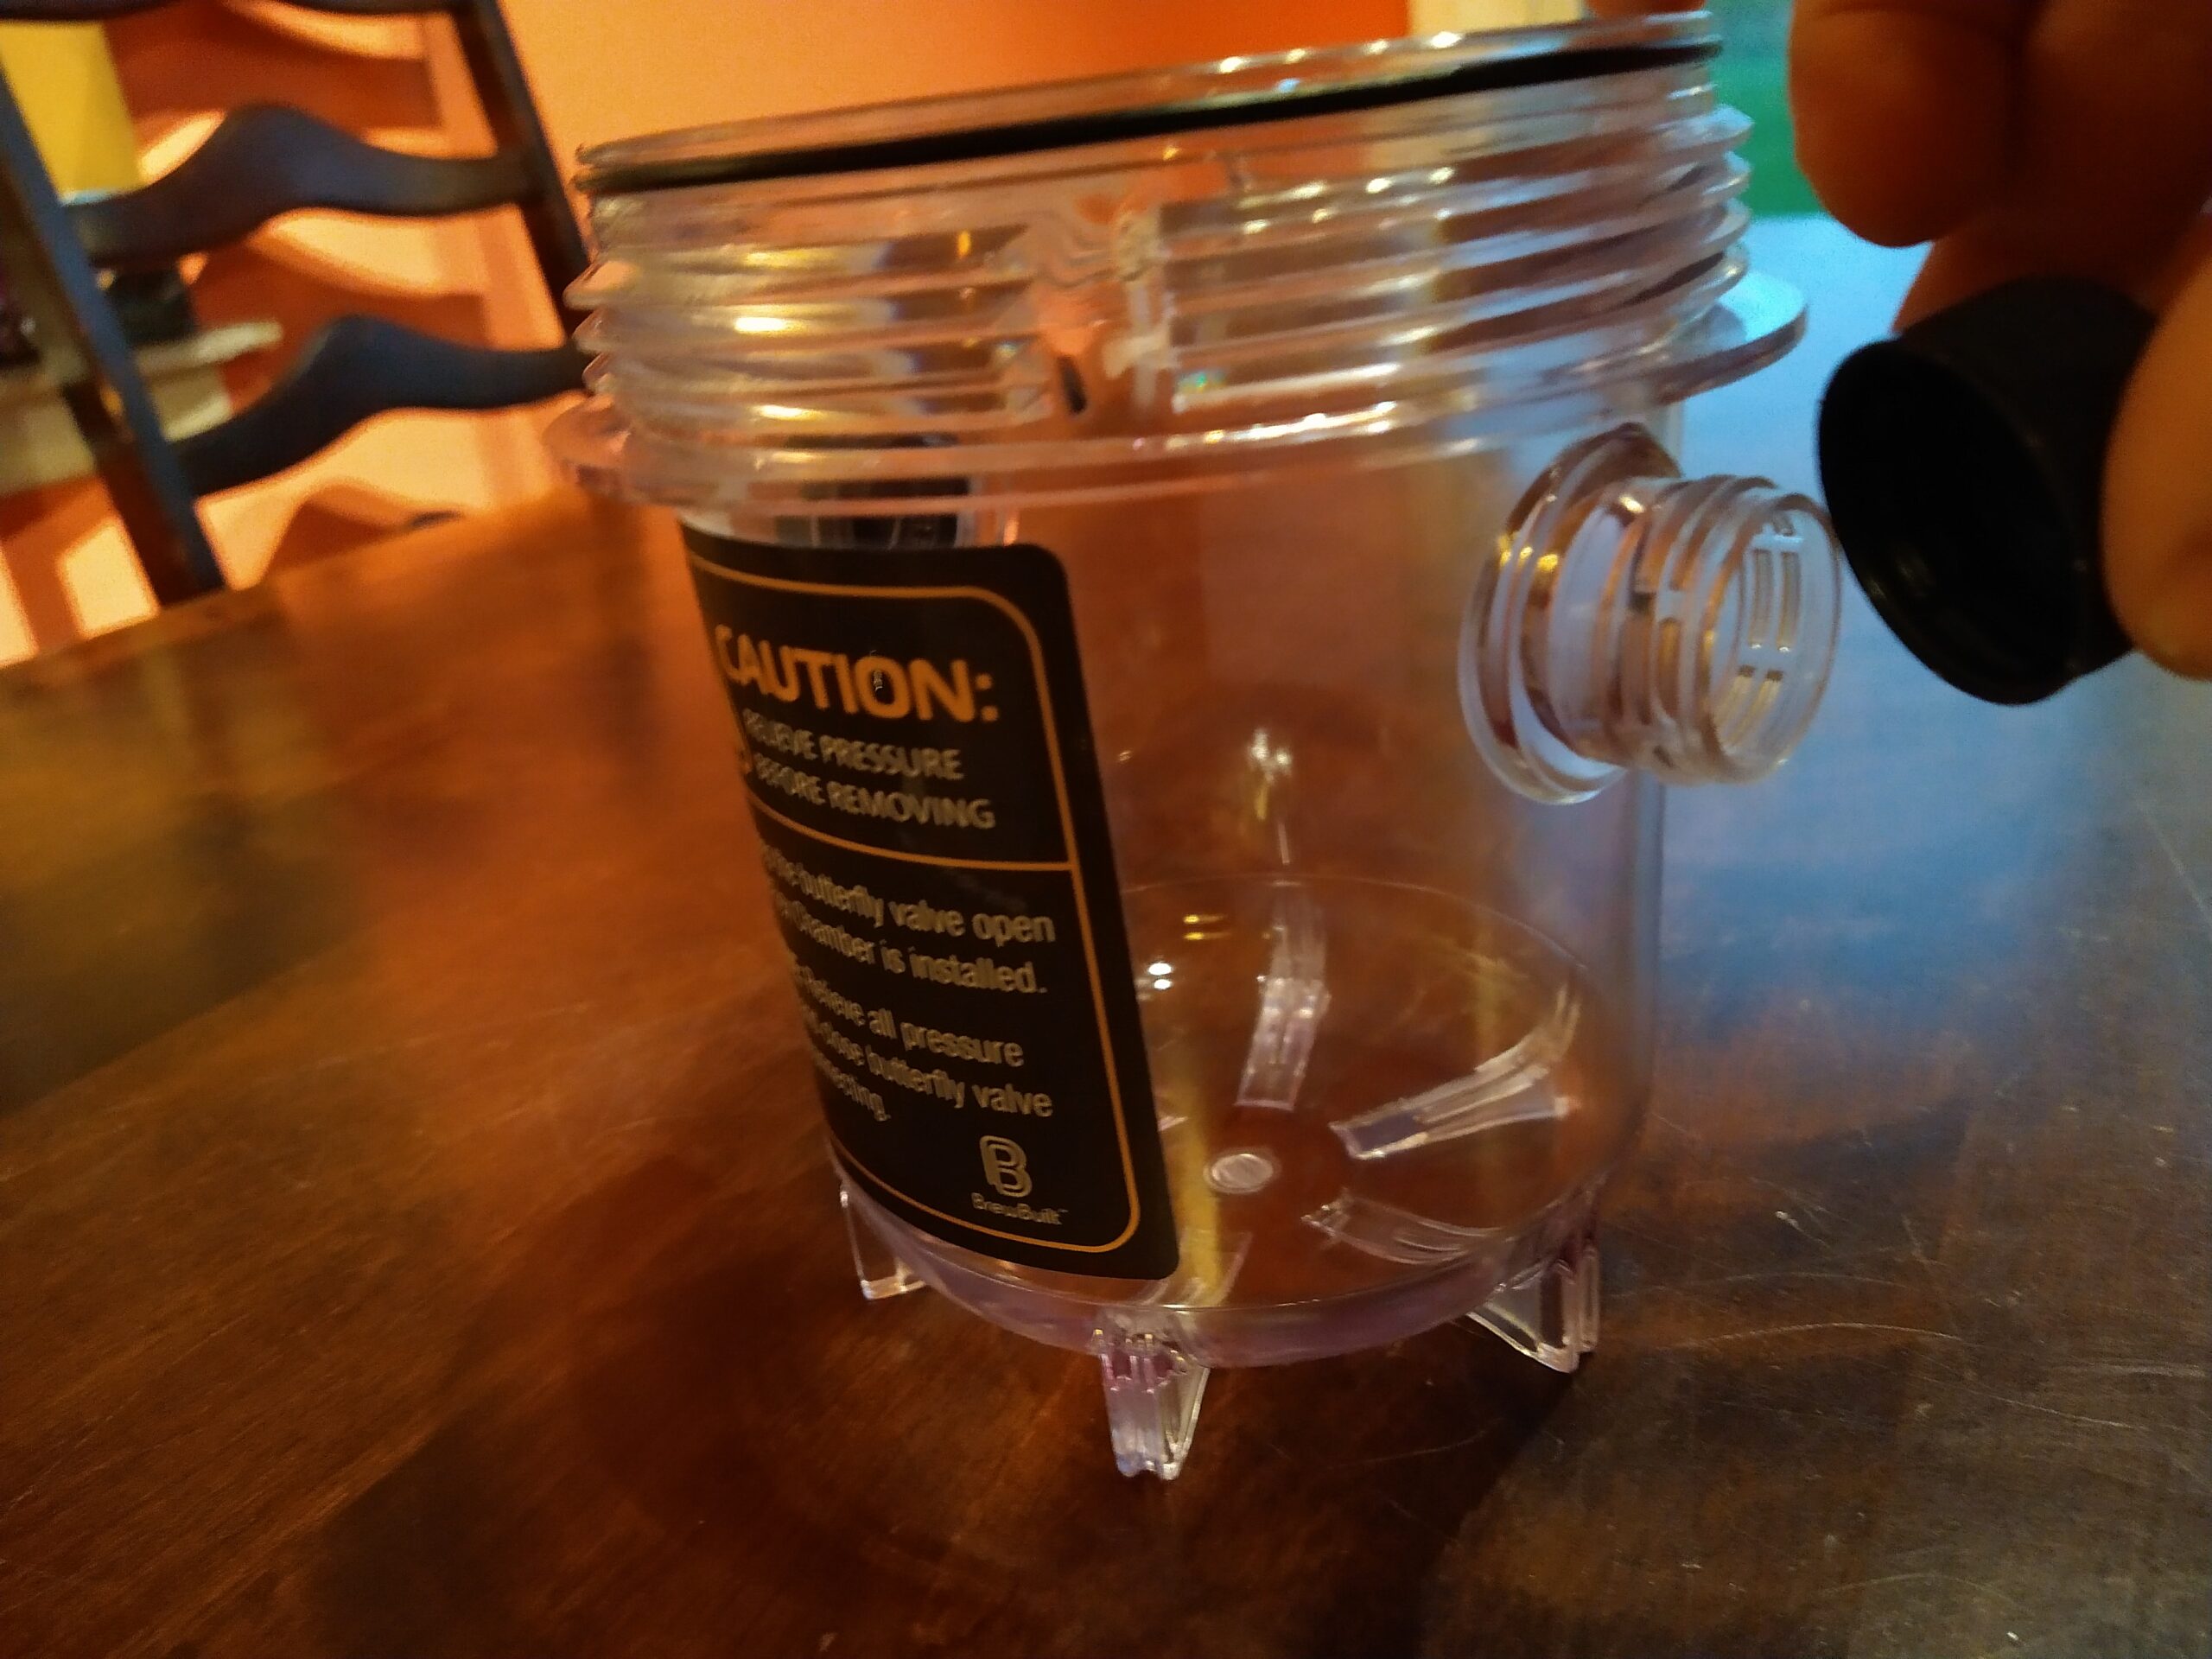 Threaded Caps on Side of Flex Chamber
Parts!
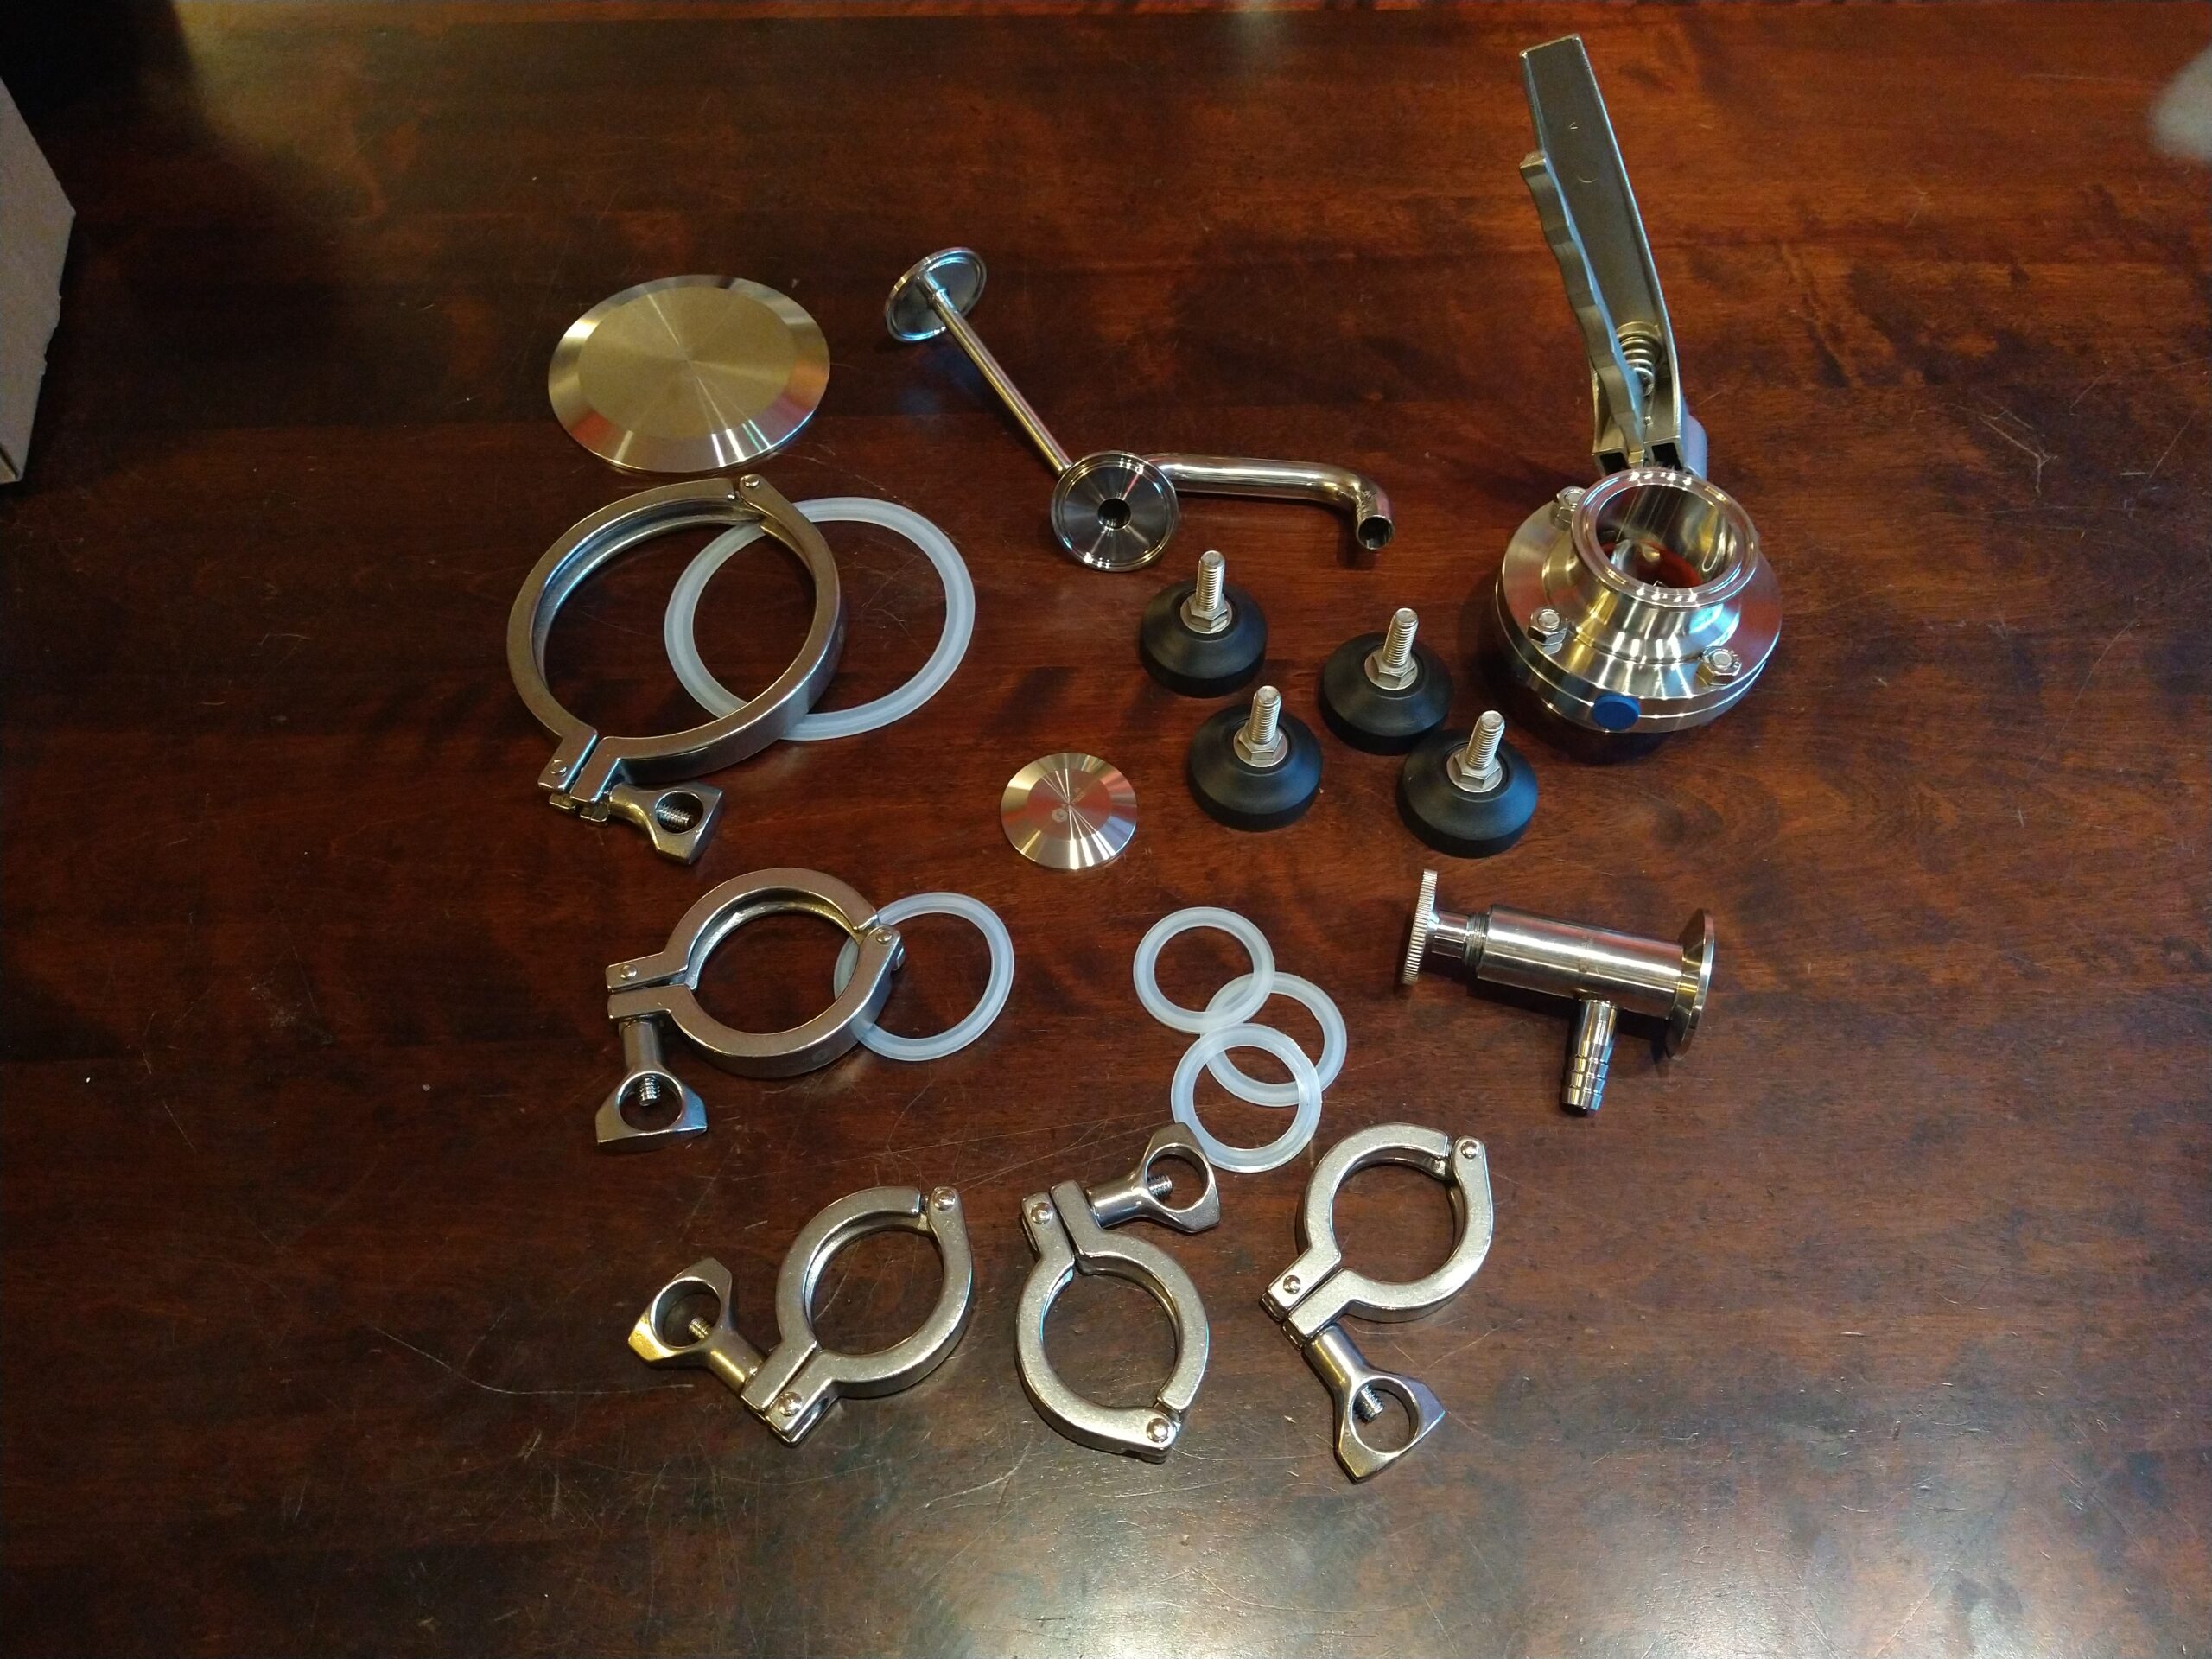 Collection of Parts for X1 Uni
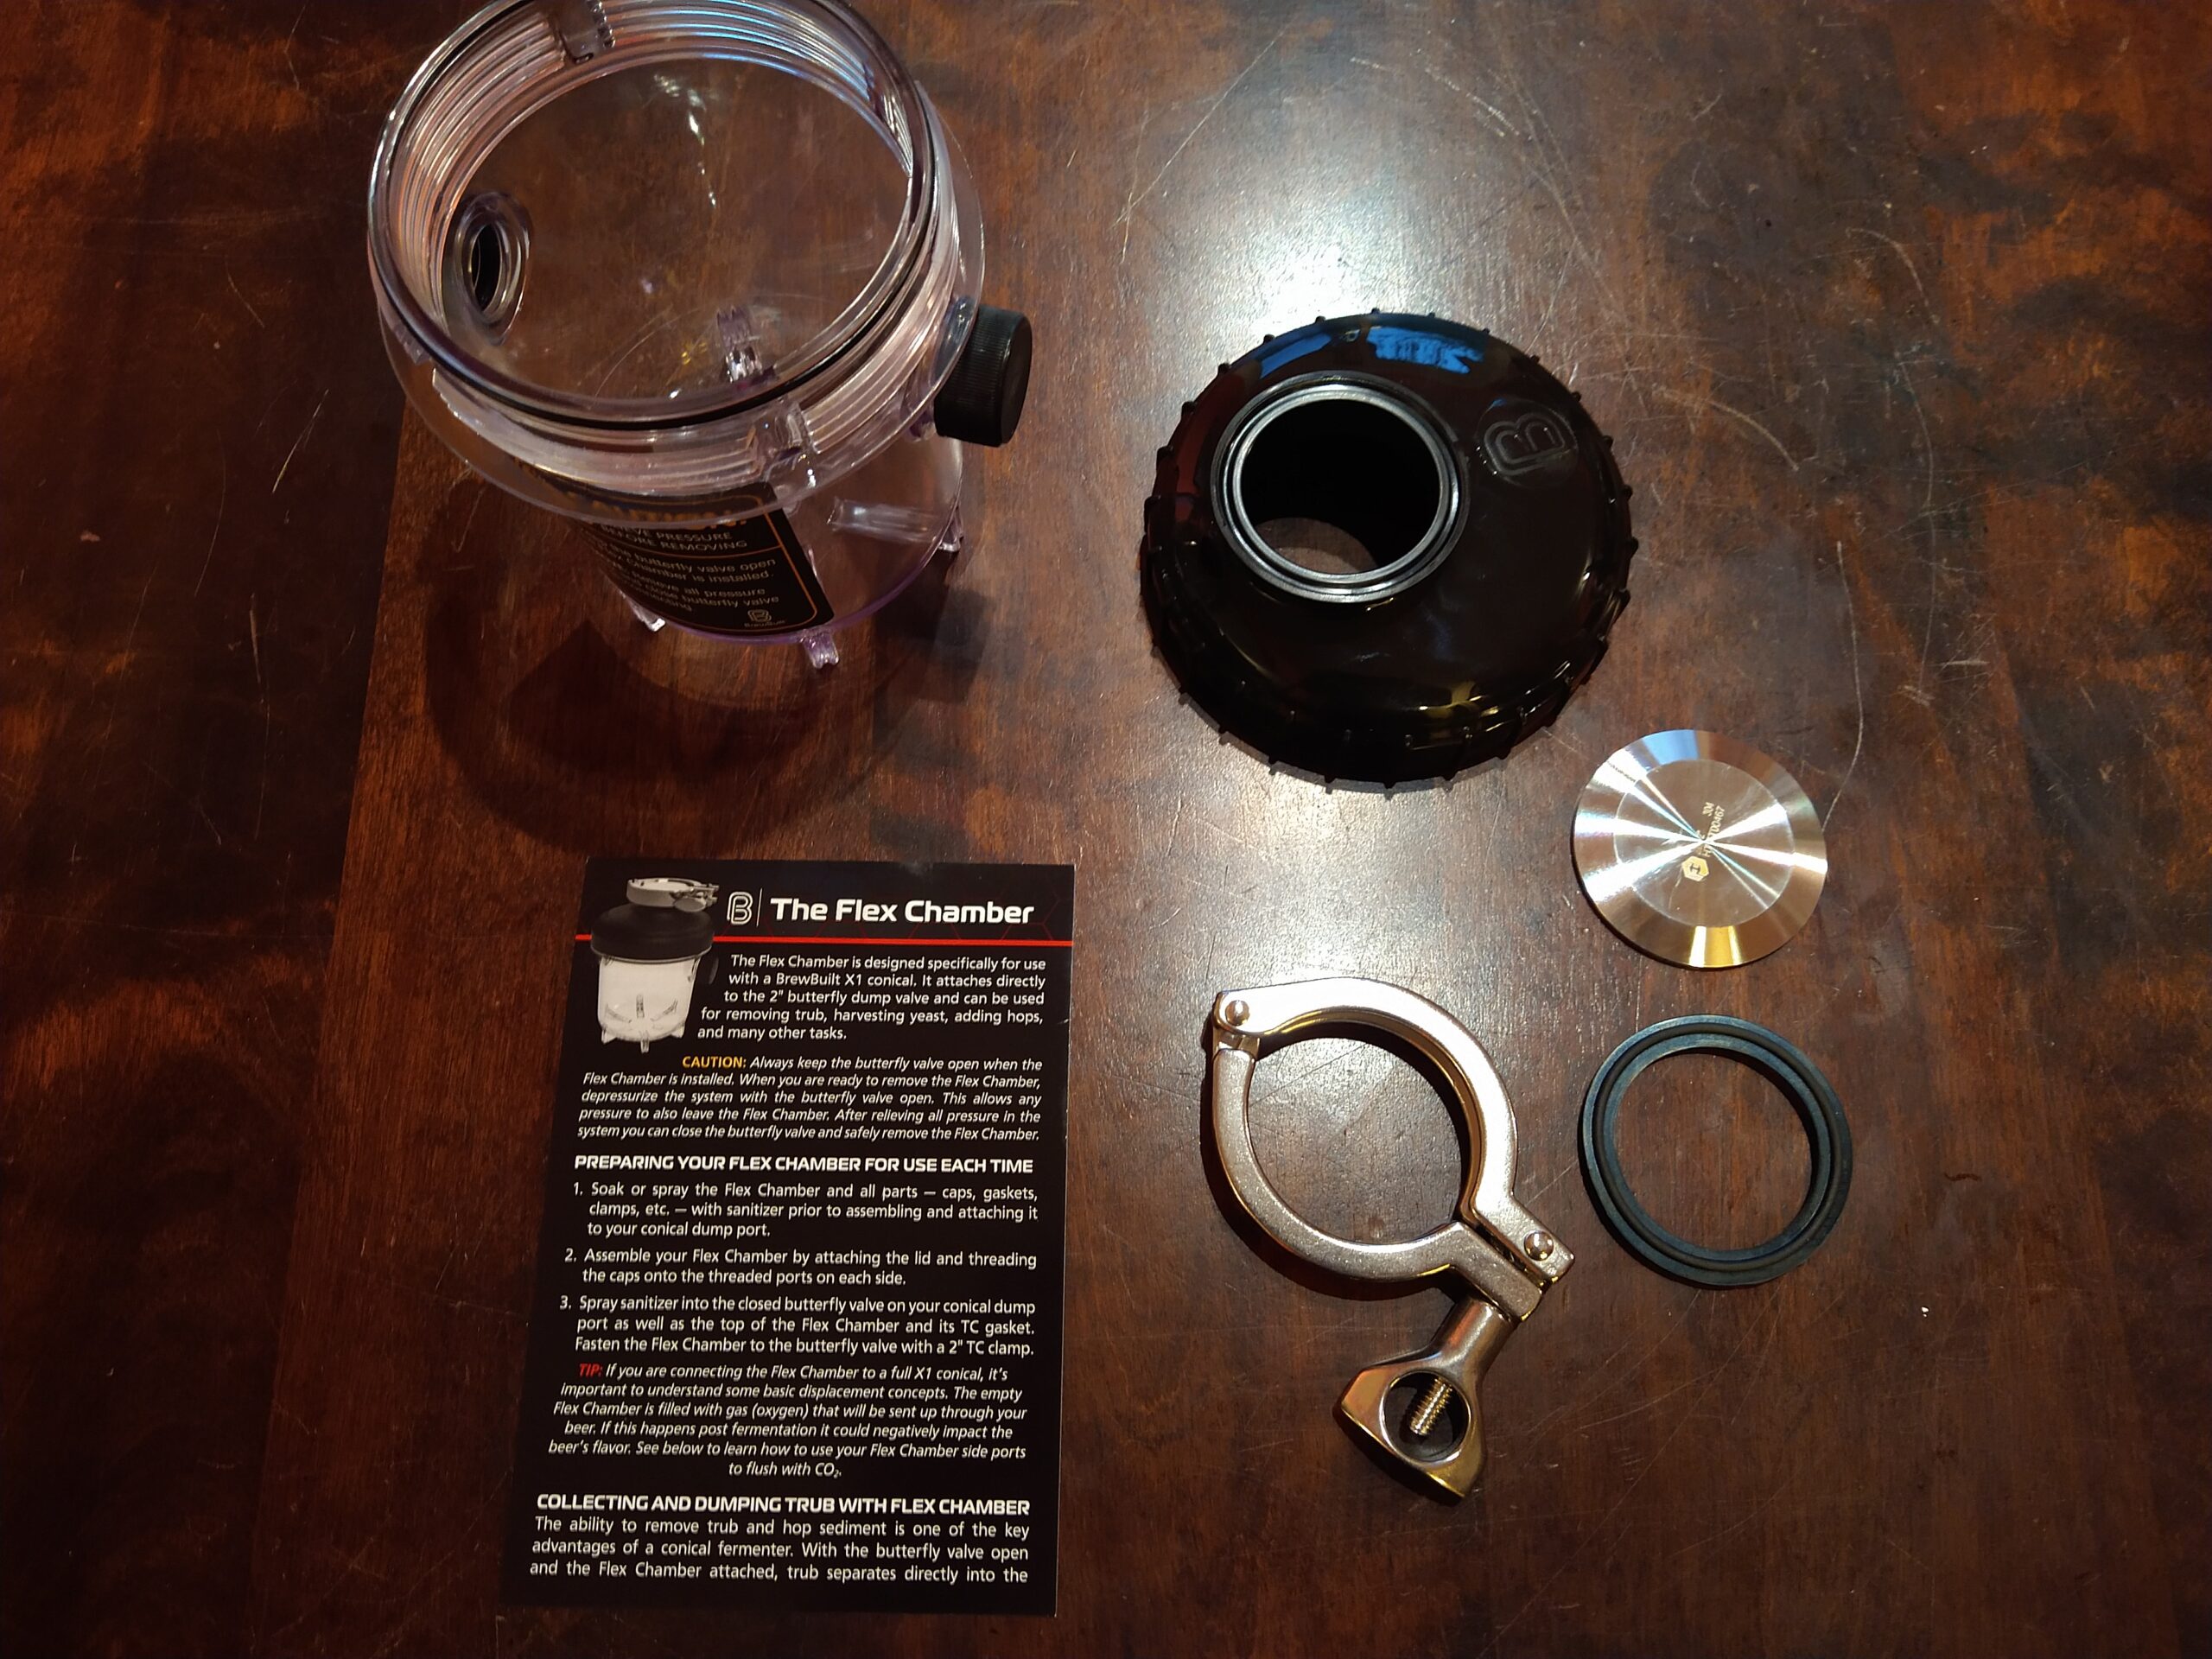 Flex Chamber Parts
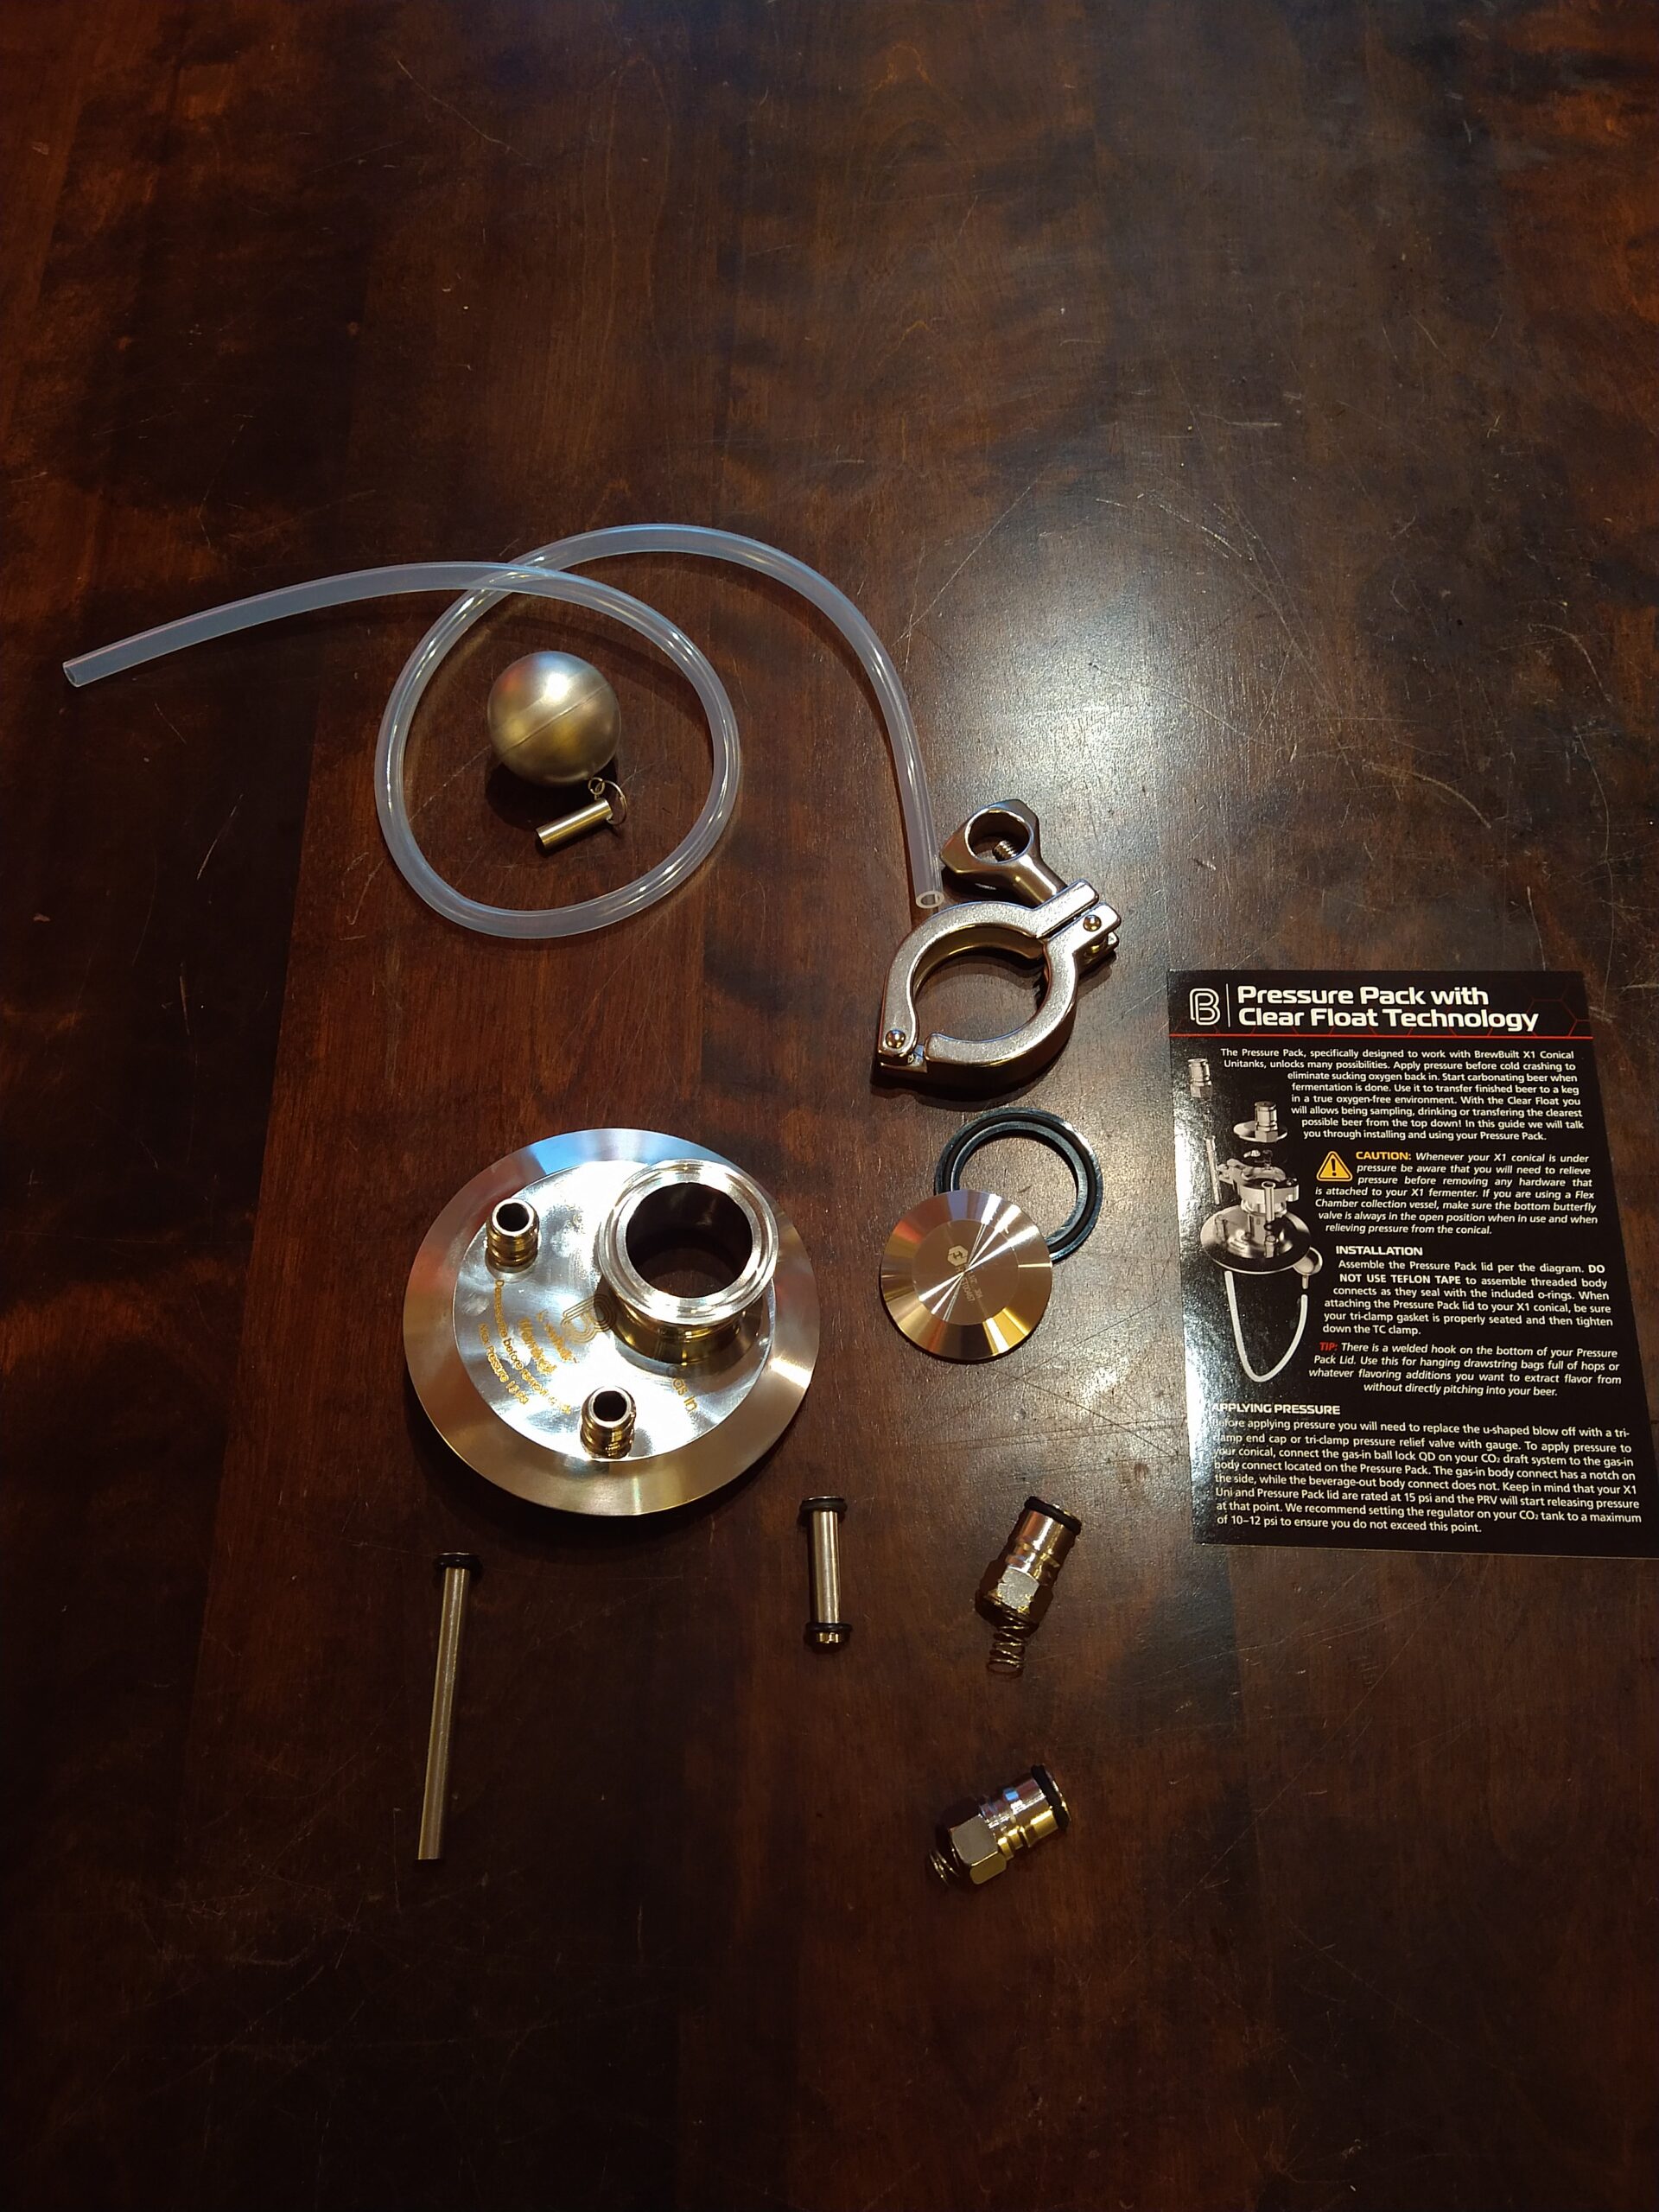 Parts to be Assembled for Pressure Pack Lid
 Inner Parts of Pressure Relief Valve
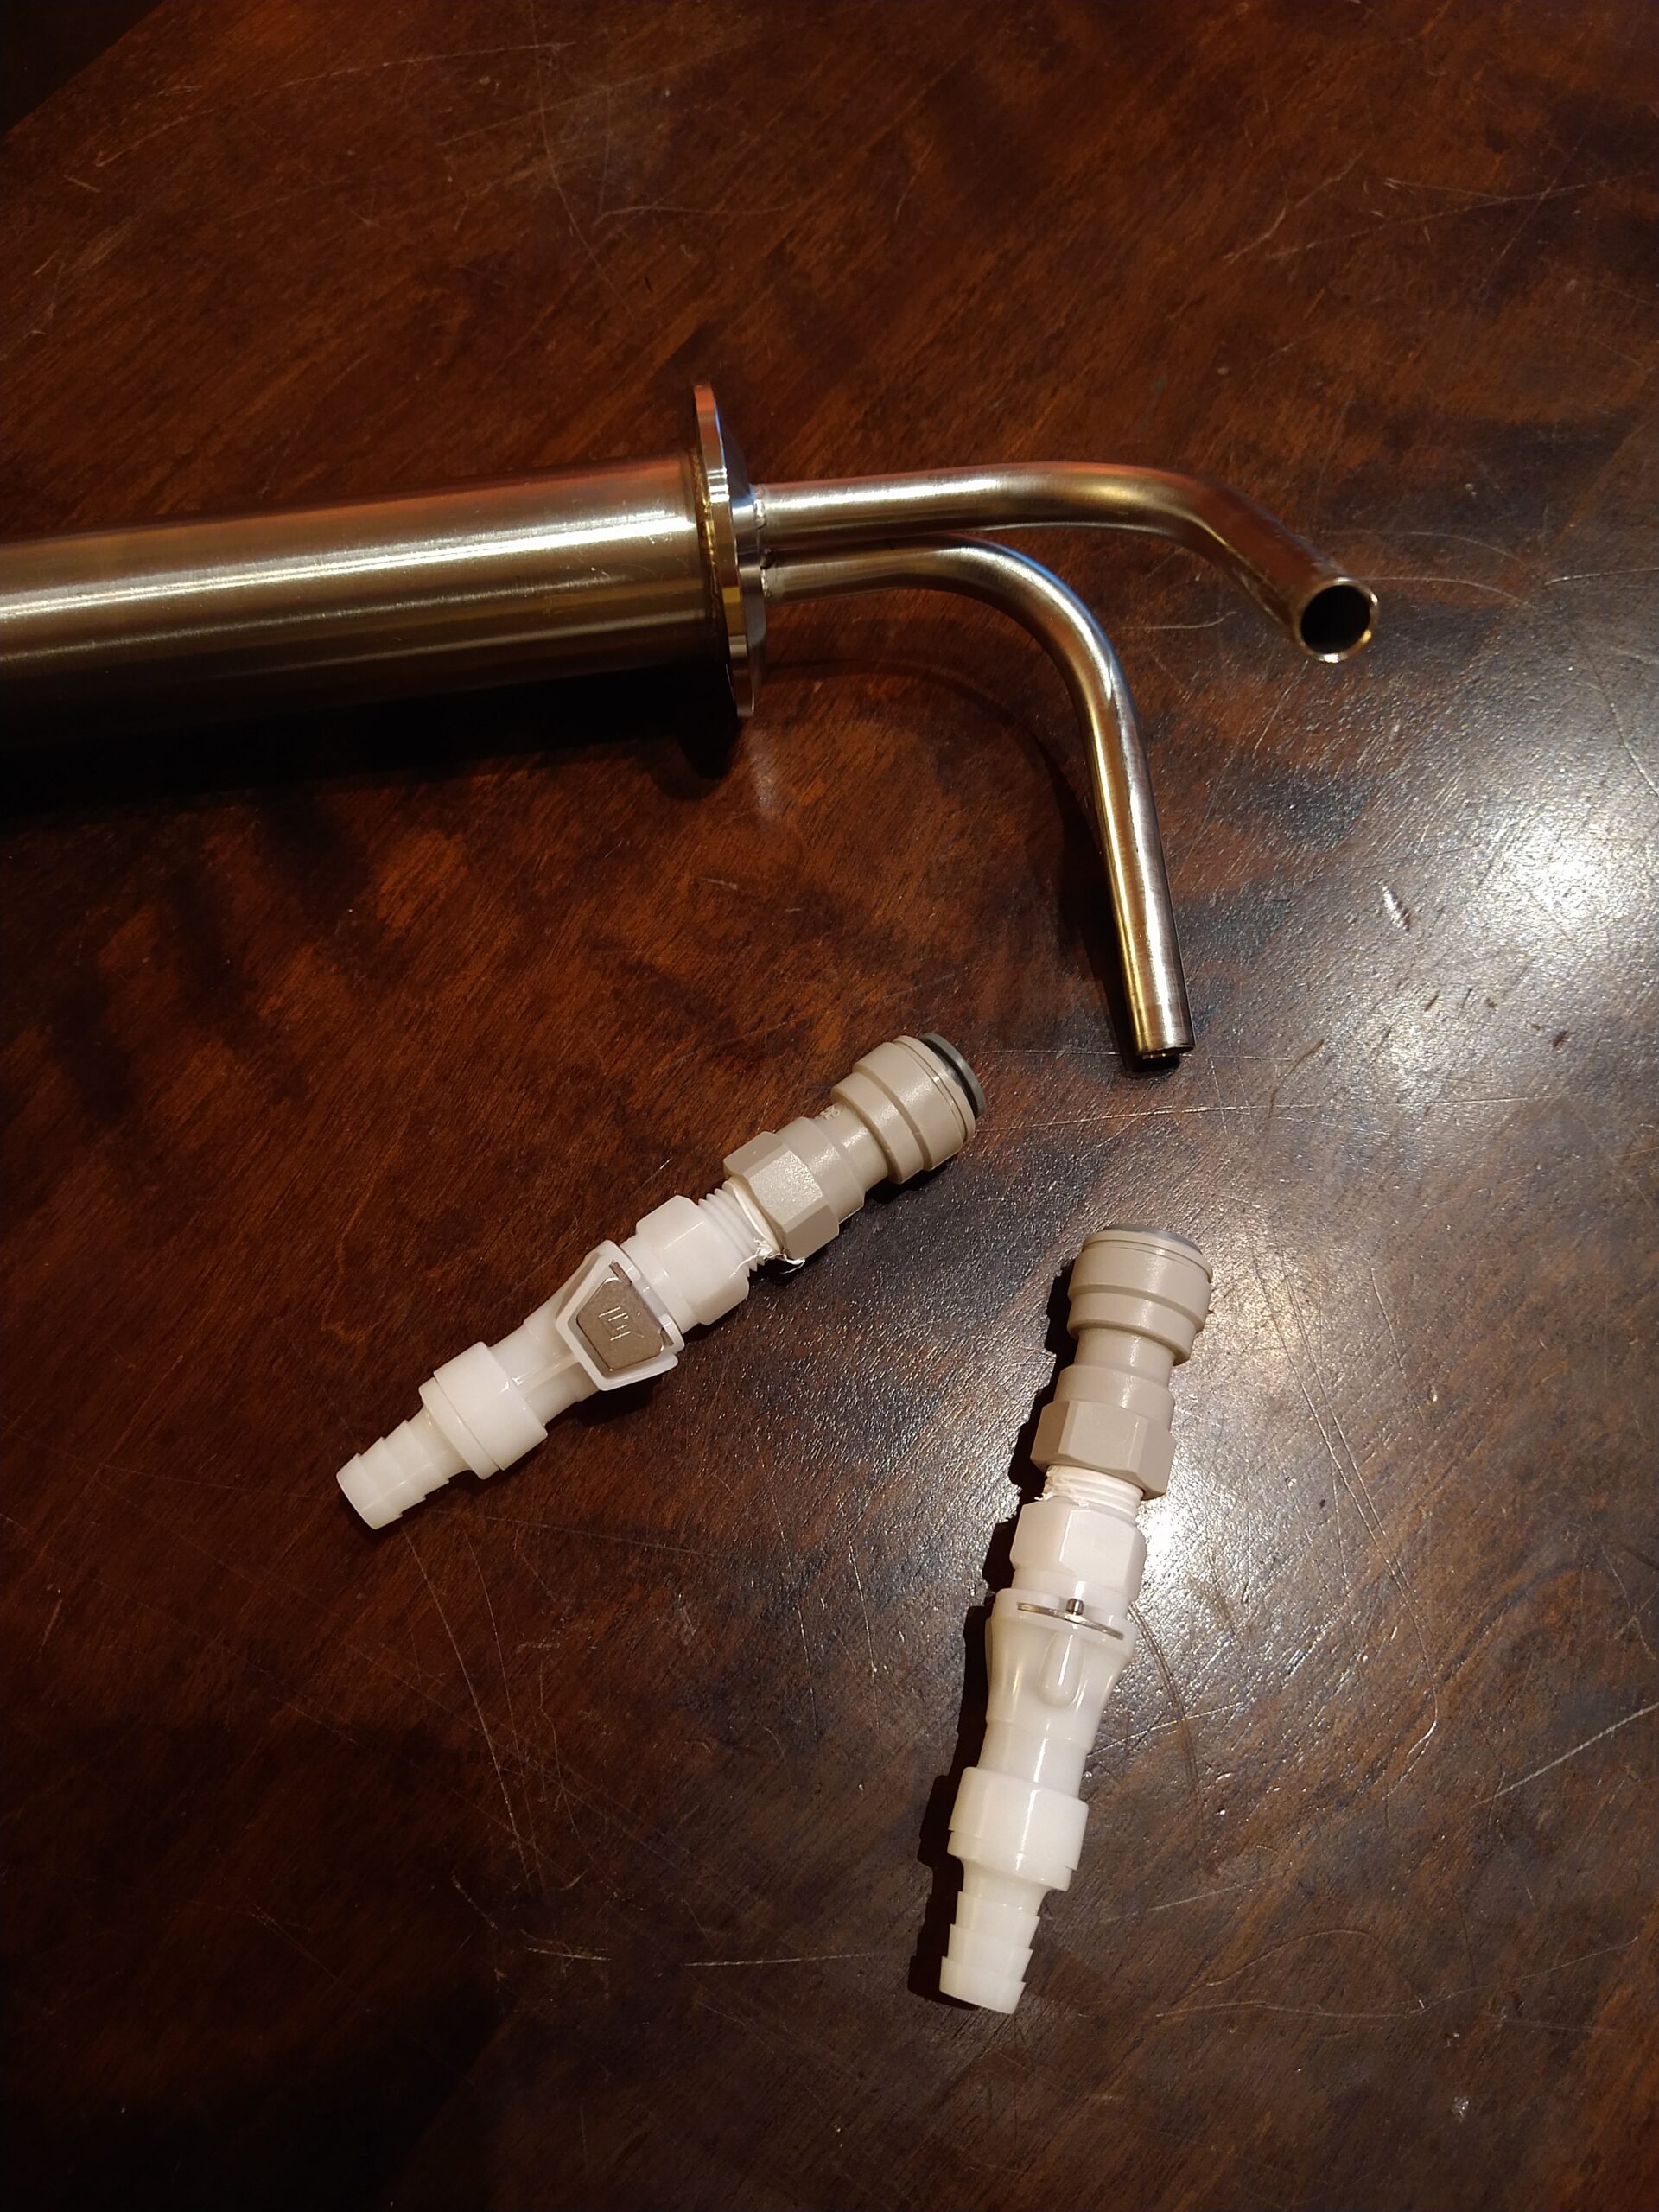 Quick Disconnect Fittings for CoolStix
Dip Tube Length
See section above for dip tube related tips
 Tubing Too Long and Dip Tube Jammed with Beer Left
 Dip Tube Too Long, Removed 10 Inches
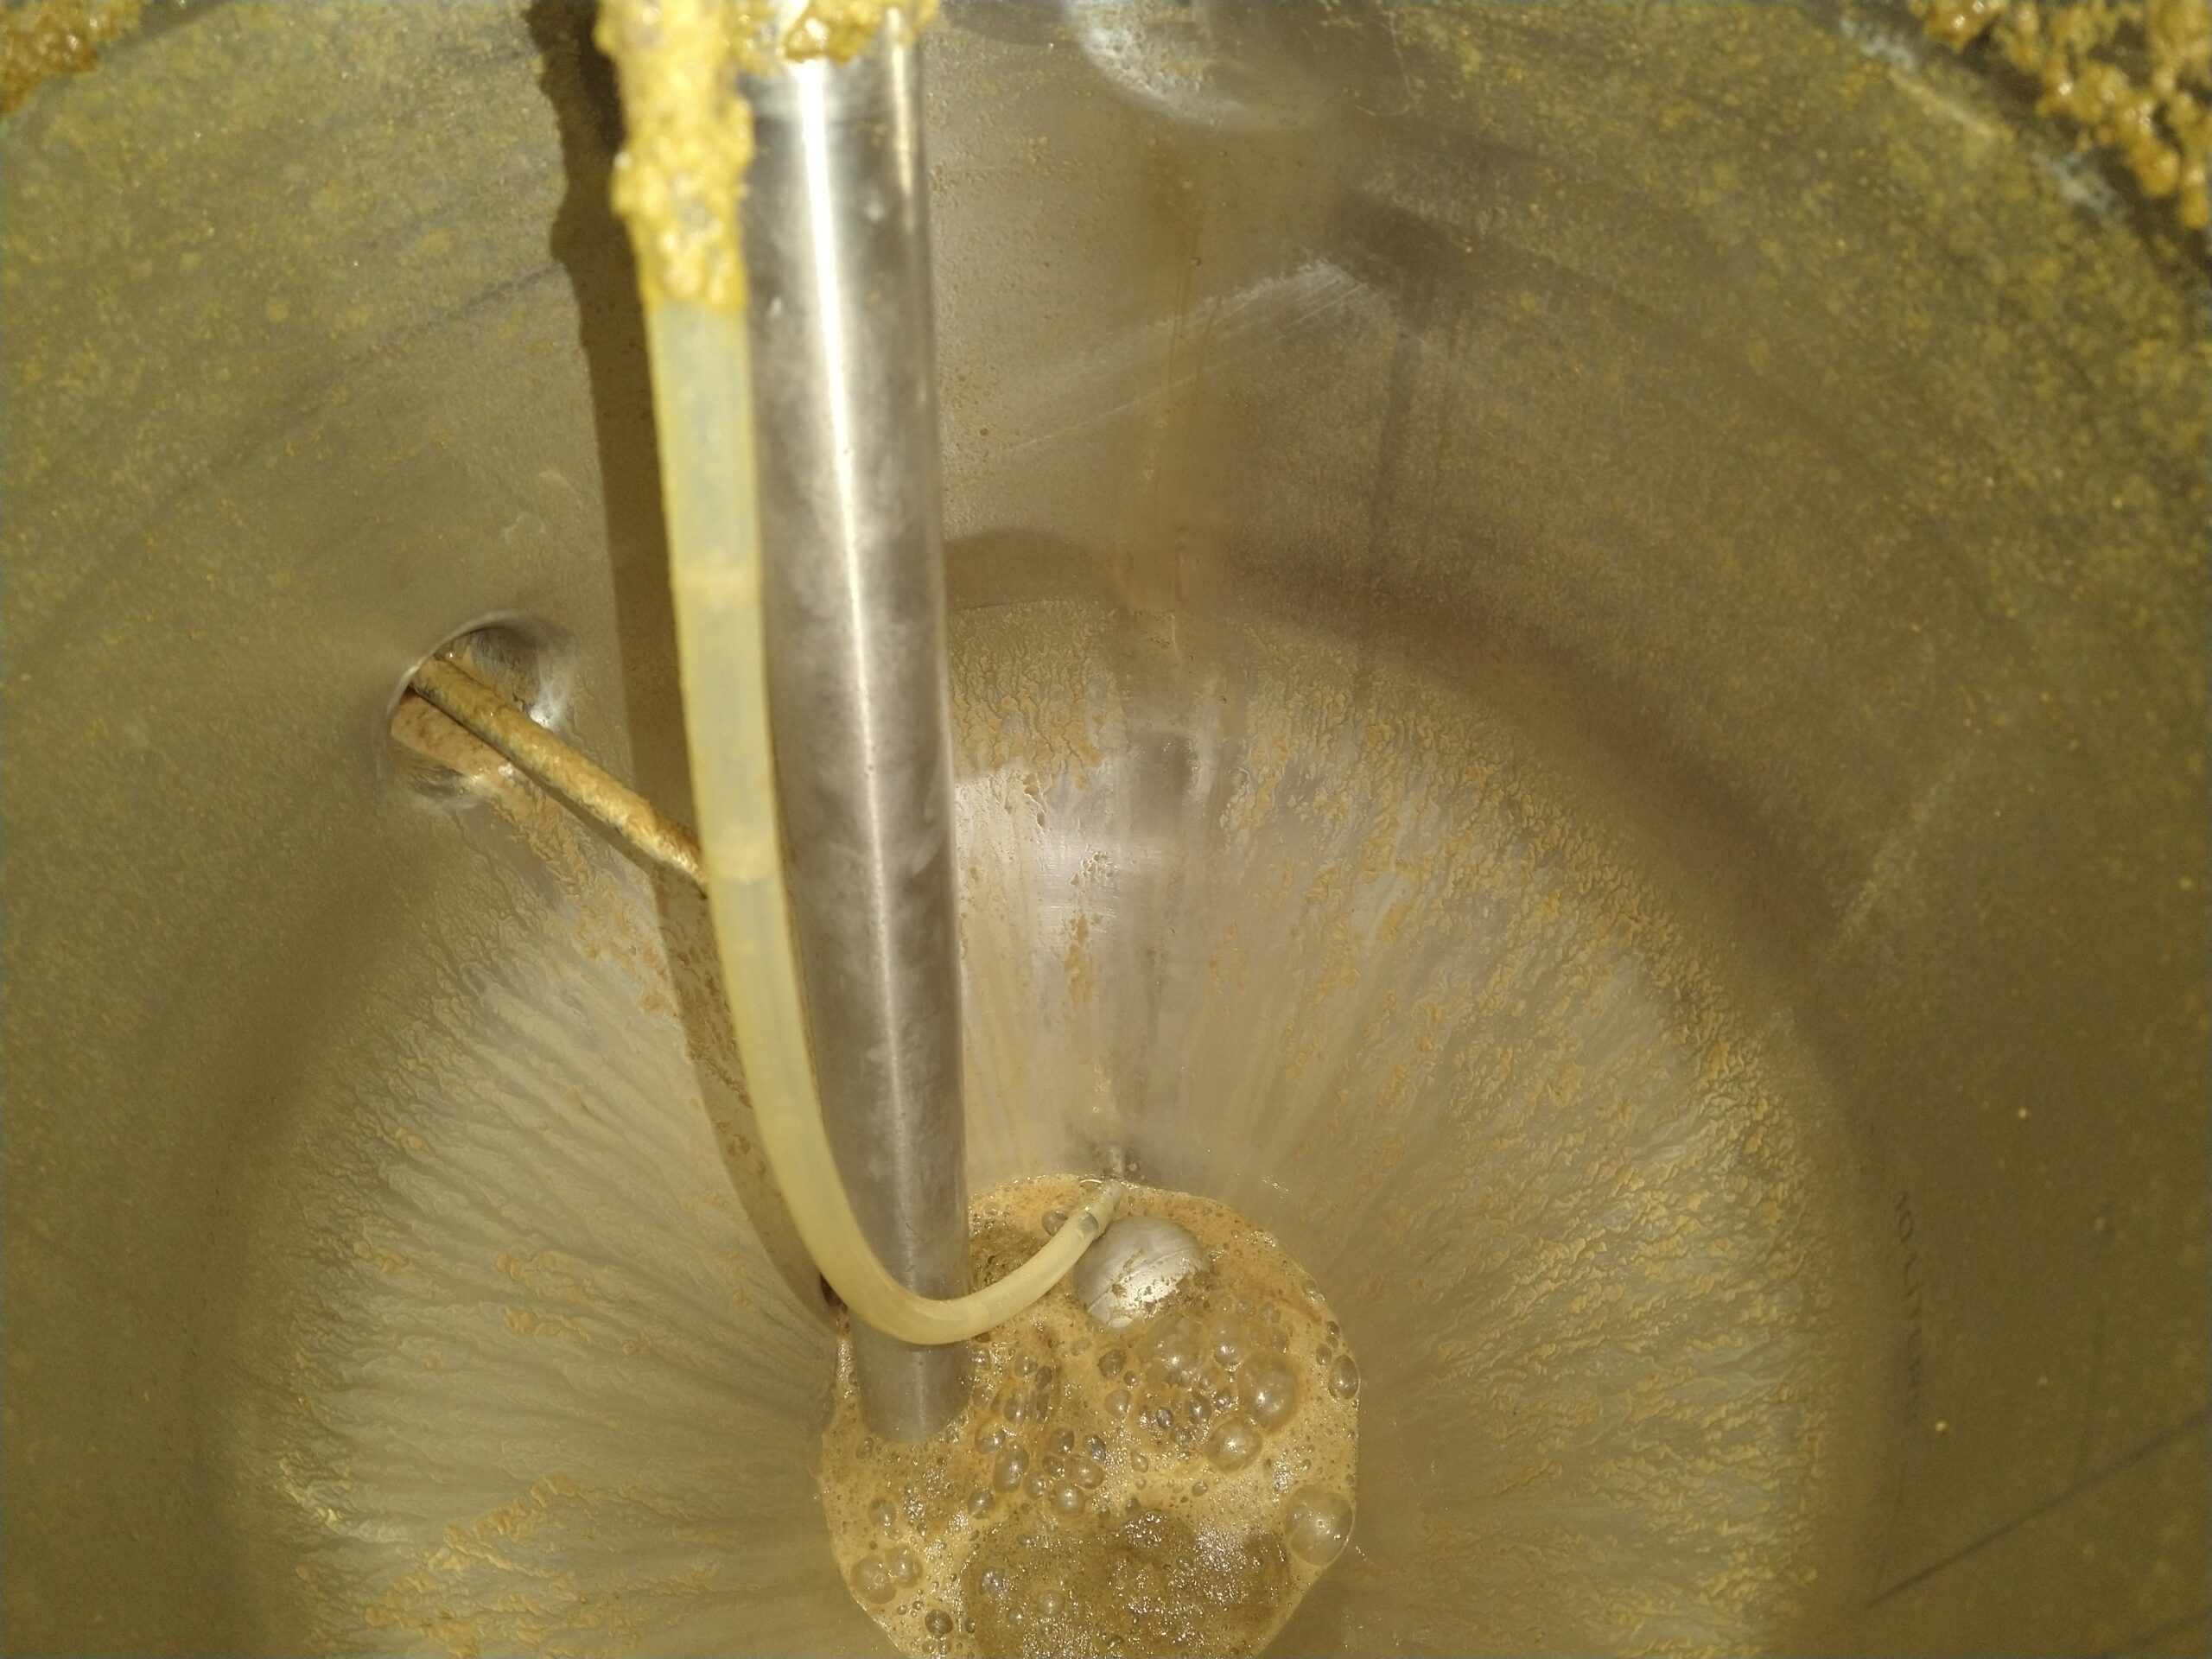 Beer Remaining After Shortened Dip Tube
More Homebrew Finds!
- Last 50 Finds!
- Top Deals – a curated list of the best deals
- Homebrew Reviews – one of the largest libraries of homebrew reviews in existence!
- Our Top Posts – tips, how-tos, resources posts and more
More Fermenter Reviews!

Most Recent Deals

We Are Homebrew Review HQ! Our 10 Most Recent Reviews

More Fermentation Related!
- Our Fermentation Related Reviews – Fermenters and More
- Yeast Starters and Fermentation Resource Page
- Yeast: The Practical Guide to Beer Fermentation
- Compare Prices: StirStarter Stir Plate
Special Thanks to MoreBeer for providing the unit used for evaluation in this review.
By Brad Probert. Check out Brad’s website – beersnobby.com
Special Thanks to Anvil Brewing Equipment for providing the unit used for evaluation in this review.
Price, promotions and availability can change quickly. Check the product page for current price, description and availability.
Make sure the components you use are compatible and rated for your intended application. Contact manufacturer with questions about suitability or a specific application. Always read and follow manufacturer directions 8.1.21 tag:lnksfxd review:x1conical tag:tpr