
Hands on Review: Anvil Crucible Cooling System
This review is by Homebrew Finds Contributor Brad Probert. Brad is an engineer, expert homebrewer and experienced reviewer. Grab a link to Brad’s website at the end of this review.
Anvil Crucible Cooling System
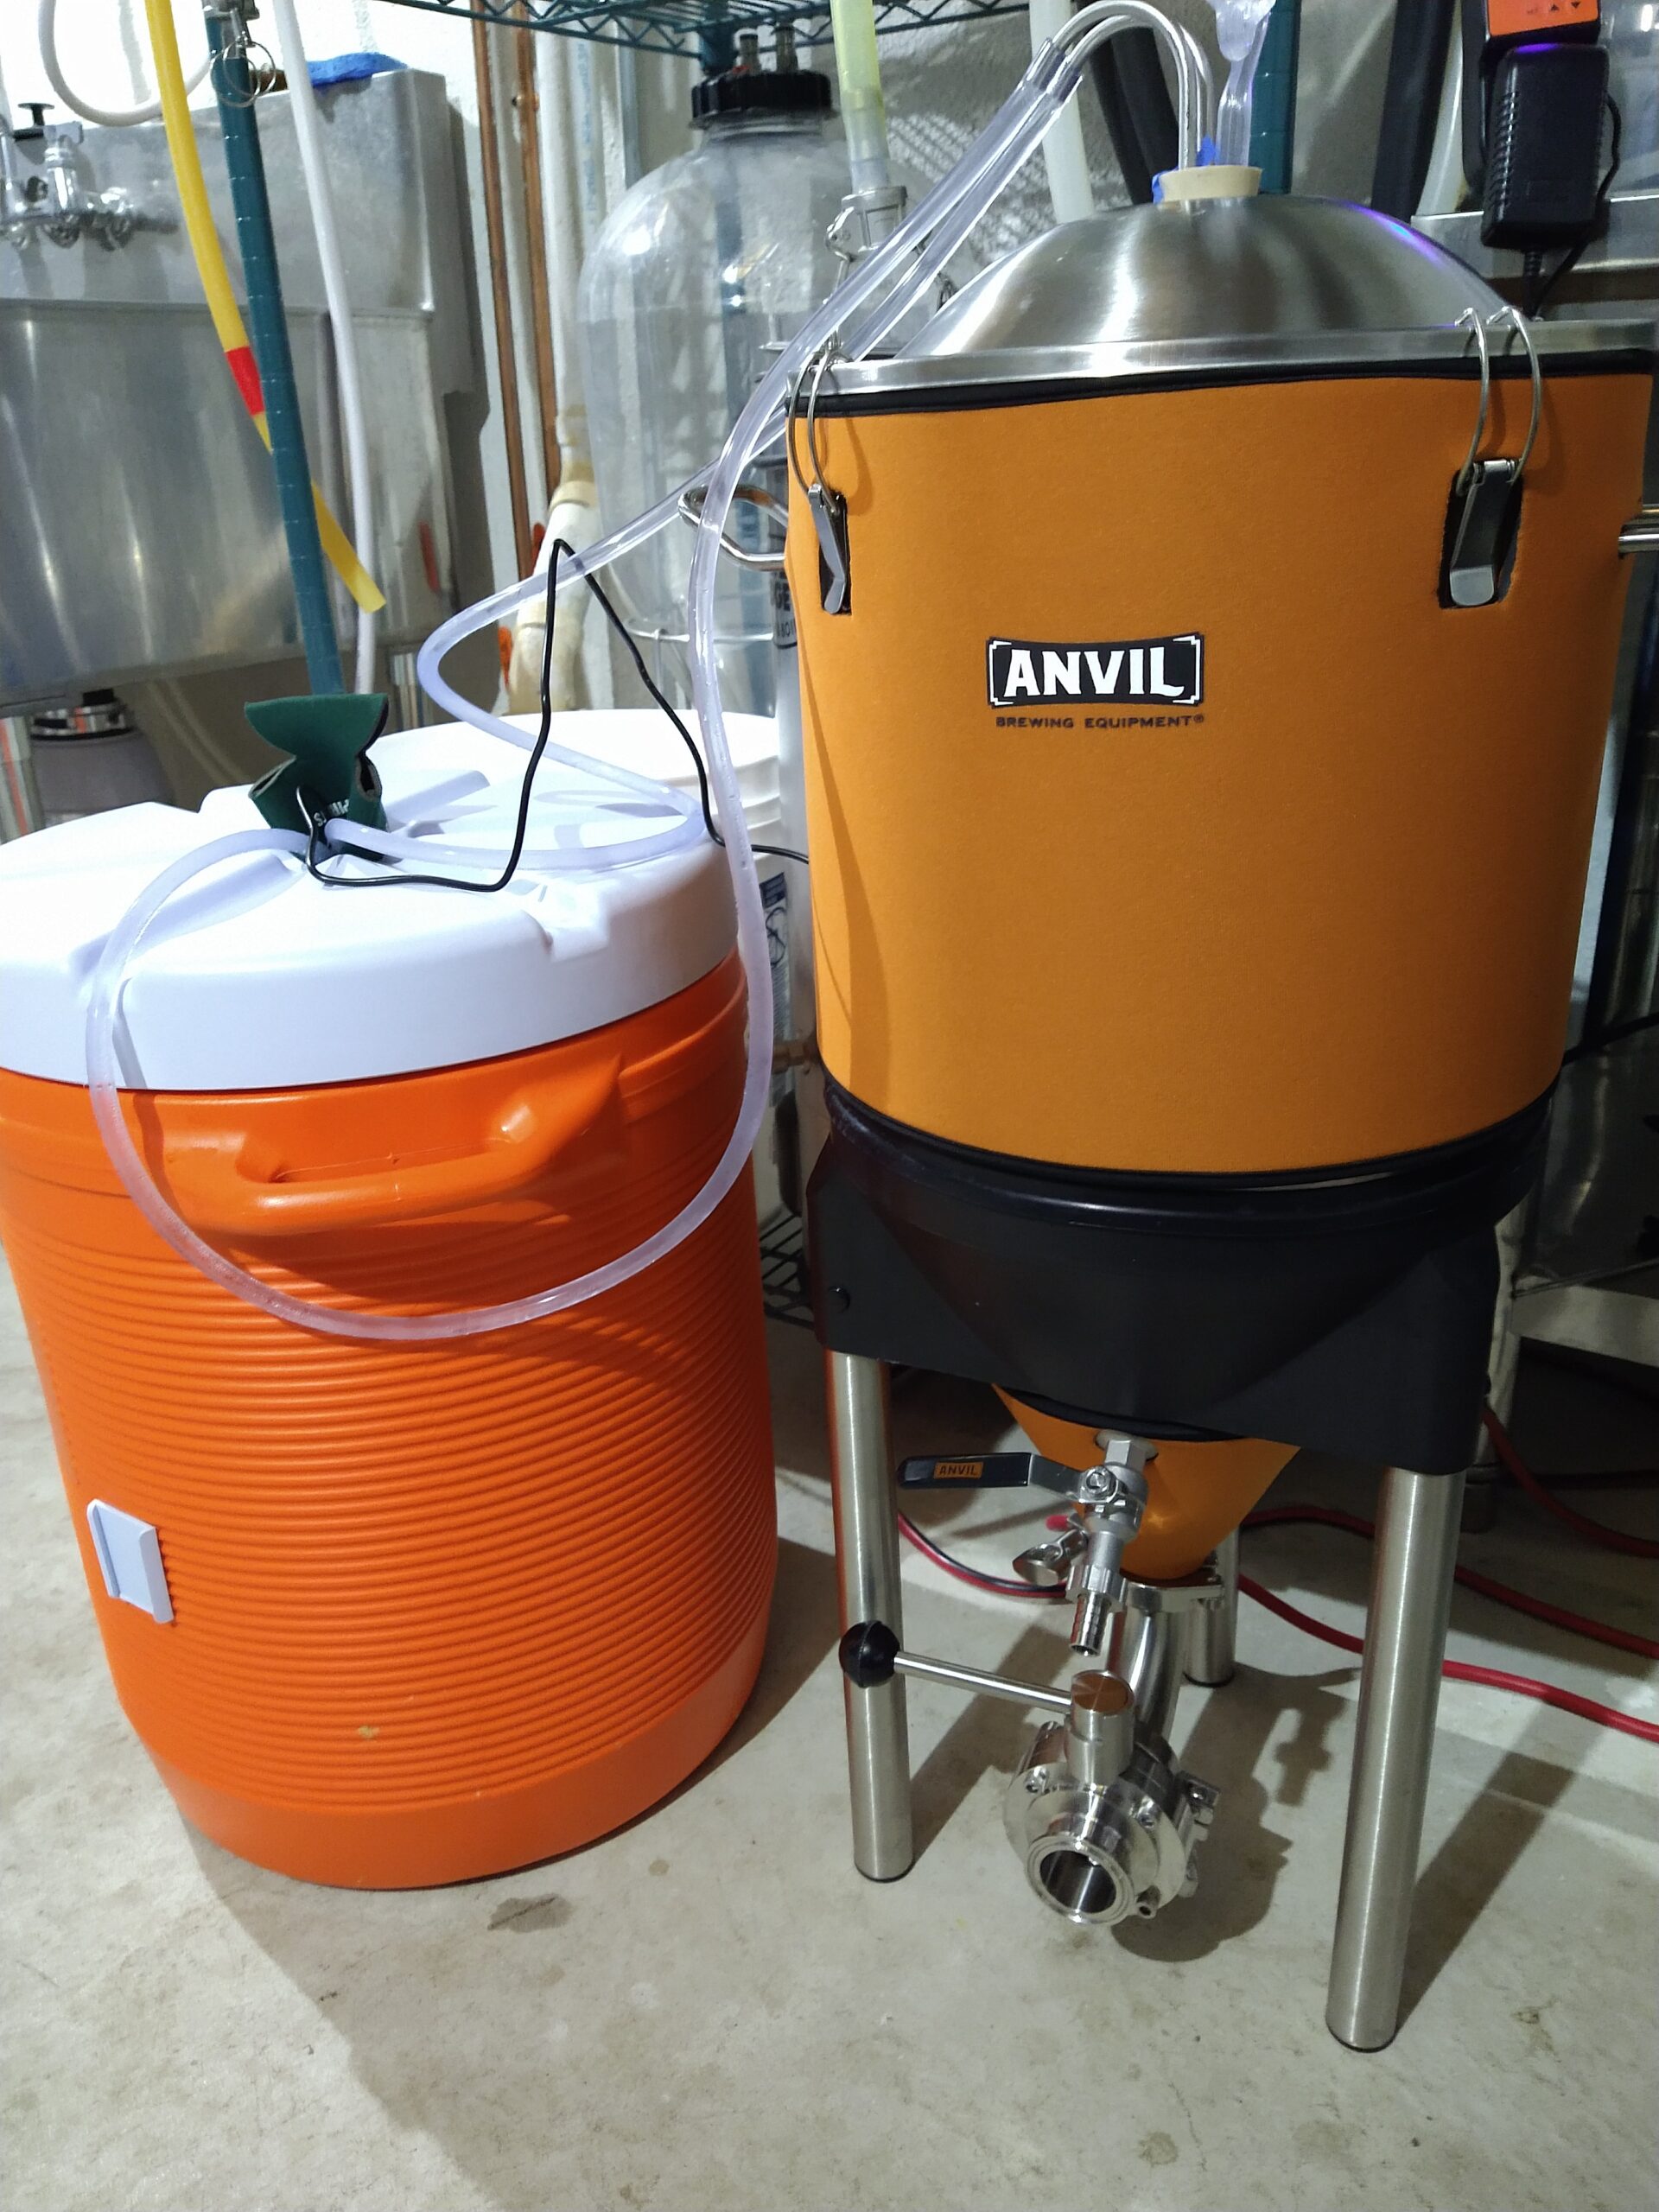
The Anvil Crucible is a new stainless steel fermentor on the market. It has the 60-degree angled cone which makes it long and narrow as it tapers down. This angle makes it steep enough that as yeast and particulate drop out of suspension in your fermenting beer, it hits the cone wall and slides down to the bottom point. This long cone makes the fermentor taller overall. The 7 gallon Anvil Crucible measures 30.5” from the bottom to the top of the lid (plus an additional 6.25” for airlock and stopper). In contrast, the Anvil Stainless Bucket Fermentor is only 19.5” tall (plus the 6.25” for airlock). Both of them have the same 16.5” width from handle to handle. So while you can stuff the Bucket Fermentor in a dorm-sized fermentation fridge, not so for the Crucible. However, Anvil has an optional Cooling System for the Crucible you can buy to add on cooling capability.
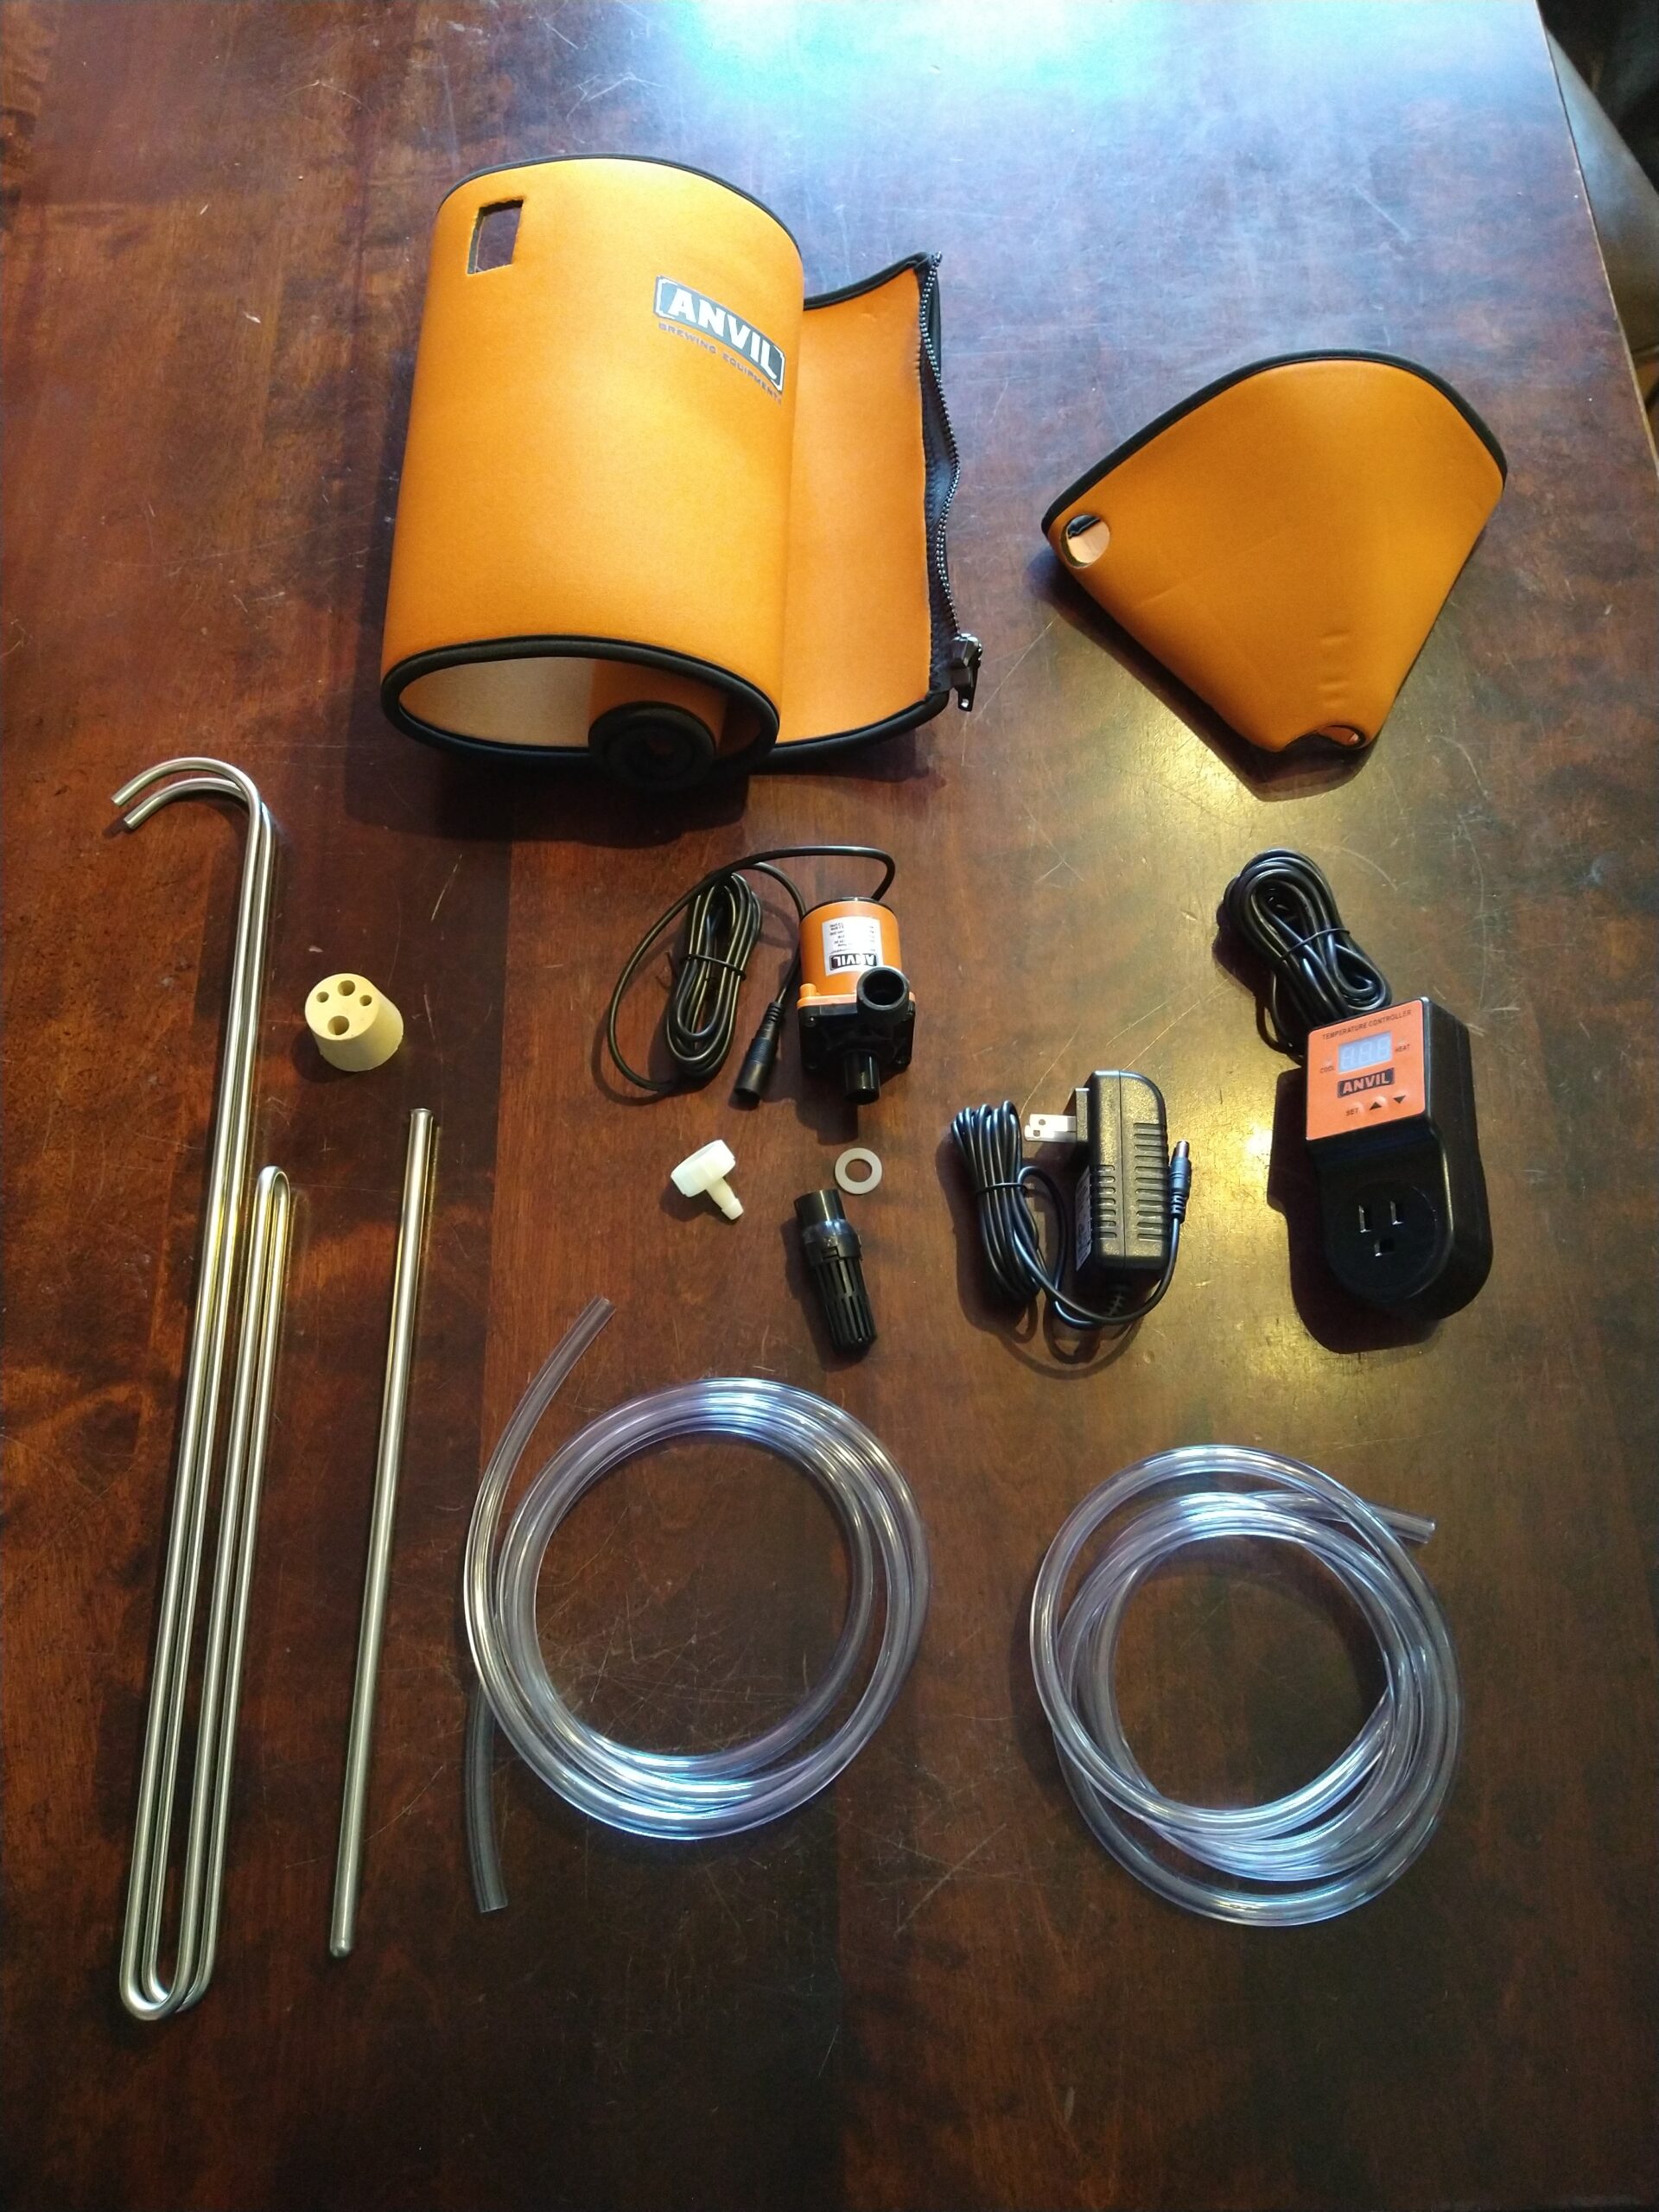 Cooling System Full Kit
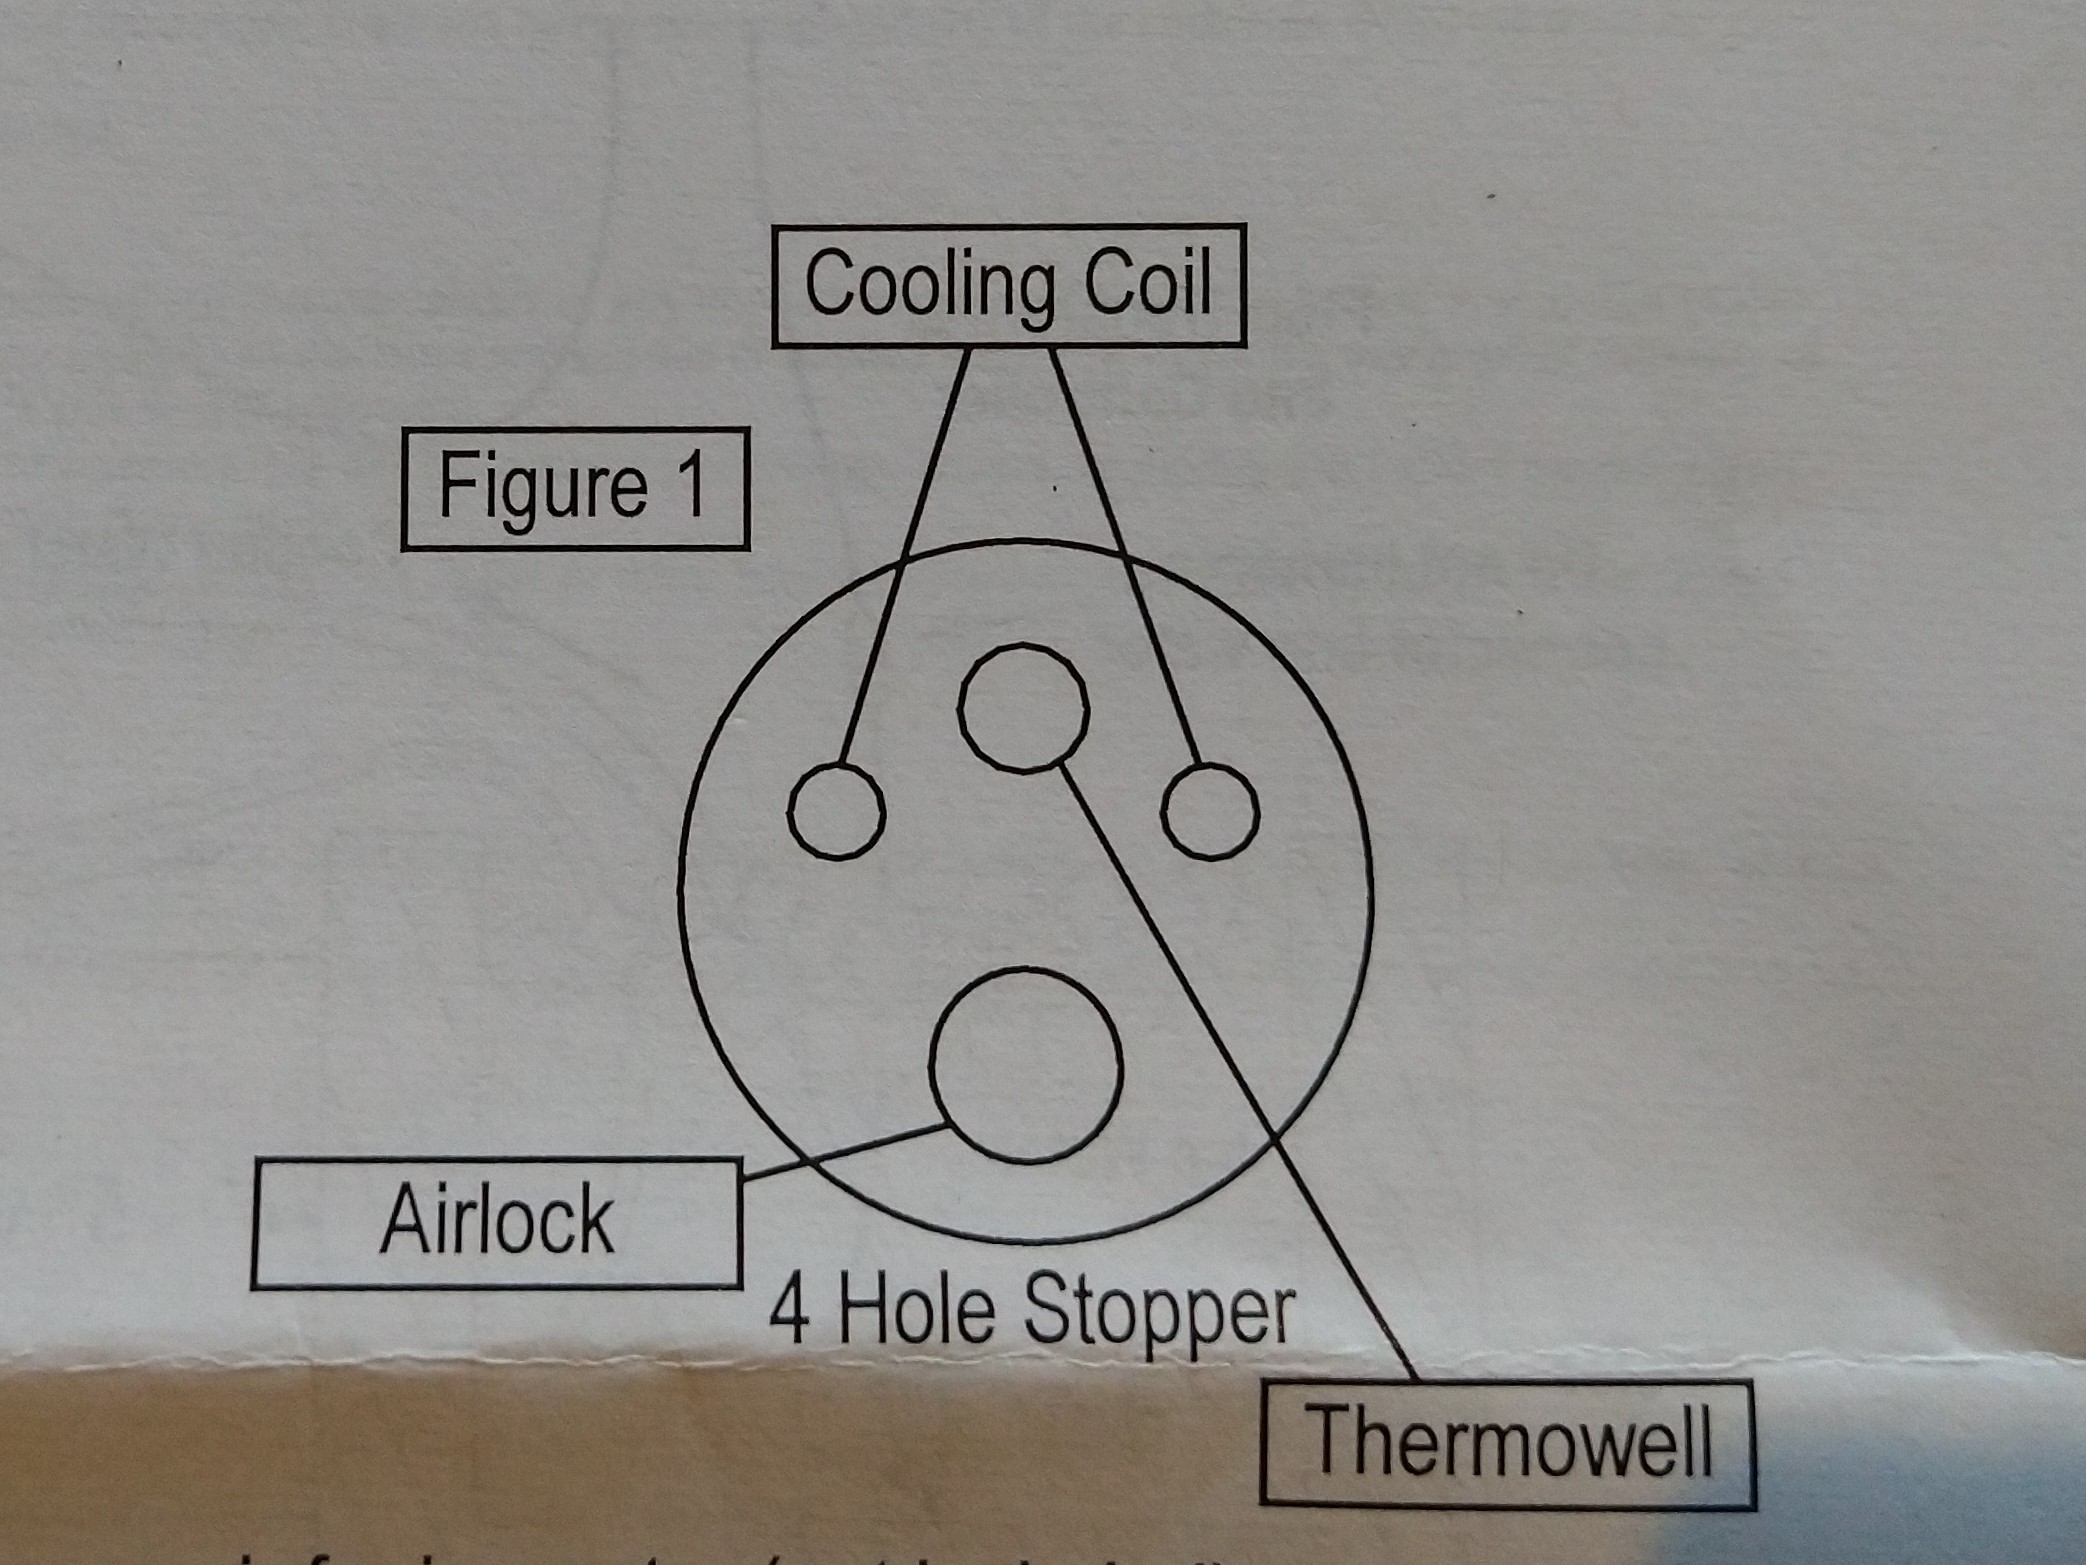
The Crucible cooling system replaces the standard one-hole stopper (just for the airlock) with a multi-hole stopper that has holes for inlet and outlet spots for the stainless cooling tubing, another hole for the stainless thermowell, and lastly a hole for an airlock. The cooling tubing is fairly narrow, but it makes up for its small diameter with lots of extra length as it runs up and down inside, providing extra surface area for cooling. To attach to the metal cooling tubes, the kit includes two 5-foot lengths of vinyl tubing, which provide a clamp-free tight fit to the inlet and outlet tubing portions.
Compare Models, Prices and Availability, Review Continues Below:
- Anvil Cooling Systems at MoreBeer
- Anvil Cooling Systems at Adventures in Homebrewing
- Anvil Fermentors and Accessories at Great Fermentations
Buy Anvil Crucible Conicals
- Anvil Crucible at MoreBeer
- Anvil Crucible at Adventures in Homebrewing
- Anvil Fermentors at Great Fermentations
- Anvil Crucible at Keg Connection
- Anvil Crucible at homebrewsupply.com
Related… Hands on Review: Anvil Crucible Stainless Conical Fermentor!
To attach to the tubing, the kit provides a small but mighty Anvil submersible pump to put in your own source of cooling water. Rated at 16 feet of head/lift, it is more than capable of the job of circulating cooling water through the small diameter tubing. There are 2 pieces to the neoprene insulation jacket. The upper cylinder section is covered by a jacket with a nice chunky/robust zipper in the bright Anvil orange color. And since the cone has a lot of surface area for heat transfer, a second neoprene jacket is customized to fit the cone and have all the necessary holes to stay out of the way of the sample valve and dump port.
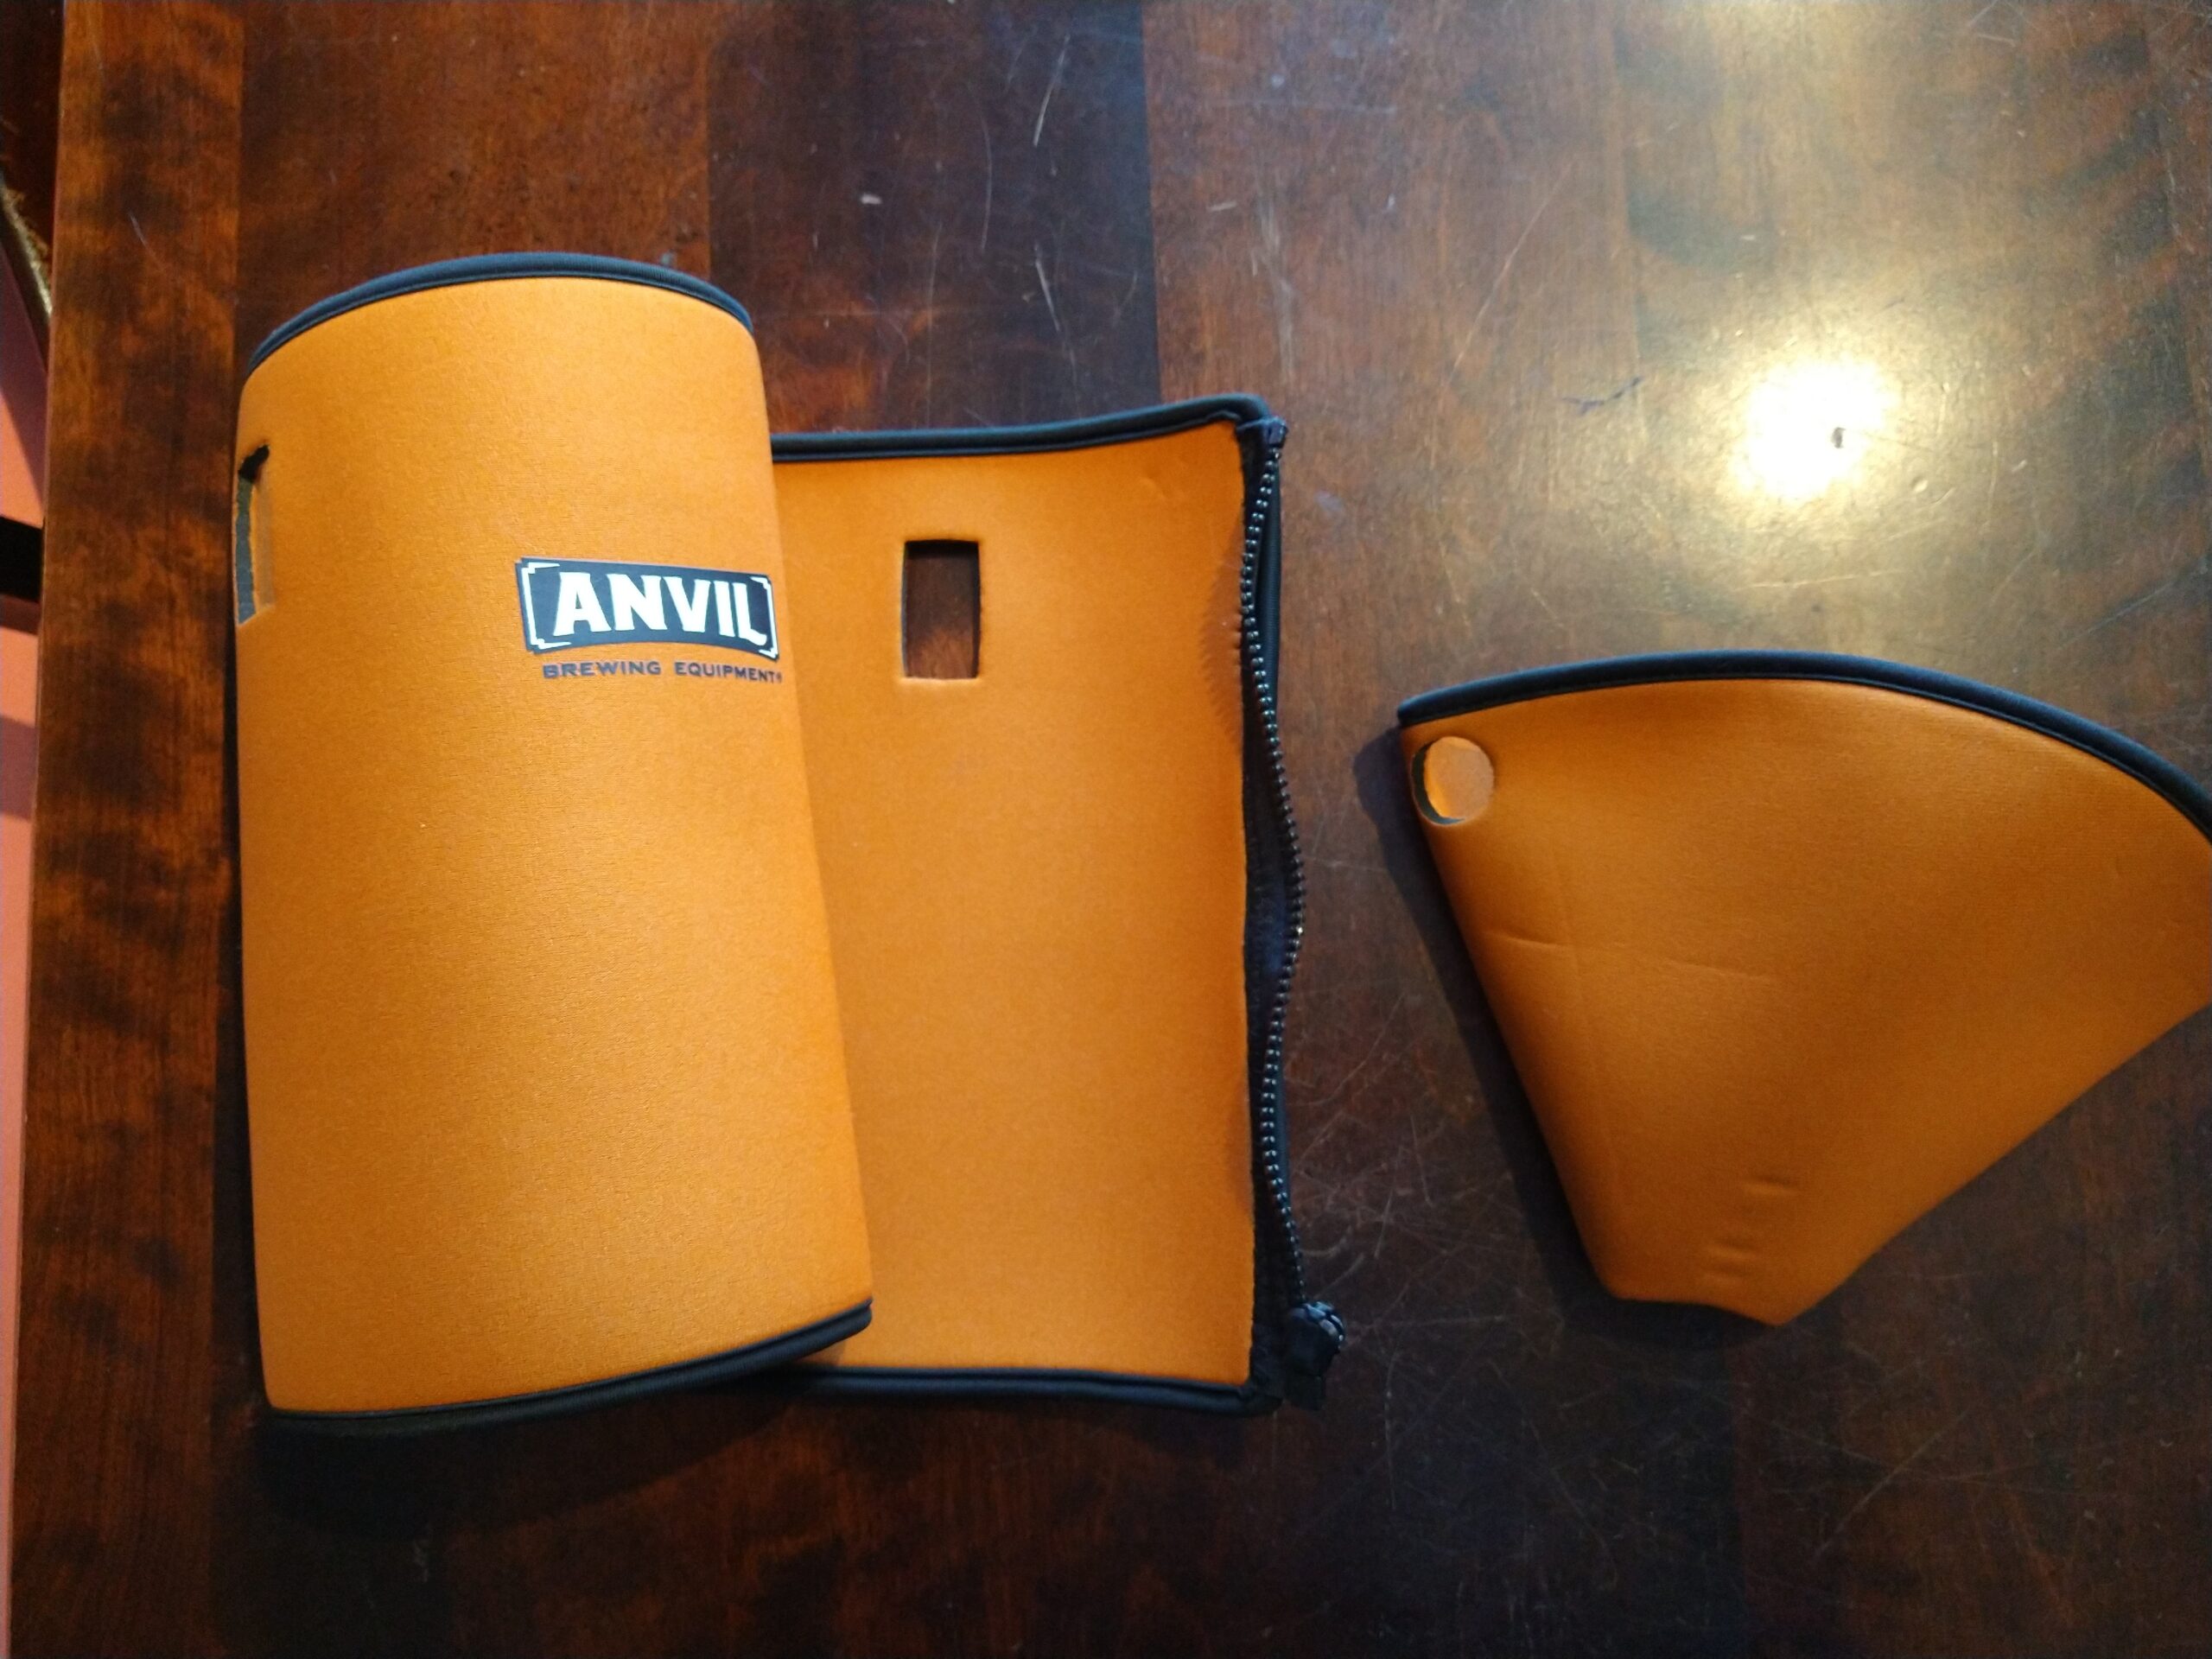 2 Piece Neoprene Insulation
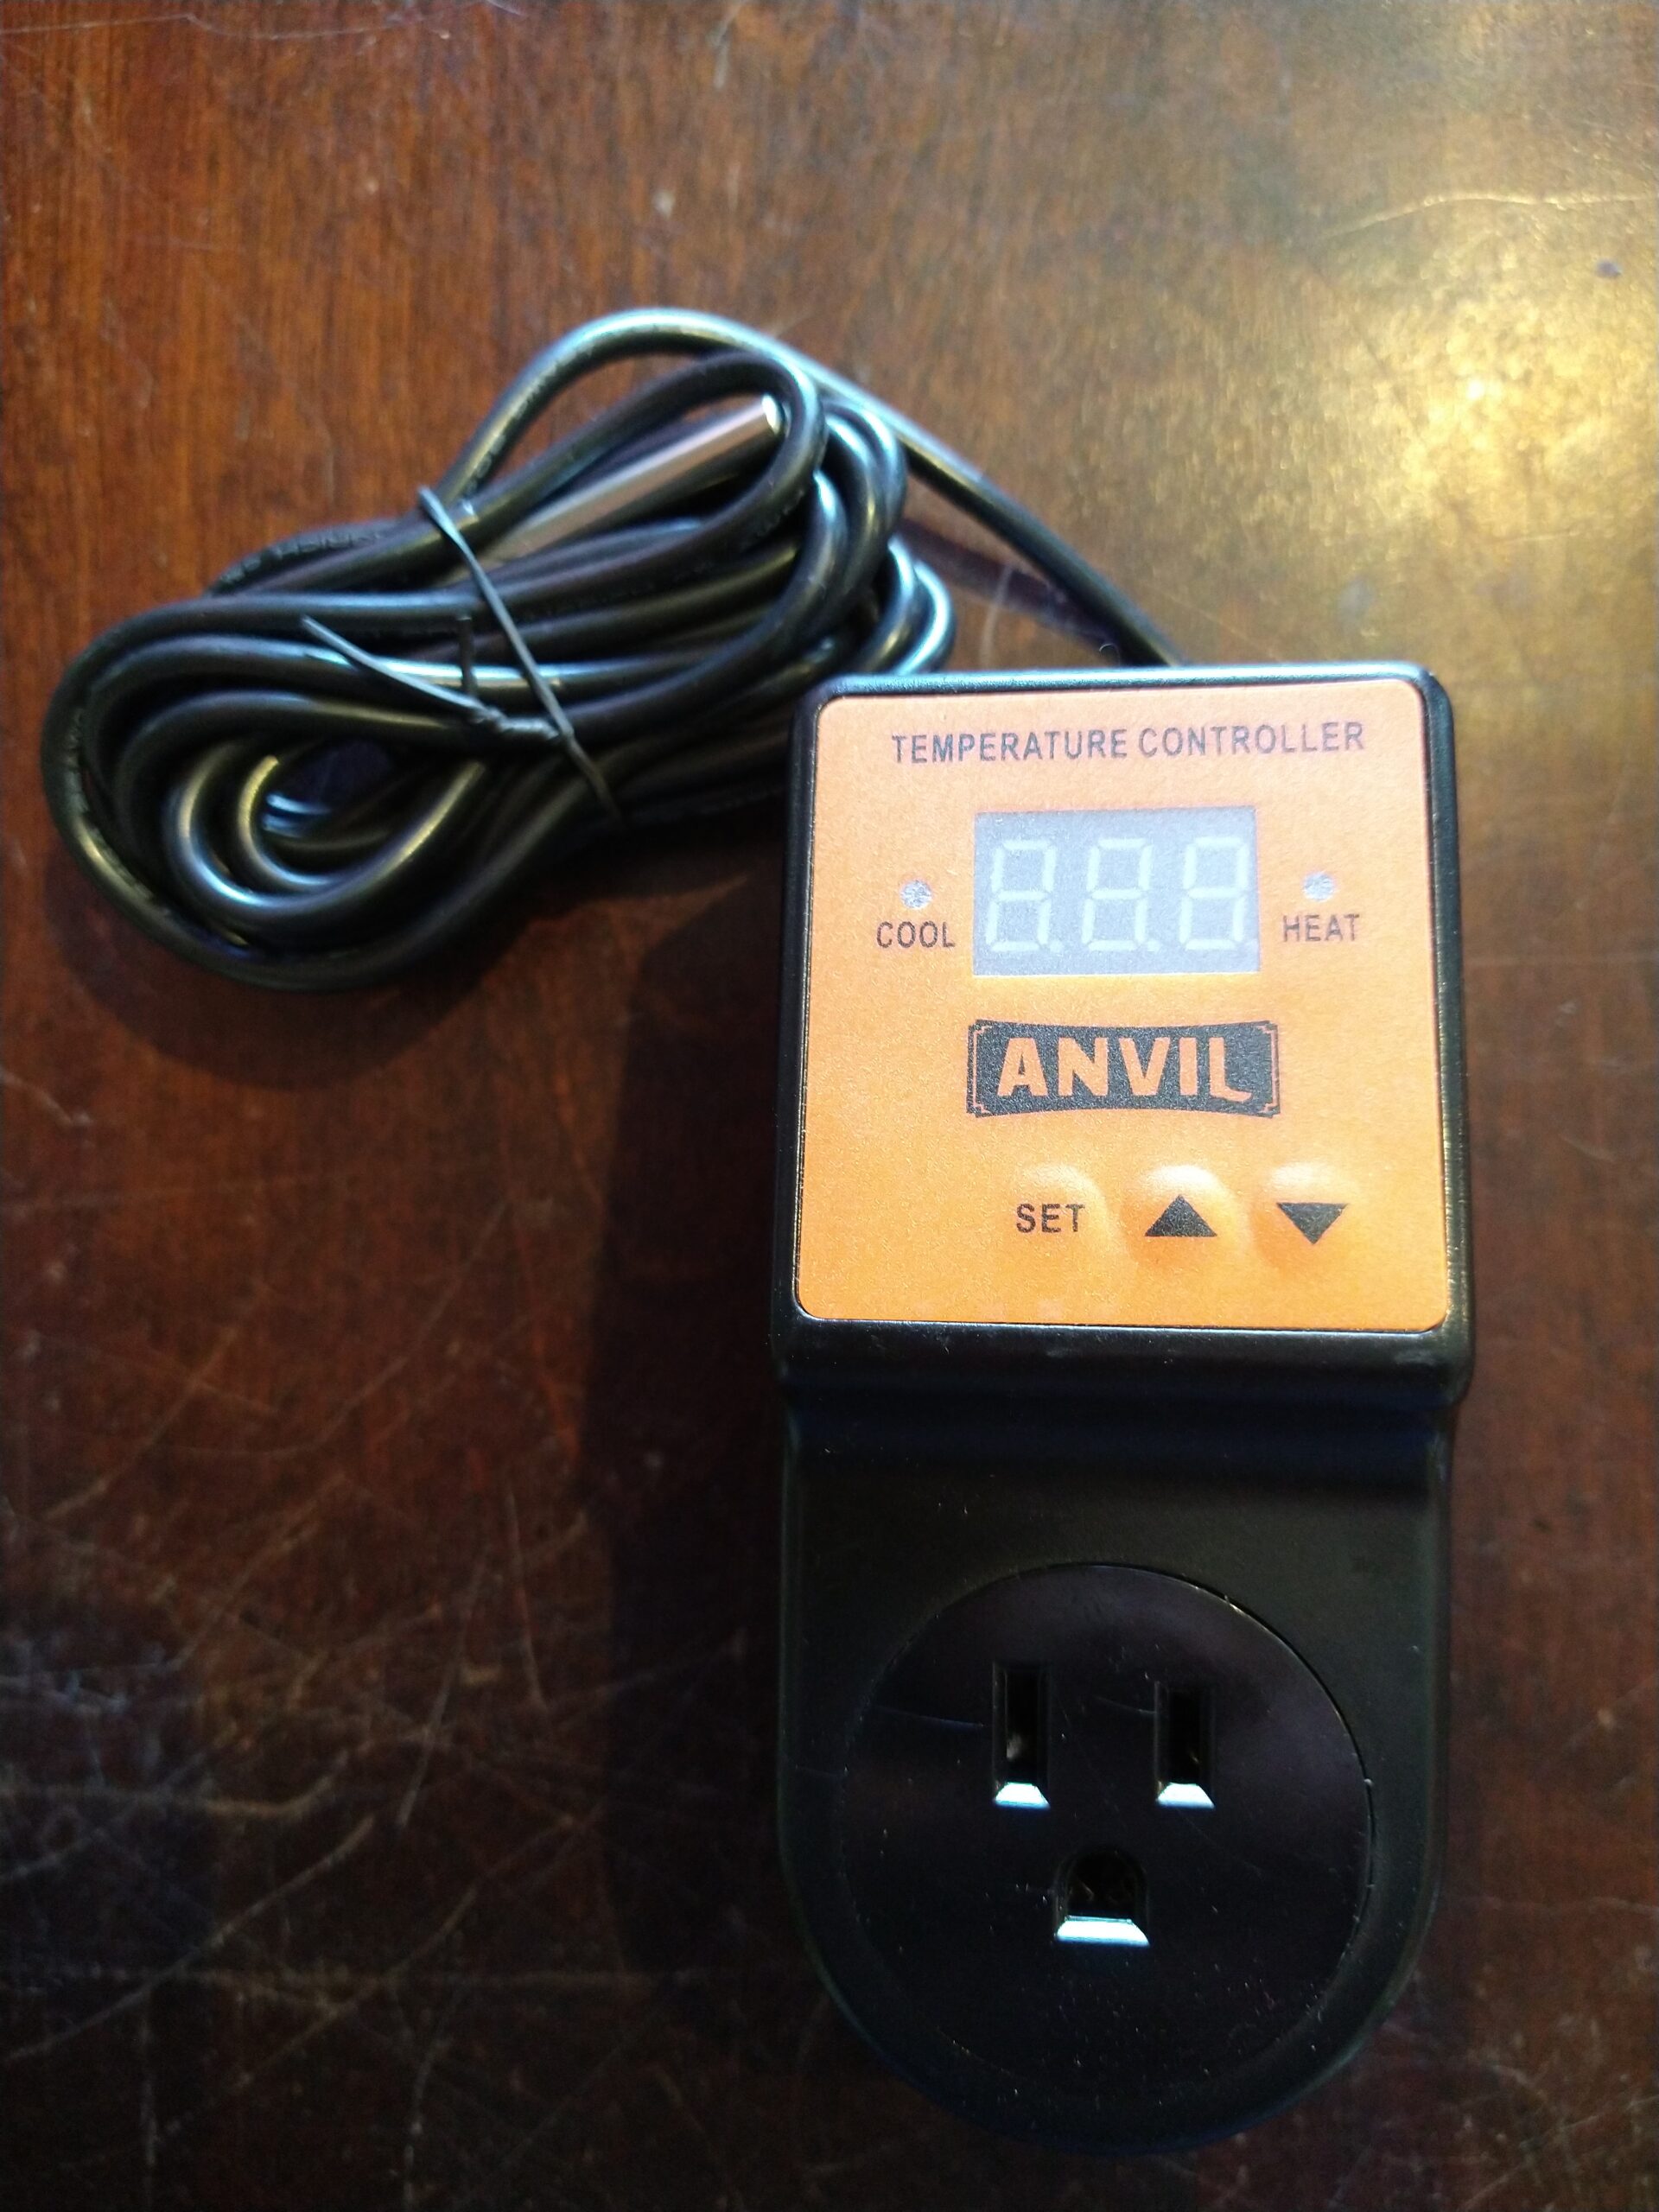
The Cooling Kit includes Anvil’s standard temperature controller. The controller has a single outlet, to run in either heating mode or cooling mode (selectable by simple button push on the controller). With only one plug, you can only have either a heat wrap or a cooling pump hooked up at one time, but most of the time you’ll be only interested in one or the other, not constantly juggling between heating and cooling. Although the controller is compact and looks simple, it contains a high-powered 1800W relay. So if you felt so inclined, you could use this beyond just fermentation temperature control if you wanted. The hard-wired temperature probe has a super-long 9.5-foot cord, and the system boasts temperature control of +/- 1 °F.
Hands on Review
As noted above, the height of the Crucible makes it a challenge to fit inside a typical fermentation chamber. So the offering of a bespoke Cooling System solution is both convenient and necessary. Luckily it’s in the Anvil line-up, so they try their best not to break the bank. And although the cooling tubes were highly polished and shiny, I was initially skeptical at their ability to really cool this unit. But I was proven wrong.
I wanted to challenge the system capability, of course with a lager. I had 6.1 gallons in the fermentor of a Sam Adams inspired lager that I wanted to ferment at 48F. The wort went into the fermentor at 64F, and I had the Cooling System hooked up to an Igloo cooler with 4 gallons of water and (5) 2L bottles of ice floating in it. In 7 hours, it dropped 17 degrees F before the controller temperature probe in the thermowell said it had reached the target temp of 48F. It then took about 12 hours for the temperature stratification inside the fermentor to even out and get the controller probe to match the Tilt temperature floating at the top of the wort.
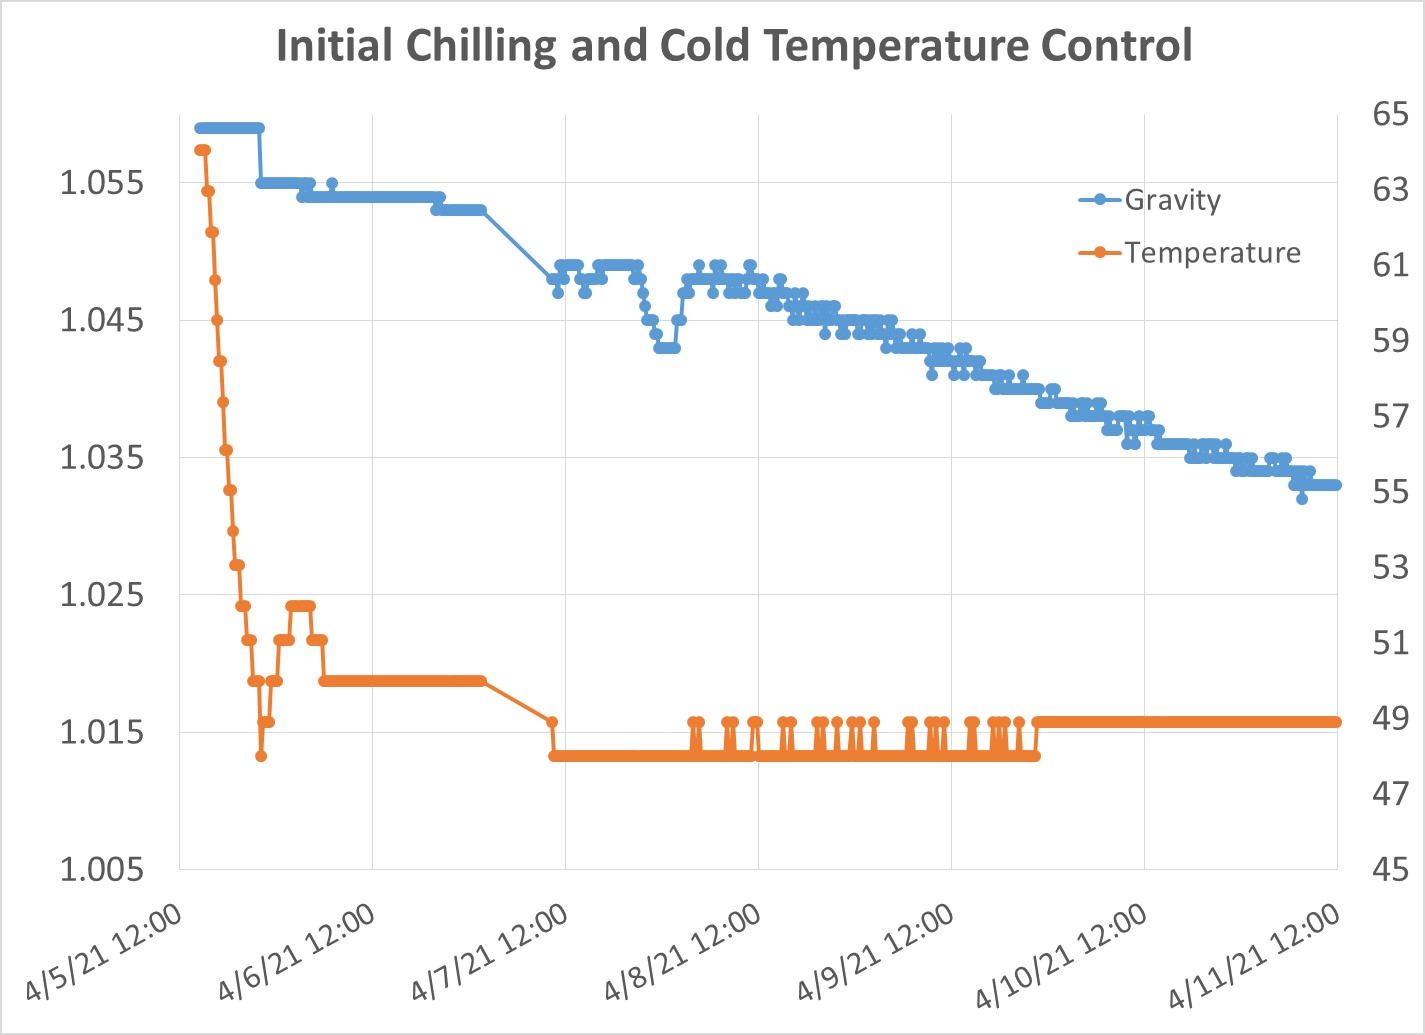 Initial Chilling and Cold Temperature Control – Plot via TILT Bluetooth Hydrometer
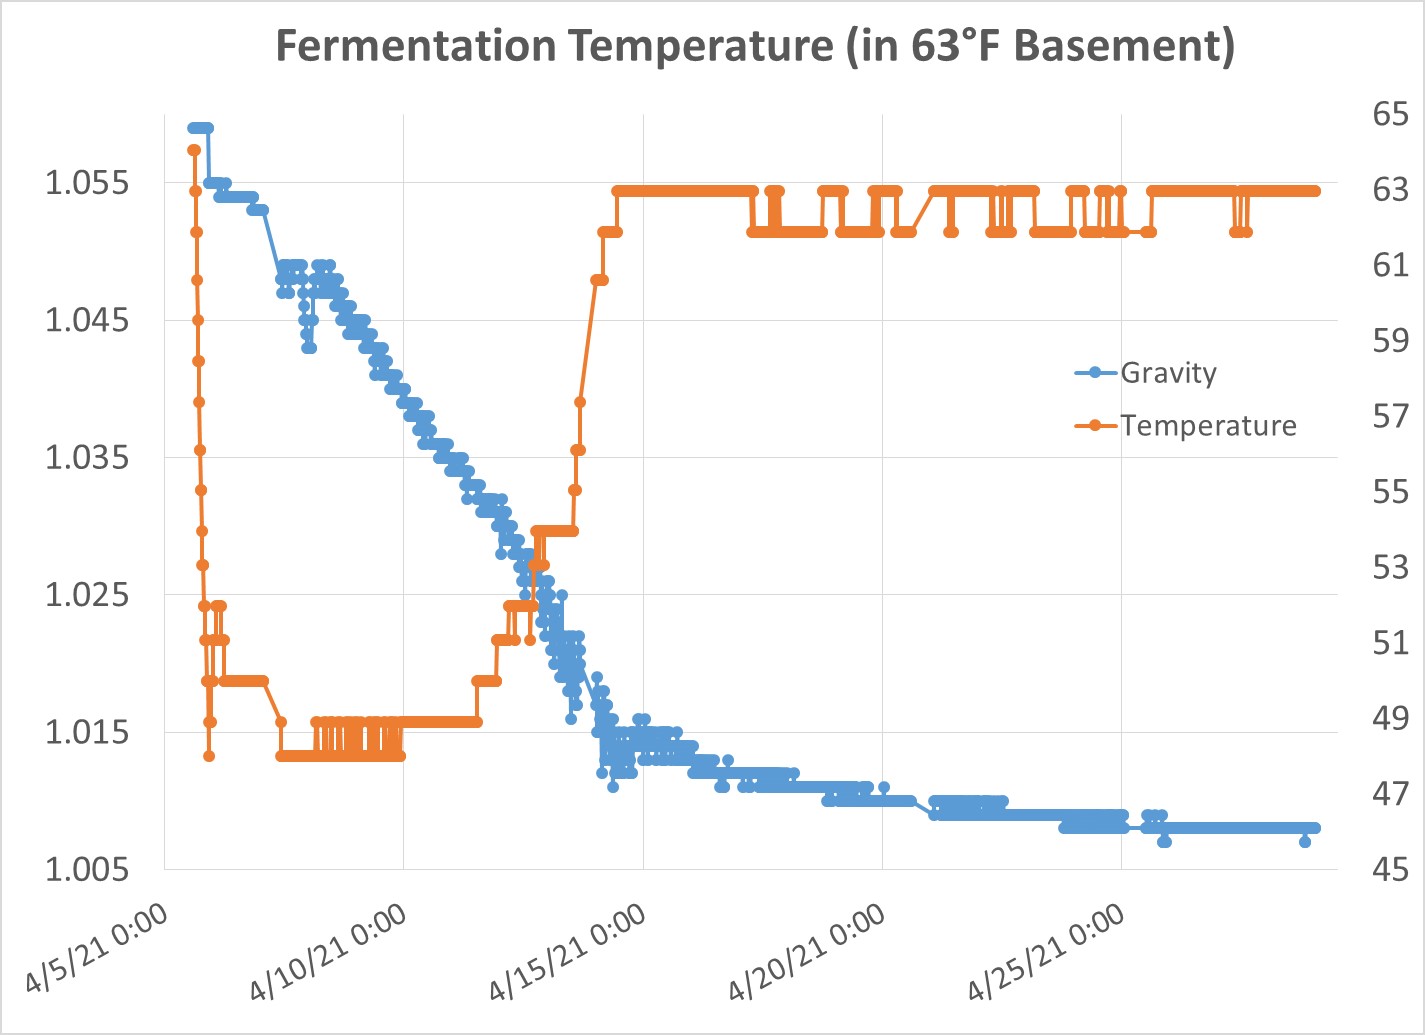 Full Fermentation Plot Plot – via TILT Bluetooth Hydrometer
From that point, I was able to maintain the 48F temperature over the next ~3 days in my 63F basement, by changing the (5) 2L bottles of ice out once a day. After 3 days, I started to raise the target temperature based on the SG readings from my Tilt. I was quite impressed with how easily it was able to maintain this 15-degree delta below room temperature with a thin neoprene jacket, and keep temperature stratification at bay with just its skinny cooling coils sitting in the center of the beer.
 Rubber Stopper
Another thing I was impressed with was the rubber stopper with the Cooling System. While such a seemingly simple part, when done poorly, it can become the Achilles’ heel to bring down a system. The stopper provided in the Anvil kit was compliant enough to allow both a snug fit to the lid & cooling tubes, but stiff enough to keep everything lined up properly. When transferring beer out of the fermentor into my keg, I replaced the airlock with an elbow connected to a CO2 tank line. I was able to provide a small ~2 psi pressure without leaks through either the cooling coil points or the thermowell interface, which was surprising to me. The other thing this simple part had to do right was have the holes in the right spot. The orientation of the thermowell relative to the cooling coil was important to avoid the thermowell tilting and contacting the cooling coil directly. And somehow it was able to handle this alignment without issues.
 Orientation of Thermowell and Cooling Loop
The Cooling System option for the Crucible provides temperature control capability for the tall conical that otherwise would be challenging for a fermentation chamber. The system performance was highly capable at handling lager fermentation despite what appeared to be a size disadvantage. Understanding the importance of fermentation temperature control, and how well this system integrates with the Anvil Crucible, the Crucible’s Cooling System kit seems like an almost mandatory addition.
Compare Models, Prices and Availability, Review Continues Below:
- Anvil Cooling Systems at MoreBeer
- Anvil Cooling Systems at Adventures in Homebrewing
- Anvil Fermentors and Accessories at Great Fermentations
Buy Anvil Crucible Conicals
- Anvil Crucible at MoreBeer
- Anvil Crucible at Adventures in Homebrewing
- Anvil Fermentors at Great Fermentations
- Anvil Crucible at Keg Connection
- Anvil Crucible at homebrewsupply.com
Related Review: Hands on Review: Anvil Crucible Stainless Conical Fermentor!
More Photos
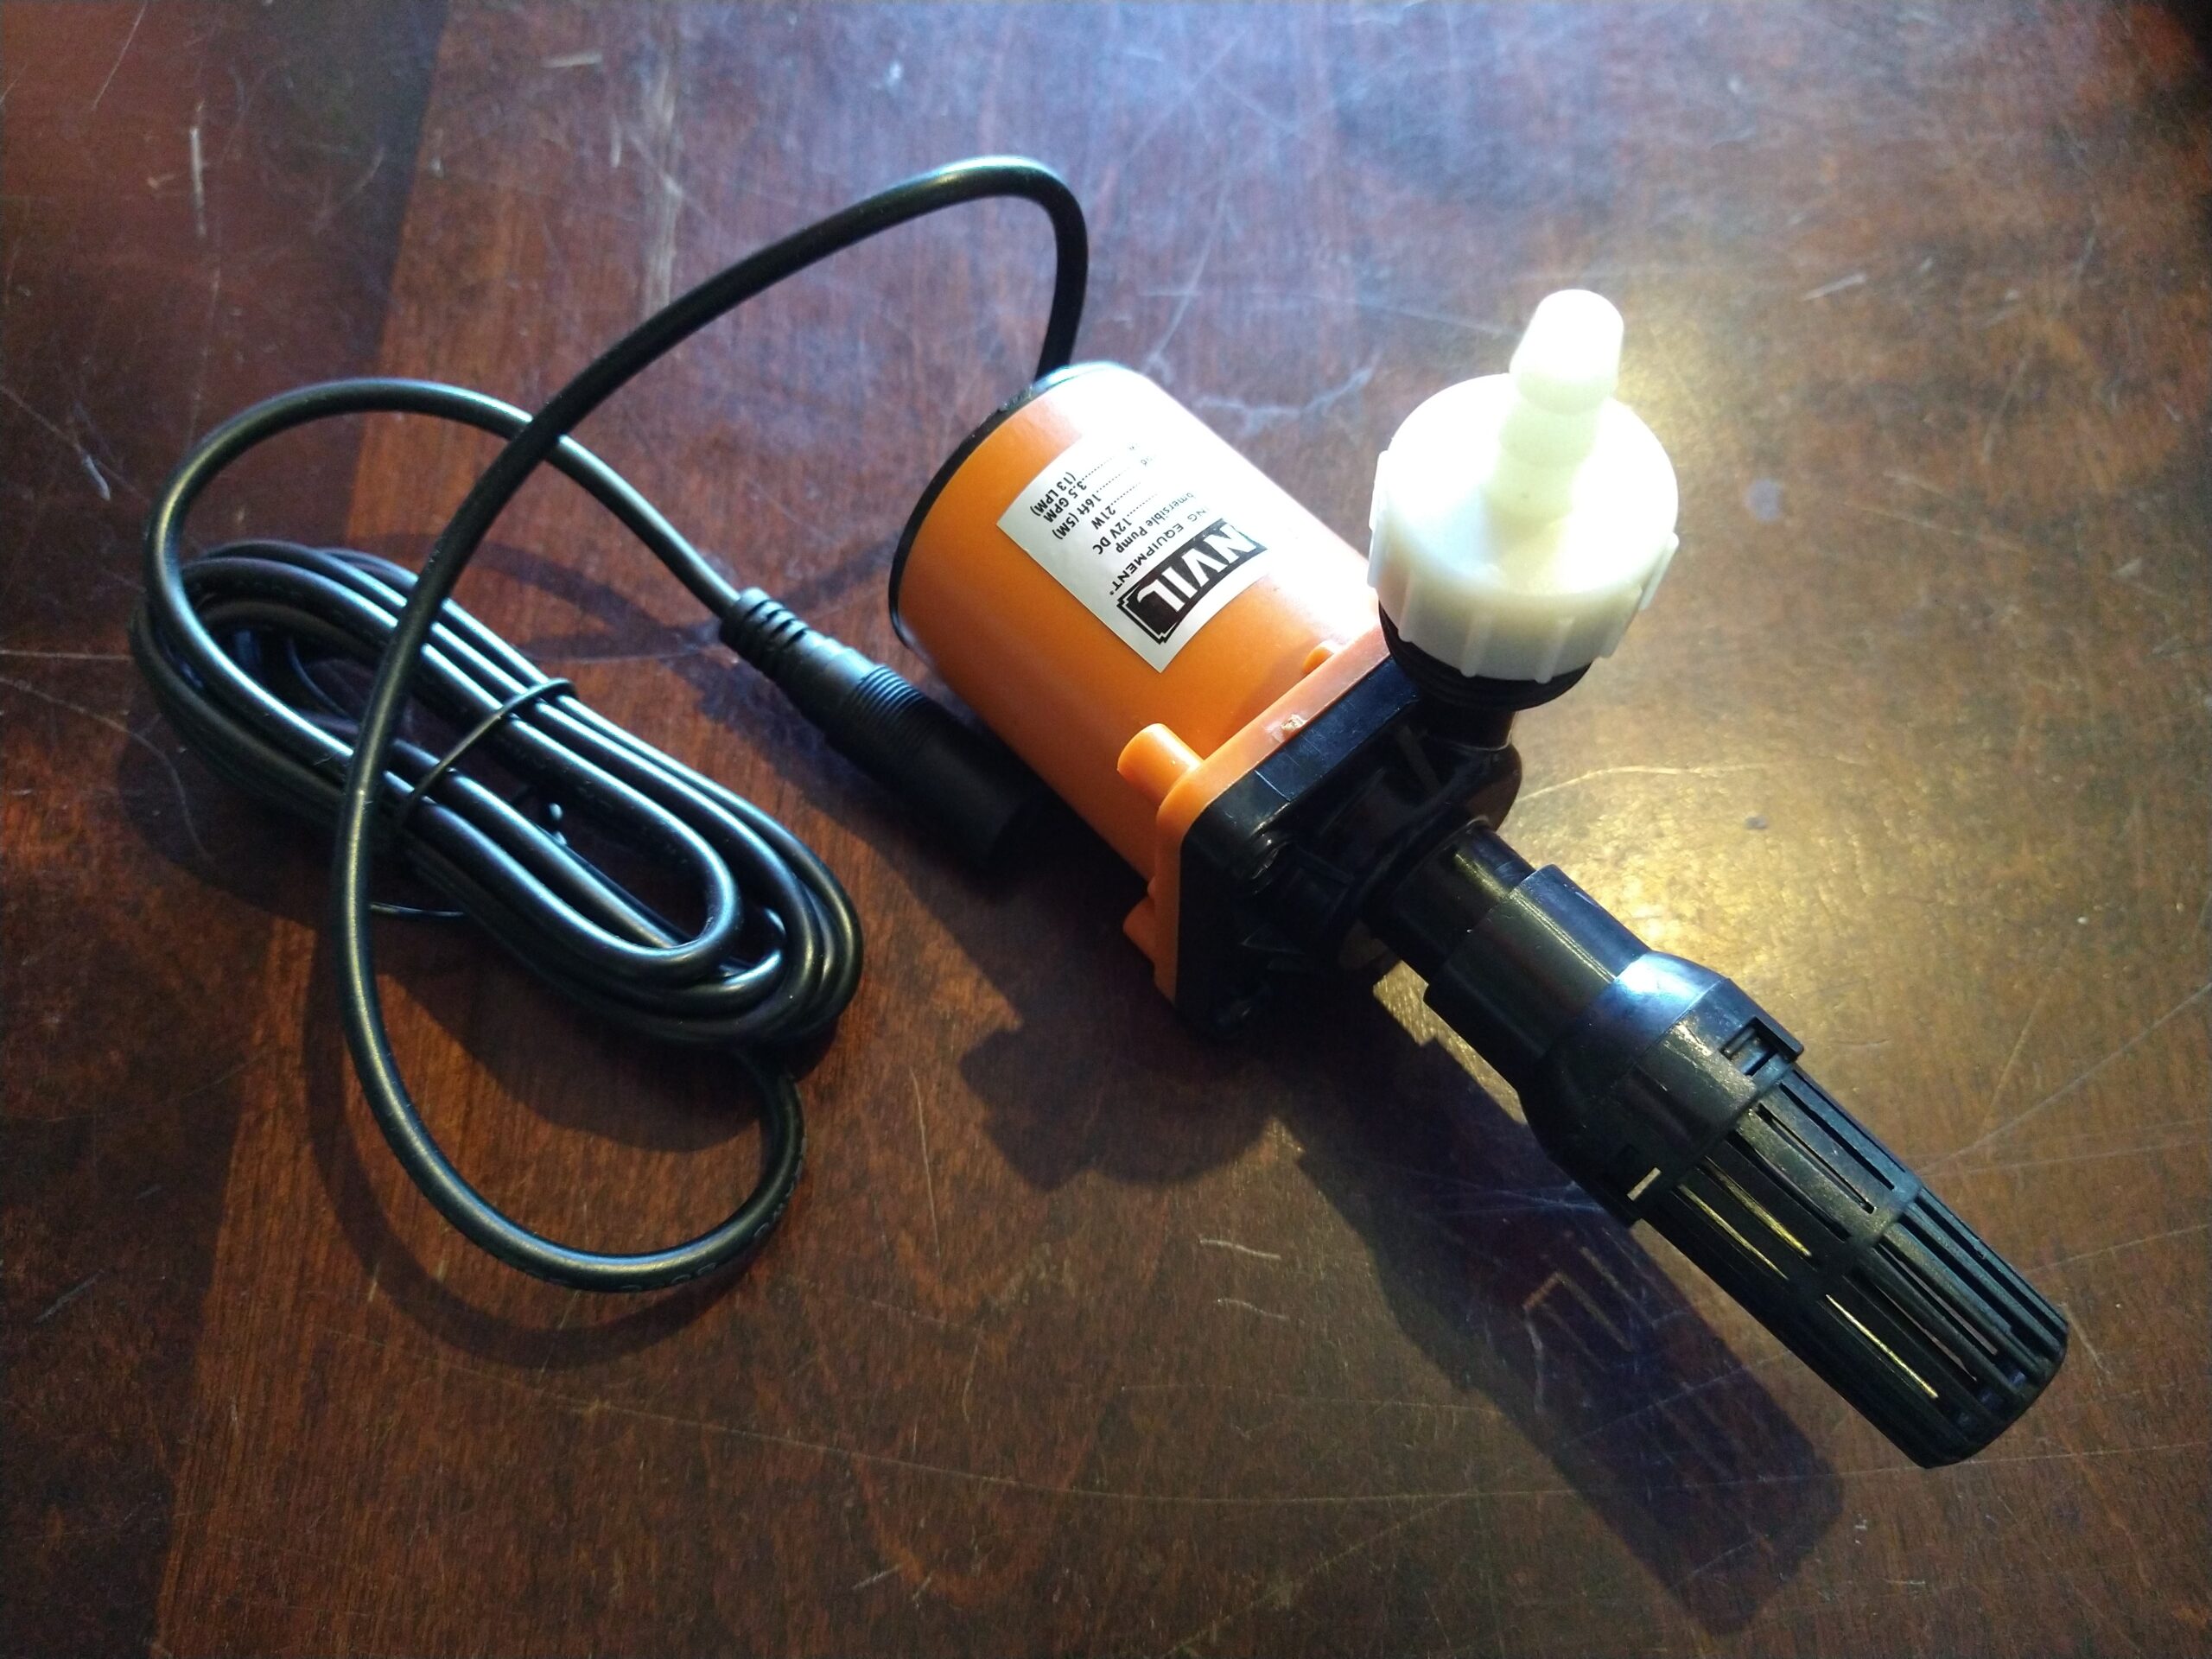 Submersible Pump
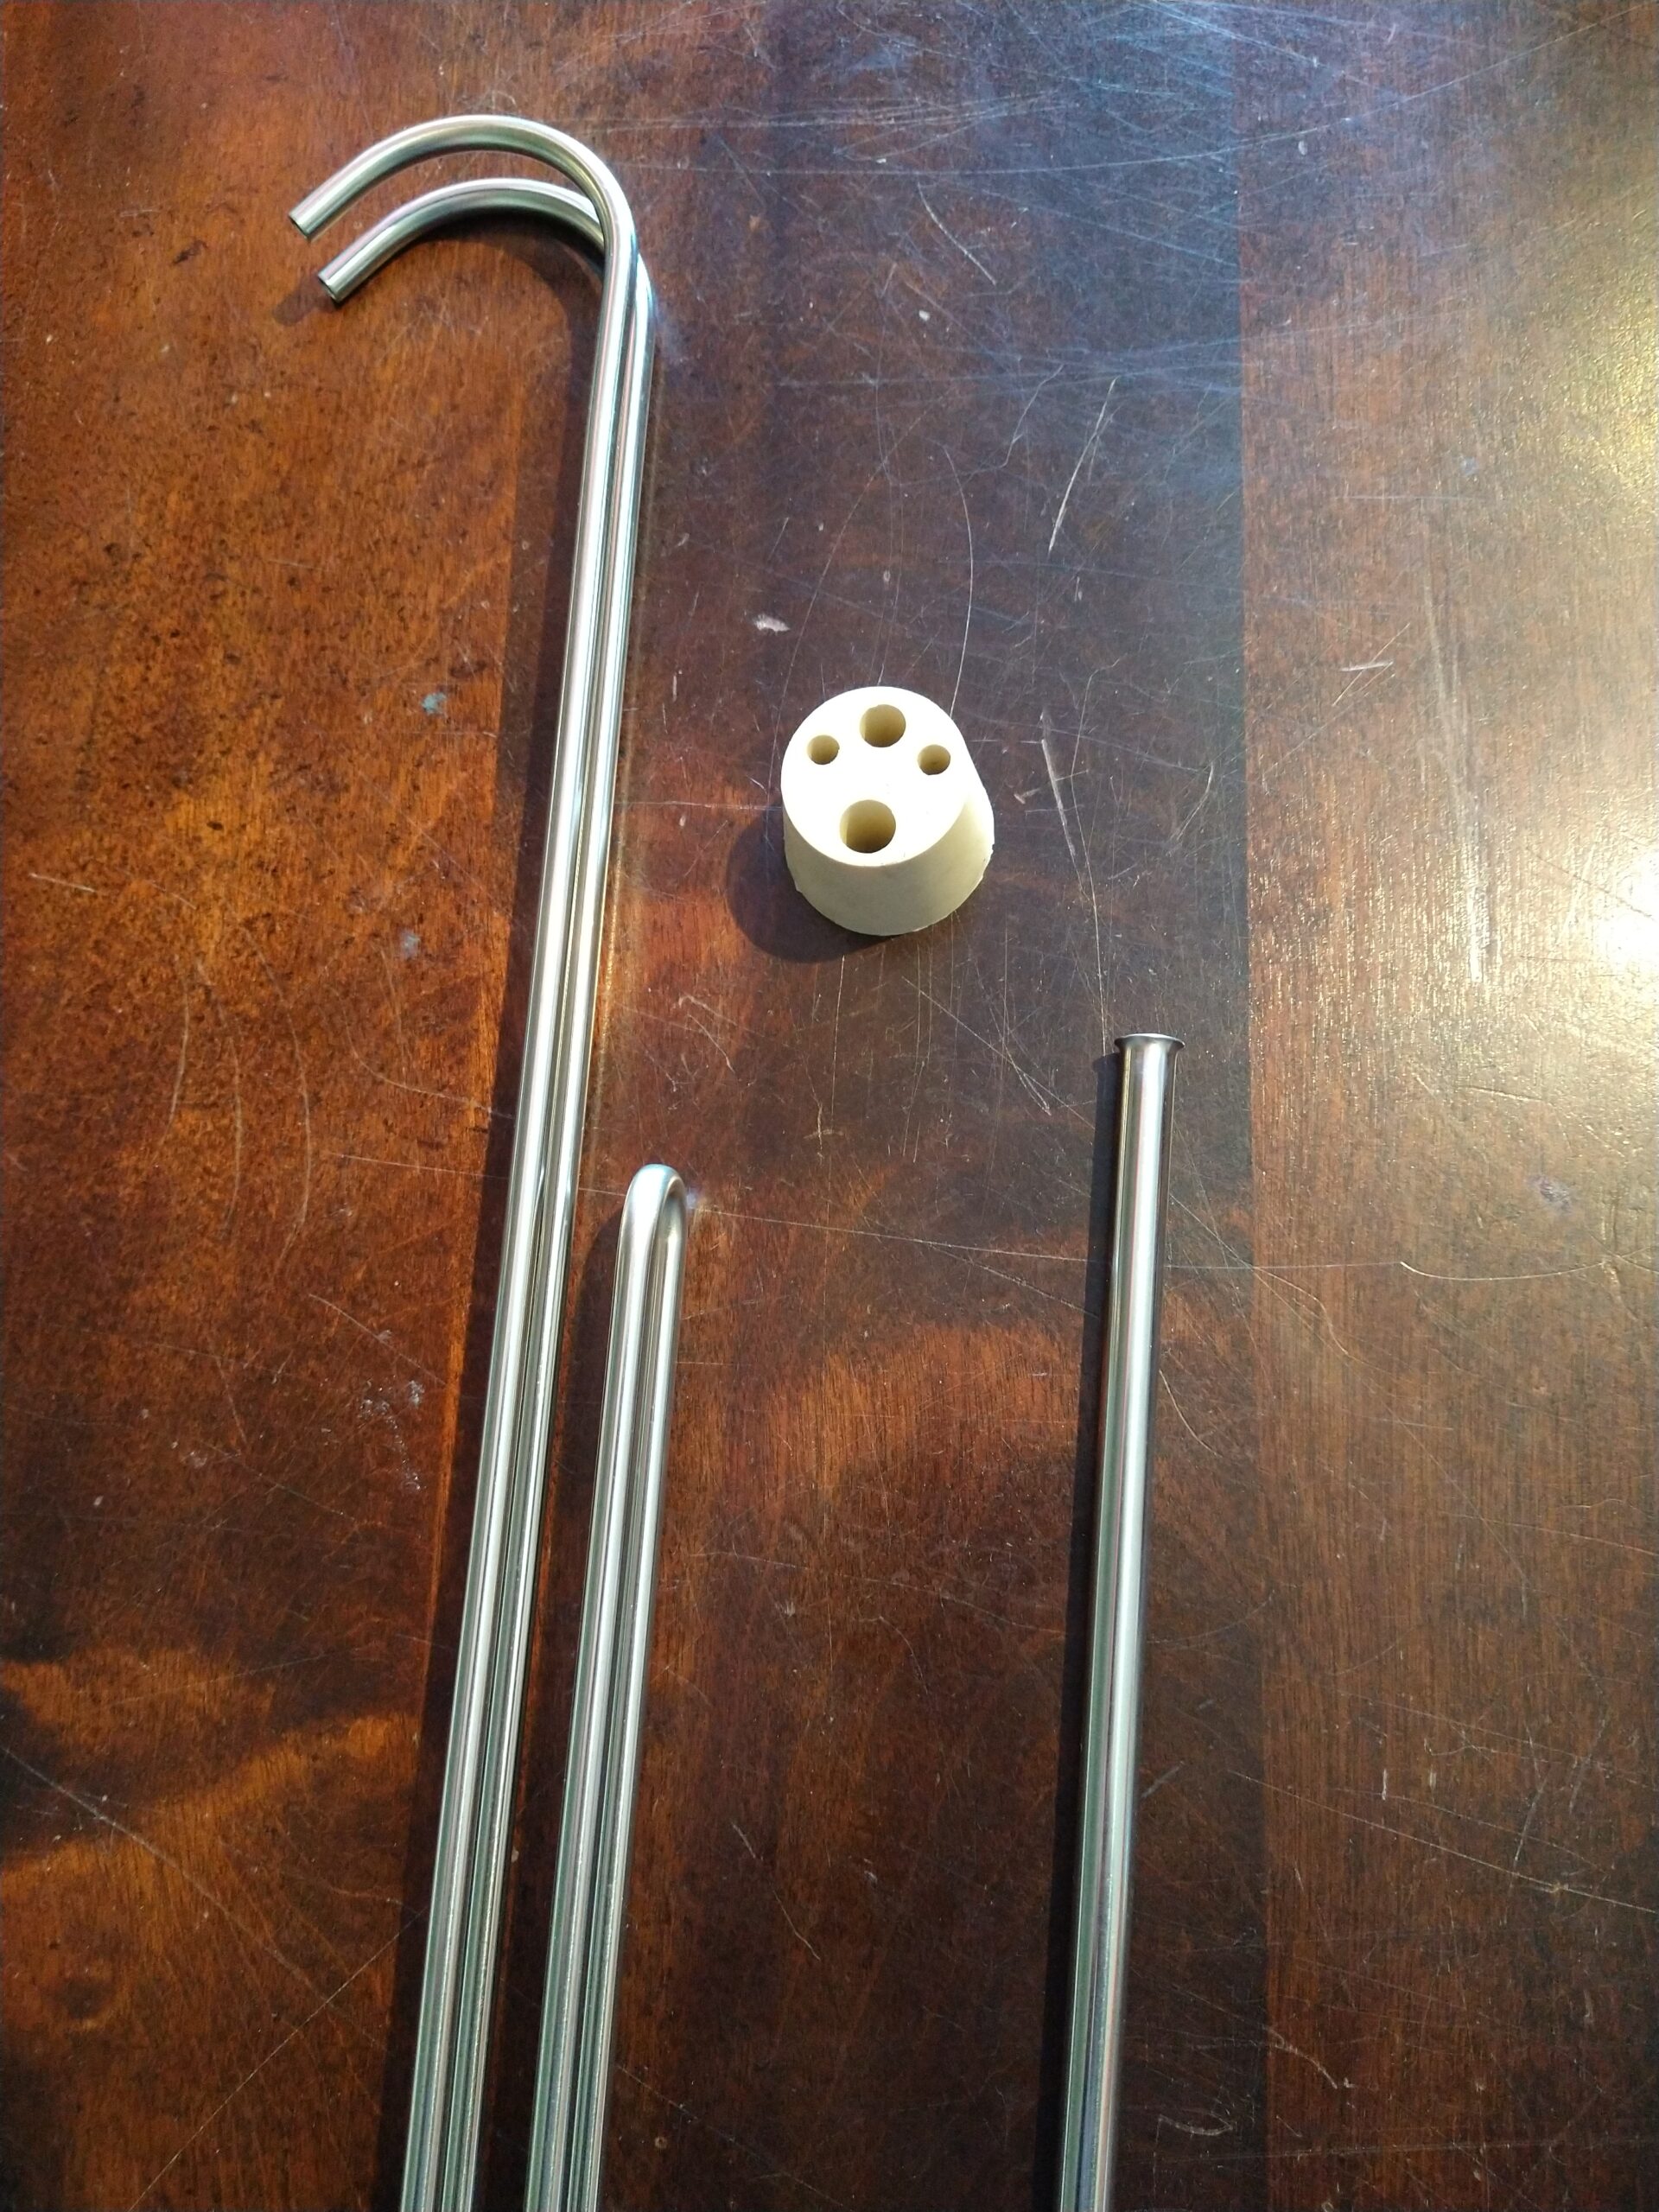 Cooling Coils, Thermowell, and Stopper
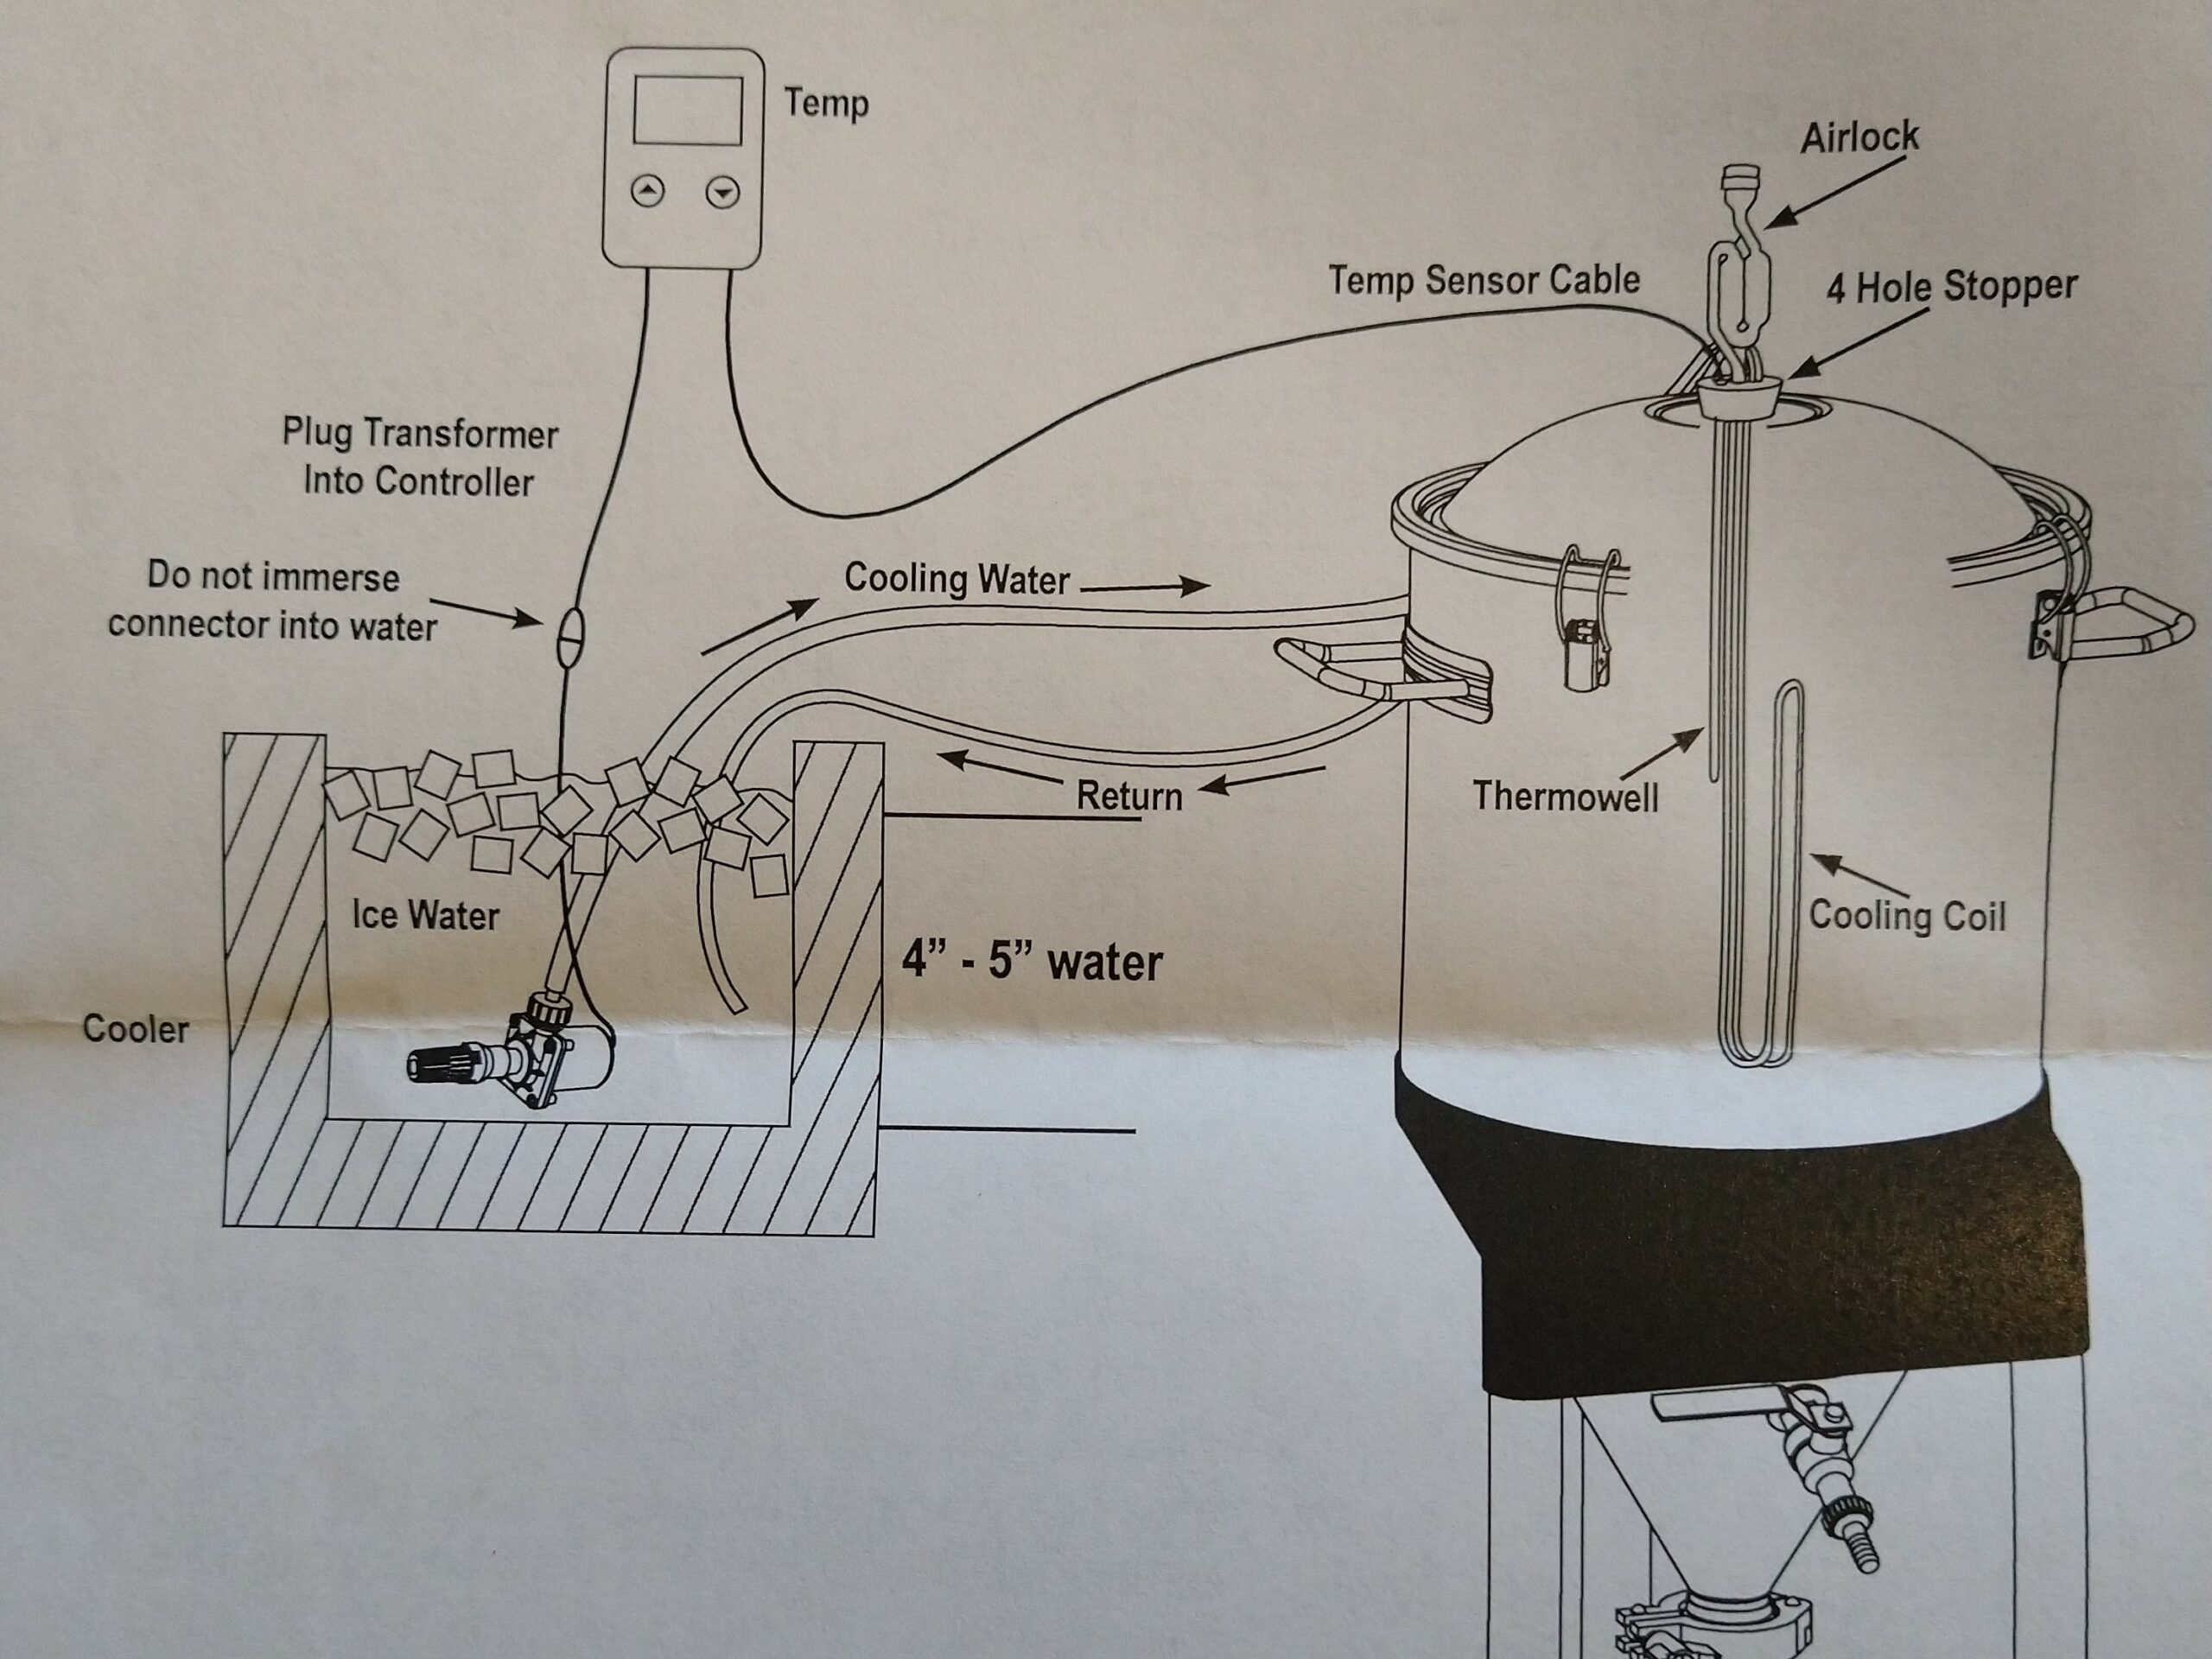 Cooling System Layout
More Homebrew Finds!
- Last 50 Finds!
- Top Deals – a curated list of the best deals
- Homebrew Reviews – one of the largest libraries of homebrew reviews in existence!
- Our Top Posts – tips, how-tos, resources posts and more
Fermenter Reviews!

Most Recent Deals

More Fermentation Related!
- Our Fermentation Related Reviews – Fermenters and More
- Yeast Starters and Fermentation Resource Page
- Yeast: The Practical Guide to Beer Fermentation
- Compare Prices: StirStarter Stir Plate
This post may contain affiliate links. We may make a commission when you use our links. This will never cost you extra. Thank you for supporting Homebrew Finds!
More Anvil Brewing Equipment Reviews+Related:
We Are Homebrew Review HQ! Our 10 Most Recent Reviews

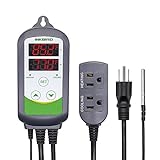
Inkbird ITC-308 Digital Temperature Controller| Review
By Brad Probert. Check out Brad’s website – beersnobby.com
Special Thanks to Anvil Brewing Equipment for providing the unit used for evaluation in this review.
Price, promotions and availability can change quickly. Check the product page for current price, description and availability.
Make sure the components you use are compatible and rated for your intended application. Contact manufacturer with questions about suitability or a specific application. Always read and follow manufacturer directions review:anvilcructempcontrol tag:tpr
I found that it wasn’t big enough to cold crash. I replaced the wimpy coil with a temp twister and put a bigger pump on it. Now it can crash.