
Hands on Review: FermZilla All Rounder Fermenter
Thank you to HBF Contributor Aaron Nord for this hands on review! Aaron is an advanced award winning brewer, a long time reader and a serial tipster!
FermZilla All Rounder
Fermenting under pressure has been a technique I have had my eye on for some time now and have felt the urge to experiment with it more and more lately. To me the most appealing benefit of pressurized fermentation is that at the end of fermentation the beer is fully carbonated and ready to drink (not accounting for beers that benefit from a period of conditioning). Other benefits include a potentially quicker fermentation, a higher retention of desirable aroma compounds that otherwise might be off gassed (e.g. hop aromas), and the ability to ferment at warmer temperatures without a high presence of unwanted esters.
Limited Time Deal (Rare!)
Deals on FermZilla are relatively rare. This is a MAP item. MAP = Minimum Advertised Price. It’s an agreement between sellers and manufacturer’s not to sell an item below a certain price. This gear generally sells for about the same price no matter where you purchase it from and is rarely discounted.
(Workaround)… Get a FREEBIE
Top Draw Corny Keg Lid via William’s Brewing
More InfoFrom the product description, check product page for current description, price and availability:
Do you want to drink the clearest beer possible from your keg as quickly as possible? The Top Draw® Keg Lid Beer Pick Up Tube fits any homebrew keg with an oval lid, and includes a beer ball lock with a Top Draw Beer Pick Up Tube in the lid. As the level of the beer in the keg drops, the pick up tube remains 1″ below the surface, always drawing the clearest beer all the way until empty. The stainless float ball itself is 1.75″ in diameter.
Installs in a few seconds – just switch out keg lids. For shorter kegs, cut the silicone tube to length.
Includes 22″ of tubing, 304 grade stainless float with attached pickup tube, and oval keg lid with both a pressure relief valve, and a beer ball lock fitting welded into the center.
- William’s Brewing has this for $34.99.
- Shipping is free or reasonably priced flat rate to addresses in the contiguous US depending on your order size for most items.
Get One FREE w/Qualifying Order!
- Use coupon code X05 with an order of $89.99 or more and you’ll get one for free.
- No need to add it to your cart. Just use the coupon code at checkout.
This works with FermZilla fermenters including the All Rounder!
- FermZilla Fermenters at William’s Brewing
- Fermzilla 60 Liter All Rounder Fermenter < the specific model reviewed here
- Fermzilla 30 Liter All Rounder Fermenter
Check Current Pricing & Availability, Review Continues Below:
- Complete Lineup of FermZilla Fermenters & Accessories at MoreBeer
- FermZilla All Rounder Fermenter – 15.9 gal. / 60 L FE148 < the specific model reviewed here
- FermZilla All Rounder Fermenter | 7.9 gal. | 30 L FE147
- FermZilla All Rounder Pressure Brewing Kit – 15.9 gal. / 60 L FE119
- FermZilla All Rounder Pressure Brewing Kit – 7.9 gal. / 30 L FE118
- Stainless Steel Pressure Kit for FermZilla FE135 < included in this review
- FermZilla Fermenters at William’s Brewing
- Fermzilla 60 Liter All Rounder Fermenter < the specific model reviewed here
- Fermzilla 30 Liter All Rounder Fermenter
- Search Amazon for “FermZilla” – offerings vary
- Related: Hands on Review: Kegland Hop Bong
Related Reviews:
This article contains affiliate links. We may make a small percentage if you use our links to make a purchase. You won’t pay more and you’ll be supporting Homebrew Finds and more content like this. Thank you for your support!
I have been fermenting with a stainless-steel conical fermenter for the past few years and have really enjoyed it. It is easy to clean, durable, makes pressurized transfers simple, and allows me to collect yeast for re-use. The model I have does not support pressurized fermentation as its pressure limit is 1-2 psi. Stainless-steel fermenters capable of pressure fermentation can be on the pricey side and since I don’t truly have a need for two stainless conical fermenters, I could not justify the cost. There is, however, a cost-effective way to get into pressurized fermentation thanks to new plastic products that have entered the market in the last couple of years.
The FermZilla All Rounder is part of Kegland’s line of plastic fermenters they have been developing and improving upon in recent years. Kegland is a manufacturer out of Australia that seems to have their ear to the ground when it comes to developing products that homebrewers worldwide are clamoring for. The All Rounder is specifically designed for pressurized fermentation which caught my eye and it has a gamut of additional accessories which further drew me in. From my initial research it appeared like the perfect way to enter the pressurized fermentation game and allow me to keep my other fermentation practices like closed transfers without a ton of extra gear or work. Plus, coming from Kegland I knew I could trust them to put out a quality piece of gear and I knew that they back up their products with top-notch instructional videos.
As noted, there are a variety of accessories that mate with the All Rounder kit and since I am in the habit of doing closed transfers, the Stainless-Steel Pressure kit seemed like a valuable addition to the fermenter itself. This kit arrived in the same large box as the rest of the All Rounder package which included the following components:
- 60 Liter (15.9 gallon) Fermenter
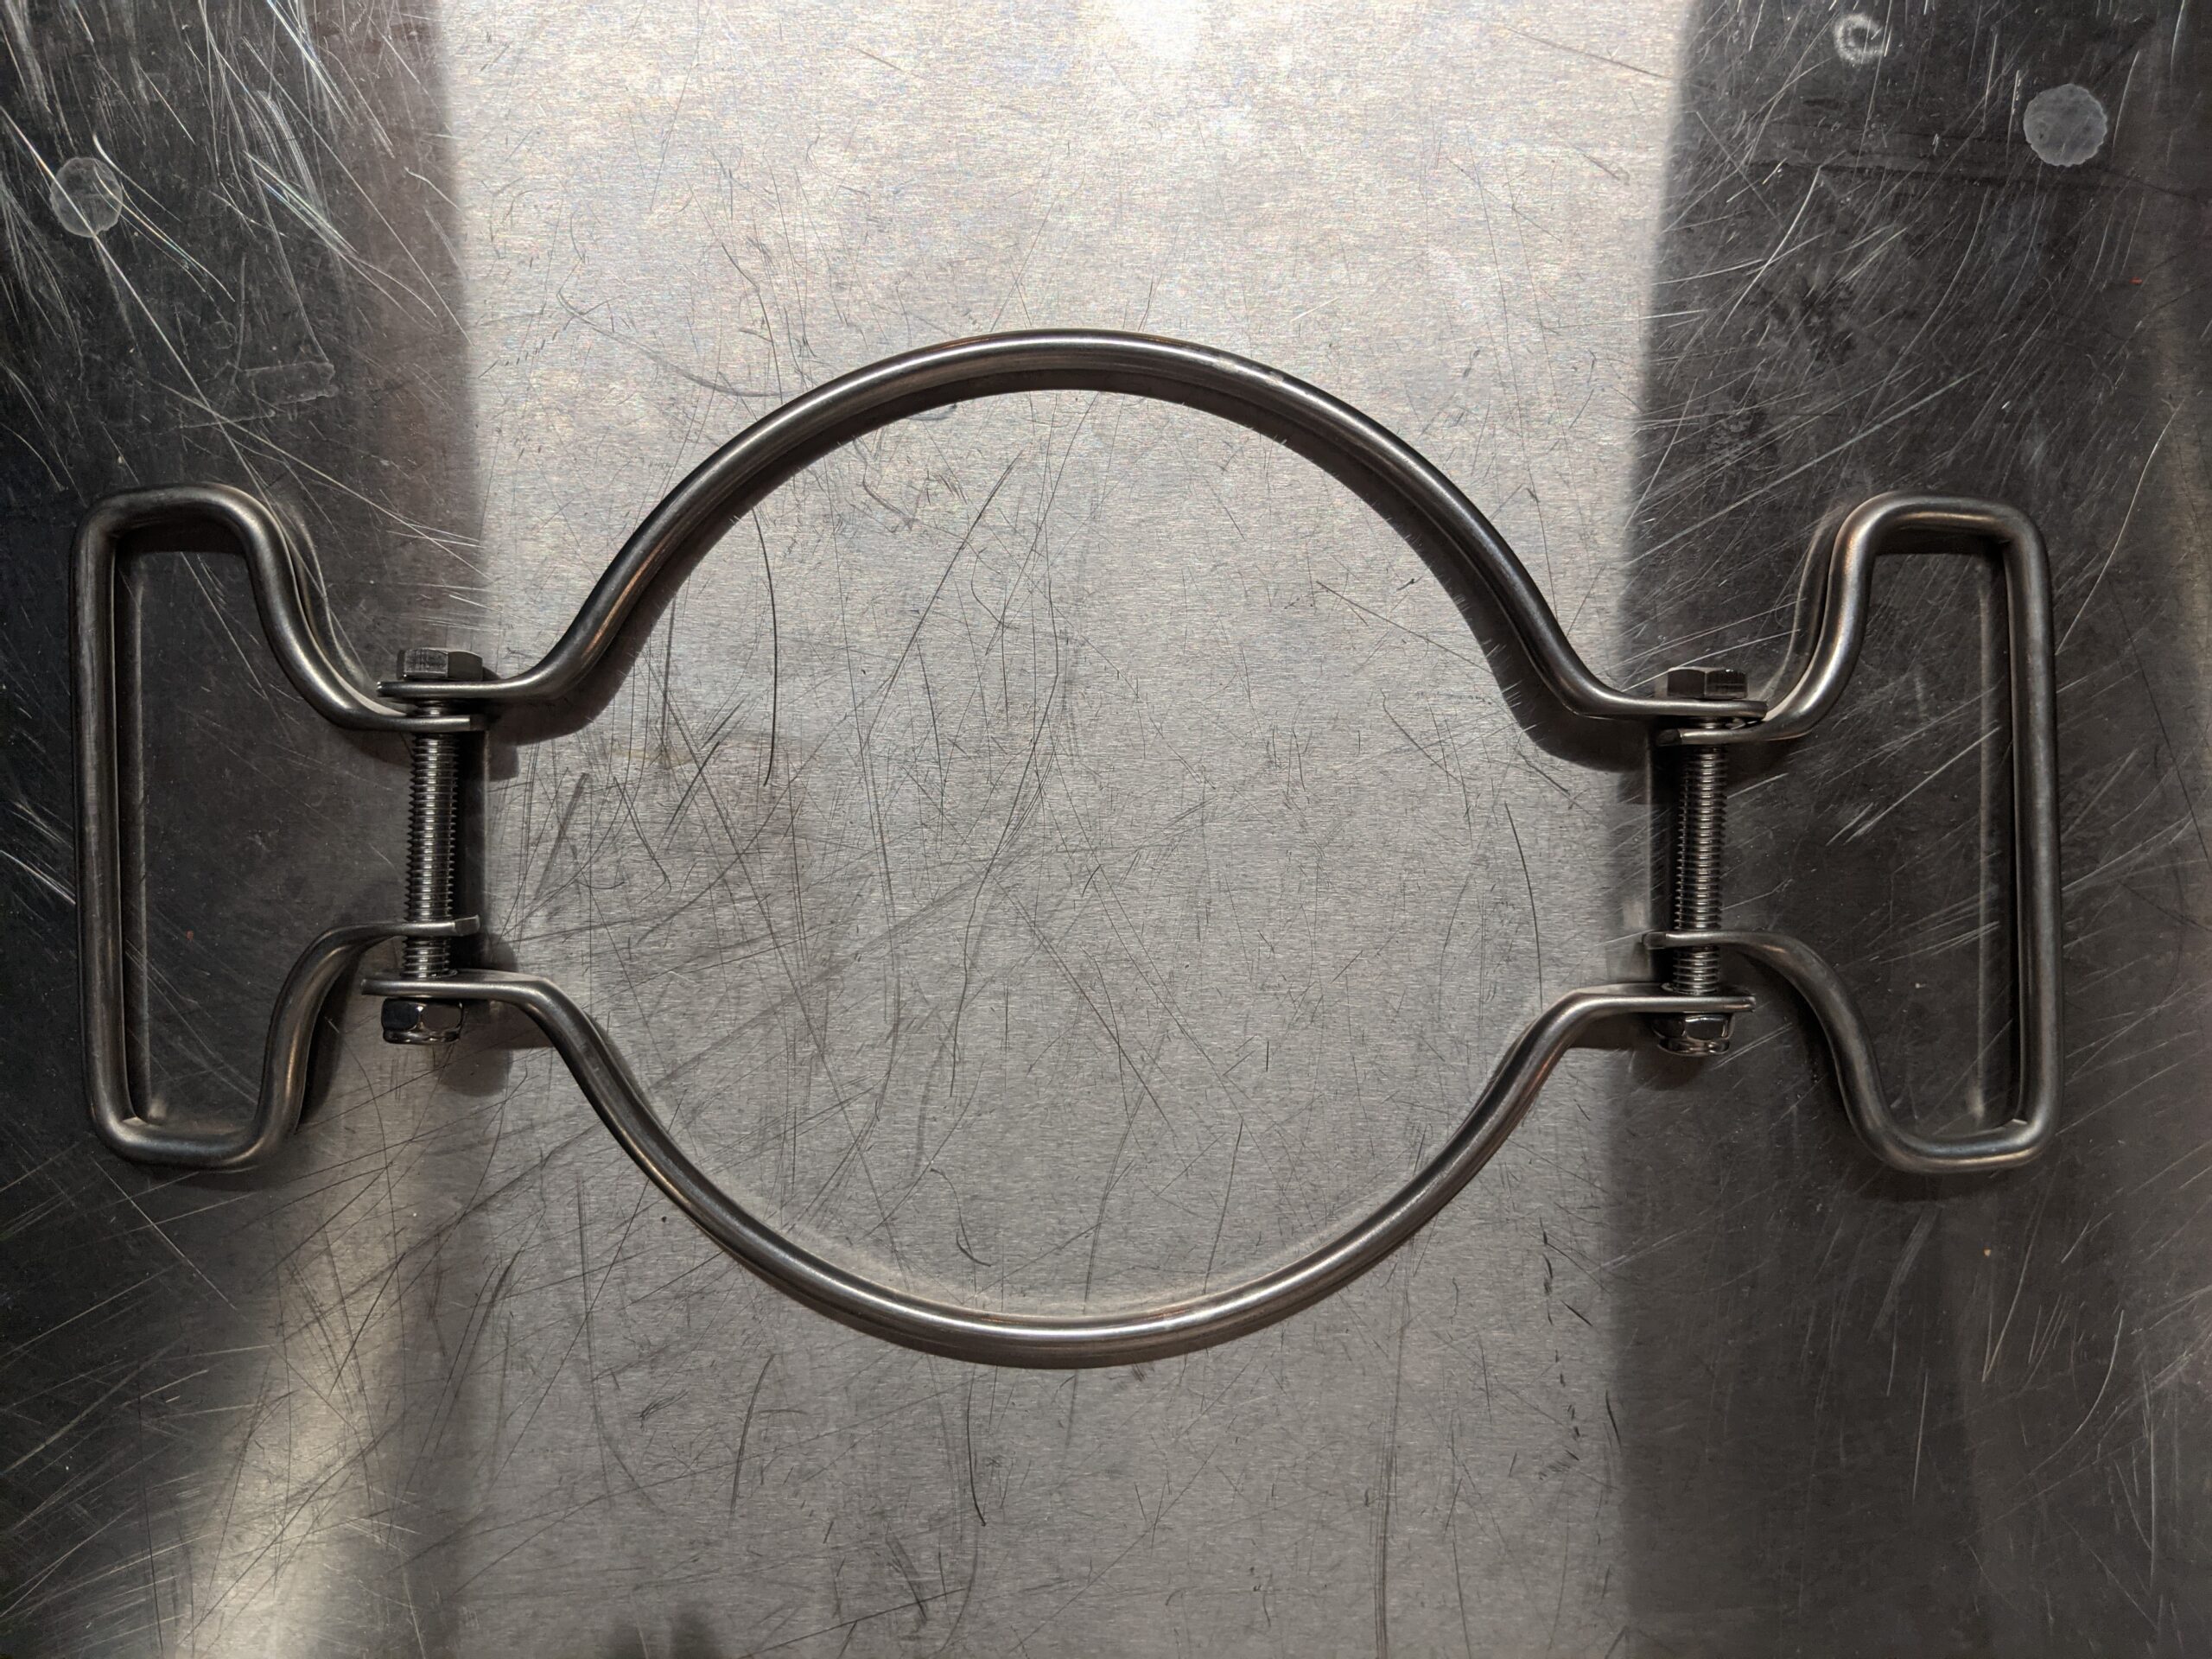
- Stainless-Steel Stand
- Stainless-Steel Handle
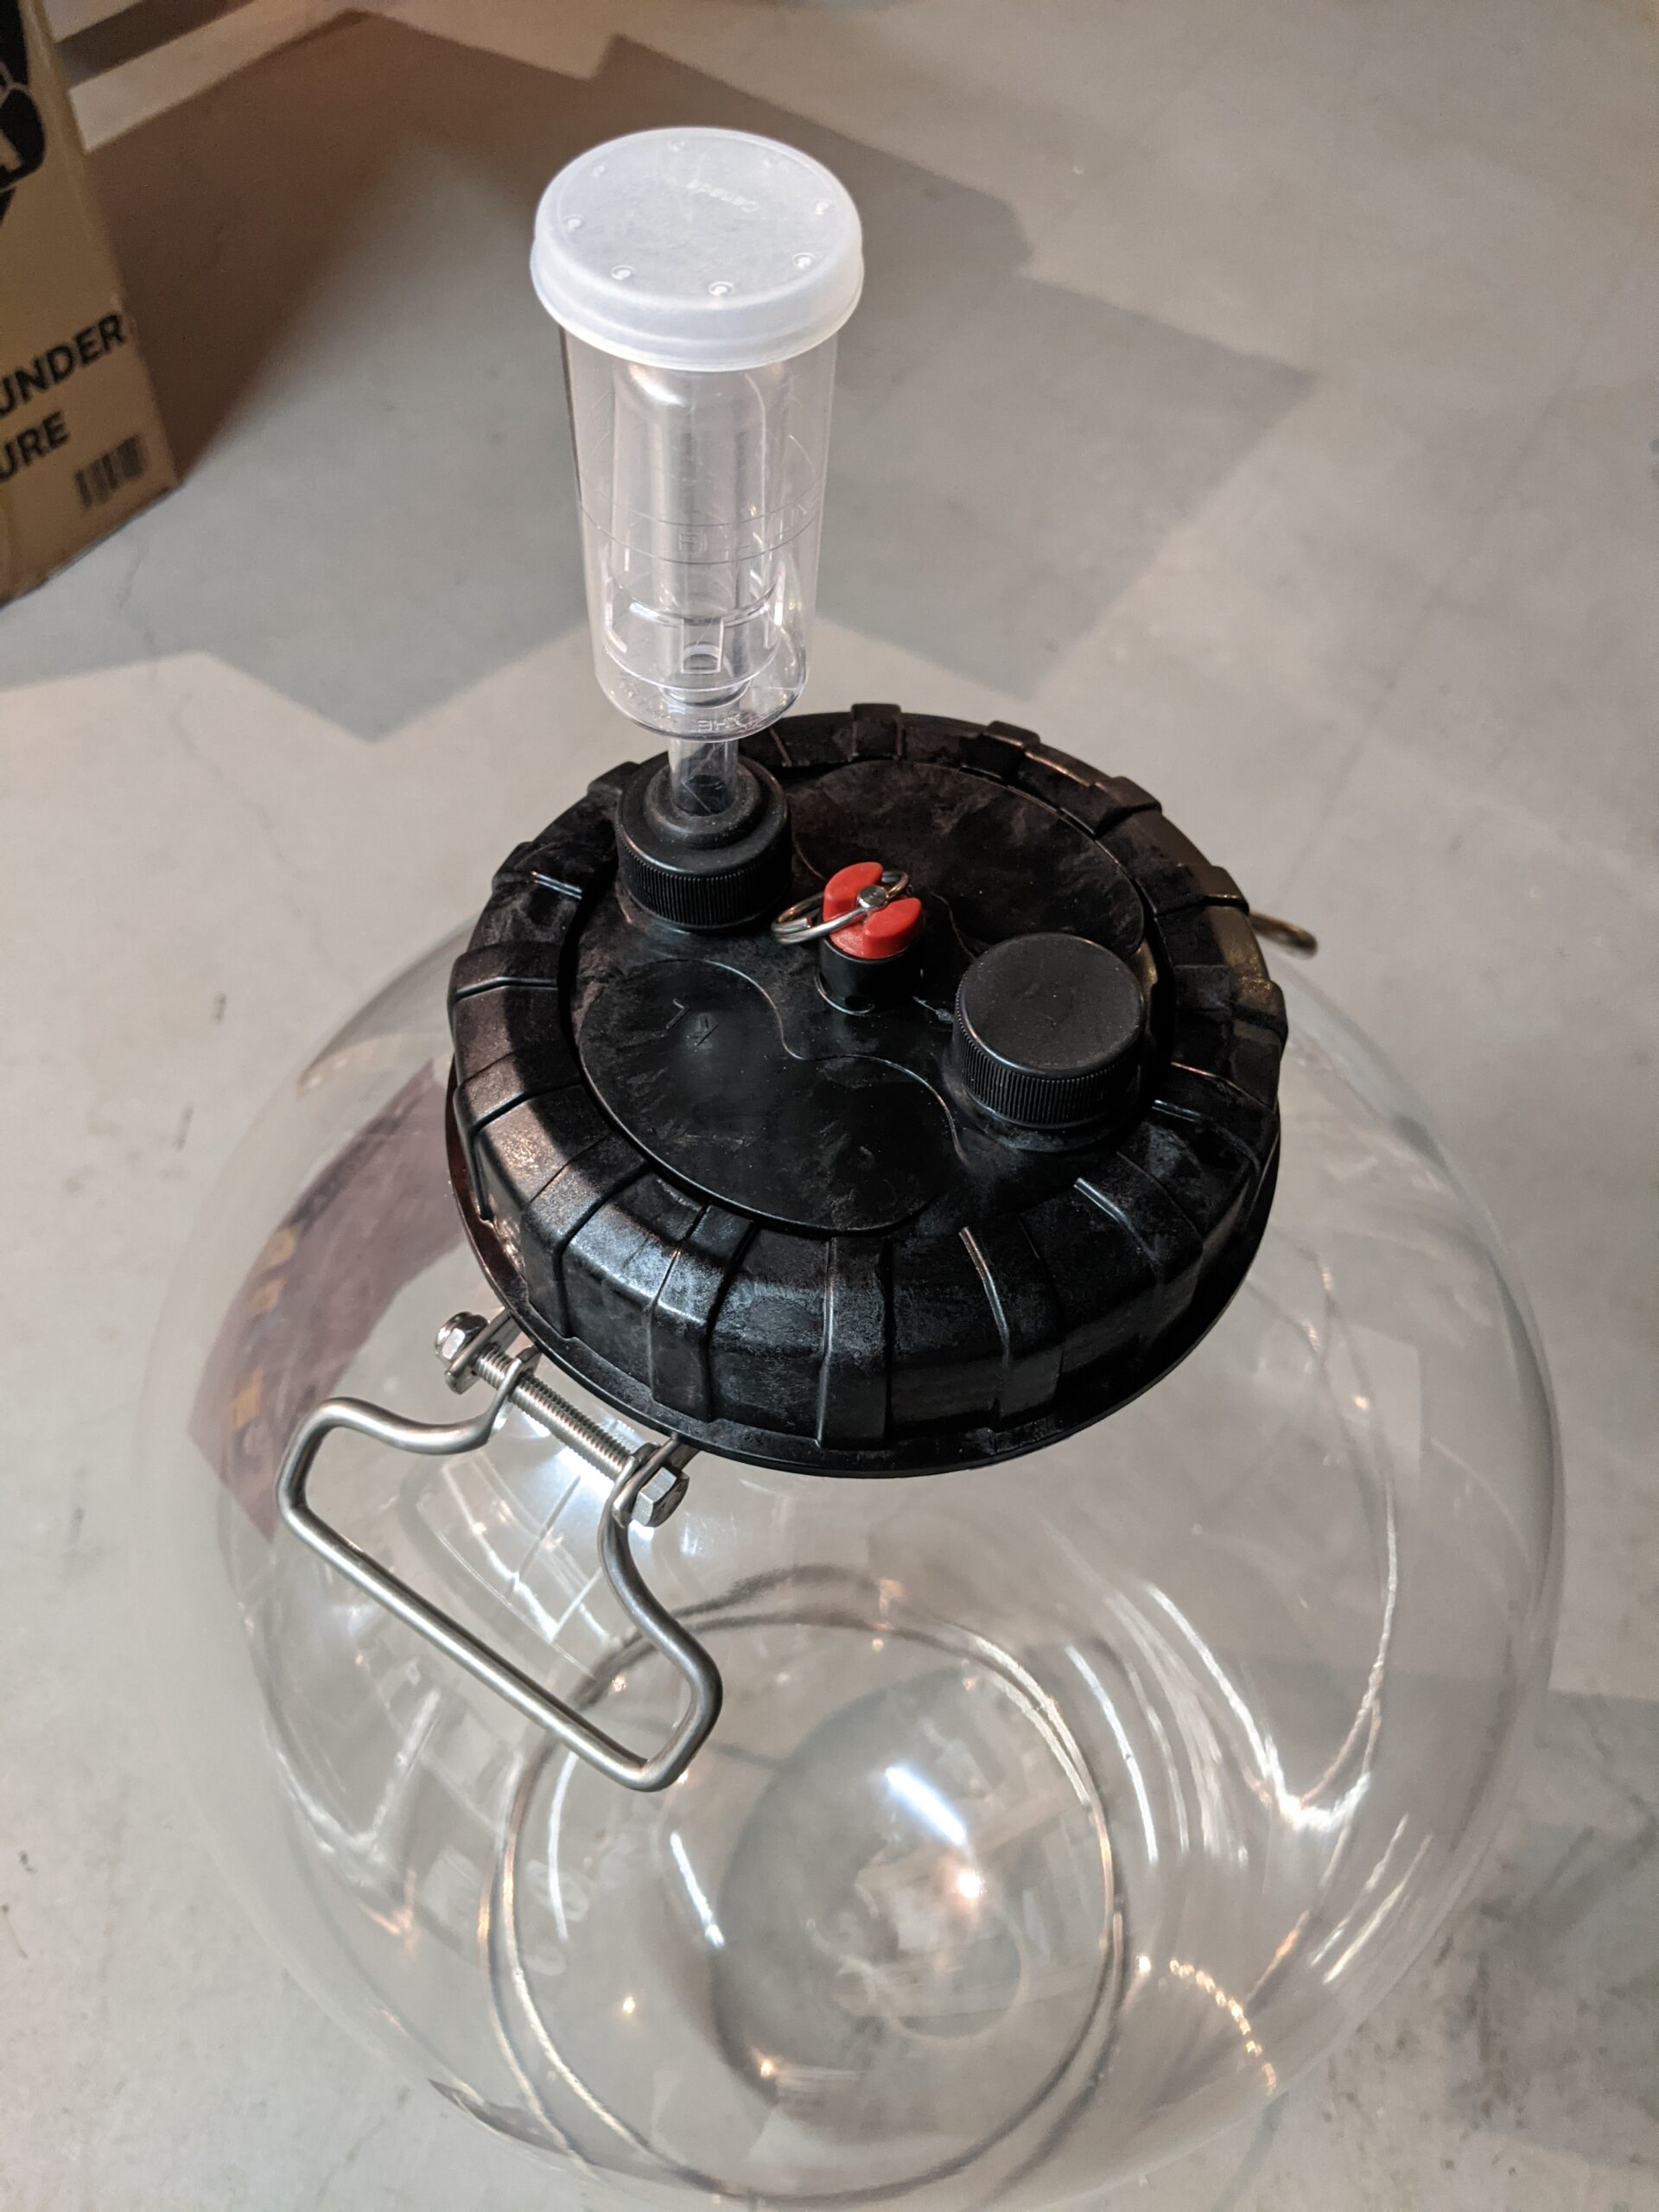
- Lid with 35 psi Pressure-Release Valve (PRV)
- 3-Piece Airlock
- Grommet Bottle Cap
- Thermometer Sticker
- Volume Marking Sticker
- Stainless-Steel Pressure kit
- (2) Stainless-Steel Gas Ball Lock Posts
- Silicone tubing
- Stainless-Steel Float
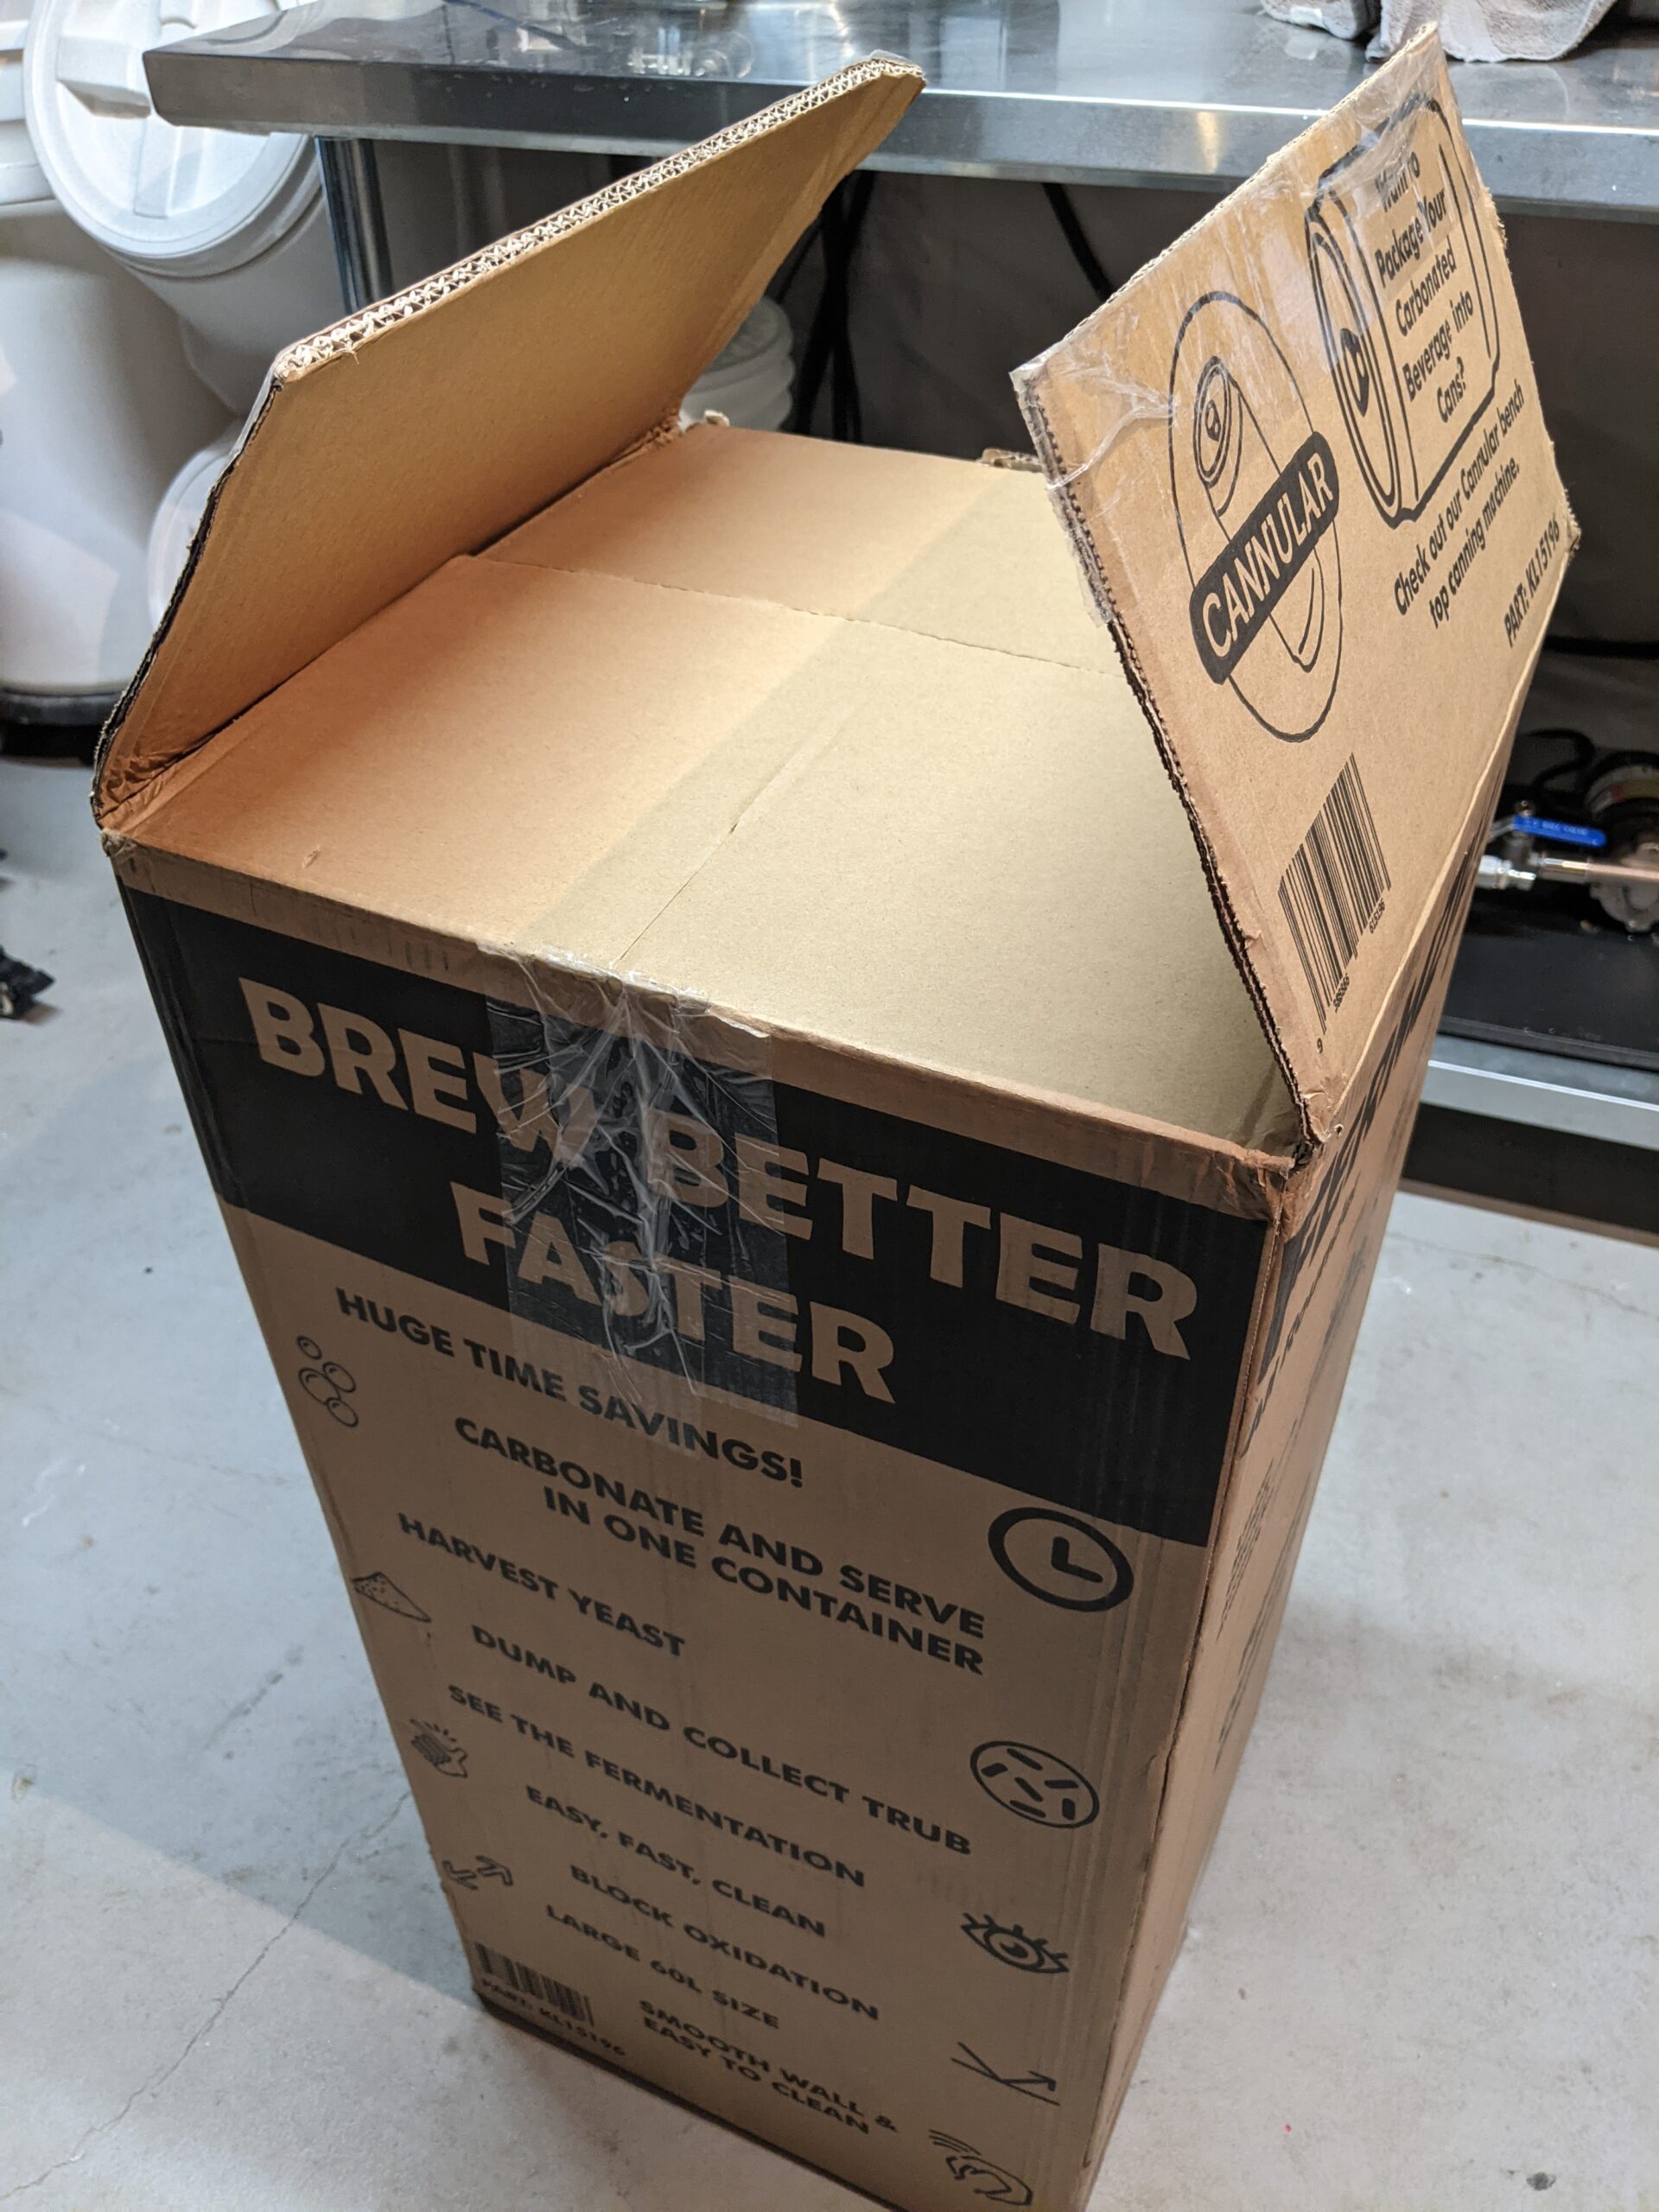 The Boxed Kegland FermZilla All Rounder
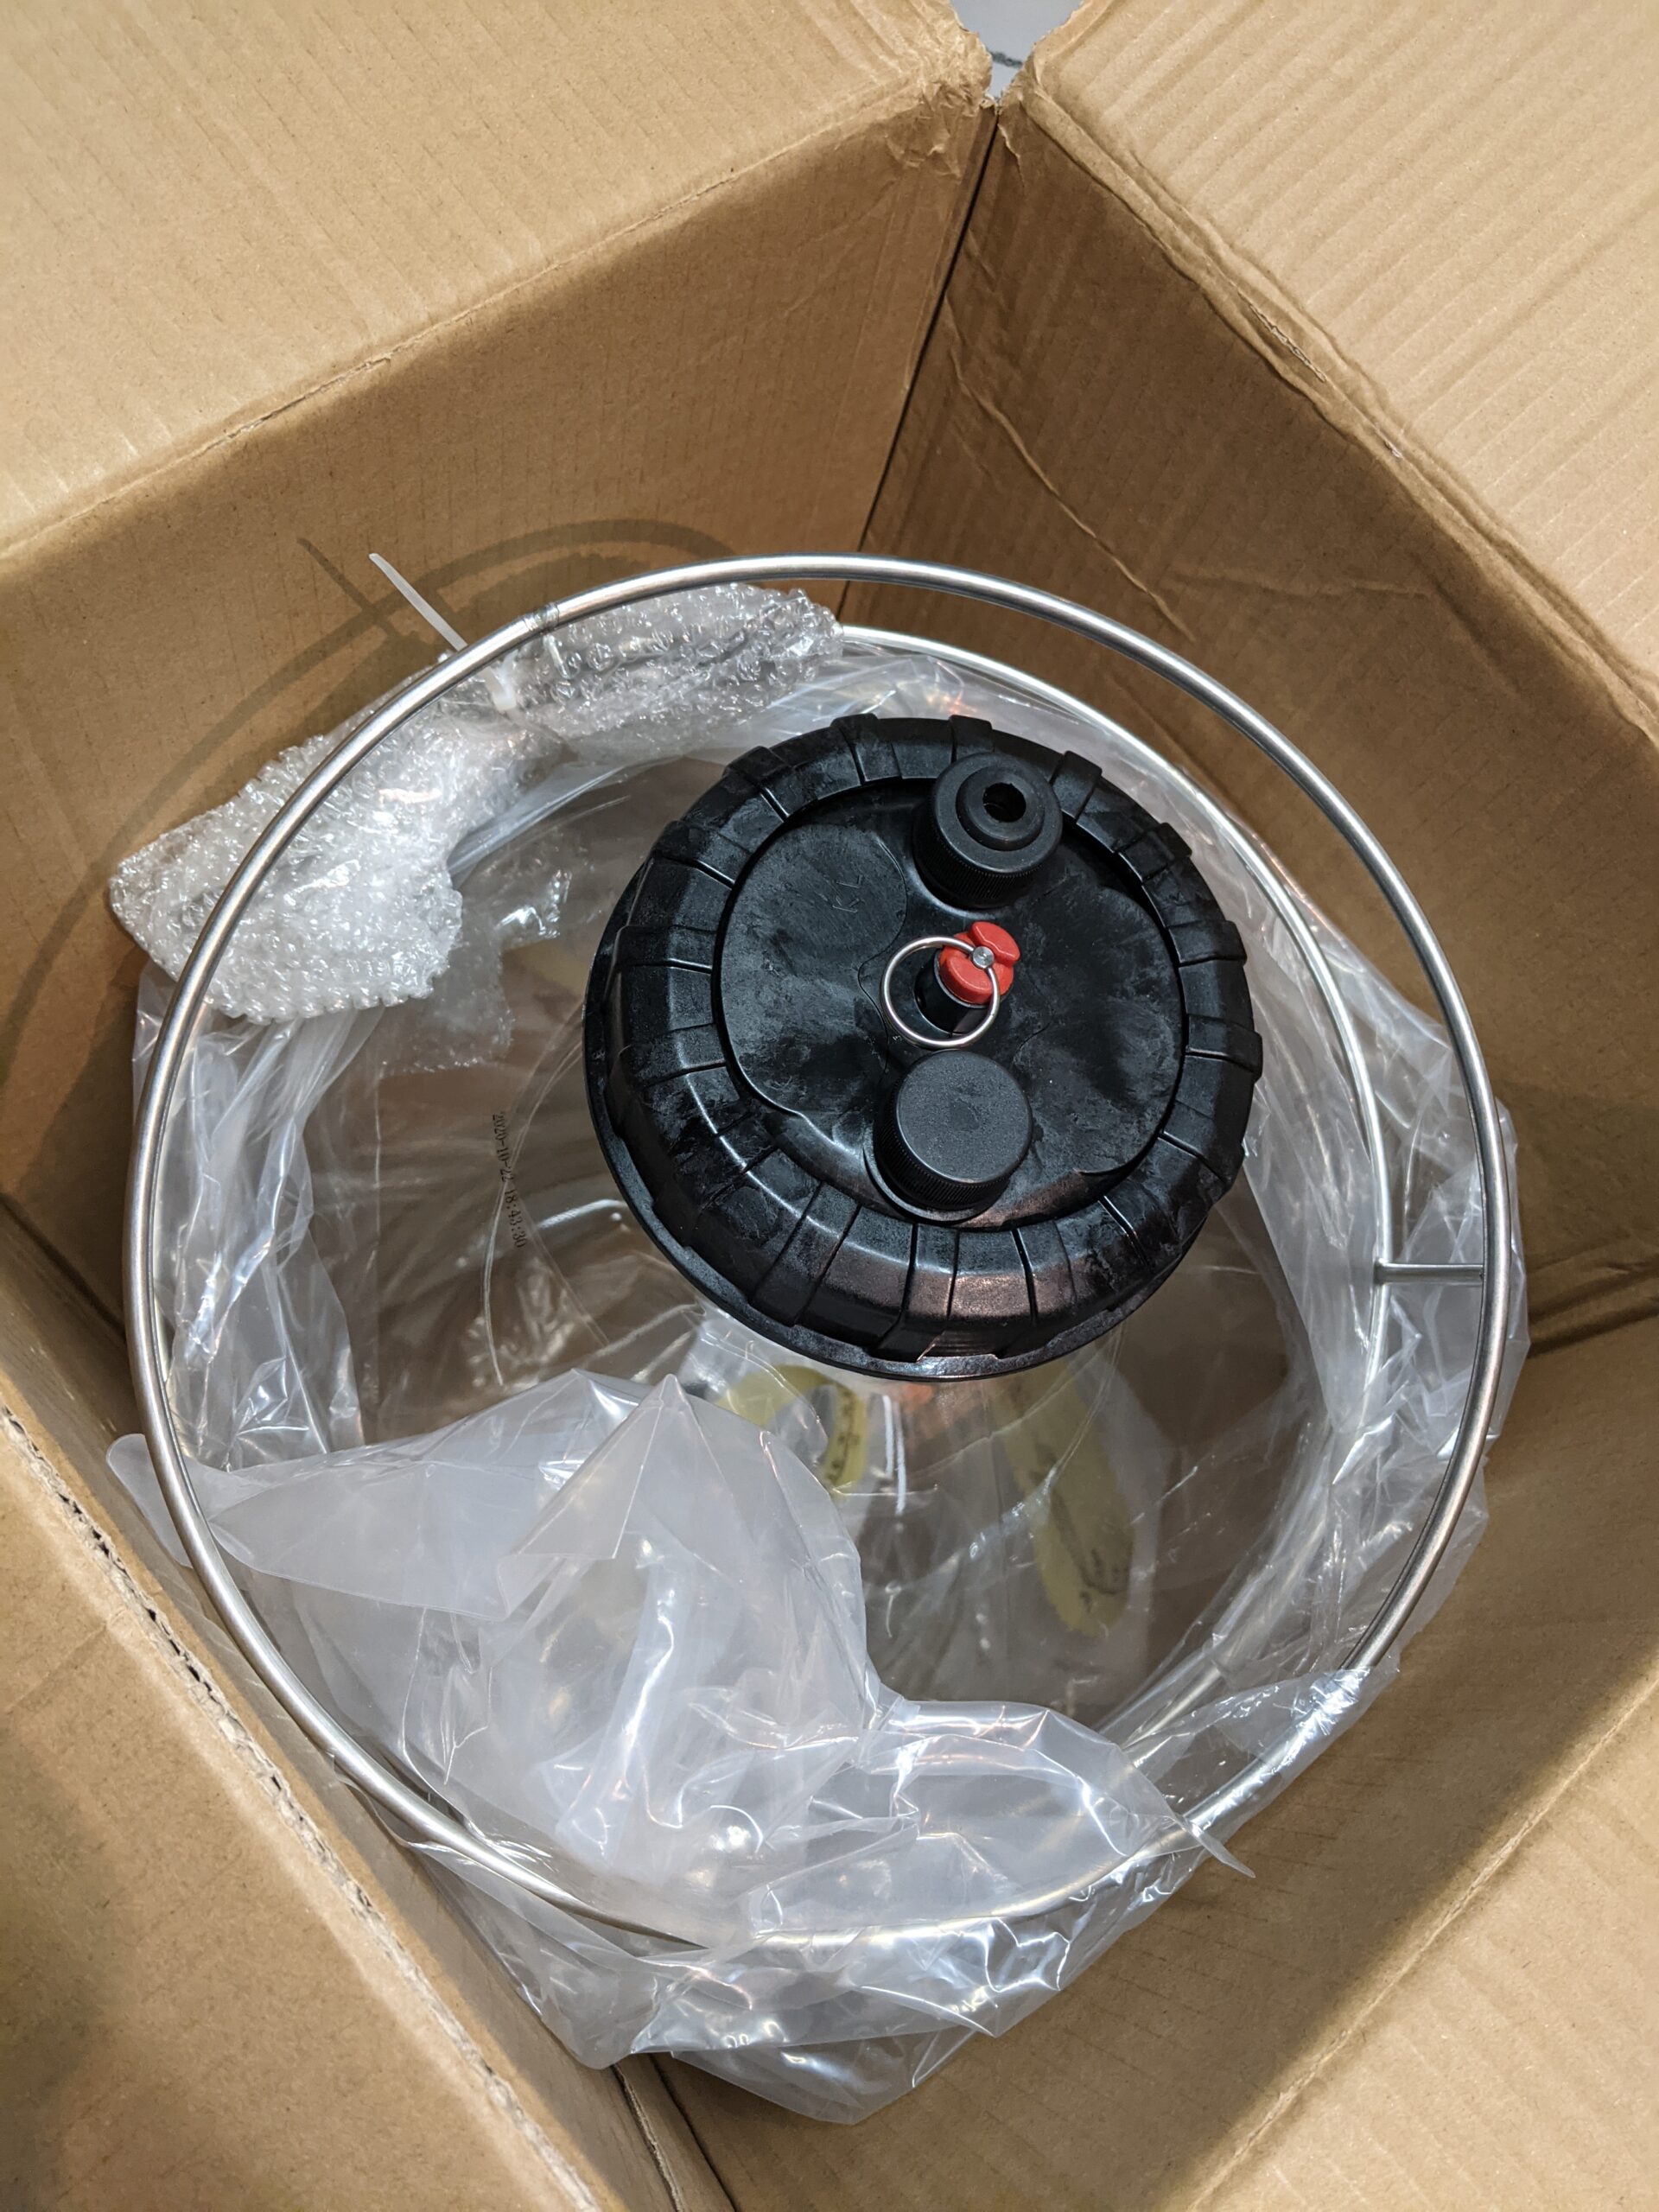 Top of the open box
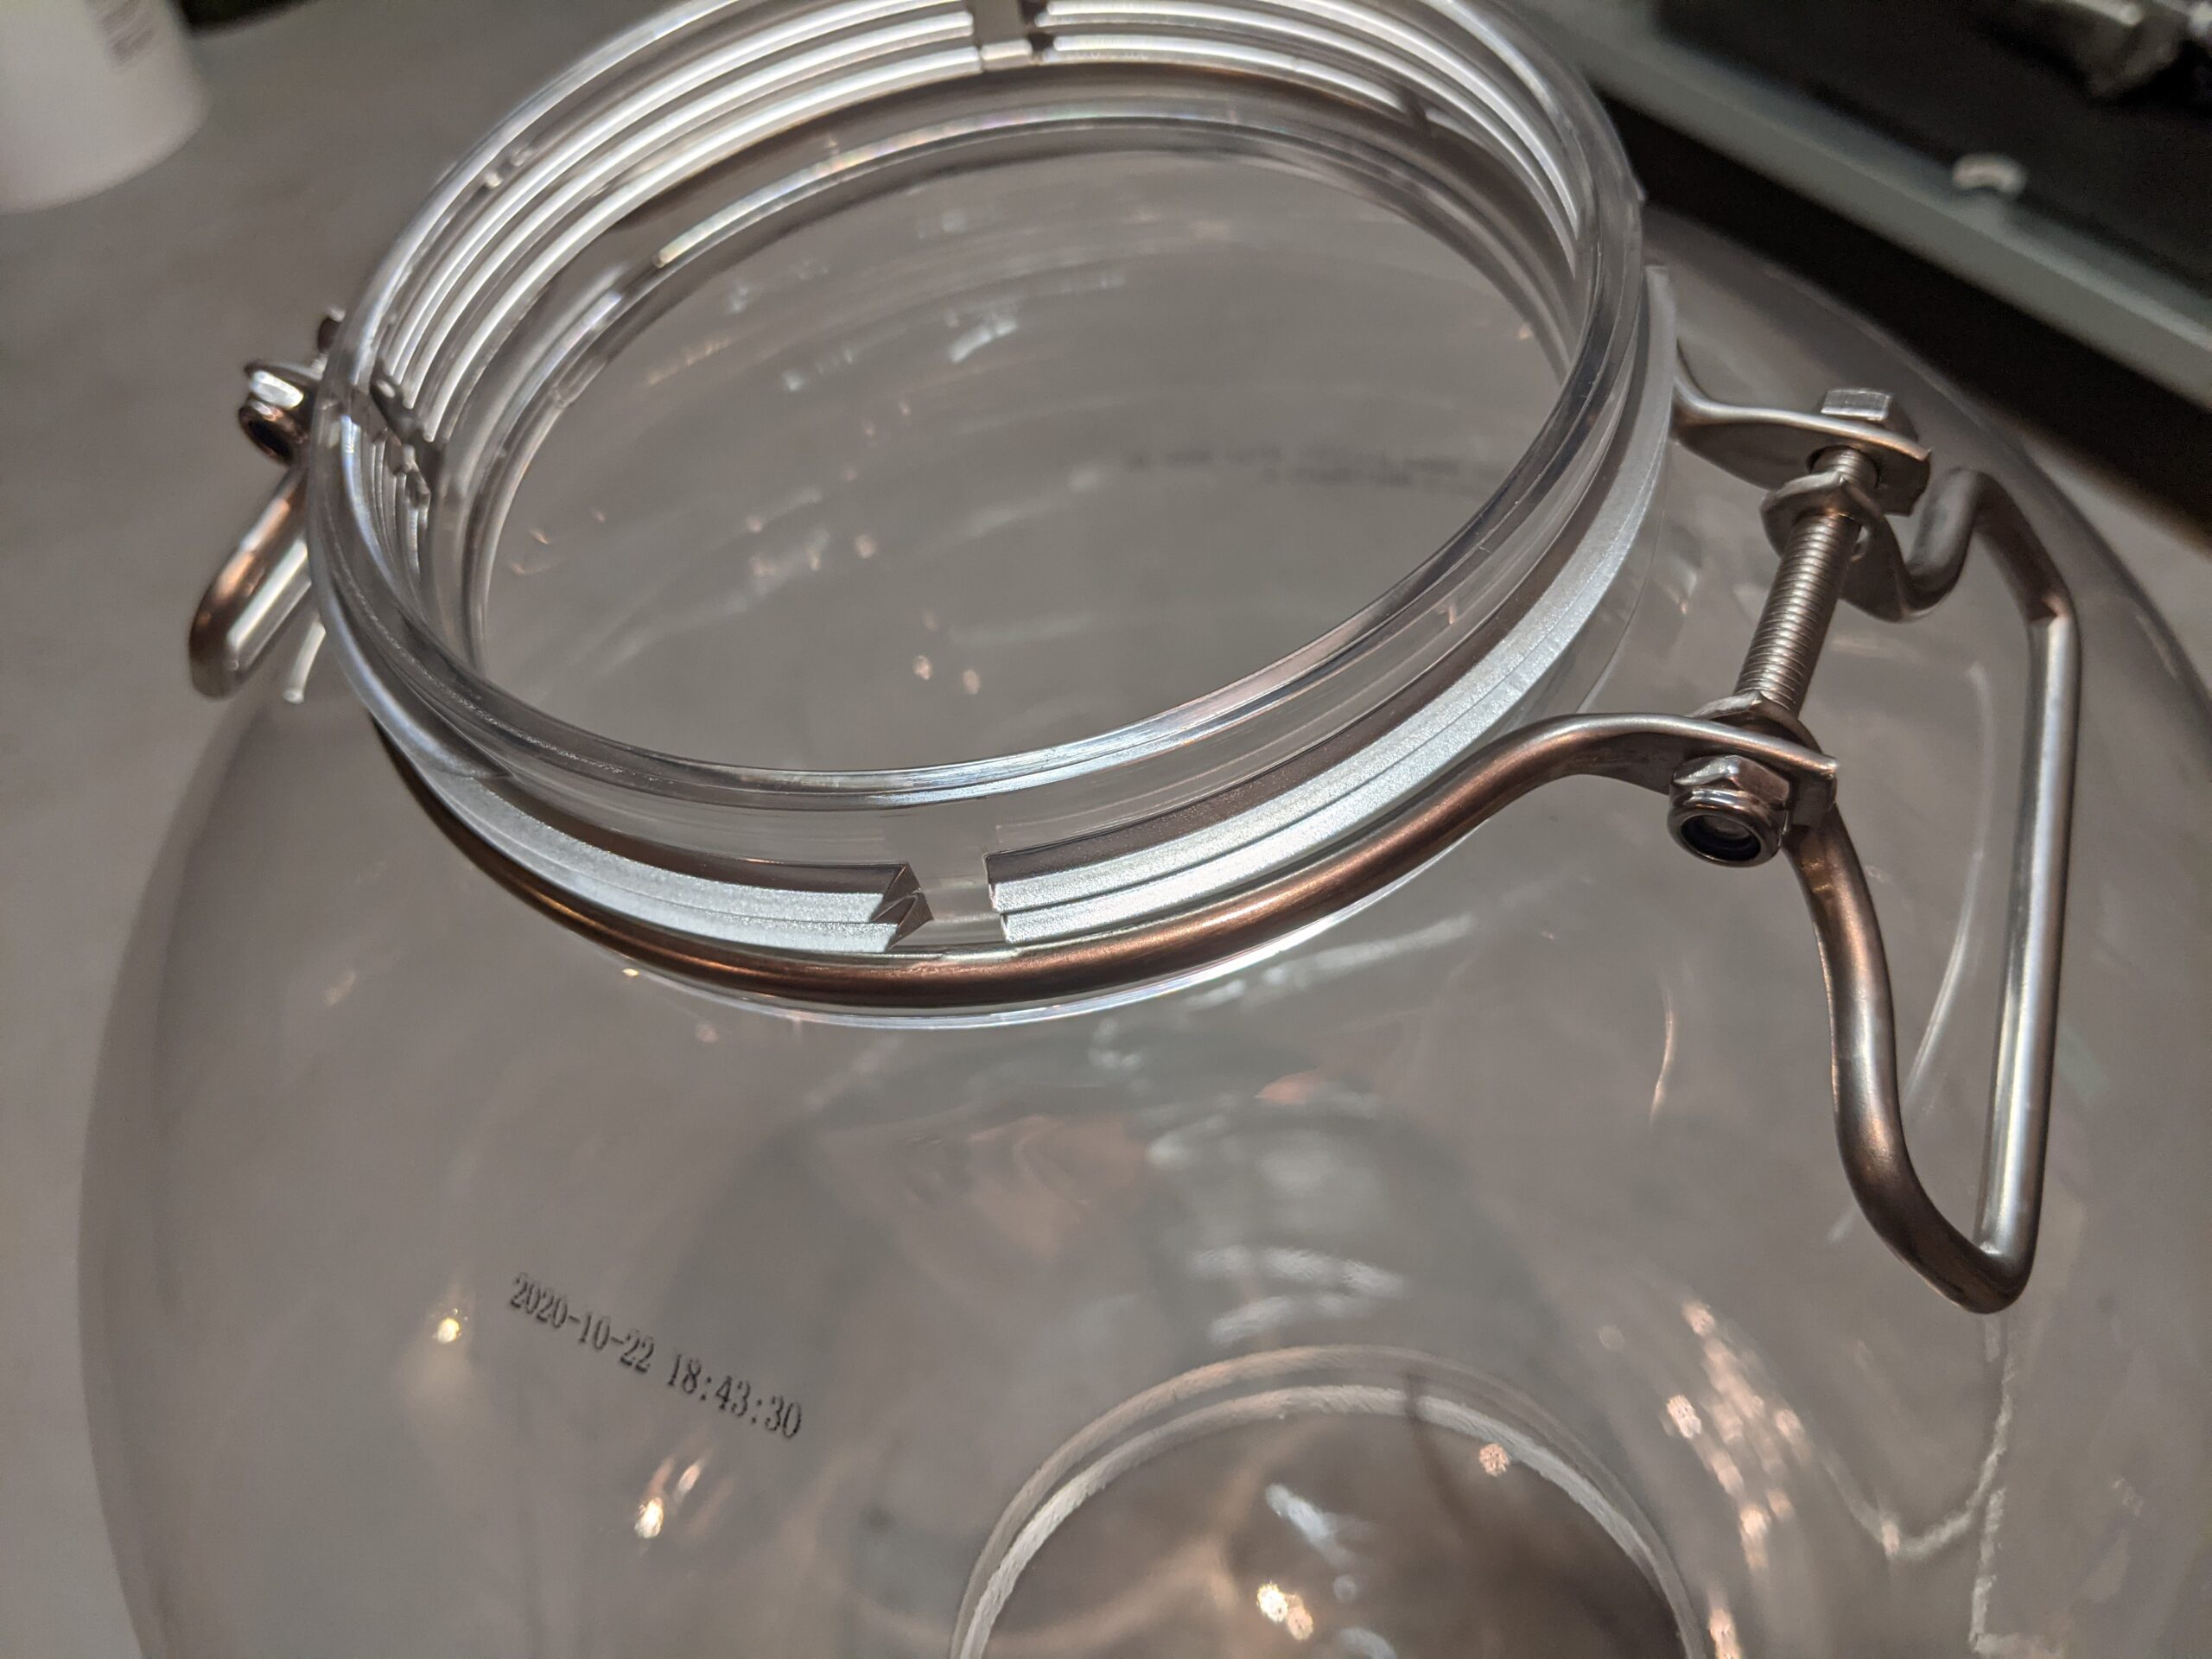 Closeup of FermZilla All Rounder Handle
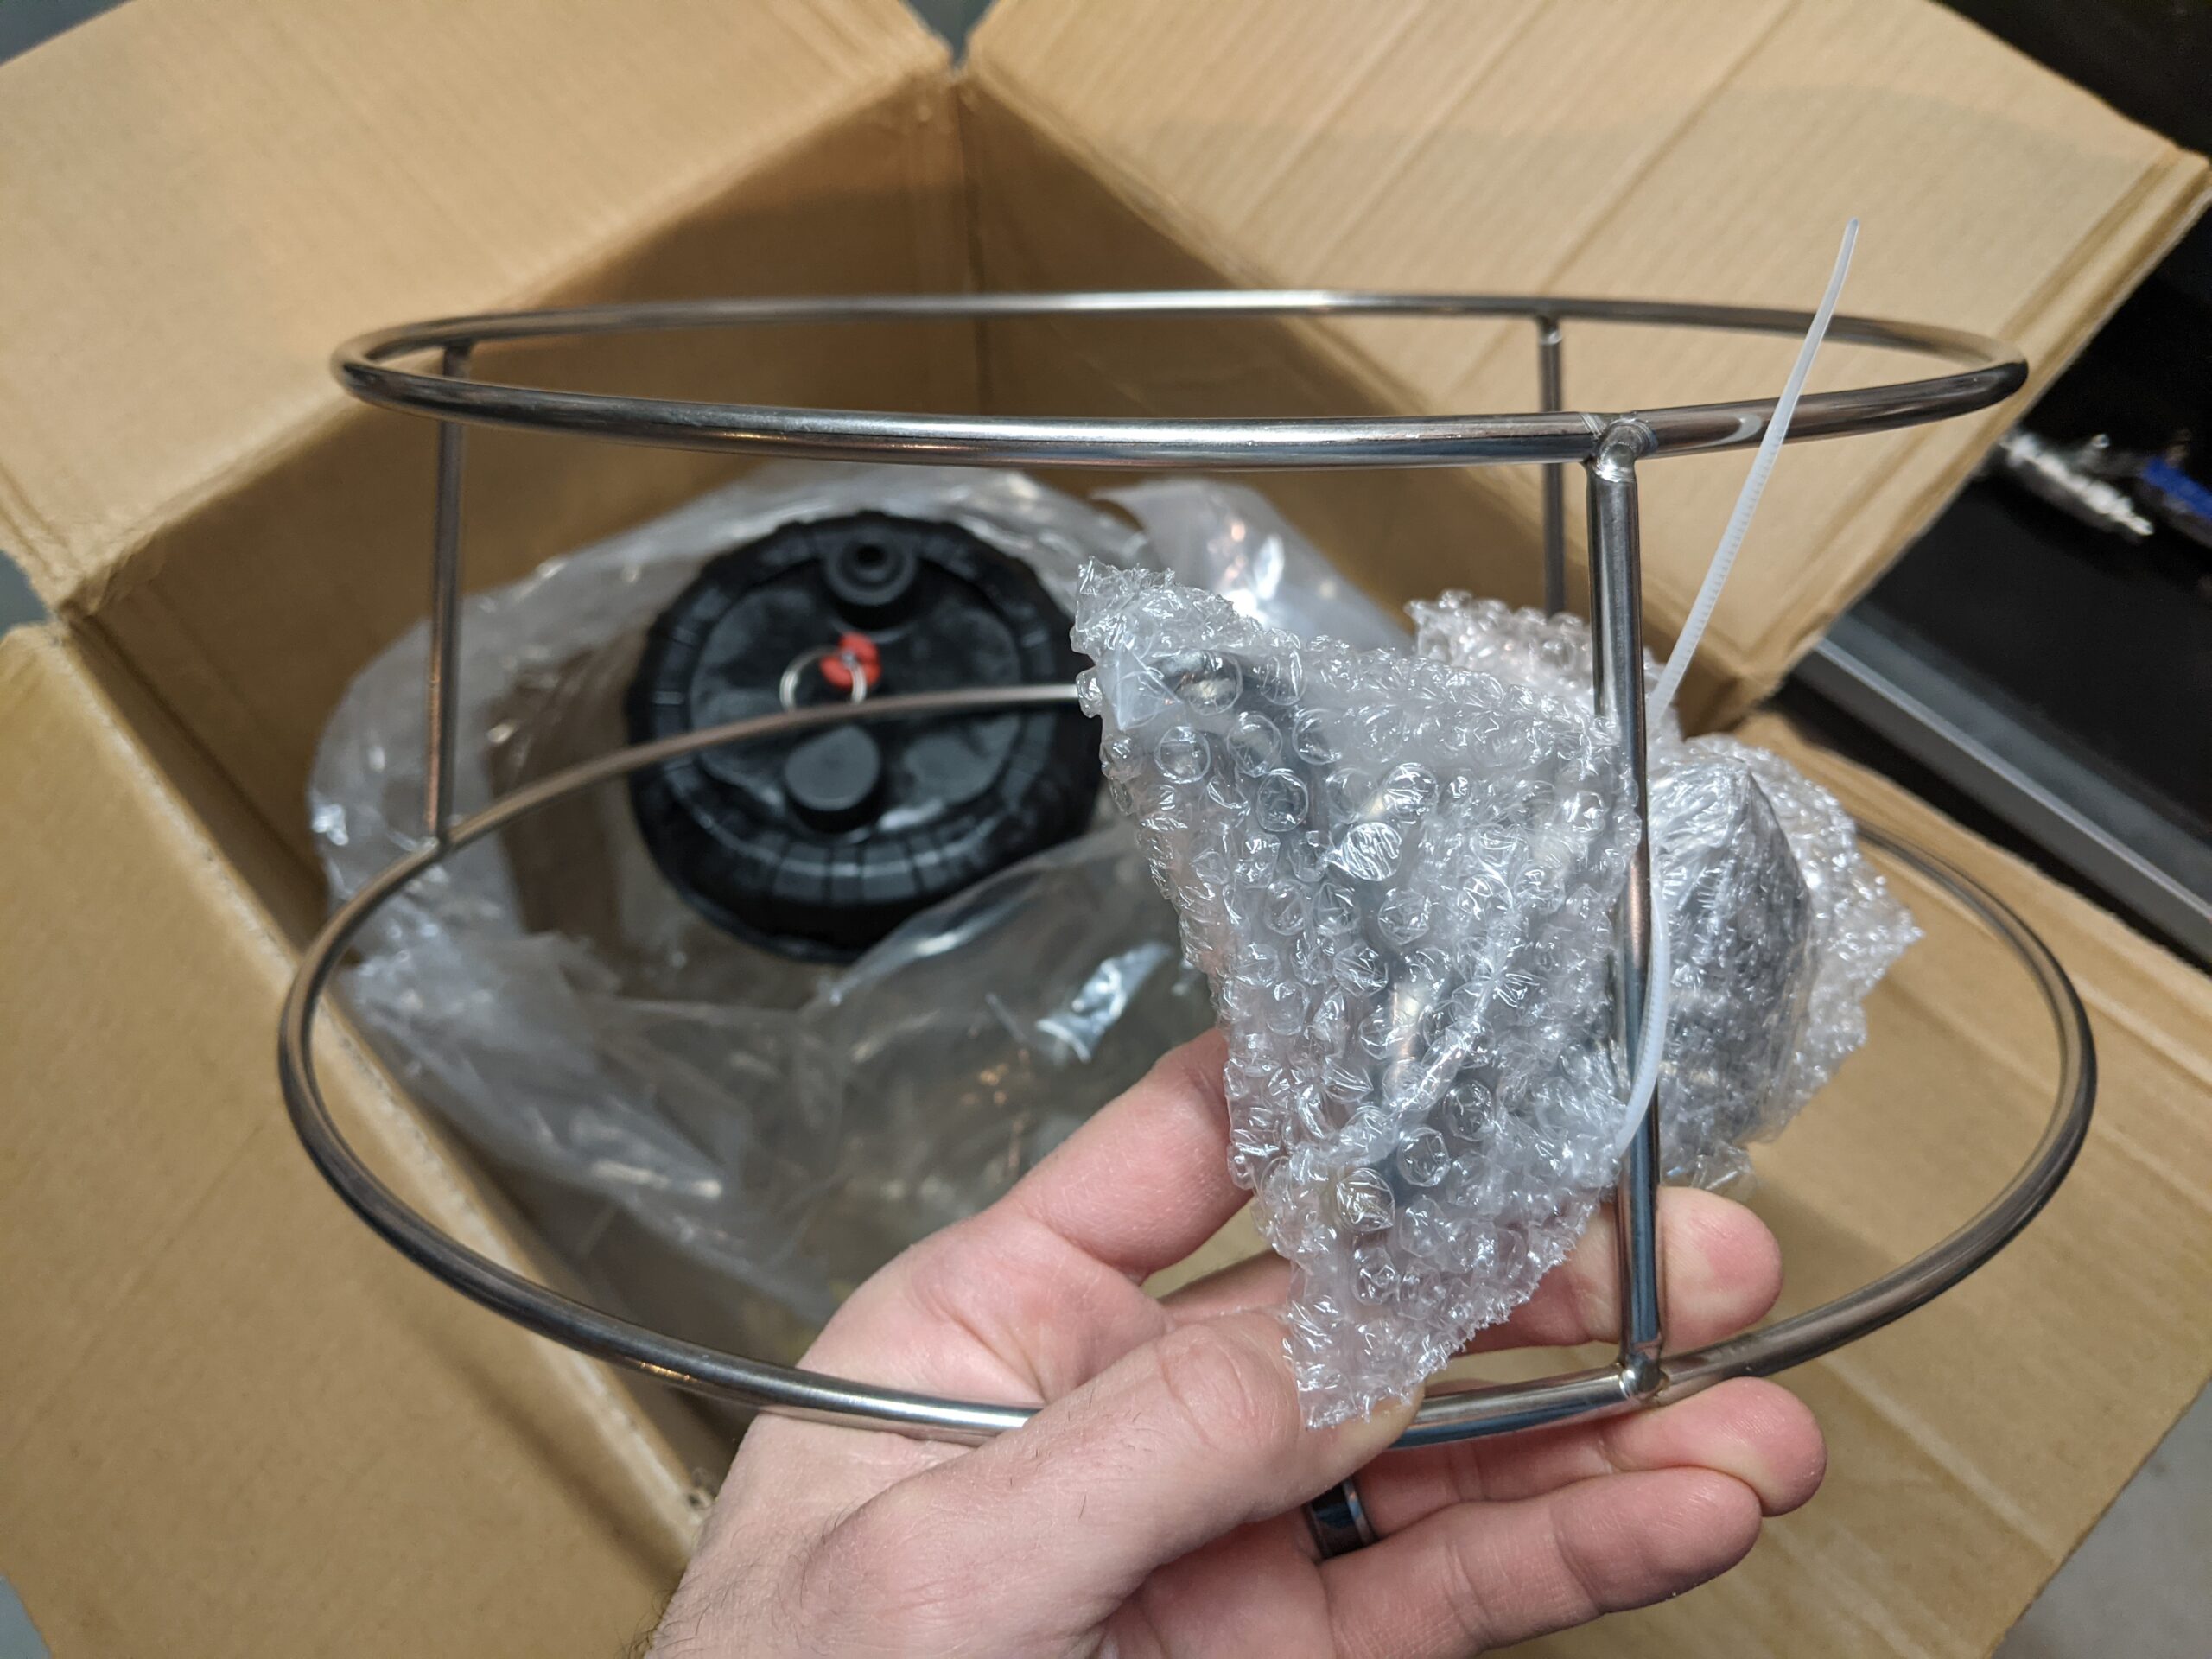 All Rounder Stainless Steel Stand
 Unassembled All Rounder Lid
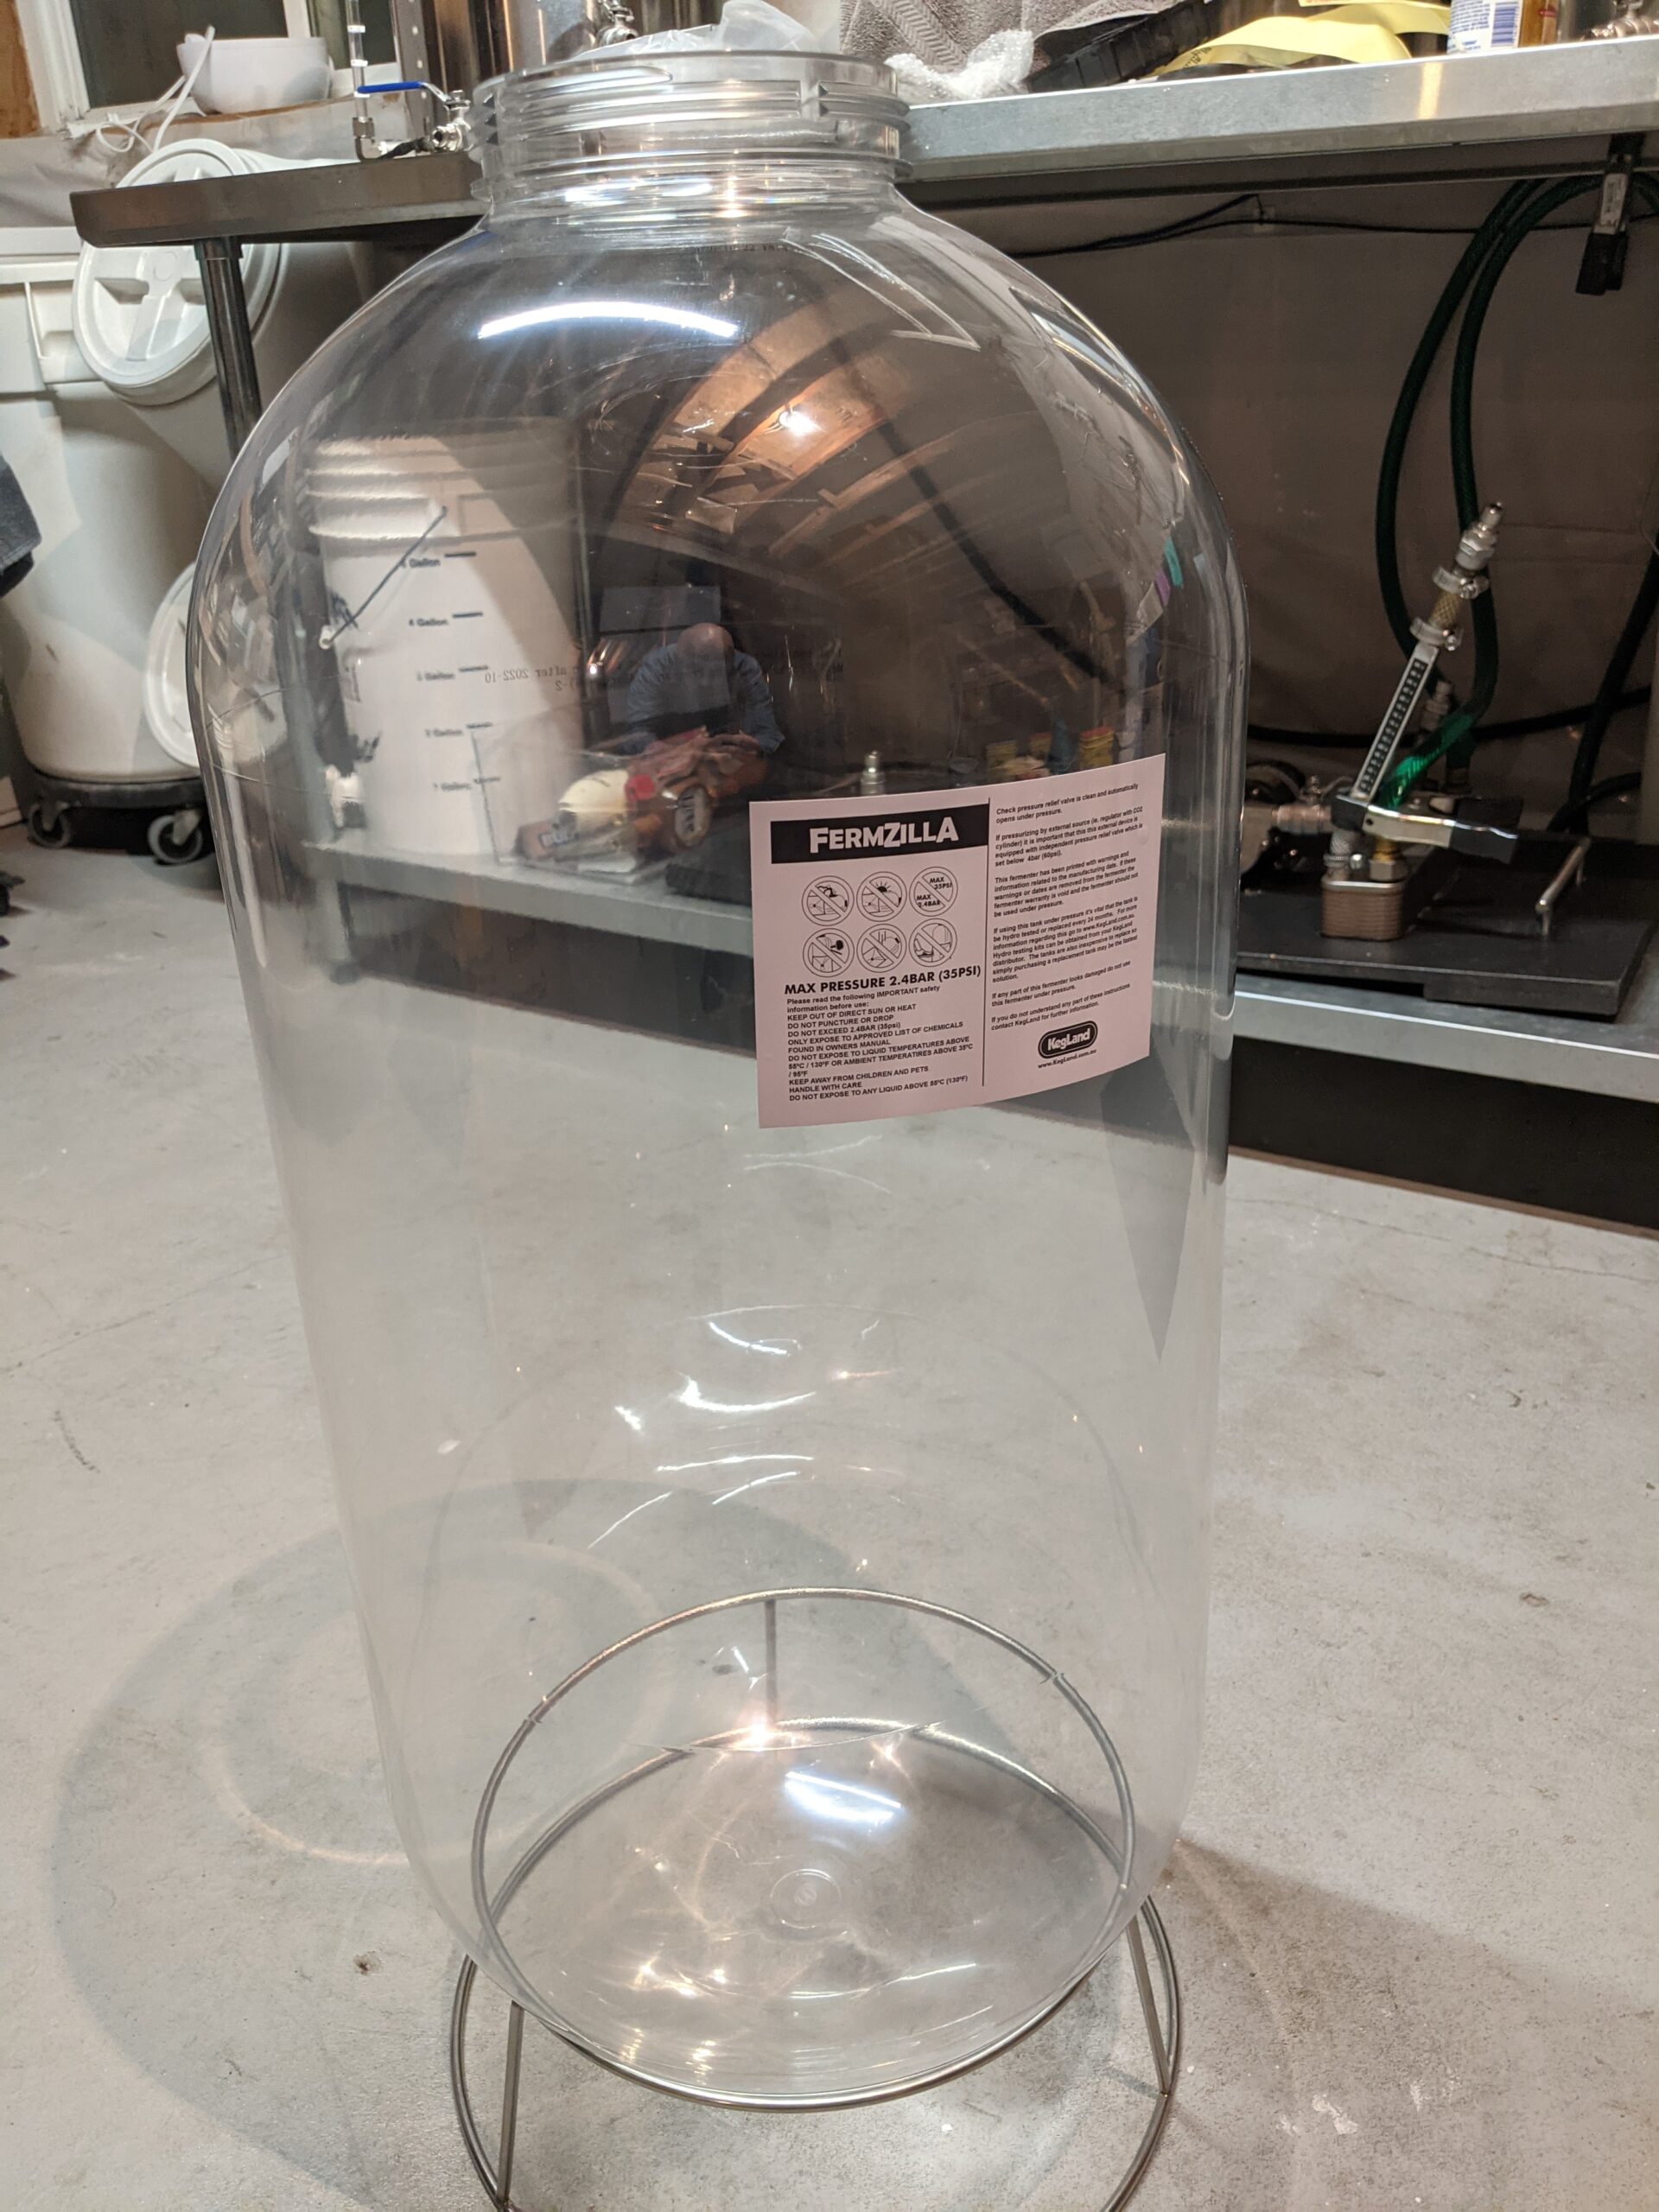 FermZilla All Rounder 60L
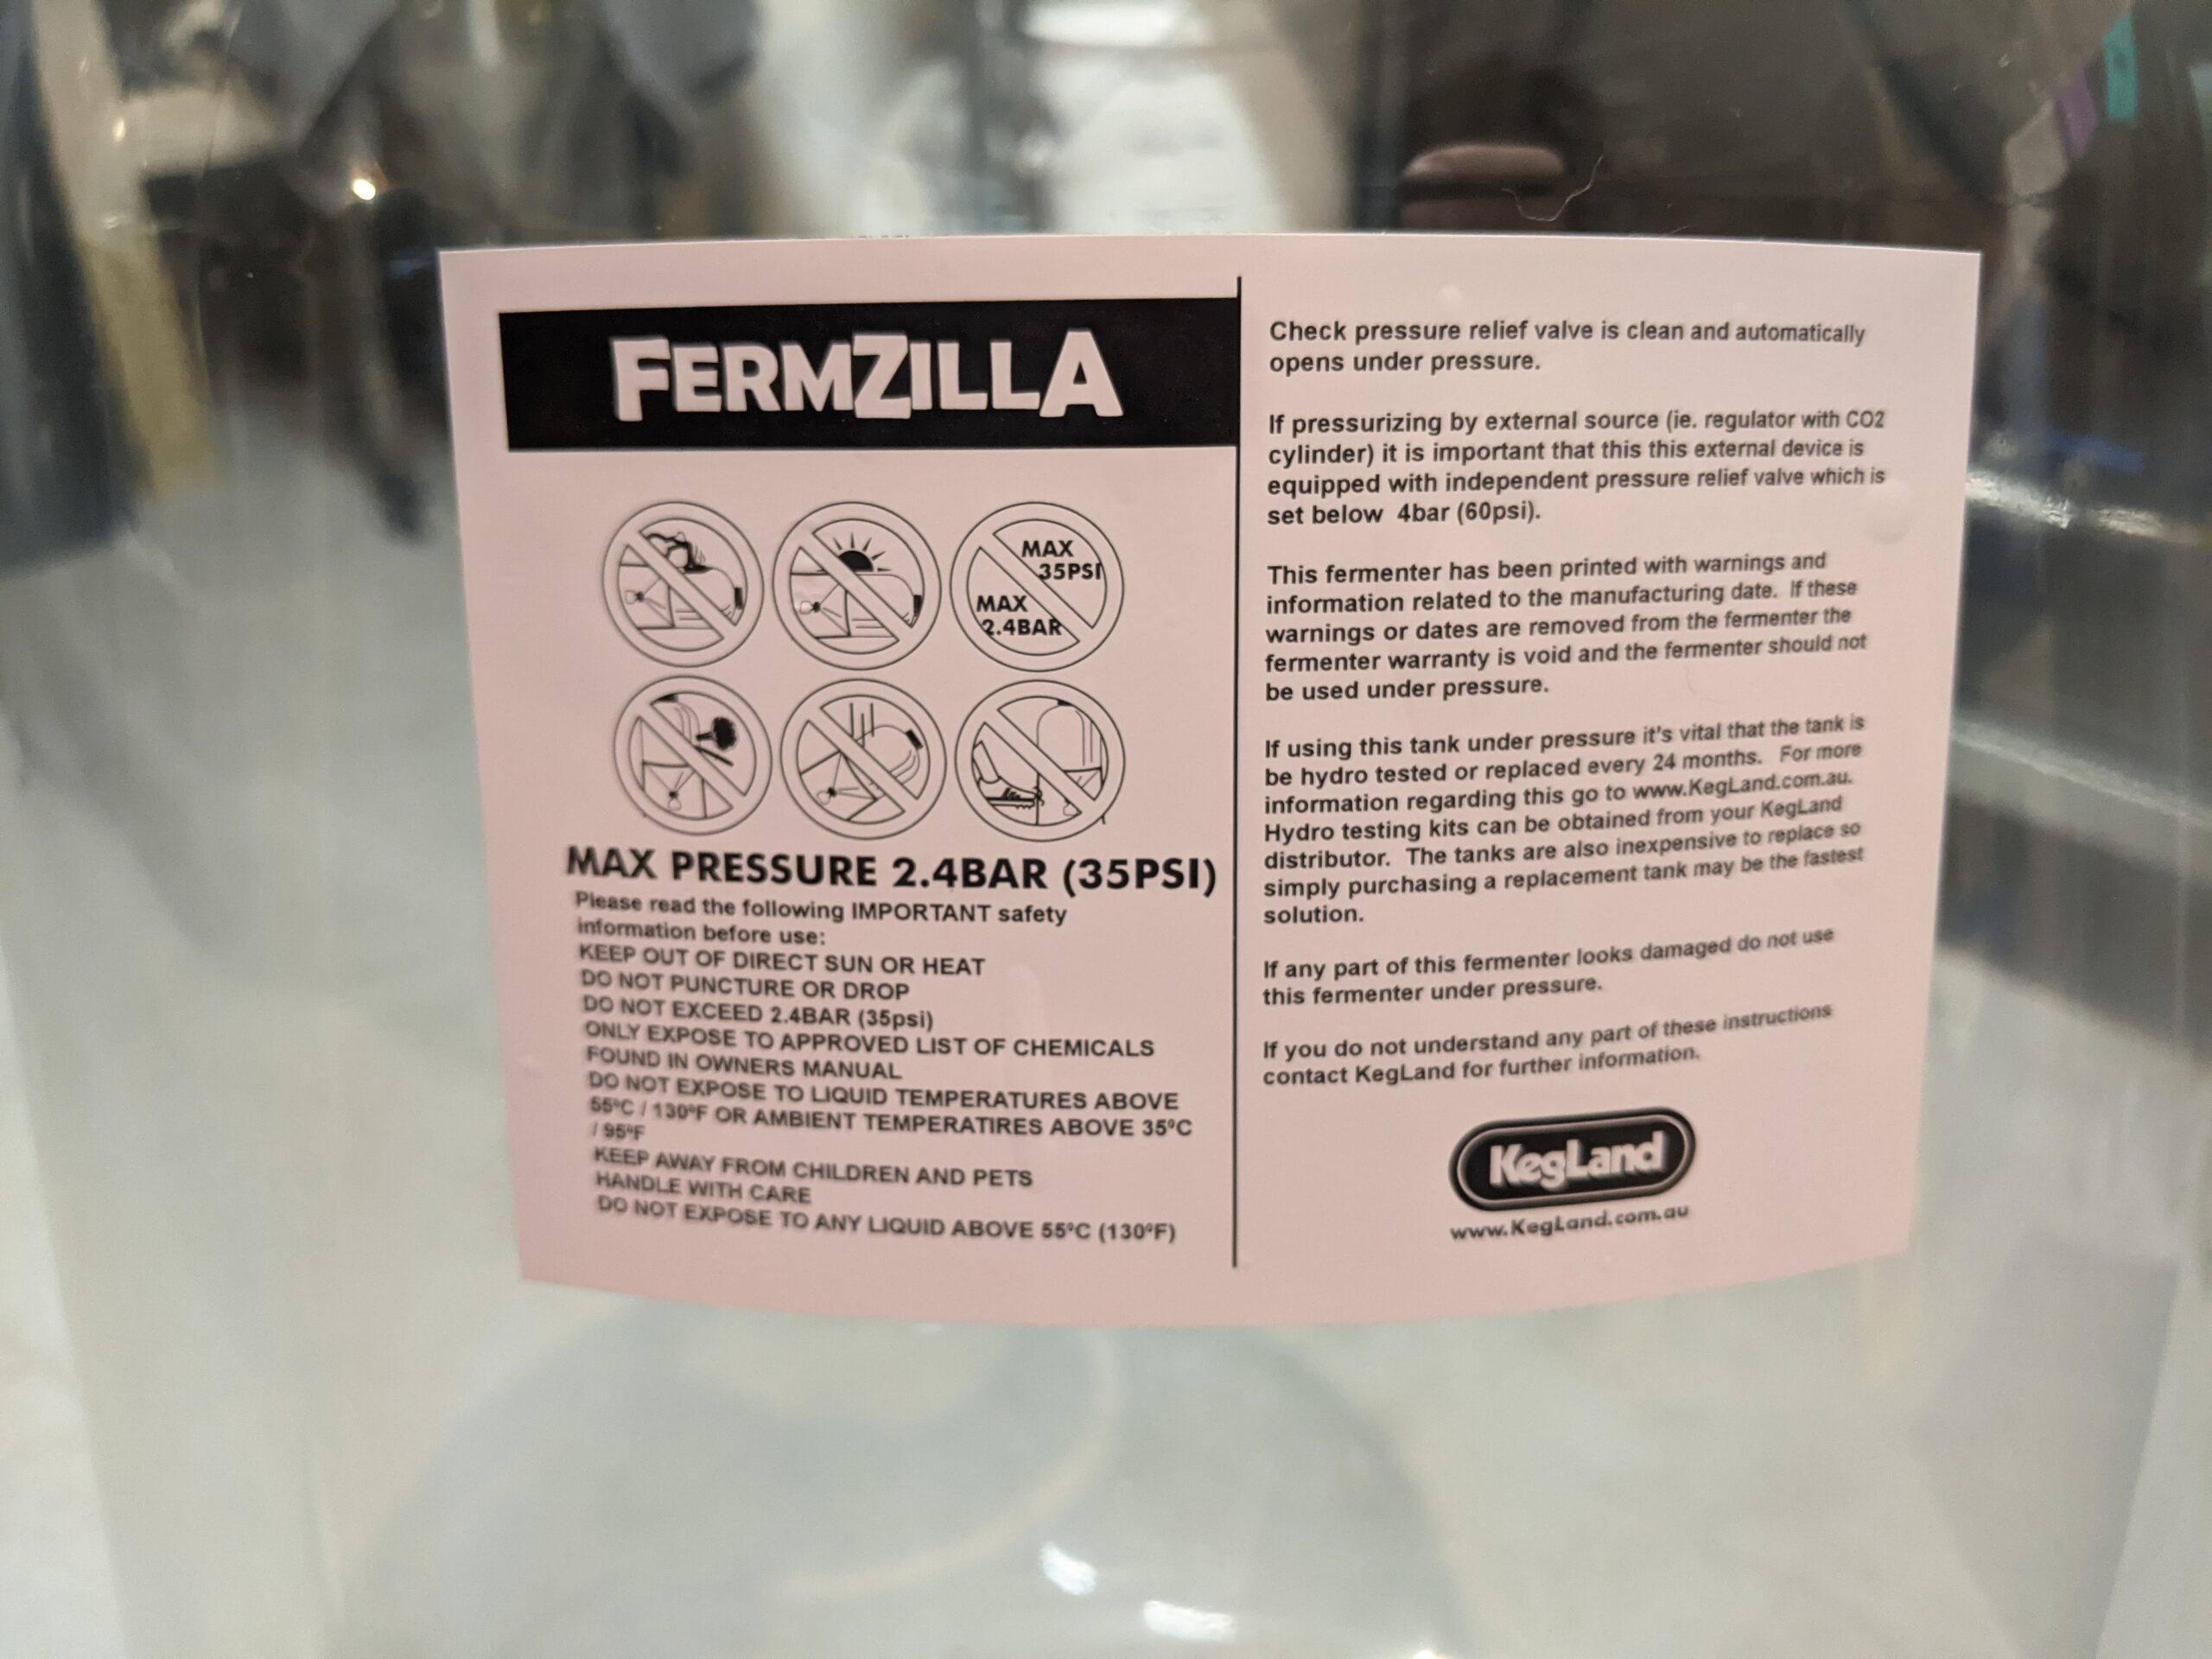 FermZilla All Rounder Label
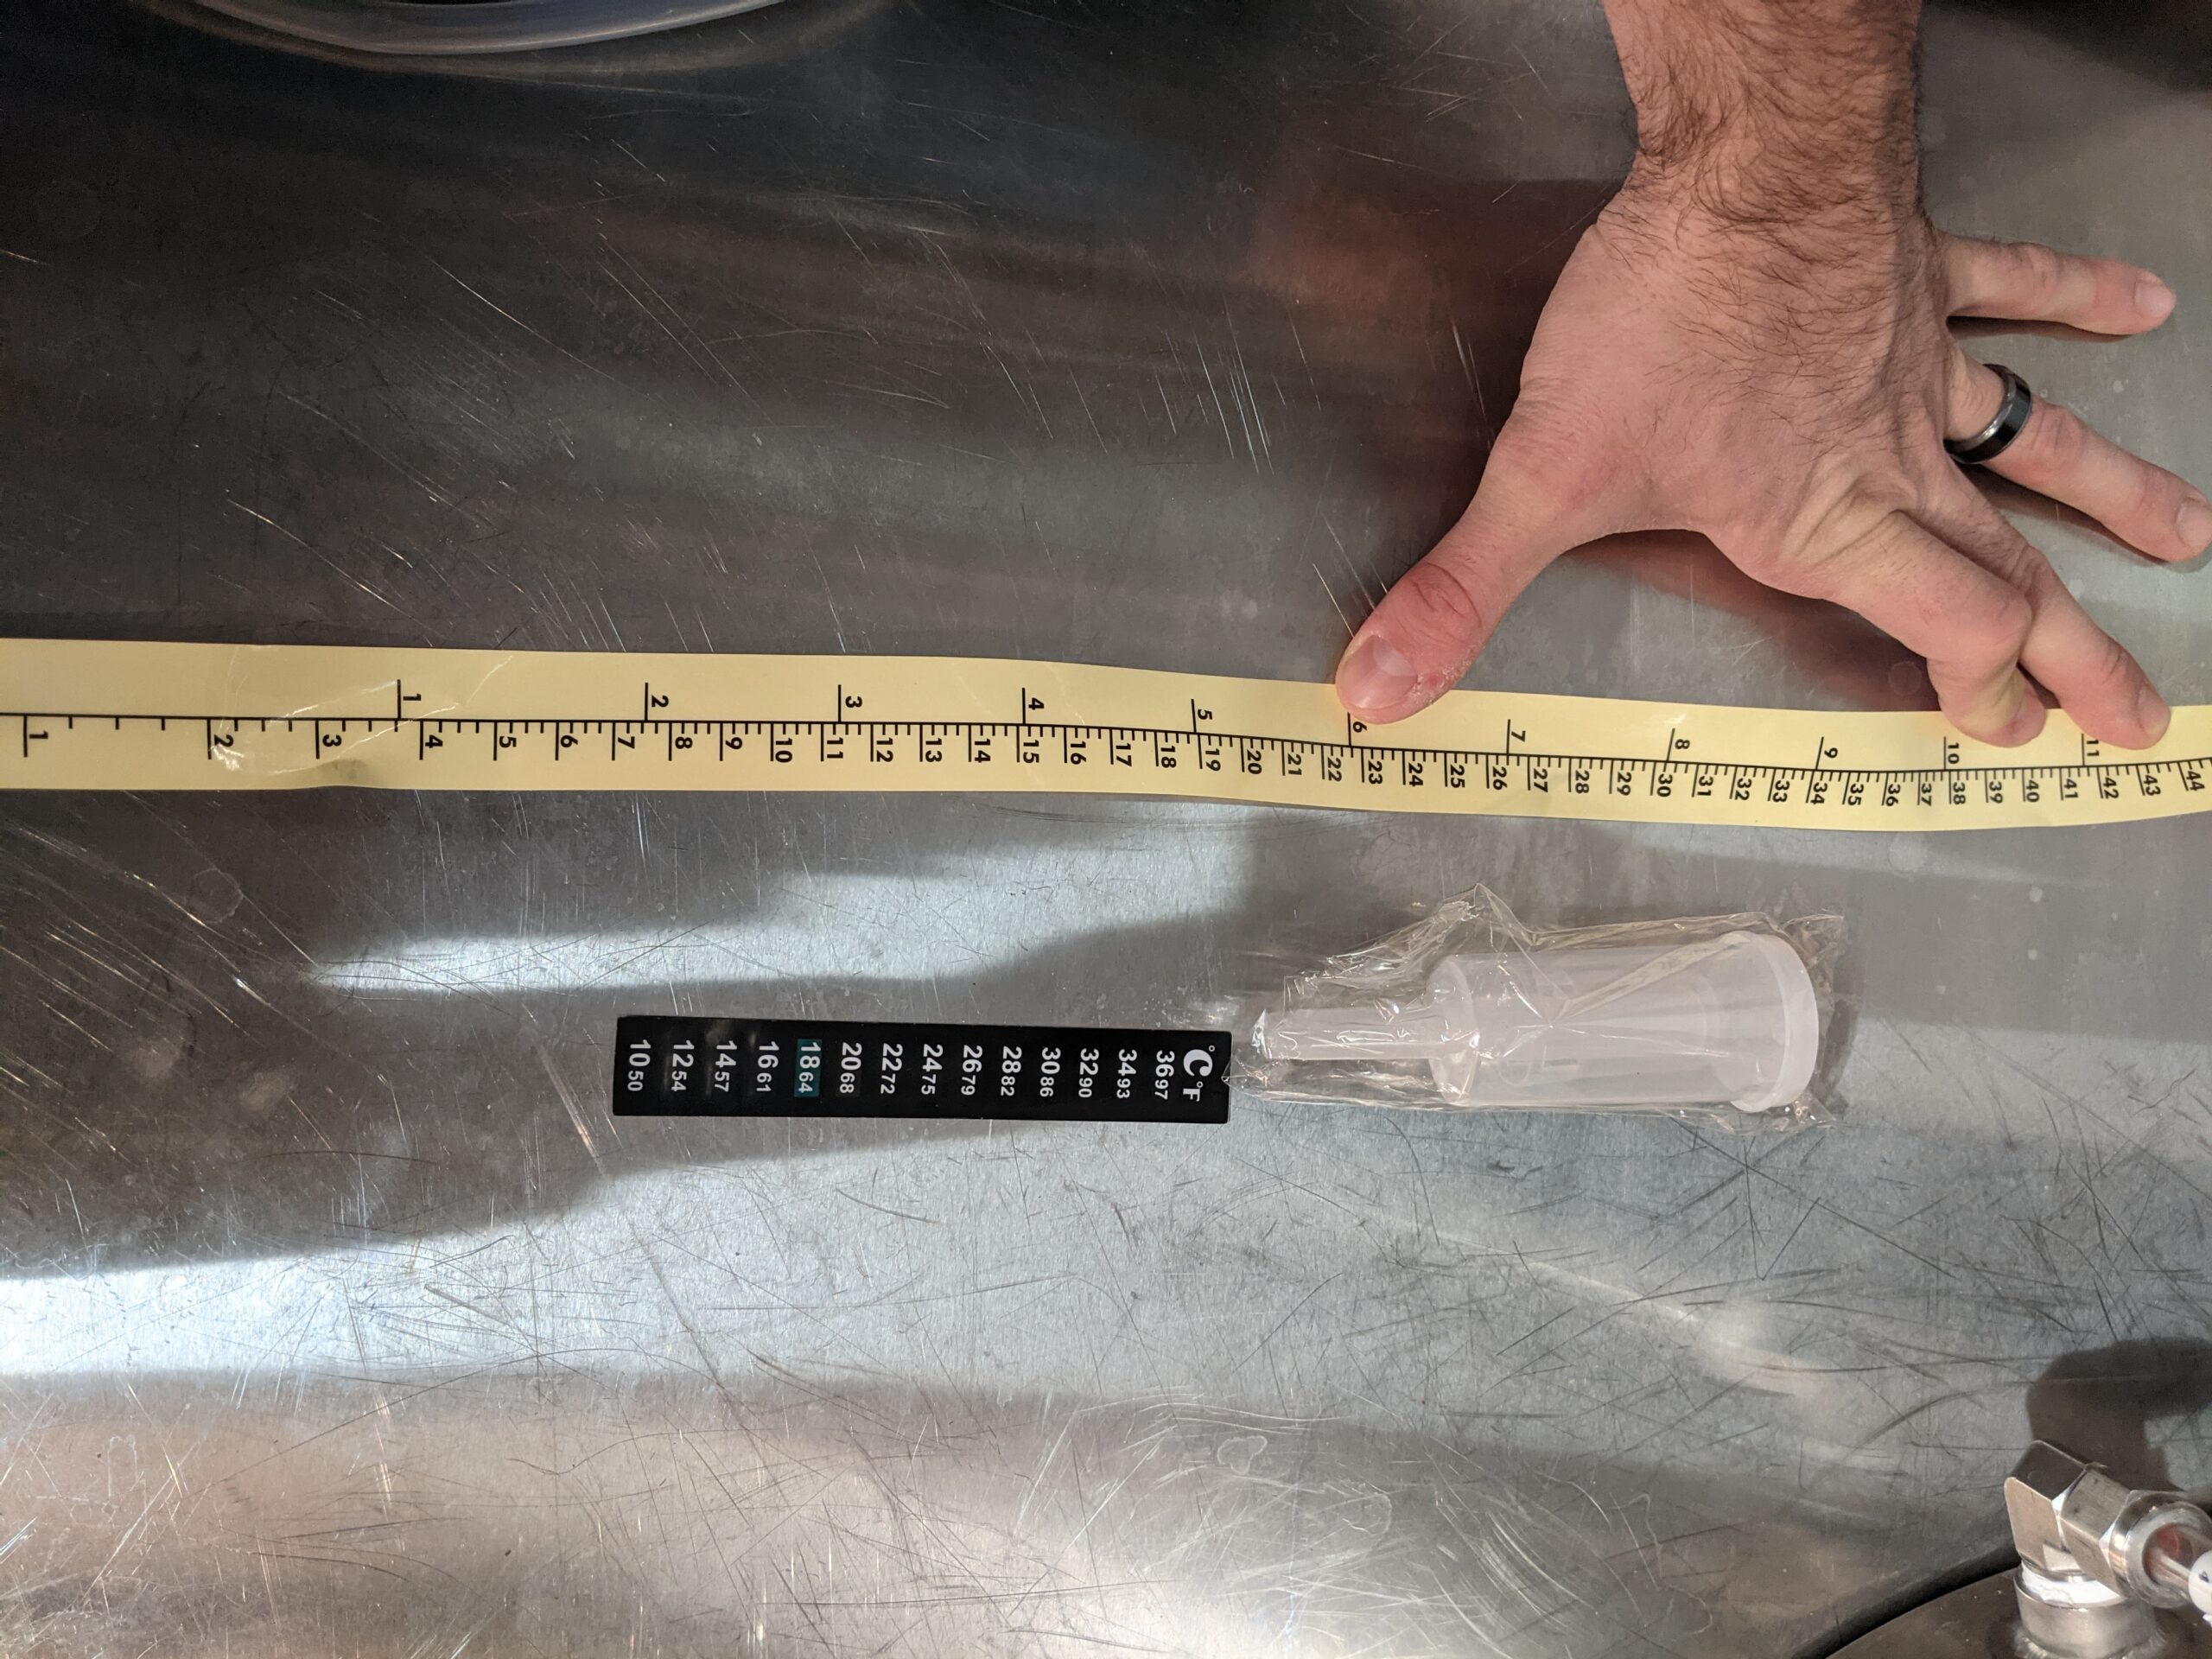 All Rounder Volume Stickers, Thermometer and Airlock
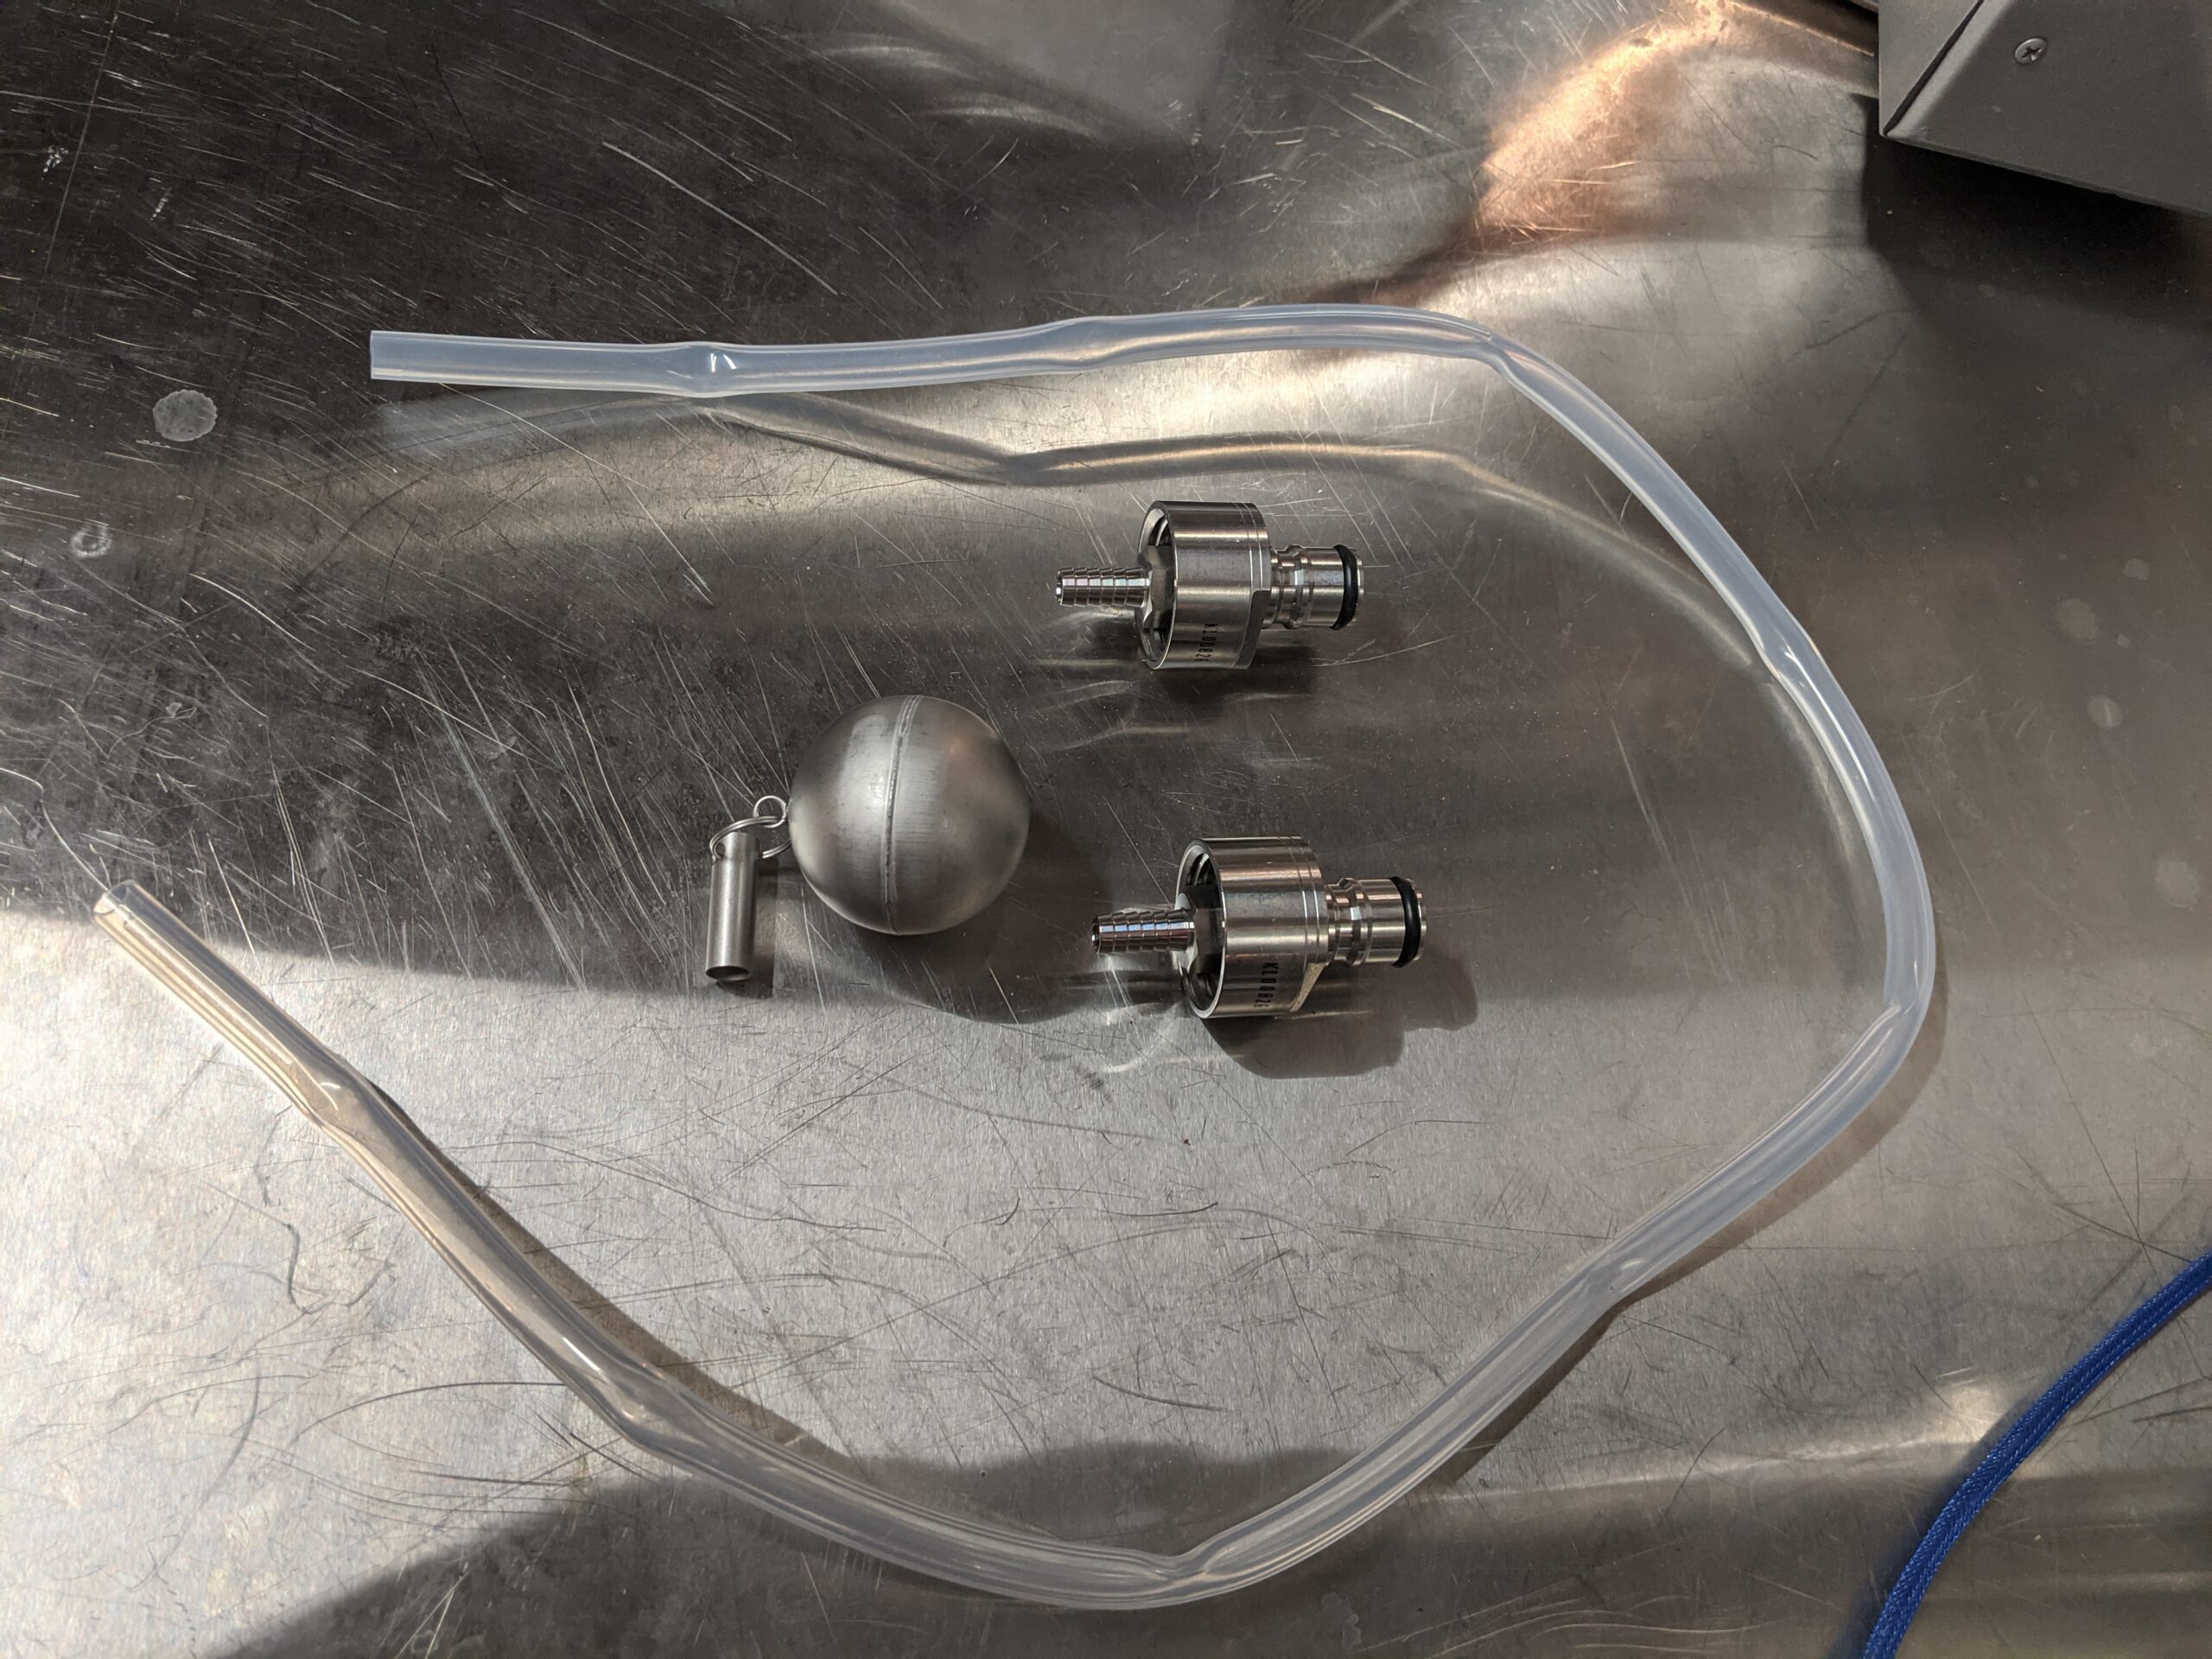 Unassembled Pressure Kit
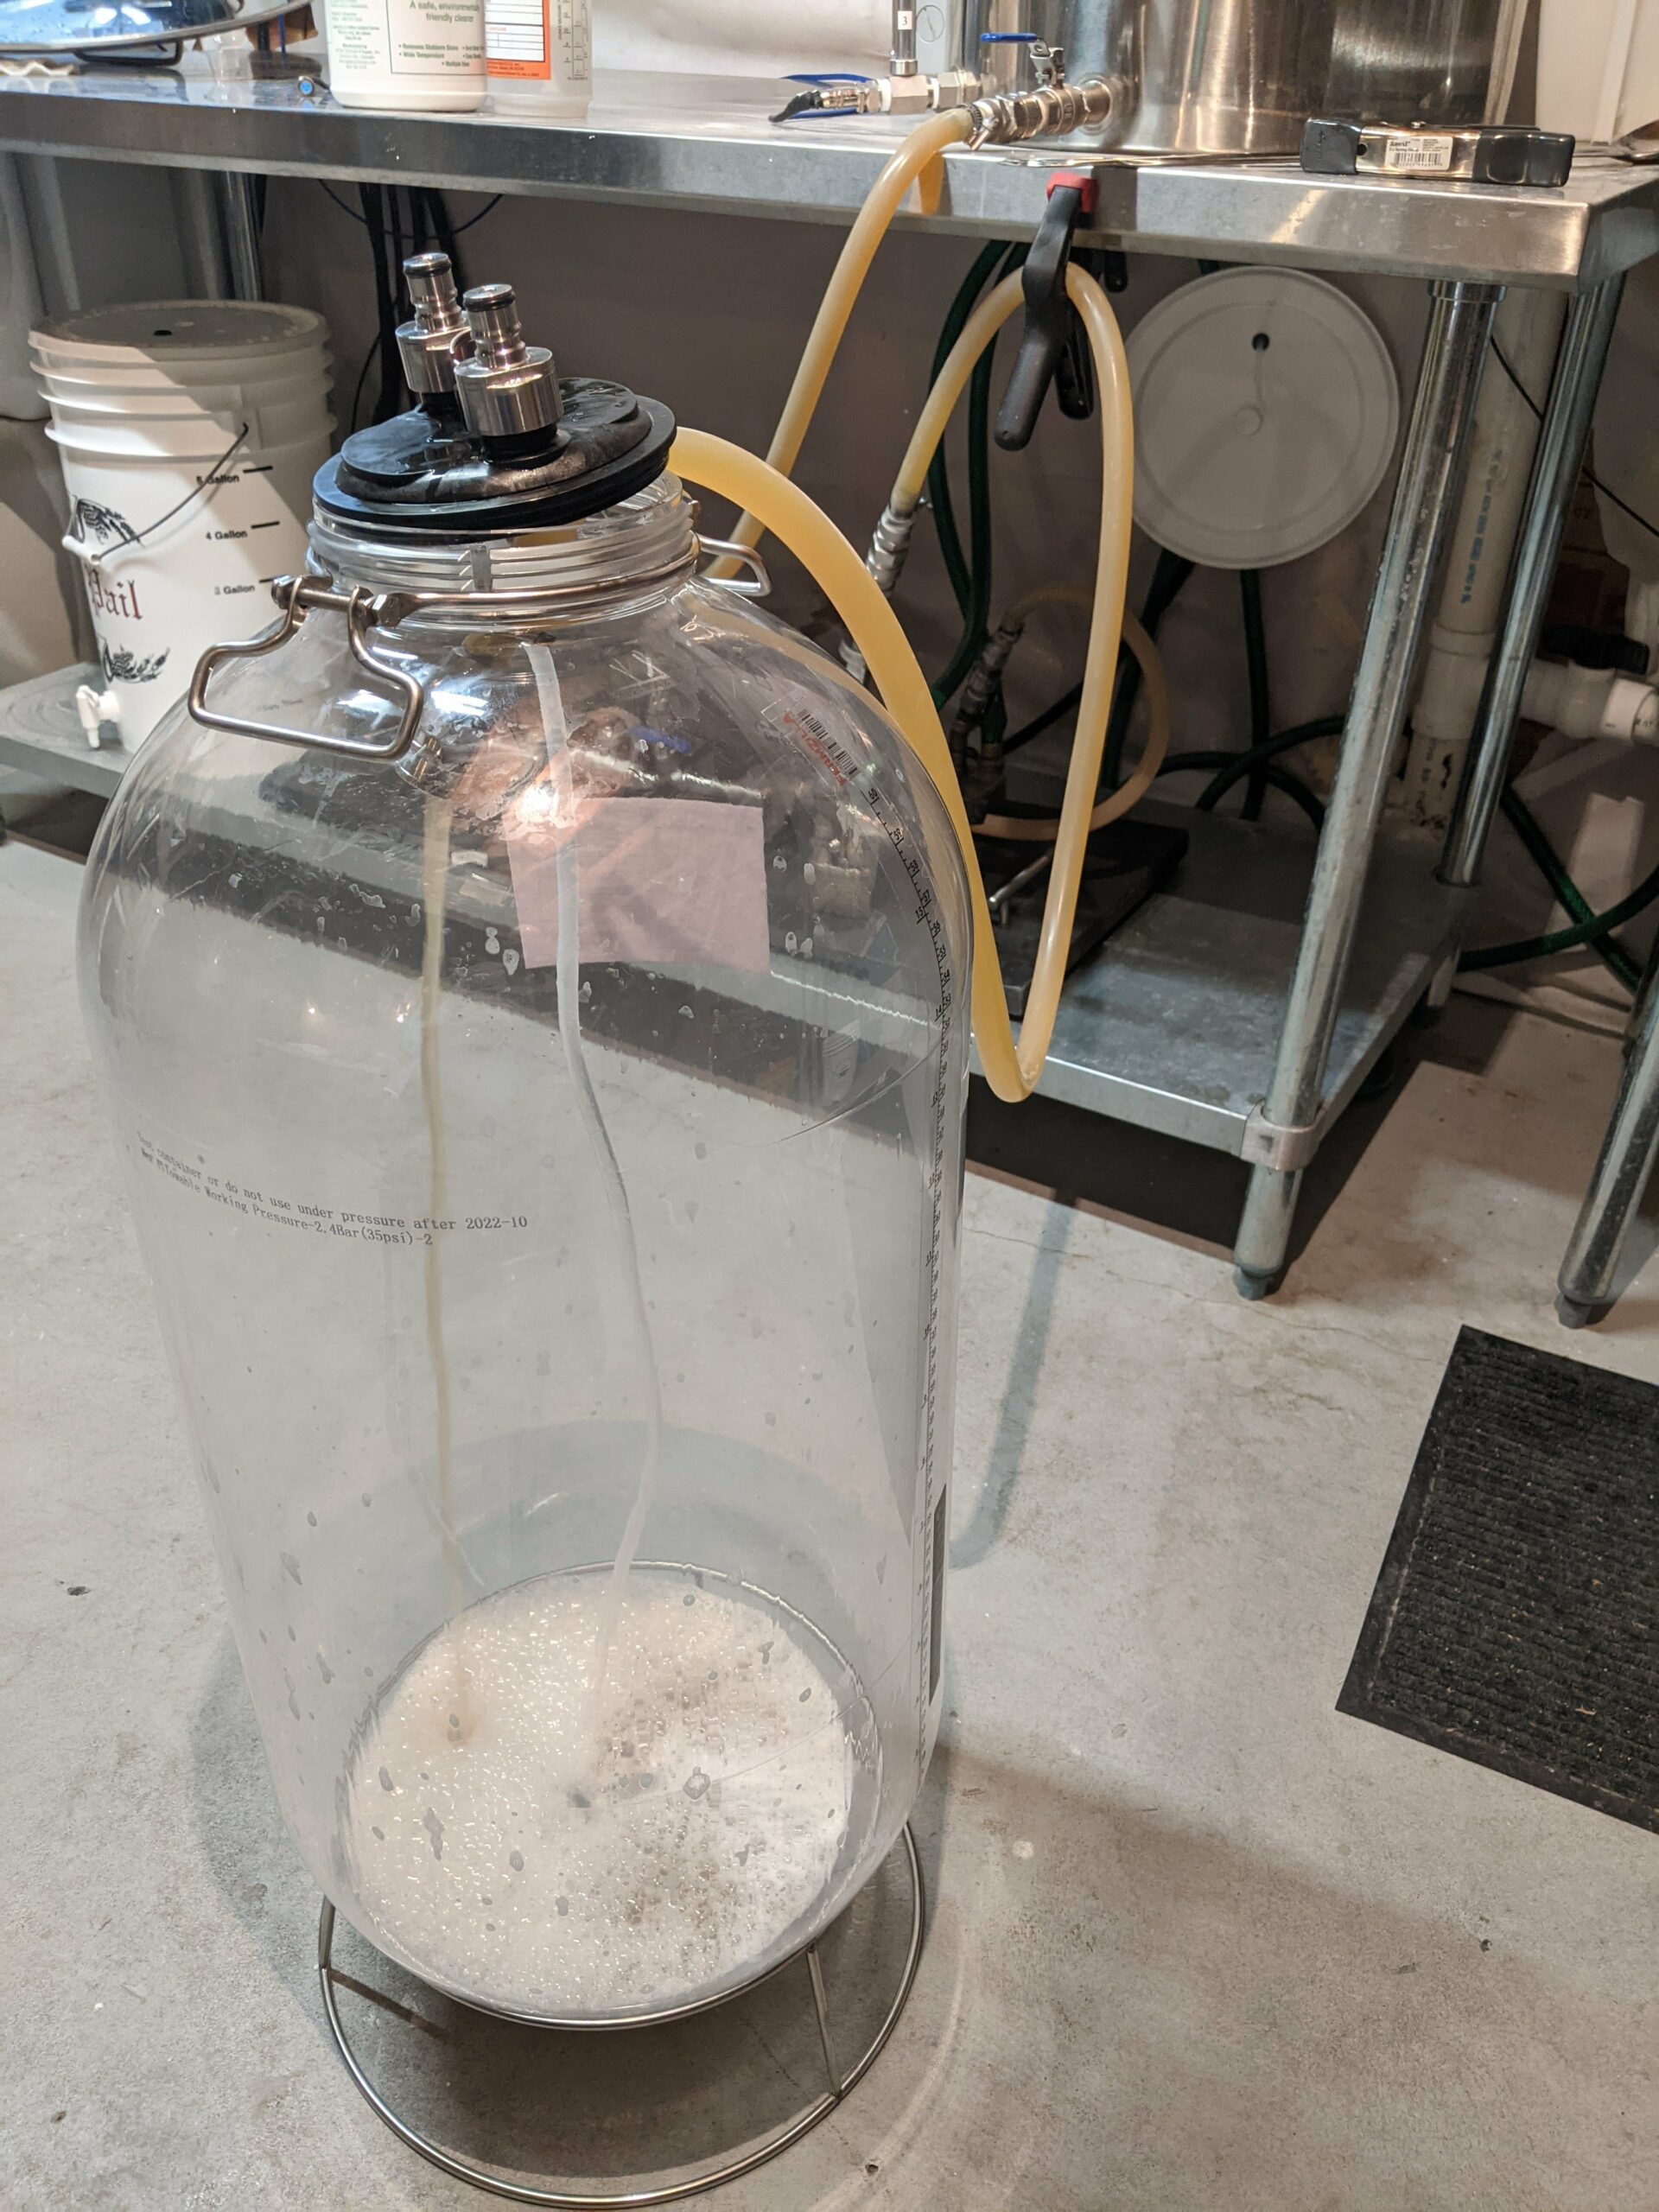
![]() Empty FermZilla All Rounder with Lid Installed
Empty FermZilla All Rounder with Lid Installed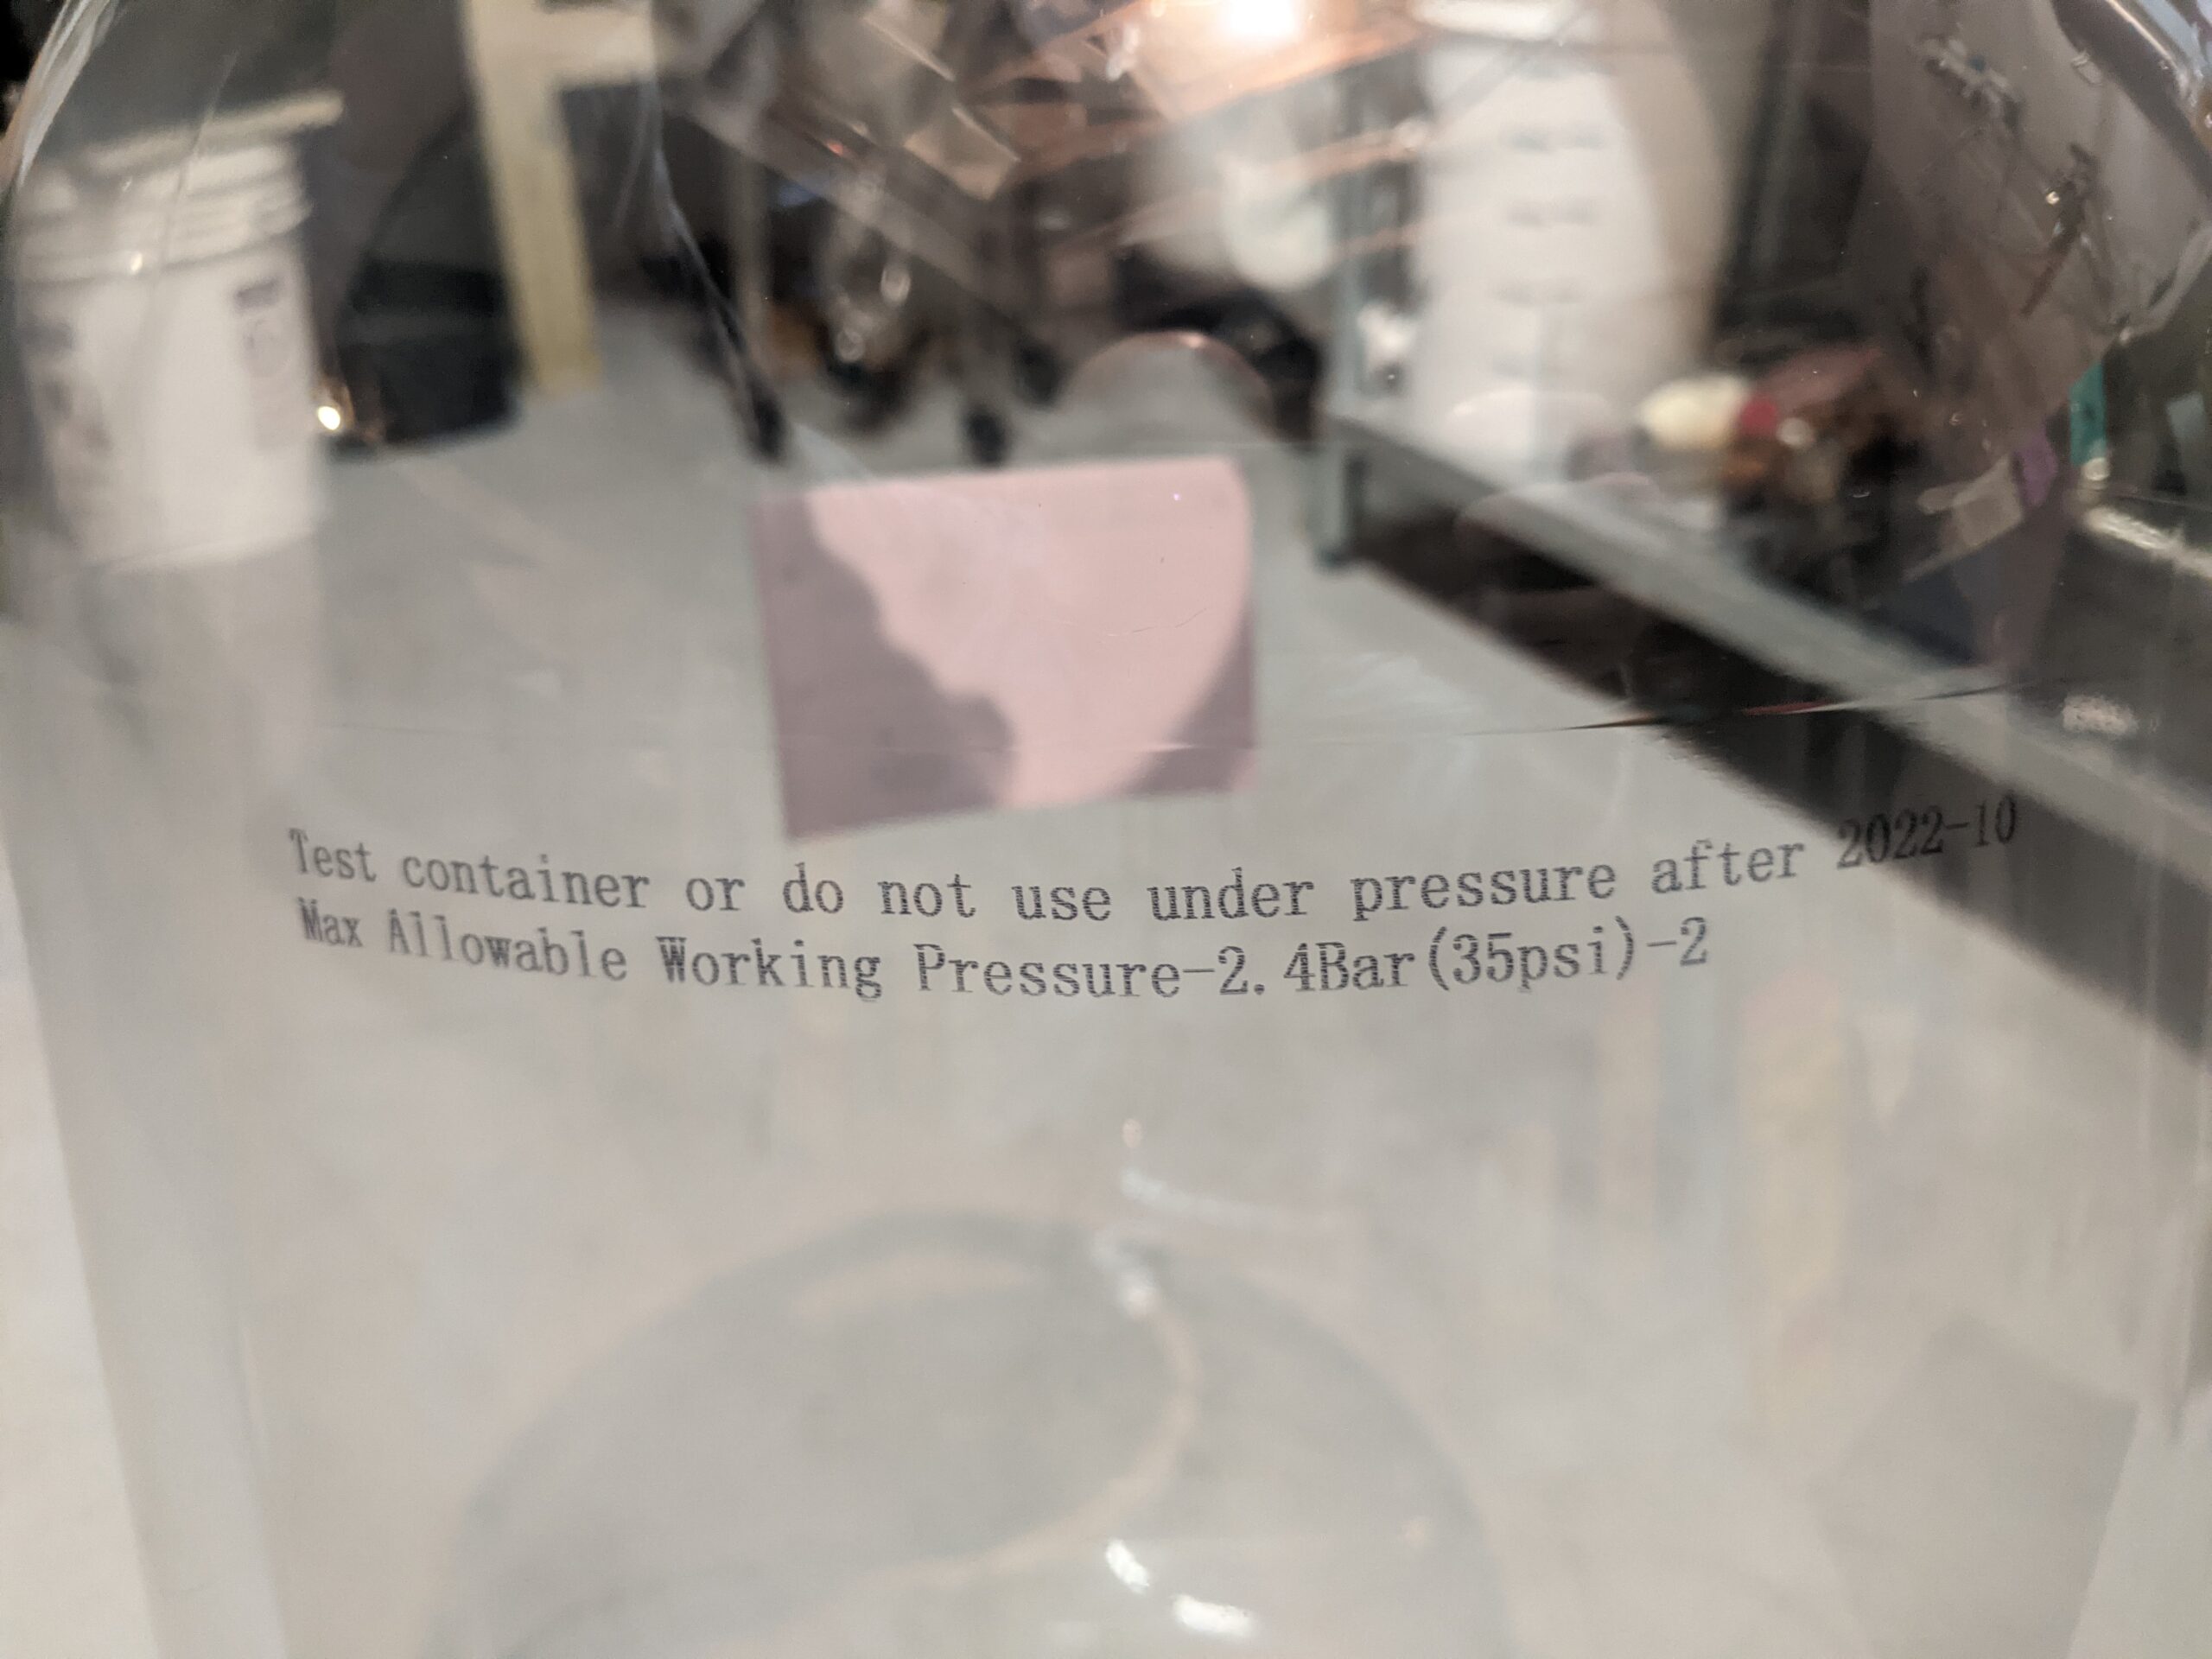 Pressure Warning
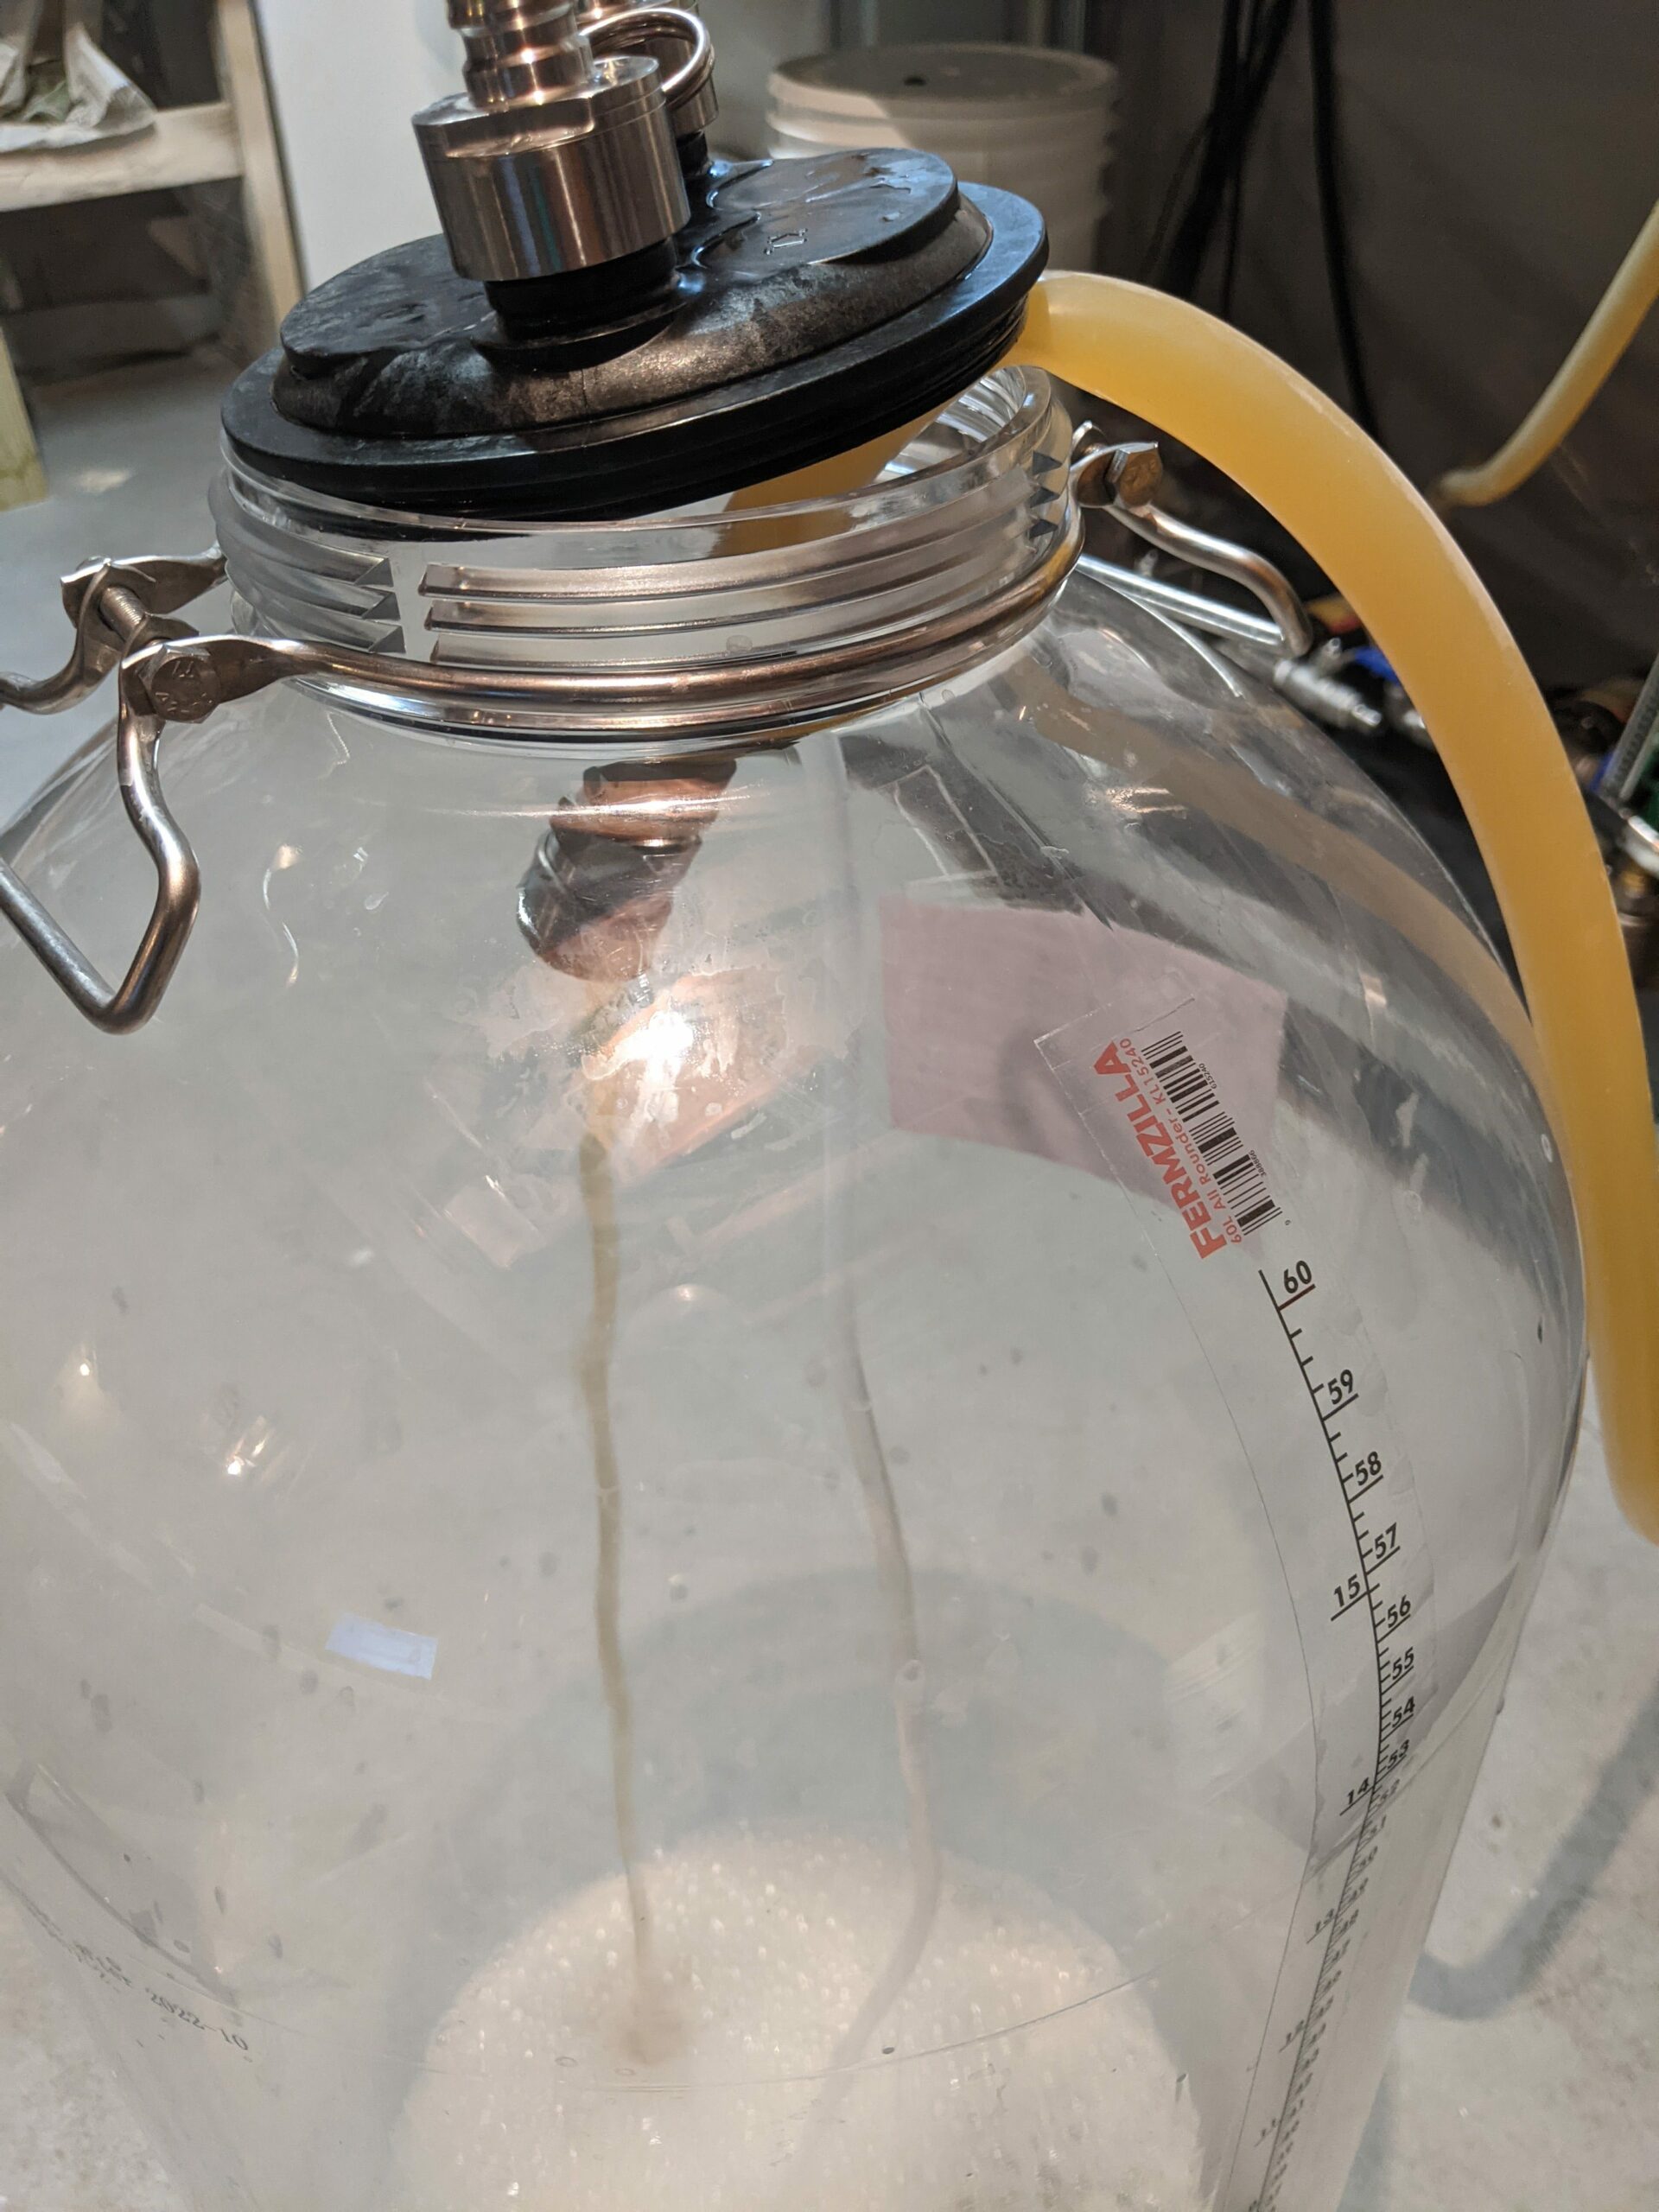
As far as quality of material, all components were well made and without flaws. The grade of plastic used for the fermenter itself is akin to that of a two-liter bottle of soda. It may be a bit thicker, but if so, not by much. The fermenter has a date stamped on it to indicate its expected lifespan. At a certain point it will need to be replaced, but the replacements are reasonably priced. The handle, its accompanying hardware, and the stand are all good quality steel and strong enough to have a solid feel to them, inflexible and rigid enough for their purposes. The PRV body is made of higher-grade plastic with a steel spring and pull ring. The airlock that came with it is the prevalent 3-piece variety that I’m sure every homebrewer is familiar with. The bottle cap is a screw-on type that, again, is reminiscent of a soda bottle with the exception that there is a grommet inset in the middle of the cap’s center to allow for the insertion of the 3-piece airlock. The thermometer sticker has both Fahrenheit and Celsius ranging from 50-97 degrees F in increments of 3s and 4s and from 10 to 36 degrees C in increments of 2. For the volume marking sticker it is detailed to the quarter liter from 0 to 60 liters on the metric side and 0 to 15 gallons on the Imperial side. The Pressure Kit contents had the high-grade stainless-steel gas ball lock posts with a female threaded connection, the variety that can screw onto the top of a soda bottle, as well as a quarter inch diameter barb to mate to the silicone tubing. The tubing is 31 inches long and is a quality material. The float is so light it feels like it is made of plastic, but I trust that is a purposeful design and it is unblemished stainless-steel.
The specifications (adapted from MoreBeer’s product page):
- 60 L (15.9 gal) Total Volume
- Pressure Rated to 2.5 Bar (36.2 psi)
- Temperature Rated to 50°C (122°F)
- Height in Stand – 34″
- Height w/ Airlock – 36.5″
- Tank Diameter – 13.9″
- Lid Ports – 28 mm PCO 1881 threads
Hands on Review
One of the features of Kegland’s products is their documentation. Whether it is in PDF or video form, their content is well-produced and easy to follow. The PDFs are easy to read, have handy diagrams, and aim to be succinct, only providing the necessary knowledge without being too wordy – admirable! Regarding the All Rounder, their four-page documentation covers warnings, assembly, and cleaning information as well as some helpful links throughout. For their Unitank and All Rounder series of fermenters they also have a guide to fixing leaks that has high-quality images and many helpful nuggets of information.
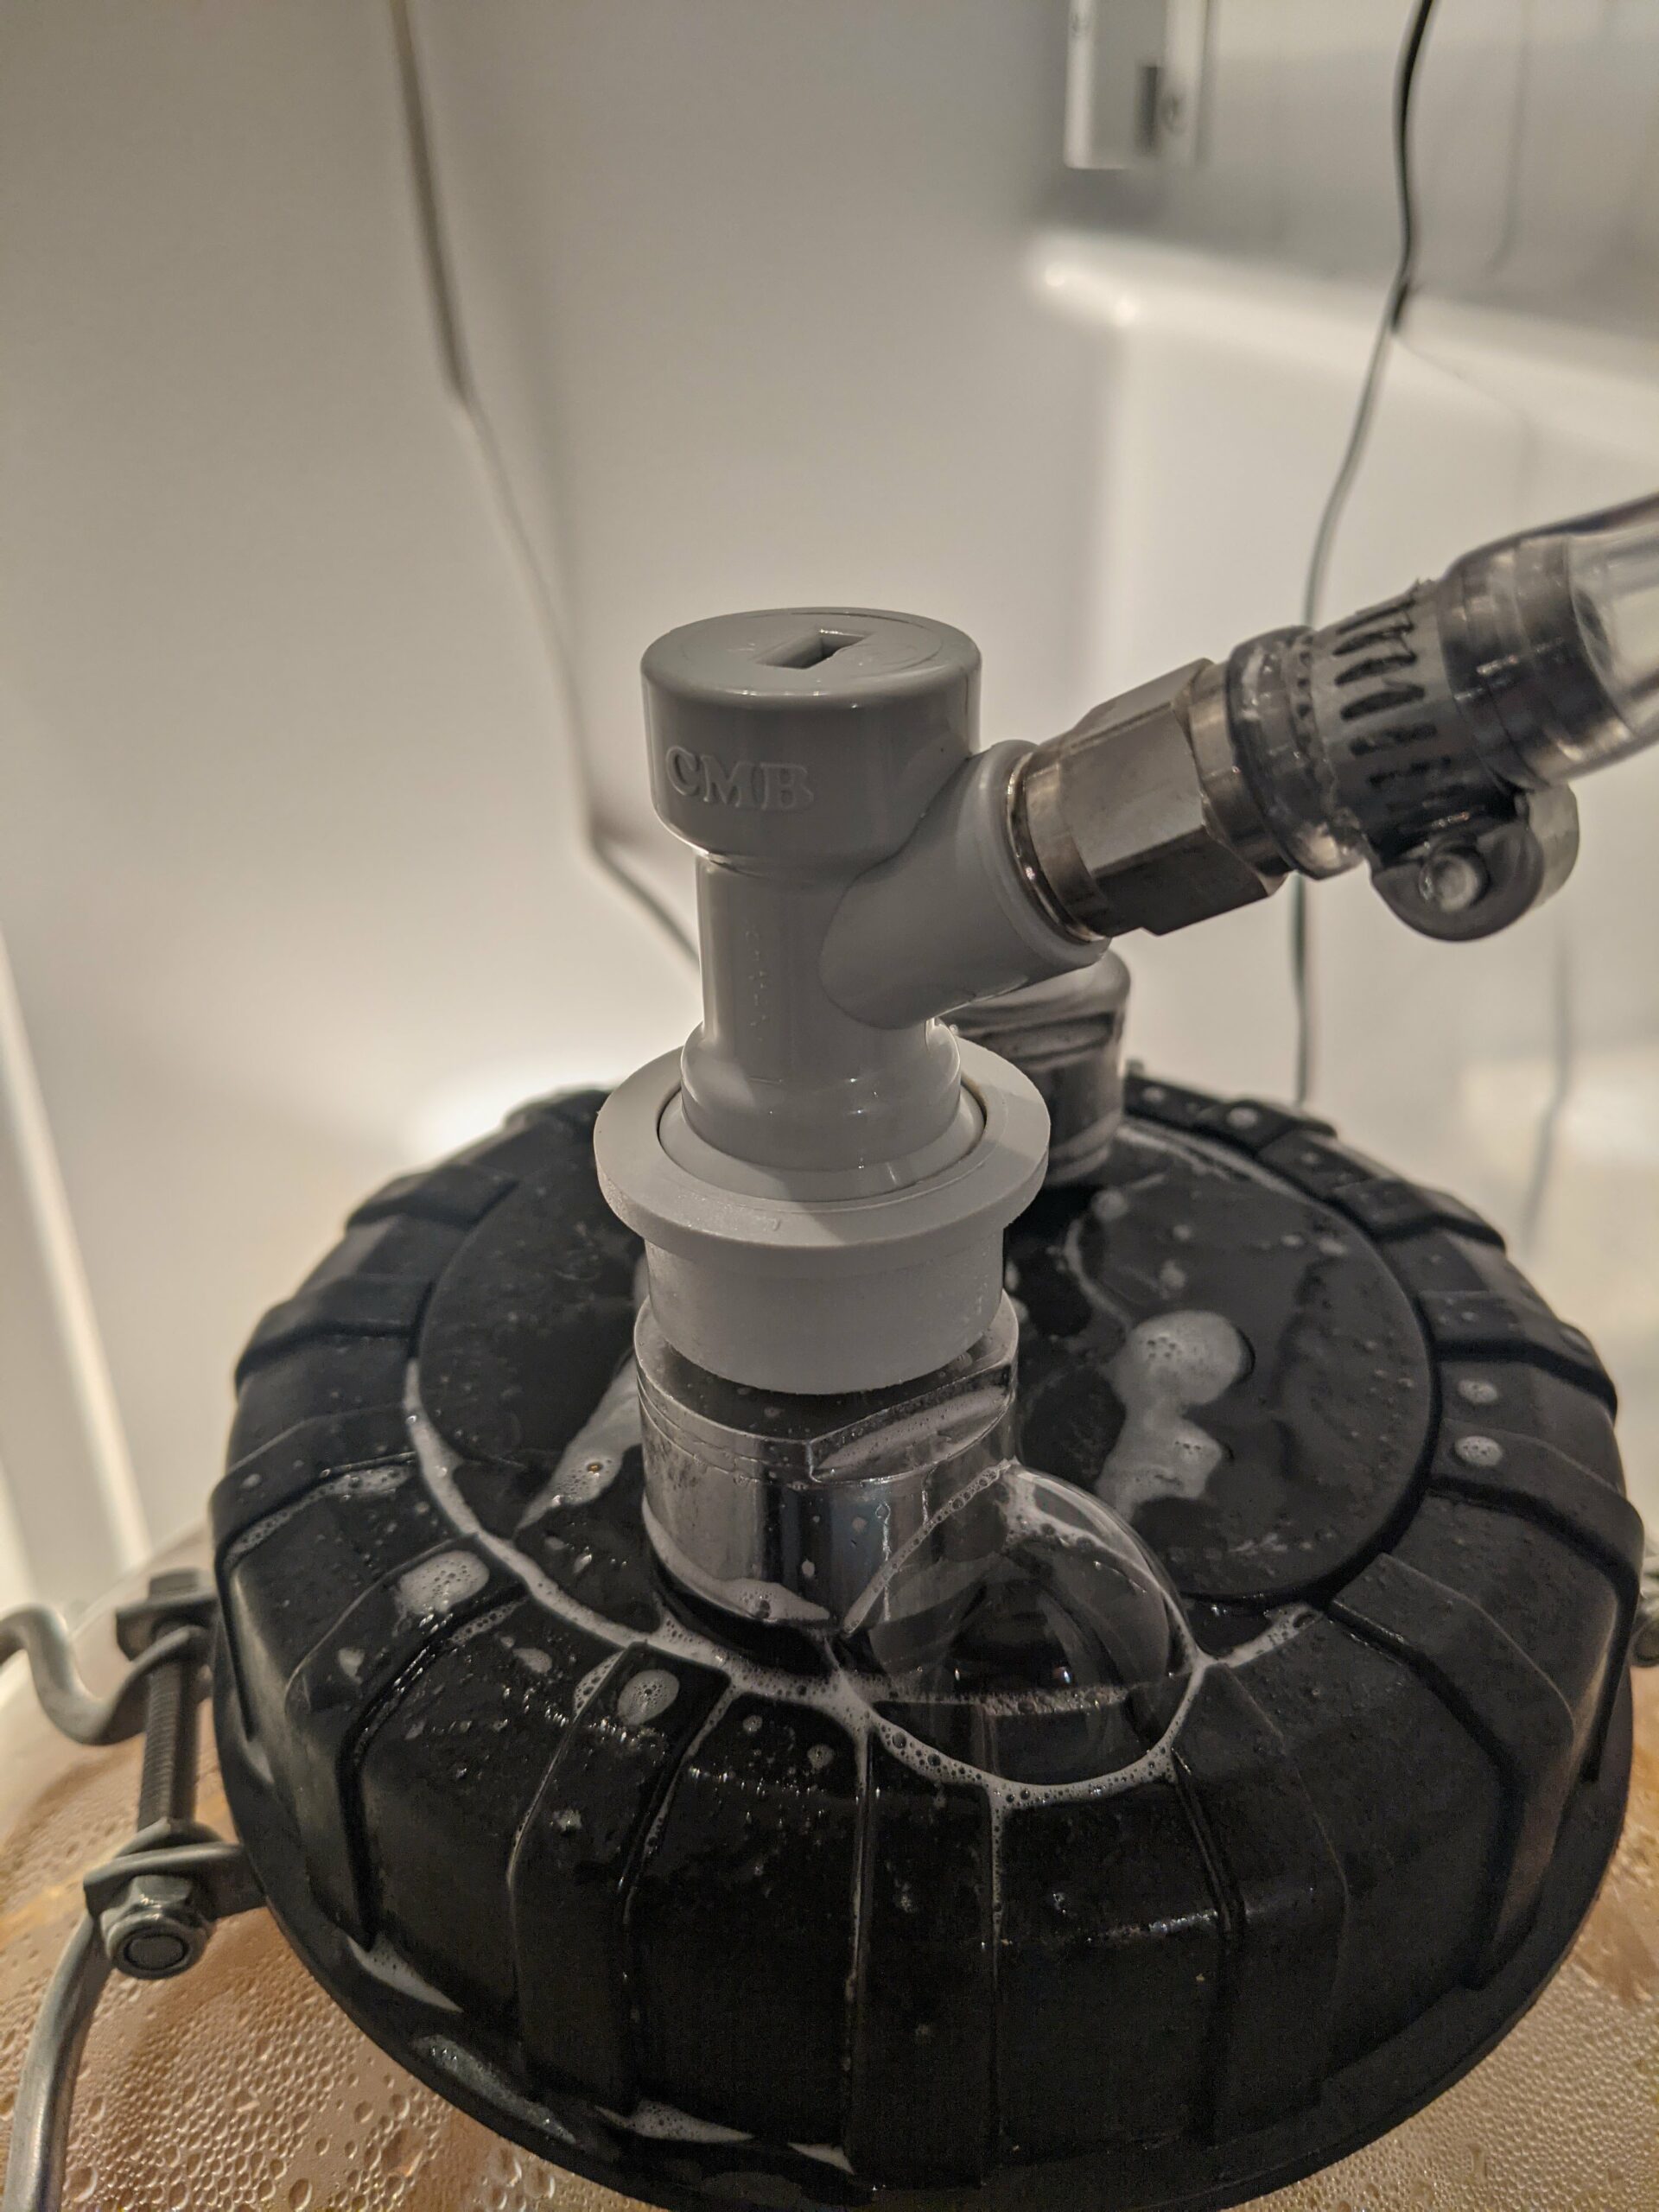
The PDFs and video came in handy at a couple points when assembling the All Rounder as there were no hard copies of the instructions included with the unit. All told, it was an intuitive assembly. The stainless-steel ball lock posts screwed onto the lid easily as did the PRV. I tried to tighten the ball lock posts down to a point that felt snug, but I tried to be careful not to overtighten for fear of warping the plastic lid. This came into play later when I realized the unit was not holding pressure. That could have been avoided if I had followed the Kegland guide for fixing leaks and checked the connections prior to using. Once the posts were on the lid, I attached the silicone tubing to one of them and attached the other end to the floater. I ensured the gasket was properly seated on the lip of the lid. The volume marking and temperature sensing stickers went on the outside of the fermenter simply enough.
Filling the Fermenter
 Starting to fill the All Rounder
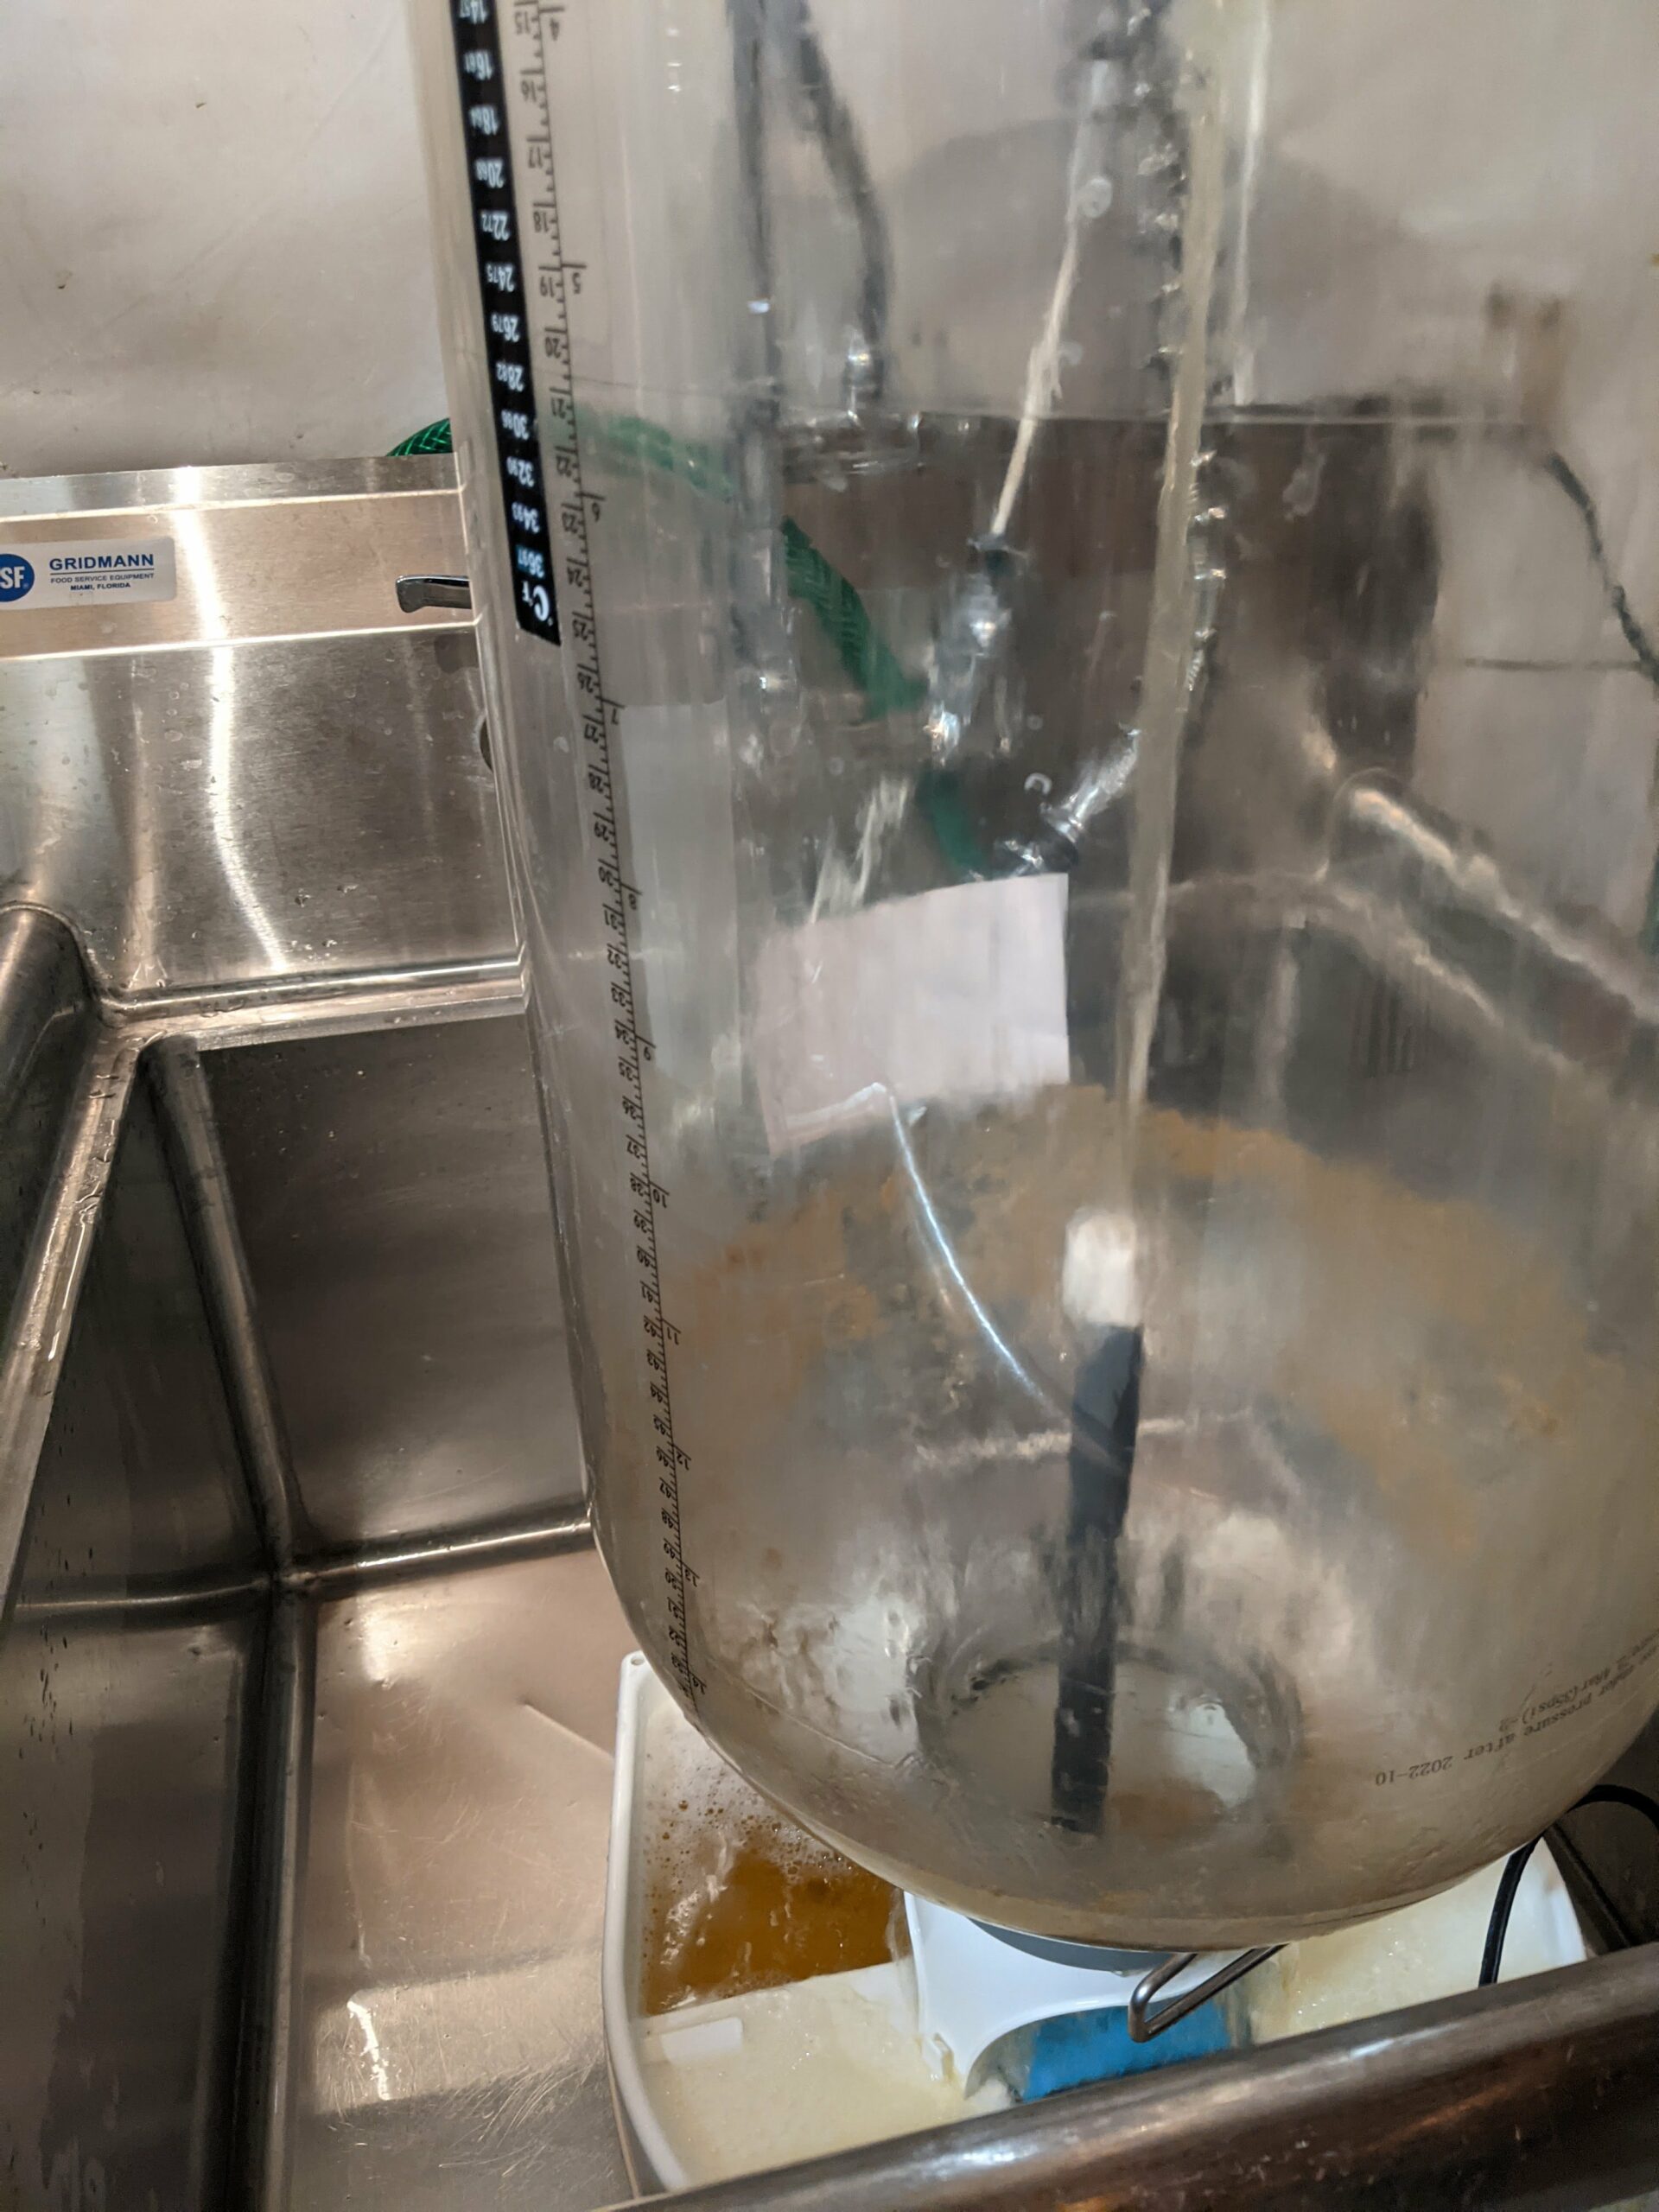
Come brew day, filling the fermenter was a breeze as I draped the output hose coming from my plate chiller down into the fermenter through the only opening on the top. Since the empty fermenter is a bit unstable, I was careful when filling to make sure the hose didn’t unbalance the rig at all and was extra careful not to bump it at all mid-filling. The steady flow of wort dropping into the fermenter thoroughly aerated the solution as evidenced by the mass of foam on top of the wort. After I had collected the desired volume, I pulled the hose, pitched my yeast, placed the lid on top, and screwed down the lid collar as tight as I could by hand. Moving the rig from the filling spot to my fermenter, a distance of about fifteen feet, was a precarious operation made less tricky by the handles, but still a task being that there were twelve gallons of liquid sloshing around inside a sixteen gallon vessel. I placed the stand inside my fermentation chamber, propped the vessel on top, and taped my temperature sensor to the side of the vessel. I have a thermowell on my conical fermenter and will be looking into adding one to the All Rounder in the future as it is something that Kegland offers for the All Rounder.
 Filling Closeup
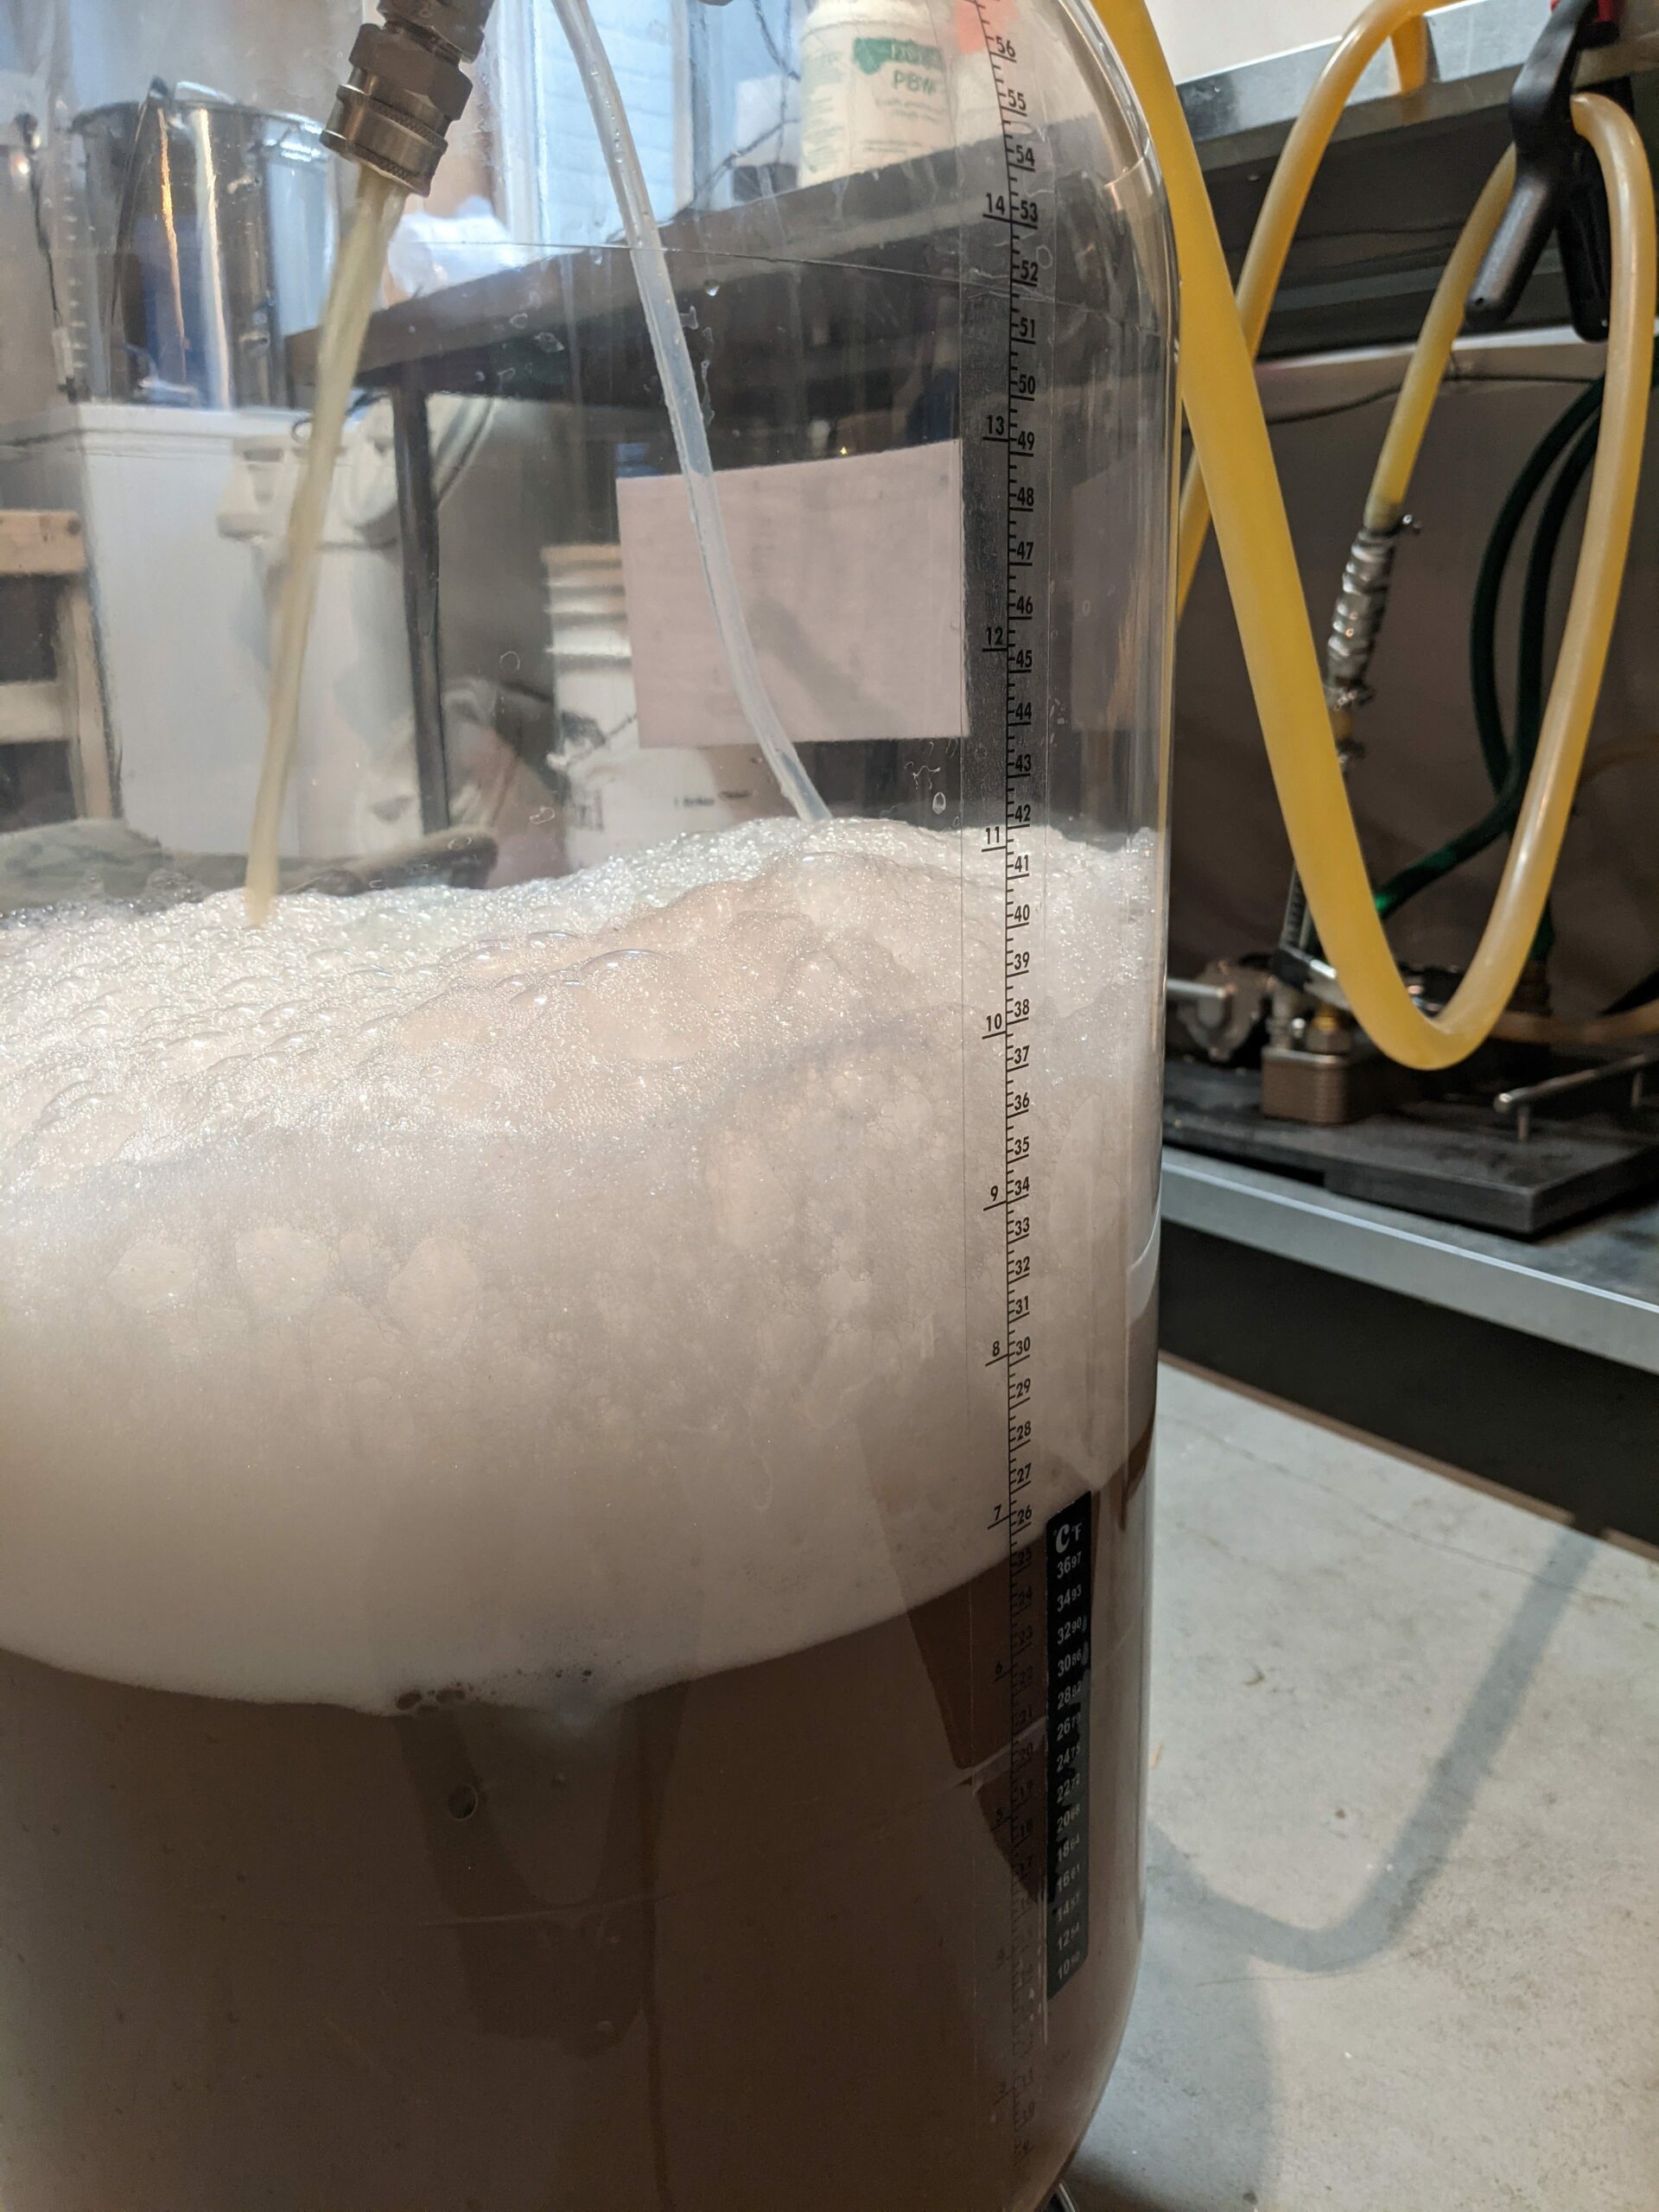 Quarter Full
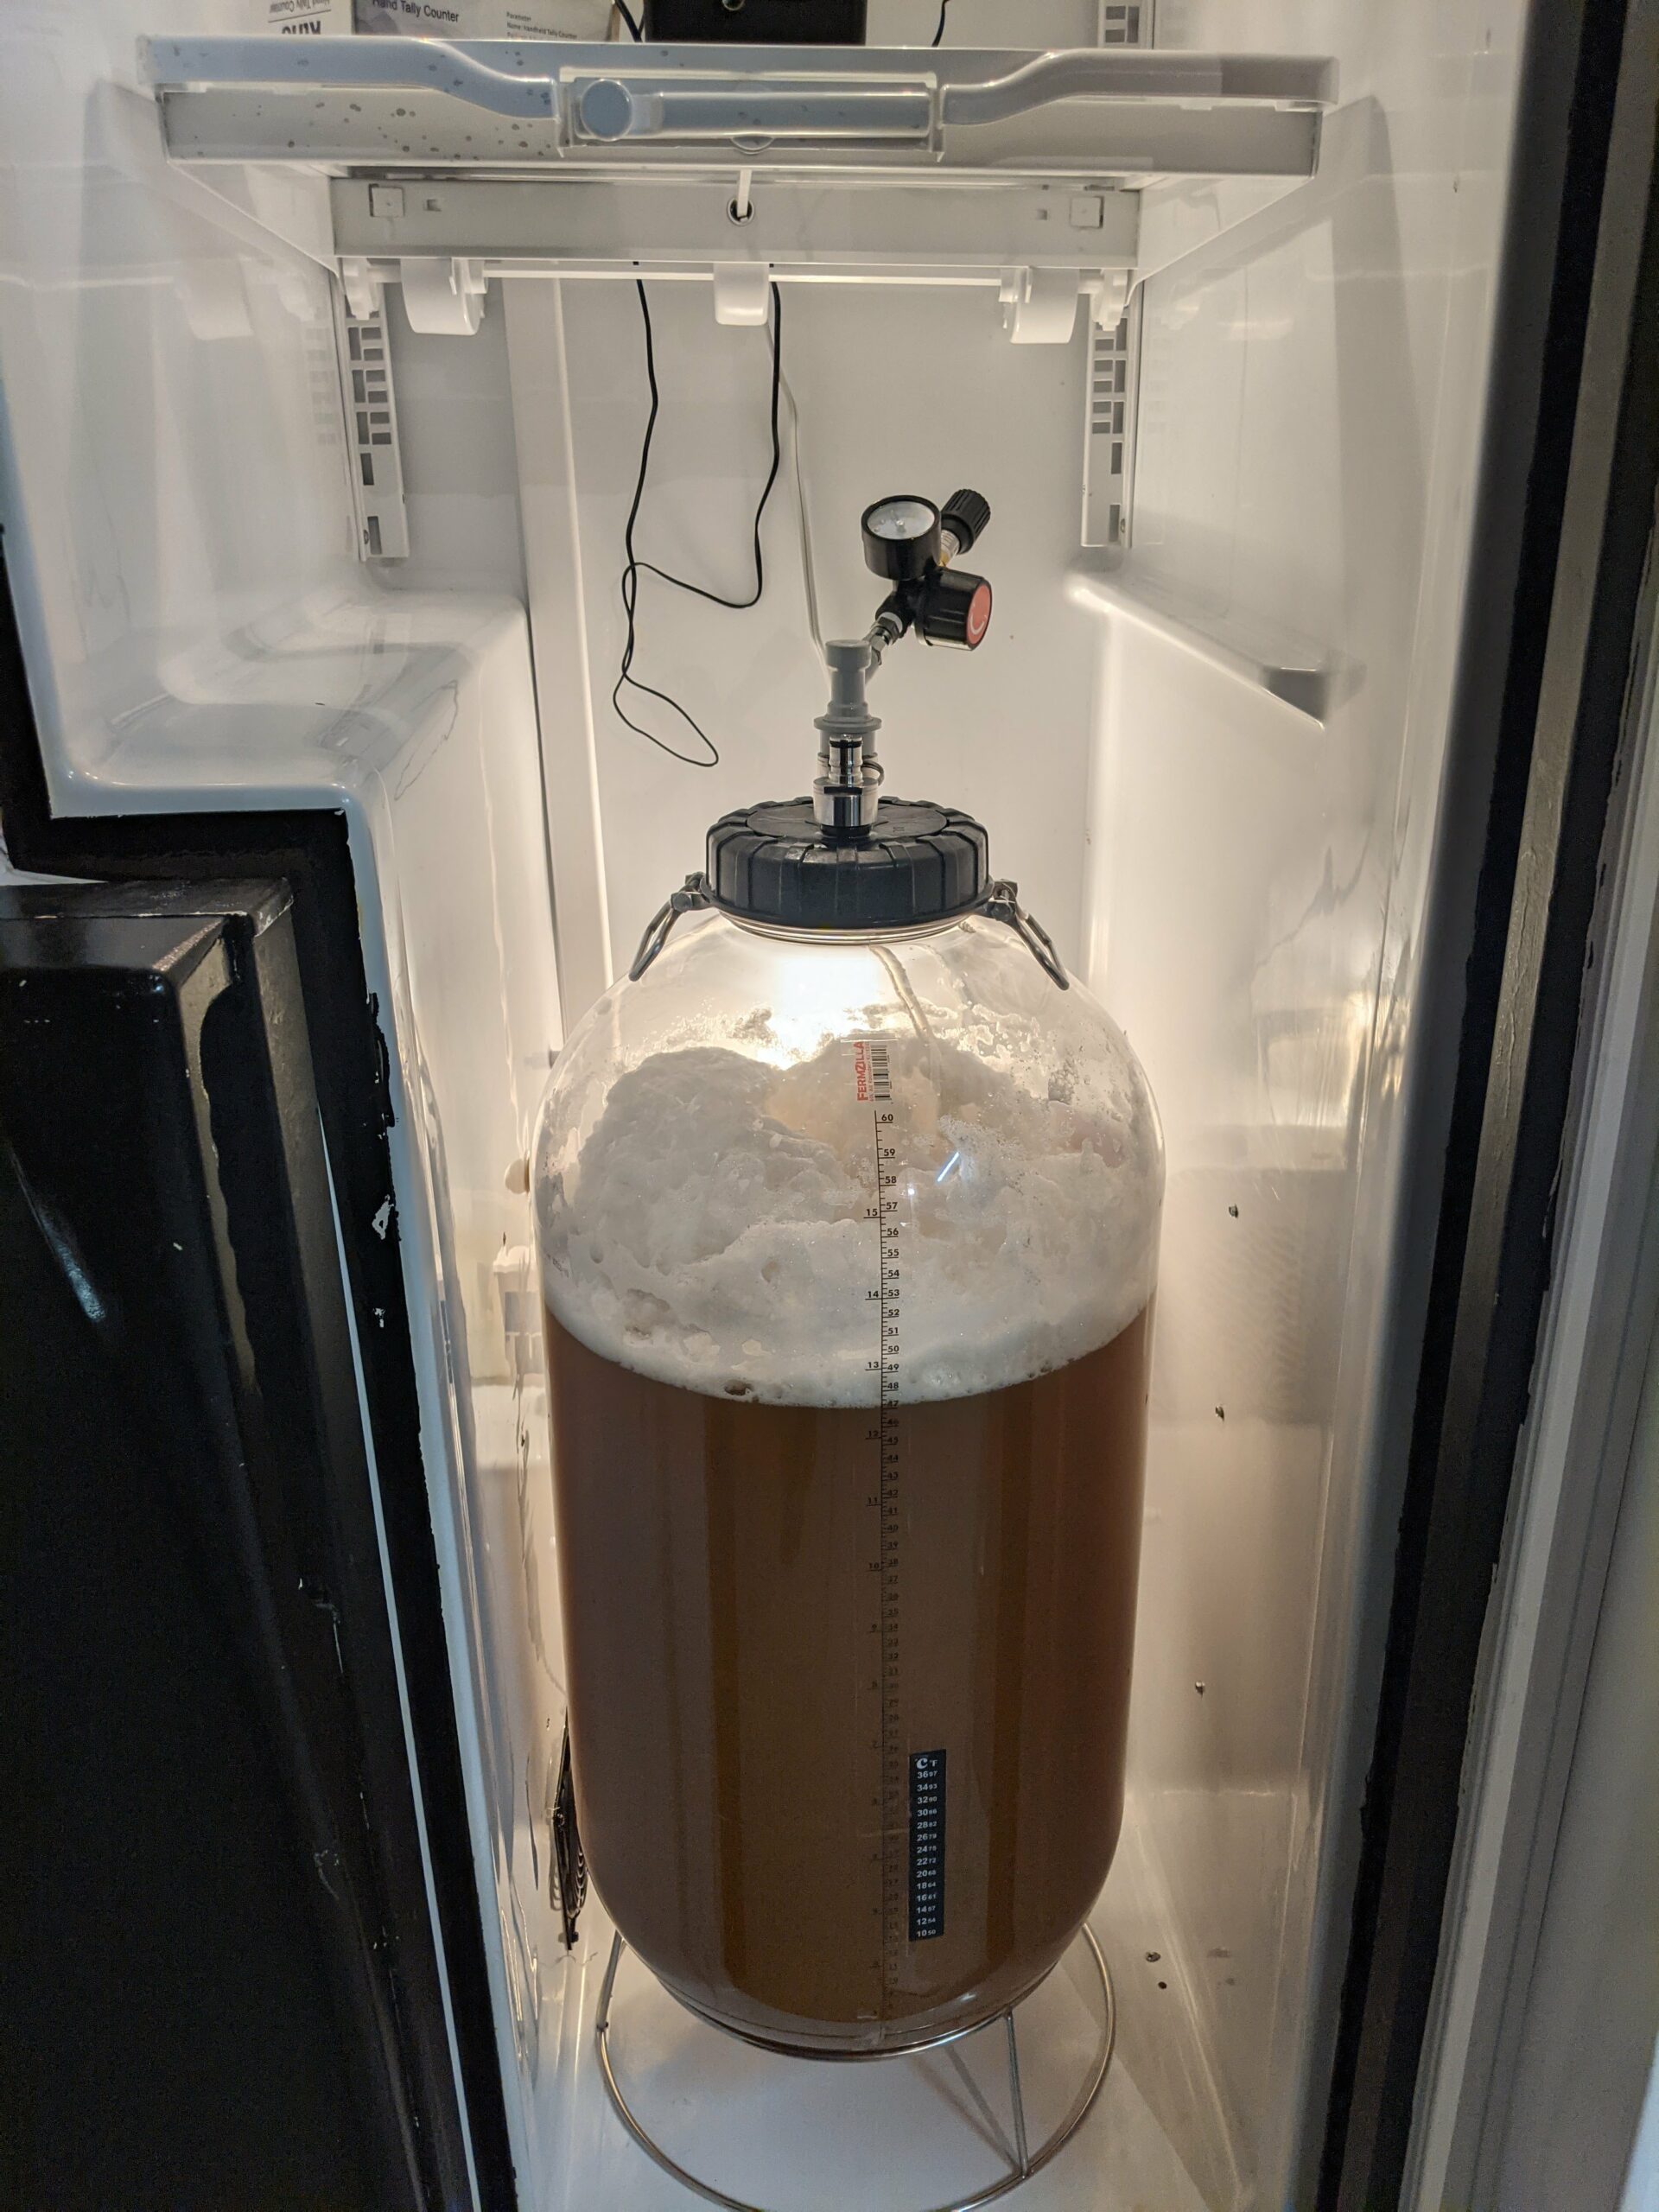
 All Rounder, Beer Transferred, On StandFilled All Rounder in Fermentation Chamber
Spunding Valve and Fermentation
Once situated in the fermentation chamber, I attached a spunding valve to one of the ball lock posts on the All Rounder. Being that this was the first time I had used a spunding valve there was a bit studying I had done to piece one together and figure out how to operate it. Much credit goes to this site for helping me along the way. I dialed in the release valve on the spunding valve to my desired pressure, 10 psi, and left the yeast to do their work
Related, Build a Spunding Valve
 All Rounder Filled, Completely Assembled in Fermentation Chamber
Over the course of the next few days I was a frequent visitor to those yeasties, delighted to see them at work. It was refreshing to once again be able to see fermentation at work, something I had missed while fermenting in the stainless conical. Although the yeast cells were clearly active on each of my visits, I did notice that the pressure gauge on the spunding valve was not reading a value above zero as I had expected. What it came down to was that there was a small leak coming from one of the ball lock posts where it seated on the lid. I found this by adding CO2 from my tank to the All Rounder, spraying Star-San all over the lid, and seeing bubbles form around the post’s bottom. It was at this point that I removed the ball lock post and found that the gasket was not seated properly inside it. I massaged it into place, put the post back on the lid, found my Crescent wrench and tightened the post down quite securely. I added more CO2 to the vessel, sprayed more Star-San, and verified that there were no more leaks.
Tip: Don’t want a leak… Follow Kegland’s guide for fixing leaks and checking connections prior to using
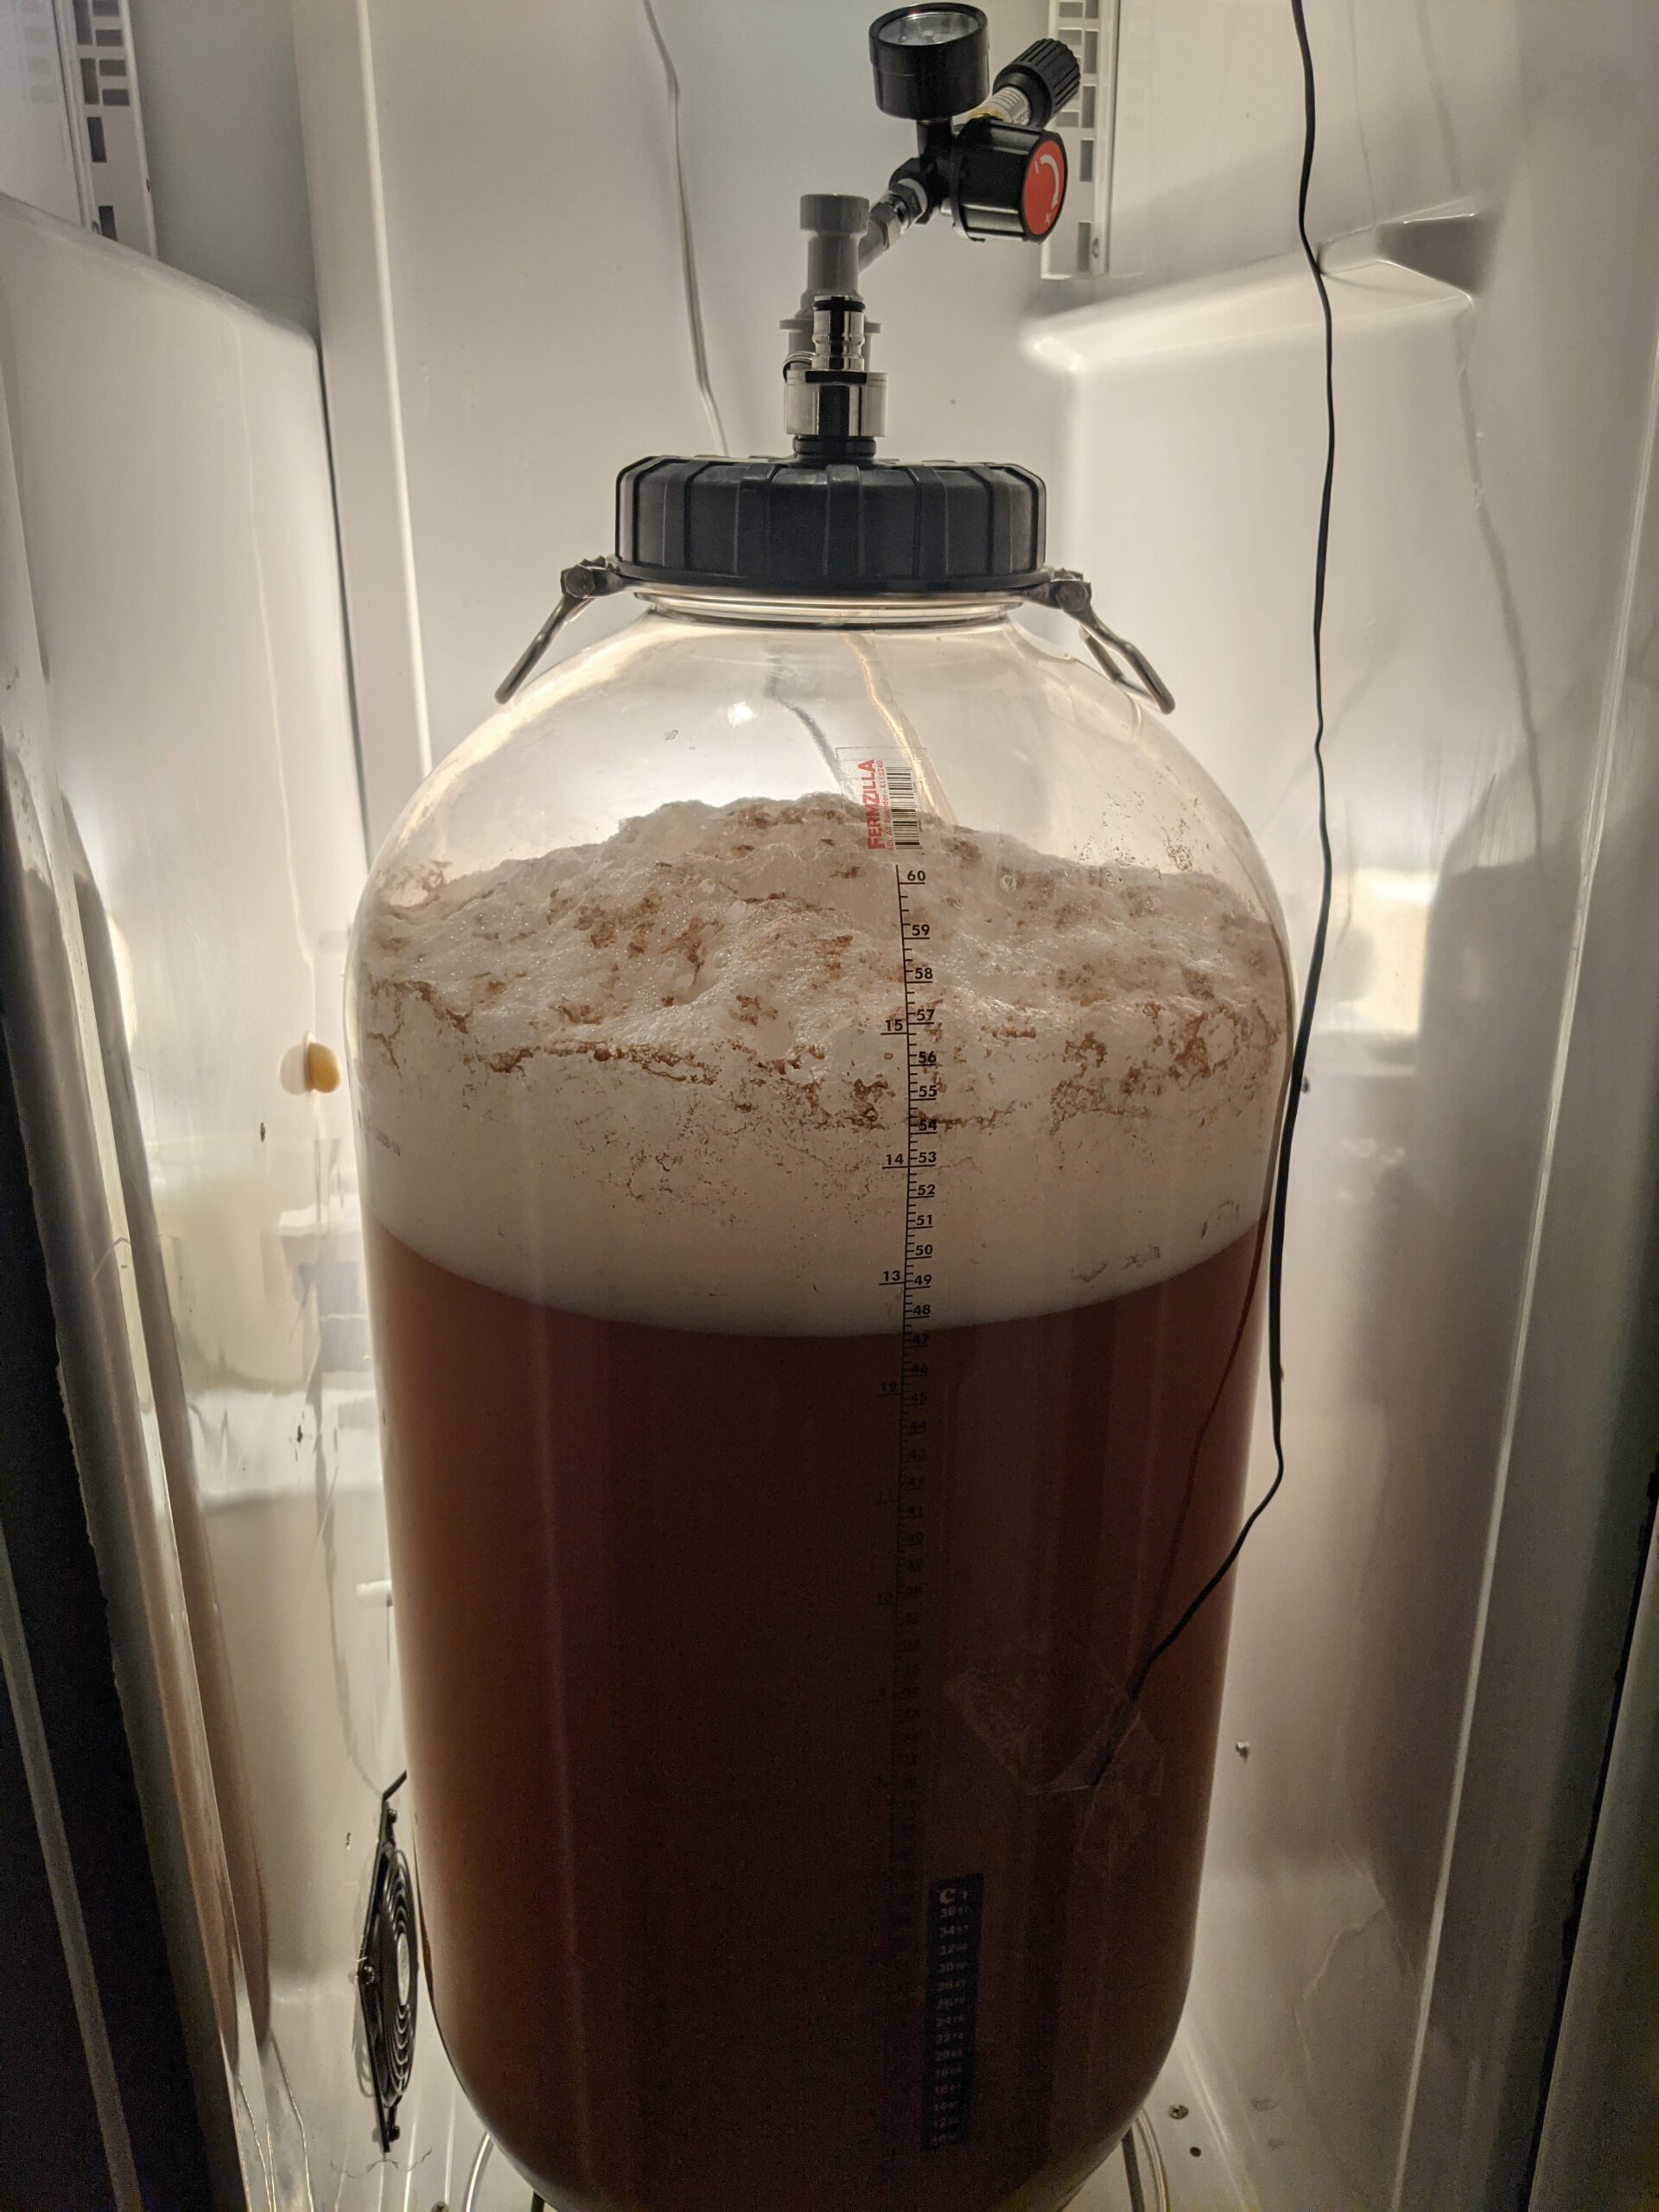 Mid Fermentation Krausen
On the subsequent batch I fermented with the All Rounder I ran into issues with the fermenter holding pressure once again. Inspecting it all carefully I once again found that the gasket on of the ball lock posts was not properly seated. I reseated the gasket and torqued on the ball lock post, only this time I was not as careful about the amount of force I applied. This resulted in the threaded post on the lid bending in near the top which prevents an airtight fastening with the ball lock post. I will be ordering a new lid and will be much more careful next time not to torque down the ball lock posts too tight. I may even apply some keg lube on the gasket to encourage a better seal without having to tighten it as much.
 Leak on Lid- Tip: Don’t want a leak… Follow Kegland’s guide for fixing leaks and checking connections prior to using
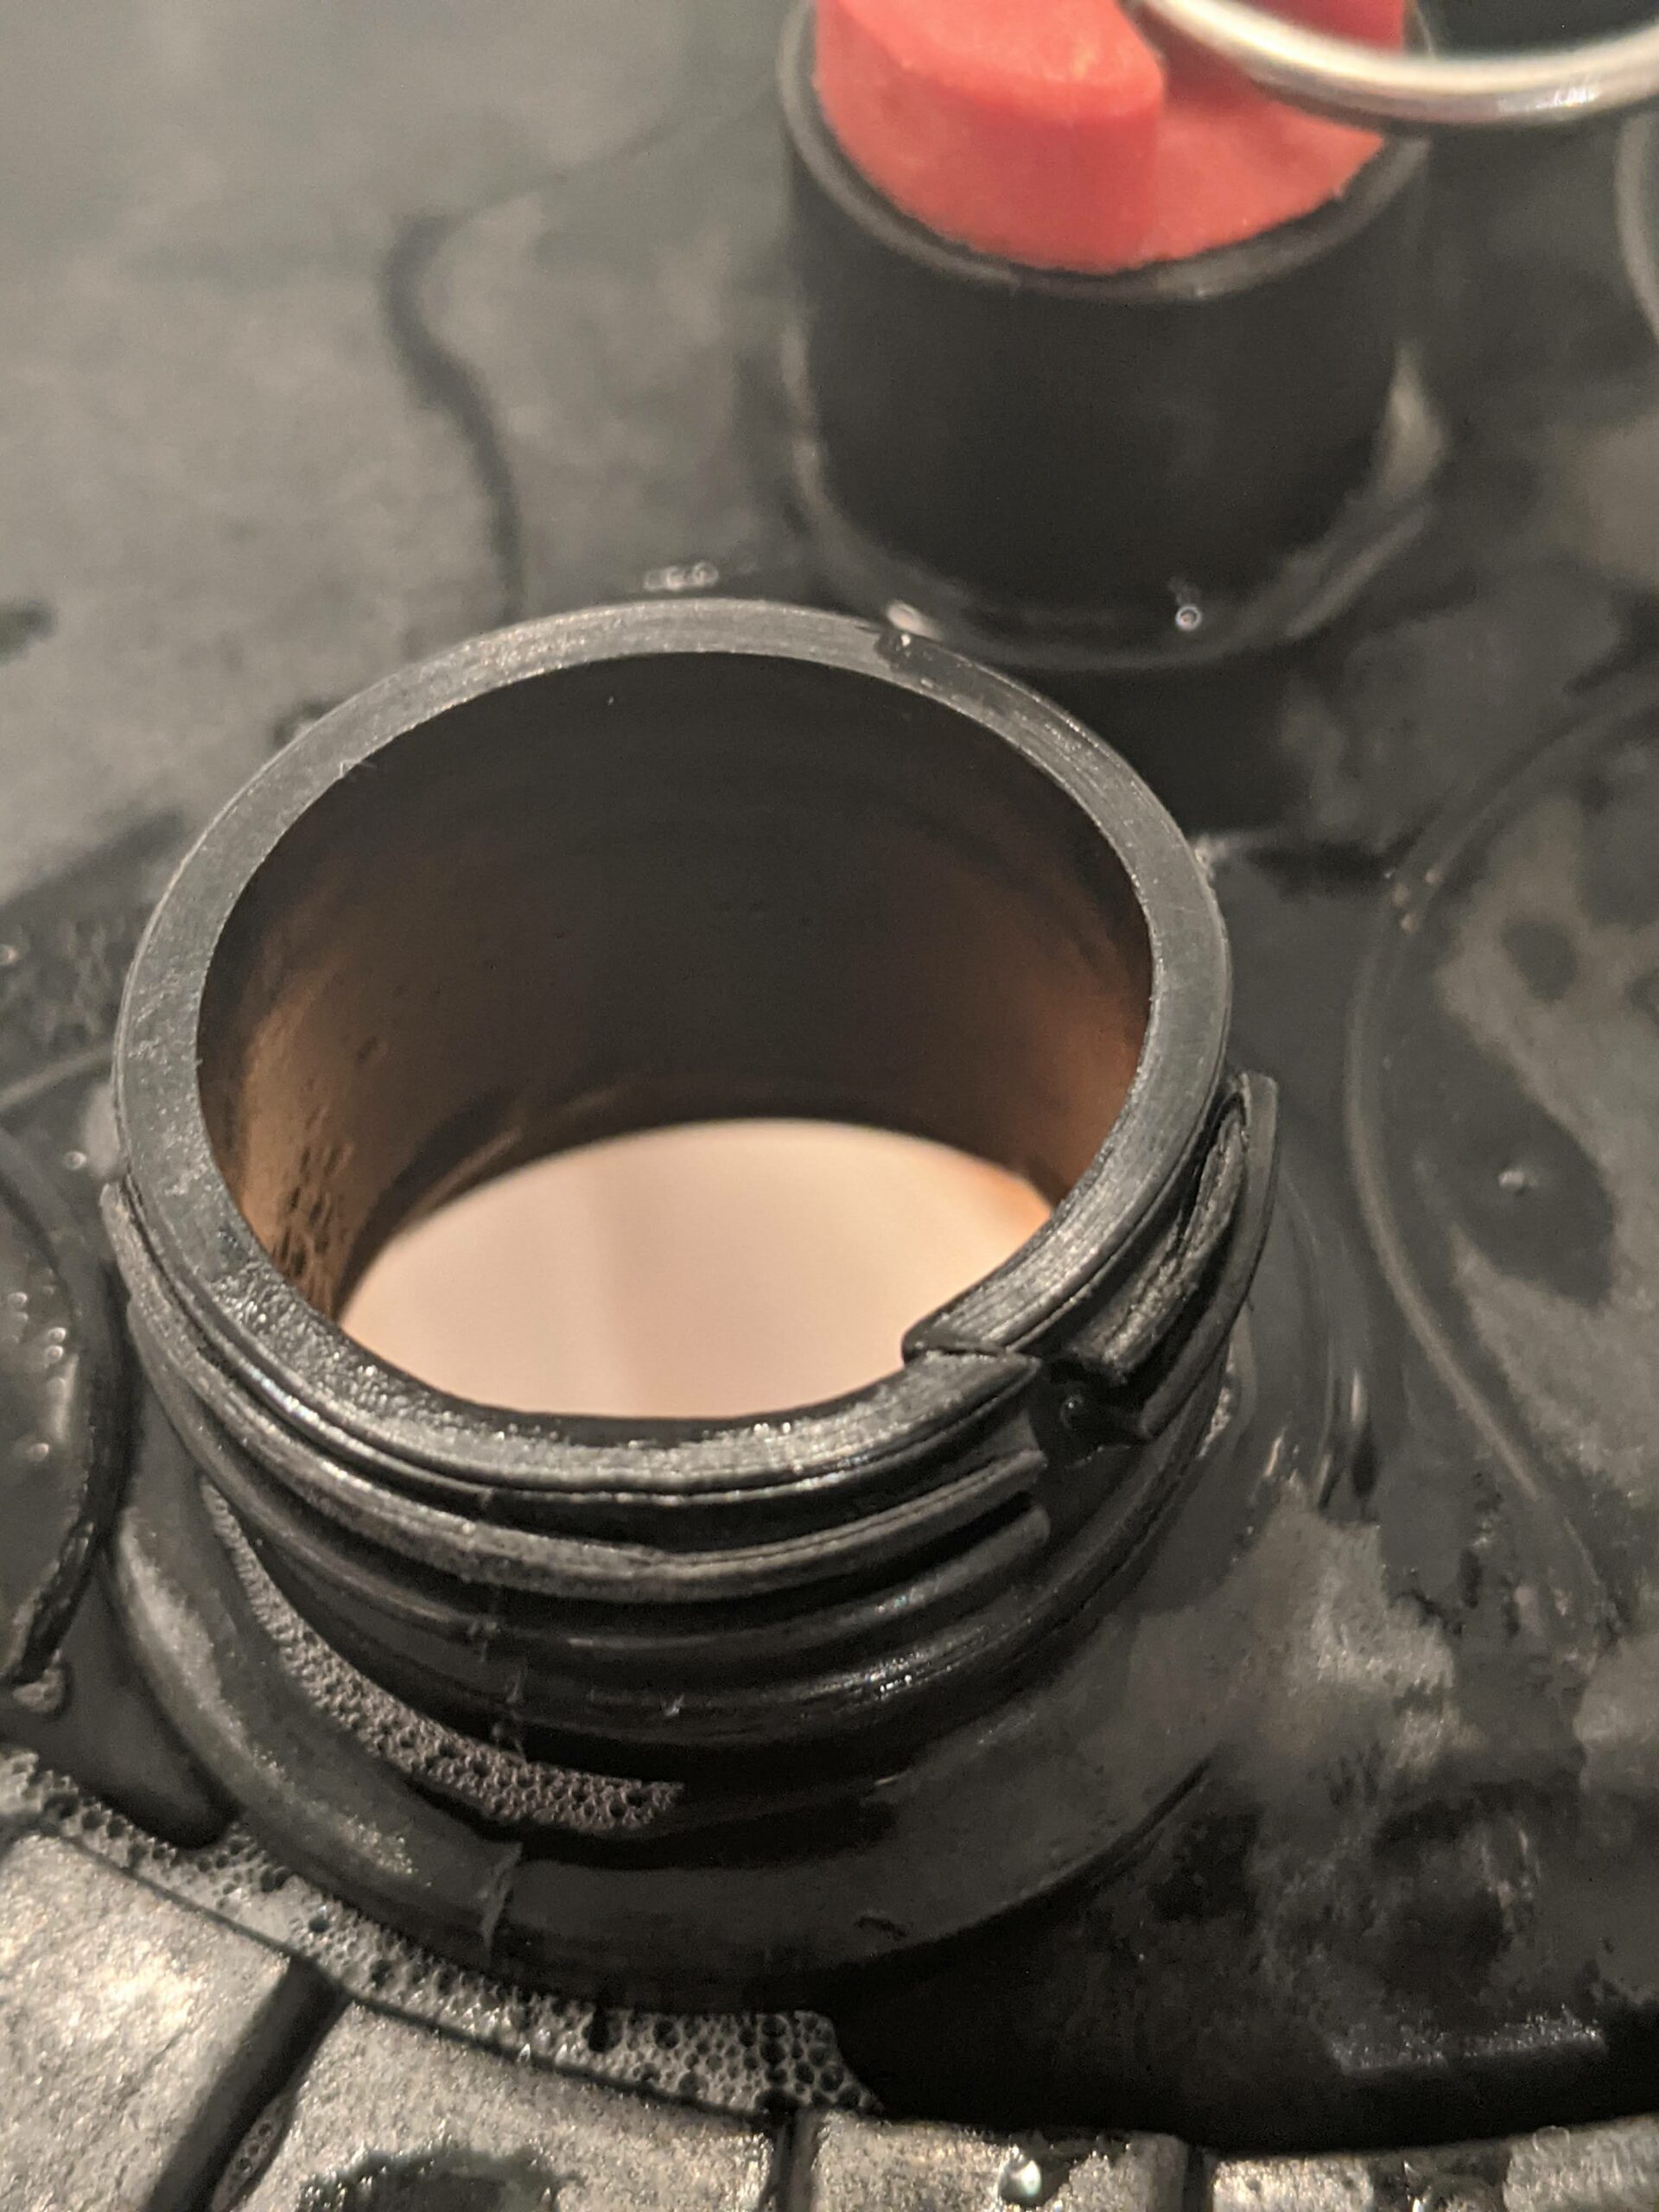
Taking Samples
Typically, during fermentation when using my conical fermenter, I will take samples every few days for hydrometer readings. I was trying to figure out how that might work with the All Rounder since there is no sample port like a typical conical has. I decided to hook up a picnic tap to the serving ball lock post, the one connected to the floater and tubing, and draw samples. This turned out to be an efficient way of drawing the liquid out, being that the vessel was under pressure and would easily push out the beer. The one downside is that at the pressure I was operating it under (~10 psi) it came out rather fast and I ended up with a foamy sample in my test jar. Once the foam subsided however, I was able to get an accurate reading from my hydrometer.
Cold Crashing
After reaching my final gravity it was time for a cold crash. With ales I cold crash as rapidly as possible by setting the fermentation chamber to 38 degrees Fahrenheit. I was careful to remove the spunding valve to avoid suck-back as well as monitoring the pressure in the fermenter to ensure that the rapid cooling wouldn’t drop it to the point of collapsing the vessel walls. As a precaution, I added a burst of CO2 a couple times over the one to two-day process of cold crashing. Having set at the desired temperature for another day and seeing that the sediment had mostly all settled to the bottom I knew it was time to transfer.
Transferring to Kegs
Thanks to the lesson I learned about which post not to use for the spunding valve it was easy to know which one to attach my transfer line to when it came time to move the finished beer to kegs. I attached a ball lock disconnect that is connected to two output ball lock disconnects which I connect to two kegs. Once everything was hooked up, I opened the PRVs on the receiving kegs and watched the beer flow from the fermenter through the lines to the kegs. Through the process I added CO2 from my tank to the All Rounder three or four times to ensure that the pressure in the fermenter stayed above that of the kegs. My impatience may have also encouraged me to do this more often than needed in order to increase the flow rate. The transfer went smoothly and only took about twenty minutes before I had two full kegs and an empty fermenter, aside from the yeast cake and trub.
![]() Transferring to keg under pressure!
Transferring to keg under pressure!
Cleanup
Following the instructions from Kegland, I used hot water to spray down the inside of the vessel, removing the majority of the trub and yeast cake. One of the home brewery tools I have certainly gotten my good out of is Mark’s Keg and Carboy Washer. This tool came in handy once again in cleaning the All Rounder. I added PBW to the basin, mixed it with warm water, and turned on the pump. After recirculating for fifteen minutes there was still a ring of post-krausen residue around the top quarter of the inside of the fermenter. At this point I took a soft rag dipped in PBW water and was able to remove it with a moderate amount of scrubbing. The other pieces were cleaned easily with a wipe-down and rinse. In the case of the posts and tubing I once again made use of the Keg and Carboy Washer accessories and hooked those up to the pump and circulated the PBW water through them. With all parts cleaned and rinsed I set them out to dry.
 Cleaning with my Mark II Keg & Carboy Washer – Review
All Rounder Things to Consider
For beers I brew often I like to collect and reuse yeast. This process is made quite simple with the conical fermenter I use as it allows for drawing that yeast out of the bottom dump valve post-fermentation. The All Rounder does not have such a feature. If yeast harvesting is something that is important to the brewer, it might prove more difficult with the All Rounder. I believe it can be done by carefully collecting it after transferring the fully fermented beer off by pouring it into a sanitized vessel, it would just be trickier than with a conical.
When nearly filled, the 15.9 gallon All Rounder was cumbersome to move. It was heavy and awkward to move across a room. I would not recommend moving it up or down stairs without help. The moving strap would certainly make transport easier and less dangerous. When empty, the fermenter is also a bit awkward as it is top-heavy and prone to falling over even when securely on the stand.
The material comparison to stainless already made, the other note on the material is that the fermenter body plastic isn’t the highest grade of material. I believe it is totally satisfactory for the purpose it serves, and it is what makes it an affordable piece of gear. Additionally, as noted about the lid becoming deformed due to my enthusiasm for overtightening, I believe it would be an upgrade to have a stainless-steel lid, but that would certainly bump the cost of the unit up.
All Rounder Benefits
Already noted, but worth mentioning again is the cost-effectiveness of the All Rounder. For under $100 one can have a high-quality fermenter that is capable of pressure fermentation without any extra modification. Compared to a stainless fermenter that does the same thing, one can buy an All Rounder for a fraction of the cost of the stainless gear.
Although I have not tried it, the All Rounder is a serving-capable vessel. I can see how it would be easy to do and would be a way to reduce the amount of gear a homebrewer maintains (but who among us are truly destined to have less gear?). To have a vessel to ferment, carbonate, and serve five or ten plus gallons at a time would be appealing to those without a lot of space or are seeking simplicity.
The cleaning aspect of the All Rounder is attractive. Compared to stainless it may not be as durable just by the nature of the material, but it was simple to clean and easy to see when all residue was removed. If cared for properly, it should last several years if not longer.
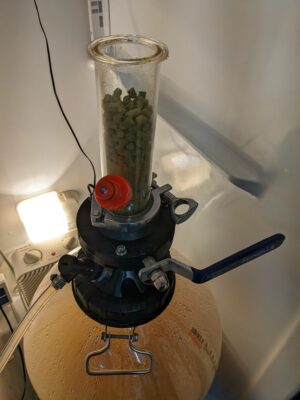
Kegland continues to innovate new products and accessories that mate with this series of fermenter. Currently available are the pressure kit which I’ve outlined, a thermowell to enable a more precise measure of fermentation temperature, a moving strap that makes transporting the vessel easier and safer, as well as a floating dip tube filter that helps to block hop particulate and other solids from getting sucked up by the transfer tube. The support that exists and the prospect for continued innovation in this product line are certainly encouraging. In fact, Kegland has a nifty dry hop apparatus on their site, but it is currently not offered outside of Australia. I put in a request to MoreBeer so hopefully that will be on its way to the US of A in time.
Conclusions
Whether looking to get into pressure fermentation or just shopping for a new fermenter, the All Rounder deserves consideration. It is well made by a company that backs up their products with support and quality documentation and is committed to continuing to make the product line maximally useful to home brewers. I look forward to mastering the art of pressure fermentation and have confidence that the All Rounder will serve me well throughout this endeavor.
 The All Rounder next to an Ss BrewTech conical
- Complete Lineup of FermZilla Fermenters & Accessories at MoreBeer
- FermZilla All Rounder Fermenter – 15.9 gal. / 60 L FE148 < the specific model reviewed here
- FermZilla All Rounder Fermenter | 7.9 gal. | 30 L FE147
- FermZilla All Rounder Pressure Brewing Kit – 15.9 gal. / 60 L FE119
- FermZilla All Rounder Pressure Brewing Kit – 7.9 gal. / 30 L FE118
- Stainless Steel Pressure Kit for FermZilla FE135 < included in this review
- FermZilla Fermenters at William’s Brewing
- Fermzilla 60 Liter All Rounder Fermenter < the specific model reviewed here
- Fermzilla 30 Liter All Rounder Fermenter
- Search Amazon for “FermZilla” – offerings vary
- Related: Hands on Review: Kegland Hop Bong
Related Reviews:
Closely Related or Mentioned in this Review:
- Mark II Corny Keg & Carboy Washer KEG300
- Hands On Review: Mark’s Keg and Carboy Washer
- Build a Spunding Valve! – How and Why
- BlowTie 2 Diaphragm Spunding Valve with Gauge FE962
Add A Kegland Hop Bong!
 Hands on Review: Kegland Hop Bong
The Hop Bong is a versatile pressurizable tri-clamp accessory, capable of not only dry hopping oxygen purged hops into fermenters, but also as an inline carbonation/oxygenation accessory.
via MoreBeer
- Hop Bong Upgrade Kit for FermZilla – 2 in. FE206
- Hop Bong Pressure Pack for FermZilla – 2 in. FE205
- All Hop Bong Options & Accessories
- All FermZilla Fermenters & Accessories
via William’s Brewing
- Hop Bong Upgrade for Fermzilla
- Hop Bong Pressure Pack for Fermzilla
- All Hop Bong Options & Accessories
- All FermZilla Fermenters & Accessories
More Photos
![]()
![]()
![]()

More Kegland Gear Reviews!

More Fermenter Reviews!

More Homebrew Finds!
- Last 50 Finds!
- Top Deals – a curated list of the best deals
- Homebrew Reviews – one of the largest libraries of homebrew reviews in existence!
- Our Top Posts – tips, how-tos, resources posts and more
- Let’s be Friends!
Recent Deals!

10 Most Recent Homebrew Resource Posts & How-To’s!

We are Homebrew Review HQ! Our 10 Most Recent Reviews

More Fermentation Related!
- Our Fermentation Related Reviews – Fermenters and More
- Yeast Starters and Fermentation Resource Page
- Yeast: The Practical Guide to Beer Fermentation
- Compare Prices: StirStarter Stir Plate
This post may contain affiliate links. We may make a commission when you use our links. This will never cost you extra. Thank you for supporting Homebrew Finds!
Special thanks for MoreBeer for providing the unit used for evaluation in this review.
Price, promotions and availability can change quickly. Check the product page for current price, description and availability.
Make sure the components you use are compatible and rated for your intended application. Contact manufacturer with questions about suitability or a specific application. Always read and follow manufacturer directions. tag:lnksfxd tag:wmsbuyageta review:allrounder #tag:tpr
A couple wraps of teflon tape before installing the stainless ball lock posts is a huge help, at least for me. I originally had the plastic ones and no matter what I did, they’d leak. Adding teflon tape completely warped them and made them leak worse. Haven’t had any issues since switching to the stainless version.
If/when you do add a thermowell, save yourself the headaches and place the mounting hardware in the reverse order of what the instructions say. In other words, place the Duotight fitting on the inside of the lid and the stainless nut on the outside. Following Kegland’s instructions, a leak slowly formed and it couldn’t be fixed. The entire thermowell also started to tilt, it was no longer perpendicular to the lid. A lot of people noted the same issue on Kegland’s Facebook group. I was about to buy a new lid and start from scratch, but somebody suggested reversing the order and sure enough, no leaks since.
What’s the story on that sick beer fridge? I spent the most time studying that picture!
Good review, thanks for posting. I purchased one of these to do pressure fermentation, unfortunately I could never get mine to reliably hold pressure for more than a day or so. I tried all the tips and tricks I could find on YouTube and from Kegland. It would hold pressure for a while then I could come back the next day and all the pressure had leaked out. Anyway I don’t think a new product should require ‘tips & tricks’ in order to get it to work properly. Also there were virtually no printed instructions that came with it, instead it directed you to their website. Luckily my local homebrew shop where I purchased it to it back no questions asked. I purchased a BrewKeg and have had zero issues with it from day 1.
I’ve got one of these and have some two pressurized fermentations, had no leaks, and was able to hold 15 psi work sounding over a 1-2 week fermentation and cold crash. I don’t have the stainless ball posts, I have the Kegland plastic ones. I don’t know if that’s the difference, but it’s always best to have the same material across a sealing interface sure to difference in thermal expansion.
A tip for tightening the lid and posts … grab yourself a couple of cheap belt wrenches; they are perfect for tightening up without over-tightening.