
Hands on Review: LaMotte Brew Lab Plus Water Test Kit
This review is by Homebrew Finds Contributor Brad Probert. Brad is an engineer, expert homebrewer and experienced reviewer. Grab a link to Brad’s website at the end of this review.
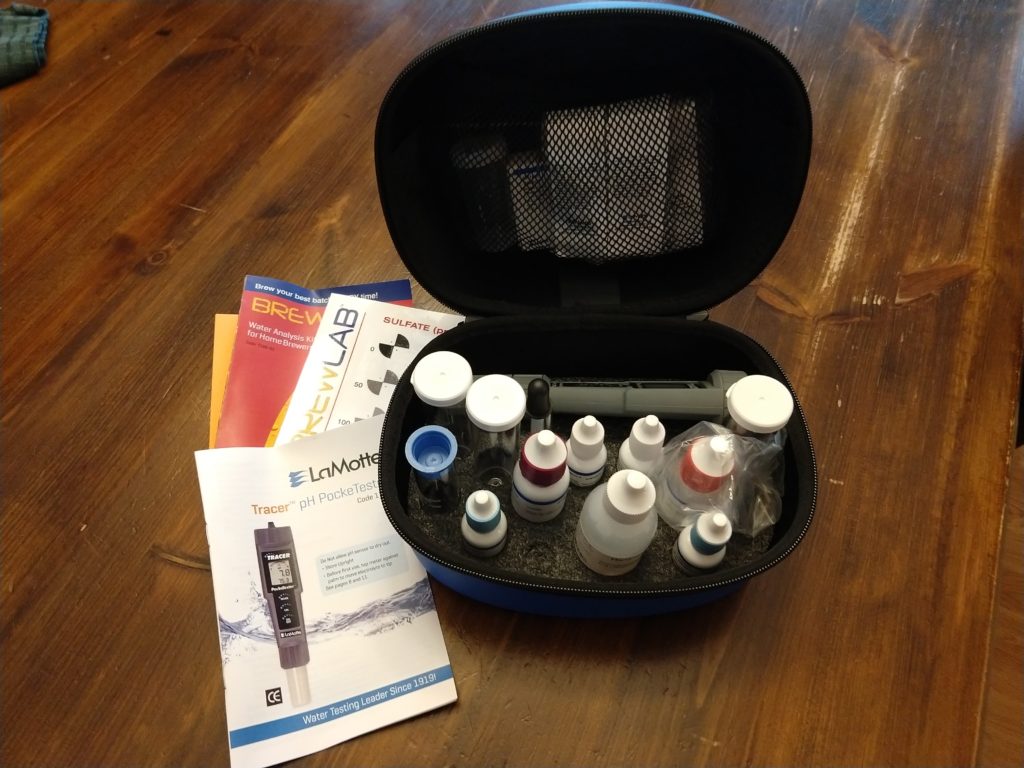
LaMotte Brew Lab Plus Water Test Kit
When I started all-grain brewing, I bought bottles of distilled water from the store and then added minerals to achieve my target water profile. After years of that, I finally switched over to using our city water, passed through a 3-stage water filter system (not Reverse Osmosis, but two types of carbon filter + sediment filter). The water on its own tasted good, so I figured I’d be fine. But my beers were boring and uninspiring. I brewed with just water as-is from the filter, and I also tried adding my brewing salts like I used to when brewing with distilled water. In both cases, not good enough.
I of course recognized the water was the common factor in all of the different boring beers. It was a personally-learned lesson that supported all those homebrew articles I’d read stressing how important water was in brewing great beer. So now I recognized the problem, but I couldn’t do anything about it without knowing the starting water profile coming out of my filter system.
LaMotte worked together with John Palmer to make a water test kit for homebrewers. The kit focuses exclusively on the minerals that are important to brewing. If you read a city water report, you find that there’s a whole bunch of stuff in there that doesn’t apply to brewing. This kit just focuses on the data that you need to enter your starting water profile into your favorite water calculator.
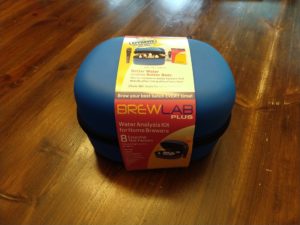 BrewLab Plus Kit – See the Palmer Brewing Solutions Approved stamp toward the top of the label
The other thing that tells you it’s geared to homebrewers is that even though it’s doing something “science-y”, it doesn’t require any kind of laboratory equipment beyond what comes in the kit. You measure out your water sample into the tubes they provide, then add various chemicals one drop at a time, looking for a color change. The most complicated thing you have to do is swirl a tube around to mix things up well.
Check Prices, Description & Availability:
- BrewLab Plus (featured in this review)
- BrewLab Basic
- BrewLab Pro
- All LaMotte Kits, Reagents and Supplies at MoreBeer
LaMotte has three kits, with two of them aimed at the average homebrewer. The BrewLab Basic kit contains everything you need to test for these 7 things: Chloride, Sulfate, Alkalinity, Total Hardness, Calcium Hardness, Magnesium Hardness, and Sodium. If you step up to the BrewLab Plus kit, it adds in a pH meter. An even bigger step up to the BrewLab Pro kit, and that adds in the ability to measure Total Dissolved Solids and Dissolved Oxygen.
If you’re measuring your water mineral levels, it probably means you’re adding brewing salts to hit a target profile for both flavor and mash performance. There are several mash pH predictive software options out there. The advice for all of them is to take your own measurements during your brew process and write them down. Compare your numbers to those that come from the predictions, and you’ll start to learn which ingredients and process steps will match the prediction, and which will need some adjustment.
Hands on Trial
I’ll admit I was a bit skeptical how this kit would work out. The thought of adding droplets to a vial of water and counting the number of drops sounded like it wouldn’t give very precise results. I use digital measurement or control in all steps of my brewing process. This chemistry process sounded so imprecise and subjective that I wasn’t sure how it would fit with my digital measuring precision brew process. But I discovered my worries were unnecessary.
I quickly found myself thinking, “Whoa, cool” as I added droplets of test solution, swirled the sample tube and watched the water change colors. I called the kids in to show them how cool it was, but they were not anywhere near as excited as me. I had to beer-geek-out myself.
All of the tests follow the same general process. You start with a small sample of water filled up to the measuring line in the provided glass test tubes. To this you add a solution of either a prescribed number of drops from the provided bottles, or you drop in a small tablet to dissolve. Then you add one drop at a time from another bottle, keeping track of the drops you add. At some point, the sample will go through a fundamental color change. The number of drops you added until you got the color change tells you the mineral level in your water.
 Calcium Hardness Test
For example, I was measuring Calcium Hardness. I started with 25 ml of water in the test tube, and added 6 drops of the prescribed liquid, and then added a small tablet. The water turned red. I then took a different bottle of liquid and added one drop at a time, swirling it around and looking for the color change. One drop- it stayed red. Another drop- red. At the fifth drop, it turned purple, showing it was on the border. One more drop and it turned a distinct blue color. Six drops x 10 = 60 ppm Calcium Hardness (measured as CaCO3). And that was it. I rinsed out the tube, and moved onto the next test with the specified drops to add.
There’s enough test liquids (reagents) provided in the kit to run 50+ water tests. I tested water samples of my water going into my home water filter and water coming out of it. The first time with the kit, the process took me an hour to run through the tests, do all the necessary number crunching, and have everything rinsed and ready to put away. There’s no complicated cleaning process for the sample test tubes beyond rinsing them out and using the little tube brush included in the kit. The second time I ran the test, it took about 45 minutes. The kit comes in a good quality zipper case that keeps everything together in secure storage that makes it neat/organized for storage when you’re done.
Conclusions
Overall, the water test kit was actually fun to use. Although by our current standards of technology, it looks low tech, it actually uses some sophisticated science to give you water mineral data. With enough reagent to run 50 tests, you can run multiple tests to confirm your water, or sample at different times of the year since some water sources change from surface to underground water at different times of the year. But most importantly, my beers are back to exciting my palate!
Check Prices, Description & Availability:
- BrewLab Plus (featured in this review)
- BrewLab Basic
- BrewLab Pro
- All LaMotte Kits, Reagents and Supplies at MoreBeer
All Water Related Reviews on Homebrew Finds – RO Filters & More
More Photos
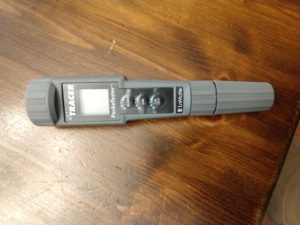 The Included pH Meter
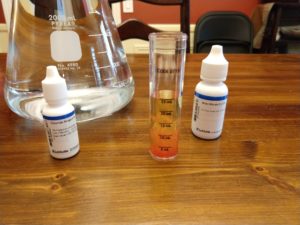 Chloride Water Test
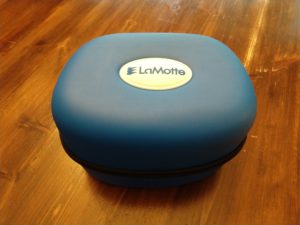 The Included Storage Case
 Tablet Added for Sulfite Test
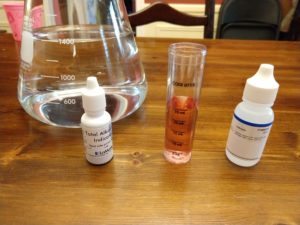 Total Alkalinity Test
 Total Hardness Test
More MoreBeer Reviews+Related:

More Homebrew Finds!
- Last 50 Finds!
- Top Deals – a curated list of the best deals
- Homebrew Reviews – one of the largest libraries of homebrew reviews in existence!
- Our Top Posts – tips, how-tos, resources posts and more
Special Thanks to LaMotte for providing the kit used for evaluation in this review.
By Brad Probert. Check out Brad’s website – beersnobby.com
This post may contain affiliate links. We may make a commission when you use our links. This will never cost you extra. Thank you for supporting Homebrew Finds!
review:lamotte tag:tpr