
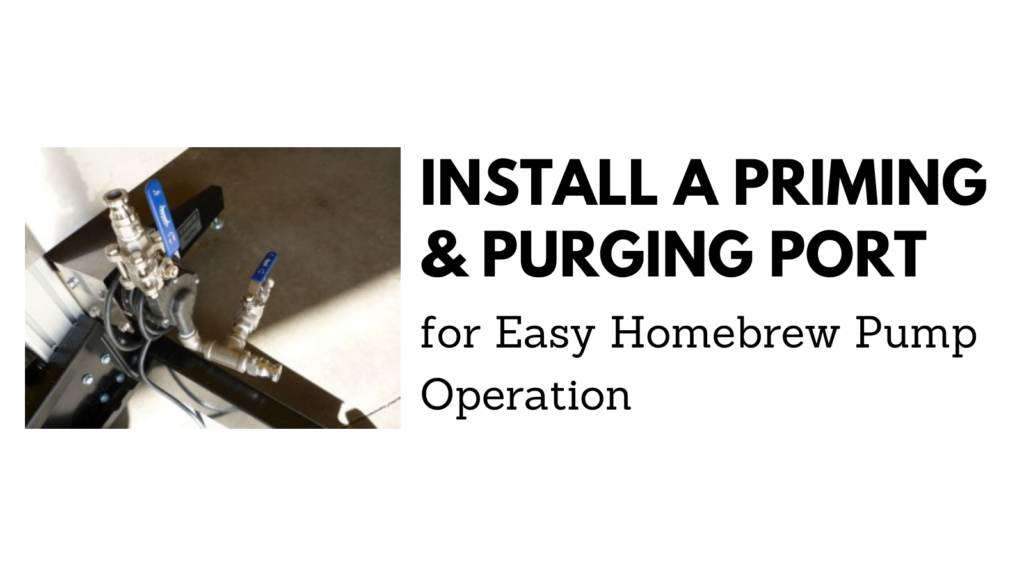
Install a Priming and Purging Port for Easy Homebrew Pump Operation
I use my March Pump to recirculate/vorlauf, transfer wort to my brew kettle, chill with a recirculating immersion chiller and transfer to my fermenter. It works great, helps me chill down very quickly and overall, it shaves a significant amount of time off my brew day.
Losing Prime, Cavitation and Clogs
When I first started using this pump, I struggled with it. It continually lost prime and, less often, clogged with grain material. Disassembling the pump head is not what I consider a real time saver. That’s no good!
Even after initially getting it primed, the pump was losing prime due to pump cavitation. Cavitation occurs when gas comes out of liquid and results in losing prime. Beyond that I had the occasional clog due to grain husks from the mash. Most brew days, I struggled with the pump, to some degree.
My first problem was… pump orientation. Originally, I had the inlet on the top and the outlet on the bottom. In that orientation, liquid hits the pump and has a tendency to stop. Having the inlet on the bottom and the outlet on the top works much better. The pump is nearly self priming in that orientation, but there were still issues with cavitation and clogging.
After continuing to struggle, I decided to add a priming/purge port.
Note: Although this post features a March pump, this assembly could be easily adapted to other manufacturers and models. You may need different fittings for your Chugger, Mk4, etc, but the concepts still apply. See our lineup of pump reviews to compare pumps
Install a Priming and Purging Port for Easy Homebrew Pump Operation
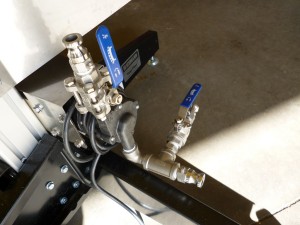
The port consists of several fittings on the “IN” (bottom) side of the pump. Those fittings have a QD that accepts incoming liquid (from mash tun or kettle) along with a tee and ball valve for priming/purging. To prime/purge I open the port and drain directly into a 1 gallon pitcher [Review]. That sets the grain bed, clears husk material and gets any vapor out of the tubing. After closing the prime/purge valve, the prime easily finishes when the ball valve on the “OUT” side of the pump is opened. As a reminder… always exercise caution when dealing with hot items and hot liquids.
This simple addition to my setup allows me to easily and quickly prime the pump and stave off potential clogs by clearing out husks before starting up the pump.
On port placement… I have used this configuration since 2012 and it has worked great for me. I’ve received mostly positive feedback but, for some reason, this is a hot button topic. The biggest point of contention seems to be port placement. I’ve placed the priming/purge port on the “IN” side of the pump to easily clear husk material and avoid clogs. That means I don’t need to manually vorlauf before hooking up tubing. It could be placed on the “OUT” side without the benefit of clearing husk material.
I call my setup a priming/purge port, because it does both of those things. It’s installed on the “IN” side of the pump. If you have yours installed on the “OUT” side… we can still be friends :).
I reached out to March Pump to ask them to verify my setup. Here’s the response I received from Otto at March Pump on 7/26/16… “Our engineers reviewed it, looks good.”
My setup consists of (top to bottom)…
Male Camlock QD – Camlocks at ProFlow
|
Stainless 1/2″ Full Port Ball Valve [for controlling flow]
|
“OUT” side of pump
|
March High Flow Homebrew Pump
|
“IN” side of pump
|
1/2″ Street Elbow – OR Search Amazon for “1/2 stainless street elbow”
|
1/2″ Tee – 1/2″ Nipple – Ball Valve – Male Camlock QD [for priming/purging]
|
Male Camlock
A note on the elbow: If the position of your pump affords you space to skip the elbow, I would skip it to help increase flow rate. It’s a bit of a trade off, but I included it because I wanted to keep the pump as low as possible to, in turn, keep my other tiers as low as possible.
Adding this port has saved me a lot of time and frustration and it’s made the pump a joy to use and a real time saver.
Some quick pointers – I believe the pump should be oriented with the inlet facing down. This allows gravity to work with the pump to help priming. You want to add a ball valve to your setup to help control flow speed. That ball valve should be placed on the “OUT” side of the pump.
- Brewing Pumps at MoreBeer
- Search Amazon for “1/2 stainless street elbow”
- Search Amazon for “1/2 stainless tee”
- Search Amazon for “1/2 stainless nipple”
Looking for a Deal? Homebrew Pump Discounts, Deals and Resources
Related:
- Using a Pedal Foot Switch for Easy Pump Operation
- Wort Chiller – SuperChiller with Recirculation WC45A
- Camlocks at ProFlow
Make Brew Day Easier With Cam Locks!

Pump Reviews!

More Homebrew Finds!
- Last 50 Finds!
- Top Deals – a curated list of the best deals
- Homebrew Reviews – one of the largest libraries of homebrew reviews in existence!
- Our Top Posts – tips, how-tos, resources posts and more

This post may contain affiliate links. We may make a commission when you use our links. This will never cost you extra. Thank you for supporting Homebrew Finds!


Make sure the components you use are compatible and rated for your intended application. Contact manufacturer with questions about suitability or a specific application. Always read and follow manufacturer directions.
Always use caution when using your pump with hot liquids. Likewise use caution when using electricity around liquids. Hot liquids and electricity can be dangerous.
This is a Top Post! See: All Top Posts toppost:pumpprimingport rs:7 tag:tpr
I have a Chugger instead of a March, and I use a very similar setup, although mine has the tee on the outlet and no elbow. Mine is set up exactly like at https://www.love2brew.com/Articles.asp?ID=604 and it works great.
Just ordered the parts to get this done. $37. I’m having the same issues, so we’ll see if this helps.
Can you post a video of you using this? I’m just getting into electric brewing and struggling to following you logic. All other posts I’ve seen recommend the flow restrictions on the outflow. I’m setting up my pumps this soon. Thanks in advance.
Eric, I also suggest putting the flow restricting ball valve on the “out” side of the pump. It’s the priming/purging setup that I have on the “in” side of the pump.
I found that I like the pump oriented the same as you show because of the self priming benefit, it automatically gets rid of any air bubbles. However after trying the manual vorlauf method, ( I just unhooked the intake hose and drain it into a jug) I still was having issues with the stray grain or two causing pump issues. I found that using a BIAB nylon screen lining my wort tun fixed all the clogging issues, no vorlauf needed. Makes cleanup easy too, just lift it out, I use a small winch.
Well all the clogging issues except for the one Jeremiah mentioned above about the importance of grain crush, that is always important, I recently bought and crushed grain from a different brew supply shop than I normally use and ended up with a lot of flour, gooey mess, it was not a good brew day, bag or no bag, proper crush is important.
A couple of things to consider. If you are getting a significant amount of grain matter in your pump head, the issues isn’t with the pump it’s originating in your mash tun. If you’re using a false bottom you may have gaps that are too big and therefore causing grain to make it into the pump. The other possibility may be with the crush of your grain. If you can solve the problem of grain clogging the pump head, that will be a huge time saver right there. The other thing that I would mention is that, as Sean mentioned in his comment, having an elbow on the inlet side of the pump head is very restrictive and can cause cavitation. That said, you’re actually using a 90 degree Street which is causing even more restriction. Basically you’re taking the 1/2″ inlet and restricting it down to 3/8″ or less. My recommendation is to change the orientation of your pump head so that it runs horizontal. Inlet on the left and outlet on the right, and put your priming valve on the outlet side not the inlet side, so that the pump head is flooded and primed when you open the valve. By making these changes you should eliminate almost all of your pump issues.
Over the years, I’ve had multiple people suggest putting the port on the outlet side and it just doesn’t make sense to me. I want it on the inlet side to clear grain and… it works that way. I know you can manually vorlauf to set the grain bed, but I don’t want to have to do that. Running a pitcher or two through the port clears any bits of grain and sets the grain bed.
If you are running a pitcher or two through the priming port, then you are manually vorlaufing. You can do this without a priming port.
Also, you mention several times in the post about cavitation issues, but a priming port does not address cavitation. Cavitation is caused by a pressure differential in the inlet and outlet under high heat. The pressure difference is great enough to cause steam in the pump head and thereby cavitation. This can be alleviated by lowering the pump placement to increase input head pressure and outlet head pressue or by increasing restrictions on the output side.
You might want to stay away from the elbow on the inlet of the pump, that is known to restrict flow. I had mine setup like that and had to get rid of the elbow to help the flow. I’ve also been told to put the purge valve on the outlet before the regular valve. That way you are filling the pump when you open the valve.
The reason I have that is I wanted to keep my pump mounted as low as possible to keep everything else within arms reach without a step stool. You’re right though, getting rid of the elbow would help flow rate.
Hey, to each his own! Just be careful when you are suggesting how others should setup their pumps. These are expensive pieces of the brew setup and it would stink if it failed due to advice that goes against the manufactur’s guidelines and physics.
I’m pretty sure physics and I aren’t at odds. Physics just texted me last night just to say what’s up. 🙂 I’m not sure what in this post would lead you to bring up pump failure. The inclusion of an elbow? I don’t think any of the advice here is going to lead to a pump failure. As far as the priming port before or after the pump. It clears husk material and primes right up until the inlet of the pump. When you open the ball valve on the out side liquid is waiting to fill the pump. Mine has been in this configuration since 2012.
Physics tells me that an elbow is going to restrict flow, restricted flow can put a strain on the pump and cause failure. March’s general installation instructions state “When using an elbow, valve, etc., the suction must have straight piping in length at least five (5) times the diameter of the pipe.”
Do you have 2.5″ worth of straight piping after that elbow but before the pump?