Category Archives: Review Updates

Hands on Review: NukaTap Forward Sealing Beer Faucets

This review is by Homebrew Finds Contributor Brad Probert.  Brad is an engineer, expert homebrewer and experienced reviewer.  Grab a link to Brad’s website at the end of this review.


Limited Time DEAL!

  • For a limited time William’s Brewing is discounting their entire lineup of kegs, kegging systems and accessories by 15%. Valid 4/22 only
  • No coupon code necessary, discount reflected in cart.
  • Shipping is free or reasonably priced flat rate to addresses in the contiguous US depending on your order size for most items.

Includes Kegland KegsHands on Review, DuoTight Fittings – Hands on Review, Nukatap Faucets and lots more

William’s Brewing Kegs and Kegging Sale!

NukaTap Faucets & Accessories – at William’s Brewing


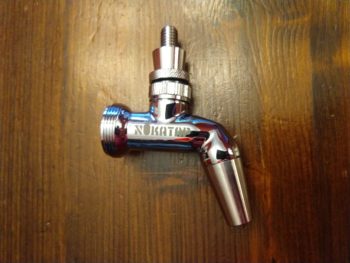
NukaTap Beer Faucet

There are several different beer faucets to choose from when equipping your keezer. The most basic type differentiation is forward sealing versus rear sealing. The rear sealing are the most common type you will find in bars, with a sliding piston visible that comes out through the front of the faucet. Those faucets don’t do well unless you have a continuous flow of beer like is found in a bar. Don’t fool yourself into thinking you pour a lot of beer so the rearward sealing faucets will be fine. They’ll gum up and stick and you’ll be cursing that decision! So the popular homebrew faucets are forward sealing.

The long-time favorite forward sealing faucet for homebrewers was the Perlick brand, but they were expensive. Kegland introduced Intertap – Hands on Review – with a design variation of the forward sealing faucet and a more affordable price. Now Kegland has improved on their Intertap design with the new Nukatap faucet. As everything I’ve tried/researched from Kegland, they take a product and then engineer specific improvements to it- either to make it available at a lower cost or for specific improved homebrew functions.

With the Nukatap, Kegland focused on improving/reducing the propensity of beer to foam while being poured. Beer foaming is simply the act of dissolved CO2 coming out of the beer and then converting to gas at the surface of your beer. Cold beer can hold more CO2 than warm beer, so as carbonated beer warms, it causes CO2 to come out of solution and thus create foam. Similarly, beer under pressure can hold more CO2 than beer that is not under pressure. So as beer goes from the pressurized keg and into your unpressurized glass, this also causes CO2 to come out of solution and create foam.

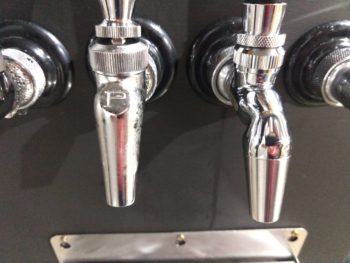
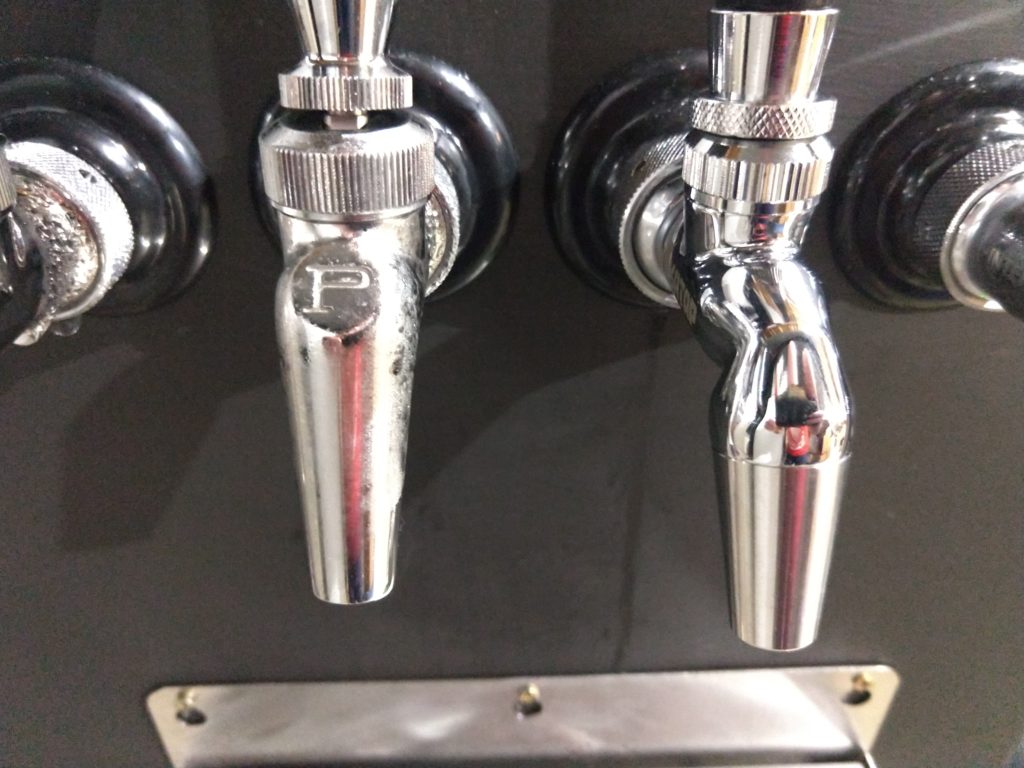
Nukatap on Left, Intertap on RightNukatap on Right, Perlick on Left

The first design action Kegland did for Nukatap was on the sealing mechanism. One big challenge at fighting beer foam is how to get the beer around the sealing mechanism inside the faucet. Perlick faucets use a ball to seal and shut off the flow. As beer passes by the ball, the flow creates a low pressure zone on the backside of the ball, and thus beer goes from high pressure to low inside the faucet, creating an opportunity to foam. Intertap faucets use a football-shaped shuttle inside the faucet. This shape is less prone to the low pressure zone like a sphere has. Nukatap has a variation on the Intertap football shape, and Kegland kept tweaking it to keep the flow calm as it passed around the sealing shuttle inside. The shape ended up looking like an old-school atom bomb, and hence the “Nuke tap” name was born.


Check Current Pricing and Availability, Review Continues Below:

NukaTap Faucets come in three variations. Stainless, Stealth (Matte Black) and Flow Control. All feature stainless steel construction, forward seal design and all the other NukaTap innovations.

I’m also linking to Intertap faucets and accessories where applicable because all Intertap spouts work with NukaTap

Continue reading

Hands on Review: VineCo Wine Kit Review!

Thank you to HBF Contributor Aaron Nord for this hands on review!  Aaron is an advanced award winning brewer, a long time reader and a serial tipster!

VineCo Wine Making Kits

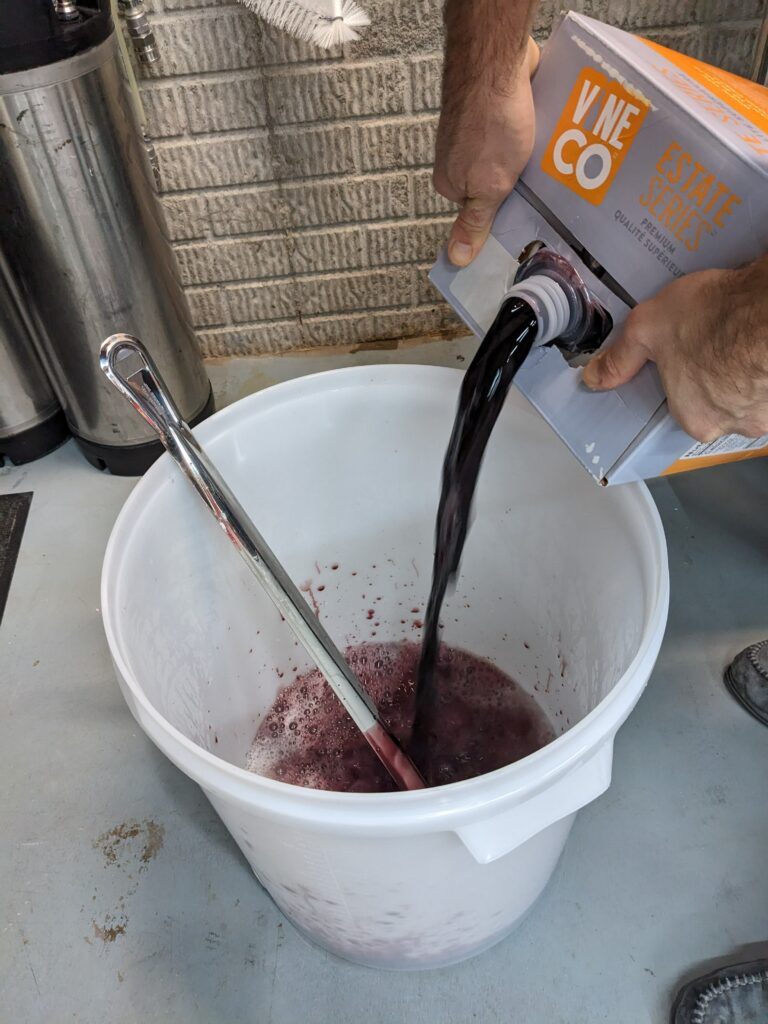
First and foremost, it should be known that I am a homebrewer and what follows detail my nascent experience as a hobbyist winemaker. The way I entered the world of homebrewing was by means of a boxed kit (I think it was a Brewer’s Best kit) and a starter equipment kit. Therefore, it felt familiar to me to do the same for this foray into winemaking. Knowing that the box would hopefully contain nearly everything I needed to turn out a tasty beverage (aside from adding my own water and some wine bottles) provided comfort and allayed some concerns I had about being a first-time winemaker.

The VineCo Series wine making kits are available from MoreBeer and come in a myriad of varieties and categories including basic fruited wines (almost in the style of a wine cooler) to premium ones presumably designed for the more refined palate. What’s more, they also tailor them to country or region-specific wines like a Washington Riesling or an Australian Shiraz. My partner and I are fans of red wines and for that reason the California Cabernet Merlot and the Italian Amarone appealed to me. The Amarone style is offered in two different categories from VineCo, the Signature and the Estate. The Signature kit is a little pricier but comes with grape skins, oak cubes, and bottle labels. I chose the Estate kit to keep it simple for my first experience. The California Cabernet Merlot is only offered in the Estate line so that choice was easier.


Make Your Own Wine!

Continue reading

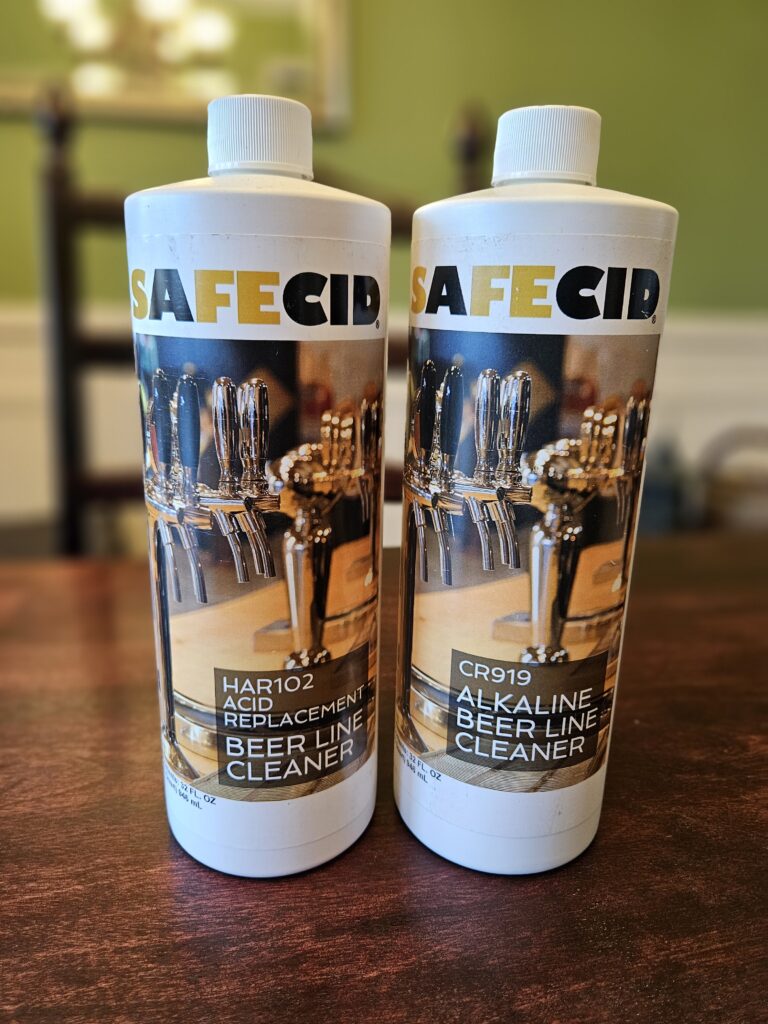
Hands on Review: Safecid Beer Line Cleaner

This review is by Homebrew Finds Contributor Brad Probert.  Brad is an engineer, expert homebrewer and experienced reviewer.  Grab a link to Brad’s website at the end of this review.

Safecid Cleaner

Those of us that have kegerators know that cleaning the beer lines is a necessary thing. We also know that cleaning them is a pretty unexciting event. Products for cleaning them are generally unexciting as well because they’re all pretty similar. There is one product that is different- Safecid Beer Line Cleaner.


Check Current Pricing & Availability:

These are affiliate links. Note that multiple variations of these products may be available, as such a different version may appear at these links


Safecid has both an acid cleaner and an alkaline/caustic cleaner. The cleaners are as potent as other cleaners, but their patented chemistry makes it non-toxic. This means it is neither harmful to people (skin, eyes), nor harmful to the water supply when rinsed down the drain. And that’s what makes it different from other cleaners.

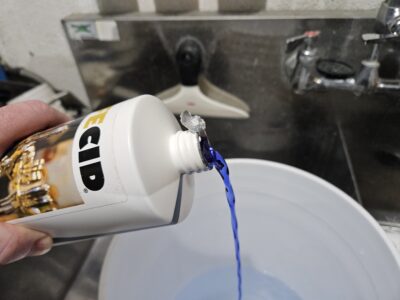
Alkaline Cleaner Distinct Blue Color

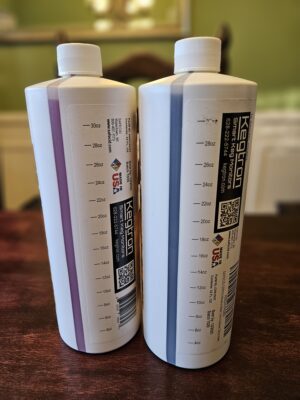
See-Through Volume Markings

The Brewer’s Association publishes draft beer cleaning guidelines for bars/breweries. They recommend a cleaning period of every 2 weeks, based on research looking at bacteria build-up in the lines. The research looked at the growth of both aerobic bacteria (leading to sour and vinegar off-flavors) and anaerobic bacteria (leading to butter and caramel off-flavors). This bi-weekly cleaning is to be done with an Alkaline cleaner, and then every 3 months an acid cleaner should be used. The alkaline cleaner deals with organic compounds (bacteria) and the acid cleaner deals with inorganic compounds (beer stone). They point out that the cleaning frequency is not dependent on how much beer is flowed through the lines- busy taps or slow ones alike.

Continue reading

Hands on Review: Kegland Ball Lock Keg + Limited Time DEAL

Kegland, based in Australia, produces a broad array of homebrewing gear. fermenters, electric brewing systems, loads of draft stuff (including DuoTight!) and lots more.

It’s obvious these folks are homebrewers at heart, because they’ve come up some really innovative stuff. The other thing they’ve generally done is hit really good price points. There is a balance between cost, features and quality and they seem to be hitting a lot of bullseyes.

This is an in depth hands on look at Kegland’s 5 gallon ball lock keg.


Limited Time DEAL:

  • For a limited time William’s Brewing is discounting their entire lineup of kegs, kegging systems and accessories by 15%. Valid 4/22 only
  • No coupon code necessary, discount reflected in cart.
  • Shipping is free or reasonably priced flat rate to addresses in the contiguous US depending on your order size for most items.

The sale includes these great kegs and lots more

William’s Brewing Kegs and Kegging Sale!


Hands on Review Kegland 5 Gallon Ball Lock Keg

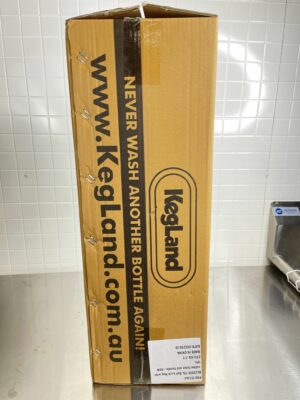
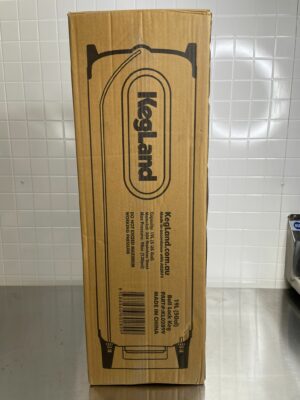
A look at the boxThe other side of the box. This is one of the better looking keg boxes I’ve run across.


Check Current Prices, Models and Availability:


This article contains affiliate links. We may make a small percentage if you use our links to make a purchase. You won’t pay more and you’ll be supporting Homebrew Finds and more content like this. Thank you for your support!


Continue reading

Hands on Review: Kegland DuoTight Fittings & EVABarrier Tubing

Kegland’s DuoTight Fittings are designed to work with EVABarrier Double Wall Tubing.  They offer quick, reliable connections, easy implementation, a variety of fitting options and feature amazing versatility.  They’re also, generally speaking, very well priced.  DuoTights are push to connect fittings and require no tubing clamps.


In This Review:

  • How to Use DuoTight Fittings – No Tools or Clamps Needed!
  • DuoTight and EVABarrier Sizing
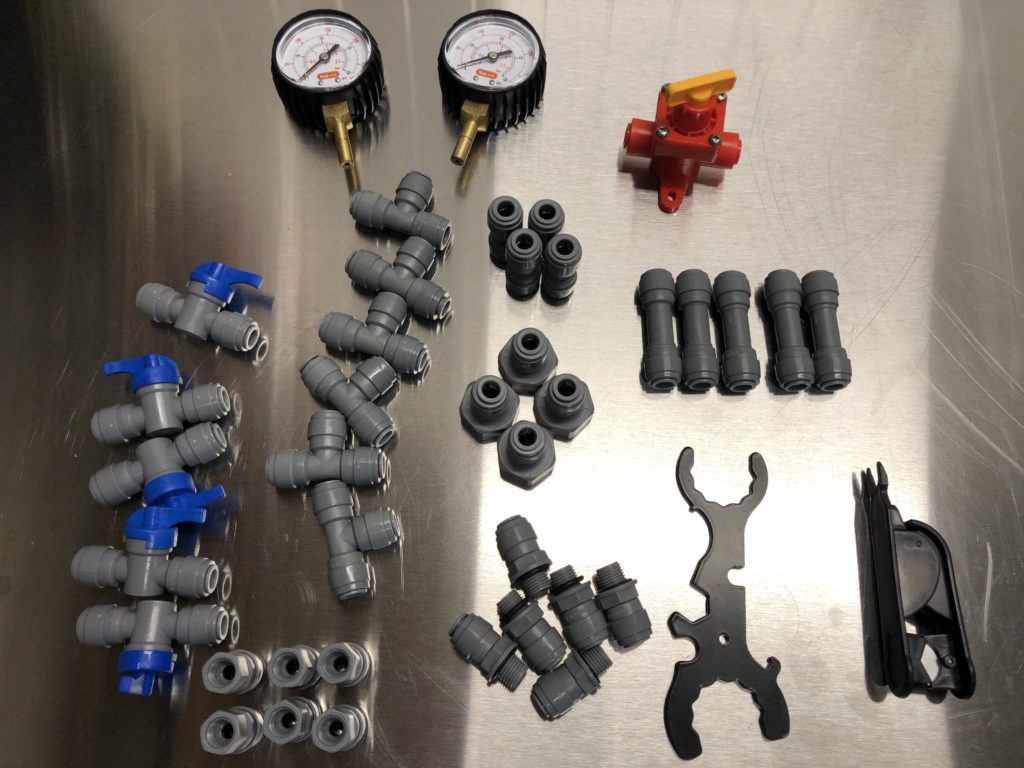
  • A Closer Look at DuoTight Fittings, EVABarrier Tubing and Related Tools
  • DuoTight Compatible Locking Clips
  • More About EVABarrier Double Wall Tubing
  • EVABarrier Tubing Resistance Estimations
  • Beer Line Tidy for EVABarrier Tubing
  • Does EVABarrier Tubing Work with John Guest Fittings?
  • Converting My Kegerator to DuoTights and EVABarrier
  • Tips for skipping ball valves in your DuoTight Setup
  • A Tweak For Super Clean DuoTight Kegerator Installs
  • Build a DuoTight CO2 Gas Manifold
  • Kegland DuoTight Ball Lock QDs
  • Pressure Tests
  • What is the Maximum Pressure for DuoTight Fittings?
  • Nukatap Counter Pressure Bottle Filler
  • DuoTight Inline Secondary Regulators
  • BlowTie Spunding Valves
  • Leaks? Troubleshooting EVABarrier/DuoTight Leaks
  • Conclusions
  • More Interesting and Unique DuoTight Compatible Fittings & Gear

Announcing: DuoTight Conversion for Tapcooler

tapcooler duotight

The Tapcooler can connect directly to your compatible forward sealing faucet (Ultratap, Vent-Matic, Perlick 600 series, Nukatap and Intertap) and allows you to easily counter fill bottles directly from the tap!

Learn More about the Tapcooler!  Hands on Review: Tapcooler Counter Pressure Bottle Filler for Forward Sealing Faucets!

OR Nukatap Counter Pressure Filler

The new fitting for Tapcooler makes a lot of sense of you already own a Tapcooler. If you don’t but are in the market for something similar that includes native DuoTight capabilities consider the Nukatap’s Counter Pressure Bottle Filler


How to Use DuoTight Fittings – No Tools or Clamps Needed!

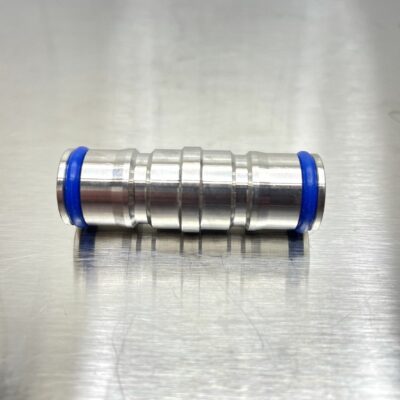
DuoTights feature a unique double EPDM O-ring design.  Coupling and uncoupling is quick and easy and requires no tools or clamps.

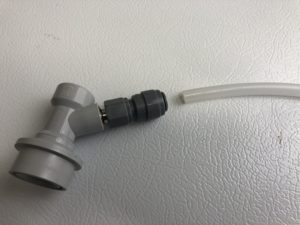
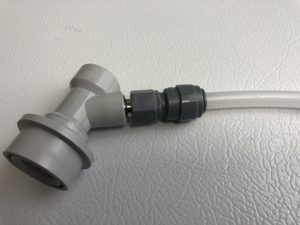
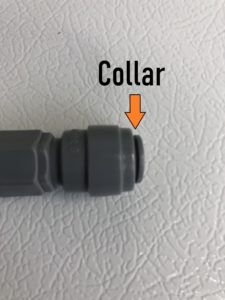
DuoTight Ball Lock QD on Left, Compatible EVABarrier Tubing on RightMaking a pressure capable connection is as easy as pushing the tubing all the way in the fitting and firmly pulling the tubing out.To disengage the connection press the collar toward the fitting body and pull on the tubing.  A couple tools are available to help with this process.  See below for photos and links.


Finding DuoTight Fittings and EVABarrier Tubing, Review Continues Below:

Continue reading

Hands On Review: Old Ale Brand Ball Lock Kegs + Limited Time DEAL

aih keg review

Hands on Review AIH’s Brand New Ball Lock Kegs

Adventures in Homebrewing produces a line of brand new ball lock kegs.  These are AIH’s own design. They are also branded “Old Ale Supply Company”.  These are available in a number of sizes from both Adventures in Homebrewing and Austin Homebrew Supply.


Limited Time DEAL!

Brand New 5 Gallon Gallon Ball Lock Kegs from Adventures in Homebrewing

I have this great keg.  Check out my Hands on Review

  • For a limited time AIH is throwing in a free Bell’s Two Hearted Clone Kit
  • Choose from all grain or extract. This is up to a $49.99 value.
  • Use coupon code KEGME to get the deal.

FREE Bell’s Two Hearted Clone Kit with Keg Purchase!


Check Current Pricing and Availability, Review Continues Below:

Also available at Austin Homebrew Supply:

Related:


Adventures in Homebrewing Keg Continue reading

Hands on Review: BrewZilla Gen 4 + OUTSTANDING Deal on 17 Gallon BrewZilla!

This review is by Homebrew Finds Contributor Brad Probert.  Brad is an engineer, expert homebrewer and experienced reviewer.  Grab a link to Brad’s website at the end of this review.


Limited Time DEAL – $300 off 17 Gallon System!

For a limited time MoreBeer has the 17 gallon BrewZilla marked down a whopping $300 to just $349.99. Shipping is also free to many US addresses. This is a great deal!

Gen 4 BrewZilla | All Grain Brewing System | Integrated Pump | Includes Wort Chiller | Wifi | Bluetooth| Rapt | 65L | 17.1G | 220V AG502.US


Hands on Review BrewZilla Gen4

I’ve brewed on several different all-in-one units. Like any brew system, they each have their own strengths and weaknesses. I did a hands-on review of the Robobrew when it first came out in late 2016. It has since changed its name to BrewZilla and is on the 4th generation of the brew unit. As you’d expect with repeated generations, they’ve been able to focus on fixing deficiencies in their previous models and also introduce new features.

The basic premise of an all-in-one brewing system is that your mash and boil kettle are in the

same vessel. So just like Brew In A Bag, after mashing, you pull the grains out and the wort stays behind to be boiled. They use electricity for heat, so they can be used outdoors where you can reach power or indoors where you have a venting system that can take care of all the steam you make during your boil.
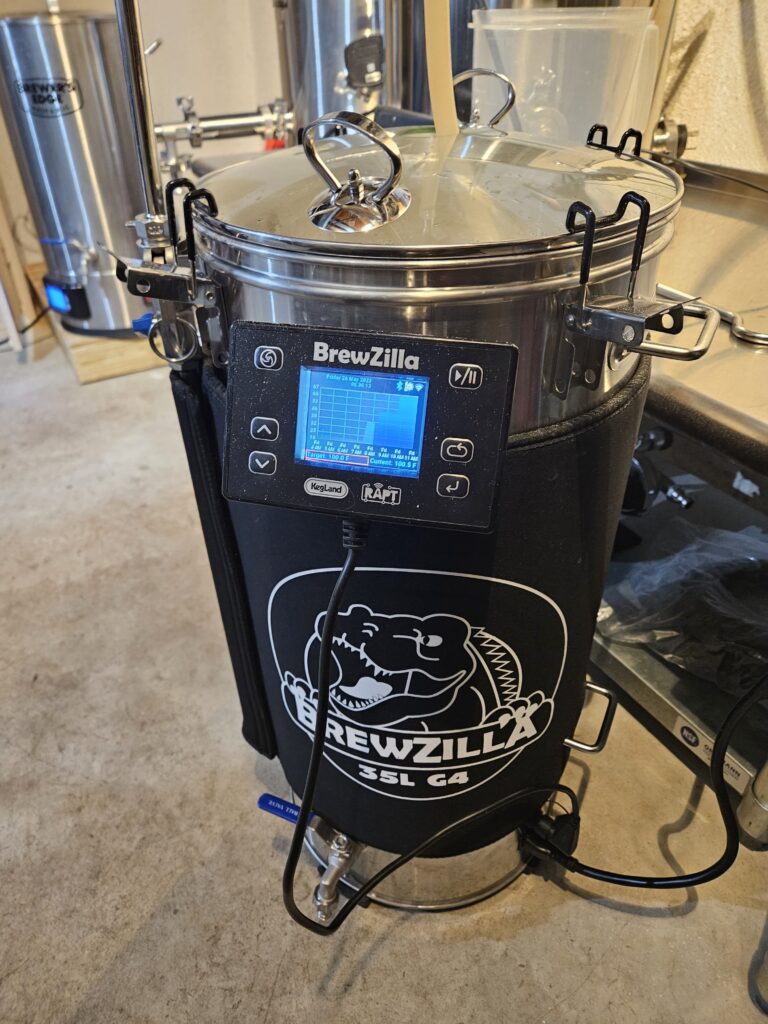
BrewZilla Without Jacket
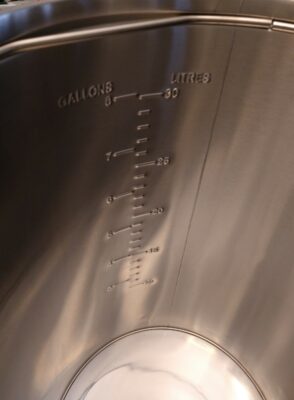
Stamped Volume Markings

Here are some basic stats on the Gen4 BrewZilla. It’s available in a 35-Liter form (for 5-6 gallon batches) with either a 110V setup, or 220V. There is also a larger 65-Liter that is only 220V (targeted to 10-12 gallon batches). The 35L unit holds 9.25 gallons, the mash basket can hold up to 23.5 lbs. of grain, and its electric heating elements can output up to 1500W of power (110V system) or 2400W of power (220V system). The 65L unit holds 17.1 gallons, the mash basket holds 41.5 lbs. of grain, and 3500W of heating power. All the Gen4 units have a pump bolted into the base. The pump can be used not only for wort recirculation during the mash, but also to pump beer through your wort chiller apparatus (should you choose to not use the immersion chiller coil included with the BrewZilla). The pump is more modular and accessible than previous Gen models. To protect the pump from clogging with hop debris during the boil or whirlpool, there is a filter screen (a perforated stainless disc that sits at the bottom of the unit) that sits at the bottom of the kettle. The small magnetic drive pump has a pump head rating of 1.5 – 2.1 m (4.9 – 6.9 ft) and a max flow rate of 11-12 L/min (2.9 – 3.2 gal/min).
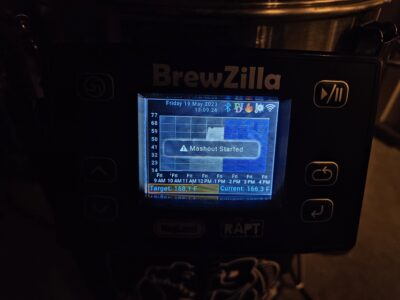
Control Panel Notification During Mash Profile

One of the key upgraded features of the Gen4 BrewZilla is the controller. RAPT Is Kegland’s line of wireless connected brewing devices. The BrewZilla now has a RAPT controller so it adds a lot of features that can be monitored and controlled over Wi-Fi. This includes basic things like monitoring temperature from your laptop/cell phone, but also allows you to program complex mash programs online and then download to your BrewZilla. You can also adjust control parameters on the fly such as pump output duty cycle and heater output level. If you get the optional Bluetooth thermometer, you can stick the temperature probe into the middle of your grain bed, and then have the controller use that as its control signal in combination with the built-in temperature sensor that sits on the floor of the unit.
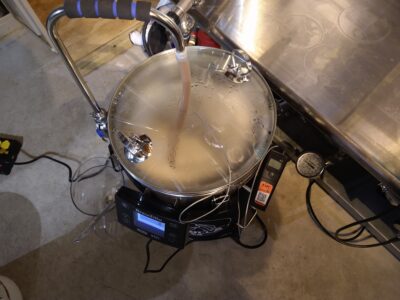
Bluetooth Temp Probe in Middle of Mash

Although All-in-One units are essentially BIAB, they use a stainless steel basket with holes in the bottom of it instead of a bag, and call it a “malt pipe”. These provide functional improvements over a nylon bag. The obvious one is they are way easier to clean. But they also allow you to ensure you get full flow through your grain bed by having holes only on the bottom. This means recirculating wort has no sneak paths out the side. The other benefit is malt pipes have simple brackets/feet welded onto the outside that allow you to lift your wet grains up and prop the malt pipe on the brew rig to drain or sparge. The BrewZilla has 2 sets of feet for this. One set is halfway up, allowing you to do the deadlift of grain & wort halfway and then let the liquid level drain down. Then when you lift it the full height, it’s not as heavy. It’s simple, but makes the process much better.
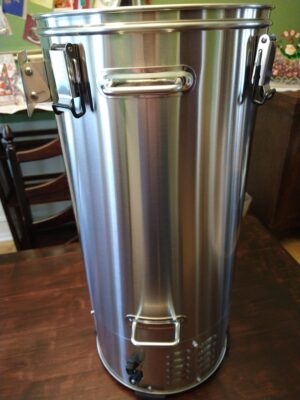
Welded-on Carry Handle (top) and Tip Handle (bottom)

There is a cool feature in the BrewZilla which normally only comes on much higher end systems, and that’s the central drain. With a concave bottom with a drain at the lowest point in the center, you don’t have to leave wort behind or goof around with tilting it to get the last drops of wort out at the end. This also enables the malt pipe to extend down lower and thus you can hold more grain (30% more than their Gen3). If you compared to other All-in-one units in the “5 gallon batch” size range, the 23.5 lbs. grain capacity is 30 – 50% more. This of course only matters if you’re trying to make high gravity brews. The drain in the floor is plumbed to the inlet of the pump below, and then you can direct pump output either to an external spigot for fast/easy transfer of wort out after brewing, or up the recirculation pipe for wort to get directed down on top of the mash.
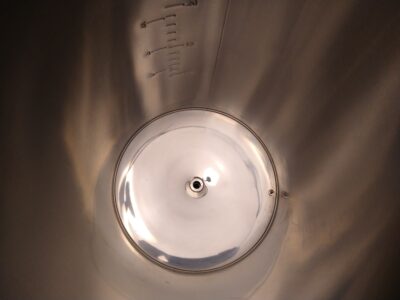
Polished Bottom with Center Drain and Built-in Temp Sensor to Side
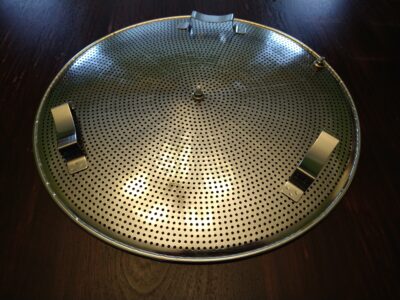
Bottom Side of Pump Filter Plate

To help with mash efficiency and mash temperature uniformity, they offer a Heat Exchanger Dish, which is just a stainless dish/plate that sits below your malt pipe and above the central drain. Without this dish in place, the flow of recirculating wort tends to go through the center of your grain bed, and straight out the drain. With the dish there, it directs the flow around the full circumference before it gets to the drain, which helps ensure a broader portion of the grist sees the flow.


Compare Prices, Review Continues Below:


This article contains affiliate links. We may make a small percentage if you use our links to make a purchase. You won’t pay more and you’ll be supporting Homebrew Finds and more content like this. Thank you for your support!


Another helpful option is the neoprene insulation jacket. This helps keep mash temperatures more consistent by cutting down heat loss through the walls of the unit. The jacket on BrewZilla also smartly covers the recirculation pipe to minimize heat loss during wort recirculation. The overall mash temperature response with a multi-step mash was impressive, with more detail provided in the Hands On section, below.

Hands on Trials

First off, all of the different parts were well made with good quality manufacturing. As I’ve found with all Kegland gear, it’s of good quality- but nothing flashy. The one exception was probably the smooth and highly polished dished bottom. That was flashy. And being a previous owner of a 1st Gen Robobrew, I was very happy to see the camlock fitting on the recirculation pipe and see that Kegland was obviously tuned in to customer feedback on their products.
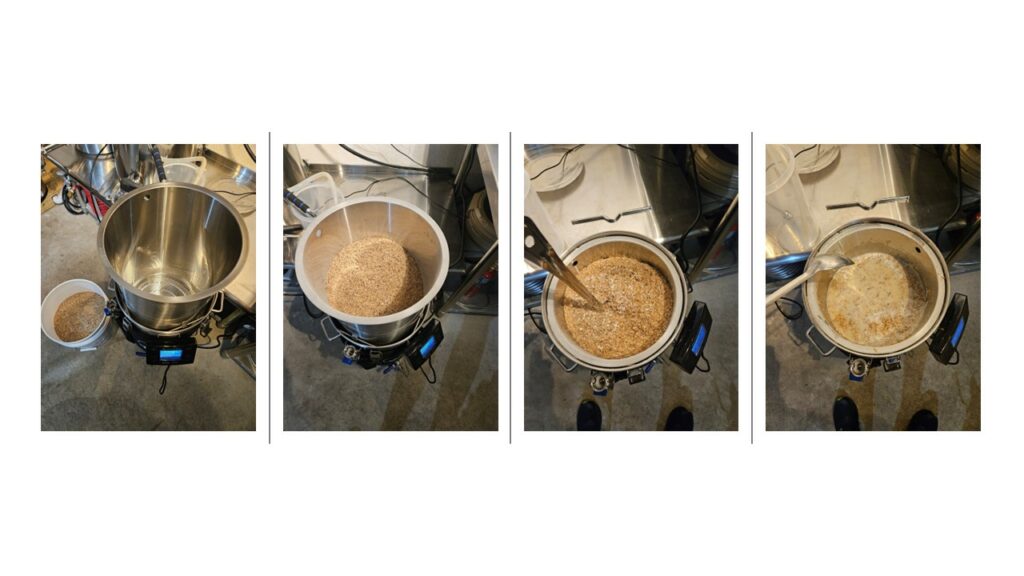
Mashing-in Sequence
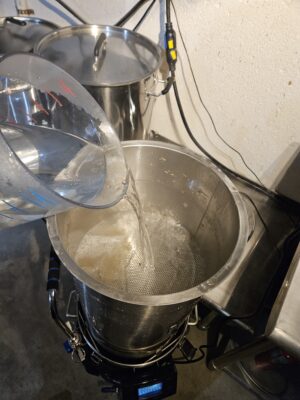
Sparging

I brewed three different batches before writing this review. Two of them followed a simple single temperature mash, and the third one I exercised the RAPT Controller more with a multi-step mash profile, with lots of monitoring via my smartphone. I was impressed with the mash efficiency I achieved. There can be a misconception that BIAB = lower mash efficiency, but really, it’s “full volume mash = lower efficiency”. I had previously done experiments with an Anvil Foundry that showed a sparge step can get you mash efficiencies > 80%. Therefore, my batches in the BrewZilla were all done with a sparge step. I rested the malt pipe at the top while pouring heated sparge water through it with a 1-gallon pitcher. The perforated plate sitting on top of the grain bed made it super simple to sparge like this and get a good water distribution pattern. The perforated plate also allowed me to push down very easily and squeeze out remaining liquid in the grains. If you’re in the school of thought that squeezing the grains is bad for your beer, this isn’t relevant for you. For the rest of us, being able to easily squeeze that out without making a mess was awesome. And it meant when I picked up the basket of spent grain, I didn’t have a trail of sugary malt drippings to clean up after. My first batch achieved 77% mash efficiency, the second one 80%, and the third 81%.
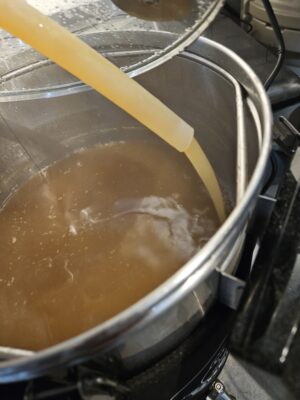
Recirc Flow Rate After CFC

I experimented a bit with the Bluetooth RAPT wireless thermometer, but I didn’t properly understand it at first. I thought the concept was I could choose whether to use the built-in sensor at the bottom of the unit or the Bluetooth thermometer, but that wasn’t the case. When you add the Bluetooth thermometer, it will then control to that temperature, but it still uses the built-in sensor as part of your heating in a way that lets you fine tune how the system as a whole responds to temperature steps in your mash. After tinkering with it a bit, I realized it has some really powerful potential, but requires a deeper dive and some experimentation to back it up. So I’ll save that for a future write-up.

Bluetooth RAPT Thermometer

My typical brew system uses a 10-gallon kettle with a pump recirculating wort through a 240V RIMS with a 3500W heating element. With that set-up, I get about 3.1 degrees/minute temperature rise when doing multi-step mash profiles. I was therefore expecting this 120V/1500W system to be slow but was shocked to find similar performance that averaged around 2.5 degrees/minute. I attributed this capability to the neoprene jacket. On the plus side, that means you can do multi-step mashes even on only a 120V outlet and not take all day. But leaving the lid on as you heat to a boil is still a must. With the large opening in its domed top, it still can allow any volatized compounds to flow out.
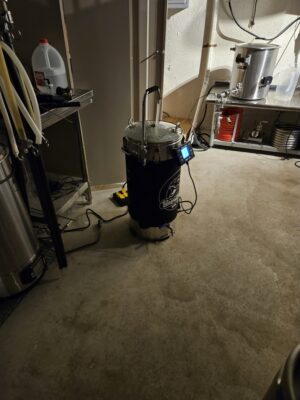
BrewZilla Mashing by Itself in Basement

I found the RAPT software a bit non-intuitive and as such, had a learning curve to it. Luckily, I did a trial run just with water in it so I could get a feel for where various controls were located and how it worked. I definitely recommend this before you try to do any multi-step mash program, or live monitoring of things from the App. Way less stressful when it’s just water! After I got the hang of it, I was able to monitor my mash well and know what was going on as it chugged away in the basement and I worked at my day job one floor above. One key thing I learned was the in-flight plotting of mash temperature isn’t a continuously updating graph, you have to hit refresh in the App to get the updated data that it is recording and holding. I assume this is for computing efficiency and Wi-Fi bandwidth load management. It was perfectly fine once I figured out how it worked.
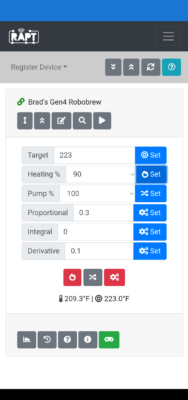
Screenshot of RAPT Controller Interface

The RAPT Controller allows you to program in multi-step mashes. But it’s a bit clunky as you figure it out. When you build the profile up using the App or Web interface, that profile sits on the RAPT server. My brain kept wanting to think I was programming the controller directly on the unit, but that’s not how it works. So after you program in the profile, you have to download it to the controller on your unit for it to work. You do all of this through the RAPT portal, and it only requires your BrewZilla to be powered on to let you download to it. This would be cool if you could just export something from Brewfather and then import it in RAPT, but you can’t. However, when you think about it, you probably don’t have that many different mash profiles, so it’s not really a big deal.
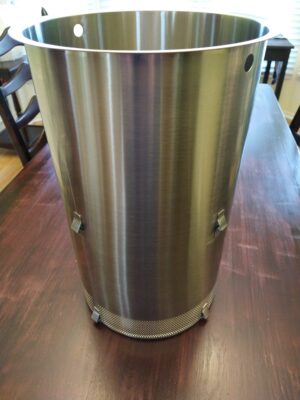
Malt Pipe
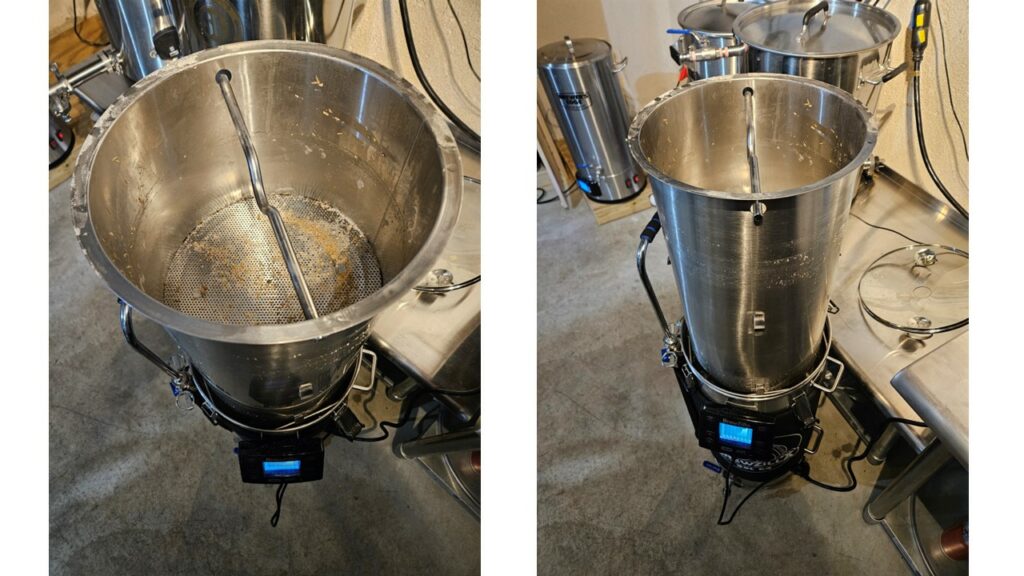
Draining Malt Pipe

One super cool feature of the mash profile programming is Kegland finally did what many have wanted these controllers to do for a long time. Rather than open loop programming a temperature and a time and guesstimating how long it will take for your mash to reach that temperature, you can tell it to not start counting down your mash step timer until it reaches the temperature. So if you want a 45-minute rest at 150F, you don’t have to think about how long it will take to get to 150F, it just heats up, and then starts the 45-minute timer when you hit 150F. I really liked this. You are also able to set up notifications at either the beginning or end of a particular mash step. I had it send an alert to my phone once it had reached mashout temperature and thus had 10 minutes left in my mash. That was cool, too. This isn’t quite as simple as it sounds, though. What I found was if the PID controller didn’t overshoot my target temp, I spent several minutes closing in on the target, but didn’t hit the temperature to start your countdown timer. So I’d end up with long mash times. I did some experiments with PID gains and the Bluetooth probe that got this working as I wanted, but I’ll detail that in a later write-up.
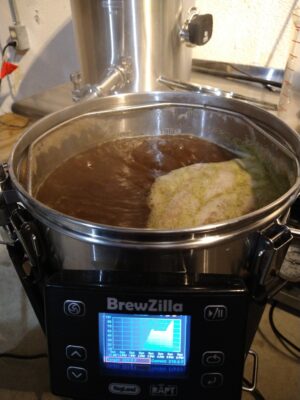
Rolling Boil at 75-percent Power

There wasn’t a boil timer interface, the controller was really just geared to controlling & monitoring mash temperatures. Not a big deal, as my Brewfather boil timer works great for this, so it isn’t a feature RAPT needs to spend time making. I could easily maintain a robust boil if I wanted to, but I like to keep it at just a good rolling circulation, so I dialed down the heating element power to 75% and maintained a constant churn of the wort and allowed boil-off of 0.4 – 0.5 gallons per hour. And the filter dish at the bottom of the kettle worked great to keep hop debris out of the pump, but not restrict flow. I had a thick cake of hop mush at the end when it was time to clean. Cleaning was fast and easy with parts light and easy to pull out, come apart, and rinse. And with the built-in pump, it was also easy to fill the unit up with cleaning solution at the end, circulate it through the unit & my Counter Flow Chiller to get everything clean.
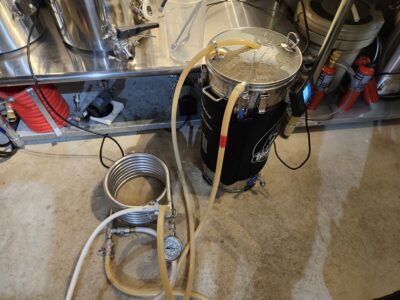
Chilling Wort Using CFC and Built-in Pump

For wort cooling at the end of the boil, I used the built-in pump and circulated wort through my CFC. With the camlock fitting on the BrewZilla, I could easily hook up my typical ½” silicone tubing hoses. I was unsure if the pump would be up to the job, but it handled it easily. I could get a good volume flow rate with the recirc valve wide open on the BrewZilla and could easily restrict it when I wanted a slower flow.

A couple of pro tips to wrap things up. First, is to make sure you add your grains to the malt pipe BEFORE you lower it into the vessel. This ensures the weight of the grain keeps the bottom plate in place, so that as you lower it down, the water doesn’t push the bottom plate out of position and create a sneak path for whole grains to get through. Second is to make sure you have the plug fully seated in your brew unit. This might sound stupidly logical, but with a 6-foot power cord, you might end up pushing the limits of where you want the unit to sit vs. where the outlet is you’re plugged into. I had the cable become partially unseated and I wasn’t aware- until I went to remove the cord at the end of a long session of PID controller experiments. If the cord isn’t fully seated, you get less electrical contact on the pins and less contact means higher heat as electricity flows through it. I ended up damaging the cord and the receptacle from overheating.
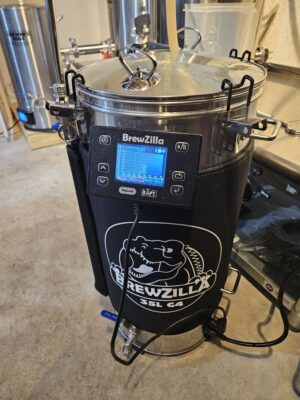
Conclusions

The BrewZilla Gen4 delivered. The controller worked great, and I absolutely loved the step mash ability to start the mash step timer using actual mash temperatures. The RAPT interface wasn’t quite as slick as I would’ve liked but overall worked flawlessly, with no glitches. And I was definitely surprised how well a mere 120V/1500W system could handle mash steps and boil intensity. The well-thought-out little pieces of the malt pipe and various recirculation designs showed to me a system that was engineered with actual brewing hours spent on the unit, which is great. I feel with all of this, I won’t have compromises on my brew day using an all-in-one system versus my bigger 2-vessel system. And that says a lot.

Special thanks to Kegland for providing the unit used for evaluation in this review.

Compare Prices, Review Continues Below:


This article contains affiliate links. We may make a small percentage if you use our links to make a purchase. You won’t pay more and you’ll be supporting Homebrew Finds and more content like this. Thank you for your support!


Data Plots

Related: Hands on Review: Robobrew (BrewZilla v1) All Grain Brewing System

More Photos
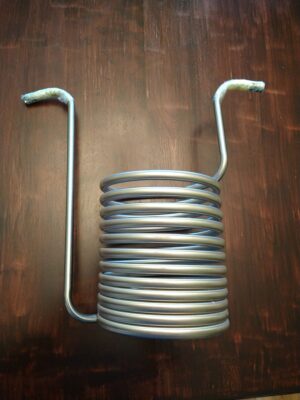
Included Immersion Chiller (Fittings Sold Separately)

Collecting Wort for Gravity Check

Control Panel and Cord
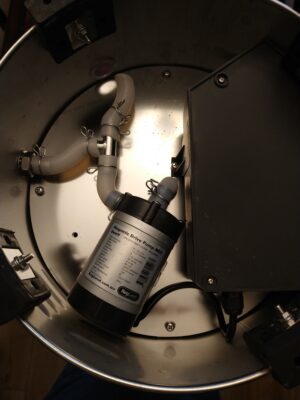
Easy Access Pump and Hose Routing Underneath
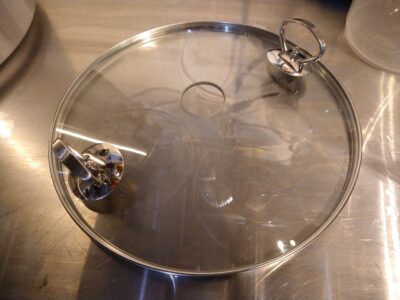
Glass Lid with Handles
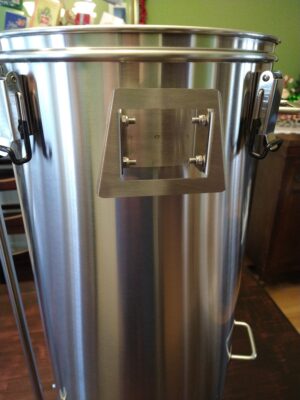
Hanger Plate for Control Panel
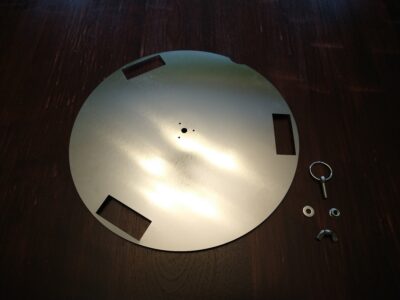
Heat Exchanger Dish
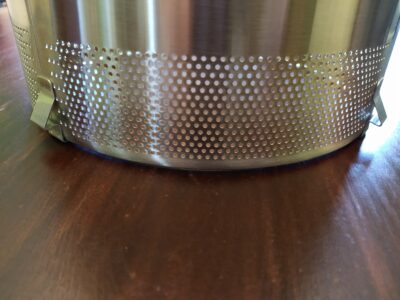
Holes in Malt Pipe to Help Flow
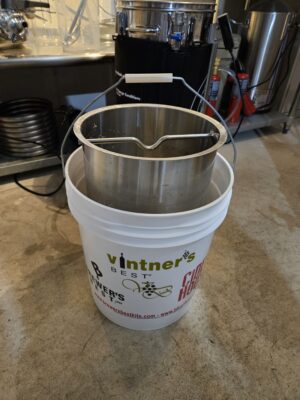
Malt Pipe Fits Perfectly in 8 Gallon Bucket
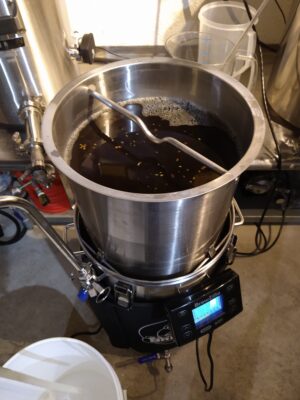
Malt Pipe Sitting at Halfway Point to Drain
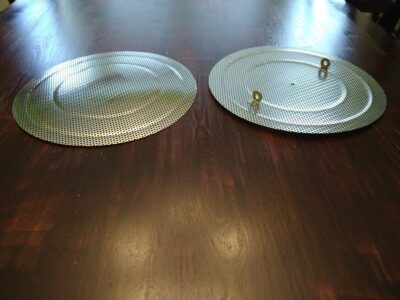
Malt Pipe Screen Bottom (Left) and Top (Right)
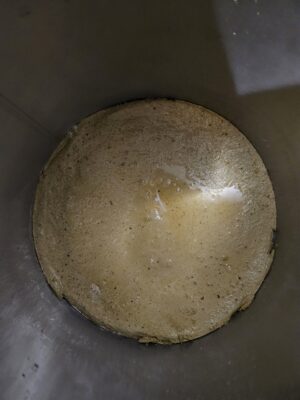
Hop Debris on Filter Screen At End

Neoprene Jacket
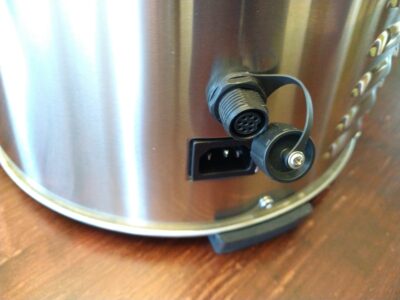
Power Connection for 110V Cord and Multi-pin Connector for Control Panel
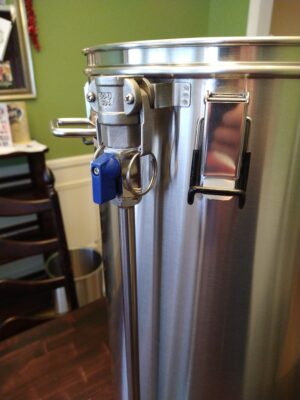
Recirc Pipe with Valve and Camlock Fitting
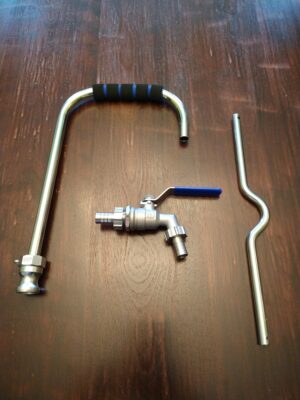
Recirc Pipe, Drain Spigot, and Malt Pipe Lift Handle
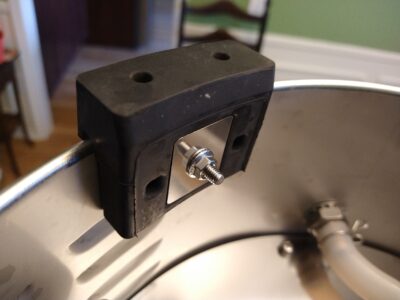
Robust Hard Rubber Feet

Convert RoboBrew to BrewZilla

If you’re looking to convert your Robobrew to a BrewZilla an upgrade board is available

robobrew upgrade board

Robobrew Gen 3.1.1 Upgrade Board Set 110 volt via William’s Brewing

More Kegland Gear Reviews!

More Homebrew Finds!

Recent Deals!

We are Homebrew Review HQ!  See Our 10 Most Recent Reviews

This post may contain affiliate links. We may make a commission when you use our links. This will never cost you extra. Thank you for supporting Homebrew Finds!

By Brad Probert.  Check out Brad’s website – beersnobby.com

Special Thanks to Keg King with the help of MoreBeer for providing the unit used for evaluation in this review

Price, promotions and availability can change quickly. Check the product page for current price, description and availability.

Make sure the components you use are compatible and rated for your intended application.  Contact manufacturer with questions about suitability or a specific application.  Always read and follow manufacturer directions. tag:lnksfxd review:bprobobrew rs:7 #tag:tpru tag:watch

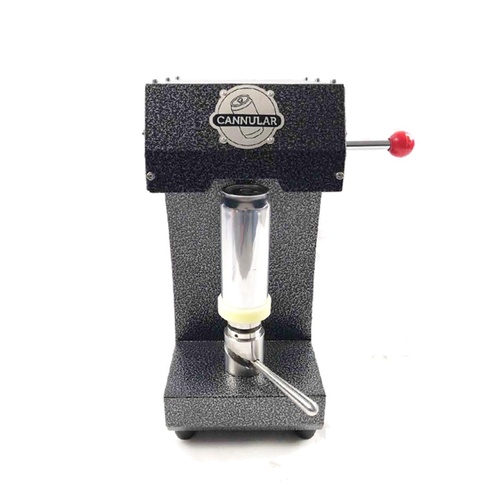
Hands on Review: Kegland Cannular Bench Top Can Seamer + An OUTSTANDING Deal on Cannular

This review is by Homebrew Finds Contributor Brad Probert.  Brad is an engineer, expert homebrewer and experienced reviewer.  Grab a link to Brad’s website at the end of this review.

Kegland Cannular Can Seamer

It’s been a long road for craft beer to be accepted in cans and not bottles. But it has been well established that cans are OK, too, and some take it even further to tout cans as a superior storage vessel for beer. I’ll avoid a full-blown comparison of the pros & cons of each, but I do feel it worth noting a couple of the selling points cans have. One is the claim that cans provide better storage with a more oxygen-proof seal than bottle caps, and 100% light blocking versus even brown colored glass. There is probably lots of debate on those two topics, but one benefit that is universally recognized is transportability. Cans are lighter and more compact, a whole lot less fragile, and you can take them to beaches and pools where glass containers are banned.

On the homebrew scale, until recently, the canners available have either been hand-crank monstrosities that look like an exhibit from a museum on the industrial revolution, or electrically driven units that look like steampunk movie props and cost a couple thousand dollars. Then in 2019, KegLand from Australia started exporting their Cannular can seamer that sells for $525 for the unit + power supply and is electrically powered. This changed the landscape significantly in the homebrew world, making canning much more within reach.


Rare, Limited Time Deal:

Cannular Bench Top Can Seamer CAN100

  • MoreBeer has Cannular on sale for $399.99. That’s a $150 savings.
  • For some pricing clarity, I’ve seen USED units sell for more than this.
  • This is a rare deal because the regular version of the Cannular is under a MAP agreement.  That means that it, generally speaking, cannot be discounted.  I don’t know if this is a one-off thing or if the reverse roller version will be an ongoing offering.
  • Get Free Shipping: Shipping is also free to most US addresses with a qualifying $59 order.  This includes bulky cases of new cans.
  • Learn More! Hands on Review: Kegland Cannular Bench Top Can Seamer – Homebrew Canner

Cannular Bench Top Can Seamer CAN100


Compare Prices, Review Continues Below:


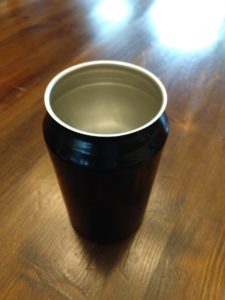
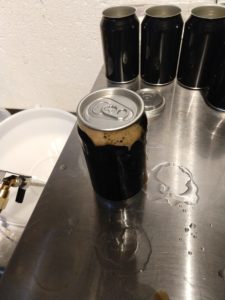
Empty CanLid on Foam

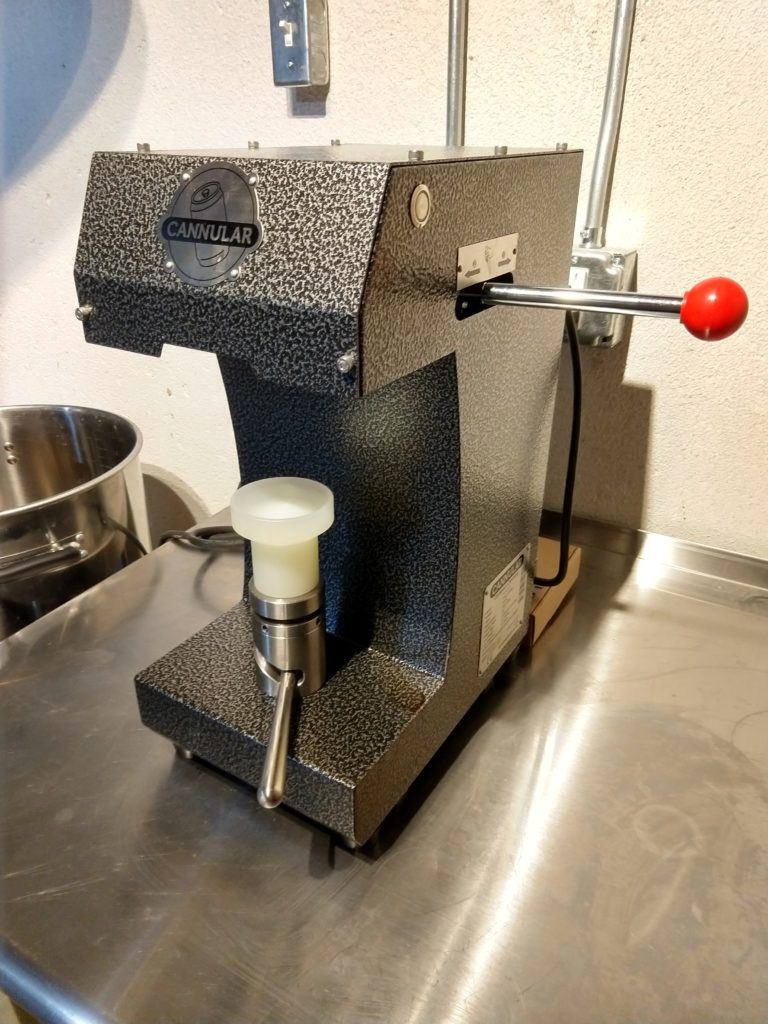
The Cannular operates with a combination of manual lever pulling and electric motor spinning. You start the process out with an empty aluminum can with no top on it. You sanitize the can, fill it with beer, and then take a sanitized lid and set it down on top of the can (ideally on foam, to ensure minimization of air in your canned product). From there, it gets placed on a small pedestal and a lever turn raises the can up into the machinery of the can seaming operation and locks it at that height. The push of a button gets the motor spinning and the can on its platform starts spinning around. Grabbing a different lever, you push back and hold it for a couple seconds, then pull it toward you for a couple seconds, and you’re done. Turn off the motor, lower your can back down on the pedestal, and you’ve canned one beer.

Continue reading

Adding Fruit to Your Homebrew Using Amoretti Fruit Purees and Artisan Natural Flavorings + Recipe for Wildberry Rye Ale!

This review is by Homebrew Finds Contributor Brad Probert.  Brad is an engineer, expert homebrewer and experienced reviewer.  Grab a link to Brad’s website at the end of this review.

Using Amoretti Fruit Puree in Homebrew

I’ll be upfront and admit I’m not a fruit beer brewer. I do enjoy a few commercially available fruit beers, but it’s more as an occasional change of pace than something I regularly seek out or buy on a regular basis. And it hasn’t been until recently that I’ve actually brewed a fruit beer myself. A friend wanted me to make a Peach Pale Ale, and that was my first foray into brewing one. I didn’t use Amoretti products on that beer, but it’s worth a brief explanation of my experience there, in order to contrast it to my experience with the Amoretti products.

Brewing the peach beer, I didn’t have the option of fresh, delicious tasting peaches to make a beer using fresh fruit. Conceptually, this seems like the ultimate solution, but this can limit your creativity to either time of year, or quality of product substantially. My first experimental batch was using a canned puree product. Thick and “sludgy”, this gave a great mouthfeel and cloudiness, but it had a distinct “dried fruit flavor” to me. It wasn’t as bright and popping as I had wanted.

For the second batch, I did a combination of the same canned puree, but also added some natural flavoring extract I got from my LHBS. That got me more brightness and pop in the flavor, but it also came with hints of alcohol-y flavors, and somewhat artificial aroma. In the end, through working a combination of this canned puree and flavor extract, I got a beer that turned out well, but I didn’t feel either was exactly the perfect tool for fruit beer.

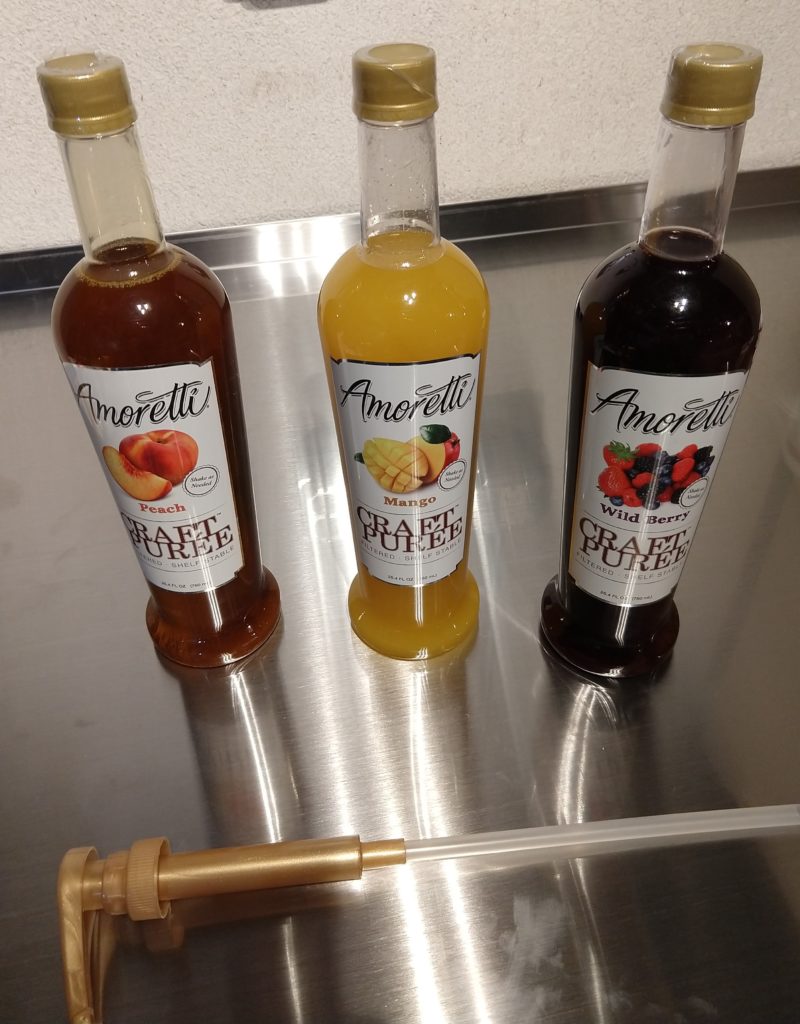
I saw Amoretti fruit purees and thought I’d give them a try to see if they provided a better option. Amoretti set me up with some bottles of their craft puree as well as their artisan natural flavor compounds. Both are advertised as additions to your beers, with concentration recommendations printed on the containers. The craft puree comes in a large bottle with a hand pump like a soap dispenser. Specifically designed for you to either add flavoring in bulk to your whole keg, or just a squirt into your glass before you fill it with beer. To make a sort of fruit-flavored-Radalizer.


Shop for Amoretti:

Continue reading

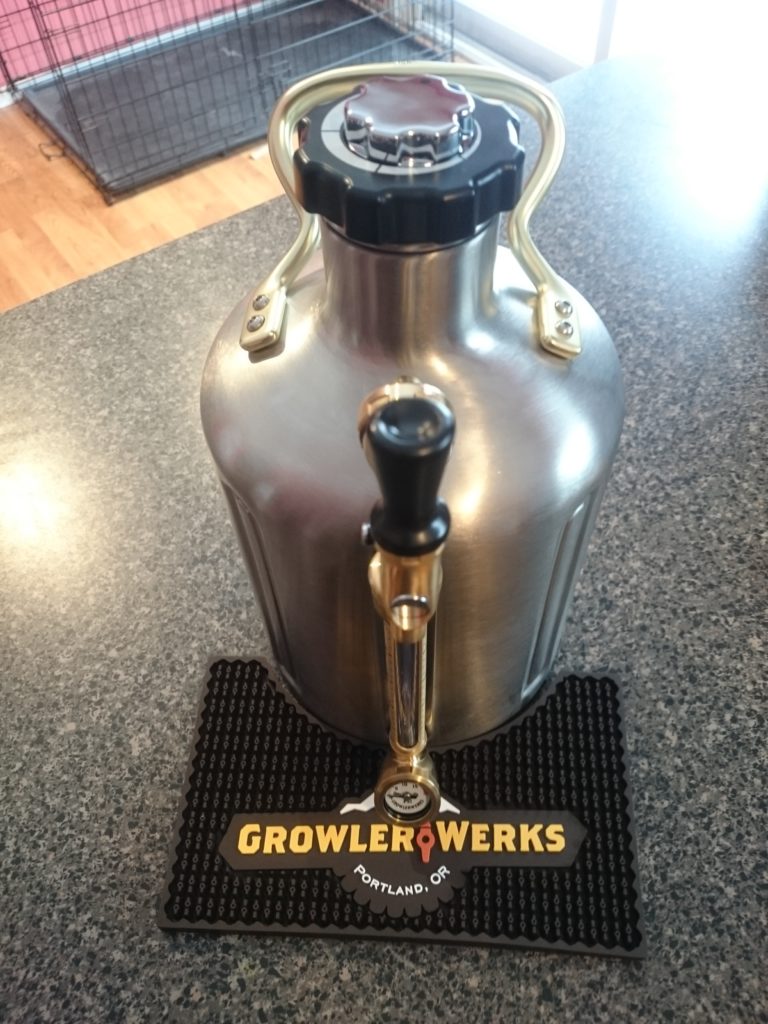
Hands on Review: GrowlerWerks uKeg 128 Pressurized Growler + Limited Time DEAL, Save 25%!

growlerwerks ukeg review

This review is by Homebrew Finds Contributor Brad Probert.  Brad is an engineer, expert homebrewer and experienced reviewer.  Grab a link to Brad’s website at the end of this review.

Hands on Review: GrowlerWerks uKeg 128

When I initially migrated from bottling to kegging, I was glad to be free of bottle wrangling. I didn’t have to keep boxes of empties, deal with cleaning/sanitizing, or the bottle-filling process. I also didn’t have to deal with bottling sugar calculators that had me making bottle bombs with cold-fermented lagers, or ales that sat mysteriously for weeks without developing carbonation of any intensity. But not long after leaving the bottles behind, I ran into the issue of how to share my beers. Of course I could invite people over, but there’s always that party at a friend’s house or a neighbor that really likes NEIPA but can’t make it to your tasting party.

To keep your homebrew mobile, you can go the way of glass growlers like the brewery taprooms do. It’s got the same appeal at home as it does at the brewery- cheap and easy. But it limits you on key aspects of freshness and ability to stay cold at a party. If you think about it, it’s akin to taking a 4-pack of your favorite beer you want to share, opening the bottles and pouring it into an empty pop bottle, and screwing the lid on it. Let’s face it, your homebrew is a labor of love, and it’s natural to want to show it off to friends & neighbors. So when you think a bit about the best way to present your baby, it’s not surprising homebrewers look for something beyond the glass growler with screw-on lid.

GrowlerWerks came onto the homebrewing scene when it completed its successful Kickstarter campaign in December of 2014. They initially launched with a high-tech upgrade to the standard glass growler with their 64 oz pressurized/insulated growler. The 128 oz version came along about a year later with all the same features, but with a full gallon capacity. That’s a great difference. The uKeg 64 holds four 16-oz pints. That works well for loaning out a sample to a friend. The uKeg 128 holds eight 16-oz pints. Now you’re talking something useful to bring to a party. The 64 almost felt like more trouble than it was worth to take to a party, unless you were bringing more than one brew. But with the 128 you don’t have to show up and then hide it until your craft brew friends find you and get to sample it before it’s gone.


Limited Time Deal… Save 25%!

perfectwerks growlerwerks saleFor a limited time GrowlerWerks is discounting everything sitewide by 25% as part of a short Spring Sale. No coupon code required. Check site for current availability.

25% Off at GrowlerWerks


Check Current Pricing and Availability:

Continue reading

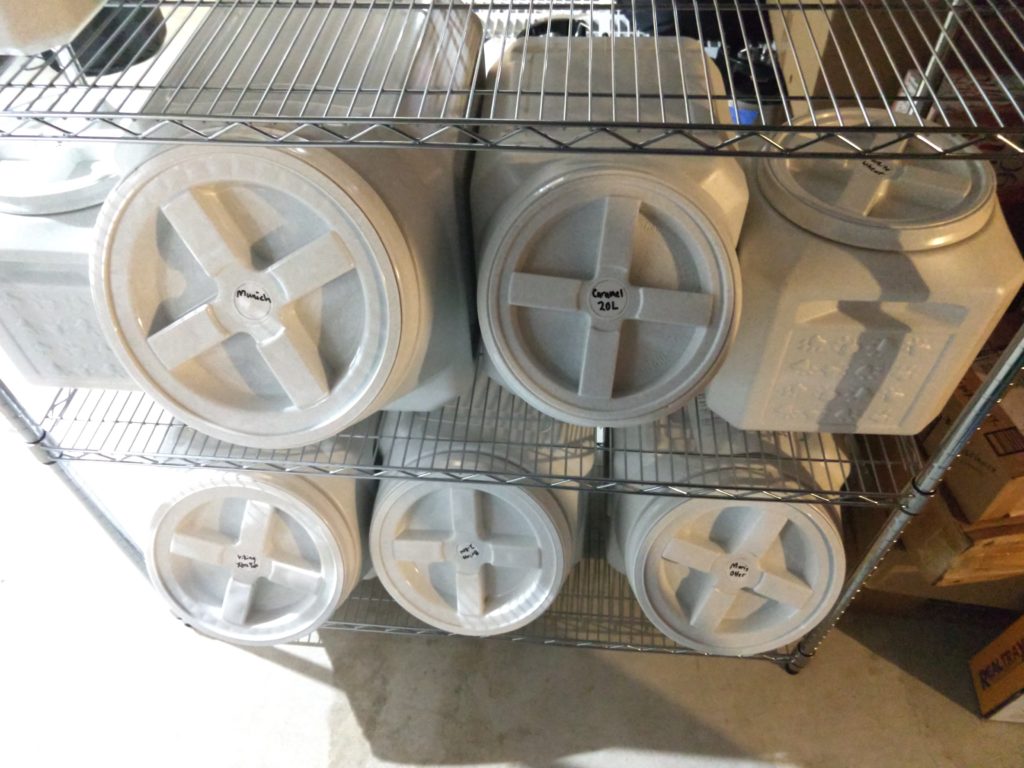
Hands on Review: Vittles Vault Stackable Storage Bins for Homebrew Grain Storage + Limited Time DEAL on 25 and 50 lb Sizes

This review is by Homebrew Finds Contributor Brad Probert.  Brad is an engineer, expert homebrewer and experienced reviewer.  Grab a link to Brad’s website at the end of this review.

Vittles Vault Storage Bins

Gamma2 as a company is 100% dedicated to their mission of designing and providing pet food containers to animal owners (technically they also care about your dog getting out of the pool, as they make a doggy pool exit ramp). But, that doesn’t mean these “pet food containers” can’t be co-opted for homebrewing. The same characteristics that make them ideal for pet food, also make them ideal for malt storage.

Vittles Vault 60-lb Container

I’ll go through a few storage basics for malt. First, you want to store it uncrushed, so that the husk helps keep the good stuff inside protected from the environment. Cracked grain kernels are more enticing to critters, and opens up the endosperm to fast staling. Beyond that, grain wants to be kept at cooler room temperatures (40 – 60F), dry, away from light, and in an airtight environment. Maltsters range in the max recommended storage time, with most in the 12-18 months range, and some up to 24 months. When you buy grains by the 55-lb sack, most will put a “best by” date on the label, since you don’t know how old it is before you get it. Although you can save money by buying grains in bulk, you need to make sure you have the right throughput to use it up before it stales.

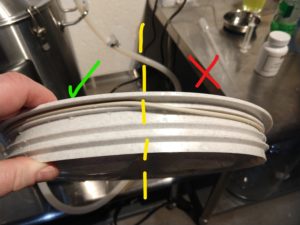
Lid o-ring Out of Groove on Right Side

Gamma2 has a number of different types and sizes of storage containers. All are designed to be airtight, so they keep air from getting in and staling your grains when you’re not scooping it. (Which of course, the same thing can’t be said for that 55-lb sack of grain you’ve got in the corner, with a stretch of duct tape over the hole you cut into it…) The lid design is how they achieve this air-tightness. There’s a compliant o-ring that’s held in a groove on the lid which gets compressed down onto a chamfered face on the body of the container to make the seal. As the threaded lid gets screwed down, the o-ring will get squished to block off the air-leak path past the lid.


Limited Time Deal!

As of this posting, the 25 lb size of is on sale for $28.95  and the 50 lb size is on sale for $36.99.

These are affiliate links. Note that multiple variations of these products may be available, as such a different version may appear at these links

Prices and availability can change quickly Check product page for current info – More About Prices


Check Pricing and Available Sizes & Configurations, Review Continues Below

These are affiliate links. Note that multiple variations of these products may be available, as such a different version may appear at these links

Also Mentioned in This Review:

Continue reading

Hands on Review: Kegland Ball Lock Cleaning Kit and Party Pump + Use it to make a PET Ball Lock Keg!

Kegland Draft Line Cleaning Pump

Kegland’s Draft Line Cleaning Pump is a single hand operated pump that attaches to a tee. The tee takes a hand pump and ball lock carbonation cap which connects to a dip tube. This hardware has some alternate uses that this review will also explore.

In true Kegland style this setup is innovative, packed with some surprising features and well priced. Here’s a hands on look.

This is currently available via via William’s Brewing and MoreBeer – the offerings are slightly different. See the breakdown of different options and separate components toward the end of this review.

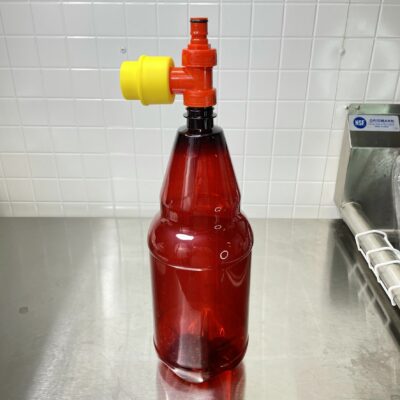
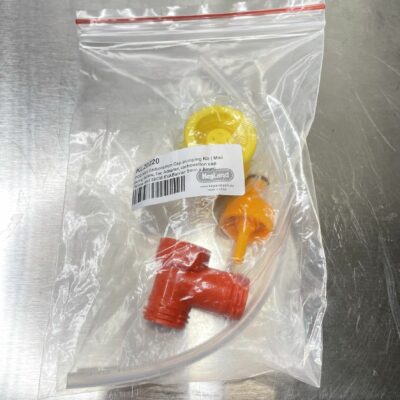
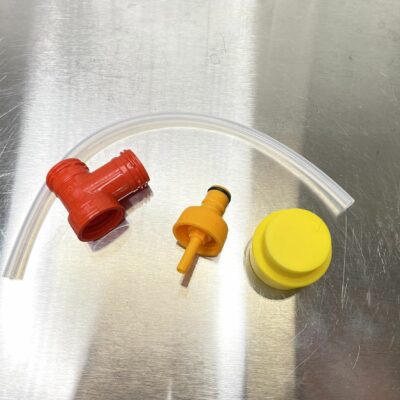
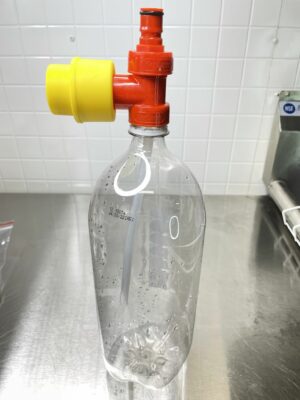
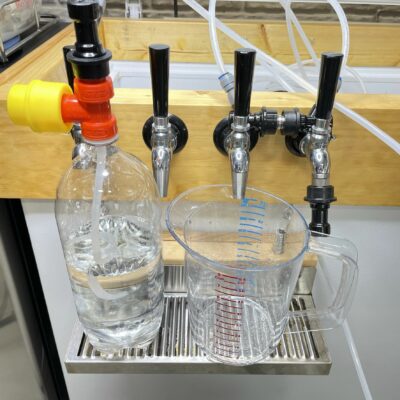
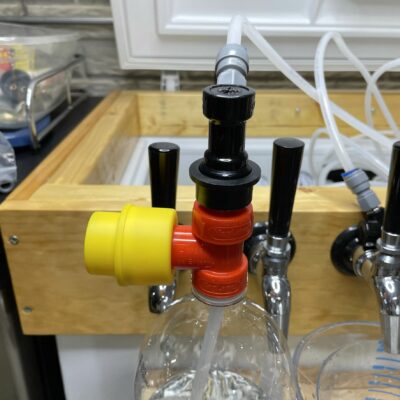
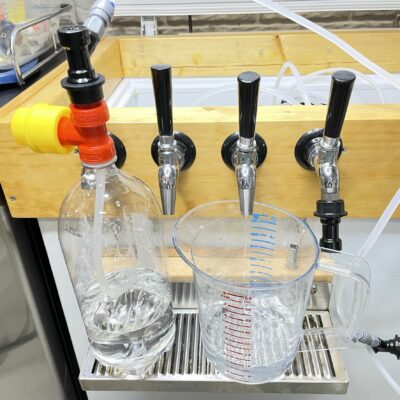
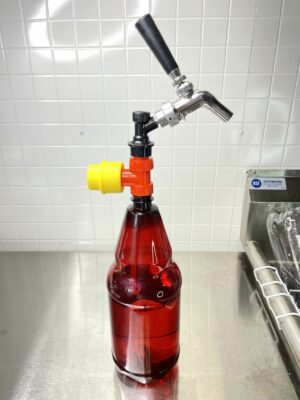
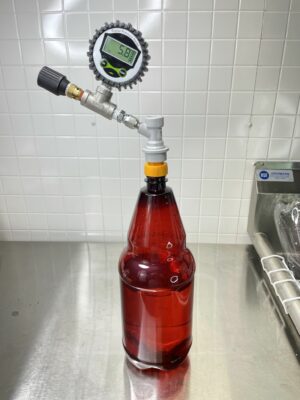
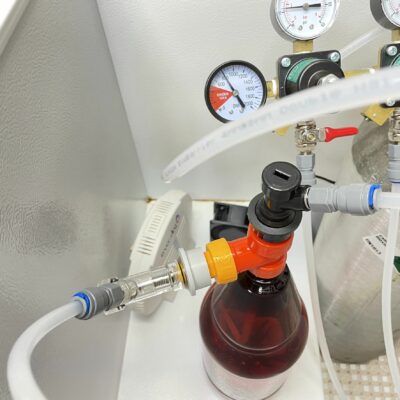
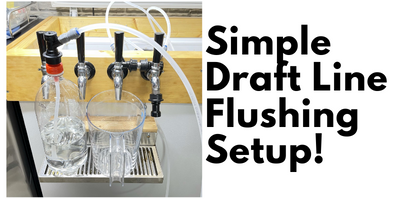
Bag o’ stuffThis is what you get with the basic pump. Tee, carbonation cap, pump and dip tube.I installed this on a 2L bottle. You’ll notice the carbonation cap has changed colors. I used one I already had (Kegland brand, just a different color), because I already has a dip tube trimmed to size and installed from a recent update to My Simple Draft Line Flushing Build.I decided to try and clean two draft lines with this pump to really test it. Here’s the key piece of hardware to clean two ball lock lines at the same time. It’s a Ball Lock Jumper from Valuebrew. There are only a couple similar offerings out there, to my knowledge. This one is unique because it uses their custom color, food grade post o-rings AND… it works with both liquid and ball lock jumpers.Here it is installed. This is connecting two 10′ EVABarrier tubing runs.Complete test setup

The plumbing for my test is as follows

  • Kegland Ball Lock Cleaning Pump (on left) >
  • Ball Lock Line Jumper – 2 ball lock QDs with a short length of EVABarrier tubing >
  • Intertap ball lock spout on right faucet >
  • 10′ EVABarrier tubing with ball lock QD >
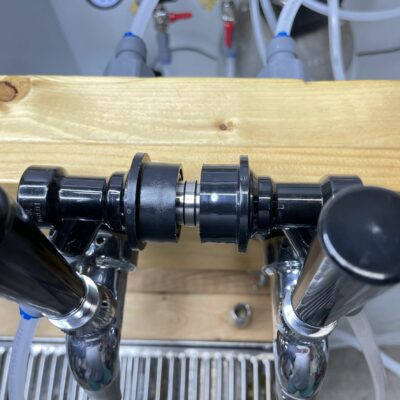
  • Ball Lock Jumper Fitting >
  • 10′ EVABarrier tubing with ball lock QD >
  • Intertap faucet (second from right) >
  • 2 Quart collection pitcher

Ball Lock QD Installed on the pump assemblyIt’s a little difficult to see but… it works. With some pumping, I got a slow steady stream of liquid. Keep in mind this is cleaning two 10′ lines at the same time.William’s Brewing has a package that gets you the pump + a large 2.5 liter growler and BLC. They also sell the standalone pump kit.  I actually purchased everything separately because I wanted a full case of these growlers.

Use it for.. Portable Serving!

Add on a ball lock faucet and you’ve got a portable serving keg without paying for expensive CO2 cartridges.  Before you email me/comment/etc… yes this will cause oxidation, I would not suggest this as a long term solution. Only for the occasion that you and your friends will be able to drink an entire growler in an evening.  Oxidation won’t have enough time to become a factor. Use another solution for longer term applications.

Use it for… Mini Pressure Fermenter

Remove the tee, add a 2.5L PET Bottle and a Spunding Valve to convert this into a pressure capable mini fermenter. You could potentially do 2 liter batches. Not ideal, but a great way to play around with pressure fermentation at an unbeatable price. See: Fermenting Under Pressure for more on the topic.

Convert it to a Mini-Keg For Your Kegerator!

Replace the pump with another carbonation cap, use a 2.5 liter bottle and… you have a 2.5 liter keg you can use in your kegerator!

Conclusions

This collection of economical hardware is extremely versatile. As far as a cleaning pump goes, it works well, but, I prefer my own draft line flushing build. That’s very similar but replaces pumping with a quick shot of CO2. That’s less work. Having said that, you get a lot of equipment and capability with this setup. If you’re looking to build my flushing assembly, I suggest buying the Kegland cleaning setup and another carbonation cap. That gives you a ton of flexibility.  Line cleaner, mini fermenter, party pump and ball lock mini keg.  Overall, this is another win for Kegland, innovative, packed with features and well priced.

via William’s Brewing

via MoreBeer

via Valuebrew

Related Resources!

Build a Simple Draft Line Flushing Setup

Keg Deals!

keg deals

Build a Recirculating Draft Line Cleaner

Rebuild Your Kegs!

More Kegland Gear Reviews!

More Homebrew Finds!

This post may contain affiliate links. We may make a commission when you use our links. This will never cost you extra. Thank you for supporting Homebrew Finds!

Price, promotions and availability can change quickly. Check the product page for current price, description and availability.

Make sure the components you use are compatible and rated for your intended application.  Contact manufacturer with questions about suitability or a specific application.  Always read and follow manufacturer directions. tag:lnksfxd review:kldlcp tag:tpru

Hands on Review: BrewZilla Gen 4 + OUTSTANDING Deal on 17 Gallon BrewZilla!

This review is by Homebrew Finds Contributor Brad Probert.  Brad is an engineer, expert homebrewer and experienced reviewer.  Grab a link to Brad’s website at the end of this review.


Limited Time DEAL – $300 off 17 Gallon System!

For a limited time MoreBeer has the 17 gallon BrewZilla marked down a whopping $300 to just $349.99. Shipping is also free to many US addresses. This is a great deal!

Gen 4 BrewZilla | All Grain Brewing System | Integrated Pump | Includes Wort Chiller | Wifi | Bluetooth| Rapt | 65L | 17.1G | 220V AG502.US


Hands on Review BrewZilla Gen4

I’ve brewed on several different all-in-one units. Like any brew system, they each have their own strengths and weaknesses. I did a hands-on review of the Robobrew when it first came out in late 2016. It has since changed its name to BrewZilla and is on the 4th generation of the brew unit. As you’d expect with repeated generations, they’ve been able to focus on fixing deficiencies in their previous models and also introduce new features.

The basic premise of an all-in-one brewing system is that your mash and boil kettle are in the

same vessel. So just like Brew In A Bag, after mashing, you pull the grains out and the wort stays behind to be boiled. They use electricity for heat, so they can be used outdoors where you can reach power or indoors where you have a venting system that can take care of all the steam you make during your boil.

BrewZilla Without Jacket

Stamped Volume Markings

Here are some basic stats on the Gen4 BrewZilla. It’s available in a 35-Liter form (for 5-6 gallon batches) with either a 110V setup, or 220V. There is also a larger 65-Liter that is only 220V (targeted to 10-12 gallon batches). The 35L unit holds 9.25 gallons, the mash basket can hold up to 23.5 lbs. of grain, and its electric heating elements can output up to 1500W of power (110V system) or 2400W of power (220V system). The 65L unit holds 17.1 gallons, the mash basket holds 41.5 lbs. of grain, and 3500W of heating power. All the Gen4 units have a pump bolted into the base. The pump can be used not only for wort recirculation during the mash, but also to pump beer through your wort chiller apparatus (should you choose to not use the immersion chiller coil included with the BrewZilla). The pump is more modular and accessible than previous Gen models. To protect the pump from clogging with hop debris during the boil or whirlpool, there is a filter screen (a perforated stainless disc that sits at the bottom of the unit) that sits at the bottom of the kettle. The small magnetic drive pump has a pump head rating of 1.5 – 2.1 m (4.9 – 6.9 ft) and a max flow rate of 11-12 L/min (2.9 – 3.2 gal/min).

Control Panel Notification During Mash Profile

One of the key upgraded features of the Gen4 BrewZilla is the controller. RAPT Is Kegland’s line of wireless connected brewing devices. The BrewZilla now has a RAPT controller so it adds a lot of features that can be monitored and controlled over Wi-Fi. This includes basic things like monitoring temperature from your laptop/cell phone, but also allows you to program complex mash programs online and then download to your BrewZilla. You can also adjust control parameters on the fly such as pump output duty cycle and heater output level. If you get the optional Bluetooth thermometer, you can stick the temperature probe into the middle of your grain bed, and then have the controller use that as its control signal in combination with the built-in temperature sensor that sits on the floor of the unit.

Bluetooth Temp Probe in Middle of Mash

Although All-in-One units are essentially BIAB, they use a stainless steel basket with holes in the bottom of it instead of a bag, and call it a “malt pipe”. These provide functional improvements over a nylon bag. The obvious one is they are way easier to clean. But they also allow you to ensure you get full flow through your grain bed by having holes only on the bottom. This means recirculating wort has no sneak paths out the side. The other benefit is malt pipes have simple brackets/feet welded onto the outside that allow you to lift your wet grains up and prop the malt pipe on the brew rig to drain or sparge. The BrewZilla has 2 sets of feet for this. One set is halfway up, allowing you to do the deadlift of grain & wort halfway and then let the liquid level drain down. Then when you lift it the full height, it’s not as heavy. It’s simple, but makes the process much better.

Welded-on Carry Handle (top) and Tip Handle (bottom)

There is a cool feature in the BrewZilla which normally only comes on much higher end systems, and that’s the central drain. With a concave bottom with a drain at the lowest point in the center, you don’t have to leave wort behind or goof around with tilting it to get the last drops of wort out at the end. This also enables the malt pipe to extend down lower and thus you can hold more grain (30% more than their Gen3). If you compared to other All-in-one units in the “5 gallon batch” size range, the 23.5 lbs. grain capacity is 30 – 50% more. This of course only matters if you’re trying to make high gravity brews. The drain in the floor is plumbed to the inlet of the pump below, and then you can direct pump output either to an external spigot for fast/easy transfer of wort out after brewing, or up the recirculation pipe for wort to get directed down on top of the mash.

Polished Bottom with Center Drain and Built-in Temp Sensor to Side

Bottom Side of Pump Filter Plate

To help with mash efficiency and mash temperature uniformity, they offer a Heat Exchanger Dish, which is just a stainless dish/plate that sits below your malt pipe and above the central drain. Without this dish in place, the flow of recirculating wort tends to go through the center of your grain bed, and straight out the drain. With the dish there, it directs the flow around the full circumference before it gets to the drain, which helps ensure a broader portion of the grist sees the flow.


Compare Prices, Review Continues Below:


This article contains affiliate links. We may make a small percentage if you use our links to make a purchase. You won’t pay more and you’ll be supporting Homebrew Finds and more content like this. Thank you for your support!


Another helpful option is the neoprene insulation jacket. This helps keep mash temperatures more consistent by cutting down heat loss through the walls of the unit. The jacket on BrewZilla also smartly covers the recirculation pipe to minimize heat loss during wort recirculation. The overall mash temperature response with a multi-step mash was impressive, with more detail provided in the Hands On section, below.

Hands on Trials

First off, all of the different parts were well made with good quality manufacturing. As I’ve found with all Kegland gear, it’s of good quality- but nothing flashy. The one exception was probably the smooth and highly polished dished bottom. That was flashy. And being a previous owner of a 1st Gen Robobrew, I was very happy to see the camlock fitting on the recirculation pipe and see that Kegland was obviously tuned in to customer feedback on their products.

Mashing-in Sequence

Sparging

I brewed three different batches before writing this review. Two of them followed a simple single temperature mash, and the third one I exercised the RAPT Controller more with a multi-step mash profile, with lots of monitoring via my smartphone. I was impressed with the mash efficiency I achieved. There can be a misconception that BIAB = lower mash efficiency, but really, it’s “full volume mash = lower efficiency”. I had previously done experiments with an Anvil Foundry that showed a sparge step can get you mash efficiencies > 80%. Therefore, my batches in the BrewZilla were all done with a sparge step. I rested the malt pipe at the top while pouring heated sparge water through it with a 1-gallon pitcher. The perforated plate sitting on top of the grain bed made it super simple to sparge like this and get a good water distribution pattern. The perforated plate also allowed me to push down very easily and squeeze out remaining liquid in the grains. If you’re in the school of thought that squeezing the grains is bad for your beer, this isn’t relevant for you. For the rest of us, being able to easily squeeze that out without making a mess was awesome. And it meant when I picked up the basket of spent grain, I didn’t have a trail of sugary malt drippings to clean up after. My first batch achieved 77% mash efficiency, the second one 80%, and the third 81%.

Recirc Flow Rate After CFC

I experimented a bit with the Bluetooth RAPT wireless thermometer, but I didn’t properly understand it at first. I thought the concept was I could choose whether to use the built-in sensor at the bottom of the unit or the Bluetooth thermometer, but that wasn’t the case. When you add the Bluetooth thermometer, it will then control to that temperature, but it still uses the built-in sensor as part of your heating in a way that lets you fine tune how the system as a whole responds to temperature steps in your mash. After tinkering with it a bit, I realized it has some really powerful potential, but requires a deeper dive and some experimentation to back it up. So I’ll save that for a future write-up.

Bluetooth RAPT Thermometer

My typical brew system uses a 10-gallon kettle with a pump recirculating wort through a 240V RIMS with a 3500W heating element. With that set-up, I get about 3.1 degrees/minute temperature rise when doing multi-step mash profiles. I was therefore expecting this 120V/1500W system to be slow but was shocked to find similar performance that averaged around 2.5 degrees/minute. I attributed this capability to the neoprene jacket. On the plus side, that means you can do multi-step mashes even on only a 120V outlet and not take all day. But leaving the lid on as you heat to a boil is still a must. With the large opening in its domed top, it still can allow any volatized compounds to flow out.

BrewZilla Mashing by Itself in Basement

I found the RAPT software a bit non-intuitive and as such, had a learning curve to it. Luckily, I did a trial run just with water in it so I could get a feel for where various controls were located and how it worked. I definitely recommend this before you try to do any multi-step mash program, or live monitoring of things from the App. Way less stressful when it’s just water! After I got the hang of it, I was able to monitor my mash well and know what was going on as it chugged away in the basement and I worked at my day job one floor above. One key thing I learned was the in-flight plotting of mash temperature isn’t a continuously updating graph, you have to hit refresh in the App to get the updated data that it is recording and holding. I assume this is for computing efficiency and Wi-Fi bandwidth load management. It was perfectly fine once I figured out how it worked.

Screenshot of RAPT Controller Interface

The RAPT Controller allows you to program in multi-step mashes. But it’s a bit clunky as you figure it out. When you build the profile up using the App or Web interface, that profile sits on the RAPT server. My brain kept wanting to think I was programming the controller directly on the unit, but that’s not how it works. So after you program in the profile, you have to download it to the controller on your unit for it to work. You do all of this through the RAPT portal, and it only requires your BrewZilla to be powered on to let you download to it. This would be cool if you could just export something from Brewfather and then import it in RAPT, but you can’t. However, when you think about it, you probably don’t have that many different mash profiles, so it’s not really a big deal.

Malt Pipe

Draining Malt Pipe

One super cool feature of the mash profile programming is Kegland finally did what many have wanted these controllers to do for a long time. Rather than open loop programming a temperature and a time and guesstimating how long it will take for your mash to reach that temperature, you can tell it to not start counting down your mash step timer until it reaches the temperature. So if you want a 45-minute rest at 150F, you don’t have to think about how long it will take to get to 150F, it just heats up, and then starts the 45-minute timer when you hit 150F. I really liked this. You are also able to set up notifications at either the beginning or end of a particular mash step. I had it send an alert to my phone once it had reached mashout temperature and thus had 10 minutes left in my mash. That was cool, too. This isn’t quite as simple as it sounds, though. What I found was if the PID controller didn’t overshoot my target temp, I spent several minutes closing in on the target, but didn’t hit the temperature to start your countdown timer. So I’d end up with long mash times. I did some experiments with PID gains and the Bluetooth probe that got this working as I wanted, but I’ll detail that in a later write-up.

Rolling Boil at 75-percent Power

There wasn’t a boil timer interface, the controller was really just geared to controlling & monitoring mash temperatures. Not a big deal, as my Brewfather boil timer works great for this, so it isn’t a feature RAPT needs to spend time making. I could easily maintain a robust boil if I wanted to, but I like to keep it at just a good rolling circulation, so I dialed down the heating element power to 75% and maintained a constant churn of the wort and allowed boil-off of 0.4 – 0.5 gallons per hour. And the filter dish at the bottom of the kettle worked great to keep hop debris out of the pump, but not restrict flow. I had a thick cake of hop mush at the end when it was time to clean. Cleaning was fast and easy with parts light and easy to pull out, come apart, and rinse. And with the built-in pump, it was also easy to fill the unit up with cleaning solution at the end, circulate it through the unit & my Counter Flow Chiller to get everything clean.

Chilling Wort Using CFC and Built-in Pump

For wort cooling at the end of the boil, I used the built-in pump and circulated wort through my CFC. With the camlock fitting on the BrewZilla, I could easily hook up my typical ½” silicone tubing hoses. I was unsure if the pump would be up to the job, but it handled it easily. I could get a good volume flow rate with the recirc valve wide open on the BrewZilla and could easily restrict it when I wanted a slower flow.

A couple of pro tips to wrap things up. First, is to make sure you add your grains to the malt pipe BEFORE you lower it into the vessel. This ensures the weight of the grain keeps the bottom plate in place, so that as you lower it down, the water doesn’t push the bottom plate out of position and create a sneak path for whole grains to get through. Second is to make sure you have the plug fully seated in your brew unit. This might sound stupidly logical, but with a 6-foot power cord, you might end up pushing the limits of where you want the unit to sit vs. where the outlet is you’re plugged into. I had the cable become partially unseated and I wasn’t aware- until I went to remove the cord at the end of a long session of PID controller experiments. If the cord isn’t fully seated, you get less electrical contact on the pins and less contact means higher heat as electricity flows through it. I ended up damaging the cord and the receptacle from overheating.

Conclusions

The BrewZilla Gen4 delivered. The controller worked great, and I absolutely loved the step mash ability to start the mash step timer using actual mash temperatures. The RAPT interface wasn’t quite as slick as I would’ve liked but overall worked flawlessly, with no glitches. And I was definitely surprised how well a mere 120V/1500W system could handle mash steps and boil intensity. The well-thought-out little pieces of the malt pipe and various recirculation designs showed to me a system that was engineered with actual brewing hours spent on the unit, which is great. I feel with all of this, I won’t have compromises on my brew day using an all-in-one system versus my bigger 2-vessel system. And that says a lot.

Special thanks to Kegland for providing the unit used for evaluation in this review.

Compare Prices, Review Continues Below:


This article contains affiliate links. We may make a small percentage if you use our links to make a purchase. You won’t pay more and you’ll be supporting Homebrew Finds and more content like this. Thank you for your support!


Data Plots

Related: Hands on Review: Robobrew (BrewZilla v1) All Grain Brewing System

More Photos

Included Immersion Chiller (Fittings Sold Separately)

Collecting Wort for Gravity Check

Control Panel and Cord

Easy Access Pump and Hose Routing Underneath

Glass Lid with Handles

Hanger Plate for Control Panel

Heat Exchanger Dish

Holes in Malt Pipe to Help Flow

Malt Pipe Fits Perfectly in 8 Gallon Bucket

Malt Pipe Sitting at Halfway Point to Drain

Malt Pipe Screen Bottom (Left) and Top (Right)

Hop Debris on Filter Screen At End

Neoprene Jacket

Power Connection for 110V Cord and Multi-pin Connector for Control Panel

Recirc Pipe with Valve and Camlock Fitting

Recirc Pipe, Drain Spigot, and Malt Pipe Lift Handle

Robust Hard Rubber Feet

Convert RoboBrew to BrewZilla

If you’re looking to convert your Robobrew to a BrewZilla an upgrade board is available

robobrew upgrade board

Robobrew Gen 3.1.1 Upgrade Board Set 110 volt via William’s Brewing

More Kegland Gear Reviews!

More Homebrew Finds!

Recent Deals!

We are Homebrew Review HQ!  See Our 10 Most Recent Reviews

This post may contain affiliate links. We may make a commission when you use our links. This will never cost you extra. Thank you for supporting Homebrew Finds!

By Brad Probert.  Check out Brad’s website – beersnobby.com

Special Thanks to Keg King with the help of MoreBeer for providing the unit used for evaluation in this review

Price, promotions and availability can change quickly. Check the product page for current price, description and availability.

Make sure the components you use are compatible and rated for your intended application.  Contact manufacturer with questions about suitability or a specific application.  Always read and follow manufacturer directions. tag:lnksfxd review:bprobobrew rs:7 #tag:tpru tag:watch
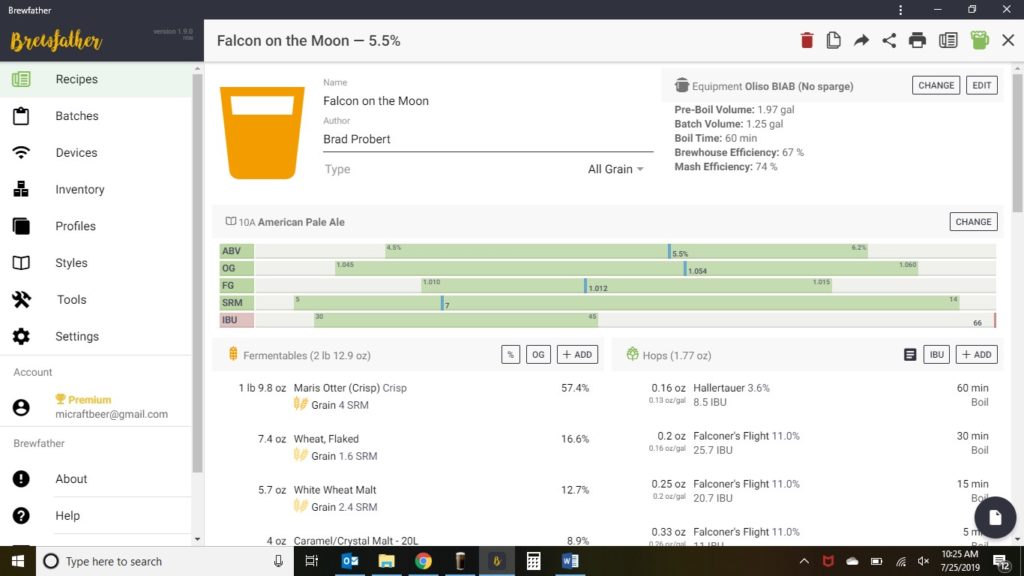
Hands on Review: Brewfather App! – Recipe Formulation, Calculators & Brew Day Tools

This review is by Homebrew Finds Contributor Brad Probert.  Brad is an engineer, expert homebrewer and experienced reviewer.  Grab a link to Brad’s website at the end of this review.

Brewfather App

Depending on your brewing personality, you might take notes on paper, do no recipe calculations at all, or use brewing software. I started using BeerSmith when I moved to all-grain brewing, since there were more variables to control when making a recipe and more process steps to keep track of. I’ve been using BeerSmith 2 for the past 5 years, and that’s established my baseline expectations of brewing software. That’s the perspective used when I evaluated the Brewfather software.


Give it a Try!

Brewfather offers a free full feature trial.  After the trial period, you’ll still have access via a limited, non-expiring account

Our 10 Most Recent Reviews | Great Deals – Our Last 50 Finds


Continue reading

Hands on Review: Brew Floors Epoxy Flooring

This review is by Homebrew Finds Contributor Brad Probert.  Brad is an engineer, expert homebrewer and experienced reviewer.  Grab a link to Brad’s website at the end of this review.

Brew Floors Epoxy Flooring

As kids, we build forts out of blankets, pillows, boxes, etc. And the really lucky kids have tree forts in their yards. In the homebrewing world, the tree forts are the dedicated brewing areas in basements, garages, or sheds. And like a good tree fort, you want to customize it to your taste. A good portion of the brew area customization revolves around the practical aspect of brewing beer- good closet or shelf space, custom hooks and gizmos to hang your lengths of tubing to dry, and a source of good brewing tunes. What’s standard in most of the different brewing spaces is poured concrete flooring. Industrial and efficient, but it lacks a certain pizzazz.


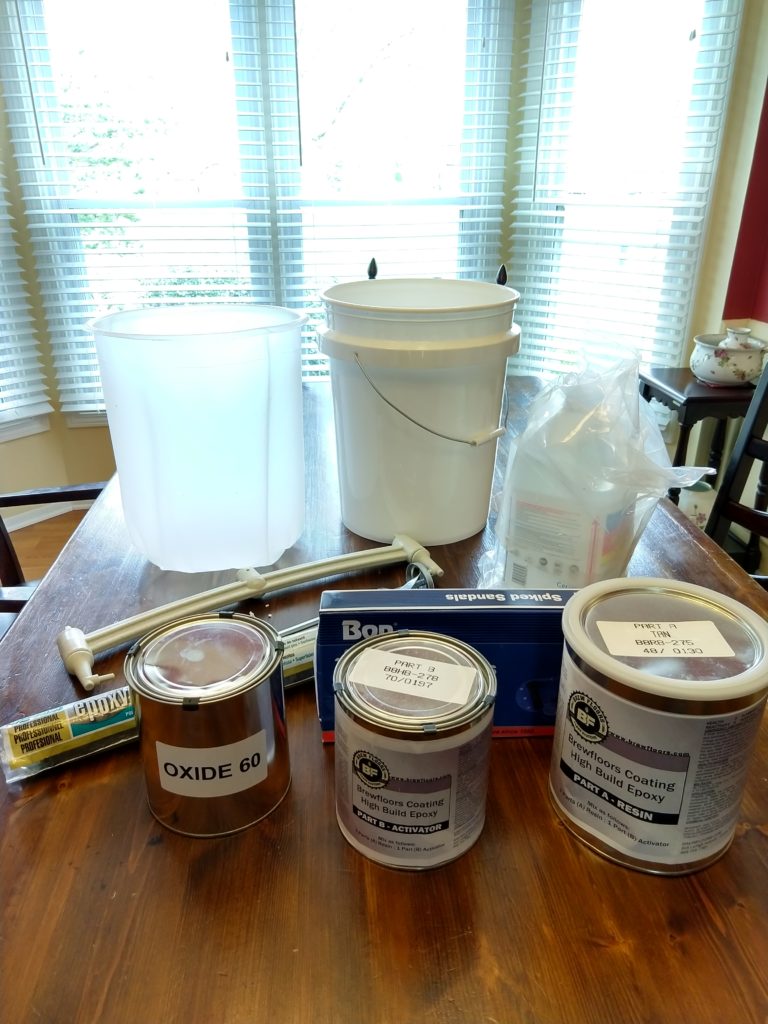
Enter Brew Floors. They sell kits for the DIY crowd- whether you’re a professional brewery or a home brewery. Heck, I suppose you probably don’t even have to use it in <gasp> a brewery! It’s an epoxy resin system, meaning it comes as a 2-part liquid that once combined makes a new compound that hardens into a durable, shiny, waterproof layer. They have various level kits from small to large square footage, as well as products that are thicker for use in more industrial areas, available in 4 different colors.

Continue reading

Hands on Review: Spike Conical Fermenters

spike conical review

This review is by Homebrew Finds Reader Benji S.  Benji has been brewing for 10 years.  His favorite style is Festbier.  He’s an all grain brewer and member of WIZA (Whidbey Island Zymurgy Association).  Check him out on Instagram at neon_hop

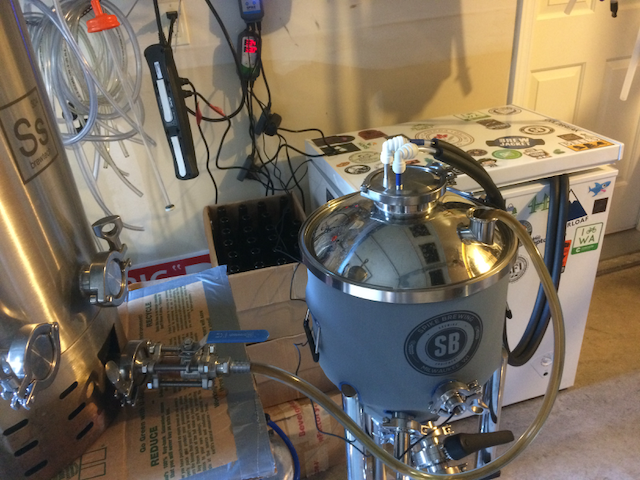
After well over a year of evaluating, I splurged recently and got a Spike Conical (the CF5). I’ve seen quite a few others going through this debate period, so I wanted to provide a hot take to help others in their own decision making process. So far I’ve assembled and prepped it for my first brews, but haven’t actually used it yet. Most of the points here will be about equipment quality/features rather than practice.

For context; I added on the temp control bundle with heater, leg extensions, casters, extended bracing shelf, and a few other nice to haves. So some of these will cover things that aren’t part of the “core” conical package.


Compare Prices, Review Continues Below


Related, Save on Refurbished Conicals at MoreBeer

  • MoreBeer periodically makes a limited number of refurbished conicals available.
  • This is a great chance to get a deal.
  • Shipping is also free (for most sizes) to addresses in the contiguous US.
  • Limited quantities are available, check link below if you can still get in on this deal.

Refurbished Conicals at MoreBeer

Continue reading

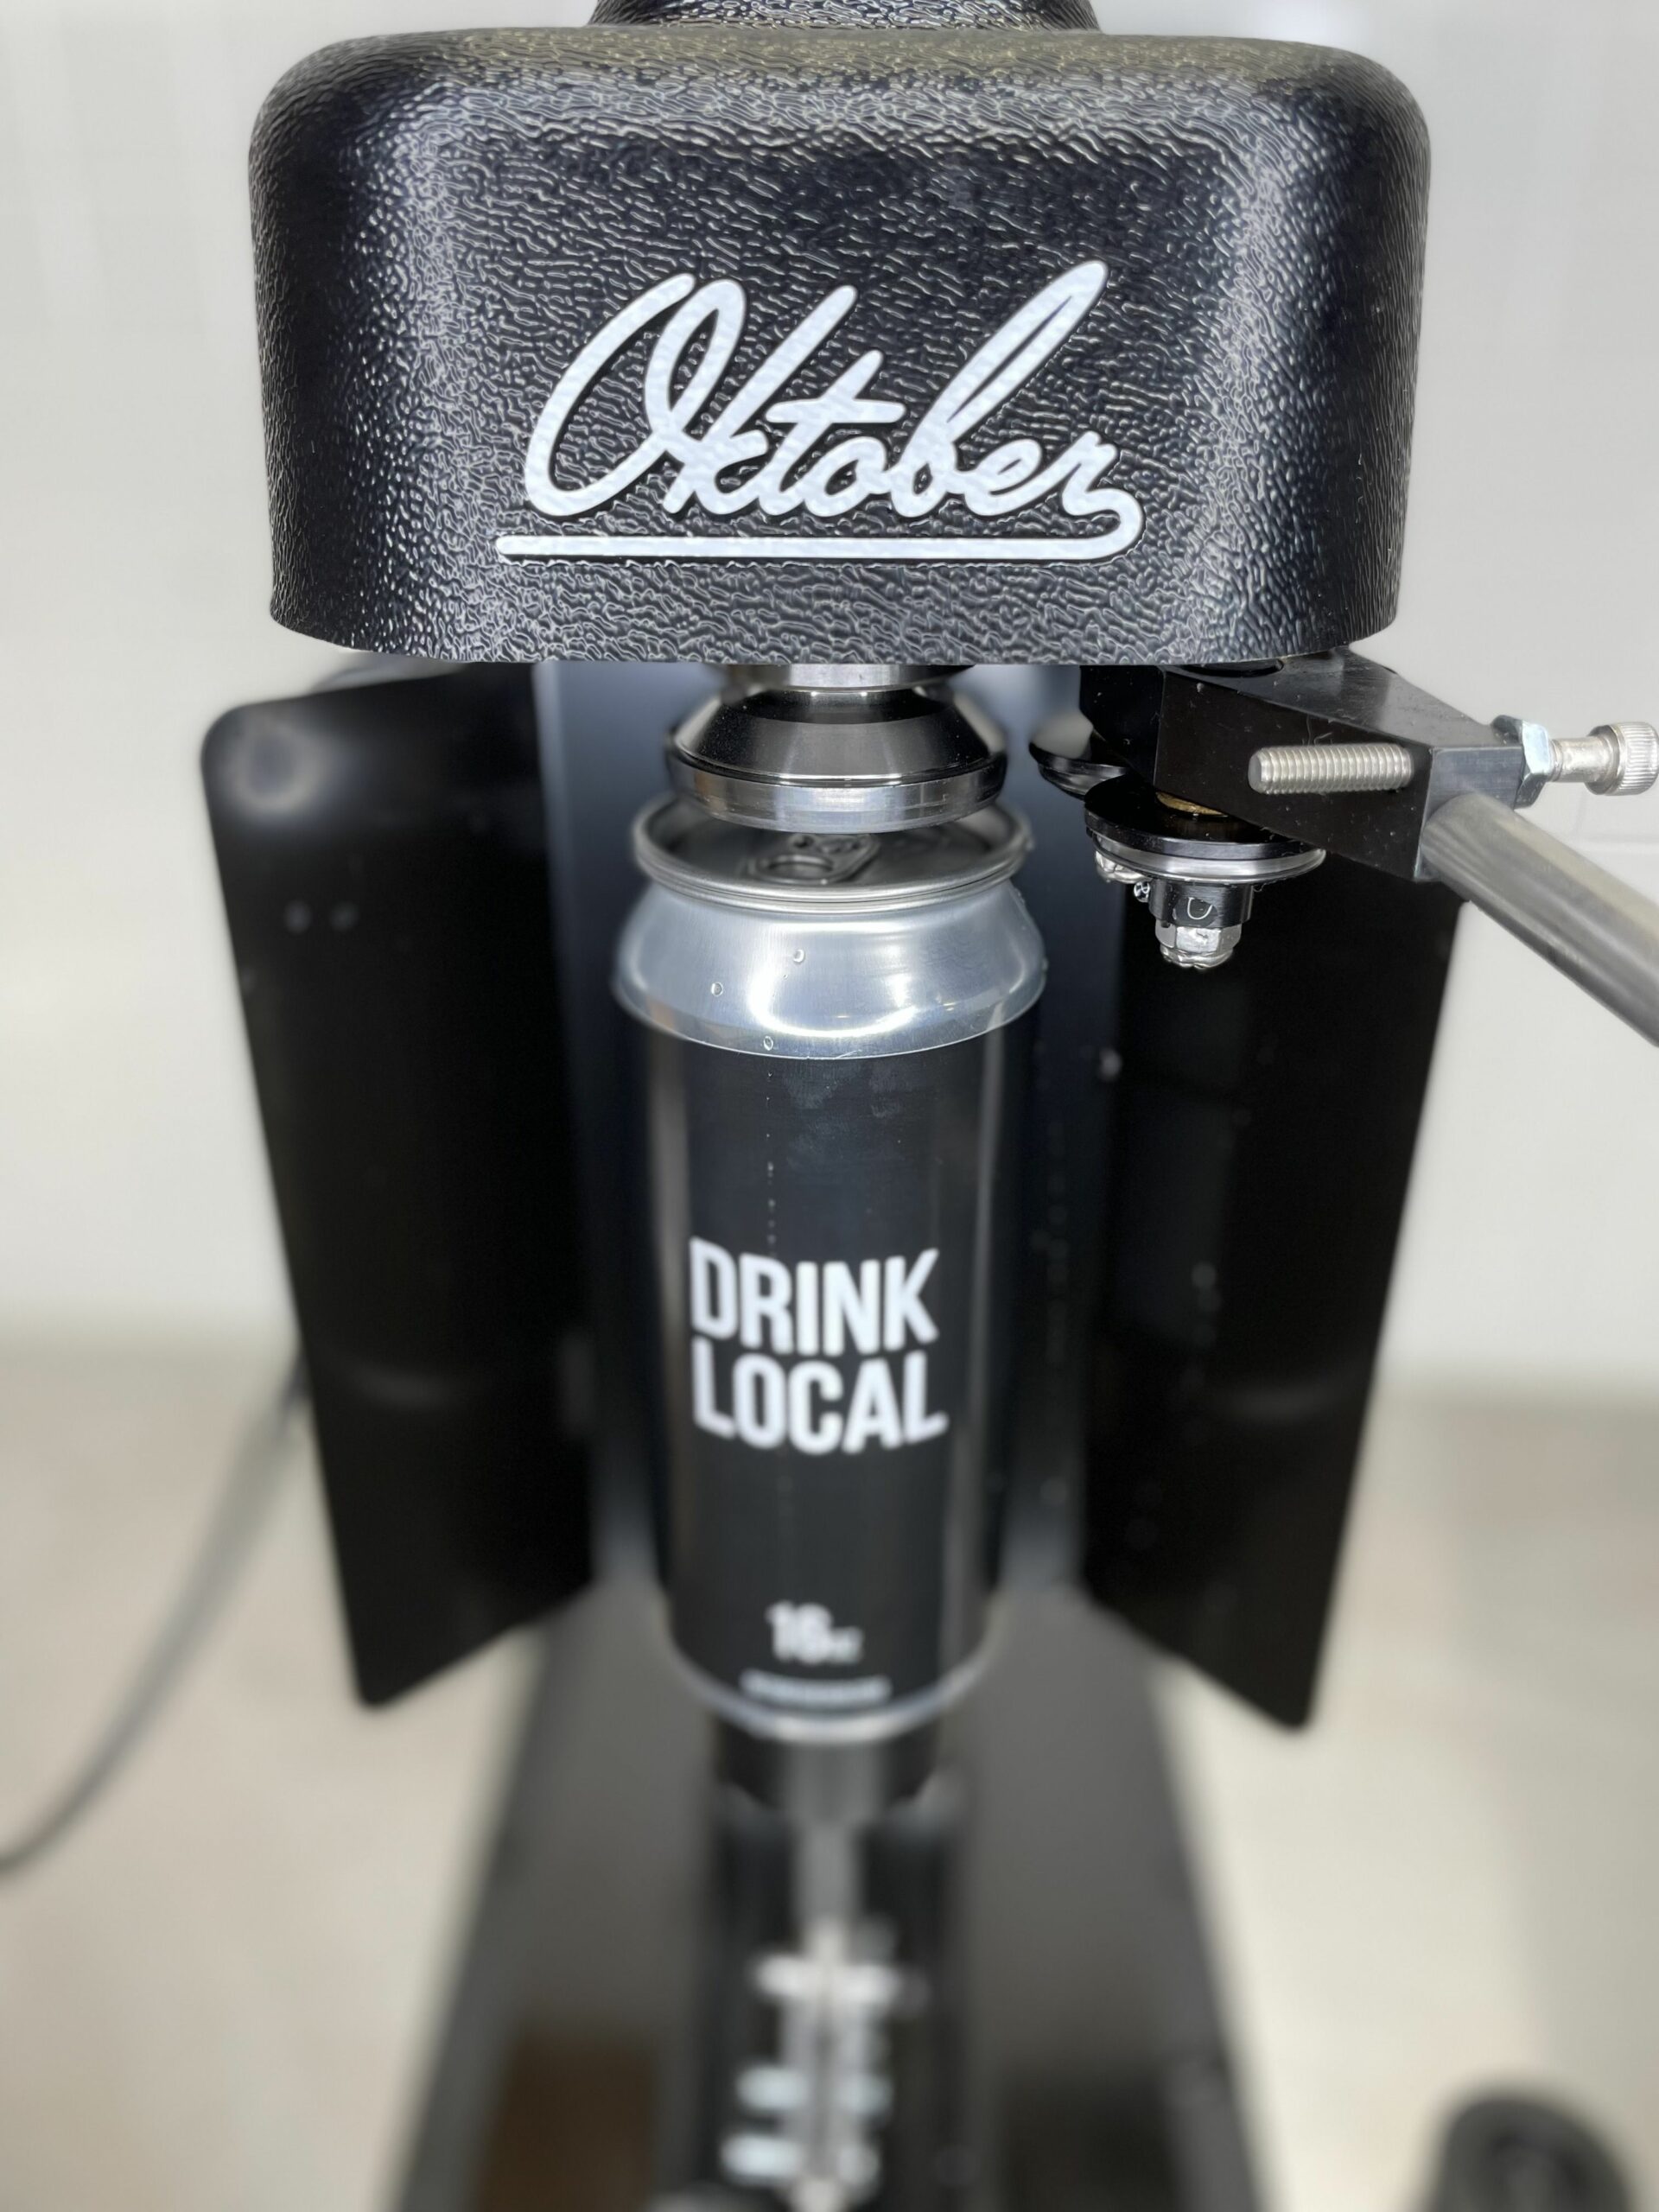
Hands on Review: Oktober Design SL1 Can Seamer – Can Your Homebrew + An OUTSTANDING Deal on Cannular

Oktober Design was started in 2014 by a group of engineers and beer lovers. They make high quality, well thought out and affordable Crowler and Can seamers.  Their target has been brew pubs and smaller commercial brewers. With the introduction of the SL1 they’ve finally made a machine designed specifically for homebrewers.

Before Oktober Designs and similar started making countertop can seamers, canning beer was out of reach and unrealistic for homebrewers and even some smaller brew pub operations.  I looked into canning early in my homebrewing career. Around that time a manufacturer released an “affordable” system that was in the $10k, range. That was considered affordable at the time. I’m happy to say that times have changed.


Related: Can Your Homebrew for LESS, Check out Cannular:

Deals on Cannular are rare. MoreBeer periodically offers a discount


Limited Time DEAL!

An Outstanding Deal on Cannular!

Cannular Bench Top Can Seamer CAN100

Cannular Bench Top Can Seamer via MoreBeer

More Info

From the product description, check product page for current description, price and availability:

The Cannular is a manual can seamer that is easy to use, reliable and beautifully simple.

Whether you’re a brewery looking to offer canned beer to go or a homebrewer wanting to keep your creations fresh and fully protected from light, the Cannular is the answer. This bench top unit is one of the most compact and easy to use can seamers you’ll find. The Cannular only requires one person to operate, and each can takes roughly 5 seconds to seam. With a two-person team, one filling and one seaming, the Cannular becomes a suitable option for nano breweries doing small canning production runs.

Operation:
The beauty of the Cannular lies in how truly simple it is to operate. With only three points of operation, it only takes a few minutes to familiarize yourself with the machine. The seaming process is as follows:

Place lid atop the can and place the can on the platform
Turn the platform lever clockwise to raise the can to the seamer
Press the button to turn the machine on and begin spinning the can
Push the seaming lever away from you and hold for 1-2 seconds
Pull the seaming lever towards yourself and hold for 1-2 seconds
Press the button to turn off the machine and stop spinning the can
Turn the platform lever counterclockwise to lower the can
That’s all there is to it!

Construction:
The Cannular was designed to be compact, durable, and safe to operate in a wet environment. The platform assembly is made from 304 grade stainless steel, so no matter how messy your canning gets, there’s no need to worry about rusting or degradation. The body of the unit is made from hammered sheet metal and bolted together with stainless steel screws. Rubber feet help keep the unit from slipping and sliding while in use. Additionally, the Cannular features built-in brackets near the feet so you have the option to mount the machine to your counter or benchtop. The Cannular runs off of 24v DC power via the Anderson socket located on the back. This lower voltage was chosen specifically to make the unit as safe to use in a wet environment as possible.

Power:
As noted above, the Cannular comes with a 24v DC Anderson socket located on the back of the unit. It does not, however, include a cord and plug. When purchasing the unit, you’ll have the option of pairing it with either a power supply with 110v plug, or with a 6 ft. long cord with Anderson plug and alligator clips. The power supply is straight forward, and allows you to plug the unit into a standard 110v power socket. The alligator clips give you the option to power the unit from a battery, and can even be used with an 18v cordless power drill battery. This is certainly the most affordable option for powering the Cannular, and we’ve found that upwards of 200 cans can be seamed on a single battery charge.

Why Cans?
So why can when you can bottle? There’s no doubt that canning has become a more and more popular format for packaging beer among craft breweries over the last several years, and with good reason. Aluminum cans aren’t just more environmentally friendly than bottles, since cans require less energy to transport and recycle, they’re also much better at protecting the quality of the beer. Whereas bottles allow in light, which leads to skunking, aluminum cans offer 100% protection from UV and other wavelengths of light that are harmful to beer. There’s still great debate surrounding whether cans or bottles are better at keeping beer fresh, but if done correctly, cans are theoretically the superior option. When a crown cap is crimped onto a bottle, the lining of the cap can form an imperfect seal on the bottle, allowing small amounts of oxygen in, as well as small amounts of CO2 out. Over time this can result in oxidation of the beer and lost carbonation. Seamed cans, on the other hand, form a much better seal that can prevent these issues. Of course, it’s important to make sure that the can is purged of oxygen before being filled, and that the can lid is sealed atop foam to eliminate oxygen from the headspace. Aside from all the “sciency stuff”, cans are just plain safer. Take your beer backpacking, camping, or poolside and rest assured that broken glass won’t ruin your day!

Specifications:
Power: 250W
Rated Speed: 3300 RPM
Gearbox Ratio: 9.8 : 1
Power Plug: Anderson Type 40A
Can Height: 45-170mm (1.8 – 6.7 inches)*
Can Diameter: 35-75mm (1.4 – 2.9 inches)*
Dimensions: 14″ L x 9″ W x 19.5″ H
Weight: 40 lbs


  • MoreBeer has Cannular on sale for $399.99. That’s a $150 savings.
  • For some pricing clarity, I’ve seen USED units sell for more than this.
  • This is a rare deal because the regular version of the Cannular is under a MAP agreement.  That means that it, generally speaking, cannot be discounted.  I don’t know if this is a one-off thing or if the reverse roller version will be an ongoing offering.
  • Get Free Shipping: Shipping is also free to most US addresses with a qualifying $59 order.  This includes bulky cases of new cans.
  • Learn More! Hands on Review: Kegland Cannular Bench Top Can Seamer – Homebrew Canner

Cannular Bench Top Can Seamer CAN100


Why Can?

Cans block all light and oxygen transfer. That’s not true of bottles. They also play well at the park, beach and pool. Glass bottles are made from breakable glass that can… break. 🙂 Canning is also… cool. We’ve been able to pretty easily do everything that commercial brewers have been able to do – Conicals, Control Panels, Fermenting Under Pressure and More – for quite some time. Canning, until recently, was a hold out.


This article contains affiliate links. We may make a small percentage if you use our links to make a purchase. You won’t pay more and you’ll be supporting Homebrew Finds and more content like this. Thank you for your support!


Even with new equipment like the SL1 becoming available, canning is more expensive than bottling. You can save used bottles for free and use a $10 capper. This means that doing things as cheap as possible cannot be a driving factor when considering a can seamer.

Continue reading

Hands On Review: Old Ale Brand Ball Lock Kegs

aih keg review

Hands on Review AIH’s Brand New Ball Lock Kegs

Adventures in Homebrewing produces a line of brand new ball lock kegs.  These are AIH’s own design. They are also branded “Old Ale Supply Company”.  These are available in a number of sizes from both Adventures in Homebrewing and Austin Homebrew Supply.


Check Current Pricing and Availability, Review Continues Below:

Also available at Austin Homebrew Supply:

Related:


Adventures in Homebrewing Keg Continue reading

Hands on Review: Barley Crusher MaltMill

This review is by Homebrew Finds Contributor Michael Gom.  Read more about Michael below.

Note that this review covers both the 7 and 15 lb Barley Crusher Grain Mill

Hands on Review: The Barley Crusher

Having brewed all-grain for many years, I’ve spent lots of time refining my processes to try and produce predictable results. Things like brewing software make this much easier and do a great job of helping you calculate all your numbers. We can control how much grain we use and how much water, mash thickness, sparge volume, volumes going into fermenters, pitching rates, the list goes on. One thing I hadn’t been controlling, was my grain crush. When I had a local homebrew shop, the owner had no problem with me asking to double mill the grains to help get as fine a grain crush as possible while still not owning a mill. When he closed his shop, I was forced to start ordering my supplies online. Ordering from multiple different locations, having them mill my grain, it was obvious the variable that was changing was the crush size and I felt I was getting inconsistent results. Recently I purchased an all-in-one electric all grain system (Anvil), my brew days got much easier but my efficiency started to really suffer.


Check Current Prices & Availability, Review Continues Below:

7 lb Barley Crusher Mill

15 lb Barley Crusher Mill

Also: Search Amazon for Barley Crusher Grain Mill – offerings vary

Barley Crusher Motor Kit

Continue reading

Hands on Review: FLOTit 2.0 Floating Dip Tube w/DFI, Double Filter Inlet

This review is by Homebrew Finds Contributor Brad Probert.  Brad is an engineer, expert homebrewer and experienced reviewer.  Grab a link to Brad’s website at the end of this review.

FLOTit Floating Dip Tube

Floating dip tubes are a hot commodity in the homebrewing world lately.  Many people are ditching their fixed steel tubes and replacing them with a length of silicone tubing attached to a stainless ball float.  If you’ve been living under a rock and don’t know the point of the floating dip tube, it’s pretty simple.  It floats on top of your beer so that as you draw out beer, you get clear beer from the top while everything else precipitates out and makes its way to the bottom


Check Pricing & Availability:

A version is also available that works as an upgrade to traditional ball float floating dip tubes

FLOTit 2.0 – Double Filter Inlet (DFI) with 500/300 micron mesh for floating dip tube with a ball float for always clear beer, less beer waste, and no clogging. Best upgrade for pressure fermenter – affiliate link, note that multiple variations of this product may be available, as such a different version may appear at this link

Related:


Related: Fermenting Under Pressure!


Continue reading