
Hands on Review: VineCo Wine Kits!
Thank you to HBF Contributor Aaron Nord for this hands on review! Aaron is an advanced award winning brewer, a long time reader and a serial tipster!
VineCo Wine Making Kits
First and foremost, it should be known that I am a homebrewer and what follows detail my nascent experience as a hobbyist winemaker. The way I entered the world of homebrewing was by means of a boxed kit (I think it was a Brewer’s Best kit) and a starter equipment kit. Therefore, it felt familiar to me to do the same for this foray into winemaking. Knowing that the box would hopefully contain nearly everything I needed to turn out a tasty beverage (aside from adding my own water and some wine bottles) provided comfort and allayed some concerns I had about being a first-time winemaker.
The VineCo Series wine making kits are available from MoreBeer and come in a myriad of varieties and categories including basic fruited wines (almost in the style of a wine cooler) to premium ones presumably designed for the more refined palate. What’s more, they also tailor them to country or region-specific wines like a Washington Riesling or an Australian Shiraz. My partner and I are fans of red wines and for that reason the California Cabernet Merlot and the Italian Amarone appealed to me. The Amarone style is offered in two different categories from VineCo, the Signature and the Estate. The Signature kit is a little pricier but comes with grape skins, oak cubes, and bottle labels. I chose the Estate kit to keep it simple for my first experience. The California Cabernet Merlot is only offered in the Estate line so that choice was easier.
Make Your Own Wine!
- VineCo Wine Making Kits
- Winexpert Wine Making Kits
- On The House Wine Making Kits
- Wine Making Equipment Kits
- Winemaking Equipment Kit for VineCo Concentrate Kits W150
- Winemaking Equipment Kit (For Brewers) W105
- Winemaking Supplies
- Wine Bottles

This article contains affiliate links. We may make a small percentage if you use our links to make a purchase. You won’t pay more and you’ll be supporting Homebrew Finds and more content like this. Thank you for your support!
Two Ways to Save on VineCo Kits – Selection Changes Regularly
Aaron’s Wine Making Series!
- Making Wine as a Homebrewer!
- Hands on Review: VineCo Winemaking Equipment Kit from MoreBeer!
- Hands on Review: VineCo Wine Kit Review!
Contents
The Estate kits that I used included the following items:
- Wine Base
- Oak Chips
- Yeast Pack
- Bentonite
- Potassium Metabisulphite
- Kieselsol
- Chitosan
- Instructions
The wine base came in a clear plastic bag with a screw-on cap like one found on a gallon of milk. The contents of the bag consisted of grape juice concentrate that smelled terrific. This is what winemakers would call “must”. The plastic composing the bag was fairly thick and resistant to puncture. The cap was easy to remove and replace.
The oak chips were one of three potential mediums that VineCo employs for introducing barrel character to the wine. The others are oak cubes and granular oak. The oak chips looked like half-inch splinters of wood and had a slight aroma of wood. It came in a lined paper packet that was simple to open to sprinkle on the must.
The yeast pack was one that homebrewers would be familiar with except in strains that are tailored for winemaking instead of brewing.
The potassium metabisulphite and bentonite came in powdered form in their own separate packets like the lined paper packets of the granular oak. The bentonite was measured in the exact quantity needed for the kit which made it simple to add when called for. The kieselsol and chitosan came in clear, plastic packets and, like the bentonite, contained the amount called for in the recipe.
The instructions were clear and comprehensive. At no time was I confused on what to do or what the next step would entail. Before starting, it was helpful to read through them in their entirety to ensure that I understood what was before me and to make sure I had the proper equipment on hand, cleaned, sanitized, and ready for use at the appropriate step. There were several helpful tips throughout that I valued as an inexperienced winemaker as well as spots to mark down important information like crucial dates and the gravity readings. The other side of the instructions were printed in French, s’il vous plaît.
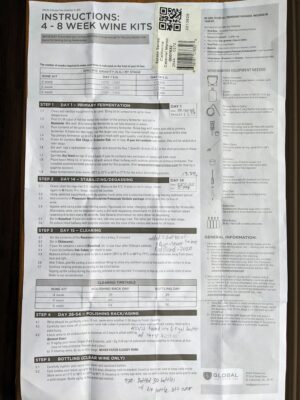
Cab Merlot Instructions
Making the Wine
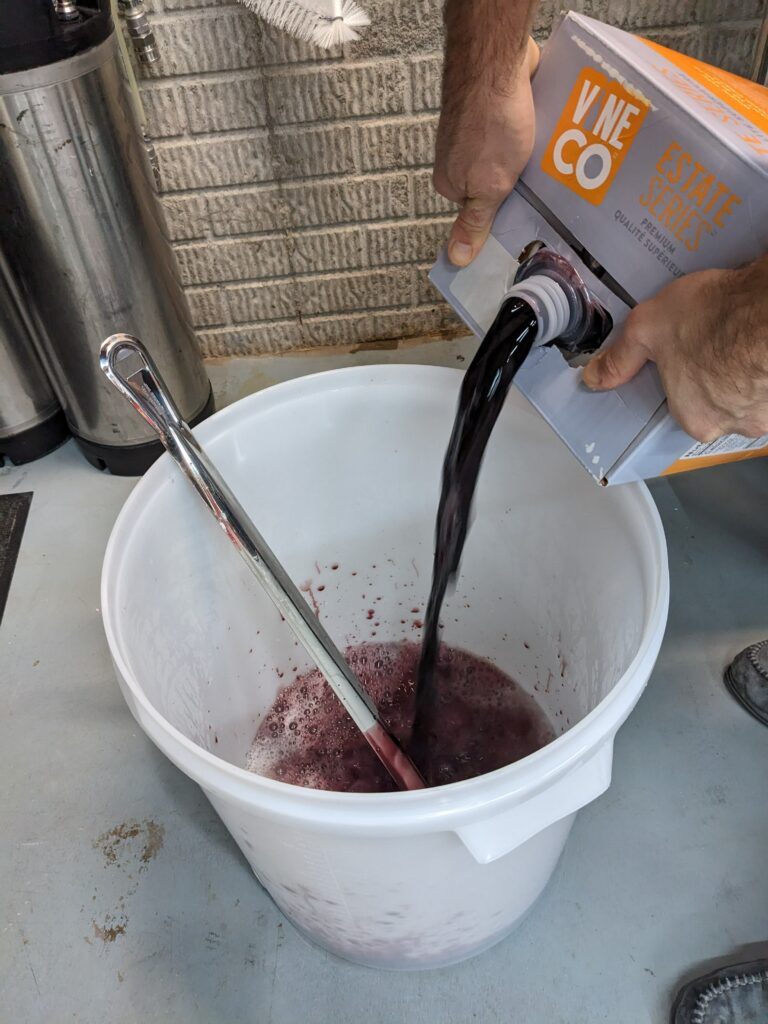
I first started with the Amarone kit. When it came to brew day (or mixing day?) the process was simple: I mixed the bentonite with hot water (I used store-bought spring water to avoid any chloramines in tap water), then added the must, rinsed the must bag with water two times and added that water into the fermenter, then topped it off with spring water until I had reached the six gallon mark. After a vigorous round of stirring, I pitched the yeast packet along with the oak chips and secured the lid and added an airlock filled with sanitizing solution. I fitted the fermenter with a heat mat to ensure it maintained the 68 degrees Fahrenheit recommended on the yeast sachet. From start to finish I was done in a fraction of the time of a traditional “brew day”.
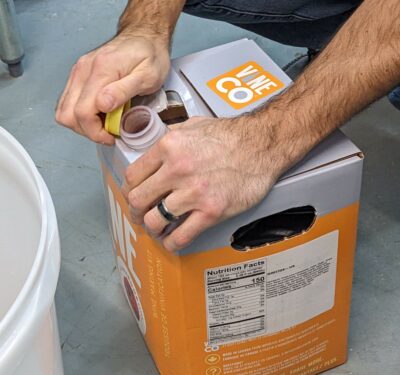
Bag in a Box
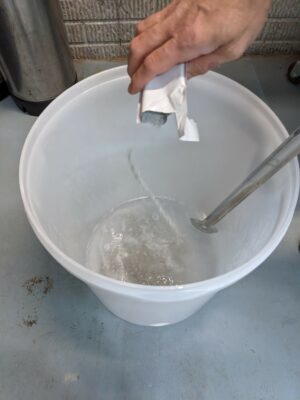
Adding Clay
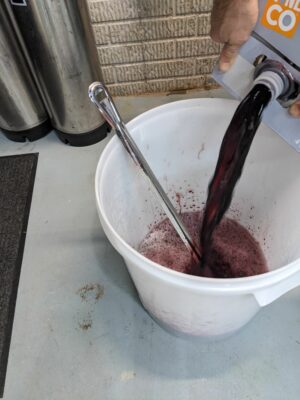
Adding Must
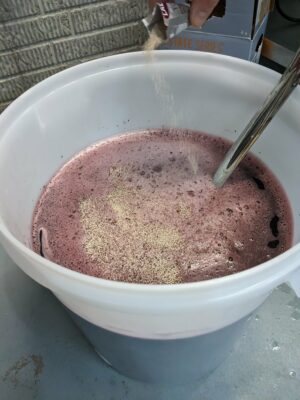
Yeast on Must
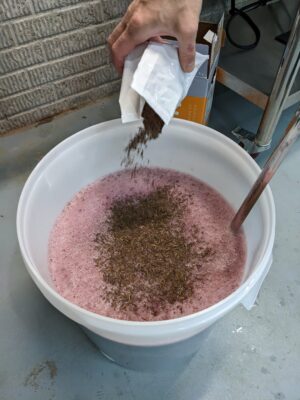
Adding Wood Chips
After two weeks, fermentation had completed, verified by a gravity reading of 0.096, and it was time to transfer to a secondary vessel. I siphoned the wine into a carboy that I purged with CO2 to the best of my ability and to which I added a measure of potassium metabisulphite. Then I degassed the liquid for about 15 minutes using a stirring attachment on a power drill. After it appeared to be mostly degassed, I added the kieselsol, mixed it again, and added more CO2 to the top. It did feel a bit odd mixing it and potentially adding more oxygen to the solution, but that is why the potassium metabisulphite is added. It took me a little over an hour to transfer it, degas it, and clean up.
Beer and Wine Party Pack – Selection Changes Regularly

At this point I took a sample and I found that it was lightly carbonated and slightly tart. Otherwise, it has blackberry in the nose with some alcohol aroma and it tasted like tart blueberries and left a slickness on my teeth.
According to the instructions, I waited 24 hours, added the chitosan and gave it a stir before replacing the lid and airlock.
After six weeks of conditioning in the secondary vessel it was time to bottle. The Amarone sample at this stage tasted like a flavorful red wine! It had a tiny bit of carbonic bite, and I was hoping I had degassed it enough. It had blackberry notes and was slightly tart but not sour. It still left a bit of squeakiness on my teeth. It appeared clear to me but probably would’ve benefited from more time clearing. At this point it was in the bottle and left to age to continue to develop.
A few weeks later it was time to mix the California Cabernet Merlot kit which went together smoothly. I heated bottled water up, mixed it with bentonite, poured the grape juice in, rinsed bag with water two times, topped off to six-gallon mark, added oak chips, stirred, added yeast, stirred, put the lid on with airlock, and put the heat belt on set to 68 degrees.
Two weeks later I racked the Cabernet Merlot to a carboy. At this time the sample tasted great with a mixed berry flavor and mild oak overtones and was slightly tart. I degassed it in the carboy and replaced the airlock, leaving it to do its thing in the secondary.
At bottling time, the flavor hadn’t changed too much, and I was looking forward to seeing how it would develop in the bottle.
Tasting Impressions
I waited about six months before trying each of the wines for the first time. I knew that they would continue to mature in the bottle over time but figured that was enough time for an initial tasting. As a disclaimer up front, I have zero training when it comes to wine tasting and, for good or bad, I approached the task like in the same fashion as I have analyzed beer (both my own homebrew and professionally made beer). I started with the Amarone wine. Its appearance was dark purple and, from what I could tell with such a dark color, clear (as in it was not cloudy or murky). The aroma of the wine had a sweet berry note as most prominent and if I had to further refine that I would say that blackberry stood out the most. There were also some alcohol notes in the aroma but not in an unpleasant or overpowering way. The flavor continued the sweet berry trend from the aroma and once again blackberry was the berry I could pick out most. It had a mild tannic bite. After swallowing, I noticed a slight residue on my molars that made my teeth squeak when rubbing them together, like how my teeth feel after drinking a tart drink like cherry juice. I would not say the wine was tart by any means. The mouthfeel of the wine was round with a touch of carbonic bite. I wondered if the latter was likely due to my technique when trying to get the CO2 out of solution and perhaps underperforming on that task. Overall, I quite enjoyed the wine, and it went well with marinera pasta.
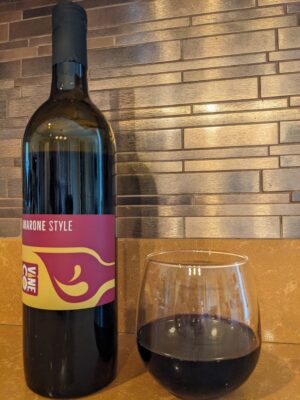
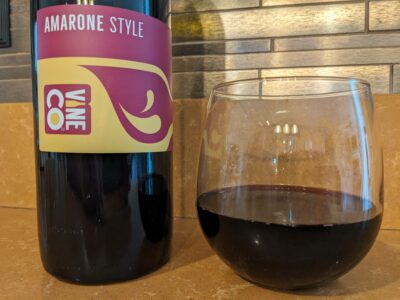
VineCo Amarone Style Wine
Note: Since neither kit included them, I decided to order the corresponding bottle labels from MoreBeer to make them a bit more presentable.
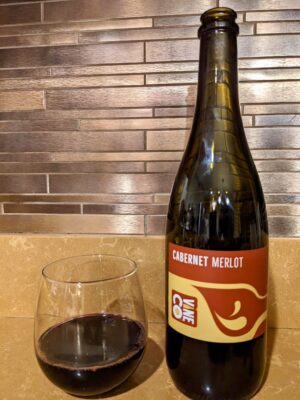
Next, I opened a bottle of the Cabernet Merlot mix, also having been aged for about six months. I could not distinguish its appearance from the Amarone, both dark, purple, and clear. It was more difficult to pick out distinct aromas and flavors with this wine when compared to the Amarone. There was a small note of alcohol present like the Amarone, but I could not pick out a categorical smell other than what I would call red wine smell. There were no prominent berries or other fruit, or wood smells being presented to my nose. The flavor was equally as non-distinct and mild, however not unlikable in any way. If pressed, I would say that there was a hint of cherry in the Cabernet Merlot mix’s flavor. There was no alcohol bite or any other off flavor that I could perceive, and I did enjoy drinking it. The mouthfeel was on the thinner side, but I would say it was like other merlots that I have had. On that point I think this represented itself more as a merlot than a cabernet but take that with a grain of salt coming from this non-expert.


VineCo Cab Merlot Blend Wine
Six months after my first tasting I tried again. The Amarone had changed a bit. It was generally more pleasant. The appearance had not changed, but everything else seemed to have mellowed out. No longer was there any carbonic bite or squeak residue left behind. The blackberry was still present in the aroma and flavor, although not as strong, and the fruit notes had picked up a jam essence. This age thing seemed to be working its magic as I would say it was a more enjoyable beverage than before.
Not as much had changed for the Cabernet Merlot. The impression it gave was again non-distinct but not in an off-putting manner. It was difficult to pick out individual aromas or flavors except a general red wine note backed by a slight alcohol aroma. There was perhaps a tad more of an oak presence and if pressed for a flavor descriptor I would say the mildest of blueberry notes was in the flavor. Its body once more struck me as thin but similar to that of other merlots I have sampled.
Summary
Overall, I am quite pleased with the results of these two kits. Functionality-wise, having nearly everything needed to produce a delicious wine come in one neat package is quite appealing to this beginner winemaker. It took a lot of the potential research and analysis out of the equation for me as I didn’t need to think about where to secure ingredients, what all I needed, or even how and when to perform the various winemaking steps. The cherry on top of the sundae is the sixty some odd bottles of tasty beverage that I can share with wine-loving family and friends.

Check Current Price & Availability:
- VineCo Wine Making Kits
- Winexpert Wine Making Kits
- On The House Wine Making Kits
- Wine Making Equipment Kits
- Winemaking Equipment Kit for VineCo Concentrate Kits W150
- Winemaking Equipment Kit (For Brewers) W105
- Winemaking Supplies
- Wine Bottles
Aaron’s Wine Making Series!
- Making Wine as a Homebrewer!
- Hands on Review: VineCo Winemaking Equipment Kit from MoreBeer!
- Hands on Review: VineCo Wine Kit Review!
Two Ways to Save on VineCo Kits – Selection Changes Regularly
Beer and Wine Party Pack – Selection Changes Regularly
Our Wine Kit Deals Roundup!
More Homebrew Finds!
- Last 50 Finds!
- Top Deals – a curated list of the best deals
- Homebrew Reviews – one of the largest libraries of homebrew reviews in existence!
- Our Top Posts – tips, how-tos, resources posts and more
- Let’s be Friends!
Recent Deals!

10 Most Recent Homebrew Resource Posts & How-To’s!

We are Homebrew Review HQ! Our 10 Most Recent Reviews

Quick Catch-Ups
- Our Last Fifty Finds
- Curated List of Keg Deals
- Curated List of Hop Deals
- Our 10 Most Recent Homebrew Resource Posts
- Top Deals – a curated list of the best of the best
- Our 10 Most Recent Reviews
This post may contain affiliate links. We may make a commission when you use our links. This will never cost you extra. Thank you for supporting Homebrew Finds!
Thank you to MoreBeer for providing the equipment and ingredients used in this write-up.
Make sure the components you use are compatible and rated for your intended application. Contact manufacturer with questions about suitability or a specific application. Always read and follow manufacturer directions. tag:lnksfxd tag:anwkseries top:vinecokitreview tag:tpr