
Hands on Review: Brew Floors Epoxy Flooring
This review is by Homebrew Finds Contributor Brad Probert. Brad is an engineer, expert homebrewer and experienced reviewer. Grab a link to Brad’s website at the end of this review.
Brew Floors Epoxy Flooring
As kids, we build forts out of blankets, pillows, boxes, etc. And the really lucky kids have tree forts in their yards. In the homebrewing world, the tree forts are the dedicated brewing areas in basements, garages, or sheds. And like a good tree fort, you want to customize it to your taste. A good portion of the brew area customization revolves around the practical aspect of brewing beer- good closet or shelf space, custom hooks and gizmos to hang your lengths of tubing to dry, and a source of good brewing tunes. What’s standard in most of the different brewing spaces is poured concrete flooring. Industrial and efficient, but it lacks a certain pizzazz.

Enter Brew Floors. They sell kits for the DIY crowd- whether you’re a professional brewery or a home brewery. Heck, I suppose you probably don’t even have to use it in <gasp> a brewery! It’s an epoxy resin system, meaning it comes as a 2-part liquid that once combined makes a new compound that hardens into a durable, shiny, waterproof layer. They have various level kits from small to large square footage, as well as products that are thicker for use in more industrial areas, available in 4 different colors.
This article contains affiliate links. We may make a small percentage if you use our links to make a purchase. You won’t pay more and you’ll be supporting Homebrew Finds and more content like this. Thank you for your support!
Hands on Review
I was skeptical about how much work a project like this might be. Brew Floors advertising says things like “no special skills required” and “easy”. Of course they would. But in fact I was pleased and shocked at how easy it really was. If you know how to mop a floor and paint, that’s pretty much all the “skill” required here.


My homebrewing buddy, Kevin, wanted to give it a go. He has a dedicated brewing space off of his bar in his basement. Kind of the size of a large walk-in closet, it measures 15 ft x 5 ft. Since the “Brew Floors I” kit covered up to 300 square feet, he decided to also use it in an unfinished closet space in the basement that measured 8 ft x 6.5 ft. My concerns over the project grew when I showed up at Kevin’s place and neither of us had read the instructions yet and all of the stuff still needed to be moved out of the two spaces. I was sure we’d be there all night.
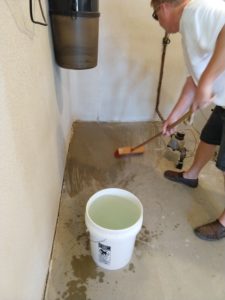 Scrubbing with acid to etch the concrete
After clearing the rooms, the first step was prepping the concrete. The provided instructions said that the concrete had to be clean of course, but if it had any kind of coating on it, it would first need to be acid etched. Concluding the basement floor did indeed have a bit of a shininess to it, and not the recommended texture of “fine grit sandpaper”, we decided we needed to etch it. The kit came with the acid for etching. We decided a 4:1 ratio of water:acid was what we wanted and mixed that up in the provided 5-gallon bucket. We then mopped the floor with the acid solution, then dumped that and mopped over that with clean water. This whole step from acid mixing and mopping took 2 hours total for the two rooms.

As a side note, disposal of muriatic acid is subject to some debate. Concluding that pouring down the drain was not the best option, we poured it out on the grass and watered that down with the hose a bit. ‘Fingers crossed’ actually worked out, and he didn’t turn up with a giant patch of dead grass afterwards!
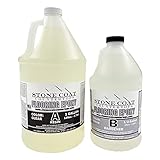
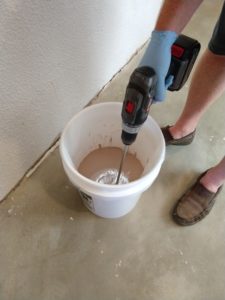 Mixing the epoxy
After leaving the mopped floor to dry for 30 minutes (and enjoying some homebrew while we waited), the next step was the epoxy. The 2:1 ratio of epoxy resin was easy as part one came in a one gallon can, and part two came in a half gallon can. We poured these into the provided bucket and then poured in the can of ‘traction dust’ (my unscientific name for the solids that get mixed into the epoxy that give the floor a slightly roughened surface so you can have traction on a wet floor). These solids were the consistency of sand. Everything got mixed in the bucket using the provided paint mixing rod that attaches to a drill (drill not provided). This mixed together rather easy and we were ready to apply.

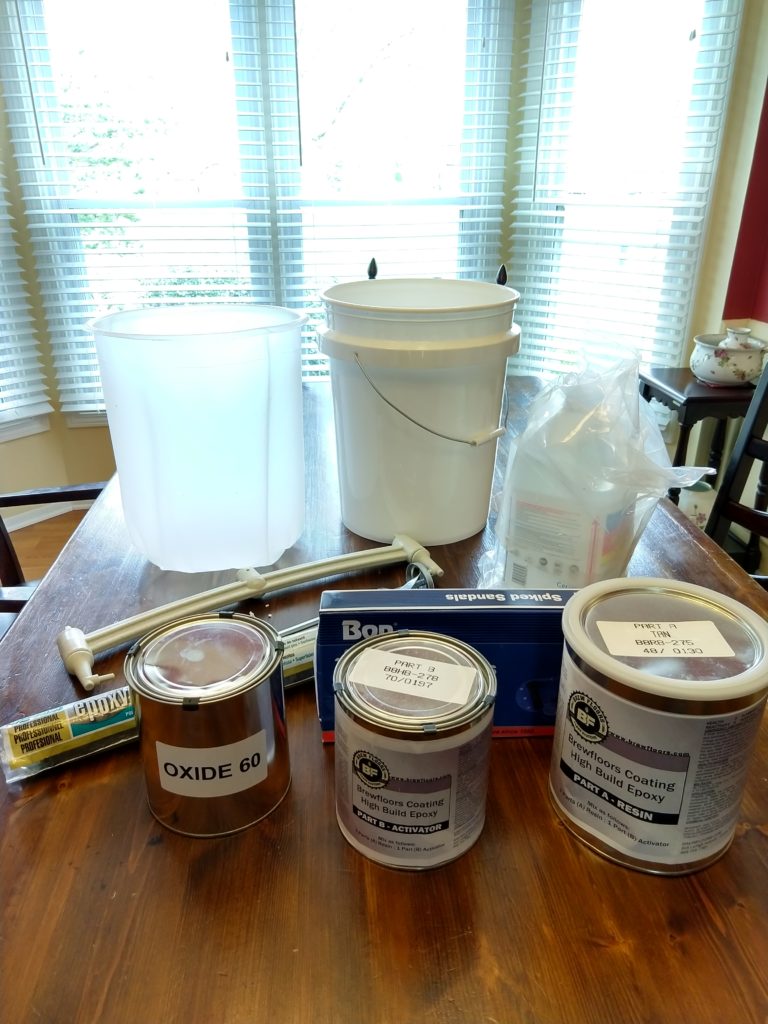
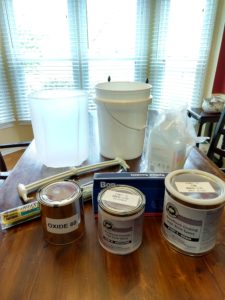 Kit Contents
The kit comes with a giant 18” roller, specifically designed for applying epoxy. The only thing we had to provide was a pole/handle to screw into the roller base, which we snagged by just unscrewing one from a push broom in the garage. Just like painting the walls in a room, the roller is massively fast, but doesn’t do well in getting fully to the edges/corners. So we painted around the edges/corners of the room with a paintbrush to ensure the epoxy got all the way up to the walls, and around the water pipes coming up through the floor. From there, the roller made very easy work of it. The brewing room was quickly done, and we moved onto the storage closet. And although their advertising said “no special skills required”, I was rather proud of myself for not painting myself into a corner! This step of mixing the epoxy and painting both rooms took 45 minutes.
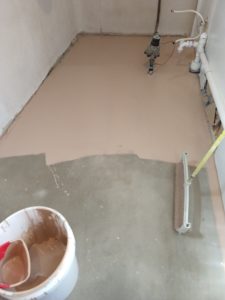 Brewing area in progress
The last step of clean-up took 15 minutes. This was really very easy because it basically was just throwing everything out. Epoxy roller got tossed and the 5-gallon bucket came with a liner, so we just dumped the liner and the left over epoxy and the bucket was good to be re-used somewhere else. I imagine if you wanted to try to salvage the roller there are products that could clean it, but I expect that would be a major pain and very time consuming.


The total 3.5 hour timeline was:
- Acid wash, water mop: 2 hours
- Wait for water to dry: 30 minutes
- Mix and epoxy floor: 45 minutes
- Clean up: 15 minutes
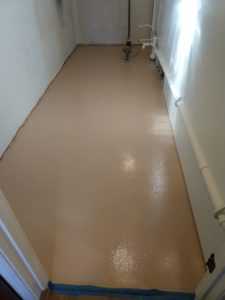 Brew area day of application
Related: Our 10 Most Recent Reviews | Great Deals – Our Last 50 Finds


Conclusions
The floor looked great freshly painted, and the instructions said to let it dry 24 hours before using it. Inspection the next day found some small spots where the coverage was thin in the transition area between where we applied it with a brush and where the roller was able to reach. So take care to not be distracted by how easy it is and rush. Reviewing it again 2 months later, it still looks great. Of course with flooring like this, the true test of time is lasting for years, but that would be a long time to wait to publish this review! Brew Floors does guarantee it will protect your floors for at least 5 years. Kevin has reported that brewing on it is great. The inevitable spills now just pool up, waiting to be cleaned up instead of soaking in and staining the concrete. And the overall room looks much sharper with the finished flooring, bringing the treehouse – err brewery – some added bling!
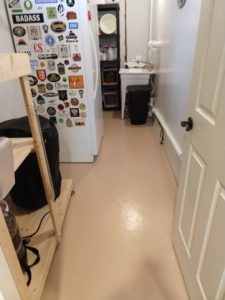 Brew area two months after application

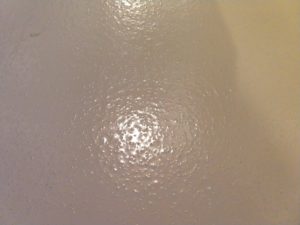 Close up two months after application
Visit Brew Floors for current pricing and availability.
Homebrew Reviews and More! Check out our extensive homebrewing reviews library, our collection of resource posts and connect with us!
More Photos…
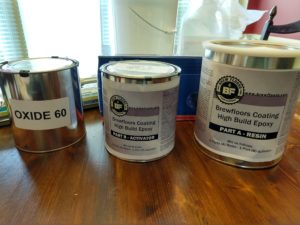 Two part epoxy and traction additive

 Trimming edges with a brush

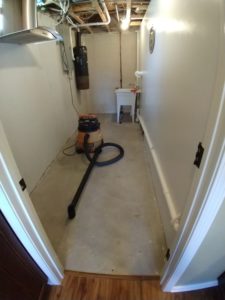 Brew area before
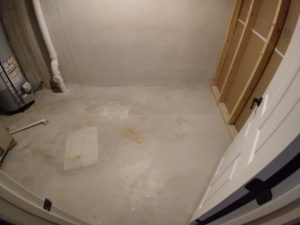 Storage area before
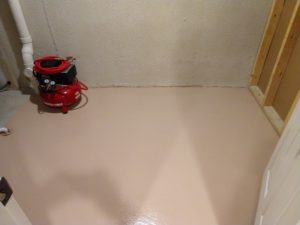 Storage area after two months
Special Thanks to Brew Floors for the materials used for evaluation in this review.
By Brad Probert. Check out Brad’s website – beersnobby.com
More Homebrew Finds!
- Last 50 Finds!
- Top Deals – a curated list of the best deals
- Homebrew Reviews – one of the largest libraries of homebrew reviews in existence!
- Our Top Posts – tips, how-tos, resources posts and more
- Let’s be Friends!
Recent Deals!
10 Most Recent Homebrew Resource Posts & How-To’s!

We are Homebrew Review HQ! Our 10 Most Recent Reviews

This post may contain affiliate links. We may make a commission when you use our links. This will never cost you extra. Thank you for supporting Homebrew Finds!
Make sure the components you use are compatible and rated for your intended application. Contact manufacturer with questions about suitability or a specific application. Always read and follow manufacturer directions. tag:lnksfxd review:brewfloors tag:tpr