
Step by Step: Finding and Fixing Keg CO2 Leaks
A leaky keg can be an issue, a big issue. That nice, full CO2 tank can go away in short order. It’s frustrating, costly and inconvenient. This post should help you them and fix them.
Start with a solid system
When you setup your kegerator, make sure your regulator, manifold and all connected lines are solid to begin with. Spray components down and check for leaks. The low pressure gauge on your regulator can be a help diagnosing overall system health. Turn off the CO2 tank and watch for changes in pressure. A drop means something is leaking.
- Every time. If your keg could have opinions (it cannot), I would venture a guess that it does not care how leak free it was the LAST time you used it. Check your kegs for CO2 leaks every time you use them.
- Poorly seated keg lids. An easy to do and easy to fix problem is a poorly seated keg lid. One trick I’ve developed is leaving the handle disengaged when pressure is first applied. Here’s what I do – insert and orient the keg lid and lift up and the lid handle and apply CO2 pressure. This leaves the lid loose enough to seat properly. When the keg headspace pressurizes, I engage the handle to lock the lid into place.
- Pressurize and test at serving pressure. If you pressurize and test at unrealistically high PSI you’re not really getting a good picture of how your keg performs at serving pressure. Stated another way – a keg may be completely tight and leak free at 30 PSI, but have a leak at 10 PSI.
- After pressurizing your keg, take a listen. Fast leaks can often be heard. This may save you some Star San, some CO2 and some time. If you don’t hear anything, proceed.
- Star San is your friend. After pressurizing at serving temperature and listening for leaks, liberally coat the keg lid and posts (both base and top) with properly diluted Star San using a spray bottle. Look closely for bubbles. If you’re unsure, keep looking and spraying. Want to know how to mix a single gallon of Star San? See: Star San Tips, Tricks and Guidelines. Wipe down the keg when you’re done.
- There is one place that the “Spray Bottle Method” doesn’t really work…. the keg’s gas post. That spot is only in play when your gas QD is engaged. The kicker is… when the gas QD is on, you can’t see underneath it to check for bubbles. The offending part at this point, in my experience, is usually gas post o-ring. A small crack on this small, very cheap gasket has sent me to refill my CO2 tank on two occasions. Since learning this lesson, I am quick to replace gas side o-rings. See: Keg Repair Part #s. I have developed a technique, that I’ve dubbed “The Pressure Gauge Method” of checking for keg lids that I use to check the entire keg, including the gas post o-ring. Keep reading for that. Note: This same spot is equally difficult to check on the liquid side, however, leak on that side are evident… your indication will be… beer leaking. See more about the Pressure Gauge Method below.


This article contains affiliate links. We may make a small percentage if you use our links to make a purchase. You won’t pay more and you’ll be supporting Homebrew Finds and more content like this. Thank you for your support!
Tip: Why Won’t My Homebrew Carbonate?
Ever have a beer that just doesn’t want to seem to carbonate in the keg? Either it just doesn’t carbonate or it does so very slowly. In my experience, this could be an indication of a CO2 leak. Pressurized gas is going to take the path of least resistance. It’s easier to leak than it is to dissolve into solution. Even a small leak can slow down or seem to stop the carbonation process. A quick synopsis of how I learned this: My beer is not carbonating as I expect it to, wait… empty CO2 tank! Fill tank, repeat. My beer is not carbonating as I expect it to, wait… empty CO2 tank! Fill tank, replace gas post o-ring, repeat… beer carbonates normally and my CO2 tank does not magically empty. I’m not saying this is always the cause – temperature, pressure and time are all factors, but if you’ve having problems getting draft beers to carbonate, it’s something to consider.
See: Why Won’t My Homebrew Carbonate? Fixing Beer Carbonation Problems for lots more info.
The Biggest Trouble Spot
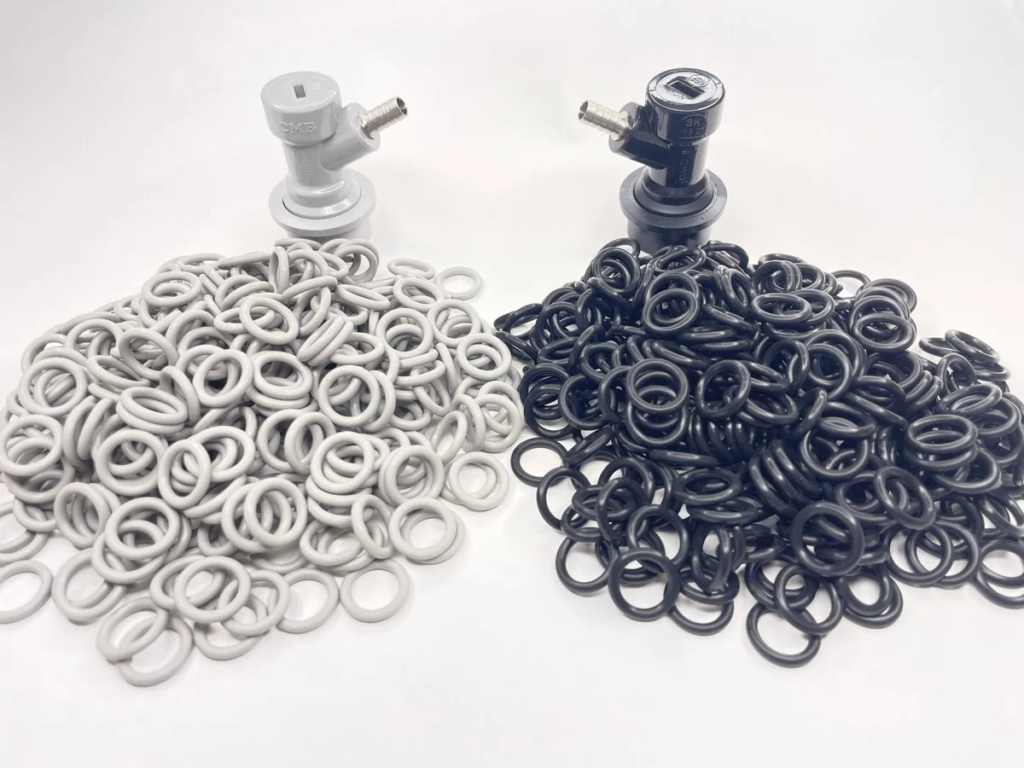
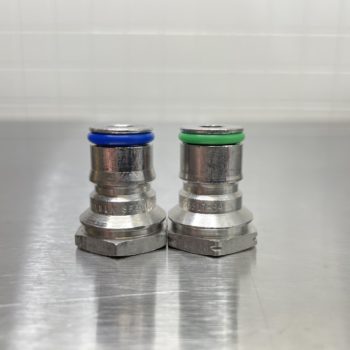 Color coded post o-rings. From our Keg Rebuild Post – Jump To: Replace O-Rings
In my opinion the most difficult spot to check and the cause of many a lost CO2 tanks are… gas post o-rings.
Testing at this point using the “spray bottle method” (spray Star San everywhere and check for bubbles) is impossible or at the very least difficult and messy. Leaks will only surface here when a gas QD is actually engaged. The problem is, you can’t easily see that spot when a QD is on.
The problem stated more simply… You need a QD on to see if it’s leaking, but you can’t see it if a QD is on. You can use what I call the pressure gauge method to check for overall leaks. But even using that method you know that you have a leak but it gives no indication where it’s at.
Be quick to replace gas side o-rings… I’m quick to replace gas post (and gas dip tube) o-rings. Beyond slow and no-carbing beers, a bad gas side o-ring can lead to empty tanks. That’s a waste of time and money and it’s frustrating.
These o-rings cost pennies each when you buy them in bulk. Liberally replacing these can save time, money and frustration.
- Keg Post O-Rings
- Keg Dip Tube O-Rings
- Full Lineup of Bulk Food Grade O-Rings
- Bulk Keg Orings and Keg Repair Part Numbers
The Pressure Gauge Method of Checking for CO2 Leaks
- Charge your keg with CO2 as usual using your typical serving pressure.
- Remove the CO2 line and replace with a pressure gauge [ball lock version via William’s Brewing] or Spunding Valve [Spunding Valve Build].
- After the pressure has stabilized. I mark the current pressure with a China Marker/Wax Pencil, or you can just remember what it reads
- Wait for a couple hours to overnight to see if the gauge drops.
- If it drops quickly, there is a leak someplace in the system. Note: If your keg has beer in it that is uncarbonated the pressure will drop some overnight (it is equalizing and carbonating the beer). What you don’t want is a quick drop in pressure.
- This technique tests the entire keg including the gas post, o-ring, QD and any tubing that’s connected.
- In my experience, over long periods of time there will be some slow gauge movement. I don’t know if these are micro leaks or temperature related, but I’m not really concerned with that, I am looking for a relatively quick drop in pressure. Something that shows up within a couple hours.
- If you suspect a leak based on gauge movement, that is not otherwise evident. I suggest starting with gas QD o-ring.
More About the Pressure Gauge Method… Checking for Draft System CO2 Leaks – Using The Pressure Gauge Method
Practically speaking, A use the “Spray Bottle Method” every time I put a keg into service and periodically double check everything with the pressure gauge method.
Find a Problem… Fix It!
Once you find a leak… fix it! Most problems can be fixed by replacing parts – lid, post and dip tube o-rings, PRV valves, lids and poppets – all replaceable. See: Keg Repair Part #s
For O-Rings, you should consider food grade replacements
If your keg has a structural or safety related issue, stop using it immediately and contact the manufacturer with questions about repair or suitability for continued use.
Using a CO2 Monitor to Check for Kegerator CO2 Leaks
Thanks to HBF Reader Elliott for this tip! Let’s be friends! 8 Ways to Connect with HBF
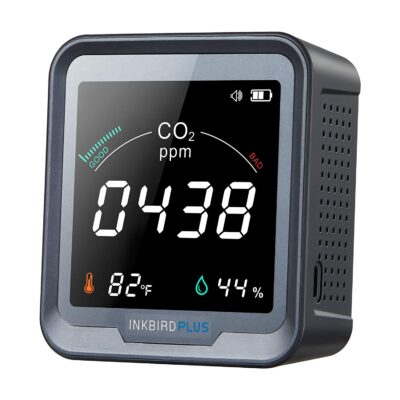
Pictured: INKBIRDPLUS Indoor CO2 Detector
Placing a CO2 Monitor with alarm inside of your kegerator can serve as another line of defense to protect against co2 leaks and loss. CO2 should not be building up in your kegerator. A CO2 monitor with alarm can alert you of this condition.
This is not a replacement for the steps outlined here, rather a another layer that could save you a trip to swap out a CO2 tank.
- Pictured: INKBIRDPLUS Indoor CO2 Detector, Air Quality Monitor, Tester for Carbon Dioxide, Temperature and Relative Humidity, Indoor CO2 Monitor with Alarm, for Grow Tents, Wine Cellars, Homes, Cars(PTH-9C) – affiliate link, note that multiple variations of this product may be available, as such a different version may appear at this link
- INKBIRD WiFi Indoor Air Quality Monitor, CO2 Detector, Accurate NDIR Sensor, Temperature and Relative Humidity, Indoor CO2 Meter with Data Logger, for Cars, Wine Cellars, Grow Tents, Homes (INK-CO2W). – affiliate link, note that multiple variations of this product may be available, as such a different version may appear at this link
- Search Amazon for CO2 monitor with alarm
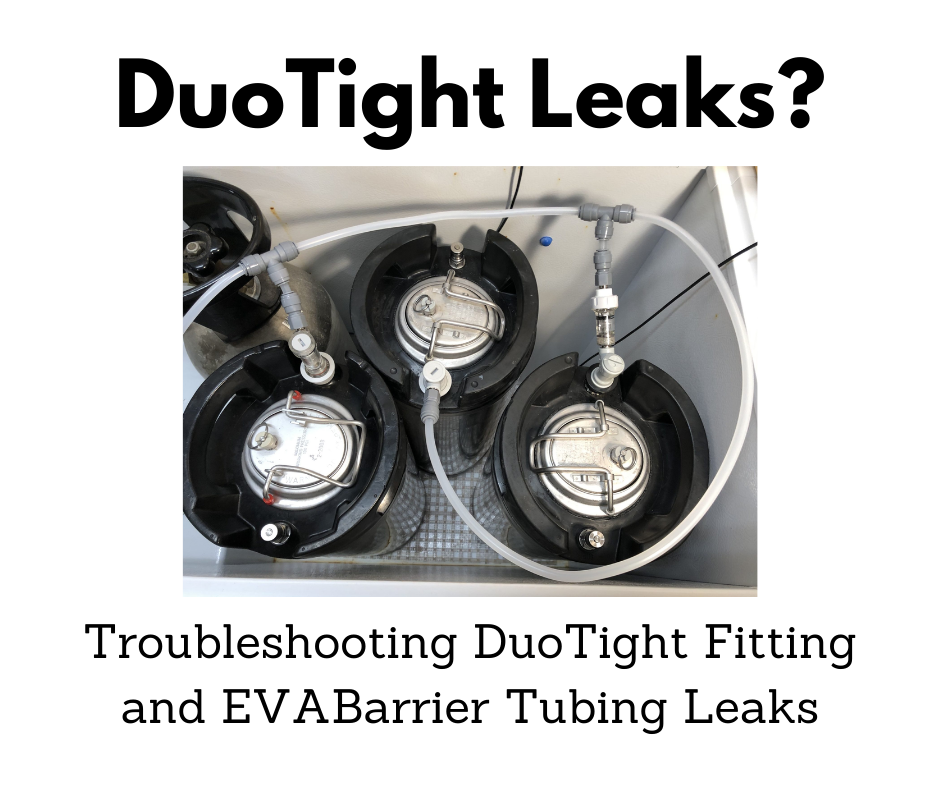
Related: Find and Fix DuoTight and EVABarrier Leaks!
Closely Related:
- How Often Should You Replace Keg O-Rings? – A Proposed Schedule for Keeping Kegs in Great Shape
- Rebuilding & Reconditioning Homebrew Kegs!
- Food Safe Replacement Keg O-Rings
- Keg Repair Part #s
- Tips and Gear for your Kegerator
- Recent Homebrew Keg Finds
- Top Draft and Kegerator Resources – Our draft top picks
- Keg Reviews
- Checking for Draft System CO2 Leaks – Using The Pressure Gauge Method
- Draft and Kegerator Related Reviews
- Why Won’t My Homebrew Carbonate? Fixing Beer Carbonation Problems
- Star San Tips, Tricks and Guidelines
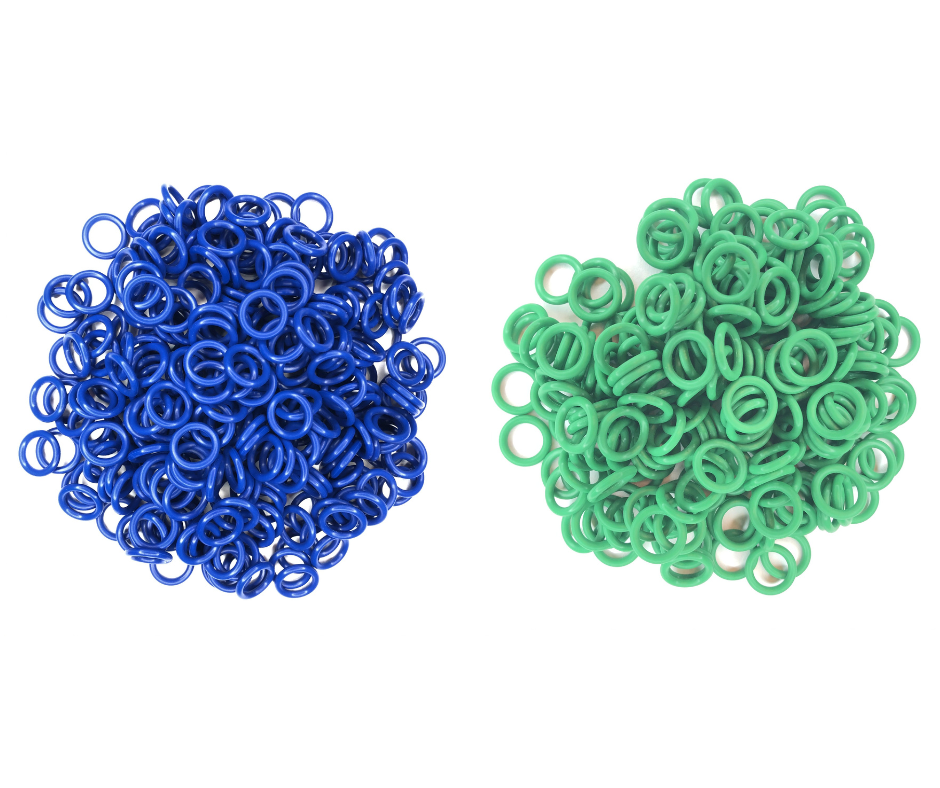
Color Code Post O-Rings for Easy Identification:
Valuebrew carries two color schemes to color keg posts. Doing this allows you to quickly identify keg posts. Gray and Black match standard keg QD colors. Blue and Green are meant to be remembered by “Blue for Beer” and “Green for Gas”. All options are made from FDA rated silicone. Since they work equally well on gas and liquid posts you can also mix and match to come up with your own color coding standard.
Keg Deals!
Rebuild Your Kegs!
How Often Should You Replace O-Rings?

More Homebrew Finds!
- Last 50 Finds!
- Top Deals – a curated list of the best deals
- Homebrew Reviews – one of the largest libraries of homebrew reviews in existence!
- Our Top Posts – tips, how-tos, resources posts and more

Also: Kegerator Tips & Gear | Keg Repair Part #s | Recent Keg Finds
Our Top Draft Resources!
- The Most Difficult Spot to Check for CO2 Leaks
- Keg O-Ring Materials Selection! – EPDM, Silicone and Buna-N?
- Why Do I Have Bubbles in My Beer Line? Diagnosing and Fixing Kegerator Foam Problems
- Five Benefits of Using Corny Kegs As Fermenters
- Rebuilding & Reconditioning Homebrew Kegs!
- Food Safe Replacement Keg O-Rings in Bulk
- Hands on Review: Kegland DuoTight Fittings & EVABarrier Tubing!
- Why Won’t My Homebrew Keg Carbonate? Fixing Draft Beer Carbonation Problems
- What Does a Flow Control Faucet Do?
- Upgrade Your Kegerator – 6 Improvements!
- Serve Homebrew on Any Kegerator & Convert Commercial Kegerator to Homebrew
- Tips and Gear for Growler Filling
- What’s the Difference Between Ball Lock Kegs and Pin Lock Kegs?
- Checking for Draft System CO2 Leaks – Using The Pressure Gauge Method
- Tip: Consider Oetiker Stepless Clamps for Kegerator Gas and Beer Lines
- Hands On Review: Inkbird ITC-308 Dual Stage Temperature Controller +WiFi Version
- Universal Poppets Tips and Tricks!
- Convert Your Mark II Keg & Carboy Washer to a Recirculating Draft Line Cleaning Pump!
- Step by Step: Finding and Fixing Keg CO2 Leaks
- Kegerator Beer Line Temperatures & Reducing Foam with a Recirculating Fan
- Kegging CO2 Use Estimations and Calculations
- Step by Step: Balancing Your Kegerator Draft System
- Building a Simple Ball Lock Draft Line Flushing Setup
- Build a Recirculating Draft Line Cleaning Pump
- Home Brew Keg Roundup – New & Used, 5 and 2.5 Gallon & More!
- Damp Kegerator? Fix Kegerator Condensation
- Portable Draft Beer Serving Options!
- Homebrew Temp Controller Roundup! – Kegerator and Fermentation – concepts, applications and models
- Bulk Keg Orings and Keg Repair Part Numbers
This post may contain affiliate links. We may make a commission when you use our links. This will never cost you extra. Thank you for supporting Homebrew Finds!
This is a Top Post! See: All Top Posts
Make sure the components you use are compatible and rated for your intended application. Contact manufacturer with questions about suitability or a specific application. Always read and follow manufacturer directions. tag:lnksfxd toppost:kegleaks rs:7 tag:tpr
Leaks are a BIG problem when not detected. Lost 2 CO2 tanks before I Iearned. Now, besides checking every connection – every connection from the CO2 tank to the keg including the beer post with Star San, I use food grade petroleum grease on every lid seal adding it generously mount it and test. It works. I don’t align the lid and then pressure tested it and haven’t had any problem. Agree to test at serving pressure. Obviously, if only tested at high pressure, there is more pressure on the lid; so, its chances to look fine are good. Also, I’ve learned to use sugar – priming or table – in the keg to carbonate saving expensive CO2.