
Hands on Review: VineCo Winemaking Equipment Kit from MoreBeer!
Thank you to HBF Contributor Aaron Nord for this hands on review! Aaron is an advanced award winning brewer, a long time reader and a serial tipster!
Winemaking Equipment Starter Kit Review
There are many ways for someone to enter a hobby like beer and winemaking. One of the more common avenues is by way of an equipment starter kit. This is how I made my foray into the world of homebrewing in 2009 and in retrospect I am glad for the experience. Buying an off the shelf kit that had nearly everything I needed was a great place to start since I really didn’t know what I was getting into. It helped me avoid the analysis paralysis that would likely have ensued in trying to figure out what I needed, in what quantity, size or quality all on my own. Thankfully, there were experienced minds who put thought and effort into packaging a collection of gear for the nascent homebrewer to be able to focus on the task of making beer. Let the analysis paralysis come later when the brewer decides to advance in the hobby.
An opportunity arose recently for me to start down a new path with winemaking by way of Winemaking Equipment Starter Kit. Since I had fond memories of a similar kit helping me get started in a hobby that became a passion (and near obsession at times), I was excited for the chance.
This review will cover the contents of the Winemaking Equipment Kit for VineCo Concentrate Kits from MoreBeer which consists of the following items:
- 7.9 gallon food grade bucket and lid with airlock hole
- 6 gallon plastic carboy for aging
- Airlock and stopper
- 7/16″ Siphon assembly
- Bottle brush
- Sample taker/thief
- Triple scale hydrometer
- Bottle filler with removable spring
- Bottle corker
- 100 Corks – 1 3/4 in.
- One Step Cleanser
Make Your Own Wine!
- VineCo Wine Making Kits
- Winexpert Wine Making Kits
- On The House Wine Making Kits
- Wine Making Equipment Kits
- Winemaking Equipment Kit for VineCo Concentrate Kits W150 << the setup reviewed here!
- Winemaking Equipment Kit (For Brewers) W105
- Winemaking Supplies
- Wine Bottles

This article contains affiliate links. We may make a small percentage if you use our links to make a purchase. You won’t pay more and you’ll be supporting Homebrew Finds and more content like this. Thank you for your support!
Two Ways to Save on VineCo Kits – Selection Changes Regularly


Aaron’s Wine Making Series!
- Making Wine as a Homebrewer!
- Hands on Review: VineCo Winemaking Equipment Kit from MoreBeer!
- Hands on Review: VineCo Wine Kit Review!
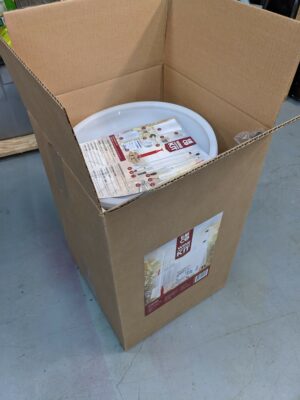
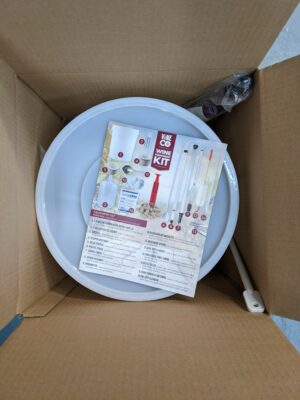
The entire kit came neatly packaged in one large box. Upon opening the box, I was presented with a color print-out that detailed the contents of the kit. Each included piece of equipment was represented by a picture and a corresponding label and description for that item. This information was useful to me, being already familiar with most of the items, and I can imagine it would be immensely helpful for someone just getting started in the hobby to know the names and purposes of each piece.
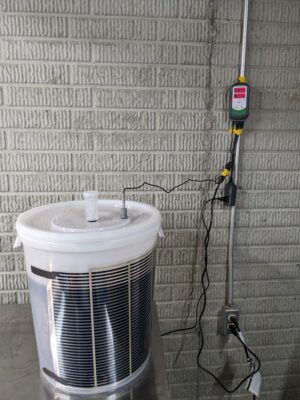
The largest item is the 7.9 gallon bucket that serves as a primary fermenter. The plastic is food grade and translucent on the verge of being opaque. It came with a lid that fits snugly on the bucket. The lid has a hole drilled with a grommet to allow a tight fit for an airlock. The lid is easy to put on and take off, especially when compared to other plastic fermentation buckets I have dealt with, owed I believe to the taller lip on the lid. This allows for a better grip, most useful for taking the lid off the bucket. The bucket also has stout handles molded to its sides up toward the top which made for easy movement of the vessel, even when full of liquid.
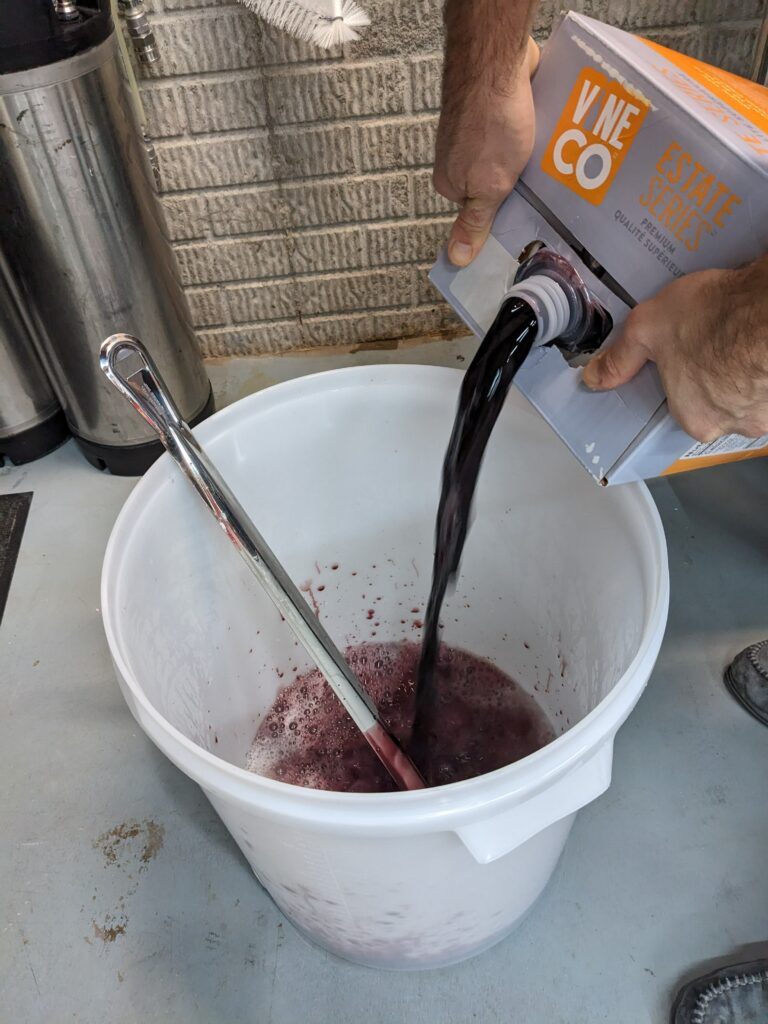
 Pouring Must
Along with a primary fermenter came a vessel to be serve as a secondary fermenter. The 6 gallon plastic carboy is clear and also made of food grade material. I have used glass carboys in the past and one definite advantage the plastic one has over glass is its weight – it is a fraction of the weight of its glass counterpart. The plastic is of harder material when compared to the 7.9 gallon bucket and I expect it would be much more resistant to scratching. Also, it won’t break and shatter into a million pieces like a glass one could.
The included airlock is the standard three-piece apparatus that most homebrewers would be familiar with, containing an outer body, a float piece, and a lid. The silicone stopper intended to be used with the airlock is the size meant for the mouth of a standard carboy and fits perfectly in the 6 gallon one in the kit. The kit also includes a solid stopper of the same size, just without the center hole, for use when fermentation has finished but there is some aging yet to be done before bottling.
Beer and Wine Party Pack – Selection Changes Regularly

To aid in the process of transferring a wine from vessel to vessel, a siphon is included. Also referred to as an auto-siphon, this piece of gear comes in handy to get a siphon going with minimal effort. This is something I used in my early days of homebrewing when I was less careful about oxygen pickup. The siphon included in the kit is the exact model I bought in a homebrew store over a decade ago. It even has the same size connecting tube: 7/16”. This is one of those “if it ain’t broke don’t fix it” types of gear that doesn’t really need to be improved upon. If one isn’t too concerned with introducing oxygen in the transfer process, the auto-siphon is incredibly useful. Both the outer body and the inner tube are made of harder, clear plastic. The inner piece forms a tight seal with the outer body with the help of a rubber type grommet, which aids in starting the siphon. The outer body has a removeable plastic stand-off on the bottom which is intended to give it some clearance from any sediment on the bottom of the vessel from which liquid is being transferred.
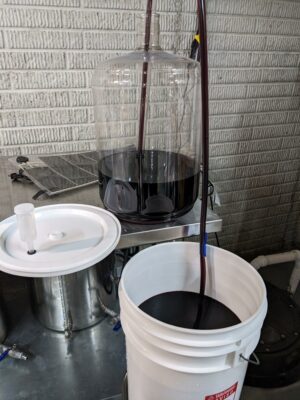 Transferring to Bottling Bucket
The bottle brush included is designed for the cleaning of wine bottles. It has a hard plastic handle mated to a twisted wire extension the end of which contains a good number of white plastic bristles. At the very end is a plume of black bristles whose purpose I would guess is to reach the corners of wine bottles more easily, allowing maneuvering around odd shapes like bottle punts.
The next piece of equipment is something I had little experience with as a homebrewer. The item is called a sample thief and although I had used one of these apparatuses in the past, the one I had used was a little simpler. It was essentially just a plastic tube, the size of a cardboard paper towel carton, with a small hole on the bottom and a smaller hole on the top. The user would dip the sanitized tube with the larger size down, into a vat of liquid, let the body fill to a desired level, then place a finger over the smaller top hole to trap the liquid inside. The sample thief included in the kit is a lot craftier than that simple contraption (more on this later). It is made of clear, hard plastic, like the material of the auto-siphon. It is almost as long as the auto-siphon with a similar looking black plastic bottom and black plastic ring at the top.
The hydrometer in the kit is identical to one I have purchased before, probably from MoreBeer. It is a triple scale model made for beer and wine. The specific gravity range starts at 0.985 and ends at 1.160
The plastic spoon is made from a PVC-like plastic and measures 27.5 inches long with the widest part of the spoon at 2 inches. It has a hole drilled in the top of the handle for easy hanging on a hook.
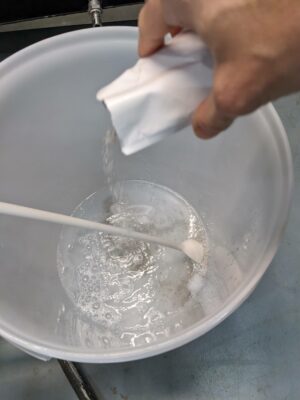 Mixing Bentonite
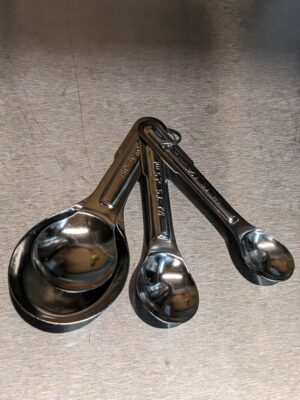
The measuring spoons are packaged in a set of four with ¼ teaspoon, ½ teaspoon, 1 teaspoon, and 1 tablespoon options. They are made of stamped metal, perhaps stainless and if not then another high polish and grade of metal.
The bottle filler is another piece of gear that I had already collected as a homebrewer. It is identical to the one that must have come in my homebrewing starter equipment kit. Made of clear, hard plastic like the auto-siphon and sample thief, it is 15 inches long with a spring-loaded trigger on the bottom of the wand. The outer diameter was 5/16”, just a tad wider than the outer diameter of the auto-siphon’s inner piece.
The kit includes a couple packets of powdered chemicals. One packet is potassium metabisulfite, intended for a dual purpose: to perform sanitation duties and an additive to the finished wine to scrub oxygen. The other packet is an oxygen-based cleanser, similar to OxiClean, but it purported to be a no rinse cleanser.
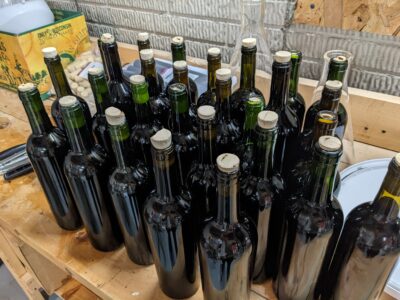
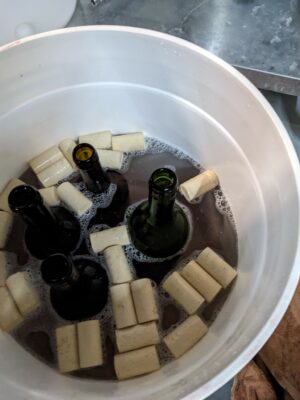 Sanitizing bottles and corks
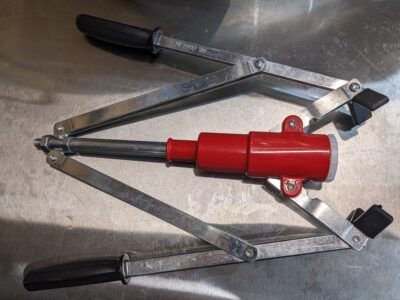
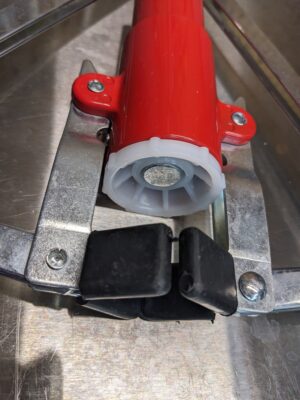
Last, but not least, is a hand corker along with 100 corks. The corks are 1 3/4 inch long and made of a natural cork material with the holes filled with agglomerated material. Agglomerated in this context refers to the leftover bits of cork being ground up and glued back together. The claim on the info sticker on the cork bag is that these “colmated” corks are a choice in the middle of natural corks and fully agglomerated corks (ones where not just the holes are filled with agglomerated material, but the entire cork is made of it). The corker is a dual-handle variety with the handles acting as levers to push a cork through a slightly larger than cork-sized body into a bottle neck. The act of pushing the cork through the corker body compresses the cork so it can fit in the bottle. The levers actuate a plunger that is about 1/2 inch wide that pushes the top of the cork down. The ends of the levers also are fitted with triangular shaped grabbers, wrapped in a rubber-like material that grip the bottle neck as the levers are depressed.
Hands on Review
Believing that most readers are familiar with most of the contents of this kit, I’ll highlight some of the pieces that I particularly liked, were novel to me as an experienced homebrewer, or that I had issues with.
Starting with the items I particularly liked is the auto-siphon. Having transitioned to low-oxygen brewing and using CO2 for mid or post-fermentation beer transfers, the auto-siphon I had from my earlier brewing days had collected dust. I busted out the one included in this kit and used it several times, transferring two batches of wine from primary to secondary to bottling bucket. I was reminded how neat this piece of gear is. It only takes a little practice and understanding to get a feel for how it works. Although possible to do with one hand, it is much easier to start the siphon with two hands: one hand holding the outer body in place while the other hand pumps the inner piece two or three times to start the upward flow of liquid. Once started, the siphon continues unabated until either the siphon is pulled from the starting vessel or that vessel is emptied to within about 3/4 inch of remaining volume. Along with the siphon came clear vinyl tubing with a 7/16 inch inner diameter that fit perfectly onto the top of the inner piece, after a quick soak in hot water. The length of tubing was sufficient to enable a siphon from the 7.9 gallon fermenter placed on a normal height table down to the carboy on the floor.
Next on the list of items I quite enjoyed is the sample thief. As mentioned earlier, the one in the kit was different from the simpler one I had used before. Although appearing simple, the one included did take some practice to get the hang of using, but once done a few times it really was just as easy as the simpler thief I had used. To fill the thief, one simply dunks it into the liquid, not fully submerged, and makes a series of hard up and down movements with it until it fills with the desired volume. In my experience it only took a few quick moves and it was over halfway filled. Pretty cool! Another feature of this thief is that it can easily fit a hydrometer which meant that I didn’t need to fill and clean a separate vial to take a reading – it served two purposes.
The spoons in the kit are worth noting because of their metallic material and because I found them to be quite handy. I’ve used them several times after for brewing as well to measure out mineral and Irish moss additions. The one downside to them is that due to their shape it is difficult to be precise – the spoon well is so wide and shallow which makes it difficult to fill and grade off excess material. I have grown accustomed to weighing out my ingredients for more accuracy, so the spoons have really served as a scooping tool rather than a true precision measurement tool and for that purpose they are great.
The wine bottle brush is another item that has been handy outside of winemaking. When using it to clean reused wine bottles, the plume feature was helpful to ensure that any sediment on or around the punt was taken care of and the plume helped to get in the nooks and crannies of other household items that have tight spaces and odd corners (e.g. a kid’s soup thermos lid).
The bottle filler, once again something I had used before with brewing, is notable due to its clever design. The bottom’s spring-loaded trigger ensures that liquid is not released from the wand until it is depressed upward. There is no need to worry with turning a spigot on and off each time a bottle needs to be filled – simple place the wand in the bottle and press up. One downside about this design is that it seems to be made for flat bottomed bottles. Wine bottles with a punt (convex shaped cone in the bottom of a bottle) make the operation of the bottle filler’s trigger nearly impossible. The trigger is about 1/8 of an inch wide and trying to land the tip of that trigger at the tip of the punt was impossible. Trying to press the trigger from the corner of the bottle was equally difficult. There just isn’t enough of a flat surface for the trigger to have a stable base from which to depress. A bottle wand made for bottles with punts would need to have a wider trigger contact point for it to work properly and not cause the user much frustration.
Lastly, the corker was a piece that I had to get used to. I have never corked beer bottles; I’ve only ever capped them. Before I corked a wine bottle, I did my best to ensure that the plunger on the corker was set to the appropriate depth for the bottles and corks I had on hand. I did this by pulling the levers all the way down, inspecting where the bottom of the plunger ended, and adjusting the screw and nuts at the top of the plunger that changed its depth. Once I believed I had it set correctly I tightened the set screw and corked my first bottle. The depth was not quite right as it was not fully in the bottle neck, so I adjusted the depth of the plunger. The next cork had the opposite problem so I re-adjusted. I worked through several corking attempts until I had the depth dialed in which took almost the entire bottling session (about 30 bottles). I don’t think I tightened the set screw enough for it to serve its purpose.
Overall, I wasn’t too worried about the varying depths. Although visually not consistent or appealing, if the corks were fully seated in the neck the corks were serving their purpose. One other tricky bit about this corker was that one must be careful not to angle it forward or backward in the process of corking, which can be difficult for the inexperienced. If canted too far one way or the other, the corker may end up chipping part of the cork off in the movement of the cork through the corker’s main body. Even downward pressure with a consistent perpendicular positioning of the corker helped to prevent this from happening once I noticed it. My second bottling session was better overall than the first thanks to the experience gained. Not being a particularly coordinated person, I found the operation a bit clumsy so perhaps more graceful operators won’t have the troubles I had or may overcome them a bit quicker.
There were a couple pieces of equipment that were not included in the kit that I found the desire for. In winemaking, most wines require a degassing step after fermentation. This process involves agitating the fermented liquid vigorously to expel carbon dioxide. A spoon can certainly be used for this purpose. However, wanting to make the process a little quicker and easier on my wrist I bought a degassing wand from MoreBeer. This wand has a shaft that can be fitted into a power drill on one end and the other end is fitted with two slotted paddles. This makes stirring and agitating five plus gallons of liquid much easier since the drill is doing most of the work. I spent about ten minutes degassing with this wand, and I would guess that it would have taken three or four times as long to manually stir it and expel the same amount of CO2. I wouldn’t say this piece of gear is essential, but I am thankful I had it in the end.
The kit did not include a carboy brush despite including a carboy. Luckily, I had one on hand already. I don’t think this is a crucial item, but having a mechanical way to scrub the sticky must, yeast, and oak chips from the upper portion of the carboy helped ensure the carboy’s true cleanliness.
One other piece I purchased was a thermowell for the fermentation bucket. The wine kits I had included yeast which recommended temperature ranges that my house’s ambient temperature did not always match. I already had a temperature controller and heat mat on hand from brewing so with the addition of the thermowell to the bucket lid I was able to keep the fermentation temperature within the prescribed range. Again, this isn’t strictly necessary as yeast are quite resilient and can do a fine job if slightly outside of their recommended range. I just wanted to be a bit more precise with the temperature control as extra insurance for a high-quality finished product.
I found the use of a bottling bucket was my preferred method for the filling of bottles. Again, I had one on hand and decided to use it. The trouble I had with the bottling wand and the wine bottles with the punts led me to transfer the wine into the bottling bucket and use the spigot with on/off functionality combined with a length of tubing to fill the bottles. If I were filling flat bottomed bottles, I could have used the auto-siphon and bottling wand included in the kit without issue.
The only item in the kit that I did not use was the potassium metabisulfite. Its stated purpose in the info sheet is for sanitization. I have used StarSan for sanitization purposes when brewing pretty much from the beginning, so I decided to continue with that product rather than mix up a potassium metabisulfite solution, and since I had StarSan on hand it was ready for immediate use.
Conclusions
For those interested in trying their hand at winemaking, this kit is a great option. The price point is approachable for those unsure if they would truly enjoy the hobby to make it long-term. The kit contains nearly everything one needs to make a fine wine short of ingredients and bottles. What’s more, the quality of the materials is such that if one decides to continue with the hobby, they will last a long time. Even if one doesn’t take up winemaking as an enduring hobby, many of the items will fine usefulness in the home brewery or beyond.
Check Current Price & Availability:
Winemaking Equipment Kit for VineCo Concentrate Kits W150
Make Your Own Wine!
- VineCo Wine Making Kits
- Winexpert Wine Making Kits
- On The House Wine Making Kits
- Wine Making Equipment Kits
- Winemaking Equipment Kit (For Brewers) W105
- Winemaking Supplies
- Wine Bottles
Aaron’s Wine Making Series!
- Making Wine as a Homebrewer!
- Hands on Review: VineCo Winemaking Equipment Kit from MoreBeer!
- Hands on Review: VineCo Wine Kit Review!
Two Ways to Save on VineCo Kits – Selection Changes Regularly
Beer and Wine Party Pack – Selection Changes Regularly
Our Wine Kit Deals Roundup!
More Homebrew Finds!
- Last 50 Finds!
- Top Deals – a curated list of the best deals
- Homebrew Reviews – one of the largest libraries of homebrew reviews in existence!
- Our Top Posts – tips, how-tos, resources posts and more
- Let’s be Friends!
Recent Deals!

10 Most Recent Homebrew Resource Posts & How-To’s!

We are Homebrew Review HQ! Our 10 Most Recent Reviews

Quick Catch-Ups
- Our Last Fifty Finds
- Curated List of Keg Deals
- Curated List of Hop Deals
- Our 10 Most Recent Homebrew Resource Posts
- Top Deals – a curated list of the best of the best
- Our 10 Most Recent Reviews
This post may contain affiliate links. We may make a commission when you use our links. This will never cost you extra. Thank you for supporting Homebrew Finds!
Thank you to MoreBeer for providing the equipment and ingredients used in this write-up.
Make sure the components you use are compatible and rated for your intended application. Contact manufacturer with questions about suitability or a specific application. Always read and follow manufacturer directions. tag:lnksfxd tag:anwkseries top:winekitreview tag:tpr